1. Introduction
2. Create Form Field
3. Display Customer Group Selection
4. Third-party Login
5. Case Study
1. Introduction
Customer Login customization is a strategy used by sellers to improve the user experience while collecting valuable customer data. This customization will include a variety of login methods such as username/password, social logins, or one-time password (OTP) for flexibility and security. Hence, the goal of this feature is to improve data collection from customers while also making the login process more user-friendly.
2. Create Form Field
Step 1: Navigate to Settings on the sidebar menu > click Customer Login.

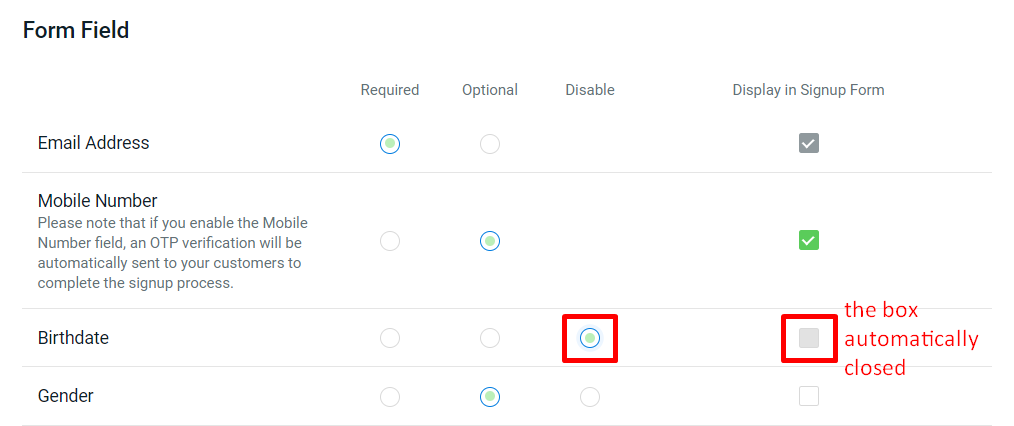
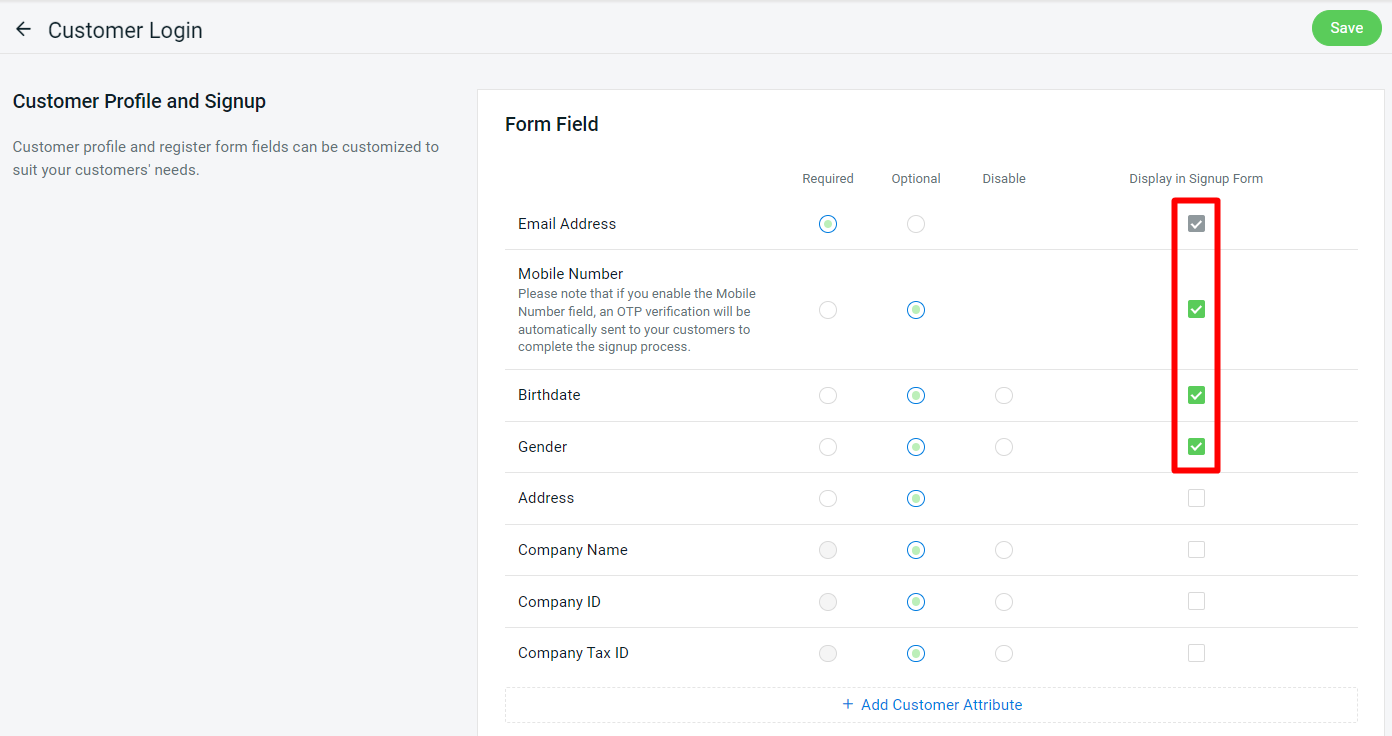
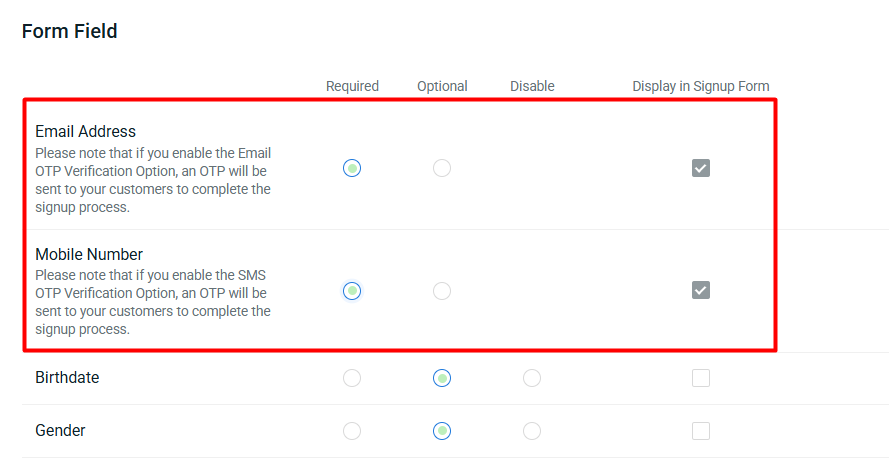
Step 2: Under the Customer Profile and Signup, tick the Form Field that is needed during sign-up.
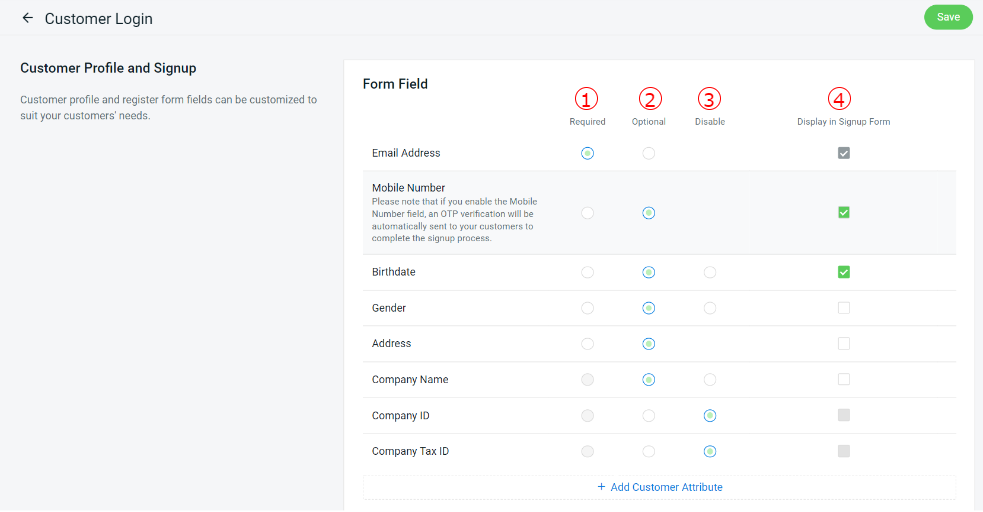
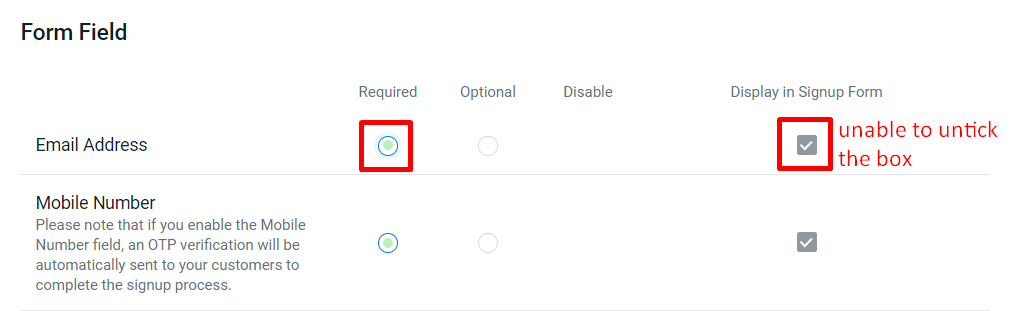
1. Required: It means that the field is mandatory for the customer to fill out during sign-up. When the seller selects Required, the Checkbox to Display in Signup Form is automatically selected and cannot be unchecked.2. Optional: It is optional for the customer to enter the information during sign up.
3. Disable: If the seller ticks the disable checkbox, the field will not appear during sign-up. Then, the Display in Signup Form checkbox will close automatically.
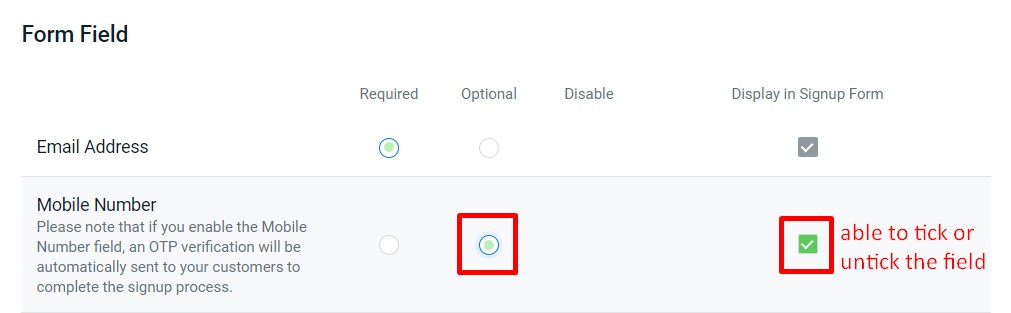
4. Display in Signup Form: Basically, it is used for Optional features where the seller can tick or untick checkbox to display the Field during customer sign-up.
 2. Optional: It is optional for the customer to enter the information during sign up.
 3. Disable: If the seller ticks the disable checkbox, the field will not appear during sign-up. Then, the Display in Signup Form checkbox will close automatically.
 4. Display in Signup Form: Basically, it is used for Optional features where the seller can tick or untick checkbox to display the Field during customer sign-up.
Step 3: If you need more information from the customer, click the Add Customer Attributes button > select the Customer Attribute option that you have created.
💡Tips: Learn more on How To Create Customer Attribute.
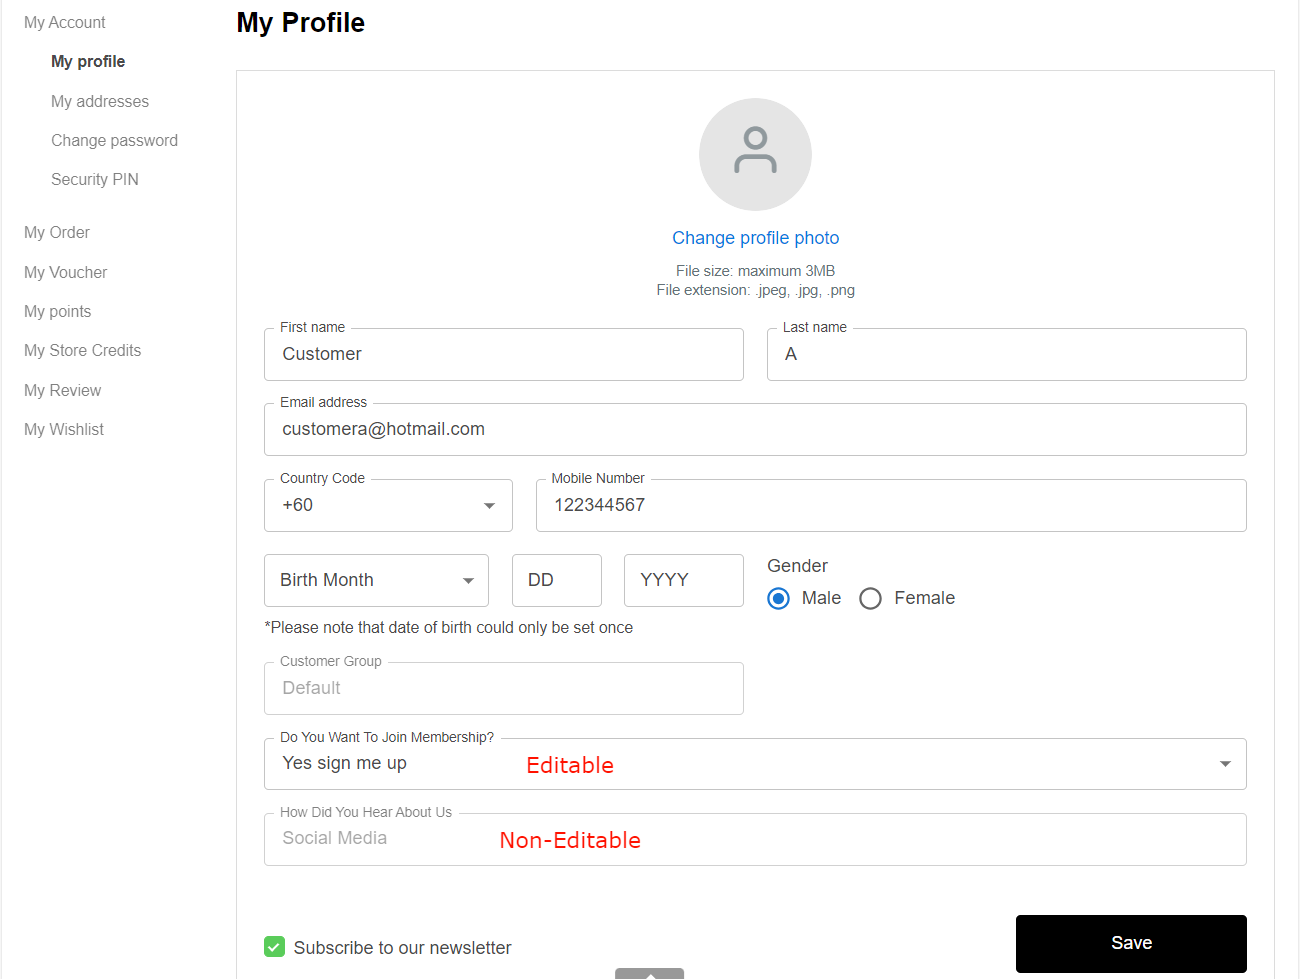
📌 Optional: You may enable the Editable by Customer setting > Save to allow your customer to modify their profile.
Editable by Customer ON: Customer can edit the customer attribute anytime.
Editable by Customer OFF: Once the customer fills in the customer attribute for the first time, it is unable to change the answer.
Step 4: Setting for Allow New Registration.
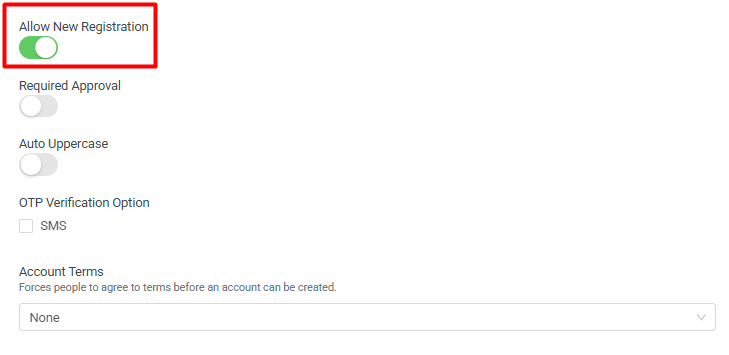
i) Enable Button
If you enable the button, the Create Account button will appear when a customer clicks the login button on your website.
ii) Disable Button
If you disable the button, customers will be unable to register for an account on your website because there is no Create Account button to click. The seller must manually create an account for their customer.
Step 5: You can enable the Required Approval button if you want to approve the customer account after they have registered.

📌Note: The customer will receive an email once you have approved their account.
Step 6: Once the Auto Uppercase button is enabled, the customer details entered during registration will be automatically converted to uppercase.
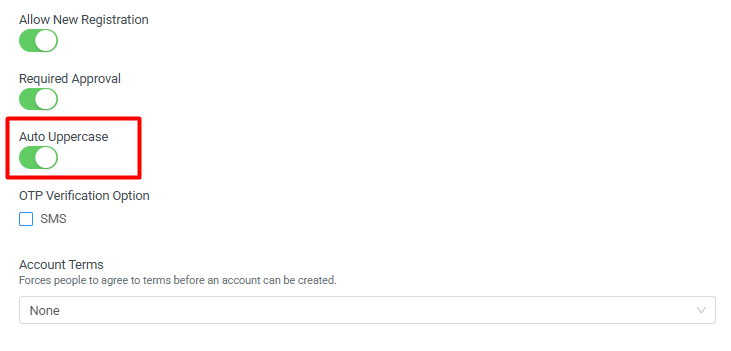
Step 7: Tick the OTP Verification Option if you want customers to receive an OTP when they enter their mobile number or email during registration.
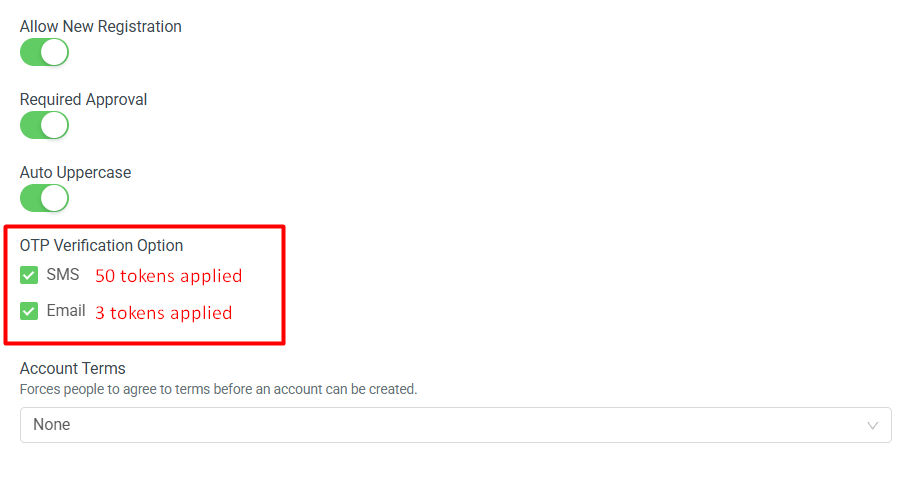
📌Note: OTP (One-Time Password) is important as it helps protect customer data and prevent fraud. To use OTP verification, you will need to top up your SiteGiant Wallet (Token). For more information, please refer to the guide on How to Top Up The Token.
Step 8: Select your Account Terms settings, which will appear during customer registration. If you do not want to force the customer to accept the terms, you can leave them as None.
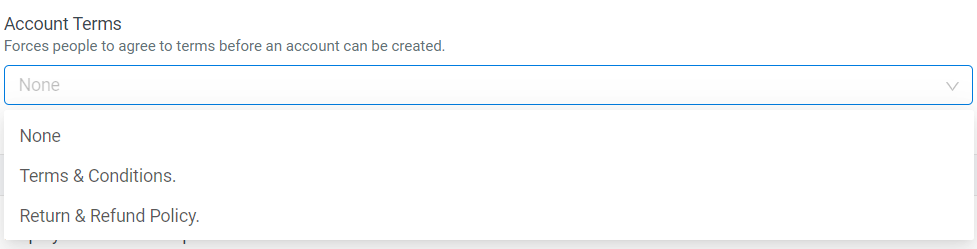
💡Tips: Learn more on How To Create Terms under Page settings.
3. Display Customer Group Selection
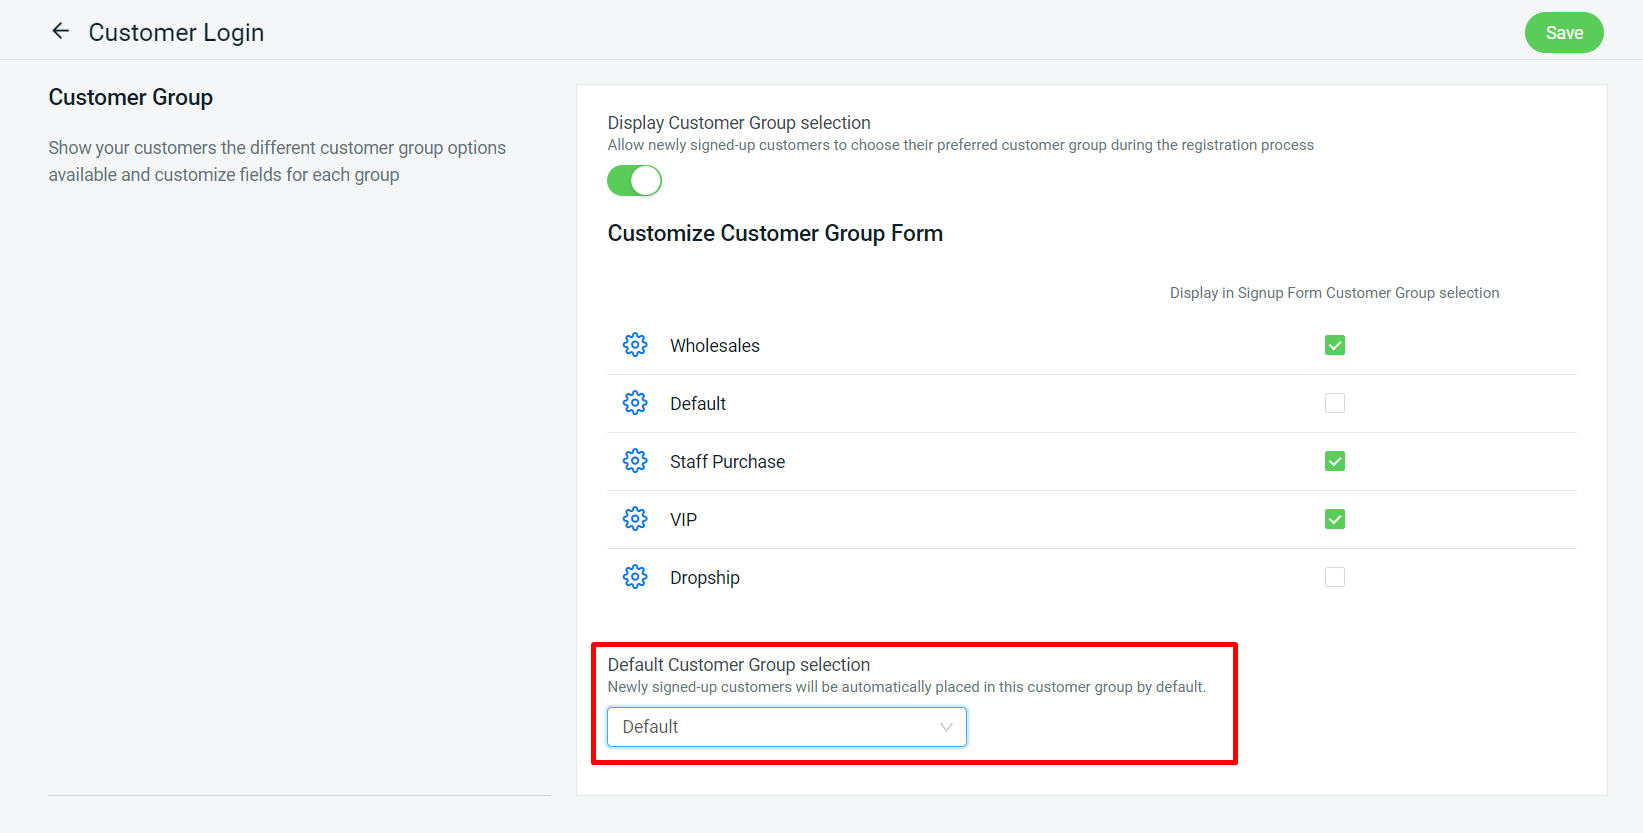
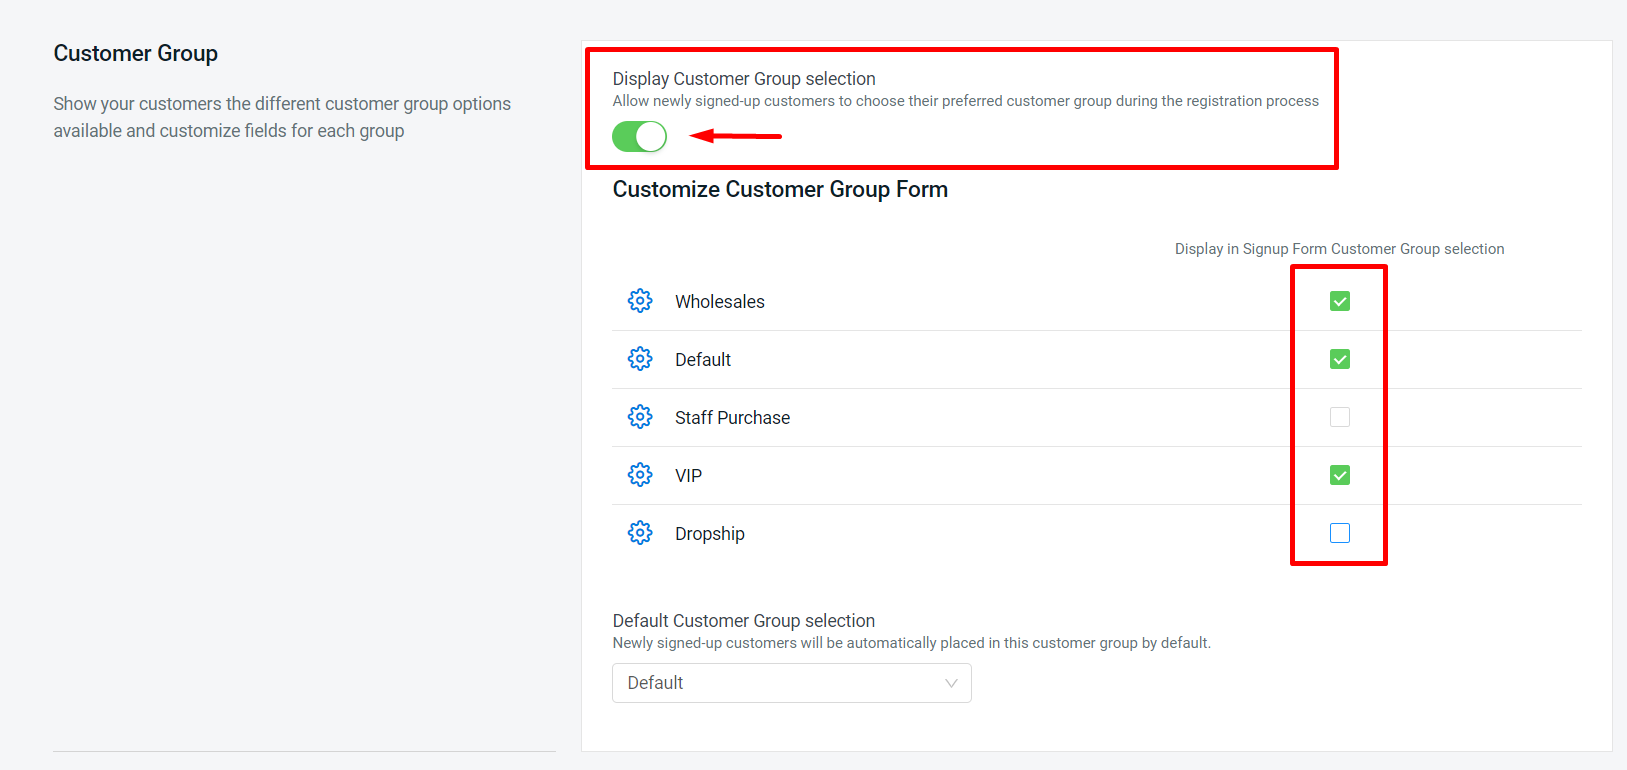
Step 1: You can enable Display Customer Group Selection to allow newly registered customers to select their preferred customer group during the registration process.
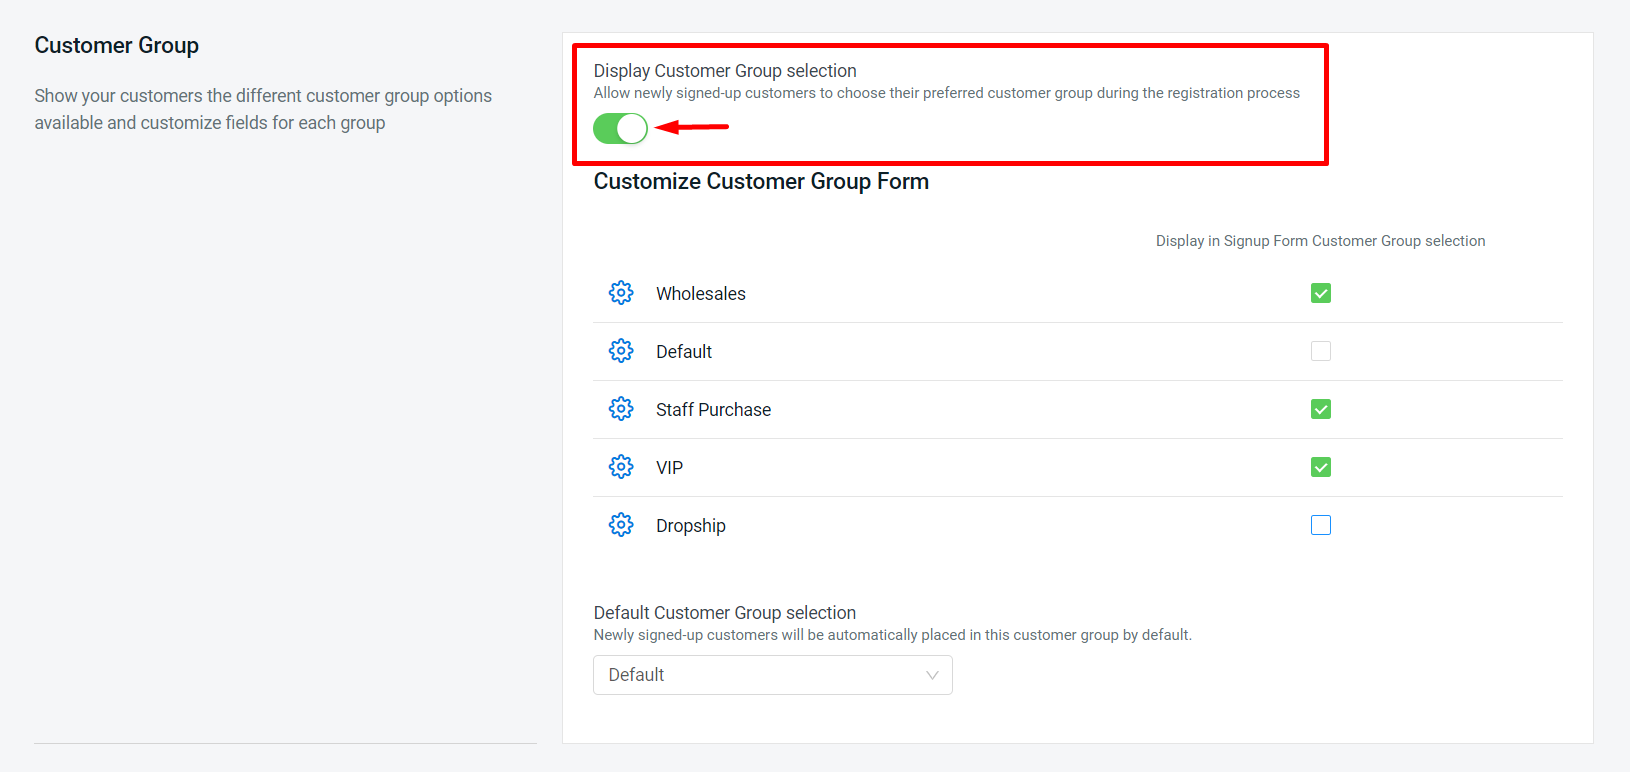
💡Tips: Learn more on How To Create Customer Group.
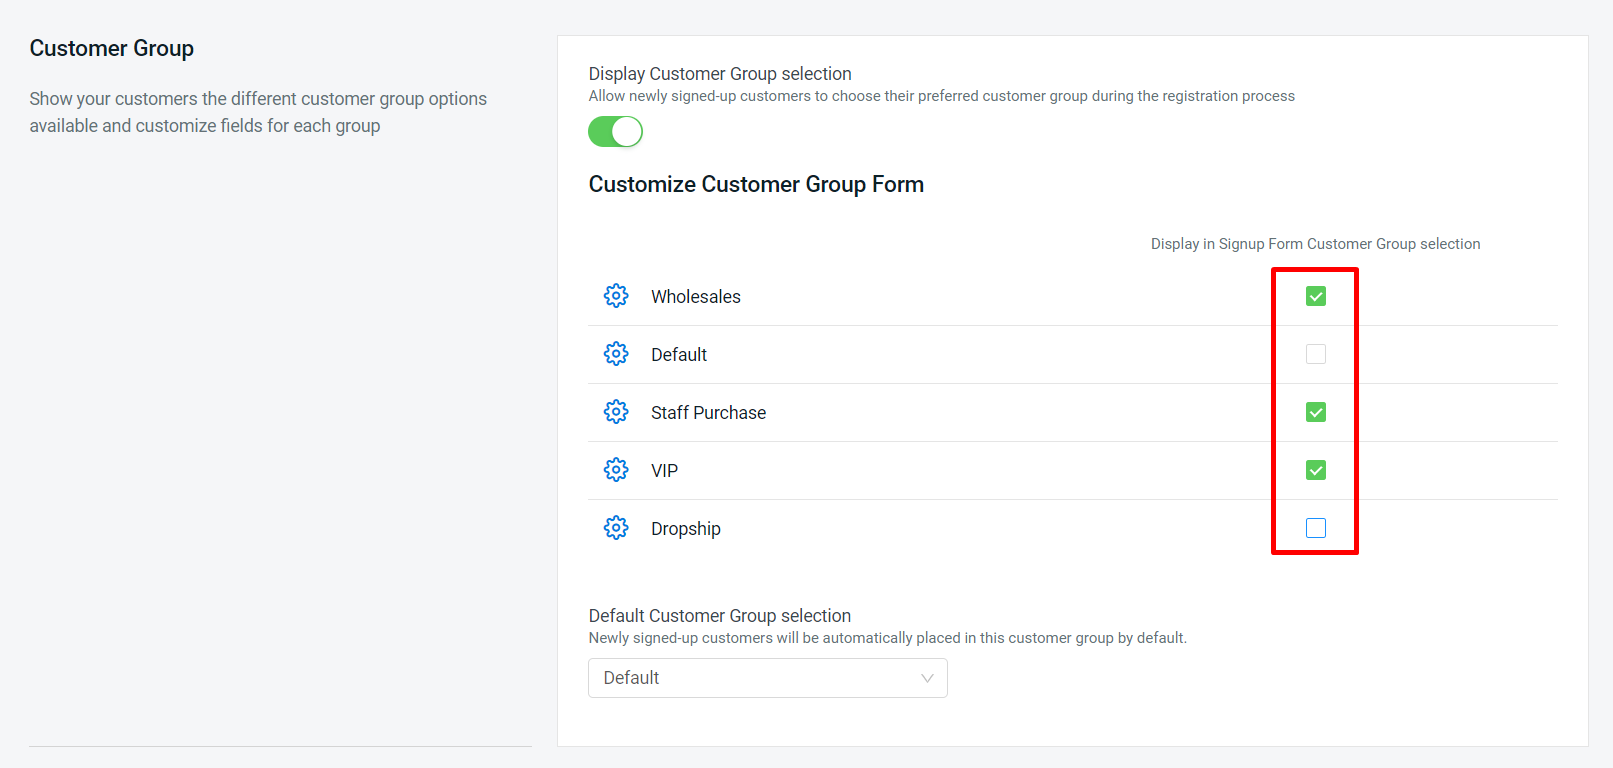
Step 2: Tick the Customer Group that you want to display on the Sign Up form.
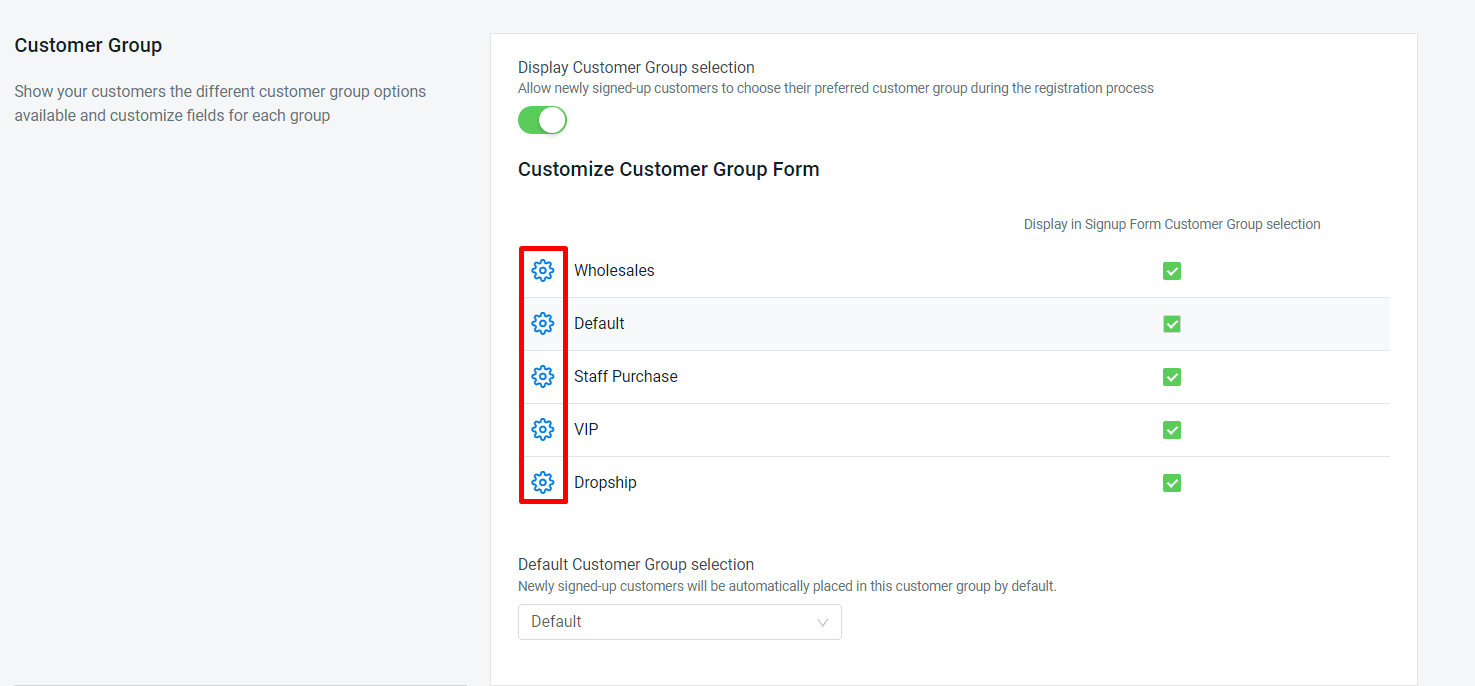
Step 3: Click the settings button in the customer group to customize the Customer Group Form setting.
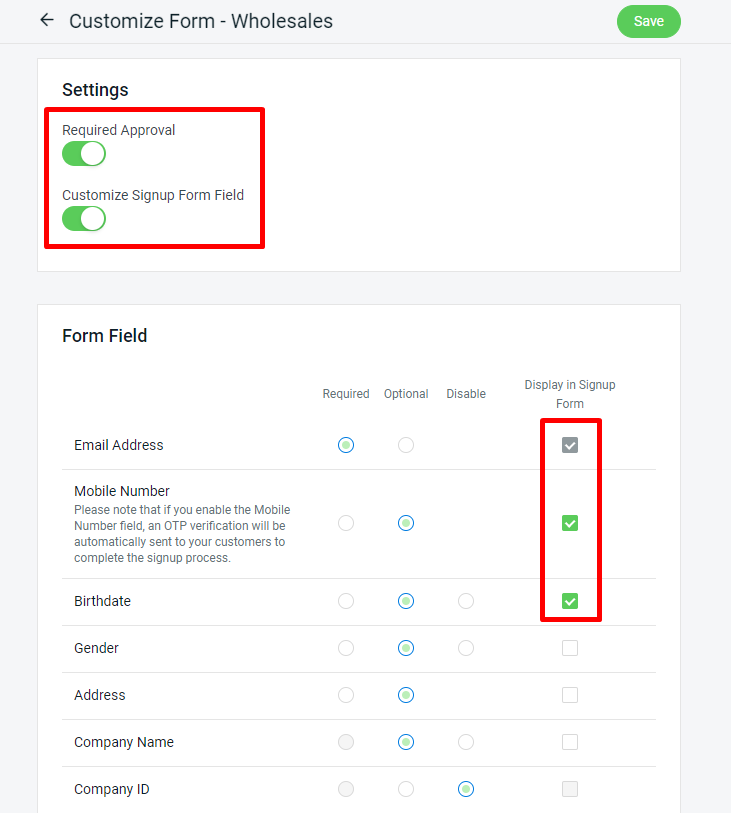
Step 4: You can enable the Required Approval and Customize Signup Form Field for the selected customer group > once done, click Save.
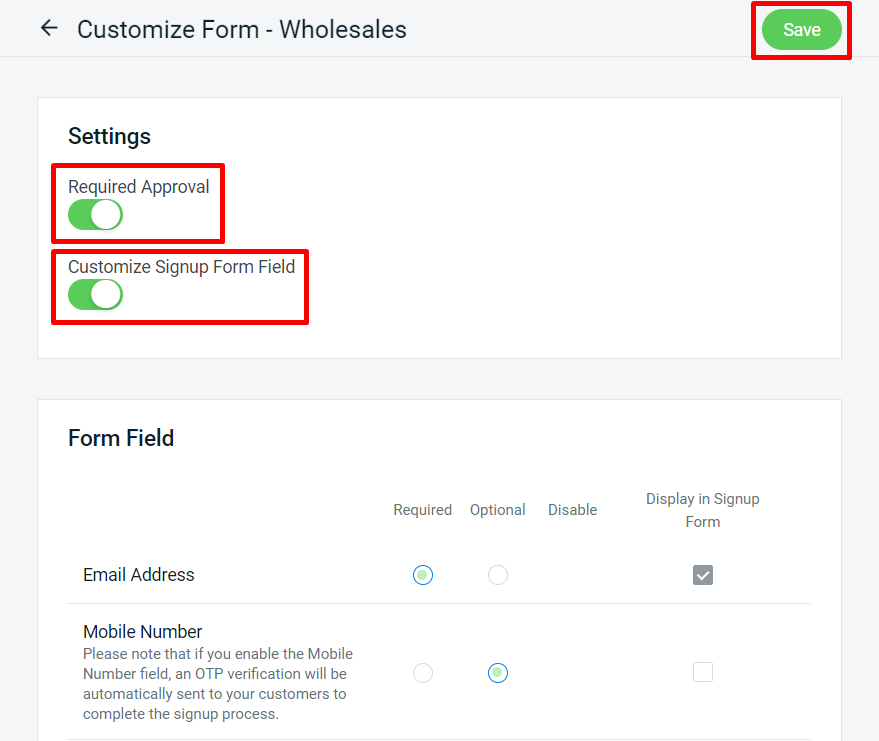
📌Note: If you disabled both buttons, the default Form Field will be used.
Step 5: Select the Default Customer Group selection.
4. Third-party Login
Step 1: Enable the status for the Third-Party Login > click the edit button to update the ID setting.
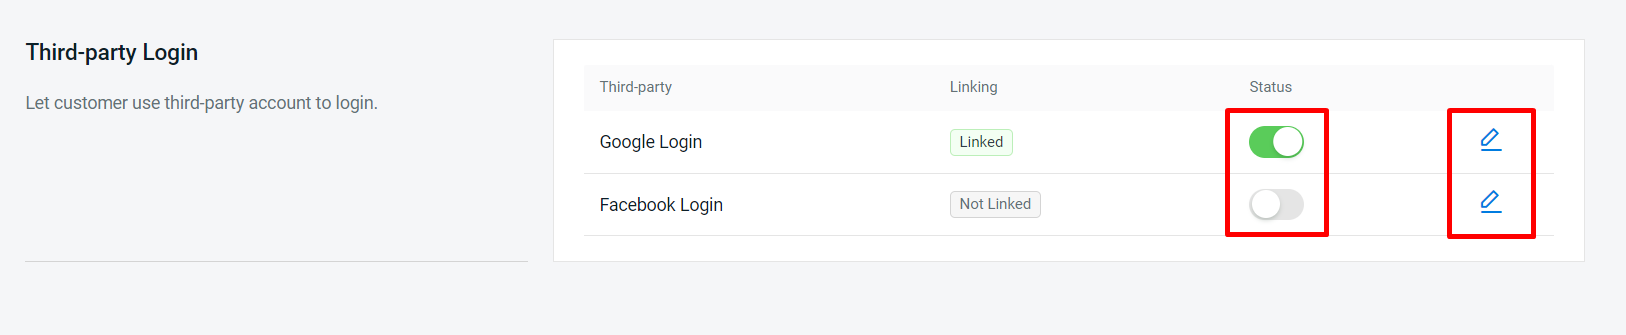
📌Note: If you disable the Third-party Login status on this Customer Login page, it will also disable the status on the App Page.
💡Tips: Learn more on How To Create Google Login and How To Create Facebook Login.
Step 2: Once all the settings are done, click Save.

Step 3: Back to the dashboard and Clear Cache to see the changes on your Webstore.
5. Case Study
Scenario 1:
Step 1: You will disable the Display Customer Group Selection.
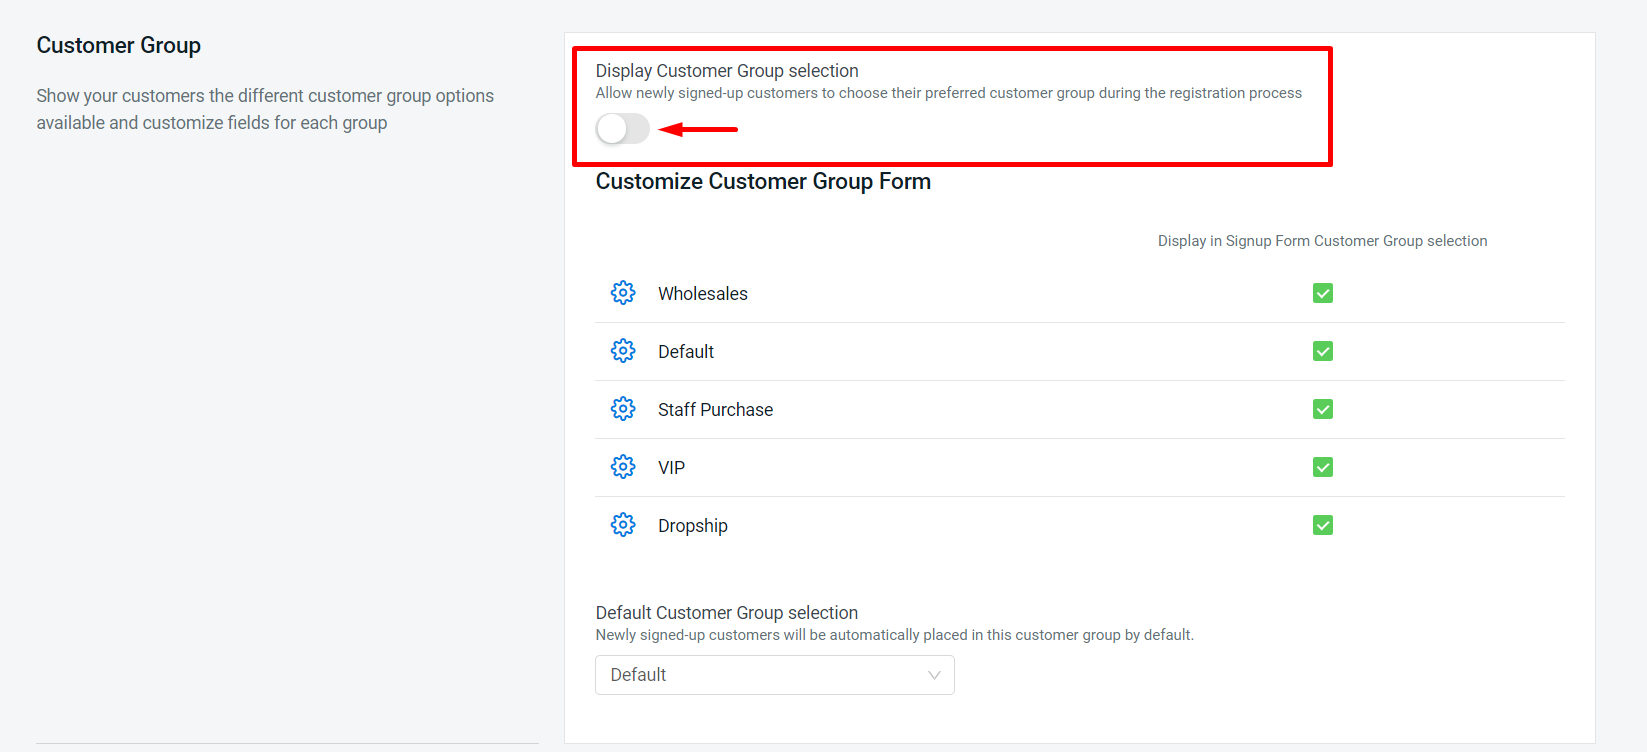
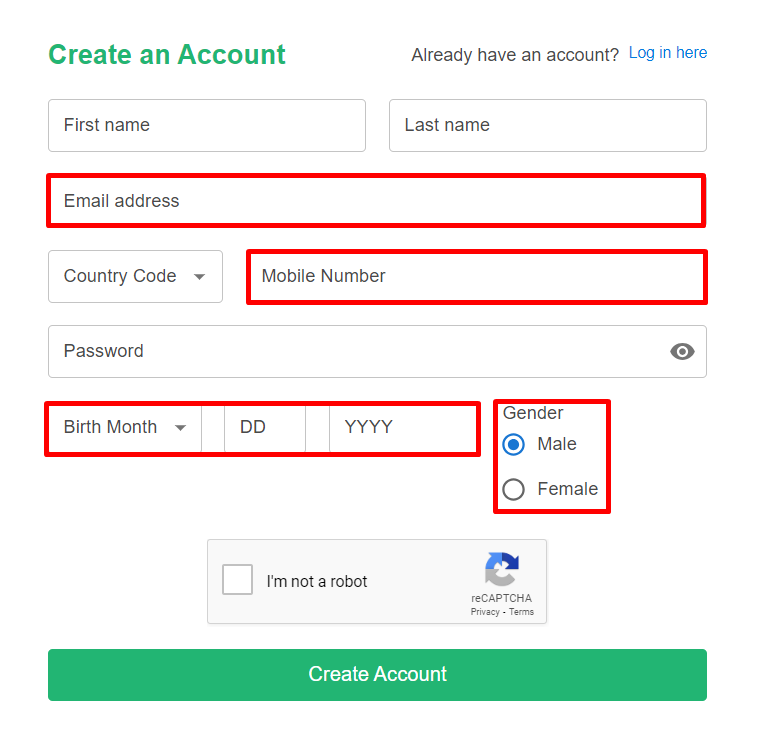
Step 2: You will tick the display field, which is an email address, mobile number, birthdate, and gender under the Signup Method.
From Customer Perspective:
The system will automatically use your default Signup Method settings. Under the Create an Account page, it will display the email address, mobile number, birthdate, and gender tabs.
Scenario 2:
Step 1: You will enable the Display Customer Group Selection button > tick the customer group that you want to display.
Step 2: Setting for each customer group that you have chosen. For example, the Wholesales customer group will enable Required Approval > enable Customize Signup Form Field and select only email address, mobile number, and birthdate.
From Customer Perspective:
The customer can select the Customer Group on the Create an Account page. Then, the form field will follow the Customize Customer Group Form setting.
Scenario 3: Enable OTP Verification Option
Step 1: You will tick the email address or mobile number to be displayed in the Signup Form and select the OTP verification option.
From Customer Perspective:
1) When new customers create an account and enter their email or mobile phone number, they will receive an OTP code.
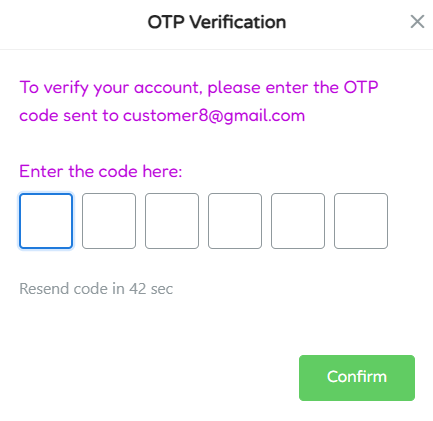
📌Note: If a customer signs up using both SMS and email, the OTP will be sent to the email as the primary option.
2) Existing customers can also choose to Login With OTP on the webstore > enter Email Address or Mobile Number > click Get code.
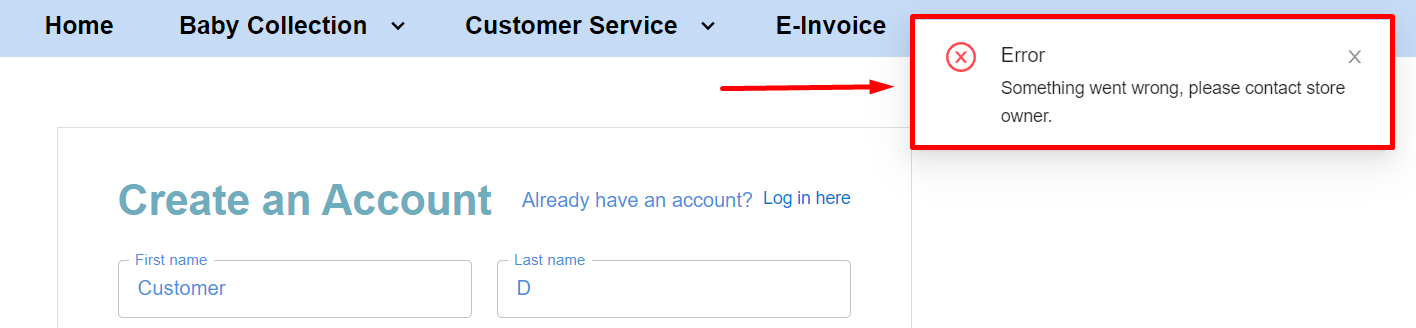
3) If you do not have enough tokens, customers will be unable to register or log in using OTP verification. It will show an error message.