1. Introduction
2. Add Customer
3. Edit Customer
4. View Customer Transaction
5. Additional Information
1. Introduction
Once your customers register for an account through your webstore, their details will then be stored in the Customer List. Otherwise, you are able to create an account for customers for record purposes.
2. Add Customer
Apart from having customers sign up through your Webstore, you may also manually create a customer’s account from the SiteGiant Seller Center.
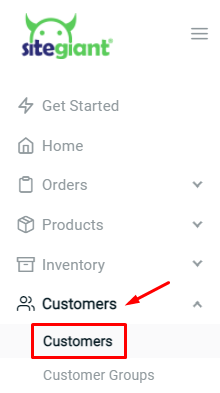
Step 1: Go to Customers on the dashboard menu
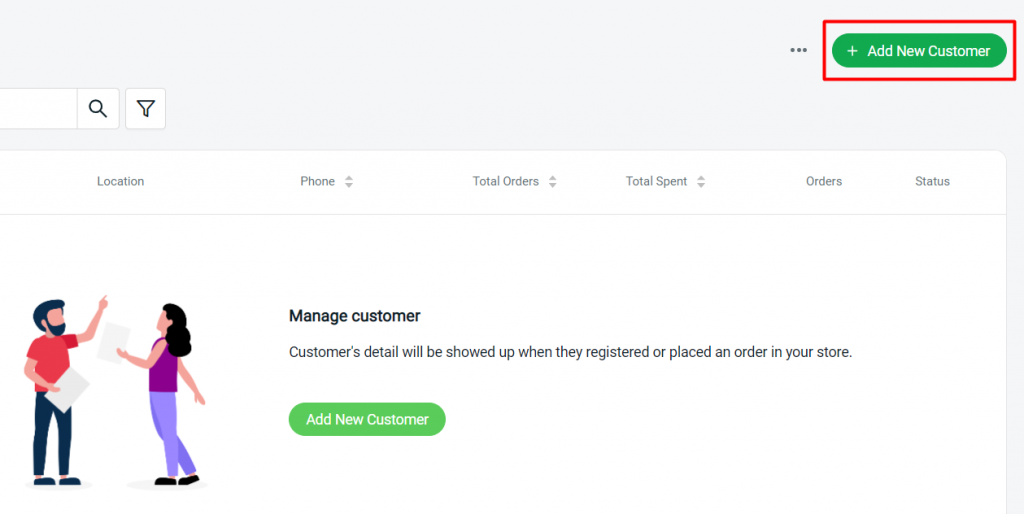
Step 2: Click on the + Add New Customer button at the top right
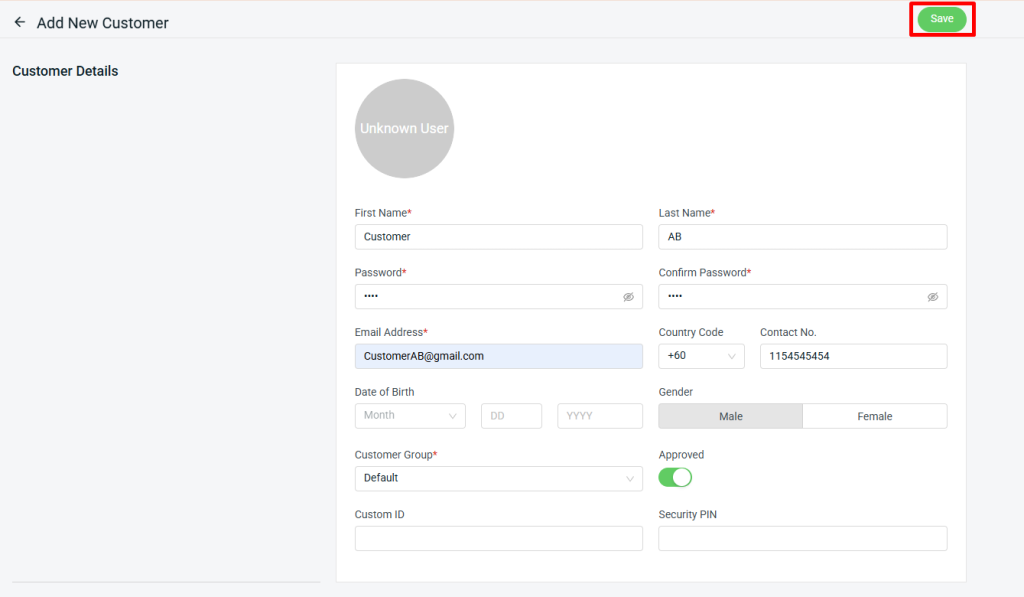
Step 3: Fill up the Customer Details and Primary Address of the customer
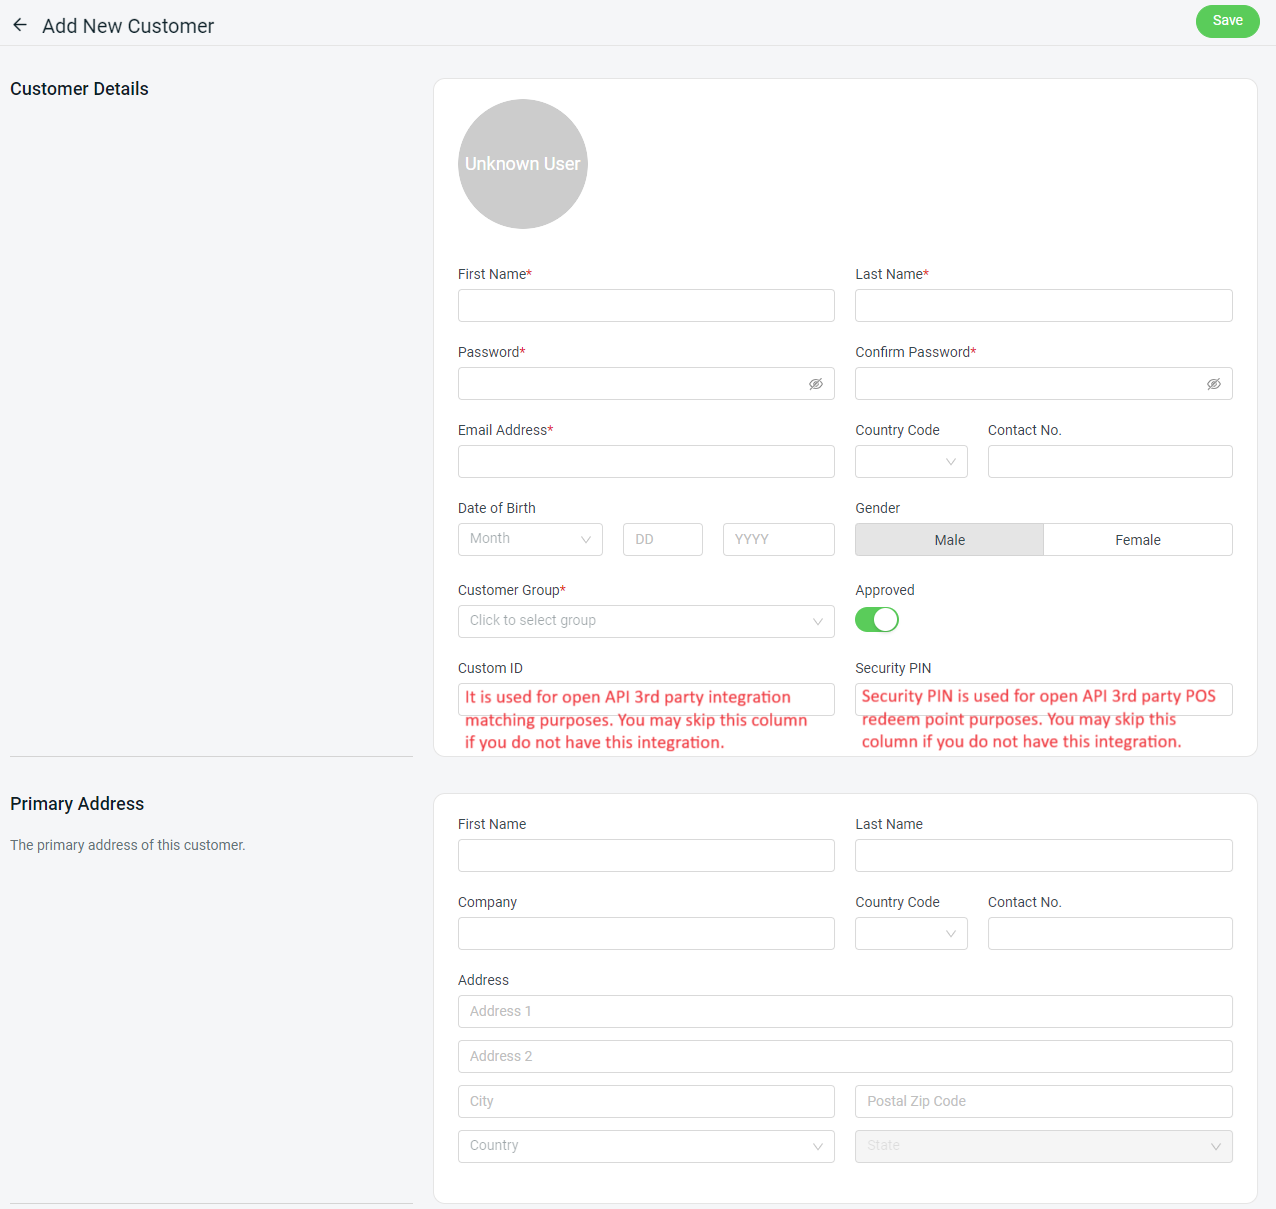
💡Tips: Learn more about How To Manage Customer Groups
Step 4: Save once you’re done filling in the customer information
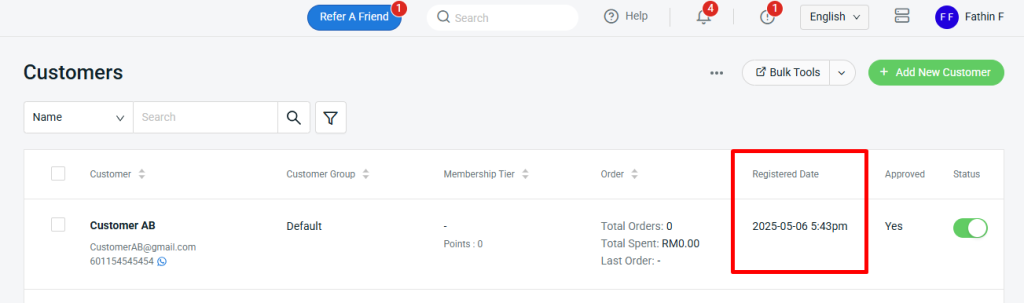
Step 5: From the customer listing, you can see the date each customer registered
3. Edit Customer
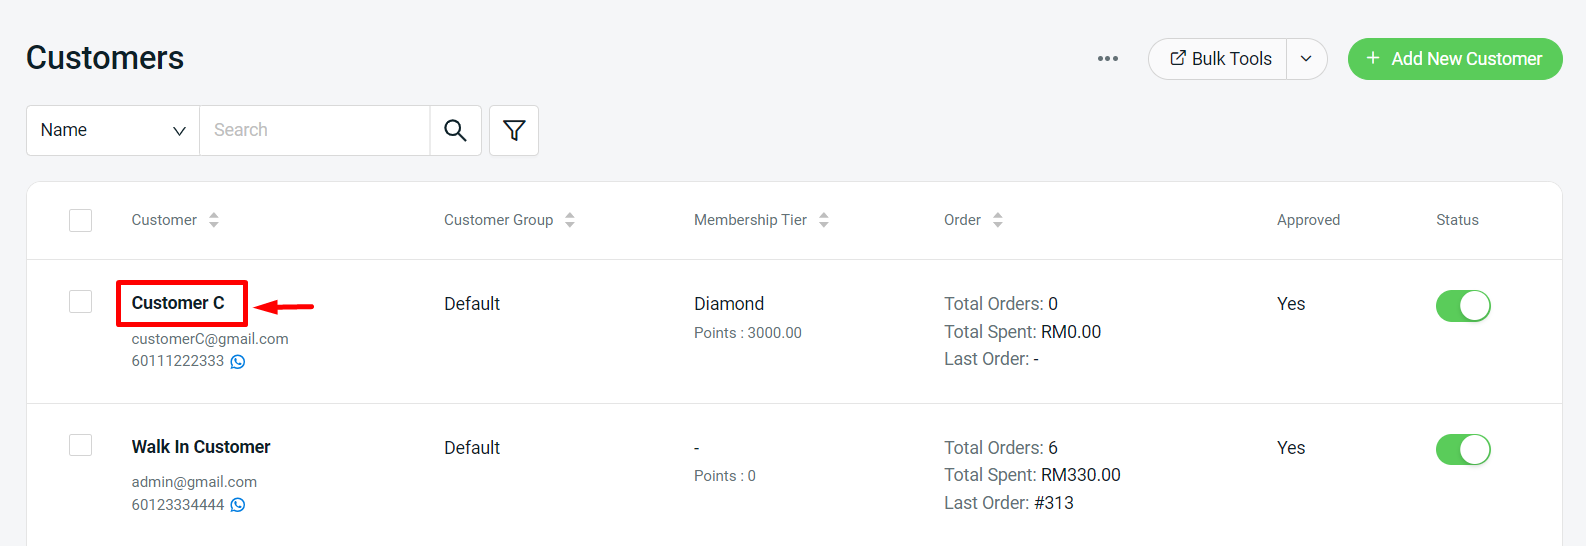
Step 1: Click on the customer name to edit customer details if necessary
Step 2: You can update/edit the Customer Details as follows.
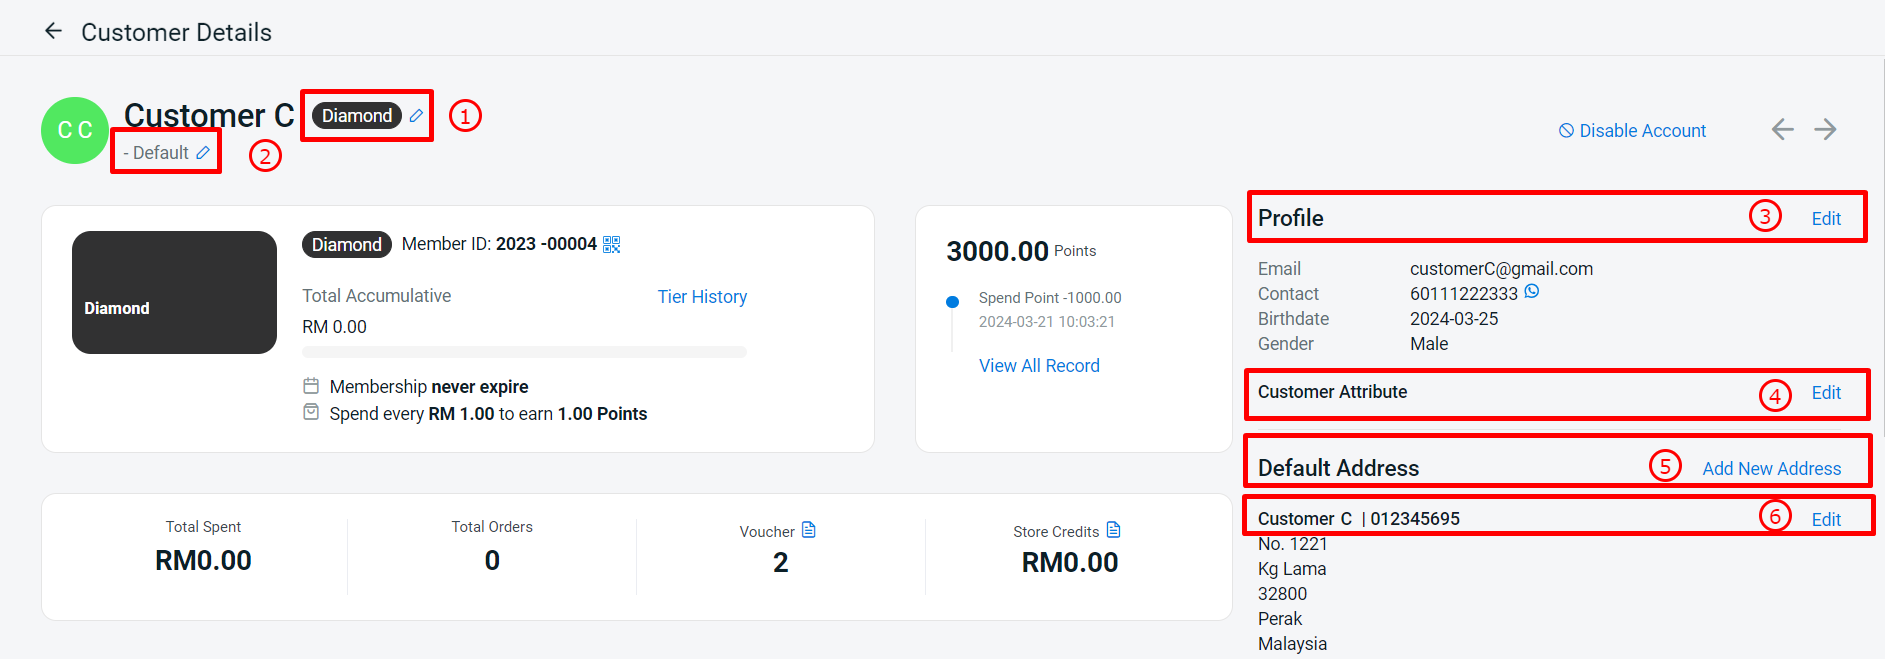
1. Membership: You can assign/edit a customer's membership manually Note: This feature is only available in SiteGiant OMO Pro Plan and above

2. Customer Group: You can change the customer's customer group manually

3. Profile: Click edit to change the customer's profile (Name, Password,Email, Contact, Birhdate and Gender)

4. Customer Attribute: This is additional information that you need from your customer(can be add under Customer Login). If the customer selects this option during sign-up, it will be automatically updated. However, you can edit or add this customer attribute manually in the customer account as well. Learn more on How To Create Customer Attribute

5. Add New Address: You can add additional addresses for your customers.  Once added, they will be able to select the address during checkout. However, customers can also add from their end by logging into their account

6. Existing Address: You can edit the customer's existing address after they register in your website account
4. View Customer Transaction
Step 1: You can check the customer’s shopping behavior on this customer profile page by looking through their Order History.
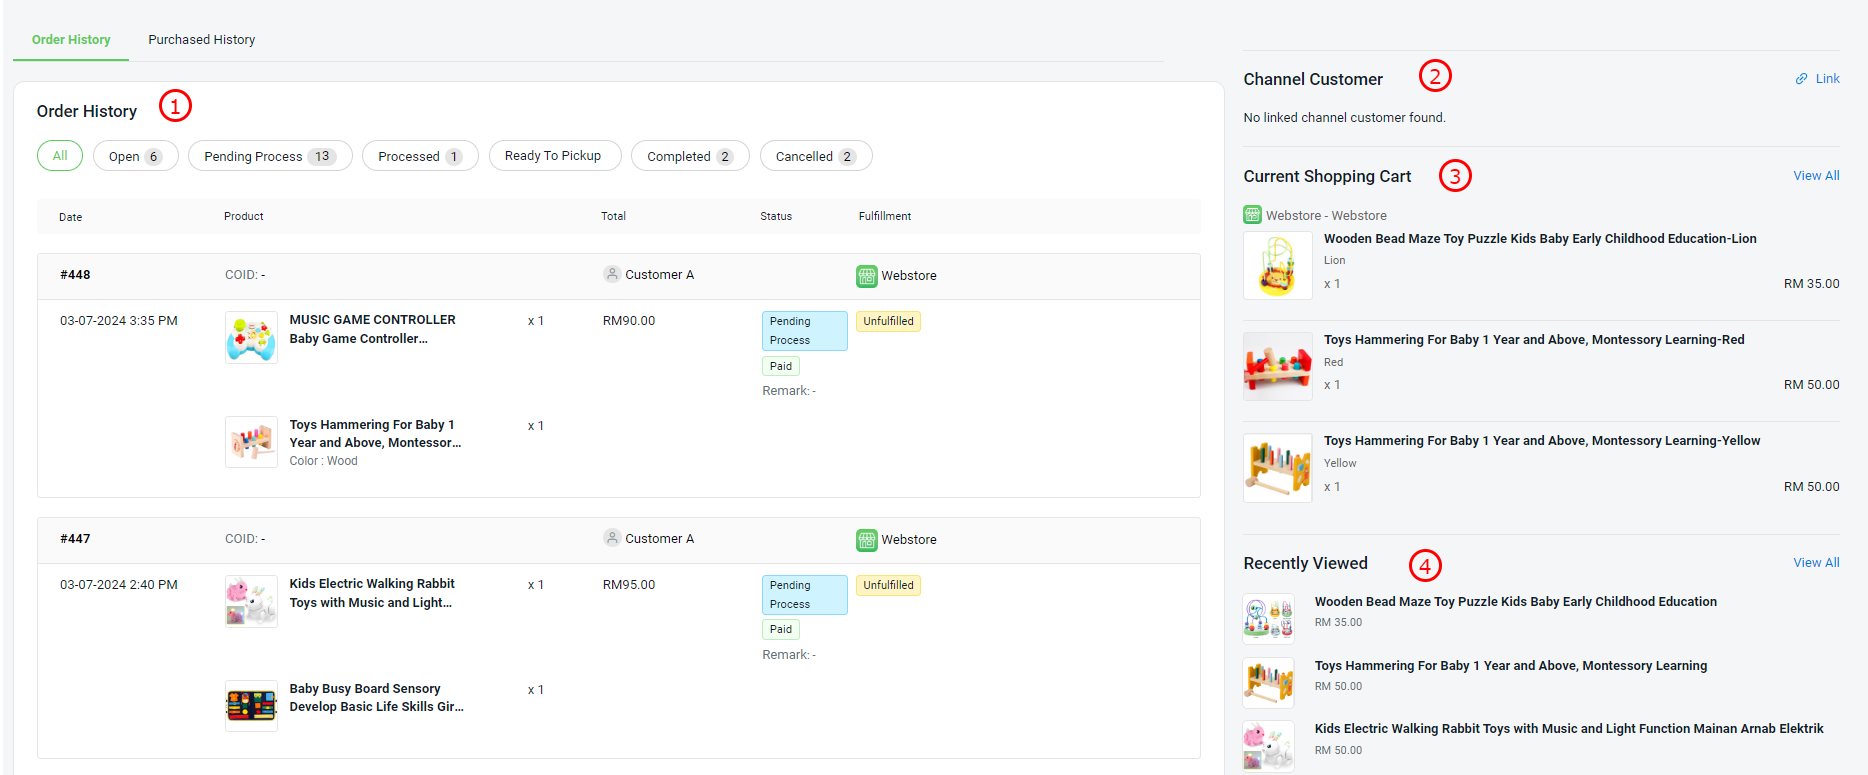
1. Order History: All customer purchase order history will be displayed. You can check and follow up with the customer regarding their order's status

2. Channel Customer: This feature also allows you to link customer accounts from the sales channel to SiteGiant customer accounts in order to view performance and transaction history together. Learn more on How To Link Channel Customer

3. Current Shopping Cart: It will show the current customer's shopping cart. This feature allows you to always target your customer's interest products.

4. Recently Viewed: You can have a look at the top products your customers always view on your website. This will benefit your business by targeting customers and sending relevant product details to customers based on the most recently viewed report.
Step 2: You can also review the customer’s purchase information through the Purchase History report.
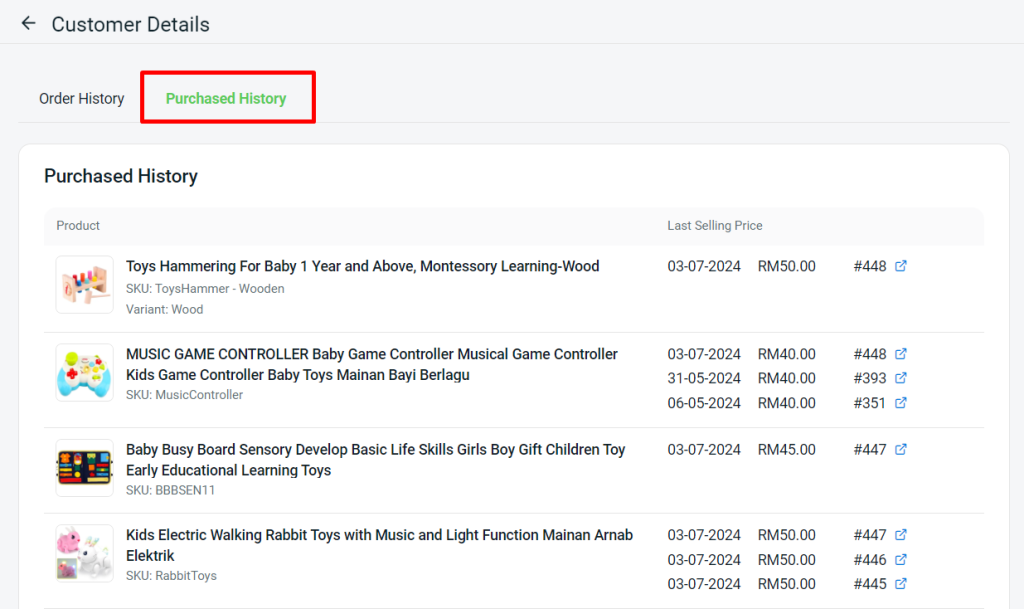
📌Note: For the previous transaction, only the 3 latest selling prices will be displayed.
📝Additional Information
1. Approve Customer Account
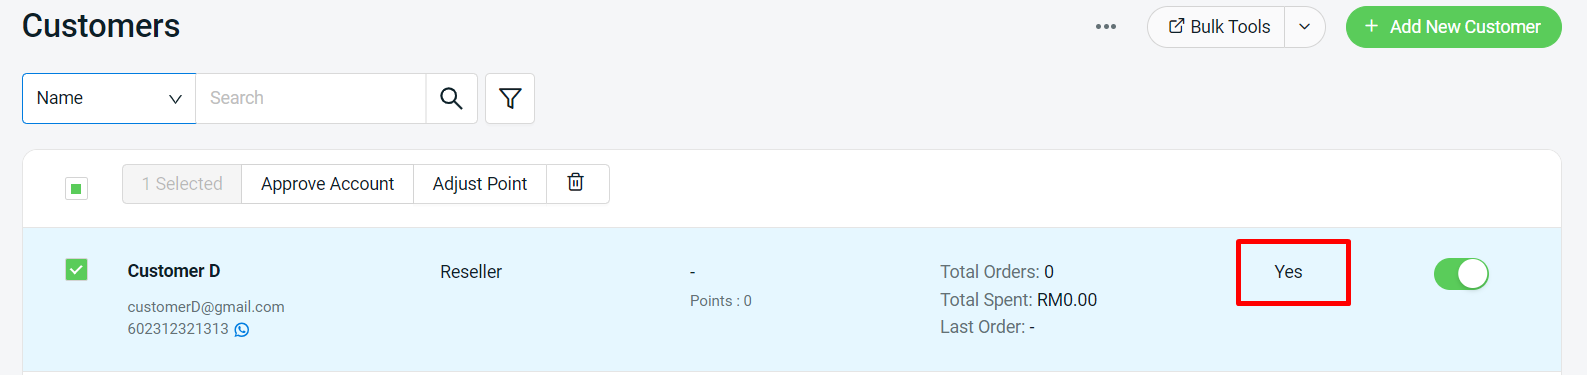
Step 1: When the customer’s status is still not approved, they cannot log in to their account. To approve it, select the Customer > click Approve Account

Step 2: Once updated, the customer’s status will change from No to Yes
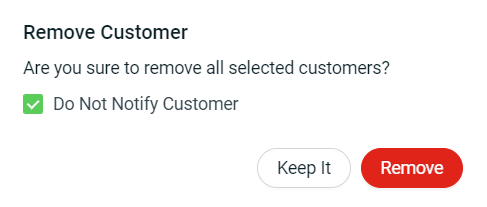
2. Delete Customer
Step 1: From the customer list, select the Customer > click on Delete icon
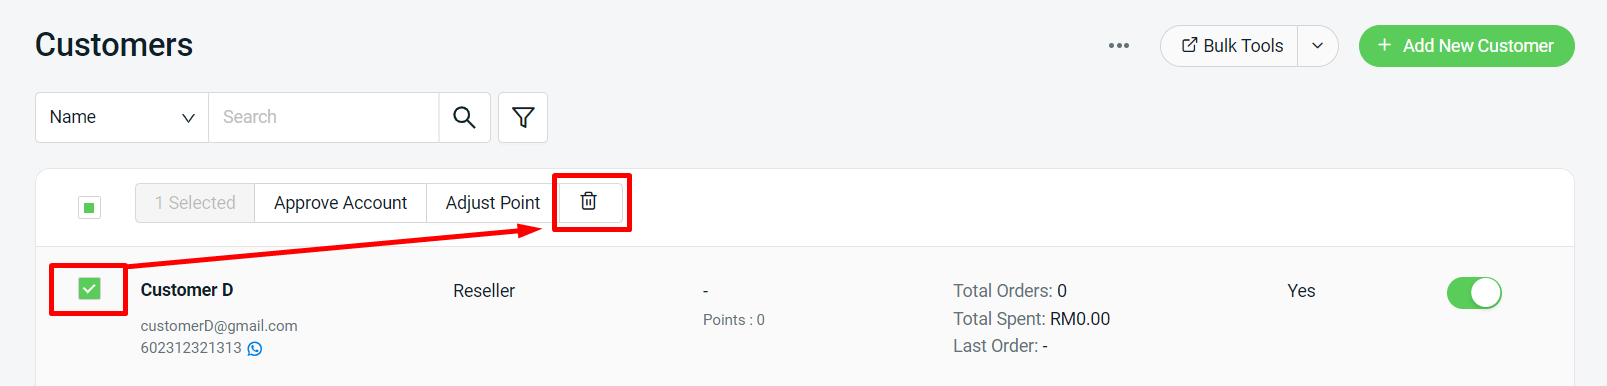
Step 2: Select whether you want to notify customers via email with the tick Do Not Notify Customers > click Remove
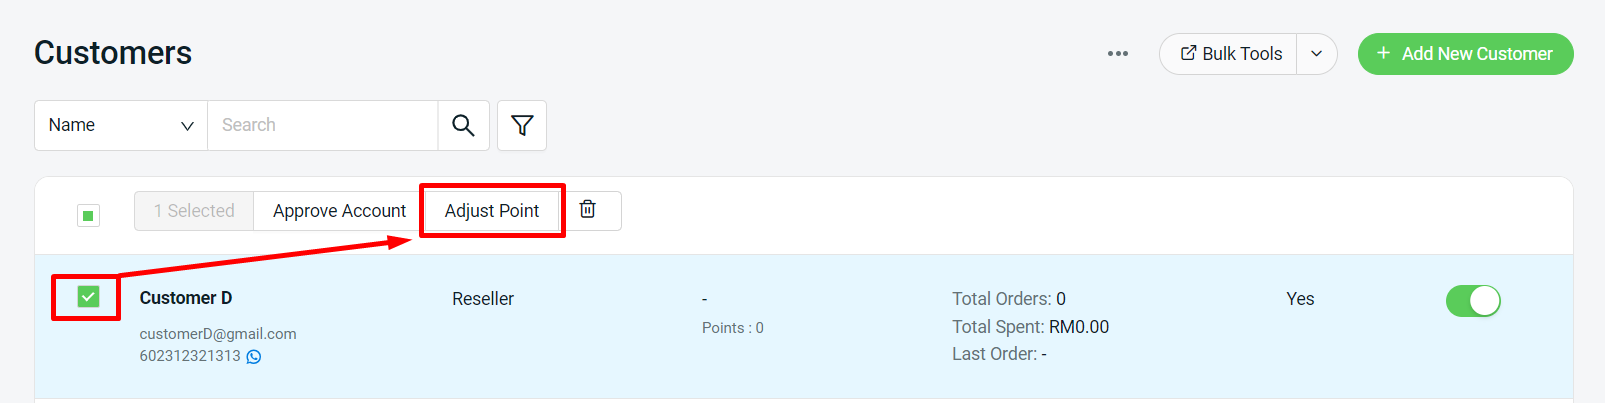
3. Adjust Point
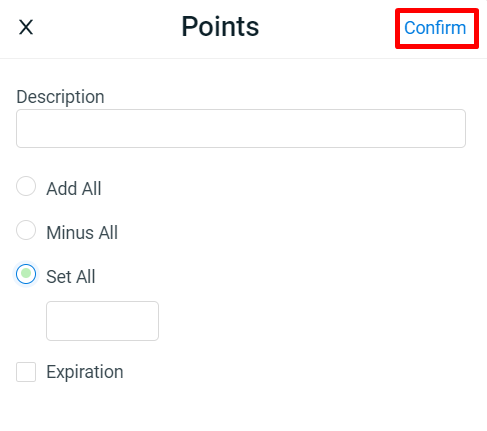
Step 1: You also can add and adjust customer points from the front page. Select Customer > click Adjust Point
Step 2: Add/Deduct the points > click Confirm
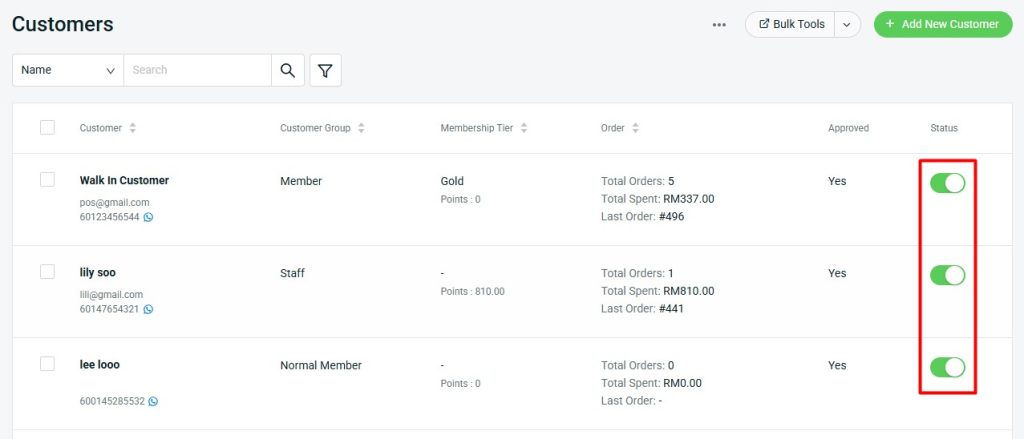
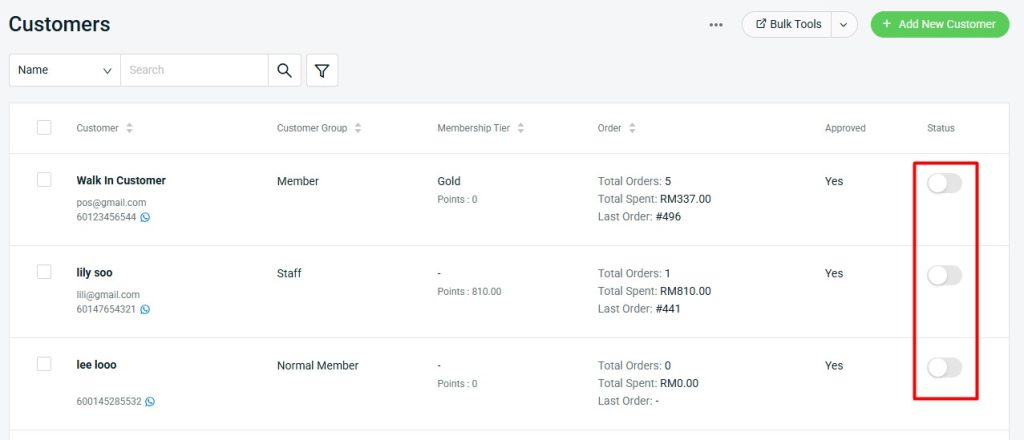
4. Disable Account
Step 1: If you want to blacklist customers from logging into their account, you can select a single customer or multiple customers in bulk > click Disable Account.
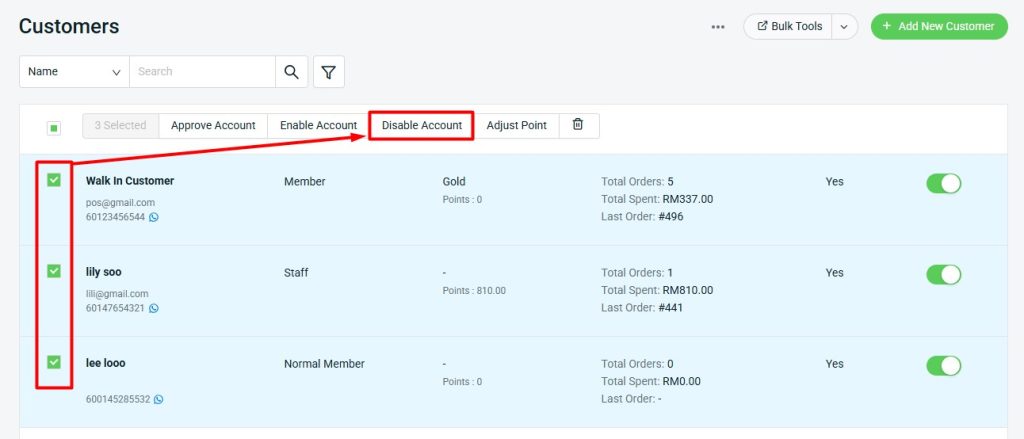
Step 2: Once updated, the status will change to Disabled.
5. Enable Account
Step 1: You can re-enable back an account by selecting customers > click Enable Account.
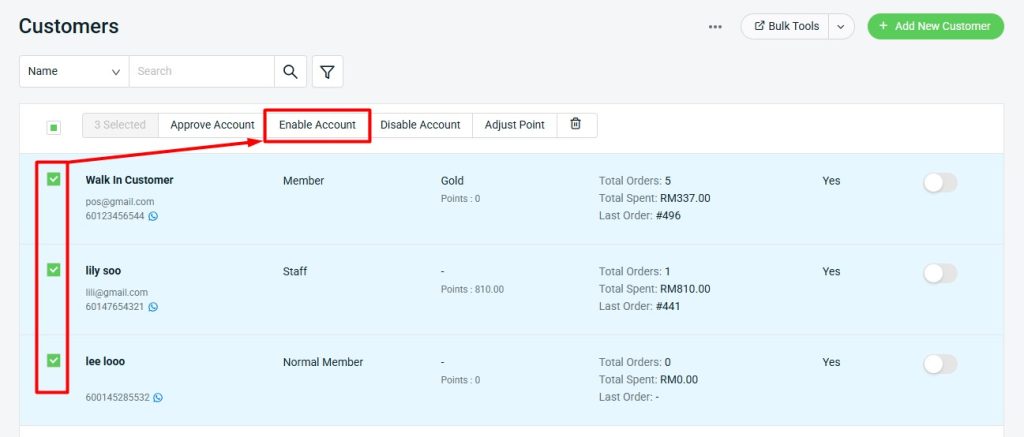
Step 2: Once updated, the status will change to Enabled.