1. Introduction
2. Set Up CCTV ParcelGuard Settings
3. Scan and Record Orders Using Order Fulfillment Assistant
4. Download Order Recording Clip
1. Introduction
Effective monitoring helps prevent business losses by reducing human errors and safeguarding parcel integrity before shipment. With CCTV ParcelGuard, you can seamlessly monitor the packing process with video tracking for any damage or loss. Record footage and packing time logs through the Order Fulfillment Assistant to track order processing and employee performance, providing greater accountability, enhanced security, and reliable evidence for dispute resolution.
📌Note: Before starting, make sure you have installed Hikvision CCTV in your warehouse.
This feature is available for Add-On only.
2. Set Up CCTV ParcelGuard Settings
1. Integration Settings
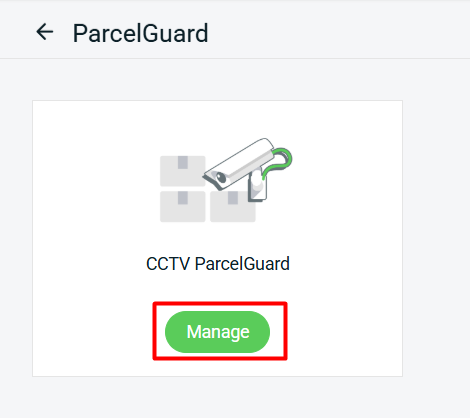
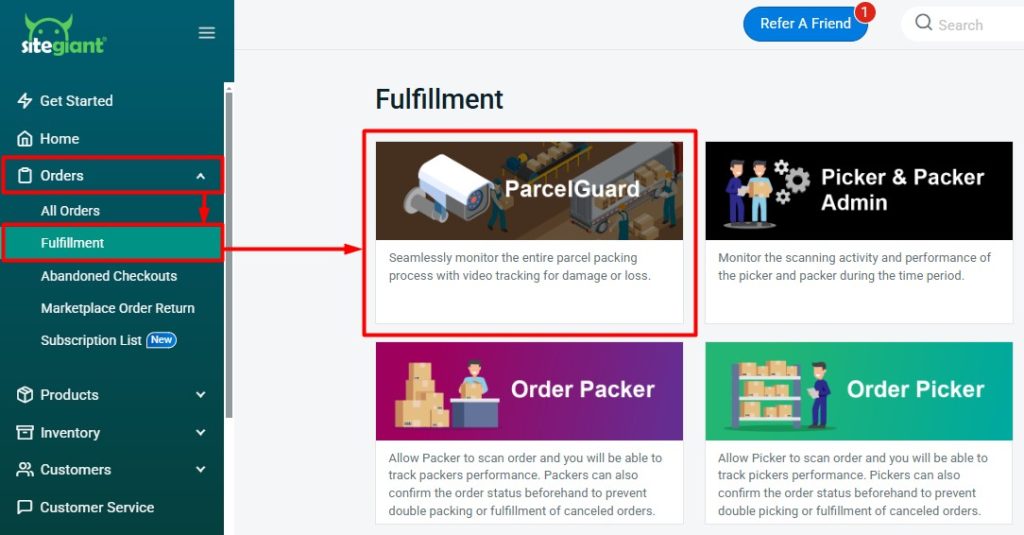
Step 1: Navigate to Orders > Fulfillment > ParcelGuard.

Step 2: Click Manage on CCTV ParcelGuard.
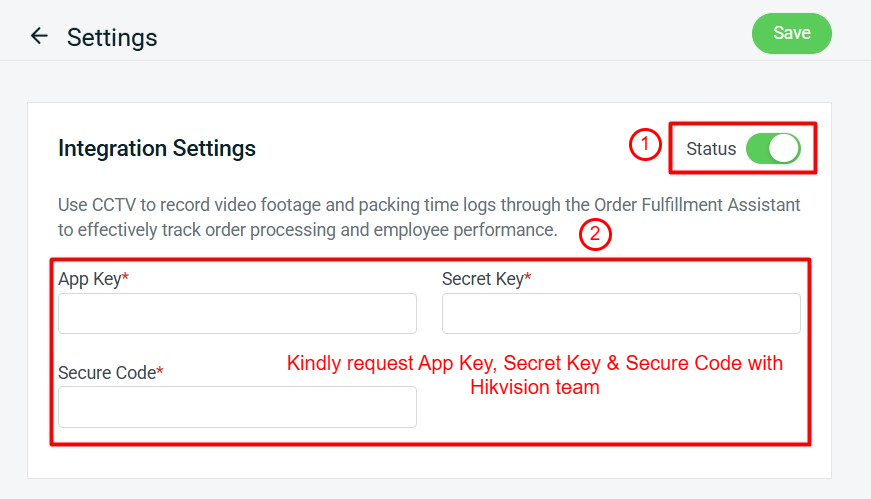
Step 3: Enable Status > Enter App Key, Secret Key and Secure Code.
📌Note: Secure Code is the Device Verification Code.
2. Clip Recording Settings
Step 1: Scroll down the page to configure the Clip Recording Settings > Save.
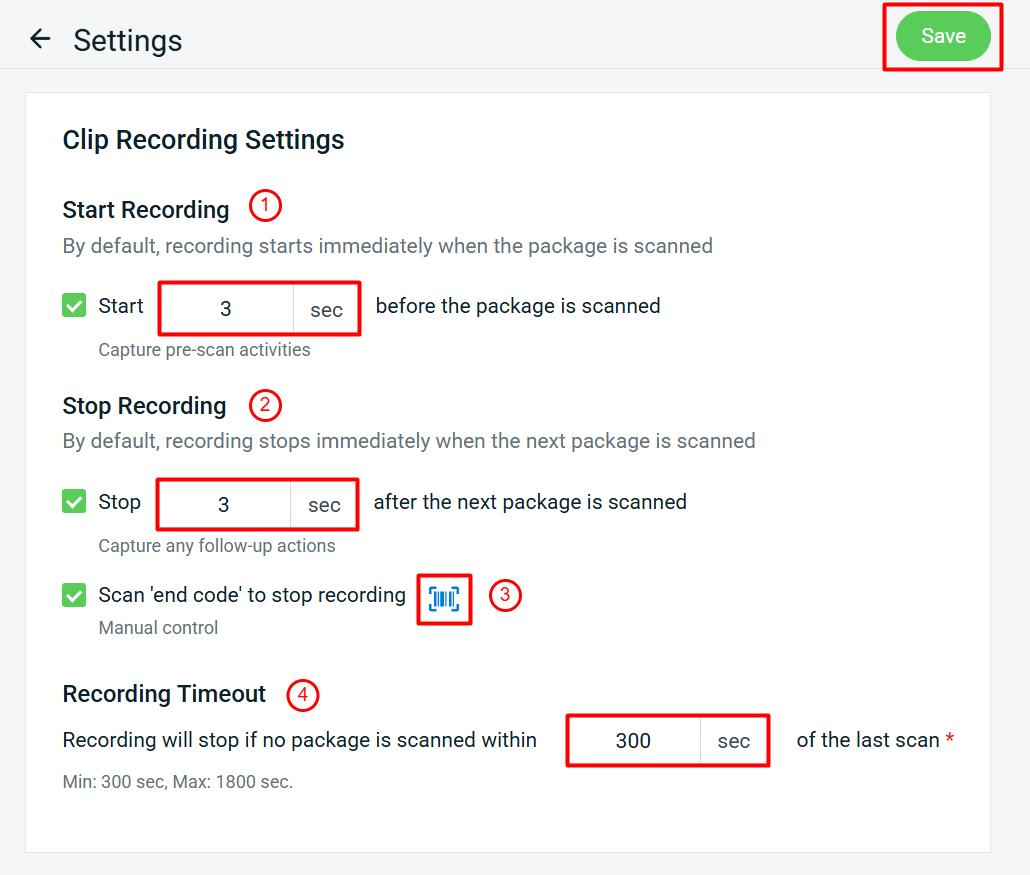
When a package is scanned, recording starts automatically and stops when the next package is scanned. To capture additional footage, you can enable the 'Start before' or 'Stop after' option.

1. Start recording before the package is scanned: Tick and set the start time to begin recording earlier when scanning a package.

Example: Set start 3 sec before the package is scanned:

One package is scanned from 8:30:00 AM – 8:30:05 AM
Recording for the package will start from 8:29:57 AM – 8:30:05 AM

2. Stop recording after the next package is scanned: Tick and set the stop time to extend recording after scanning the next package.

Example: Set stop 3 sec after the next package is scanned:

One package is scanned from 8:30:00 AM – 8:30:05 AM
Recording for the package will stop at 8:30:08 AM, making the total recording duration 8:30:00 AM – 8:30:08 AM

3. Scan 'End Code' to stop recording: Tick this option if you allow packers to stop recording manually by scanning an 'End Code', after finish packing the last package. The 'End Code' is same for all counters/packing stations. Click the barcode icon to print it out and place on packing station.

4. Recording Timeout: Set a time limit for recording to stop automatically if no package is scanned within the specified duration.

Example: Set no package is scanned within 300 sec of the last scan:

One package is scanned at 8:30:00 AM
If no additional package is scanned, the recording will automatically stop at 8:35:00 AM
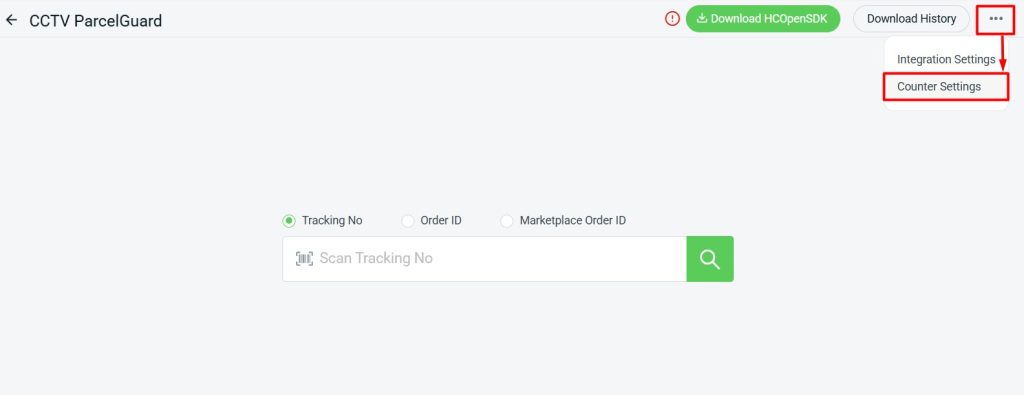
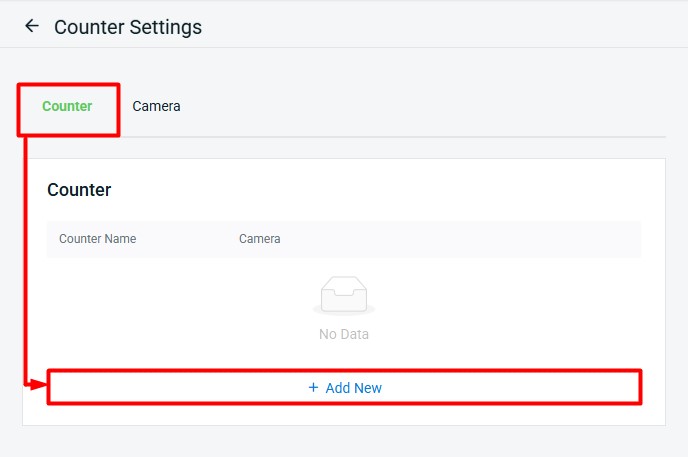
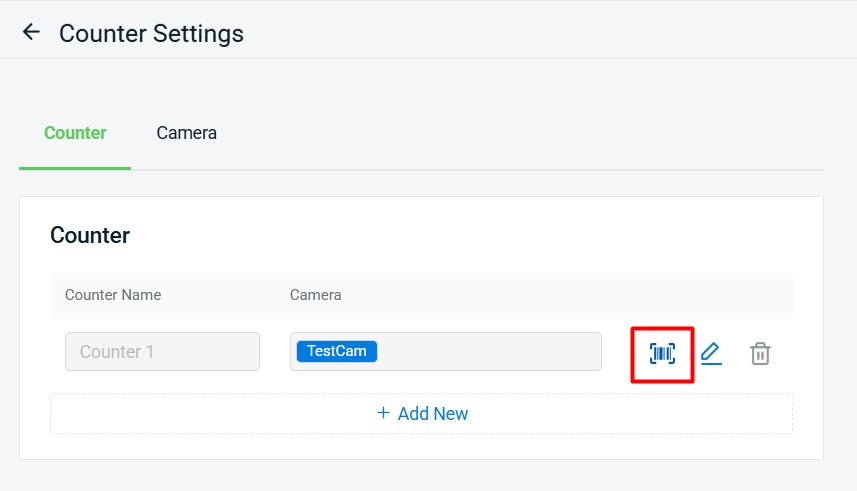
3. Counter Settings
Step 1: Click More (…) button > Counter Settings.
Step 2: Click on Camera tab to view the list of Hikvision CCTV cameras installed in your warehouse. You can edit the Camera Name as preferred. If you’ve added a new CCTV camera, click the Refresh button to update the list.

Step 3: Click on Counter tab, and Add New to create a counter for each packing station.
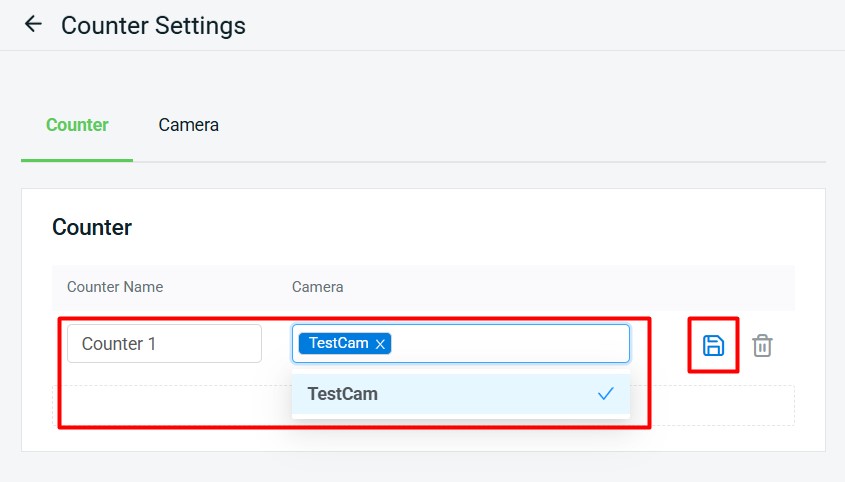
Step 4: Enter the Counter Name > apply the CCTV camera for the packing station > Save.
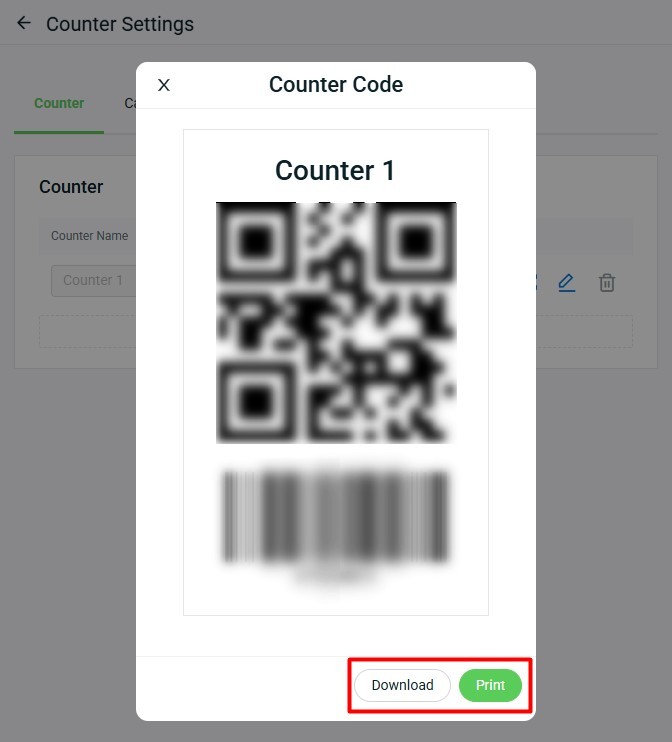
Step 5: Click on the barcode icon to preview the Counter Code.
Step 6: Click the Download or Print button to print the Counter Code and place it at your packing station. This code will be needed when opening the counter to start scanning orders through Order Fulfillment Assistant.
3. Scan and Record Orders Using Order Fulfillment Assistant
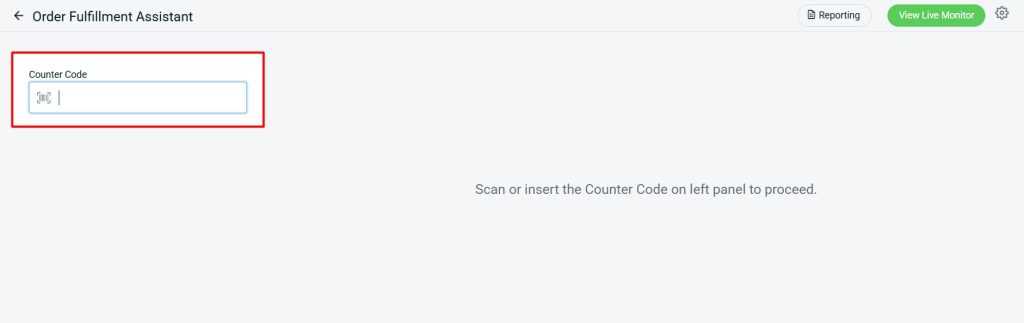
Step 1: Navigate to Orders > Fulfillment > Order Fulfillment Assistant.

Step 2: Scan Counter Code.
Step 3: The counter will be opened with On Duty status. You can now proceed to scan and pack the orders.
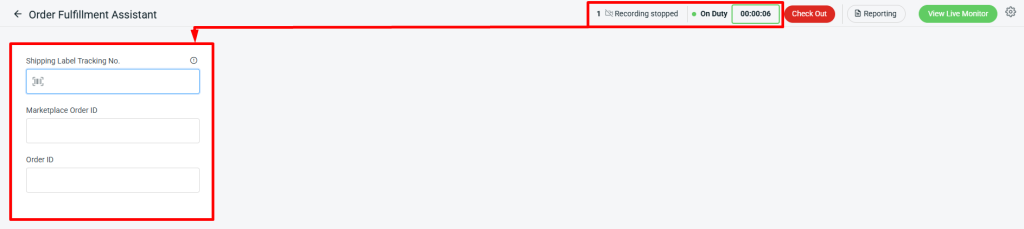
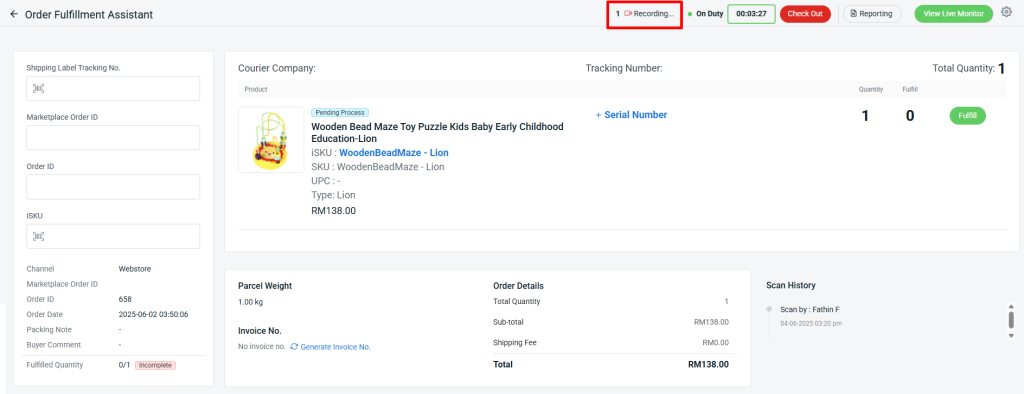
Step 4: After scanning the order, a Recording Indicator will appear to show if the recording is in progress.
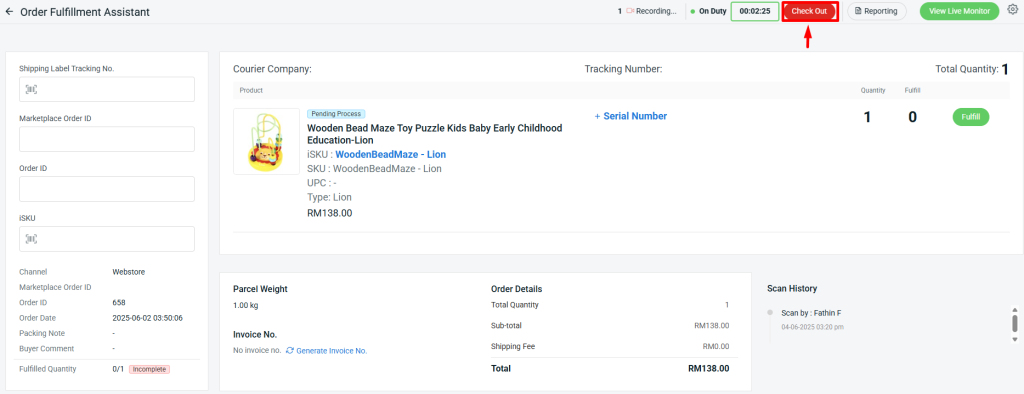
Step 5: Once you’ve finished scanning for the day and are ready to close the shift, click Check Out to close the counter.
4. Download Order Recording Clip
Step 1: Navigate to Orders > Fulfillment > ParcelGuard.
Step 2: Click Manage on CCTV ParcelGuard.

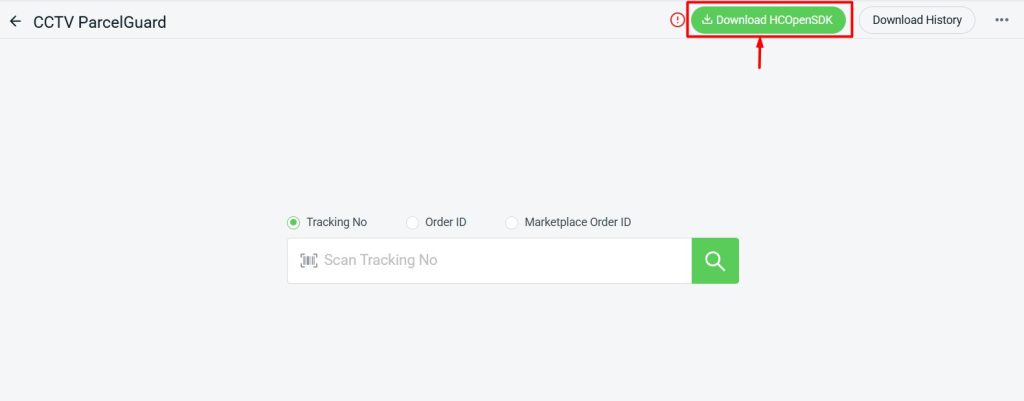
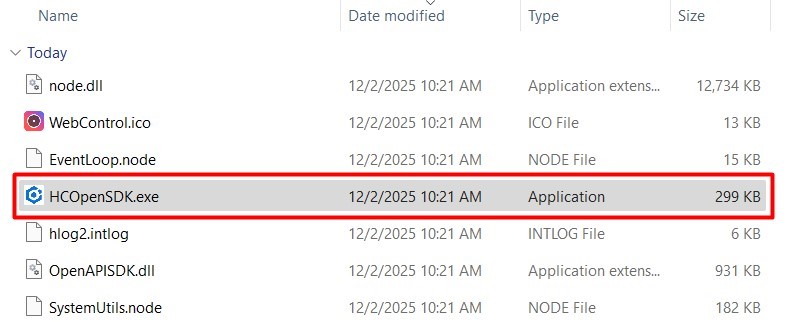
Step 3: Click Download HCOpenSDK on Window PC.
Step 4: Open HCOpenSDK from your Window PC.
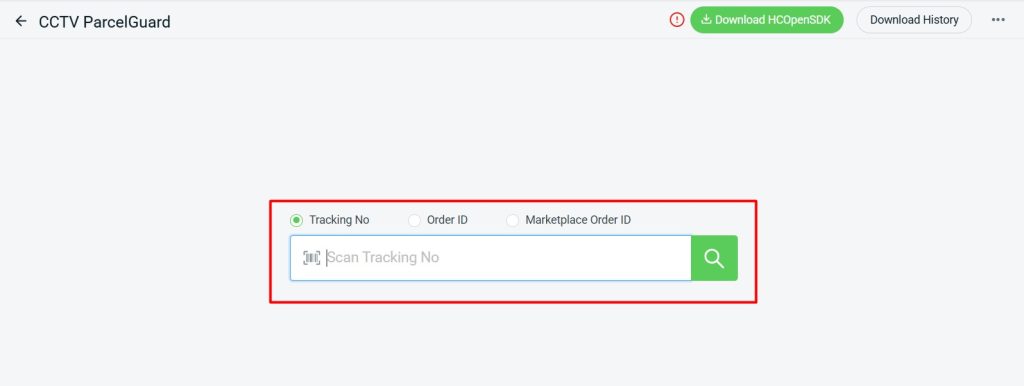
Step 5: Search or scan by Tracking Number, Order ID, or Marketplace Order ID.
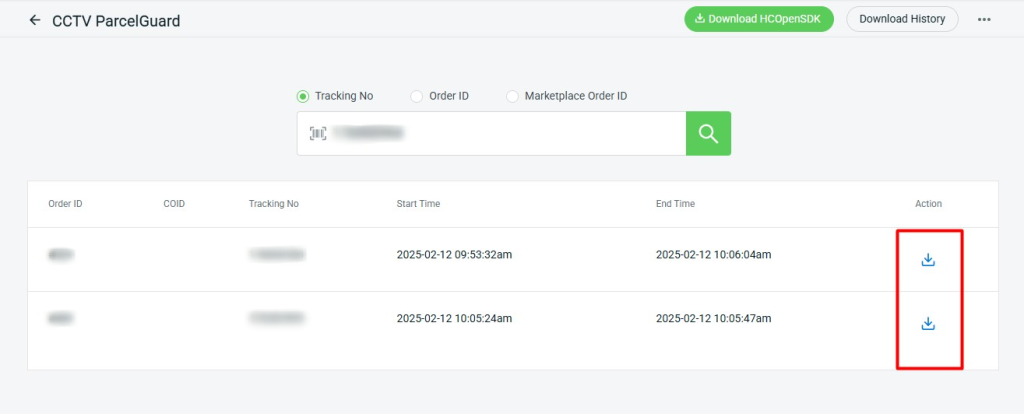
Step 6: Click the Download icon to download recording clip.
Step 7: Copy and paste the Directory that you want to save in your folder > Save.
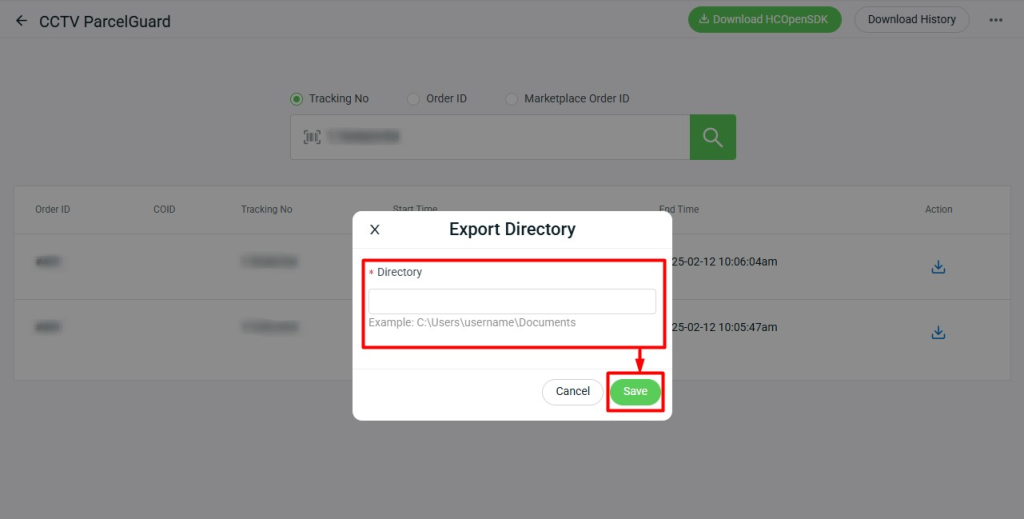
📌Note: You may find the directory on top of your desktop folder.

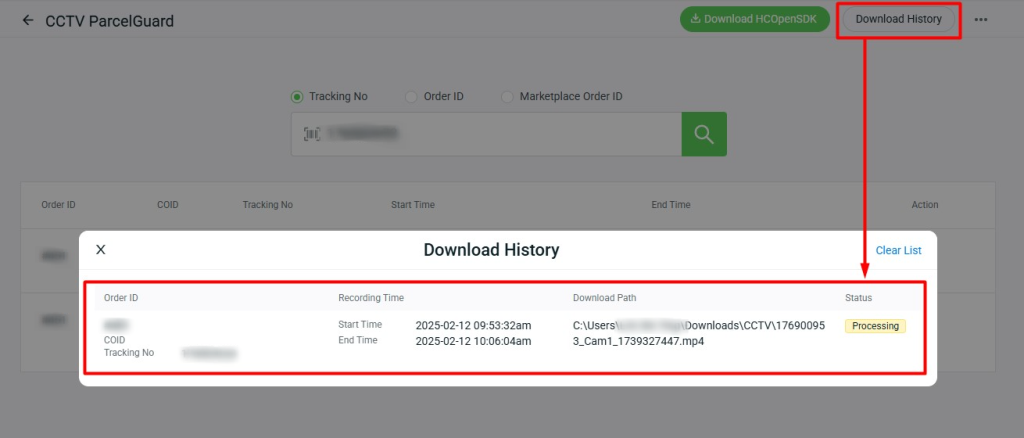
Step 8: Click Download History to check the current downloading file status. Once the Status changes from Processing to Completed, you can open the recording clip from the saved folder.