
1. Introduction
2. Set Discount Price
3. Remove Discount Price
1. Introduction

Offering discounts is one of the effective ways to attract customers to your Webstore and increase the conversion rate. When there is a discount on products, customers will buy them eventually to avoid losing the best deal. You can also create a sense of urgency by offering discounts for a limited period of time.
2. Set Discount Price
Method 1: Through Webstore Listing
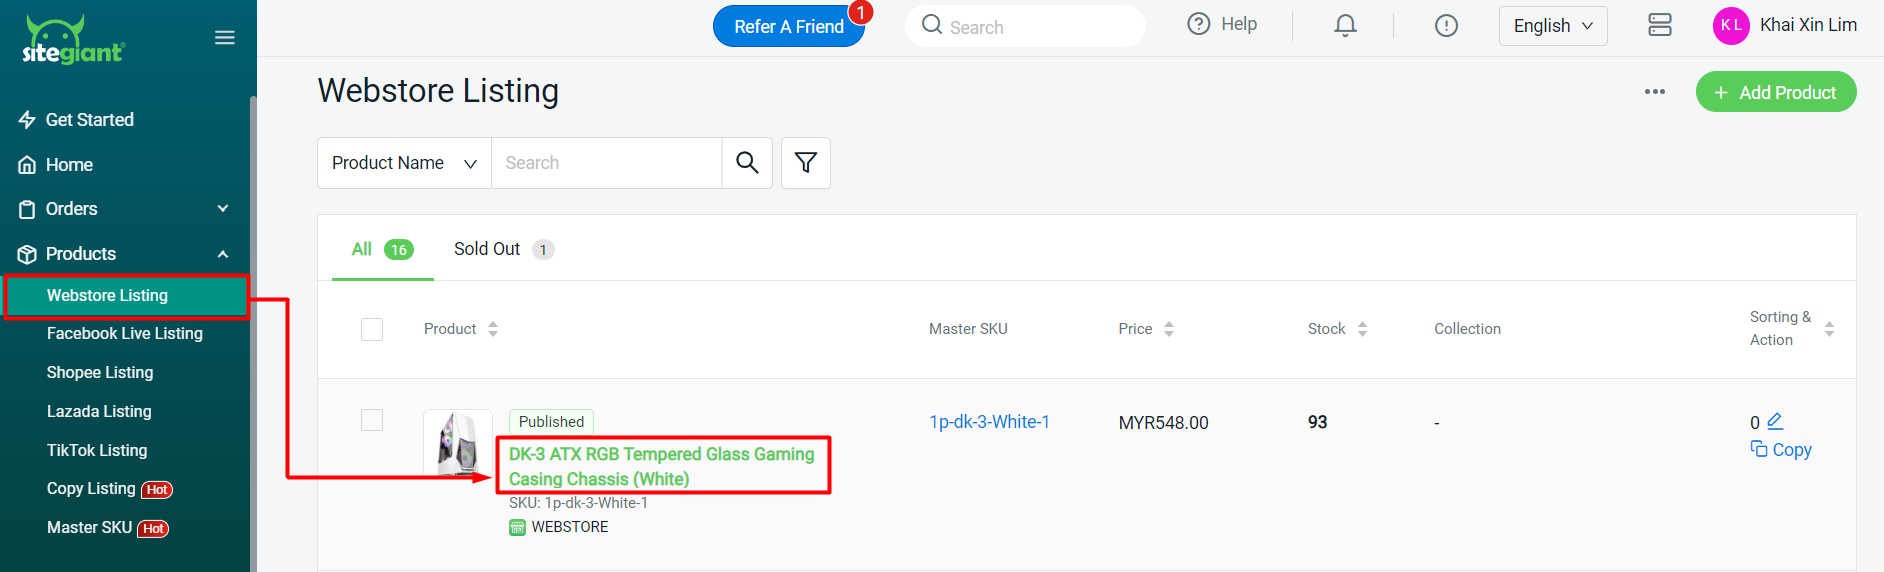
Step 1: Navigate to Products > Webstore Listing > click on the Product Name.
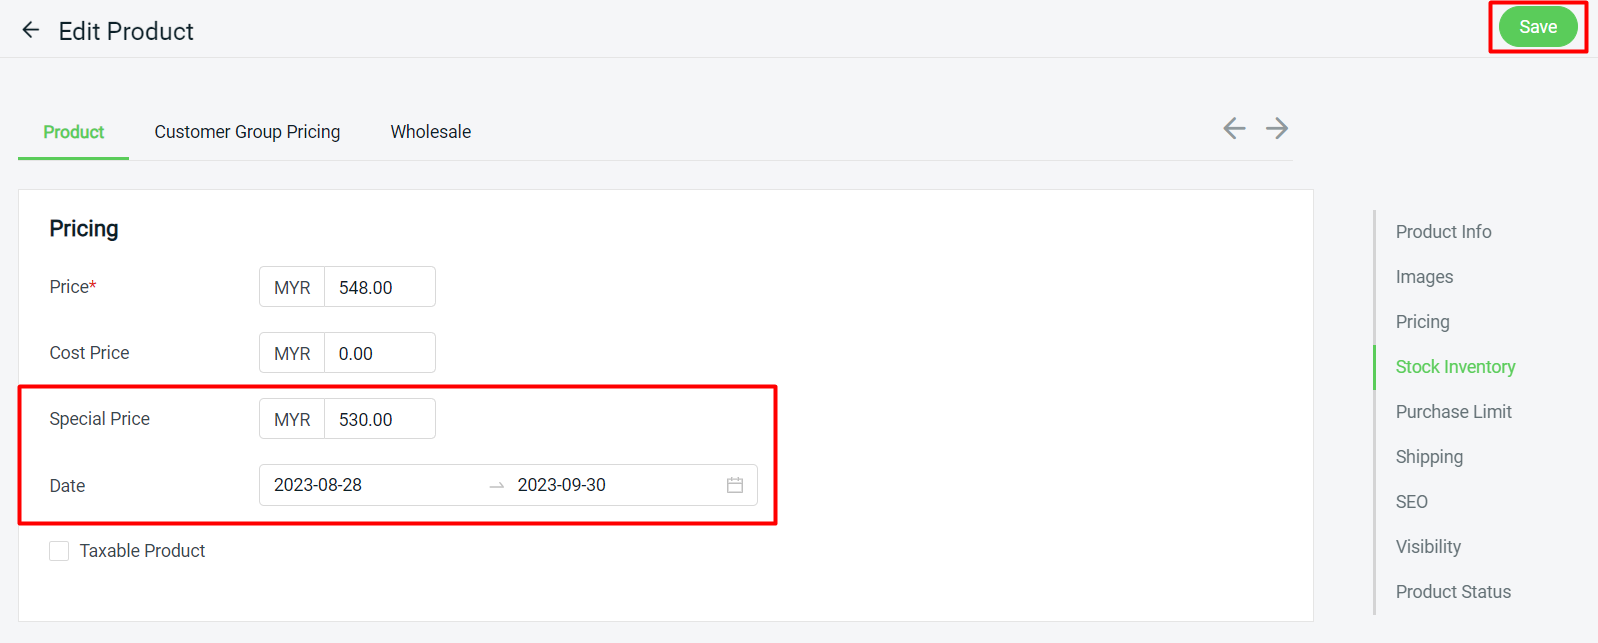
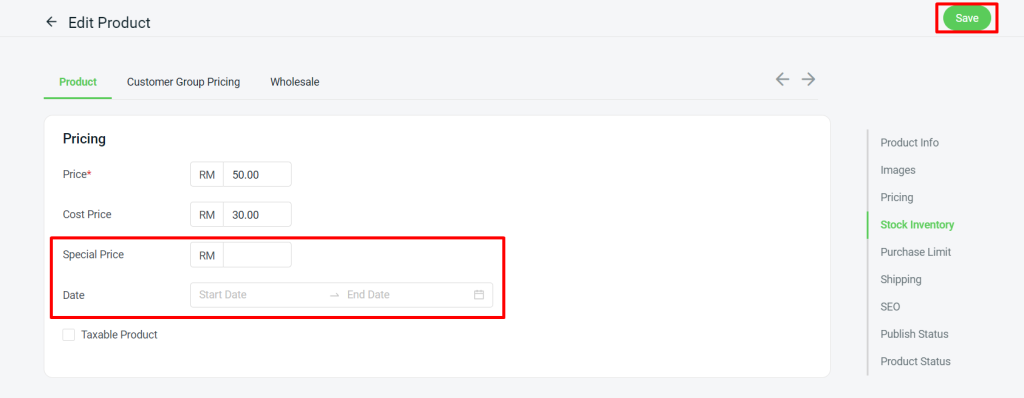
Step 2: Scroll down to the Pricing section, fill in the Special Price, and set the Promotion Date (leave blank for long-term promotion) > Save.
Single Product
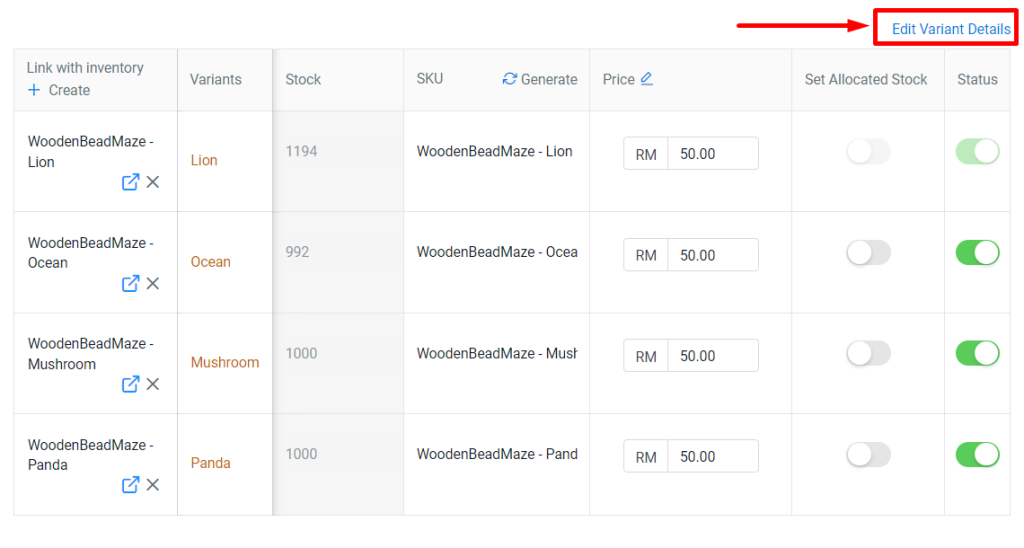
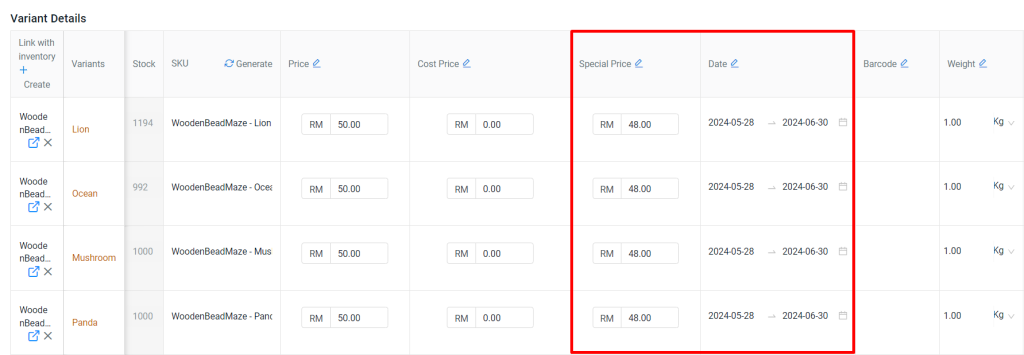
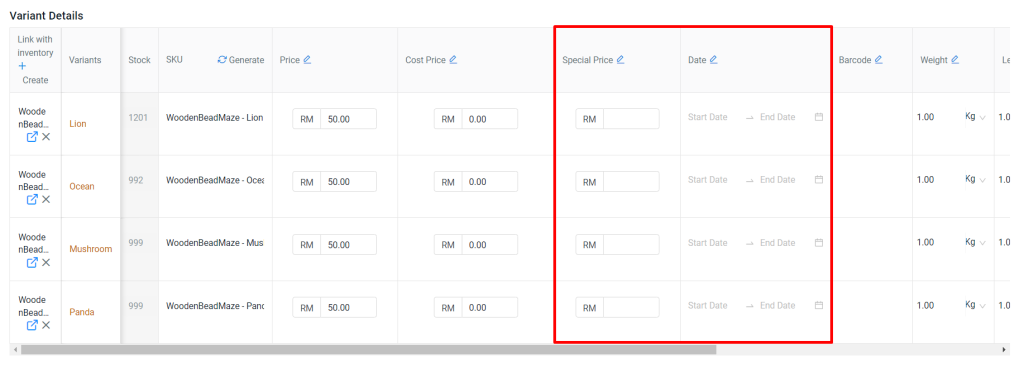
Step 3: If your product has variants, scroll down to the Variant Section > click Edit Variant Details > fill in the Special Price and set the Promotion Date (leave blank for long-term promotion) > Save.
Variant Product
Method 2: Bulk Set Special Price
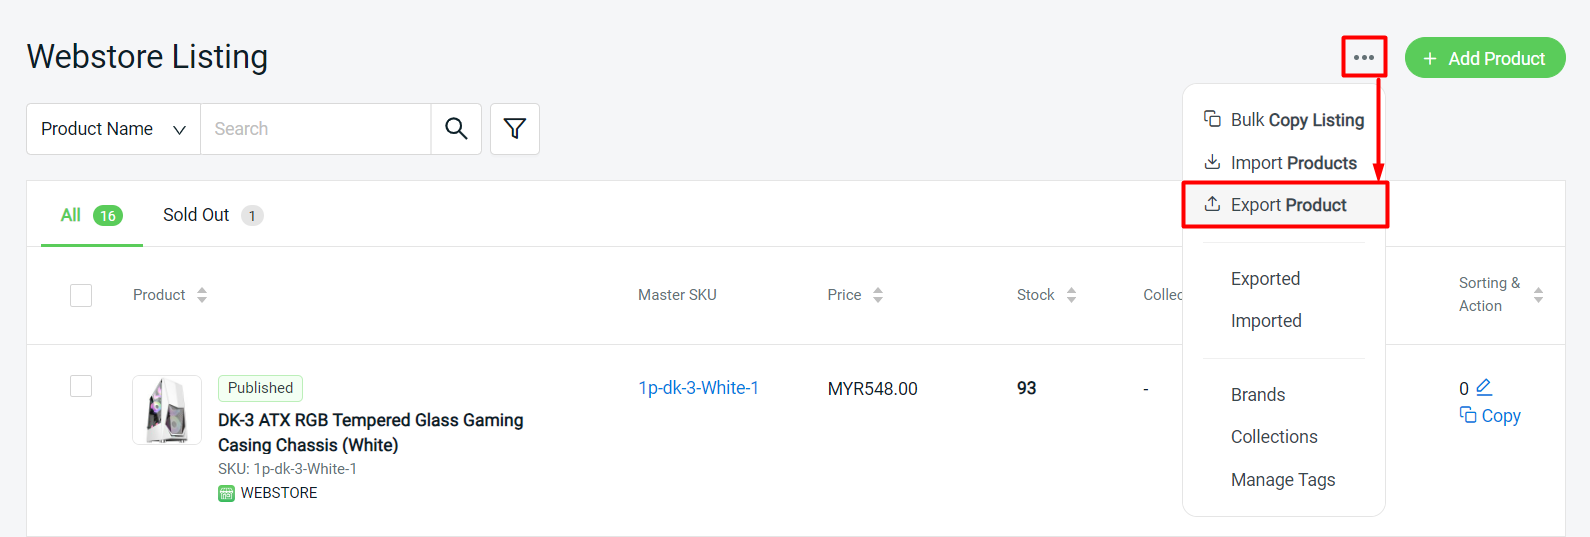
Step 1: Click on More(…) > Export Product.
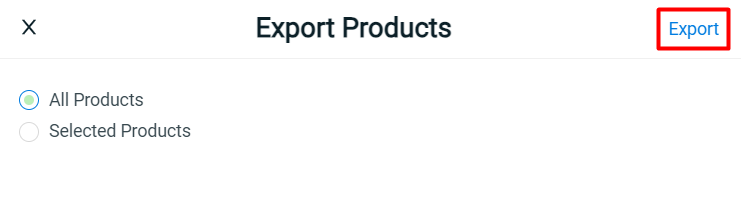
Step 2: Choose to export All Products or only Selected Products > Export.
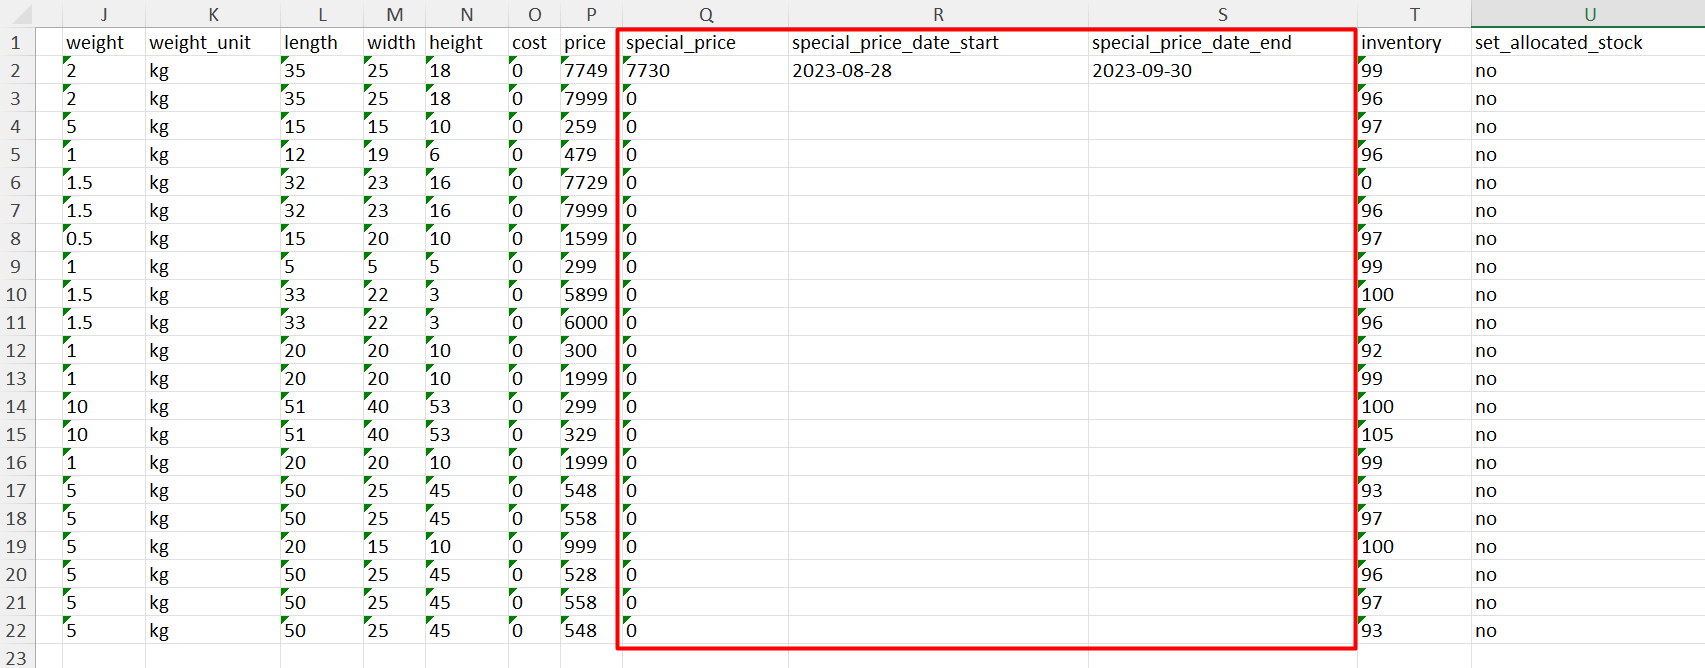
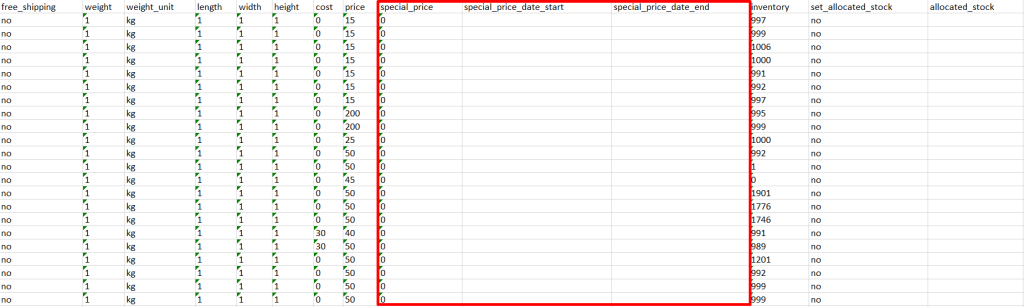
Step 3: Download and open the Excel file > fill in the special_price, special_price_date_start and special_price_date_end columns > save the Excel file.
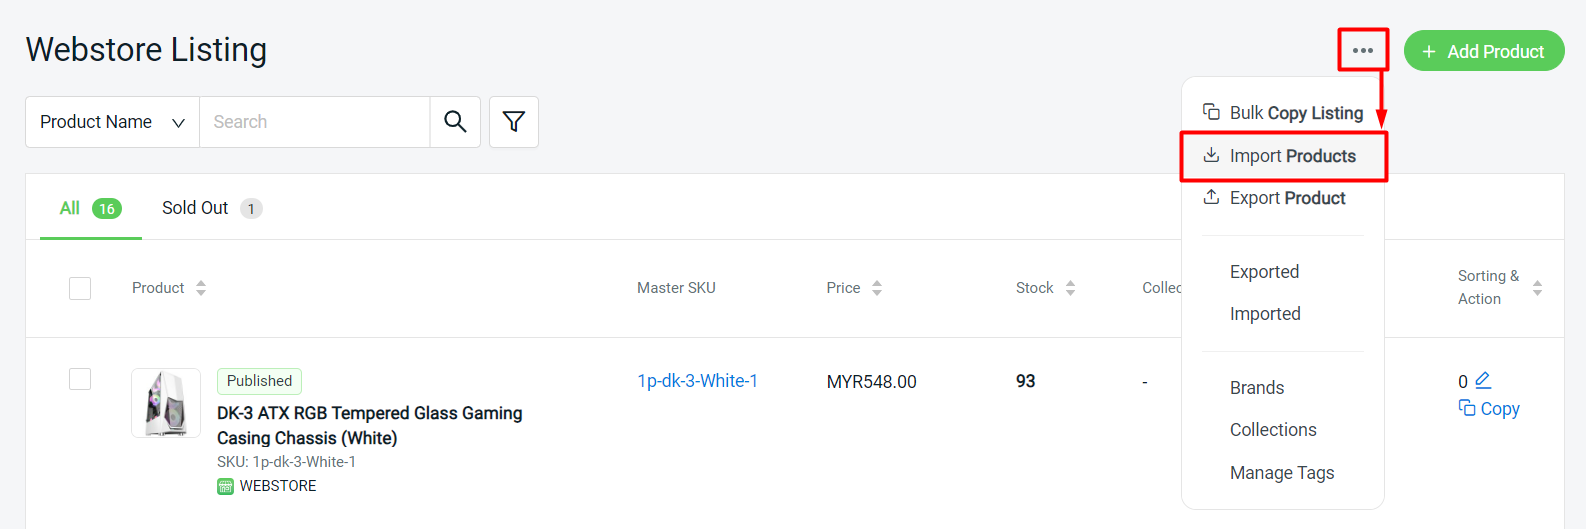
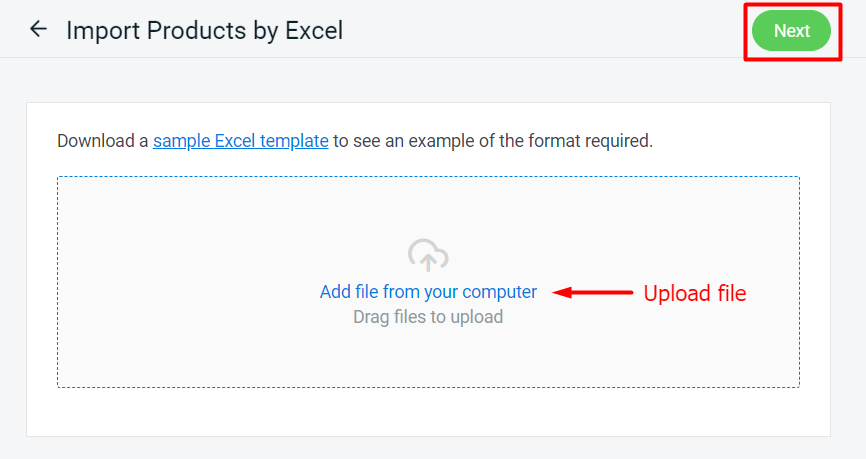
Step 4: Back to Webstore Listing > More(…) > Import Products.
Step 5: Click the column to upload file > Next > Proceed.
Step 6: Wait for the system to process the imported file. Refresh to see the changes.
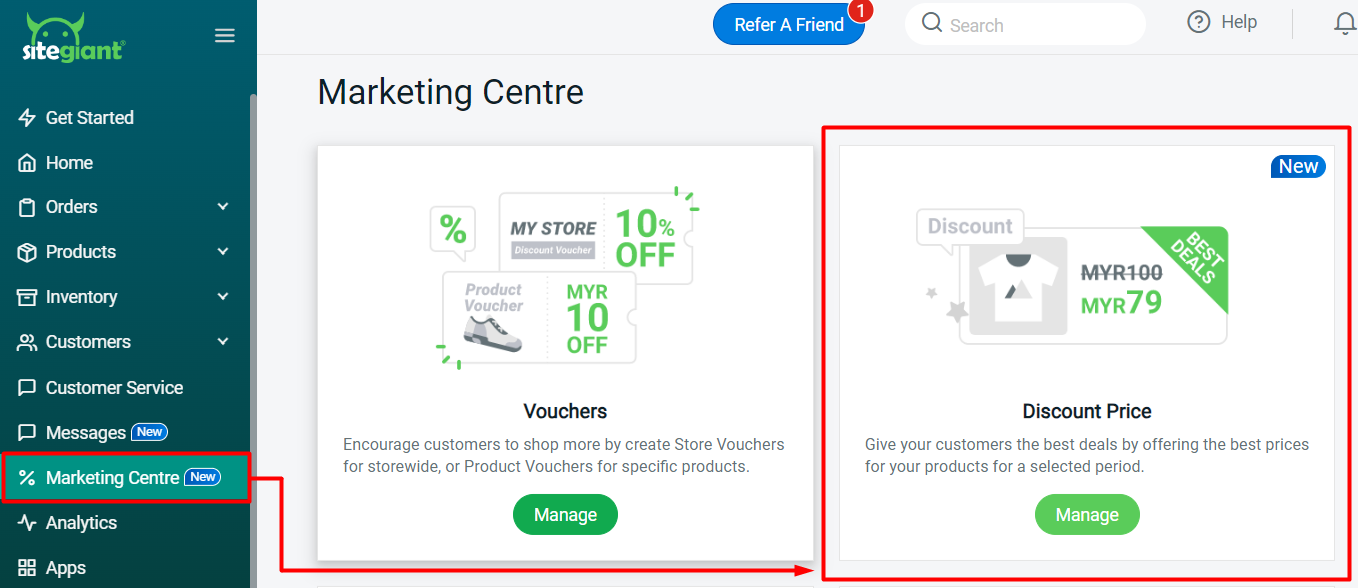
Method 3: Through Marketing Centre
Step 1: Go to Marketing Centre on the sidebar menu > Discount Price.
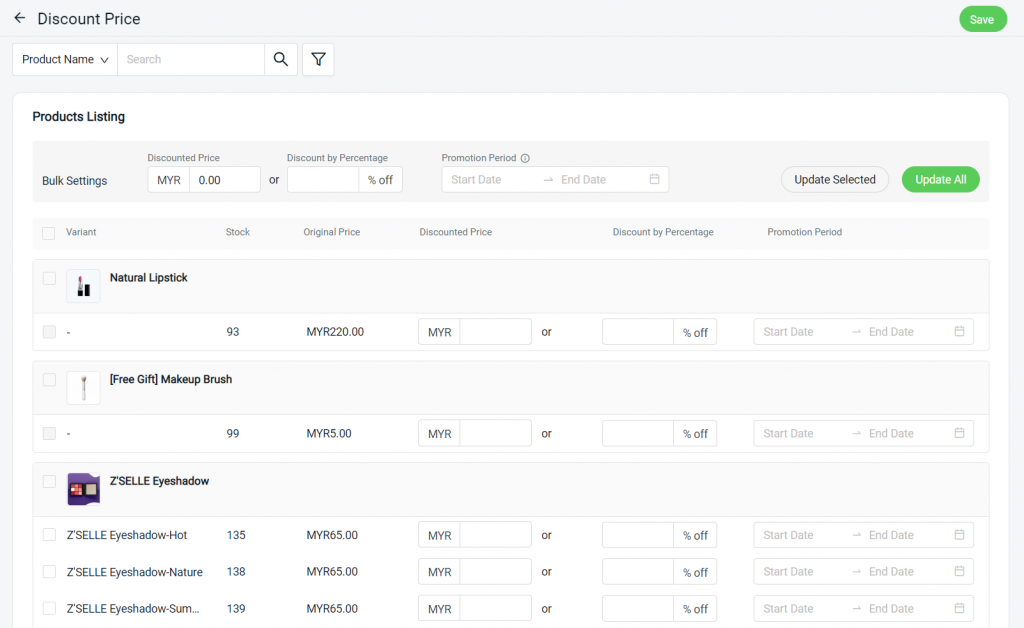
Step 2: All of your webstore listings will be listed under the Products Listing at Discount Price page.
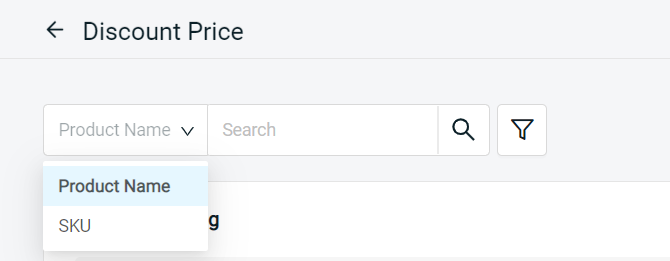
Step 3: You may search for specific products by Product Name or SKU.
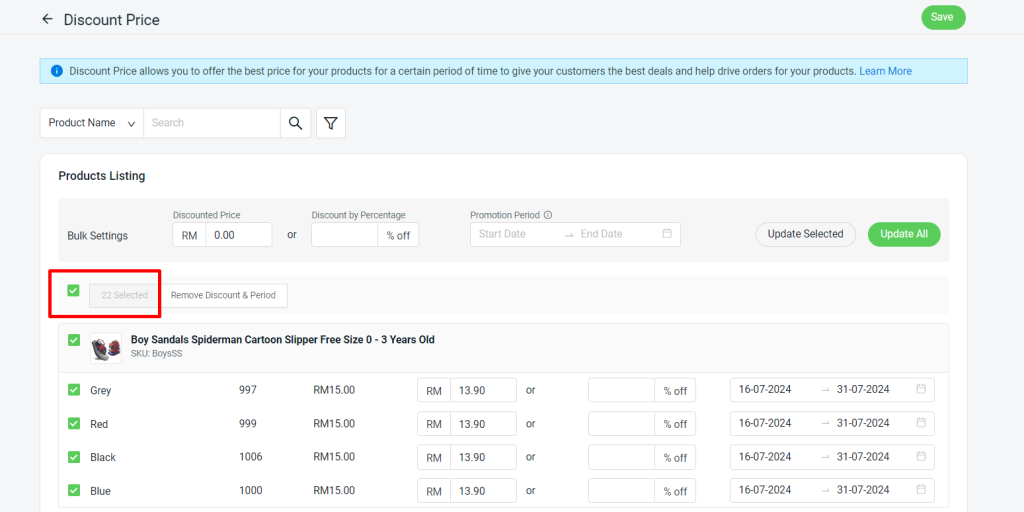
Step 4: Select the product that you wish to set a discount price > insert the discounted price or discount percentage > set the promotion period.
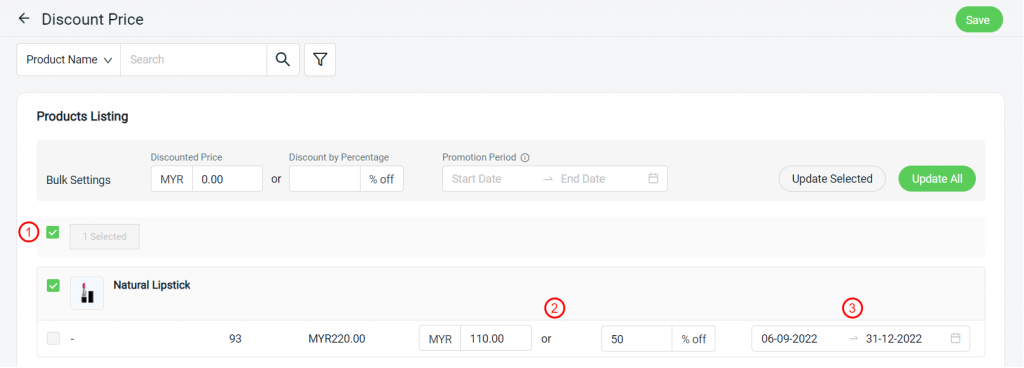
Step 5: You can also bulk settings the Discounted Price or Discount Percentage and Promotion Period for the selected products /all products.

Step 6: Make sure the products that are set with the discount price are selected > click the Save button to apply the discount price.
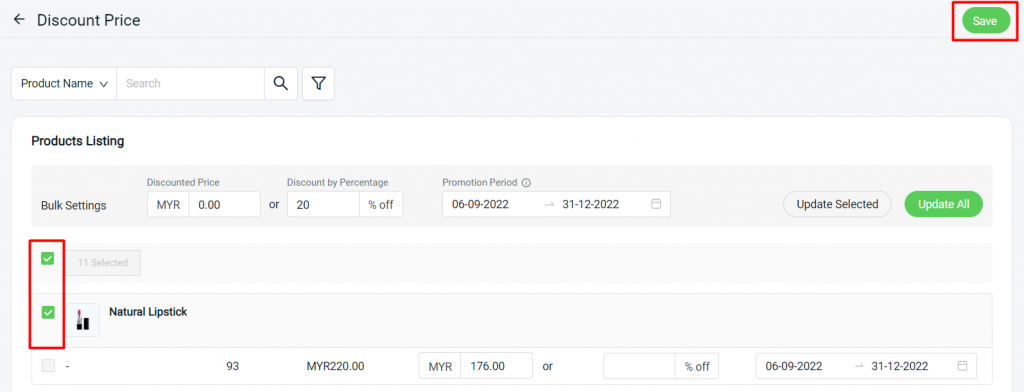
Step 7: Back to the dashboard and Clear Cache to see the changes on your Webstore.
3. Remove Discount Price
Method 1: Through Webstore Listing
Step 1: Navigate to Products > Webstore Listing > click on the Product Name.
Step 2: Scroll down to the Pricing section, remove the Special Price > Save.
Single Product
Step 3: If your product has variants, scroll down to the Variant Section > click Edit Variant Details > remove Special Price and Date > Save.
Variant Product
Method 2: Bulk Remove Special Price
Step 1: Click on More(…) > Export Product.
Step 2: Choose to export All Products or only Selected Products > Export.
Step 3: Download and open the Excel file > update special_price column as 0 > remove special_price_date_start and special_price_date_end date > save the Excel file.
Step 4: Back to Webstore Listing > More(…) > Import Products.
Step 5: Click the column to upload file > Next > Proceed.
Step 6: Wait for the system to process the imported file. Refresh to see the changes.
Method 3: Through Marketing Centre
Step 1: Go to Marketing Centre on the sidebar menu > Discount Price.
Step 2: All of your webstore listings will be listed under the Products Listing at Discount Price page.
Step 3: You may search for specific products by Product Name or SKU.
Step 4: Select the product you wish to remove the discount price > click Remove Discount & Period > Save.

Step 5: You can bulk remove the Discount & Period by bulk ticking the relevant product > Save.
Step 6: Back to the dashboard and Clear Cache to see the changes on your Webstore.