1. Introduction
2. Landing Page Integration
3. Create Landing Pages Products
4. Display Landing Page Products On Webstore
5. Additional Information
1. Introduction
The main objective of a Landing Page Product is to convert visitors into customers. By concentrating on a specific product and minimizing distractions, a landing page can more effectively encourage visitors to engage in the desired actions compared to a general website page. There are a few benefits if you are using this feature:
1) Highlighting Special Offers: Landing pages are an excellent way to promote limited-time deals, discounts, and special promotions, creating a sense of urgency and fast action.
2) Clear Messaging: These pages provide an opportunity to quickly and effectively communicate the conditions and benefits of promotions, ensuring that visitors understand the value of the offer.
This feature is only available for the ERP Value Plus Plan and above.
2. Landing Page Integration
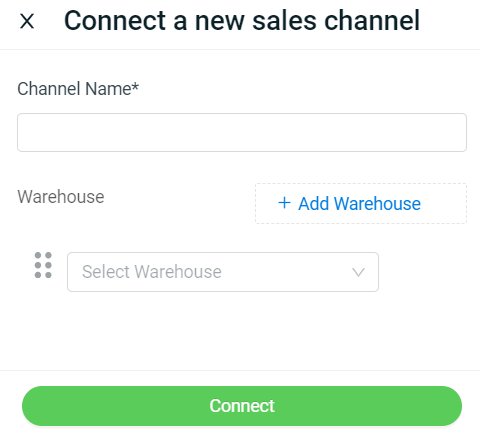
Step 1: Log in to your SiteGiant Seller Center > add [+] channels > choose Landing Page.
Step 2: Enter Channel Name > Select Warehouse > click Connect.
3. Create Landing Pages Products
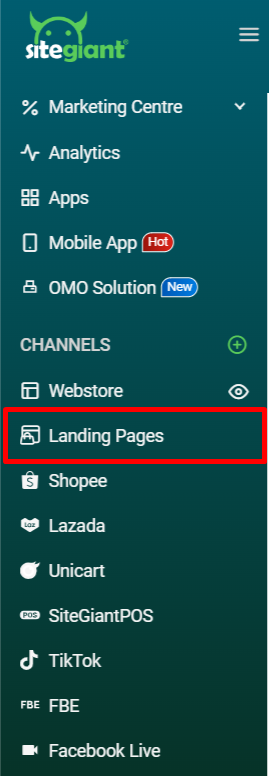
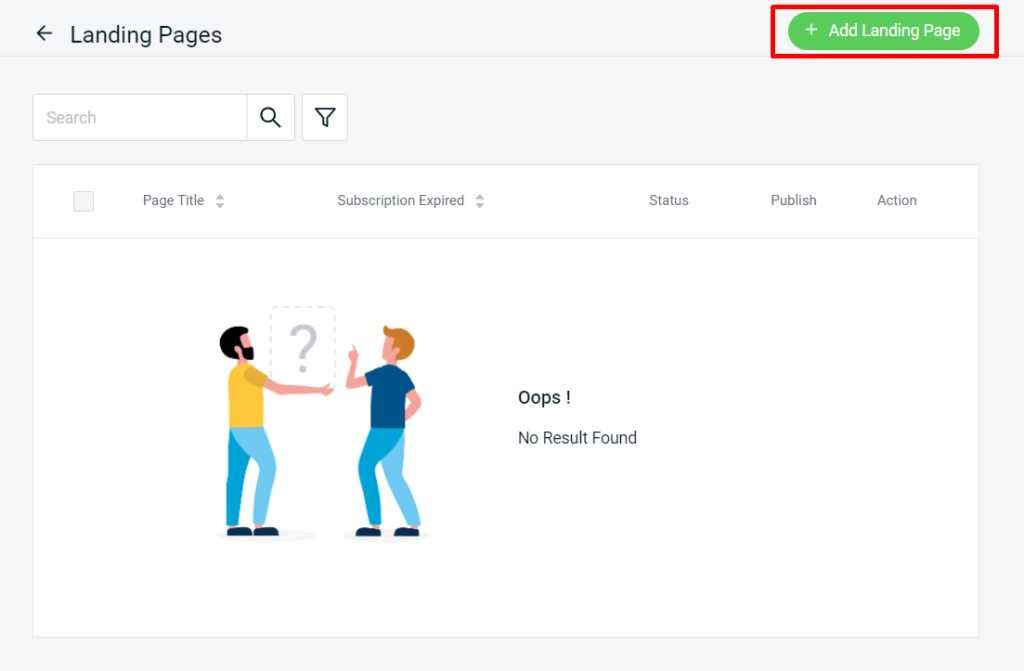
Step 1: Navigate to Landing Pages on the sidebar menu.
Step 2: Click on + Add Landing Page.
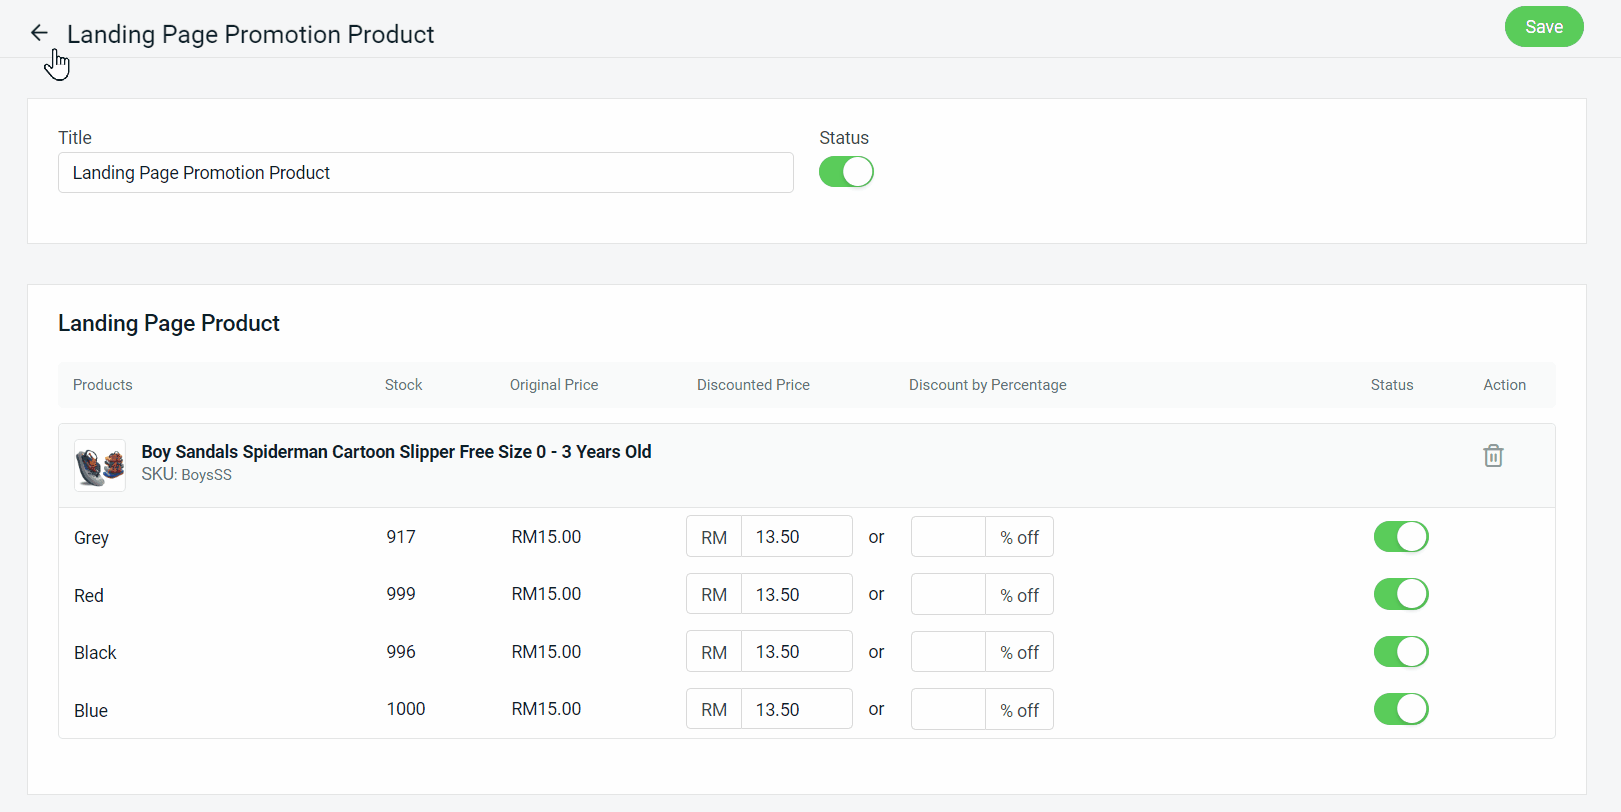
Step 3: Enter the Landing Page Title > toggle on the Status > update the product’s Available date (Optional).

📌Note: If you do not have a specific date for page availability, you can leave the available date field blank.
Step 4: Click + Add Product to select the Main Product.

Step 5: Choose the Main Product > click the Continue button to add.
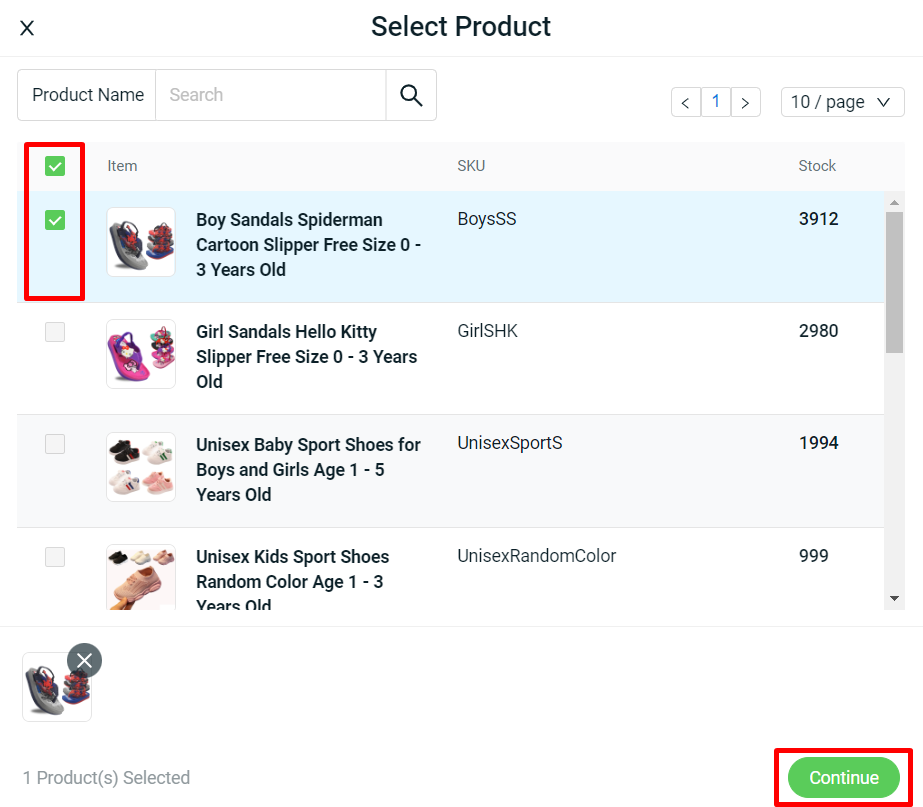
📌Note: You can select only one main product per landing page, which can display up to 20 variants. Any additional variants will automatically be disabled.
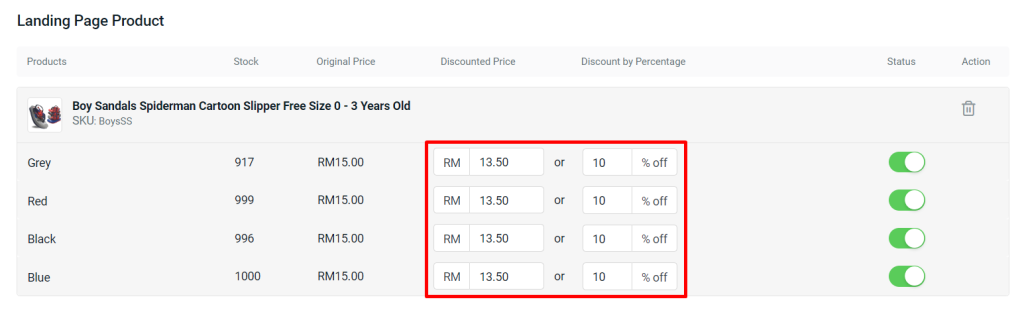
Step 6: Enter the Discounted Price or Discount by Percentage.
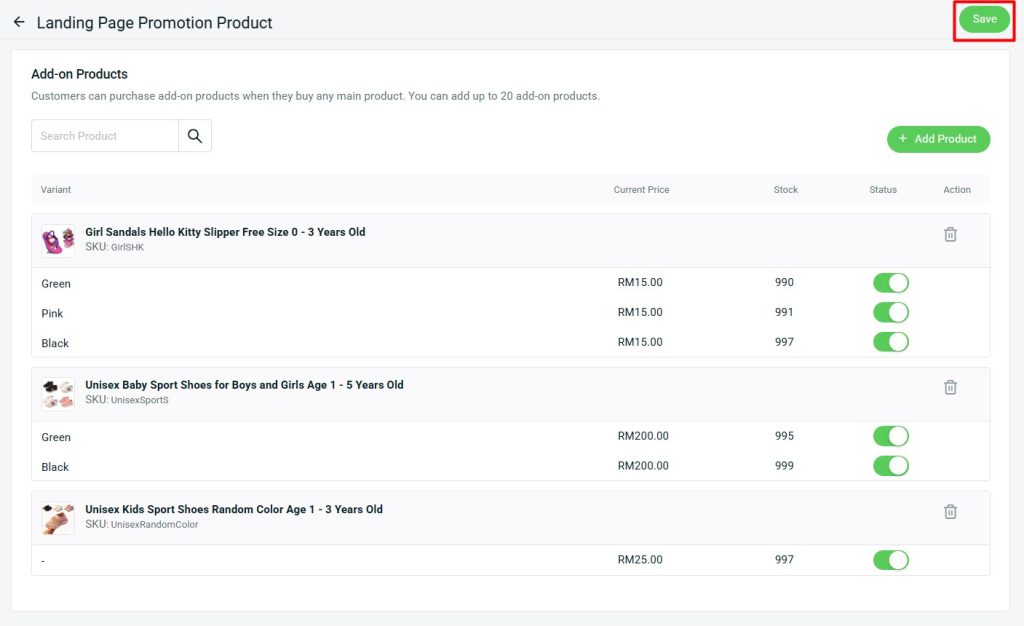
Step 7: Click + Add Product to select Add-on Products.
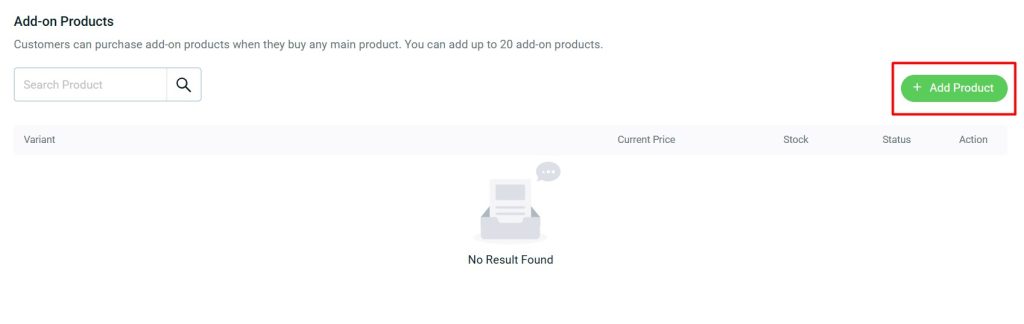
Step 8: Select multiple Add-on Products > click Continue.
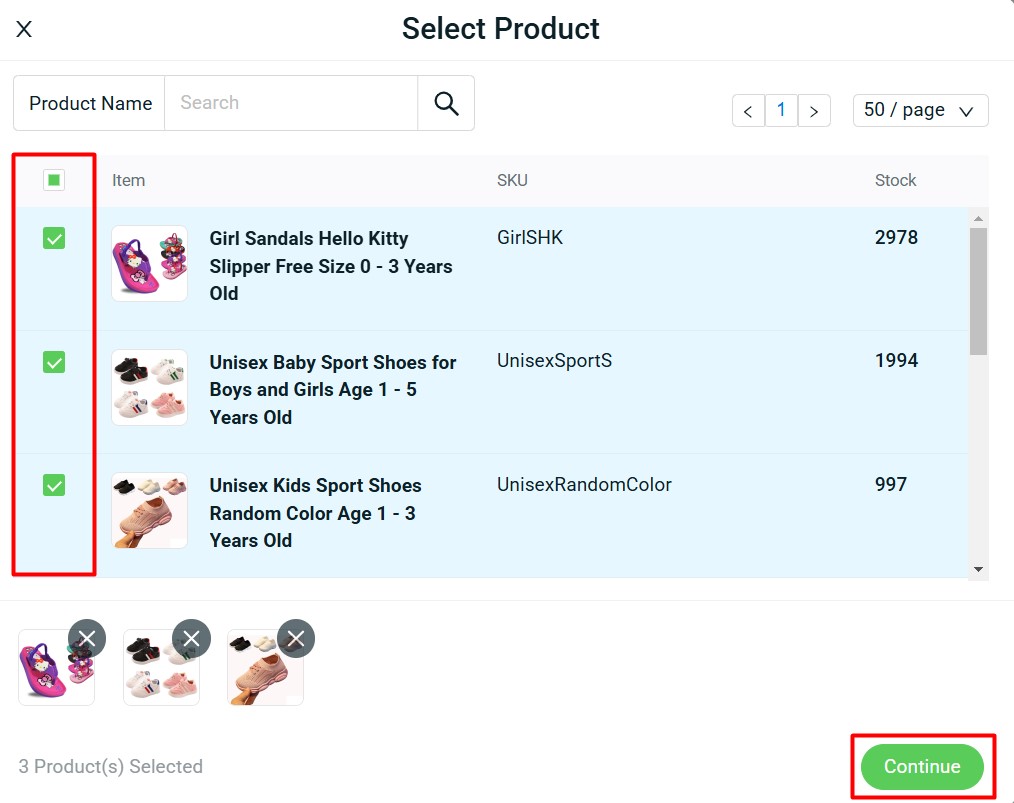
📌 Note: You can add a maximum of 20 add-on products.
Step 9: Once you’ve finished, click Save.
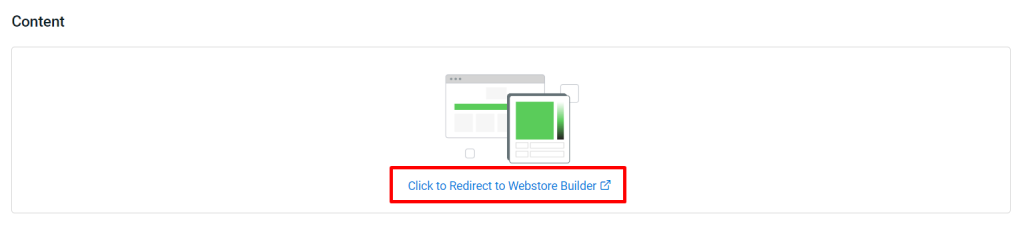
Step 10: If you wish to add more blocks or designs on the landing page, may Click to Redirect to Webstore Builder under the Content section. (Optional)
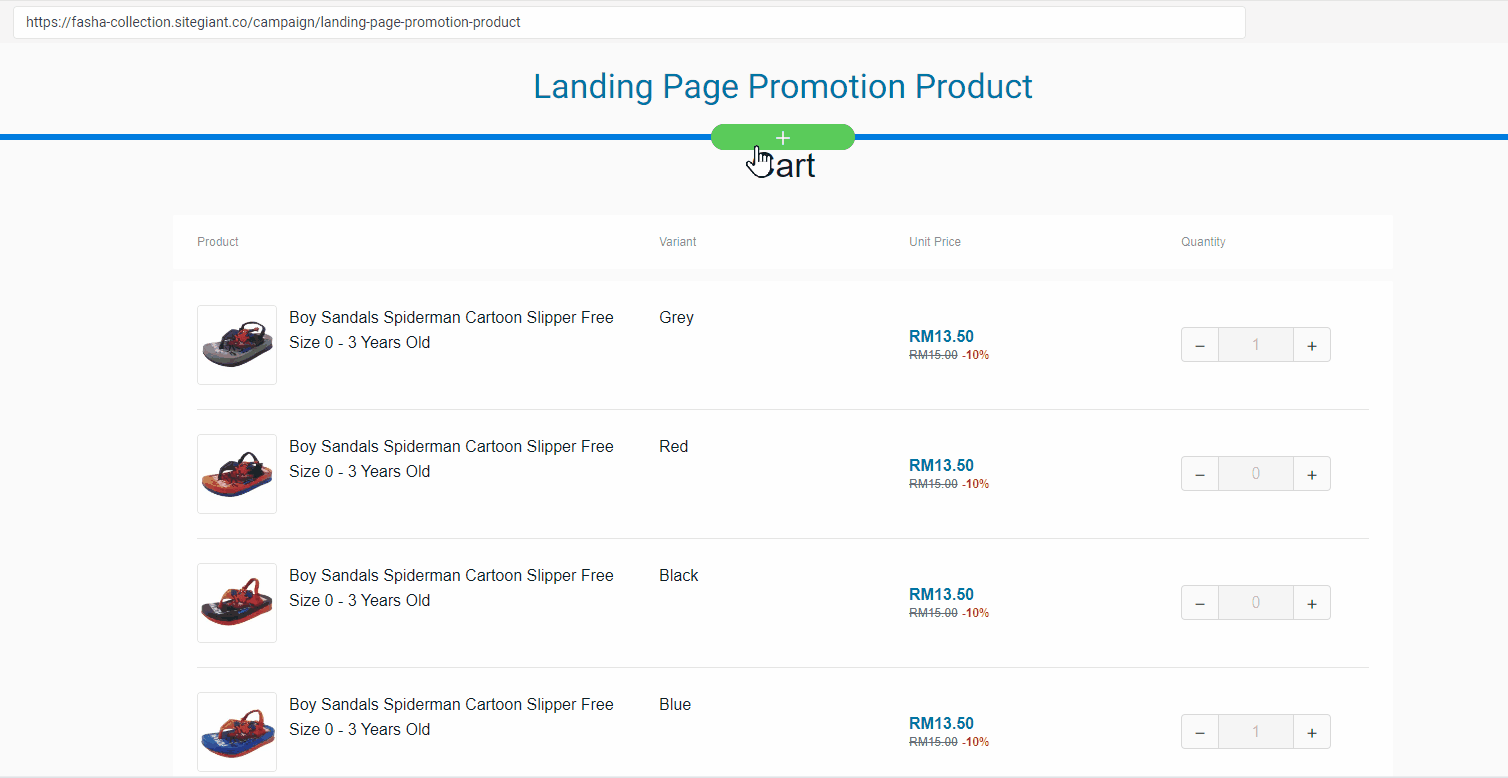
Step 11: Click on the + button at the top of the landing page cart > select the content block you wish to add and select the layout.
Step 12: Once the settings are done, you can click Save and Publish.
Step 13: Back to the dashboard and Clear Cache to see the changes on your Webstore.
4. Display Landing Page Products On Webstore
i) Display With The Sharing Landing Page Product URL Link
Step 1: You can directly copy or click the URL link from the Landing Pages listing.
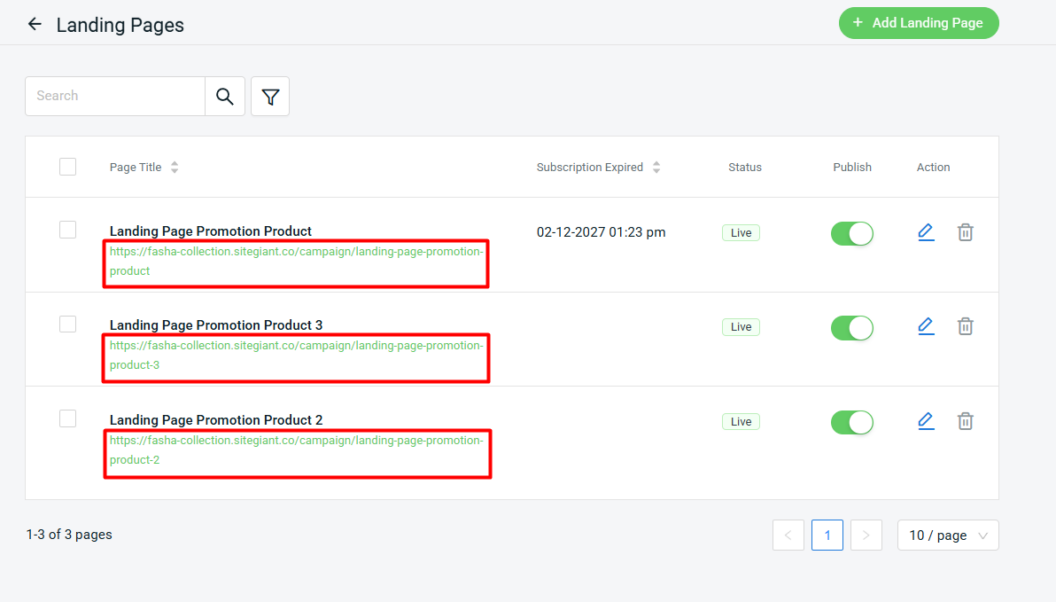
Step 2: You can also go inside the Landing Page settings> copy the SEO Link > share with your customer.
Preview From Customer Perspective
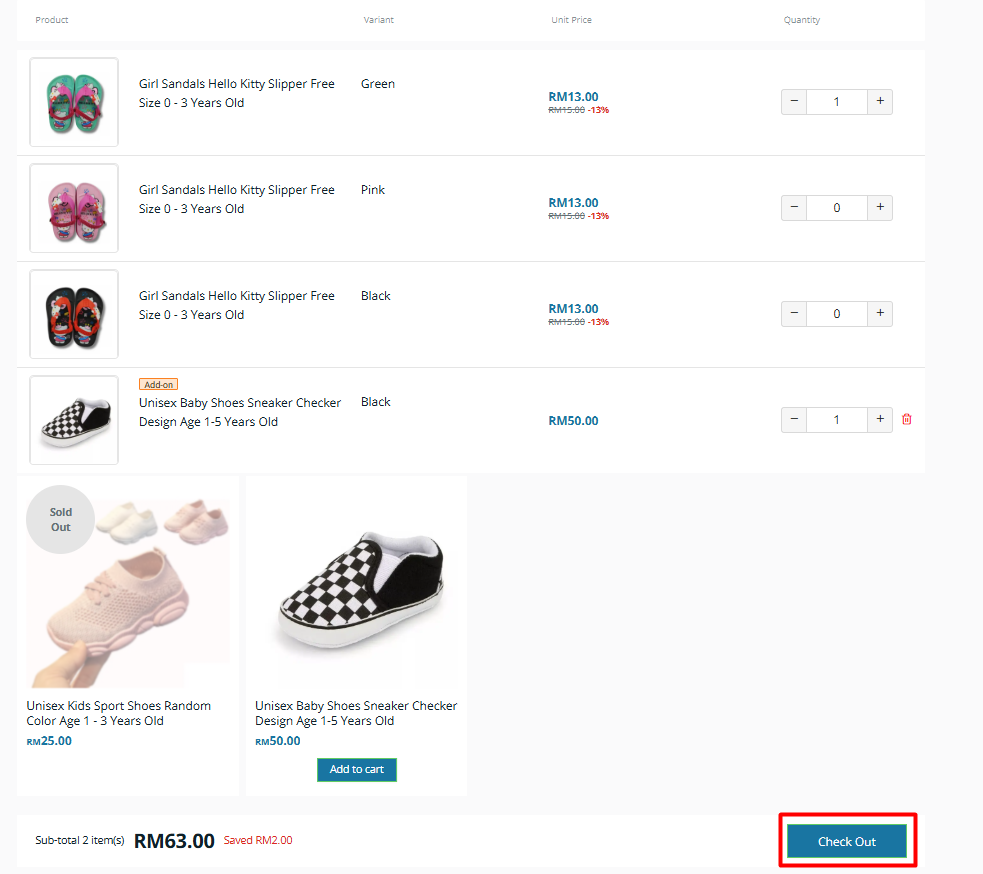
Step 1: Once customers search the URL link, they will be able to see the Landing page product listing > update the Variant Quantity they want to purchase > Add-on Products (Optional) > click Checkout to proceed.
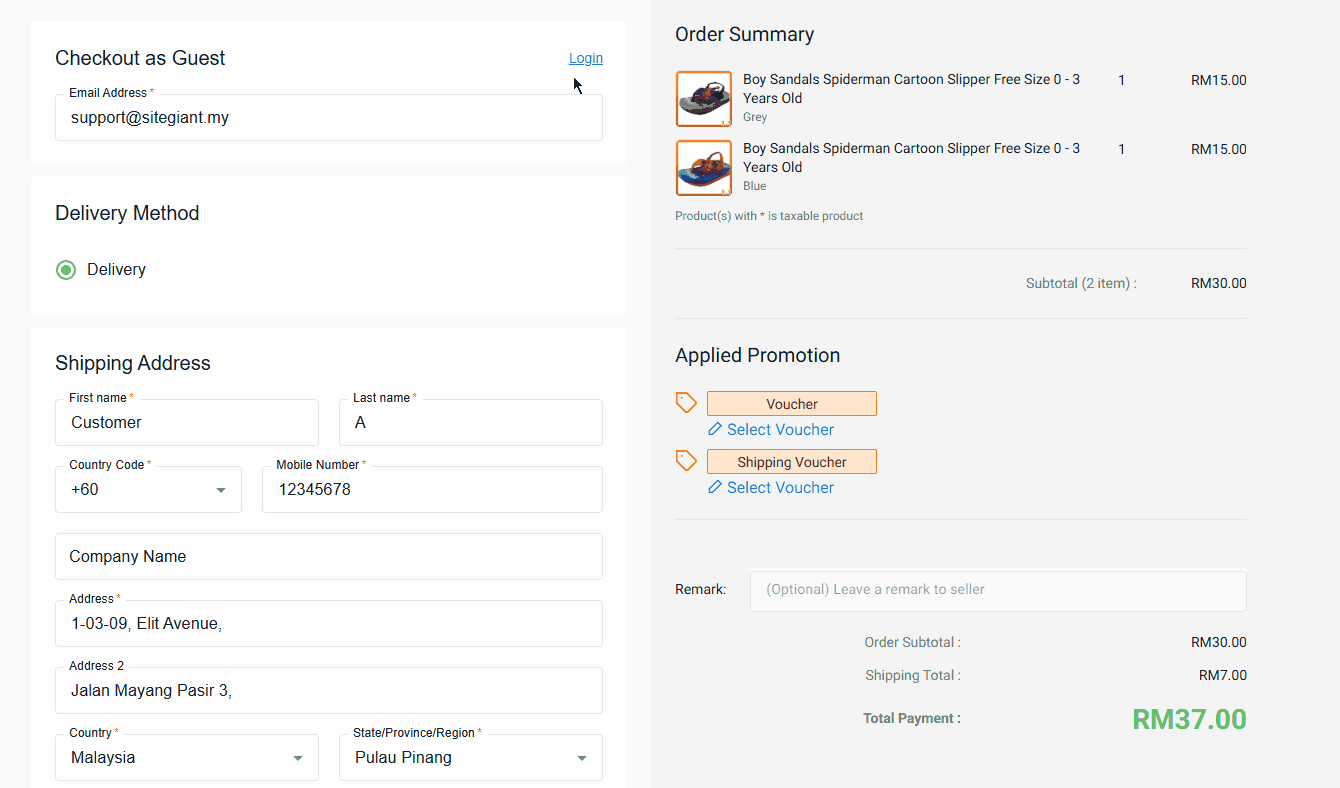
Step 2: On the checkout page, customers can either log in directly or enter their shipping address manually if they have not registered an account yet > select Shipping Method > select Payment Method > click Place Order.
📌Note: If you select Marketplace Style Checkout in the Checkout Style setting, the checkout on the Landing Page will still appear as Webstore Style Checkout. Learn more on How To Change Checkout Style.
ii) Display On Menu Management
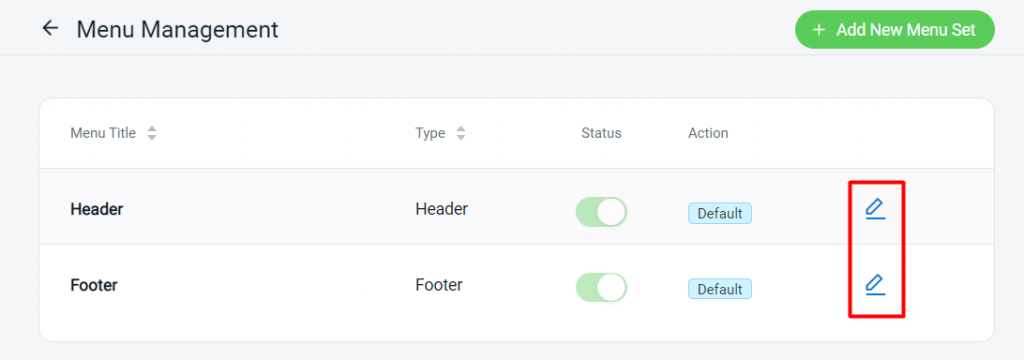
Step 1: Navigate to Webstore > Menu Management.

Step 2: Click on the Edit button of the Menu e.g. Header.
Step 3: Under Menu Set, click on + Add Menu Item.
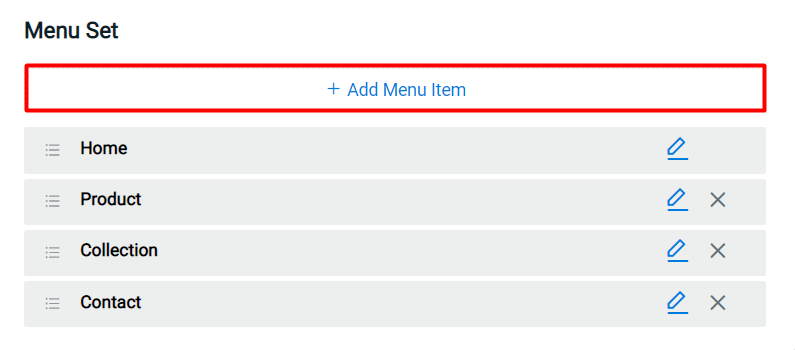
Step 4: Insert the Menu Name > set link to Internal page > select page as Landing Page > select Landing Page Product > click Save.

Preview From Customer Perspective
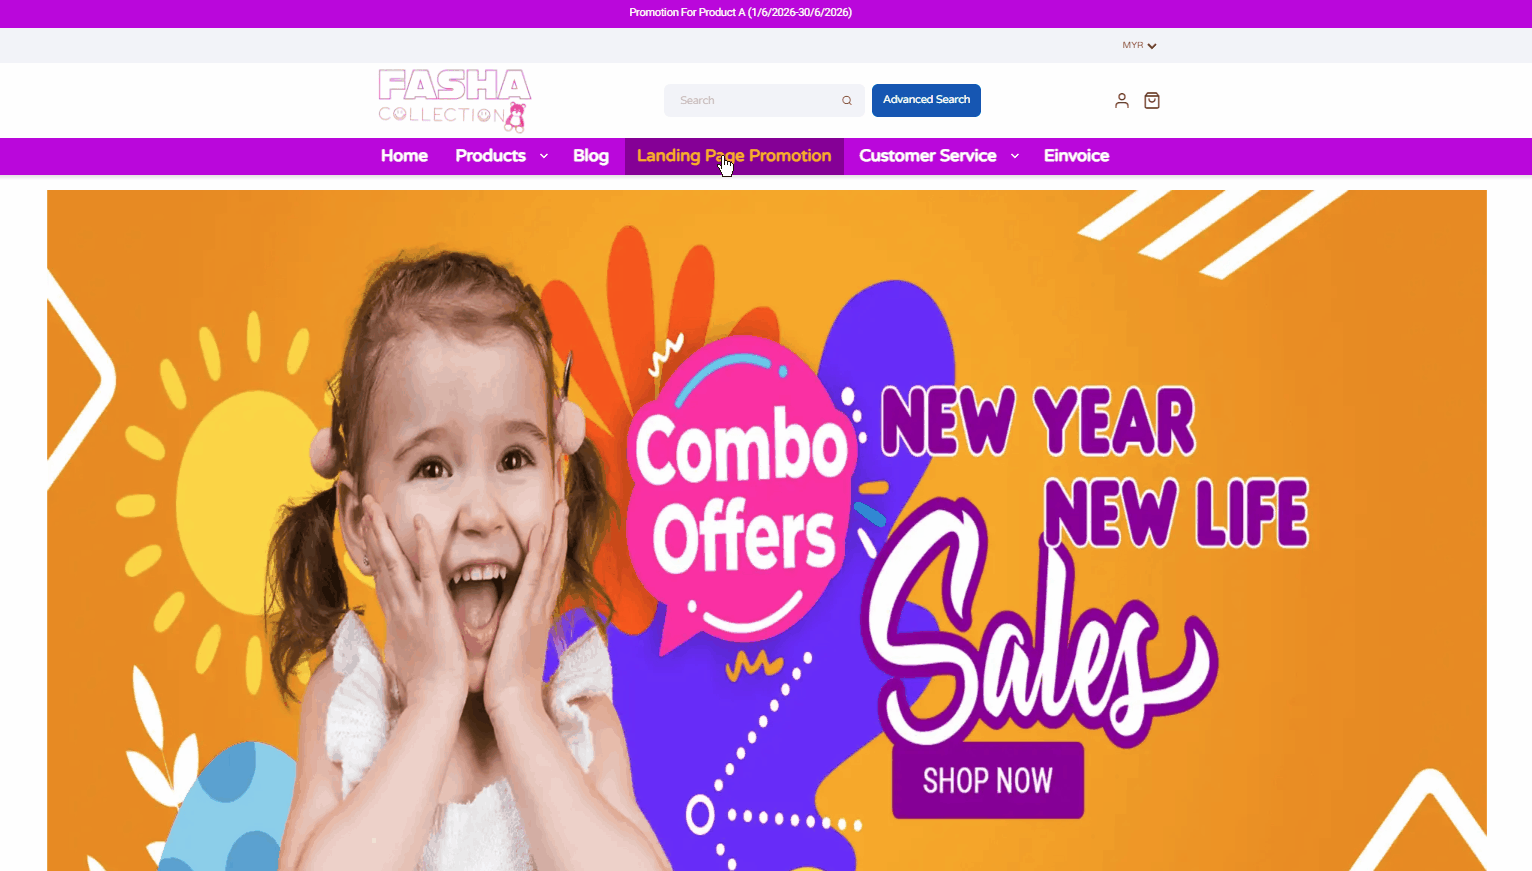
Step 1: Customers can access the Landing Page Promotion section on the menu to view product information and proceed with Checkout.
📝Additional Information
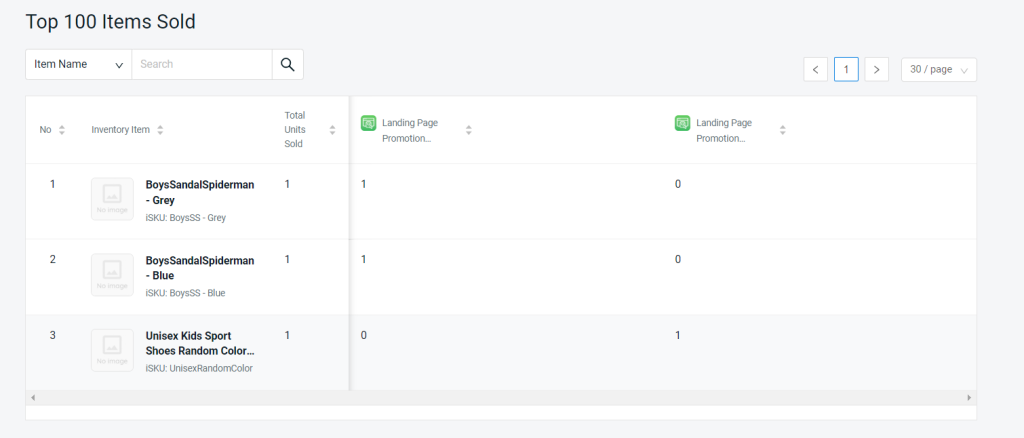
1. Landing Page Report
Step 1: Navigate to Analytics on the sidebar menu > click Landing Page Report.

Step 2: You may view and analyse the Landing Page Report as shown:
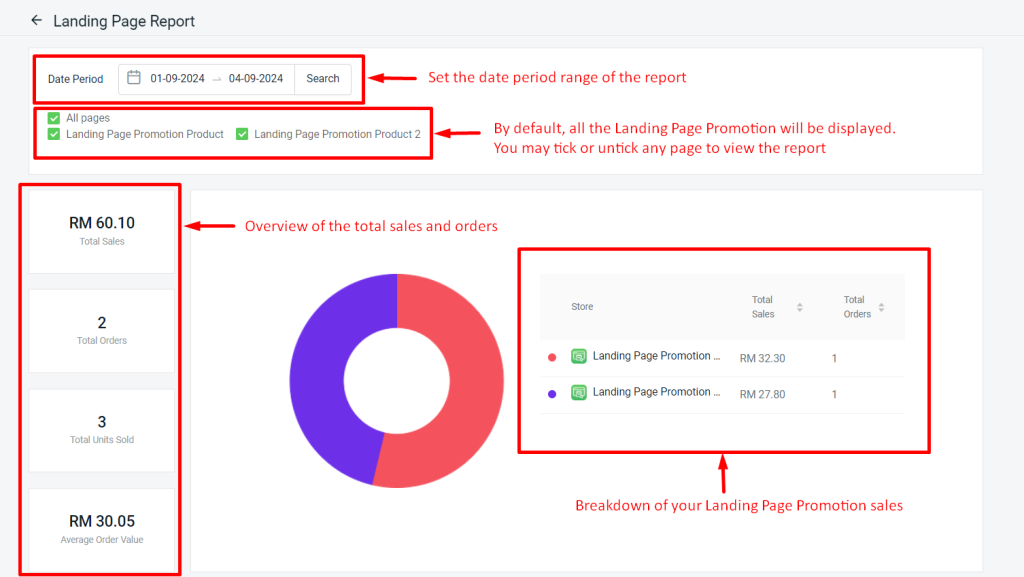
Step 3: You can also view the Top 100 Landing Page Product Items Sold.