1. Introduction
2. Create Customer With Excel
1. Introduction
Got a lot of customer details to upload?
No need to worry! With the Batch Create upload feature, you can quickly upload all customer details in bulk, saving you from the hassle of updating them one by one. This not only simplifies the process but also saves you valuable time.
2. Create Customer With Excel
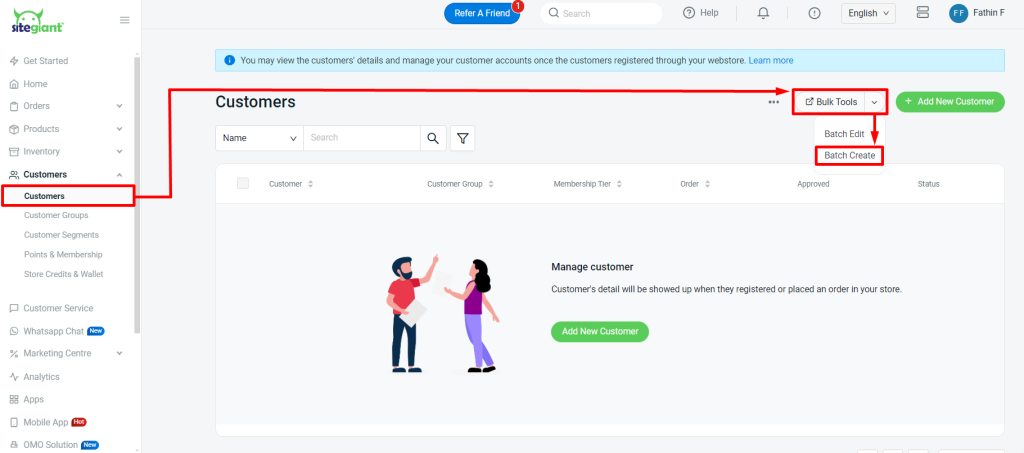
Step 1: Navigate to Customers on the sidebar menu > click Bulk Tools > Batch Create.

Step 2: Click the Download button to obtain the Excel file template for updates.

Step 3: Fill up the customer’s details field correctly.

📌Note: Column with*isrequired.
| Column | Description | Sample Data |
| *firstname | First name of the customer | Maryam |
| *lastname | Last name of the customer | Yusry |
| Unique email address. It is used to represent each of the customers so it cannot be updated and removed. | maryamyusry@email.com | |
| phone | Valid contact number | 0123456789 |
| fax | Valid fax number | 031234567 |
| birthdate | Date of birthday | 2018-03-25 (YYYY-MM-DD) |
| *gender | Customer’s gender | male OR female |
| *customer_group | Related customer group | Default |
| membership_tier | Related membership | VIP |
| firstname (address) | First name of the customer under address info | Maryam |
| lastname (address) | Last name of the customer under address info | Yusry |
| company | Company name | ABC Company |
| company_id | Company registration ID | 12345-M |
| tax_id | Tax identification number (TIN) | C20880050010 |
| phone (address) | Contact number under address info | 0123456789 |
| address1 | Customer address | 1, Support Team, Jalan Support |
| address2 | Alternative address | Tanjung Tokong |
| city | City of the address | Bayan Lepas |
| state | State of the address | Pulau Pinang |
| country | Country of the address | Malaysia |
| postal_code | Postcode of the address | 10470 |
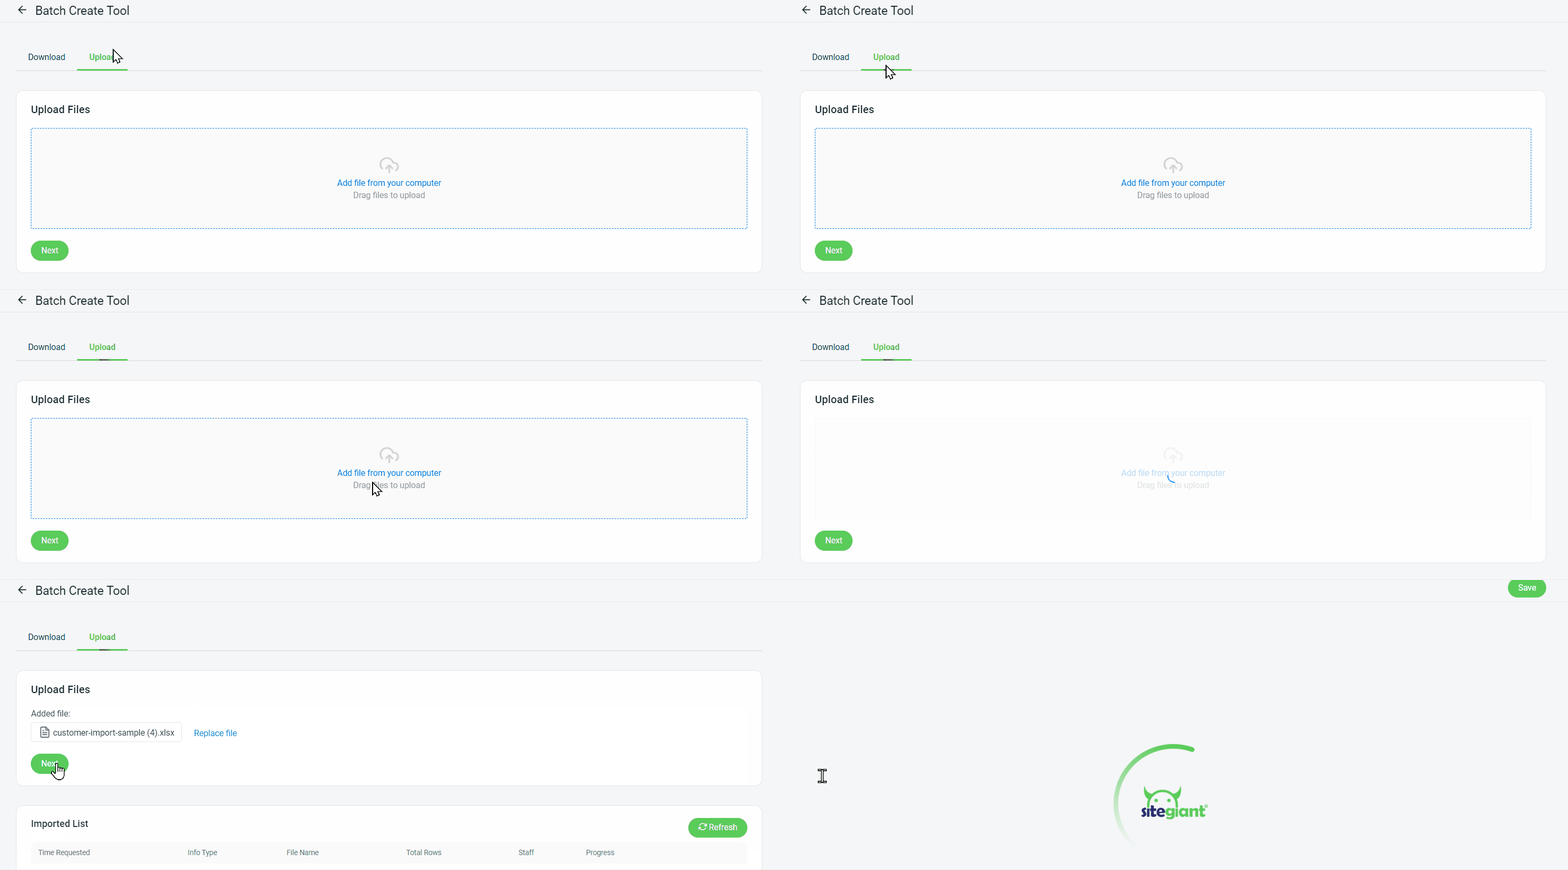
Step 4: Back to Batch Create Tool page > click Upload > Add file from your computer > Next.

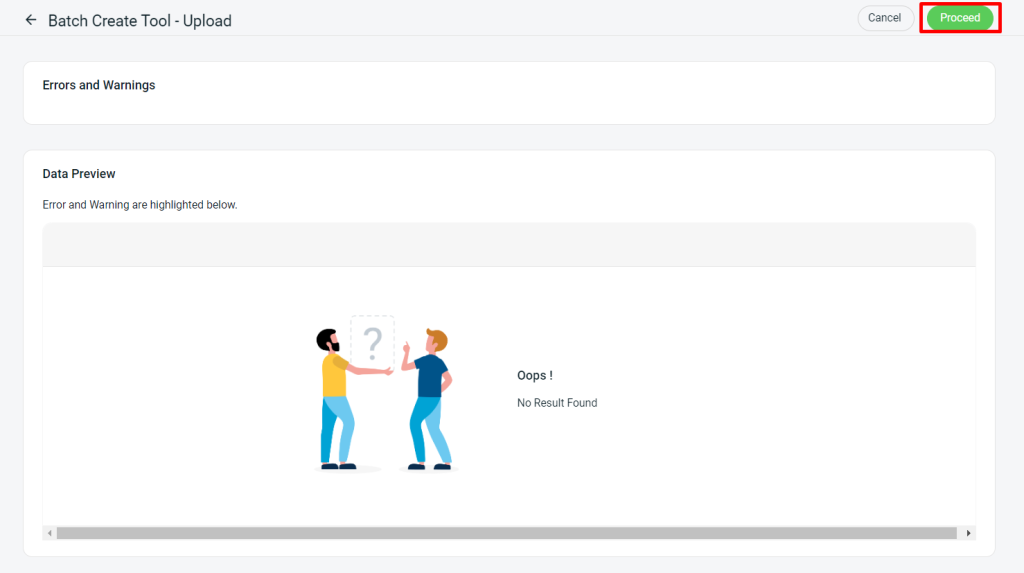
Step 5: If there are any errors in the Excel uploaded, you will see the error message in Errors and Warnings and it will show the error column in the Data Preview. Amend the error column and reupload the file. Click on Proceed if the file uploaded does not have errors.

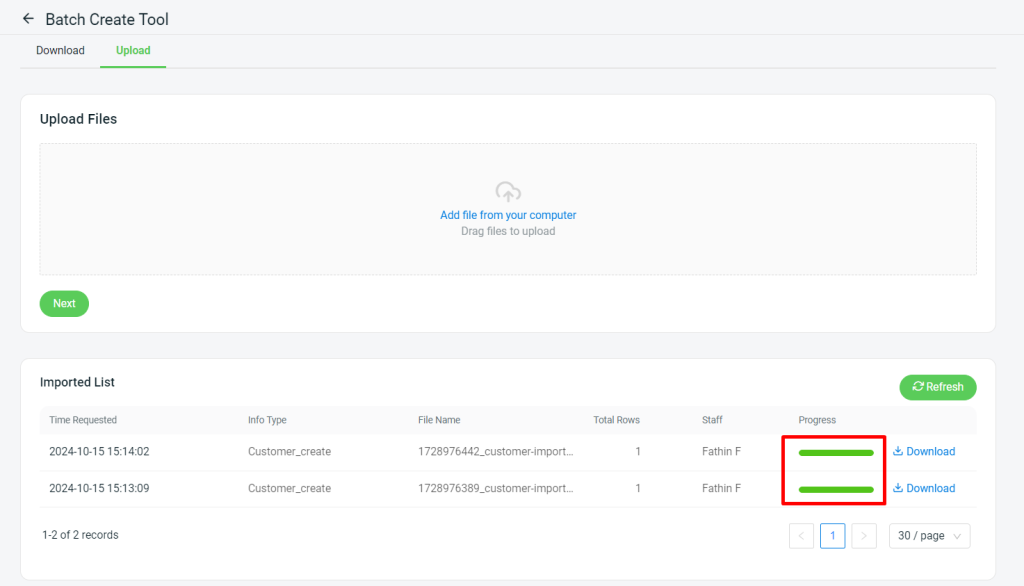
Step 6: When the Progress status turn to green, means that the data is completely update.

