1. Getting Started
  2. SiteGiant Onboarding 2: Order Processing
  1. Orders
  2. SiteGiant Onboarding 2: Order Processing

SiteGiant Onboarding 2: Order Processing

1. Introduction
2. Configure Shipping Label Settings
3. Order Processing – Marketplaces
4. Order Processing – Webstore And Others

1. Introduction

Order Processing is a crucial aspect of your business operations, and mastering it is essential for achieving customer satisfaction and maximizing revenue. This guide will walk you through the entire order processing cycle, from the order receipt to final delivery. Let’s get started and unlock the power of seamless order processing in our system!


2. Configure Shipping Label Settings

Step 1: Navigate to Orders > All Orders, all of your orders from marketplaces will be synced and listed on this page. Click on the Order Processing button to configure the Shipping Label Settings.
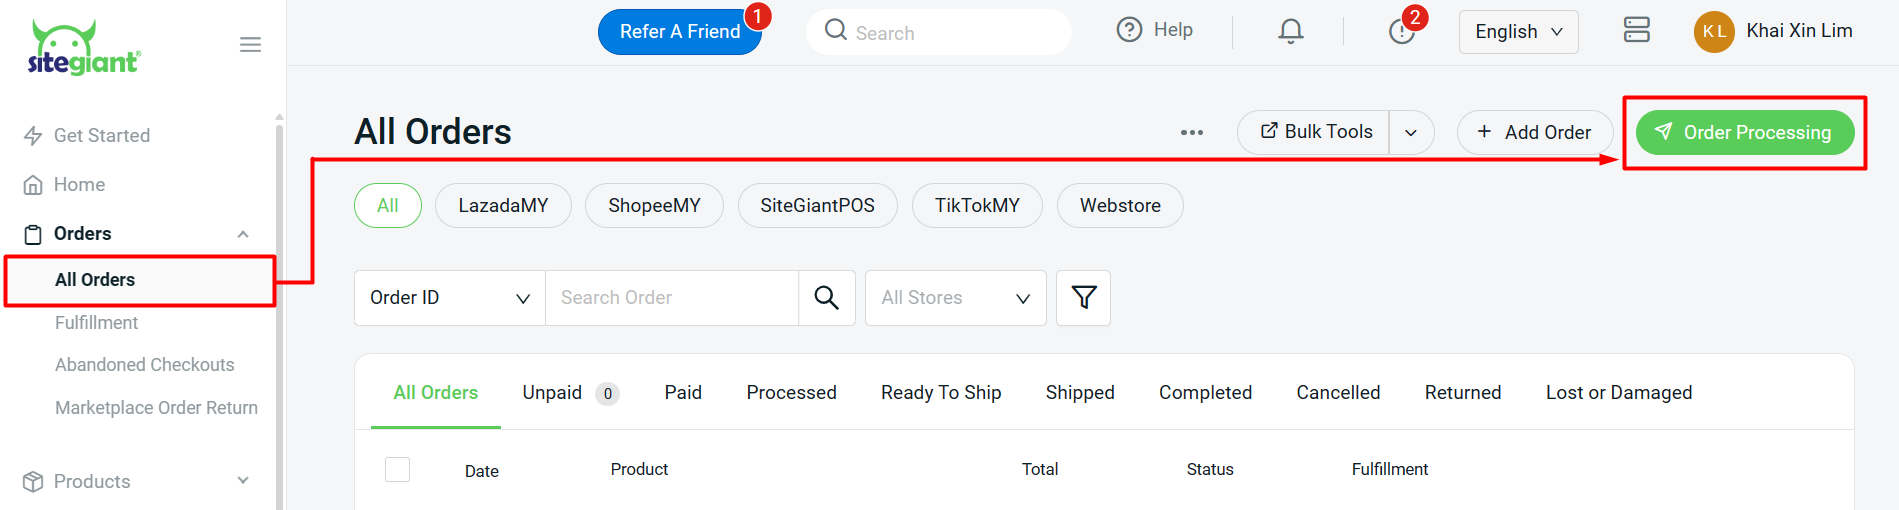
Step 2: You will be redirected to the Shipping Label Settings page.

Step 3: Under General, you can set the Item Display method in Order Processing. This setting will apply to all marketplaces including Webstore & others.

1. Show Marketplace Product: The product name under the order details will display the marketplace product name.


2. Show Inventory Item: If the product is linked with SiteGiant Inventory, the inventory item name will be displayed under order details.


3.Split kit into individual items: Enable to show every single item in a Kit.

Lazada

Step 4: Select Lazada channel > choose a Default Shipping Provider as your preferred shipping provider > decide to set which status to update when you arrange shipment for Lazada orders.

⚠️Important: You are recommended to set the status to Packed so that you have enough time to prepare the parcel before the courier comes to pick up parcels. If you set the status to Ready to Ship, kindly ensure your parcel is packed and ready for the handover process to Lazada Logistics team. Otherwise, there will be a penalty for Lazada Package Not Ready (PNR).

Step 5: Go to Shipping Label Template. You can choose the template and customize your preferred fields to show in the Shipping Label.

Step 6: Move on to the Pick List Template. A Pick List is a document to guide your warehouse pickers during the item picking process. It is printed separately with the shipping label. You can customize your own Pick List template.

Step 7: Navigate to Packing List Template. A packing List is a document that accompanies a package and provides detailed information about the contents of the package. You can customize your own Packing List template.

Step 8: Go to Invoice Template. An invoice is a document provided to the customer as proof of purchase or a formal payment request. You can customize your Invoice template.

Step 9: Go to Courier Service Settings. Click on the Edit icon to set up the shipping label template and document for the applied courier services.

Step 10: Choose Shipping Label Template and Number of Shipping Label Copies > select the documents you wish to print along with Shipping Label > Apply.

Step 11: If you have multiple Lazada stores and you want them to have the same settings as the one you have done, click on the Copy Settings on the top right > choose the store(s) and settings > Copy.

Step 12: Save the Shipping Label Settings once done with the configuration.

Shopee

Step 13: Select Shopee channel > choose the paper size > fill in the Sender Details which will appear in the Shipping Label’s Sender Details section.

Step 14: Customize the Shipping Label, Pick List, Packing List, and Invoice Template according to your preference and business practices. Courier Services Settings will show the courier services supported by Shopee. You may click the Edit button to set up the shipping label template and document preference for the applied courier services.

Step 15: Choose the Arrange Shipment MethodHeader LogoShipping Label Template, and Number of Shipping Label Copies > Select the documents you wish to print along with Shipping Label > Apply.

1. Pickup: Orders will be arranged for pickup directly based on the nearest pickup timeslot and default pickup address during arrange shipment.

2. Dropoff: Orders will be arranged for dropoff directly during arrange shipment.

3. Manual Select: Able to choose between dropoff or pickup with available timeslots during arrange shipment. (Highly recommended to use this method for pickup because it allows you to choose the preferred pickup slot and change the pickup address if necessary.)

Step 16: For certain Courier Services, you can choose whether to show the Seller Details such as Name and Phone on the Shipping Label.

Step 17: Perform Copy Settings if you have multiple Shopee stores and want them to have the same settings > Save.

TikTok

Step 18: Select TikTok channel > configure all the shipping label templates and settings > Copy Settings if applicable and Save.

Webstore And Others

Webstore and other order processing is used to process orders from SiteGiant ERP webstore, Unicart webstore, Delivered by Seller (DBS) orders of Lazada, Shopee, and TikTok, etc.

Step 19: Select Webstore and others > under Courier Service Settings, integrate and enable the status of the courier services you wish to use in order processing.

Step 20: Every Courier Service will have its own integration API key, which you will need to retrieve from the courier service and fill in the related column > fill in the Sender Details and other settings > Apply.

Step 21: Configure all the other shipping label templates and settings > Save.


3. Order Processing – Marketplaces

Step 1: Before you start to process the orders in SiteGiant ERP, you are required to move the orders that have been fulfilled in Seller Center from Pending to Printed tab to avoid double printing.

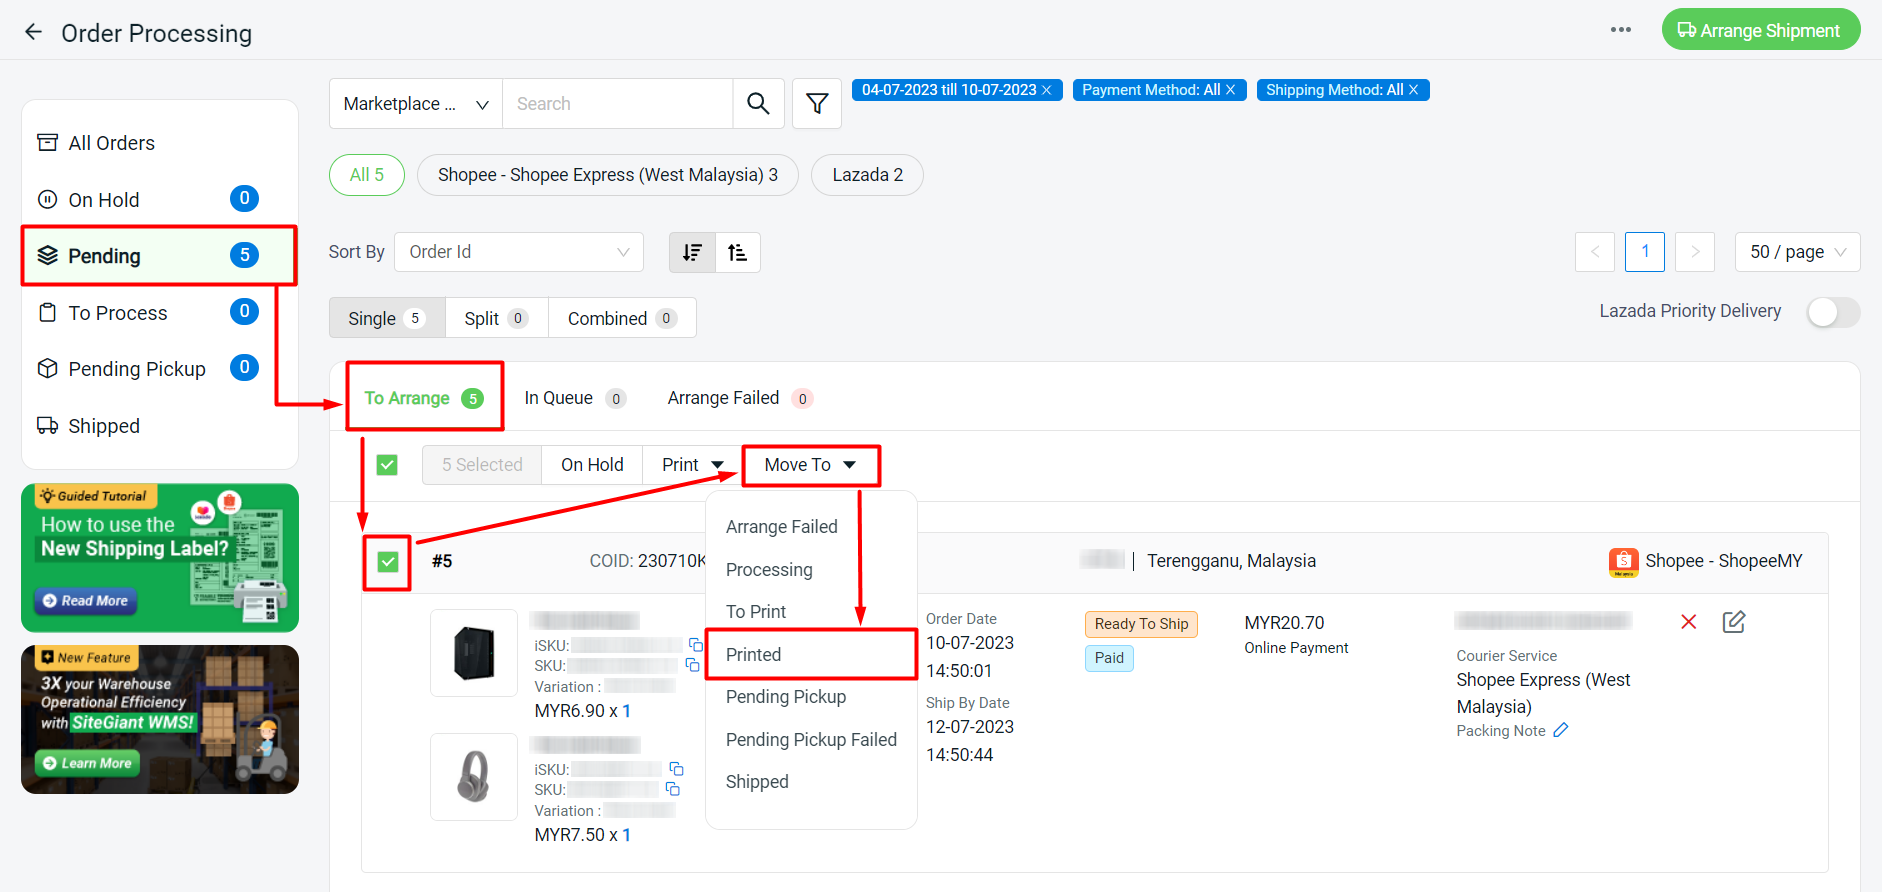
Step 2: All orders synced into SiteGiant ERP will be shown under the Pending section > To Arrange tab. Select the order(s) you wish to arrange > click on the Arrange Shipment button.

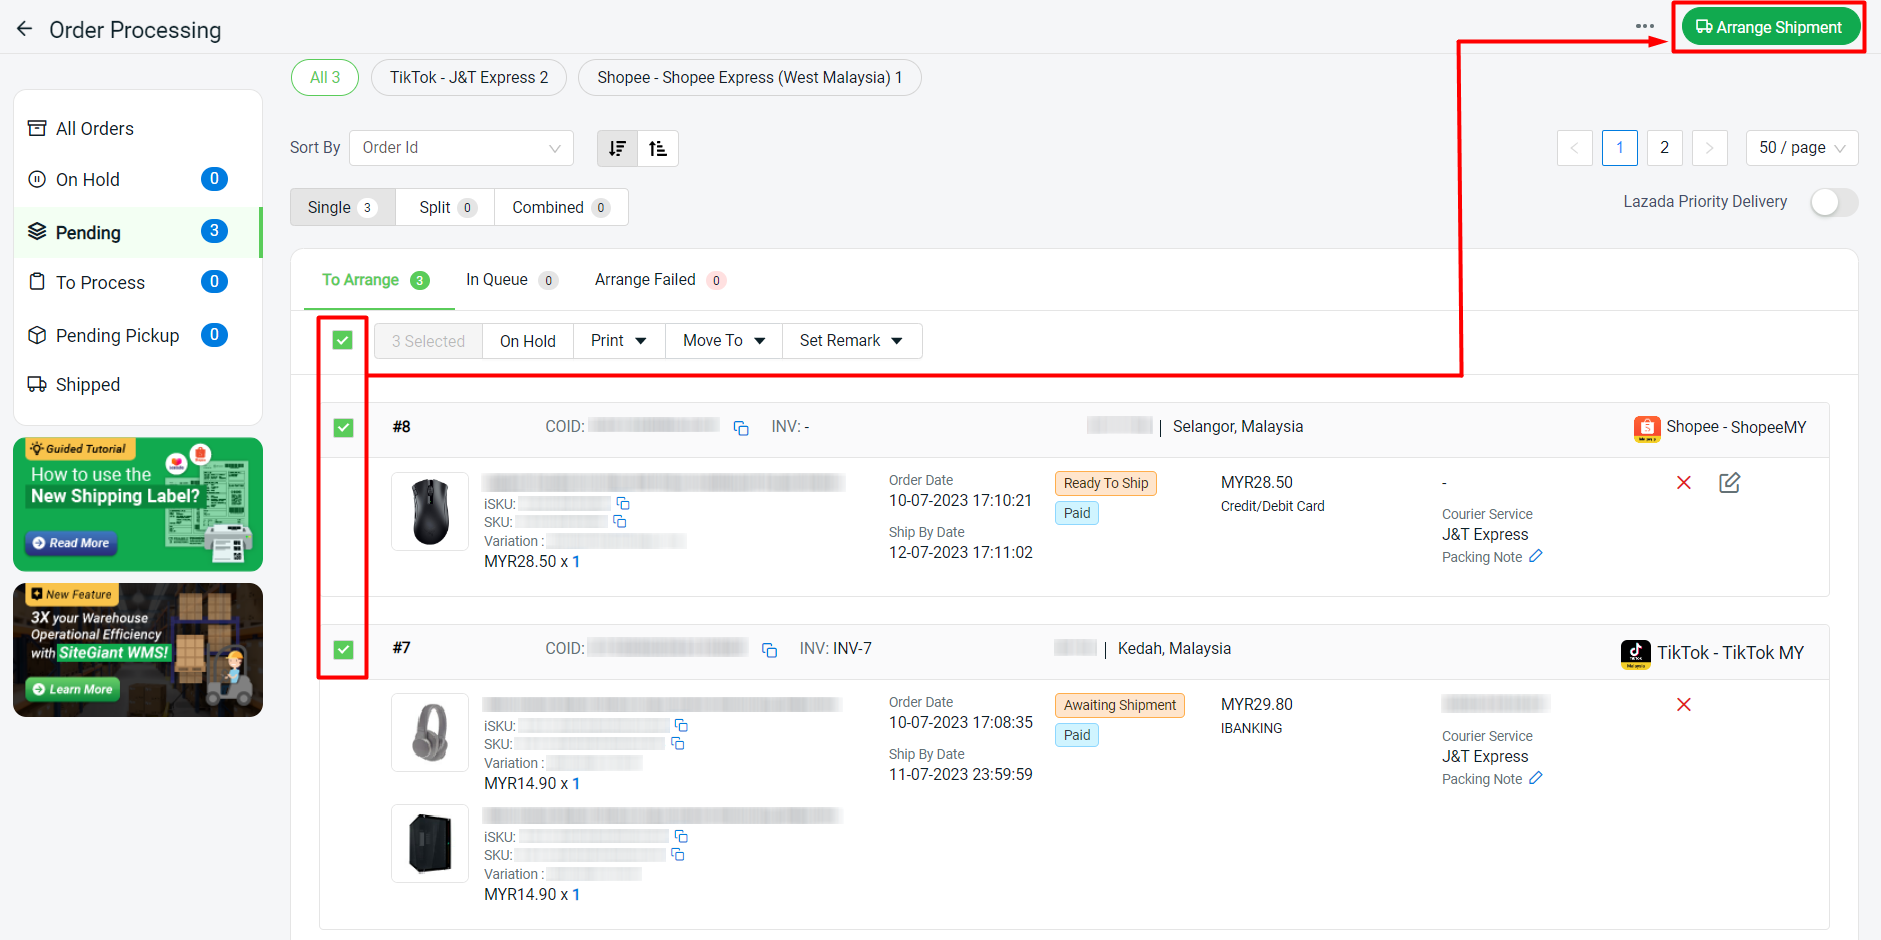
📌Note: You can arrange orders from different marketplaces together at the same time.
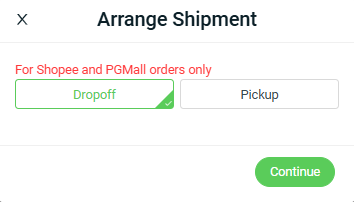
Step 3: For Shopee, TikTok and PGMall orders, if your Arrange Shipment Method is set as Manual Select, you will need to choose whether by Dropoff or Pickup > Continue.

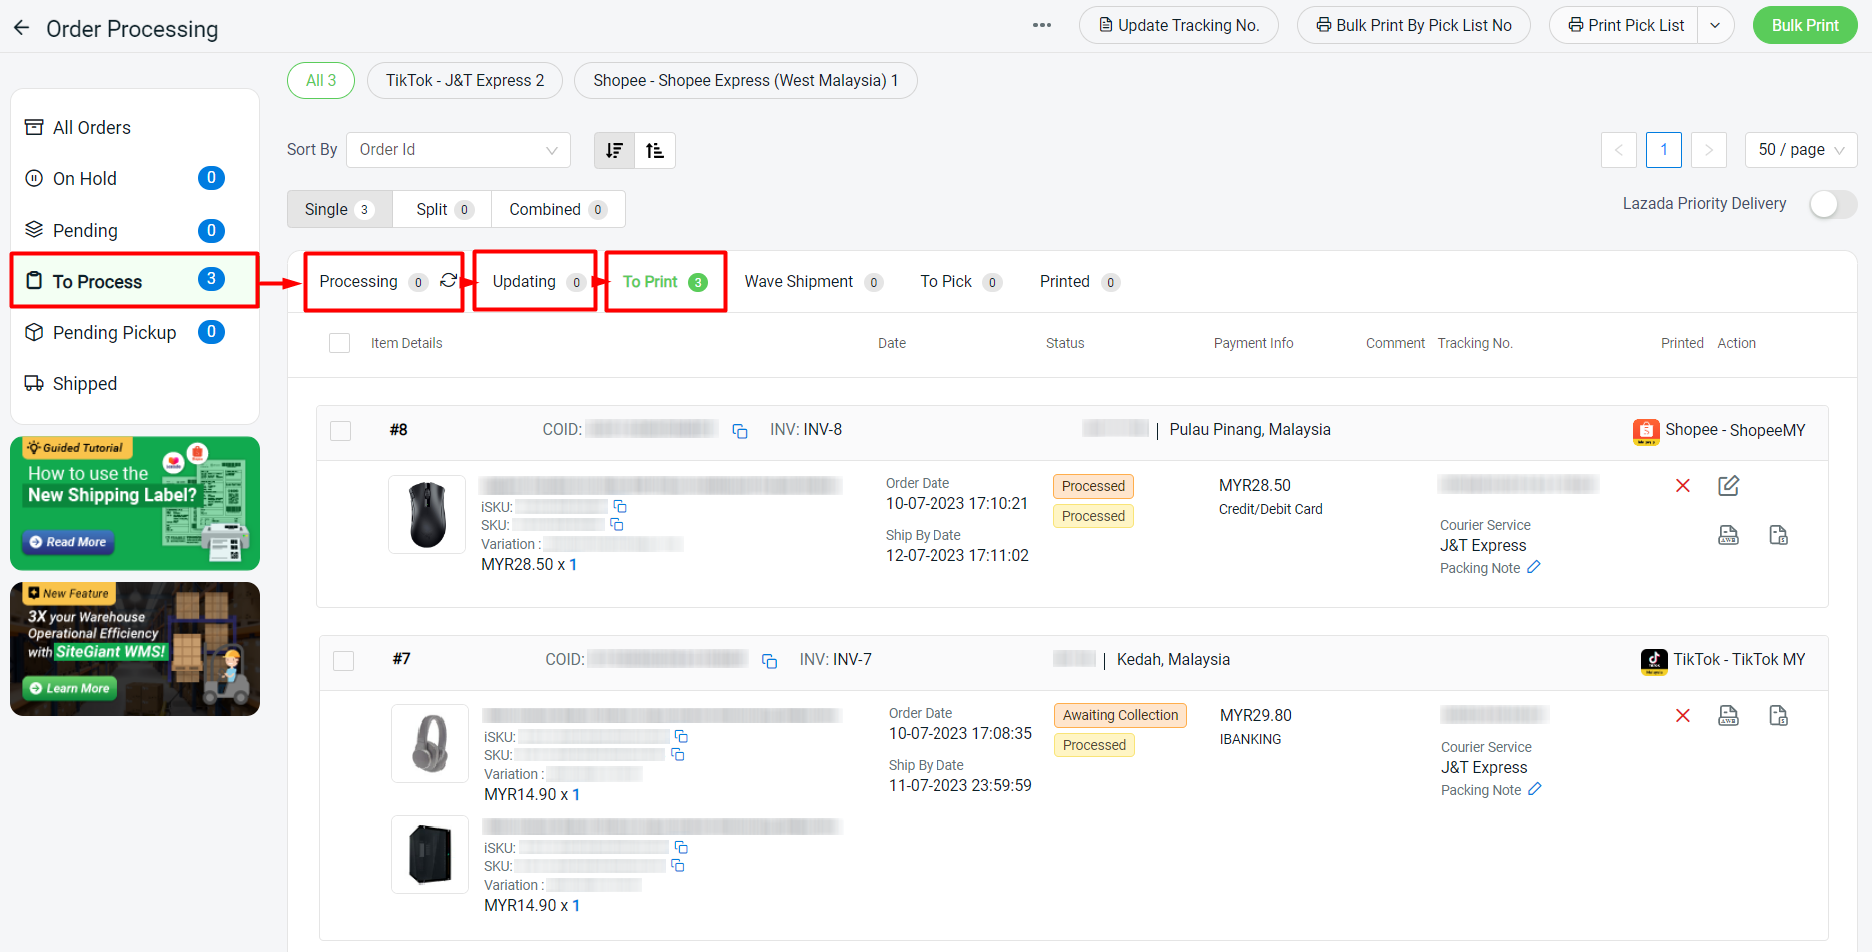
Step 4: The order will move to In Queue tab to process, then auto move to the To Process section > Processing tab > Updating tab and finally to the To Print tab. The order status will change to Processed and a tracking number is generated.

Step 5: You may print the Pick List before printing out the shipping label. (optional)

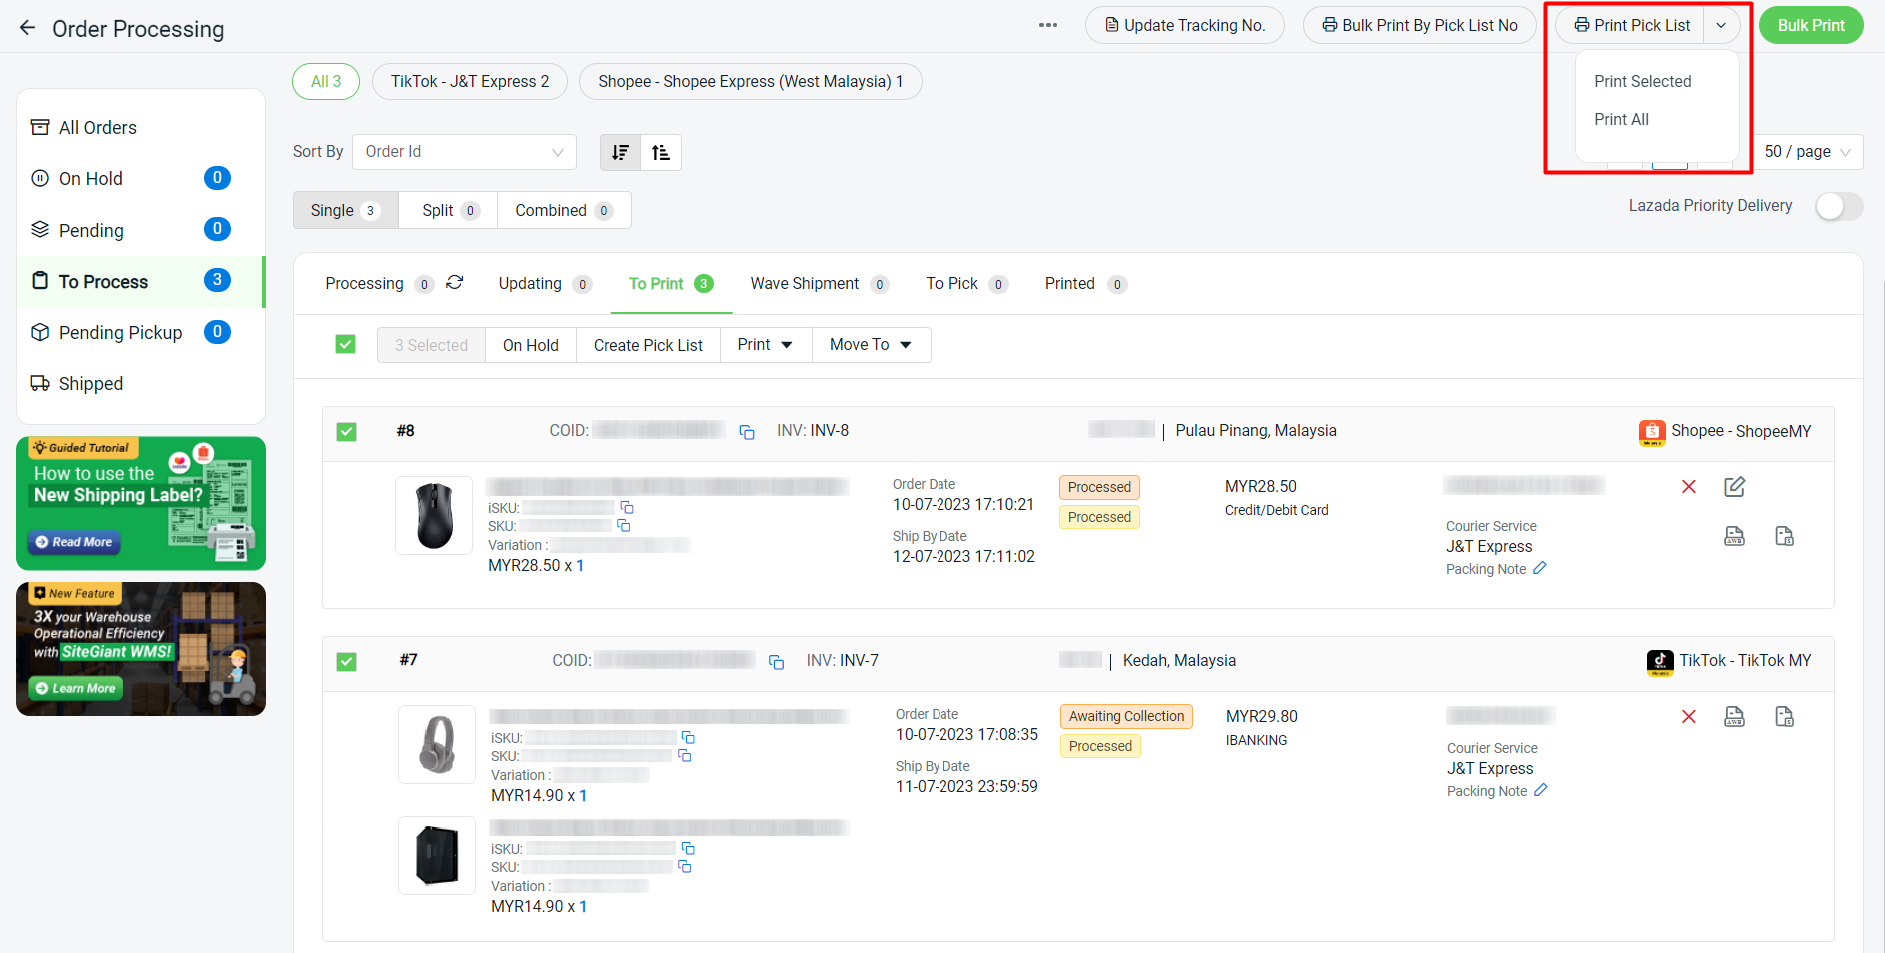
Step 6: Bulk Print shipping labels need to perform by each marketplace. Select 1 marketplace > select order(s) > click on the Bulk Print button.

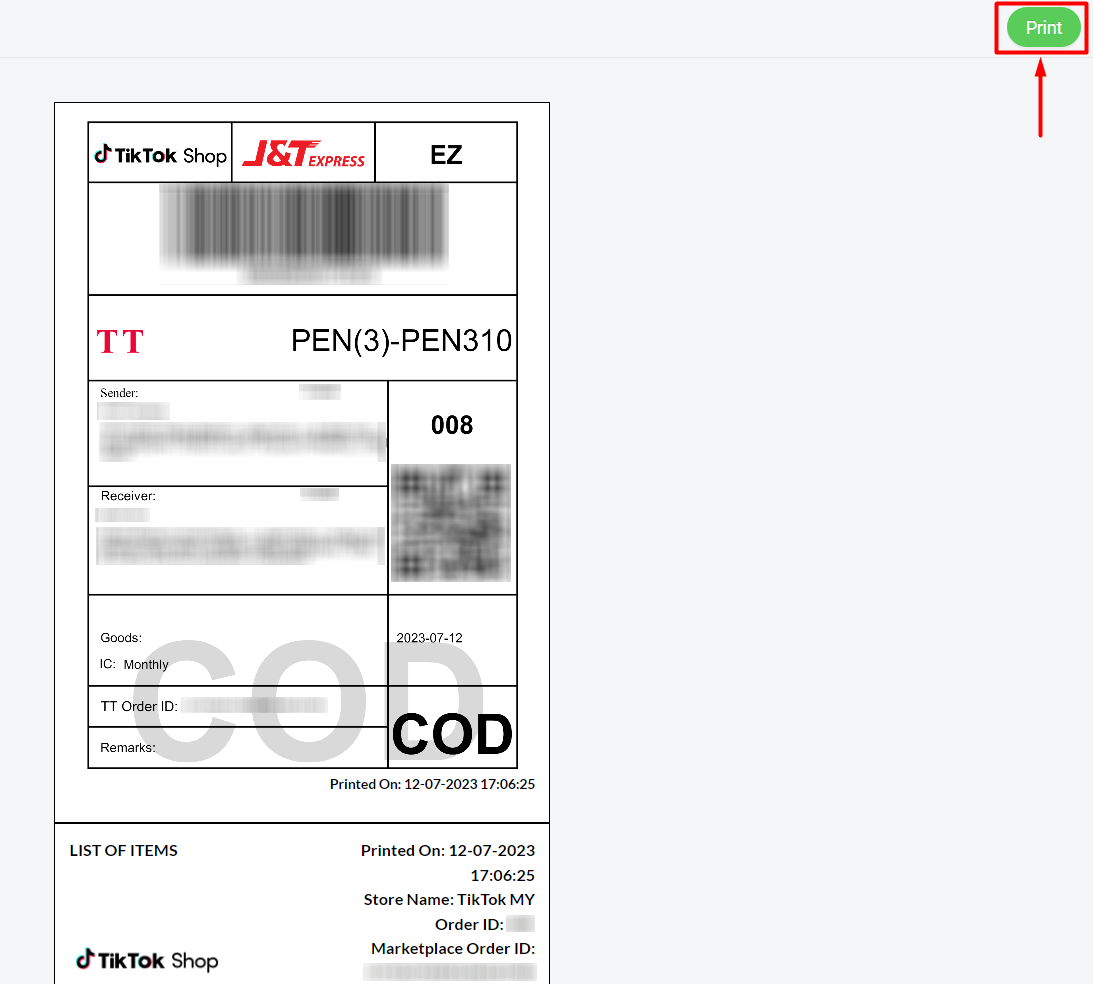
Step 7: Wait for the shipping label preview to load > click the Print button to print out the shipping label.

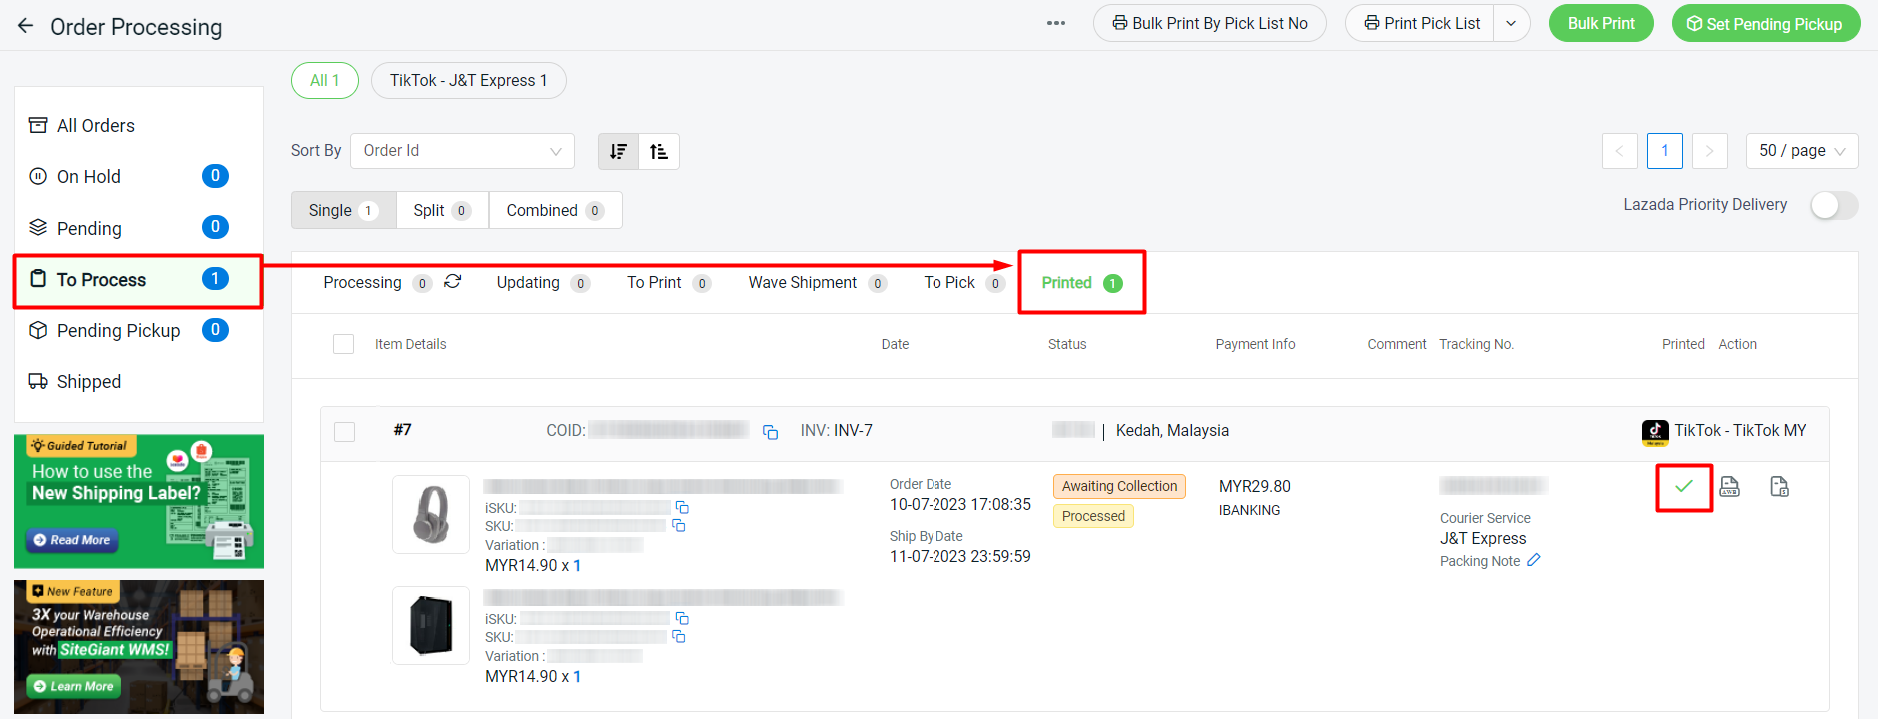
Step 8: All the printed orders will move to the Printed tab with a green tick once you refresh the page.

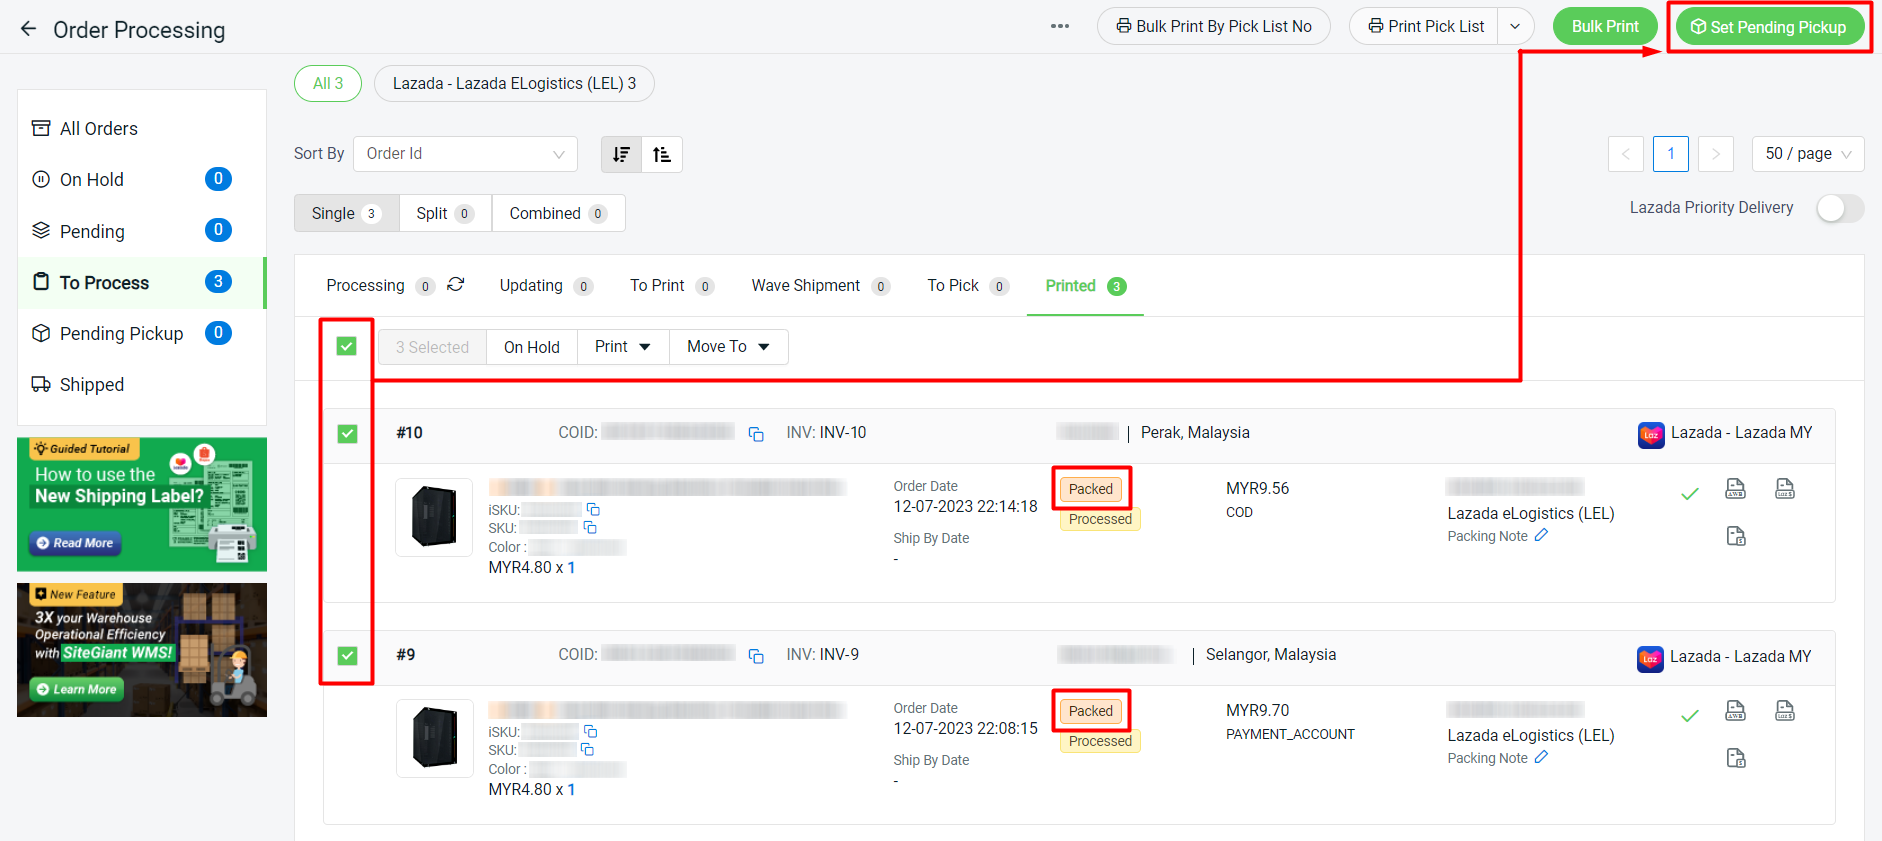
Step 9: For Lazada orders set to Packed status, you will need to set the order to Pending Pickup once the orders are done with the packing process.

Step 10: Lazada orders are now updated to Ready to Ship status.

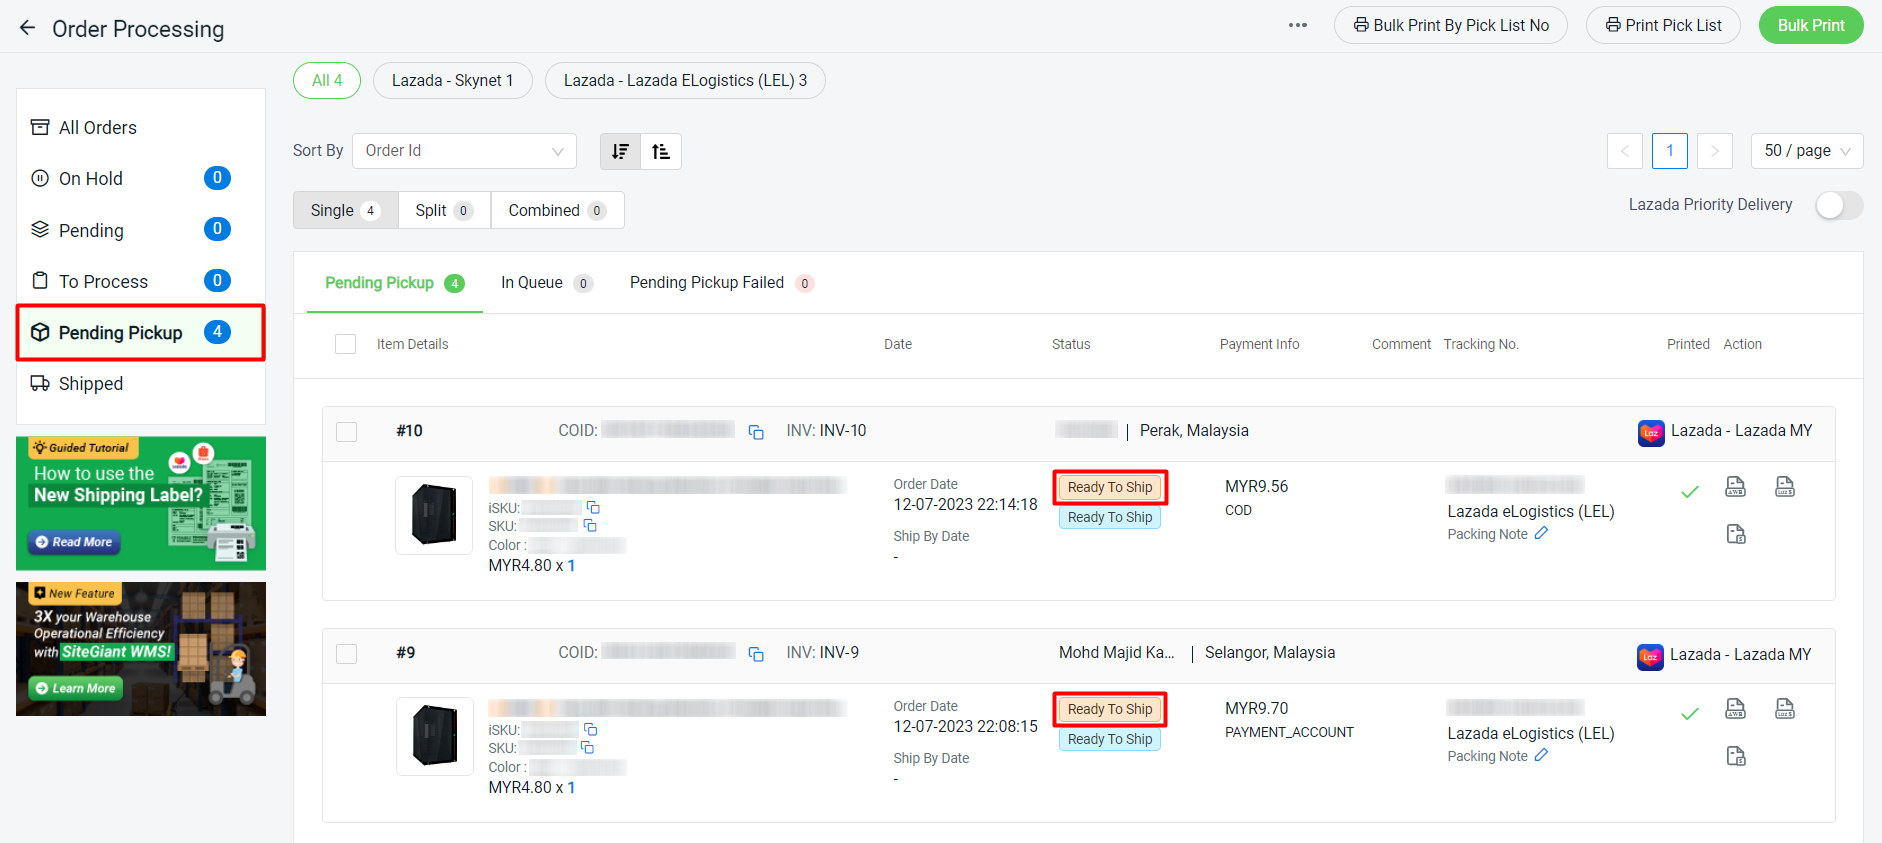
📌Note: If you did not Set Pending Pickup, the courier company would not be able to scan the parcel as the status is not Ready to Ship.

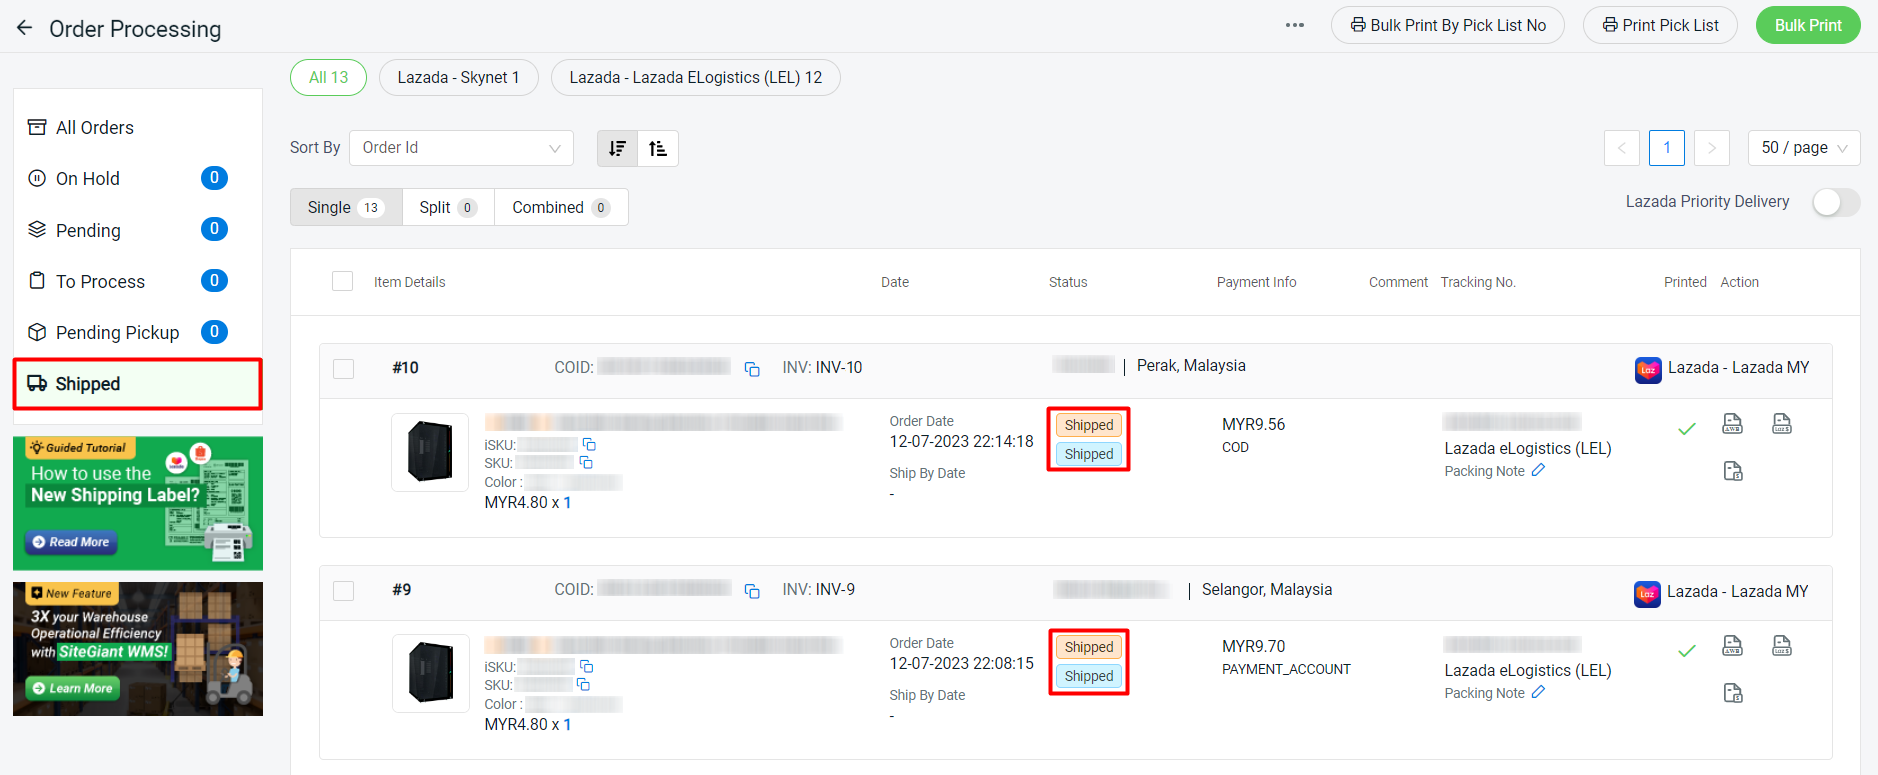
Step 11: Once the courier company picks up or receives the parcel from your dropoff, they will scan it. The order status will update to Shipped and automatically move to the Shipped tab.


4. Order Processing – Webstore And Others

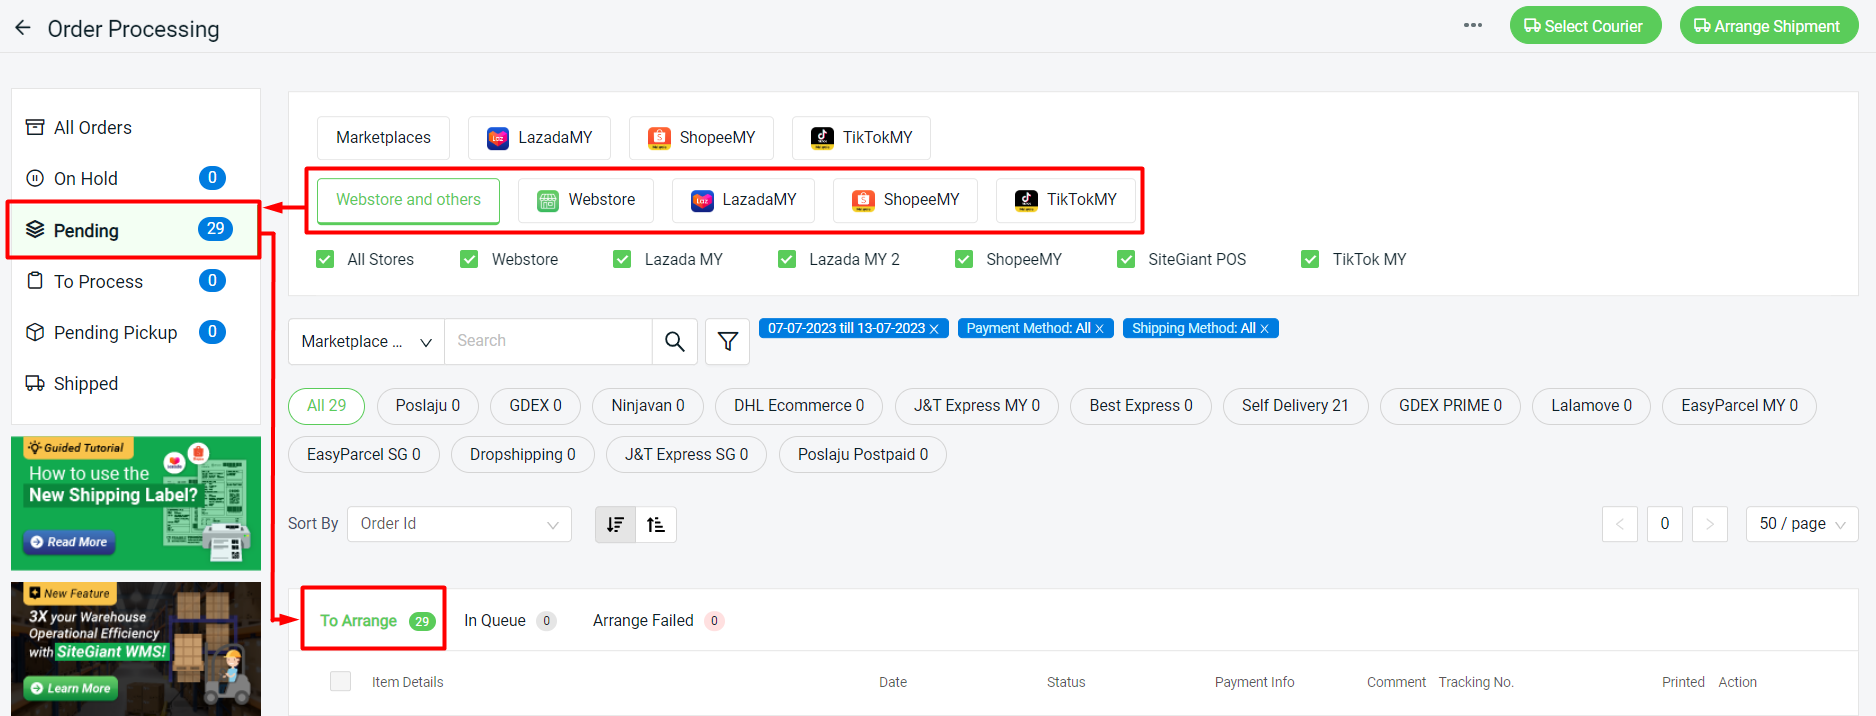
Step 1: Select Webstore and others > new orders will be synced to the Pending section > To Arrange tab.

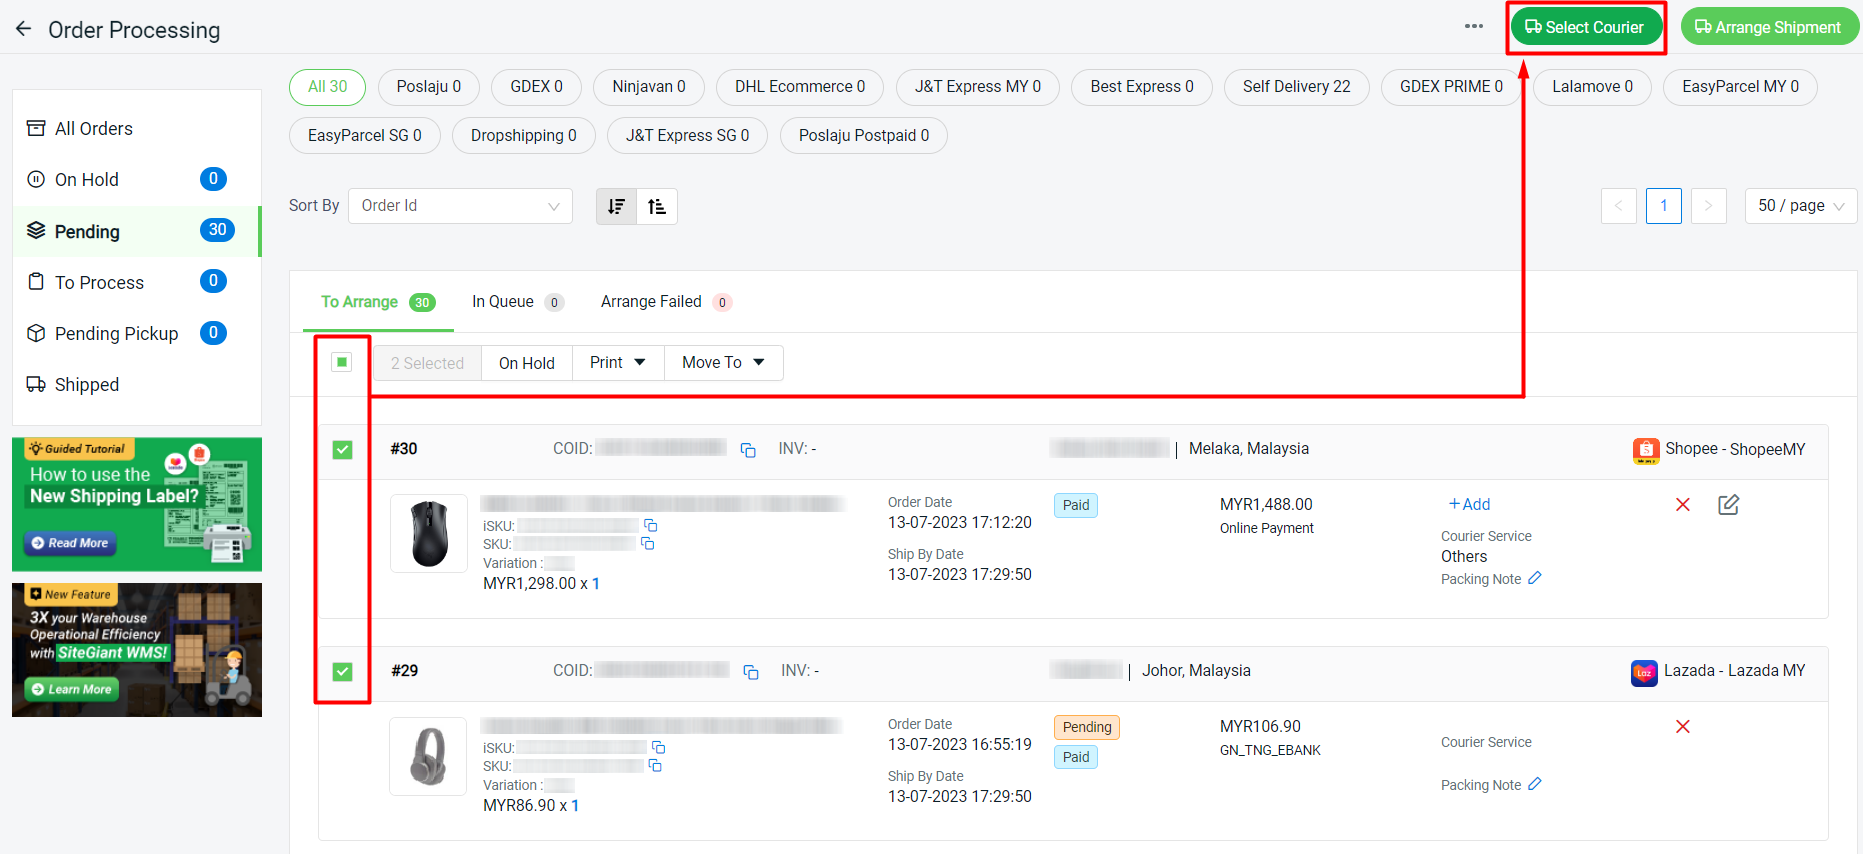
Step 2: Select the orders(s) you want to arrange with the same courier service > click on the Select Courier button to assign the courier service you integrated.

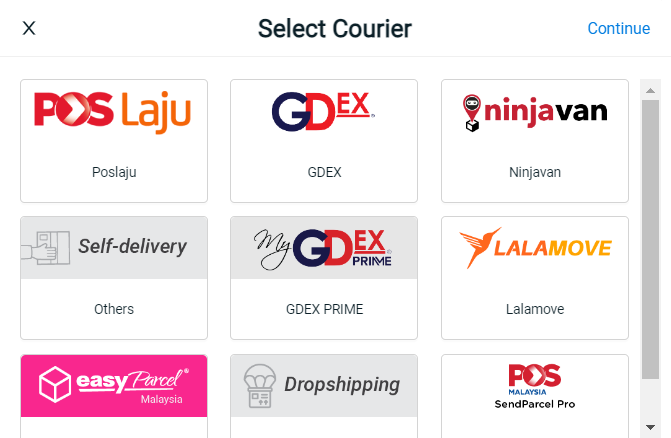
Step 3: Select the courier service > Continue.

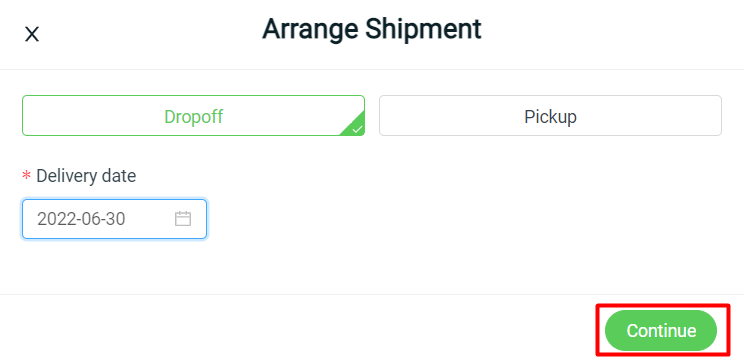
Step 4: Select the order(s) with the same courier service > Arrange Shipment > choose whether by Dropoff or Pickup with the delivery date and time etc. > Continue.

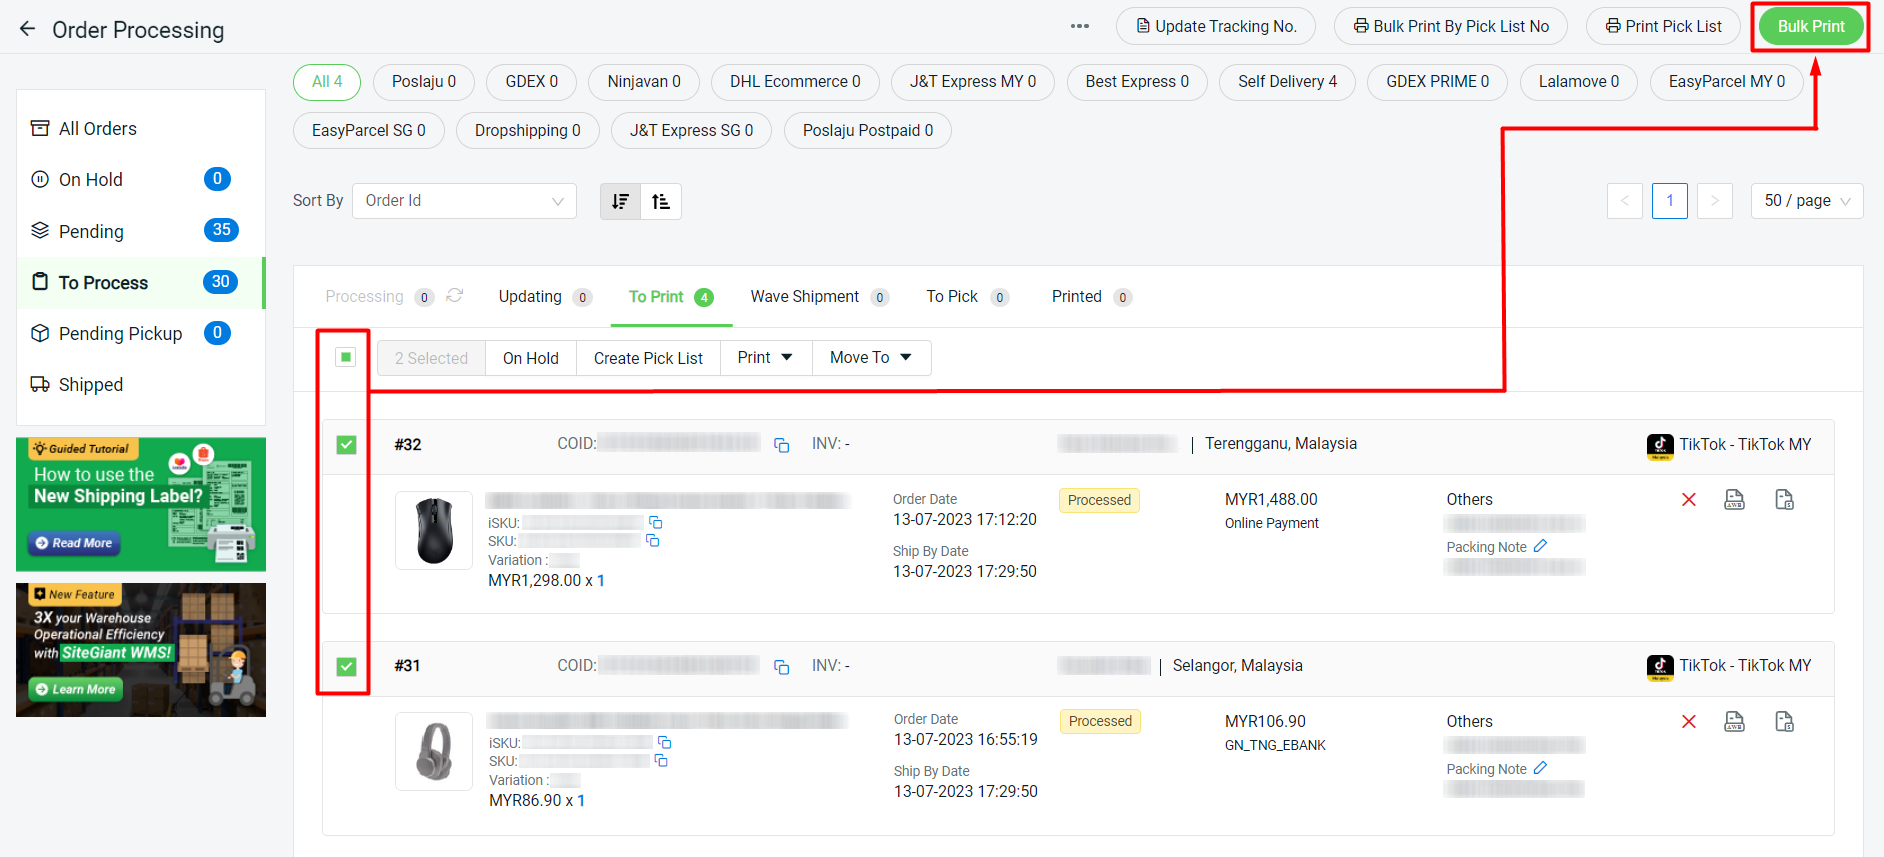
Step 5: Similar to Marketplaces Order Processing, the order will move to the To Print tab once it is successfully processed. The tracking number will be generated and updated to Seller Center. You may print the Pick List before printing the shipping label. Bulk Print shipping labels need to perform by each marketplace. Select 1 marketplace > select order(s) > click on the Bulk Print button.

Step 6: Print out the shipping label and refresh the page, the printed orders will move to the Printed tab with a green tick.

Was this article helpful?

Need Support?
Can’t find the answer you’re looking for? Don’t worry we’re here to help!
Contact Support