1. Introduction
2. Order Fulfillment Assistant Settings
3. Scan Orders Using Order Fulfillment Assistant
4. Additional Information
1. Introduction
Careful checking also helps to minimize your business loss by reducing human errors before you send out your parcels for delivery.
With SiteGiant Order Fulfillment Assistant, you are able to cross-check your marketplace order statuses before you start packing and an error message will be triggered upon scanning the wrong items for the order. You can also track and award your staff’s performance by checking the number of orders packed and the efficiency of your staff.
2. Order Fulfillment Assistant Settings
Step 1: Navigate to Orders > Fulfillment > Order Fulfillment Assistant.
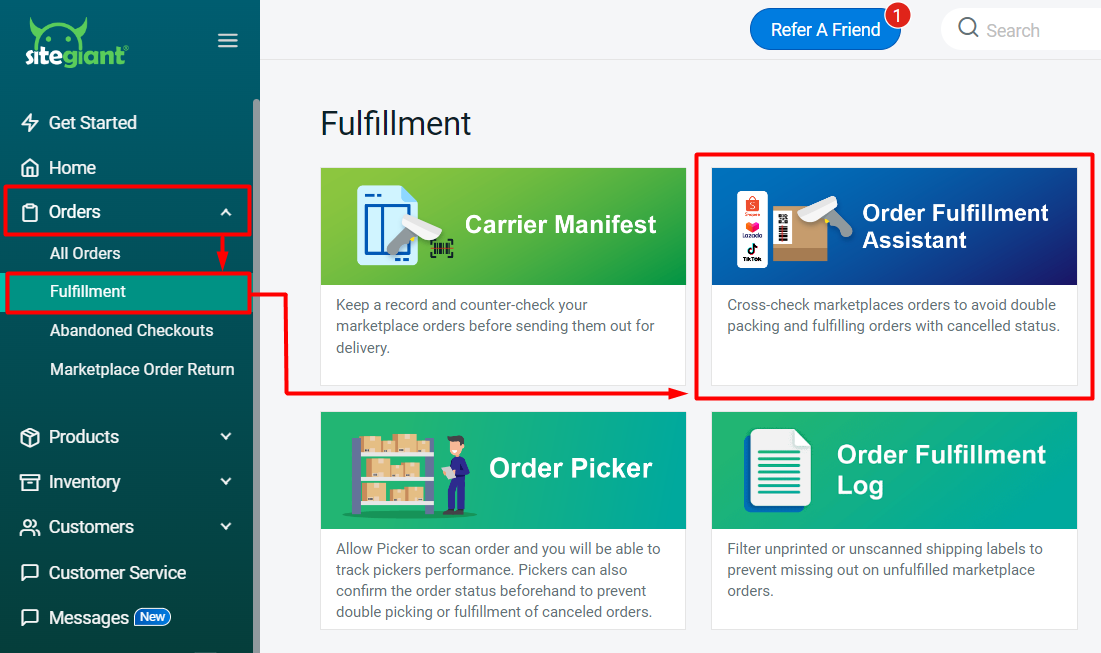
Step 2: For the first-time user, click on the Settings icon at the top right to configure the Order Fulfillment Assistant Settings.
Step 3: Configure the Order Fulfillment Assistant Settings.
I. Order and Item Processing
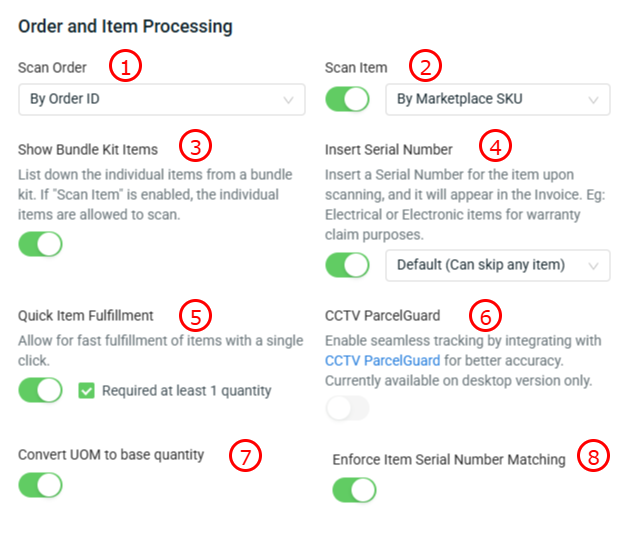
1. Scan Order: Set the default cursor focused for orders scanning (By Tracking Number, Marketplace Order ID or Order ID).

2. Scan Item: Enable to allow the scanning of item to double-check the correct items are picked (By SiteGiant iSKU, UPC or Marketplace SKU).

3. Show Bundle Kit Items: Enable to list down the individual items in a kit.

4. Insert Serial Number: Enable to key in serial number for the item upon scanning. You can set whether by Default (can skip any item), Optional (based on the inventory item setting) or Force All (all items must insert serial number).

5. Quick Item Fulfillment: Enable to allow bypass scanning items with multiple quantities. Choose whether it is required to scan at least 1 quantity of the item before bypassing the scanning.

6. CCTV ParcelGuard: If using CCTV ParcelGuard to record order fulfillment activities, may refer to the CCTV ParcelGuard tutorial for detailed steps.

7. Convert UOM to base quantity (Note:This feature only available for WMS package): When enabbling the button, there has a changes as below.

i) Show UOM - will be available with the UOM details of the item upon scanning the order.
ii) When the Scan Item by iSKU feature is enabled, it allows for the scanning of the UOM iSKU to directly fulfill the specified quantity.
iii) When Insert Serial Number feature is enabled, it allows to insert serial number based on base quantity.

8. Enforce Item Serial Number Matching: Enabling this button ensures that users can only scan item serial numbers that are already recorded in the item list. If the serial number does not exist in the system, the process cannot proceed.
II. Shipping Status
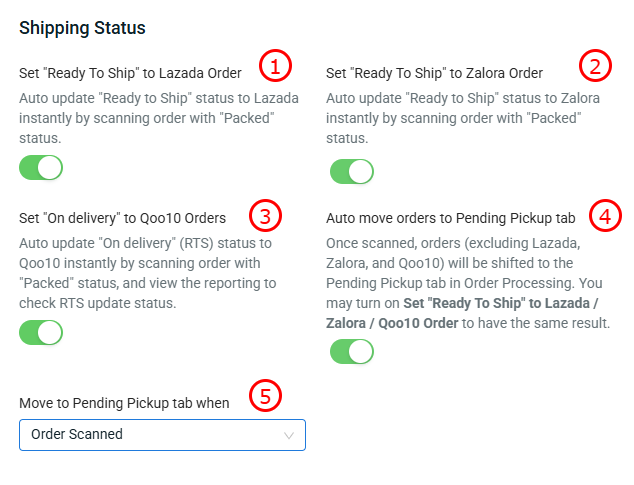
1. Set "Ready To Ship" to Lazada Order: Auto update Lazada order status from "Packed" to "Ready To Ship" status when scanning the order.

2. Set "Ready To Ship" to Zalora Order: Auto update Zalora order status from "Packed" to "Ready To Ship" status when scanning the order.

3. Set "On delivery" to Qoo10 Orders: Auto update Qoo10 order status from "Seller Confirm" to "On Delivery" status when scanning the order.

4. Auto move orders to Pending Pickup tab: Upon scanning the orders, they will automatically move to the “Pending Pickup” status. (Except for Lazada, Zalora and Qoo10.

5. Move to Pending Pickup tab when: Select when the order should be moved to Pending Pickup, either after the order is scanned or after all items are scanned. However, if the Scan Item button is disabled, you can only choose to move the order after it is scanned.
III. Order Information
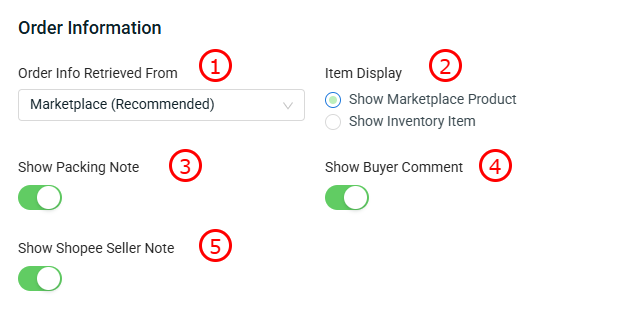
1. Order Info Retrieved From: It is recommended to choose Marketplace as it will get the latest order information directly from marketplaces when scanning the order. If choose SiteGiant, it will retrieve the order information from SiteGiant.

2. Item Display: Set it to display either marketplace products or inventory items.

3. Show Packing Note: Enable to show packing note.

4. Show Buyer Comment: Enable to show buyer comment of the order.

5. Show Shopee Seller Note: The Shopee Seller Note will be displayed upon scanning on the order fulfillment assistant website.
IV. Miscellaneous
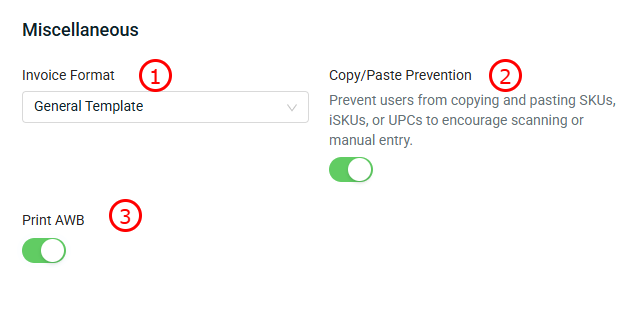
1. Invoice Format: Select either general template or order processing as the invoice format.

2. Copy/Paste Prevention: Enabling the button prevents the person from copying the iSKU/SKU/UPC from the order information. They will need to get parcel to scan the item or manual input during item entry.

3. Print AWB: The Print AWB button will appear at the top-right corner after scanning the parcel, but if the Scan Item button is enabled, it will only show once all items have been successfully scanned.
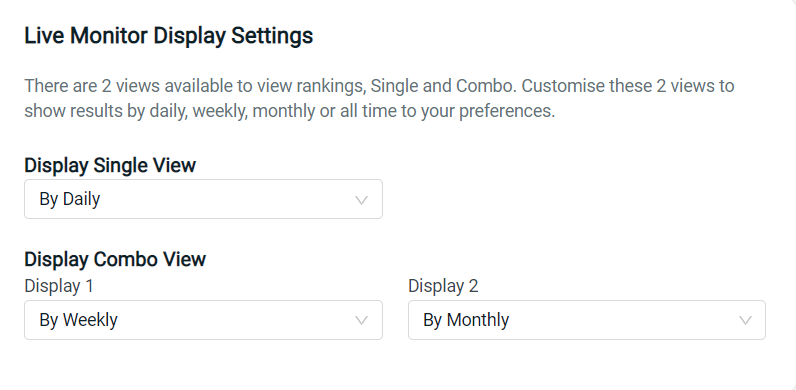
Step 4: You can set the Live Monitor Display Settings to monitor the performance of the packer. (optional)
Step 5: Click the Save button at the top to save the settings.
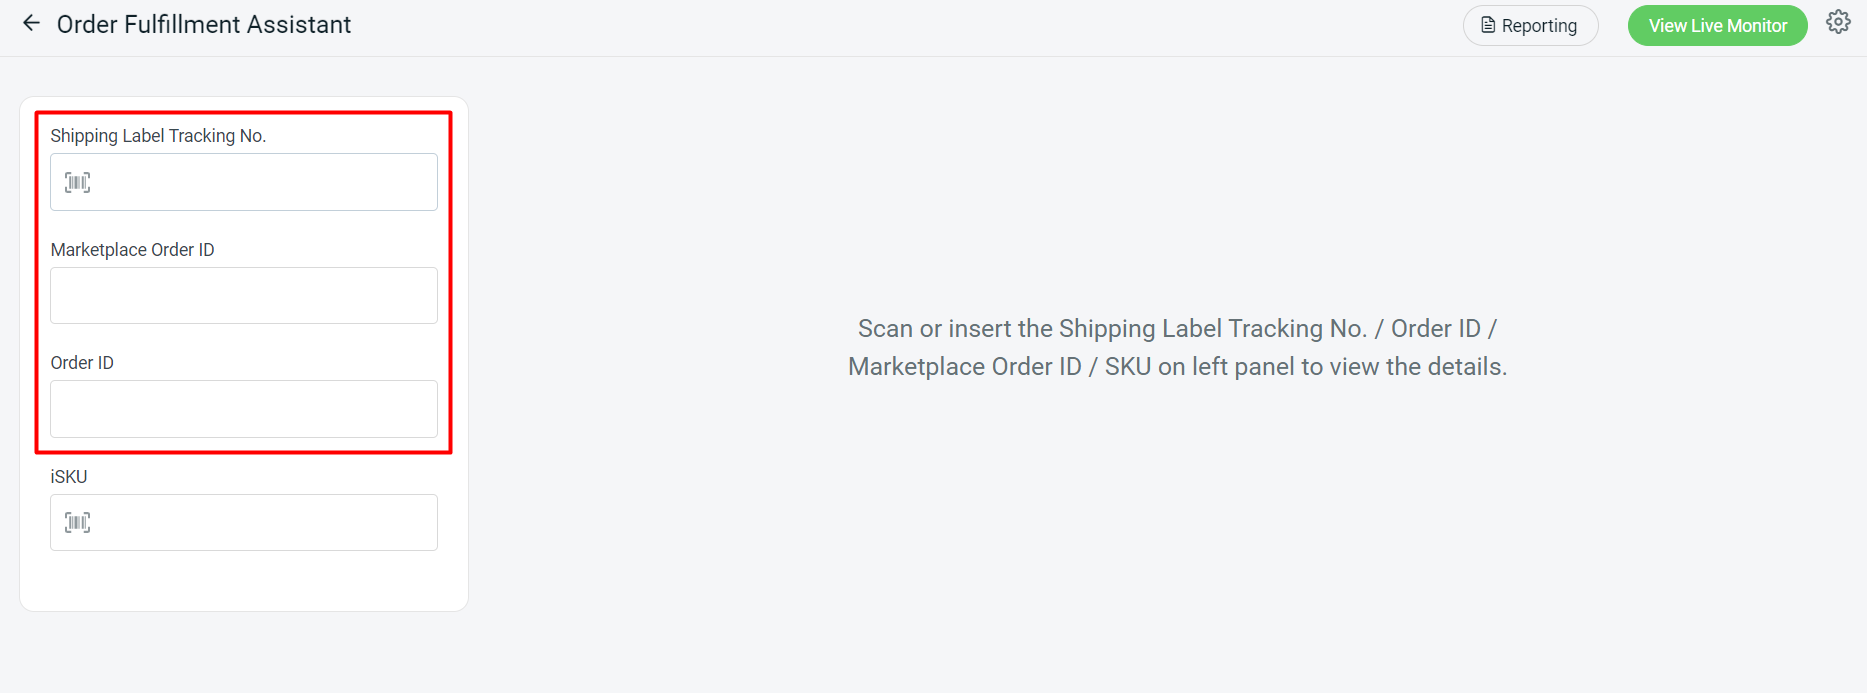
3. Scan Orders Using Order Fulfillment Assistant
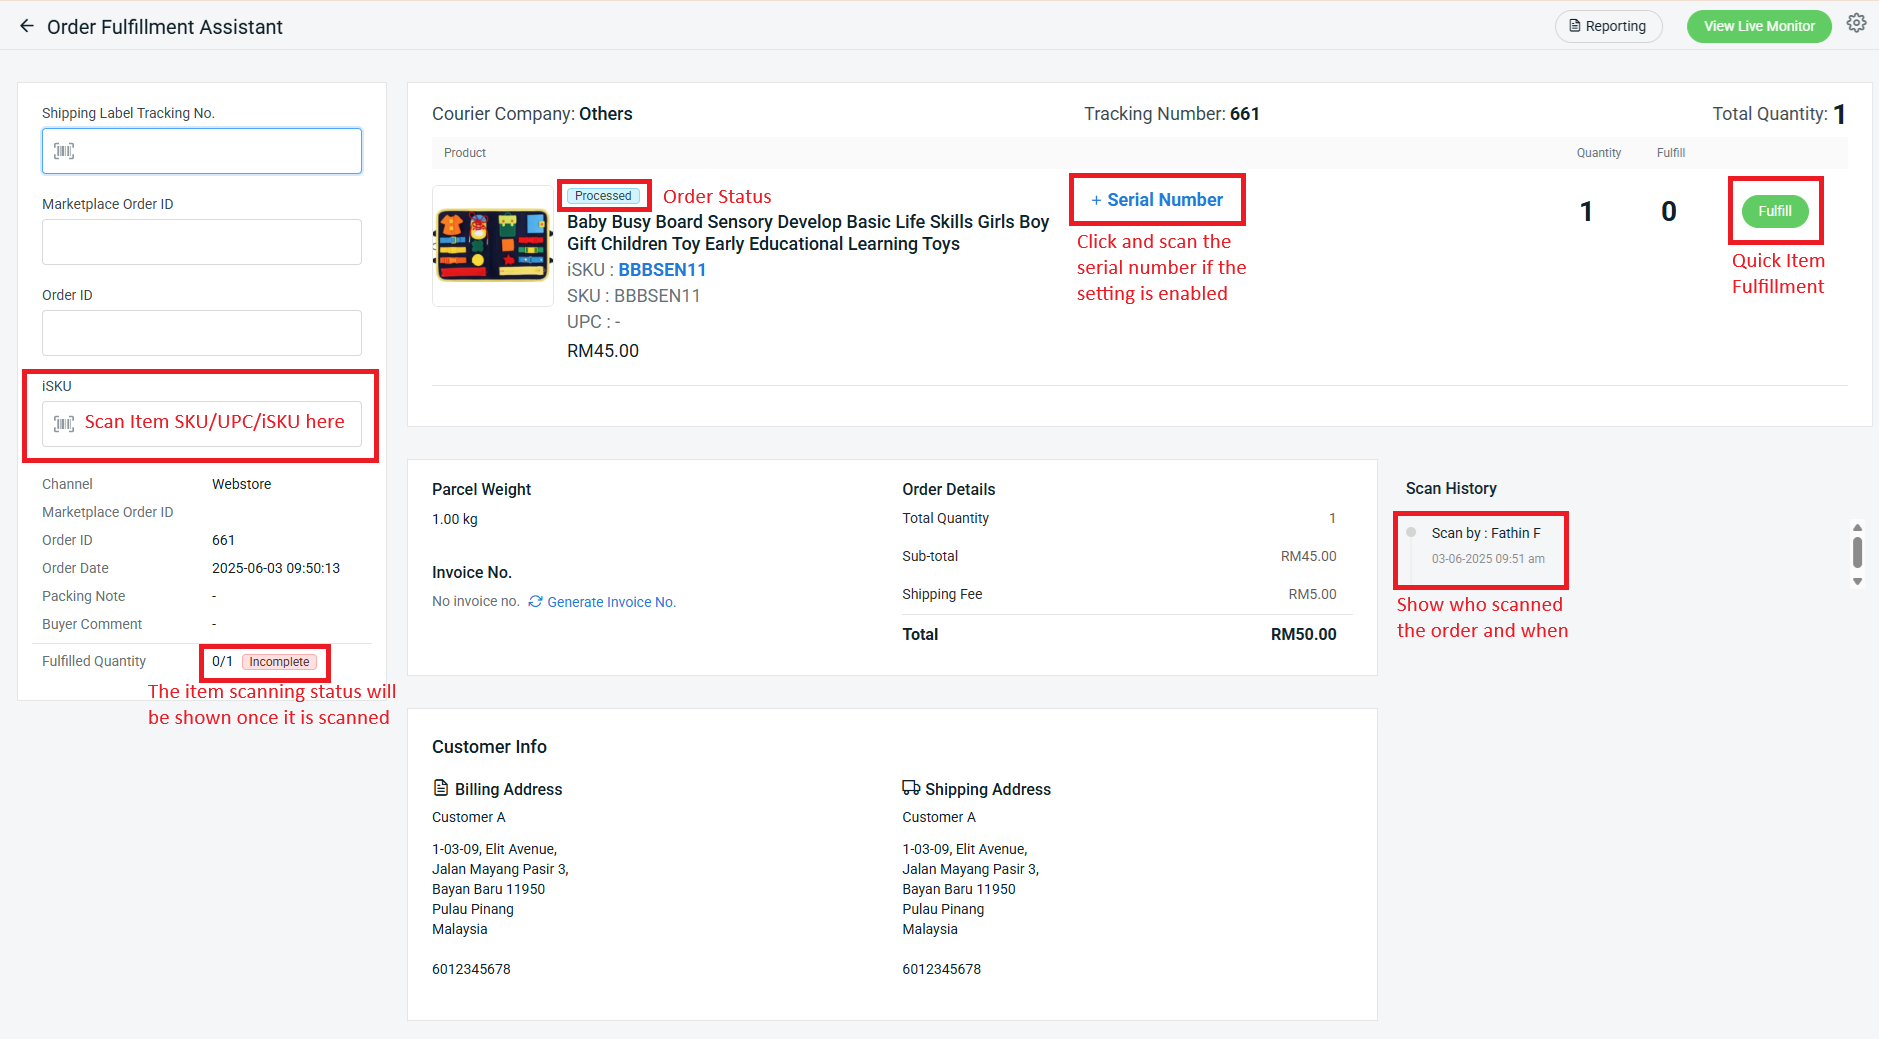
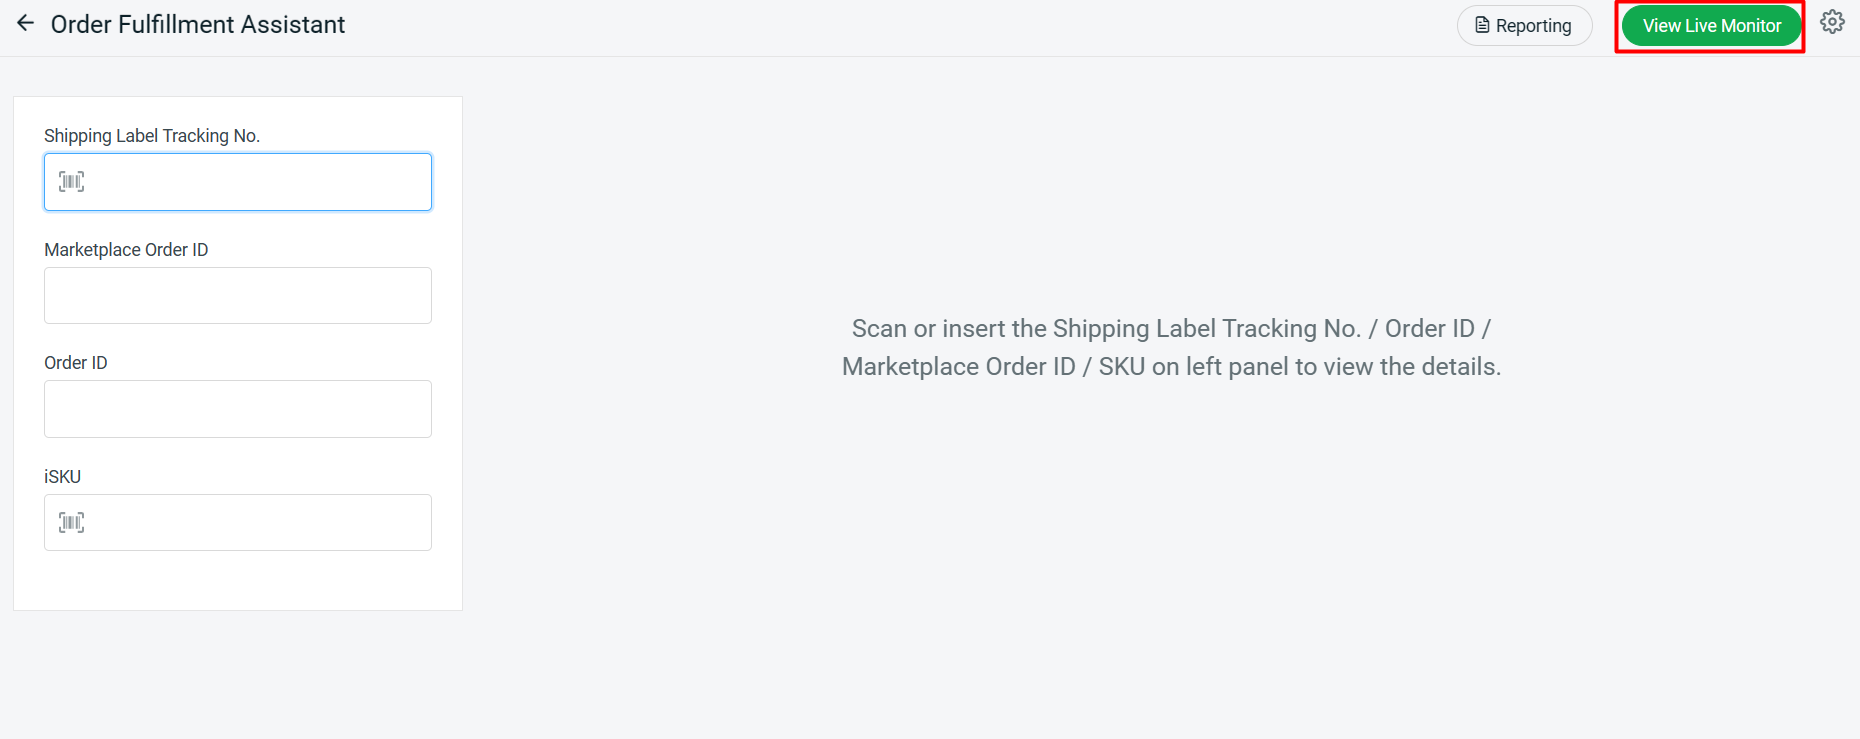
Step 1: Scan or insert the Tracking Number on the Shipping Label/ Marketplace Order ID/ Order ID.
Step 2: The order details and products will be shown > if Scan Item is enabled, you may scan the item SKU/ UPC/ iSKU to double-check that the correct items are being picked > scan the serial number if it is enabled in the settings.
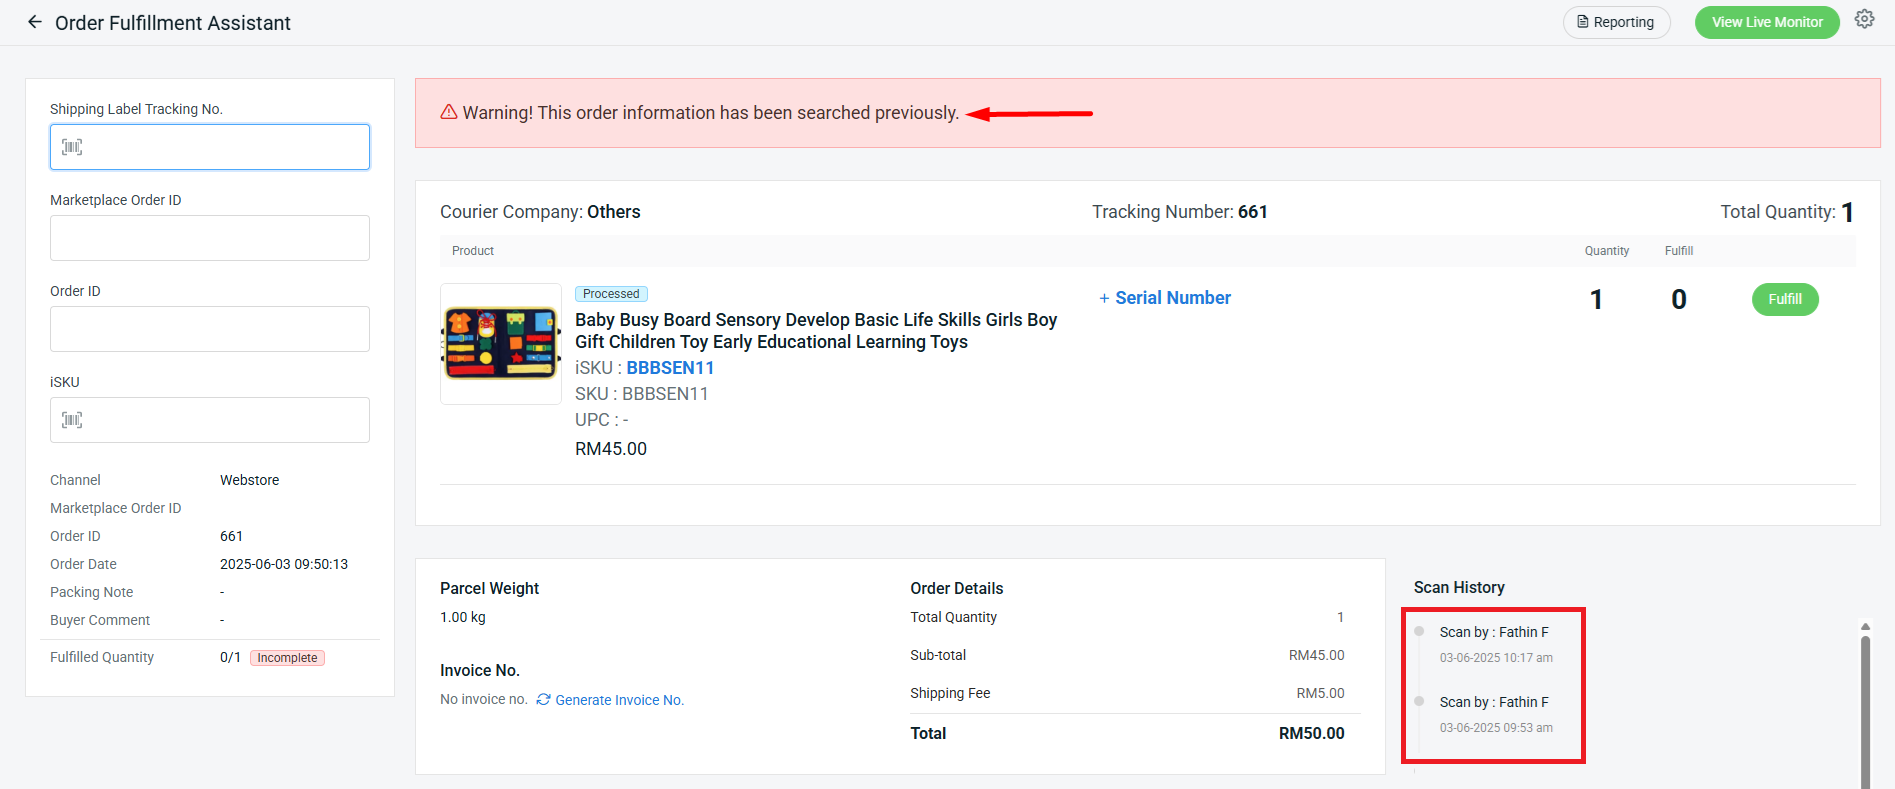
Step 3: A warning message with a beep sound will appear if the order is scanned before. Under Scan History, you may also identify the other user who has scanned the order previously.
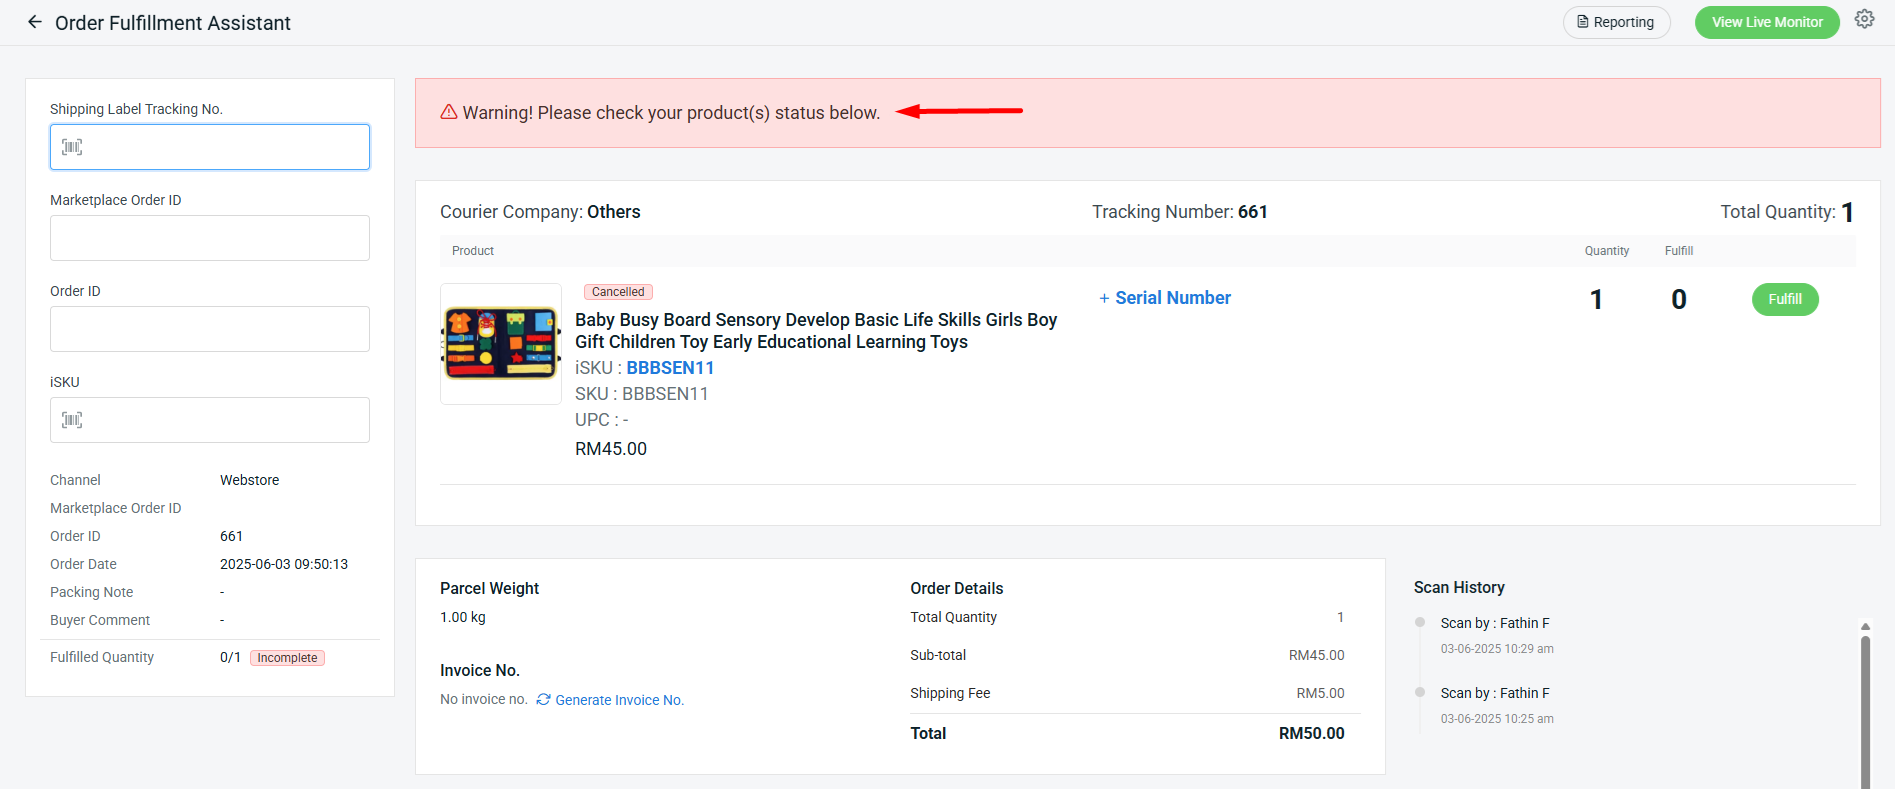
Step 4: The warning message will be shown if the order has already been cancelled.
📝Additional Information
1. Order Fulfillment Report
Step 1: Go to Reporting > click on View Report of the user to view details about the fulfillment done by the user.
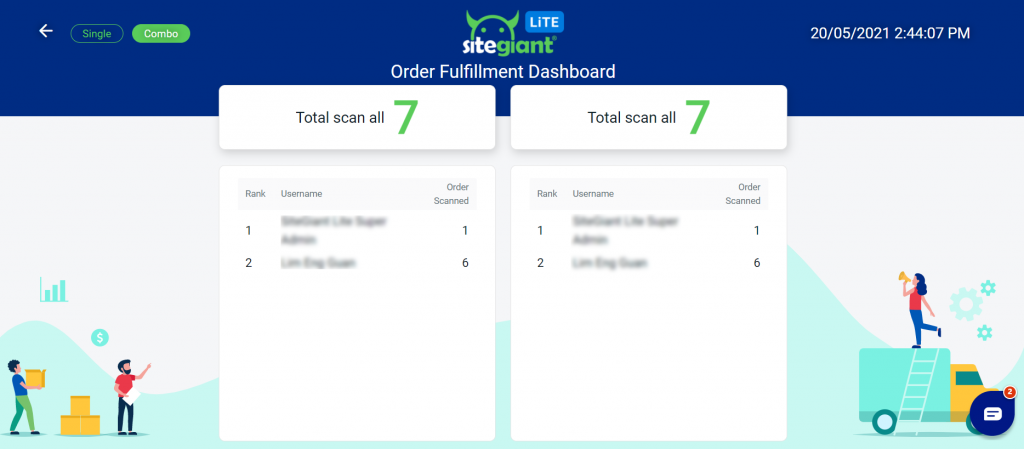
2. Live Monitor Staff Performance
Step 1: You can click on the View Live Monitor button.
Step 2: Single view shows the live tracking details in a single display.
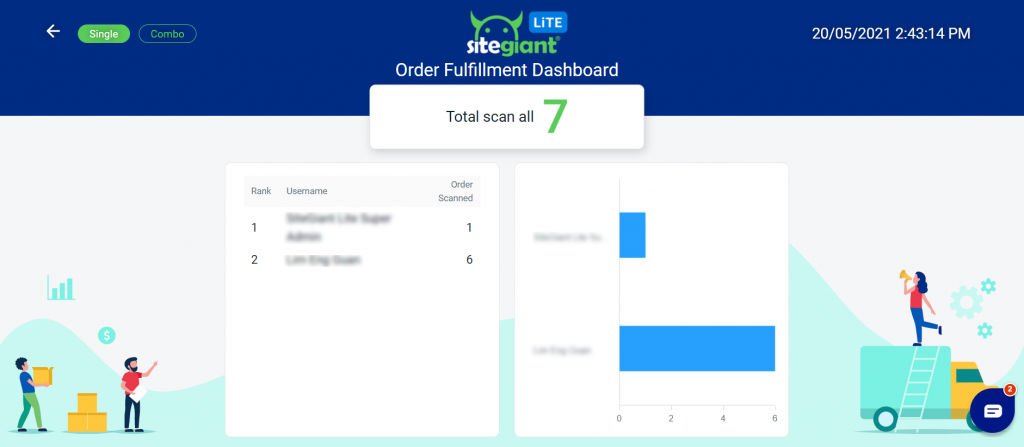
Step 3: Combo view shows the live tracking details in 2 different display options (compare performance by total amount, daily, weekly or monthly).