
1. Introduction
2. Set Up KiplePay Payment Gateway
3. Test Checkout Via KiplePay (From Customer Perspective)
1. Introduction
KiplePay is one of the fastest-growing E-Wallet in Malaysia. KiplePay payment gateway offers your customers multiple payment channels to proceed with payment from your SiteGiant webstore.
📌Note:
Make sure you have a registered account with KiplePay as you will need the Merchant ID and Merchant Secret to proceed with integration.

If you do not have KiplePay yet, you may sign up for a business account here.
2. Set Up KiplePay Payment Gateway
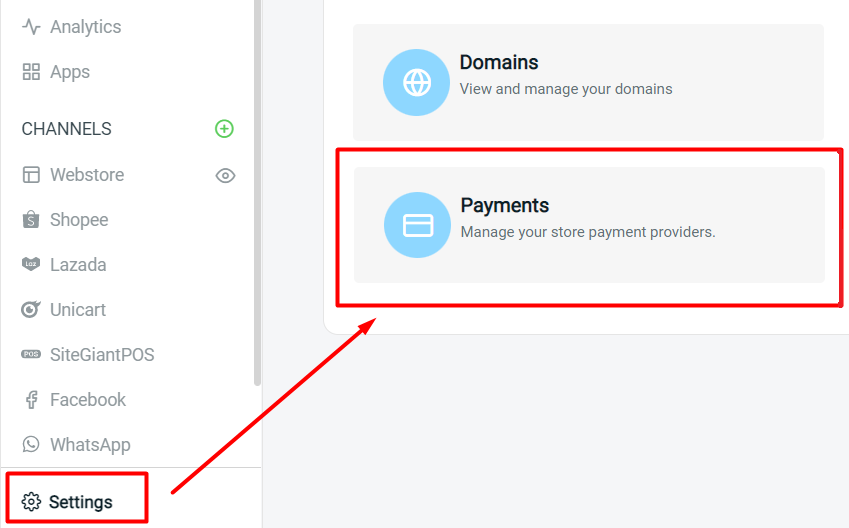
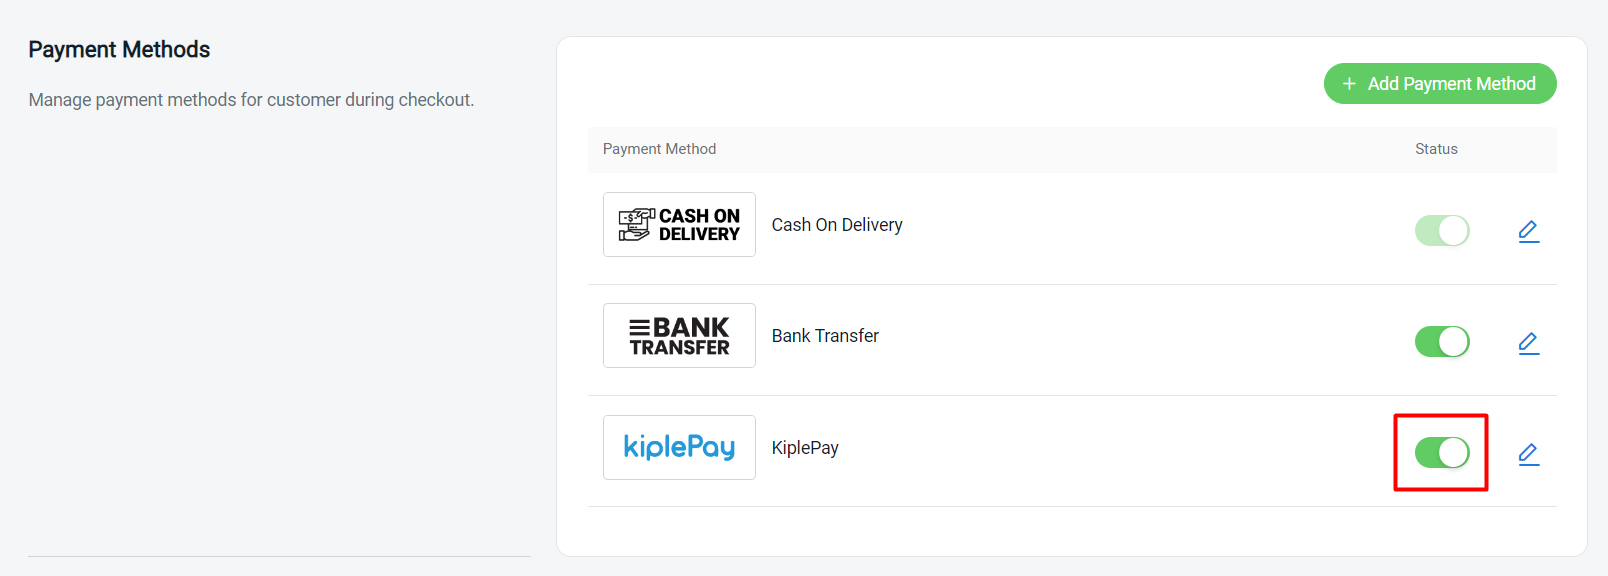
Step 1: Go to Settings > Payments
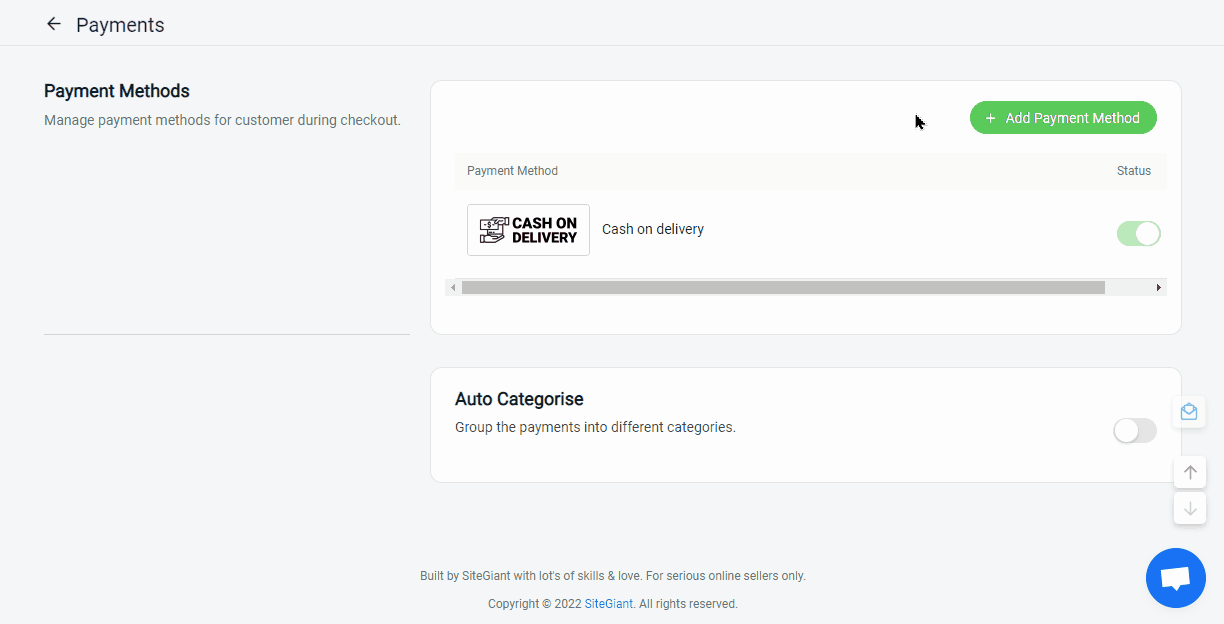
Step 2: Click the + Add Payment Method > select KiplePay > Add Payment Method to confirm
Step 3: Fill in KiplePay details such as Display Name, Merchant ID, Merchant Secret, Description, Customer Group, and Minimum Order Amount
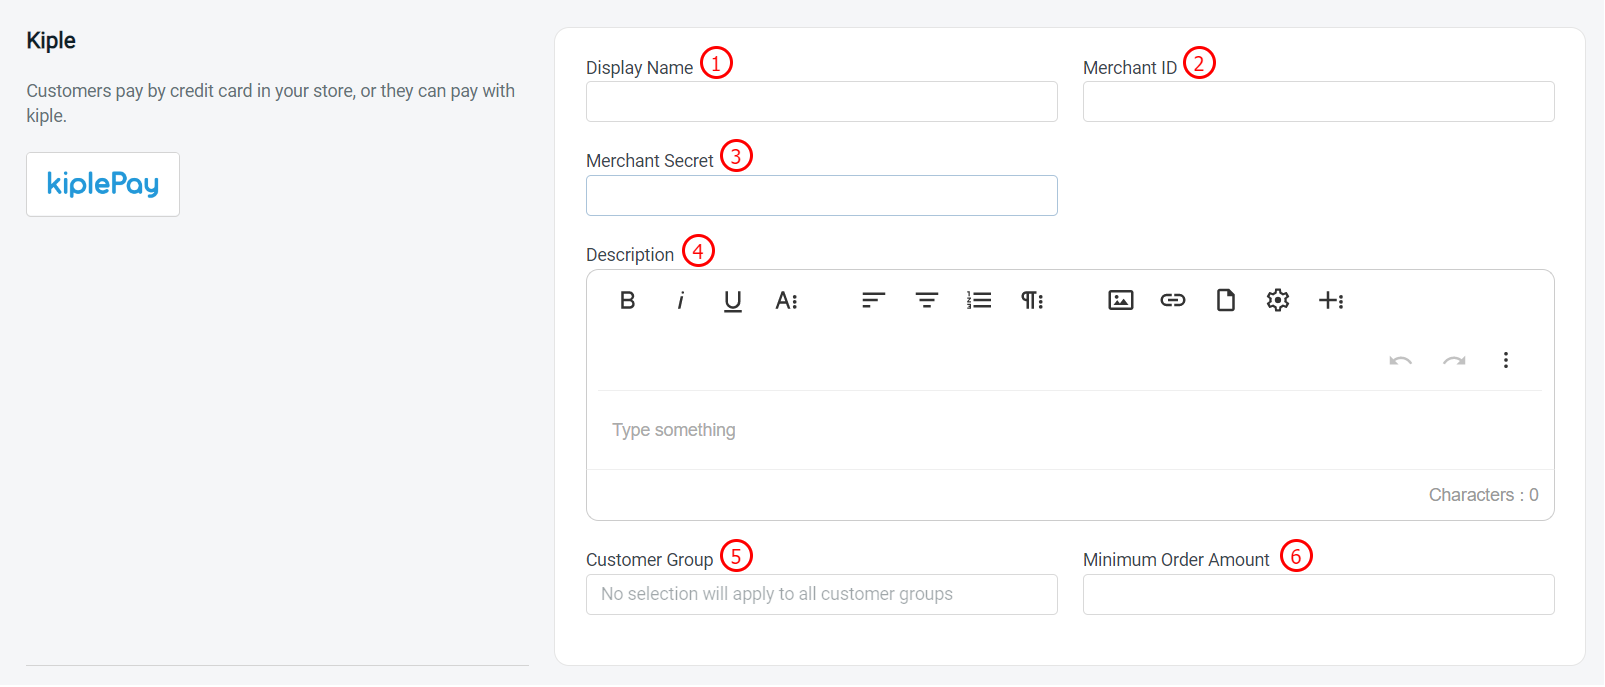
1. Display Name: The payment name to display in the Payment Method during the checkout process
2. Merchant ID*: Merchant ID that given by KiplePay
3. Merchant Secret*: Merchant Secret that given by KiplePay
4. Description: Extra information to be shown to the customer during checkout
5. Customer Group: The Customer Group that is applicable for this payment method (if no selection it will apply to all customer groups)
6. Minimum Order Amount: The order amount that needs to be reached to use this payment method
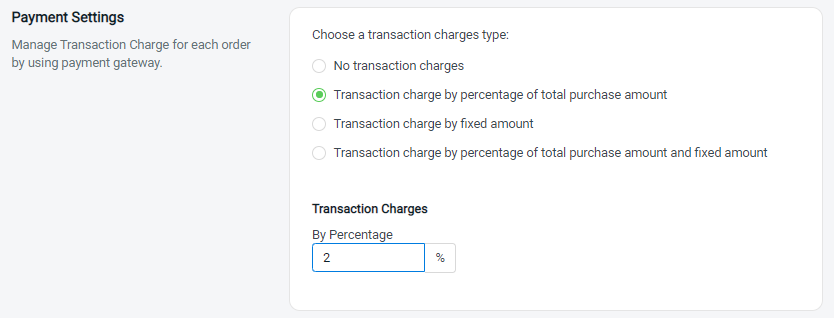
Step 4: You may set extra transaction charges applied to the customer at the Payment Settings(optional)
Step 5: Once done, click on the Add button at the top right corner > make sure the status of KiplePay is enabled
3. Test Checkout Via KiplePay (From Customer Perspective)
Step 1: You are highly recommended to try checkout on your Webstore to ensure the payment method is working as expected
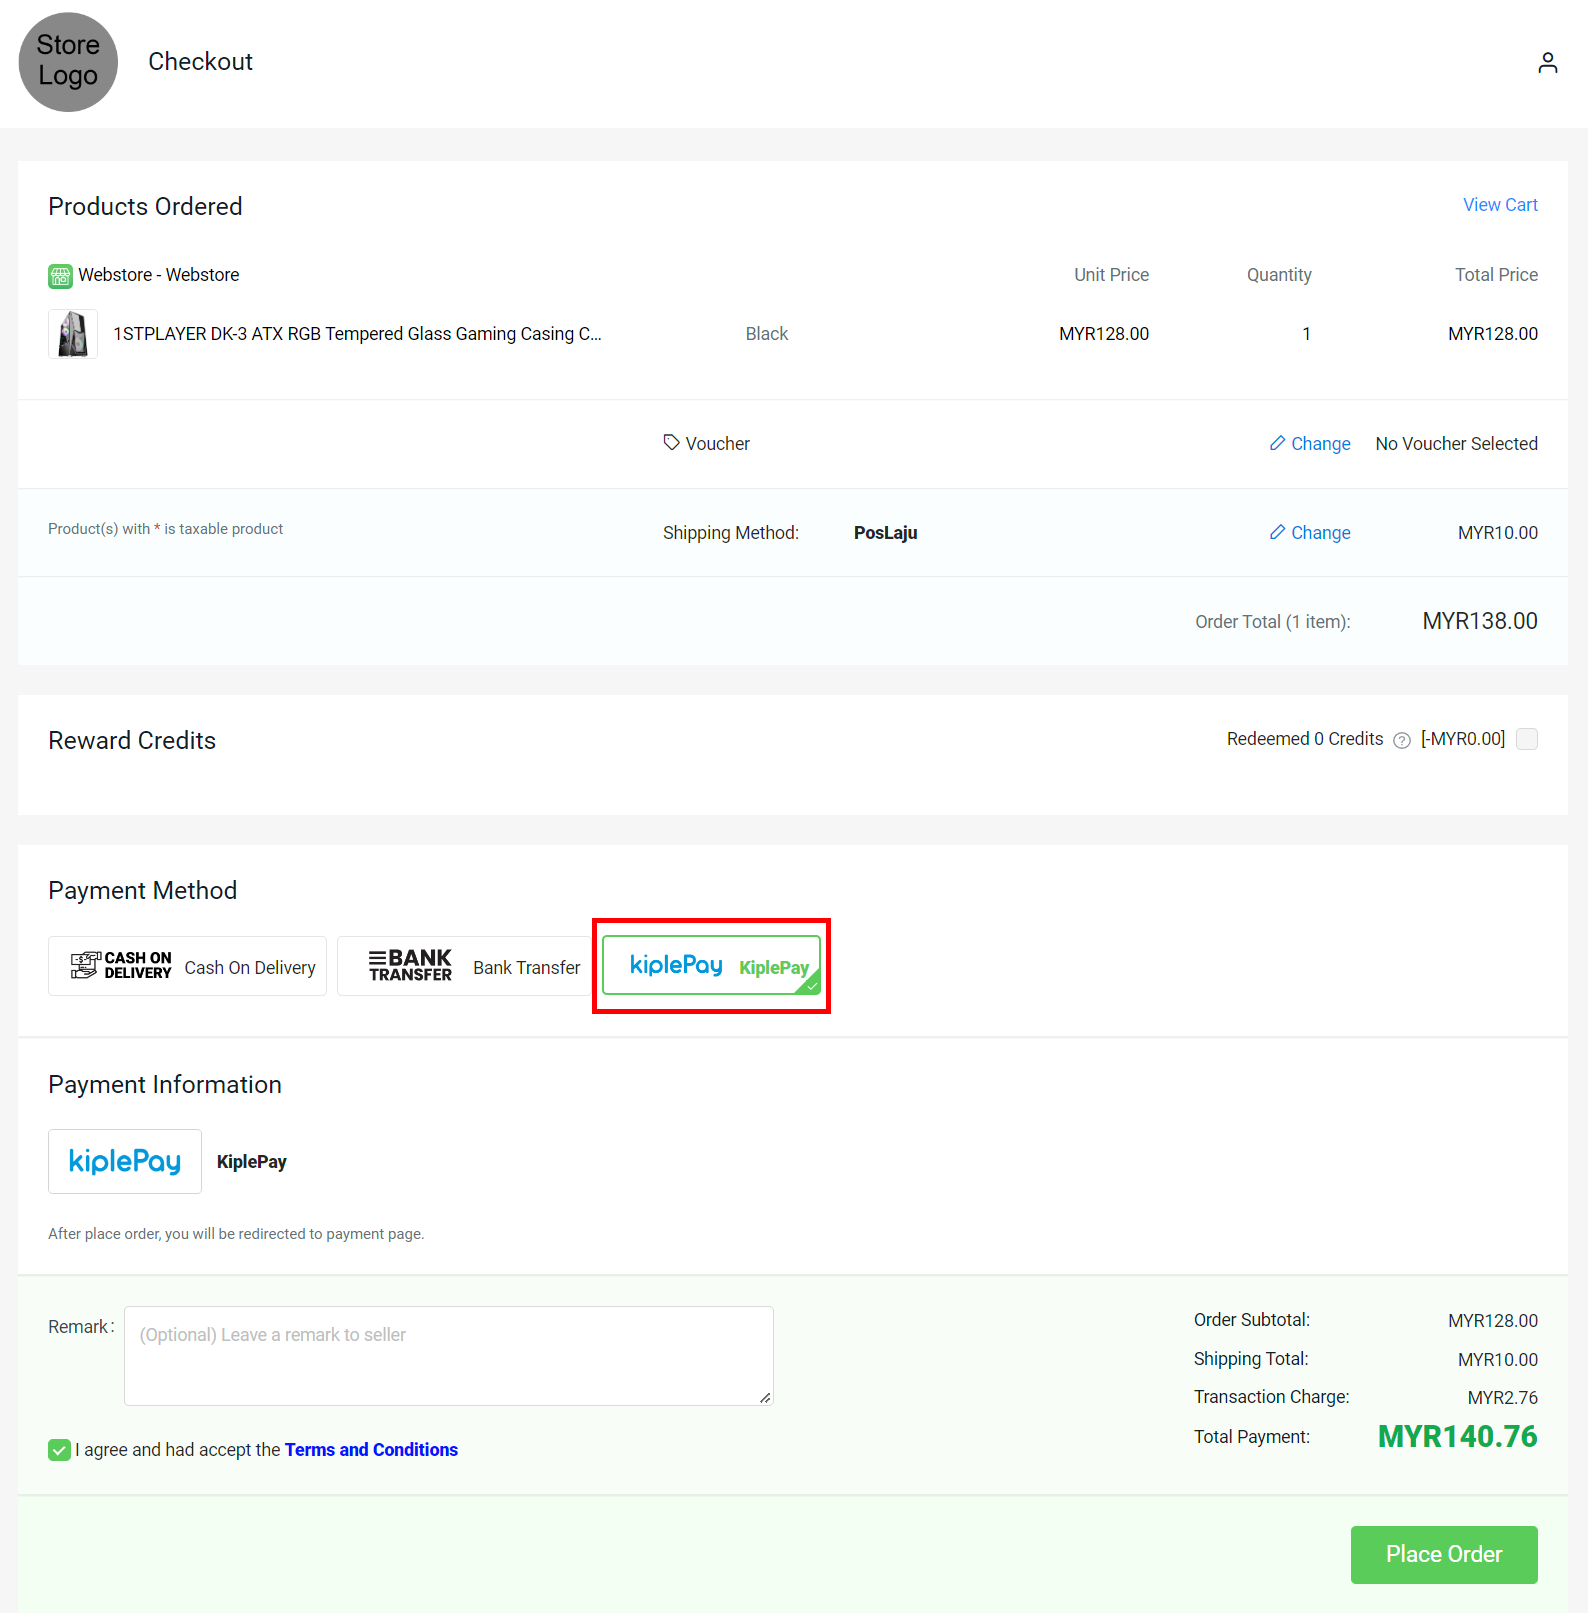
Step 2: If the page is redirecting to the KiplePay payment page, then you are successfully integrated with KiplePay