
1. Introduction
2. Register Atome Business Account
3. Set Up Atome Payment Gateway
4. Test Checkout Via Atome (From Customer Perspective)
1. Introduction
Atome allows the buyer to split their purchase into 3 interest-free payments. Thus, it would make the buyer less hesitant to place the order when they pay less upfront and with more flexibility.
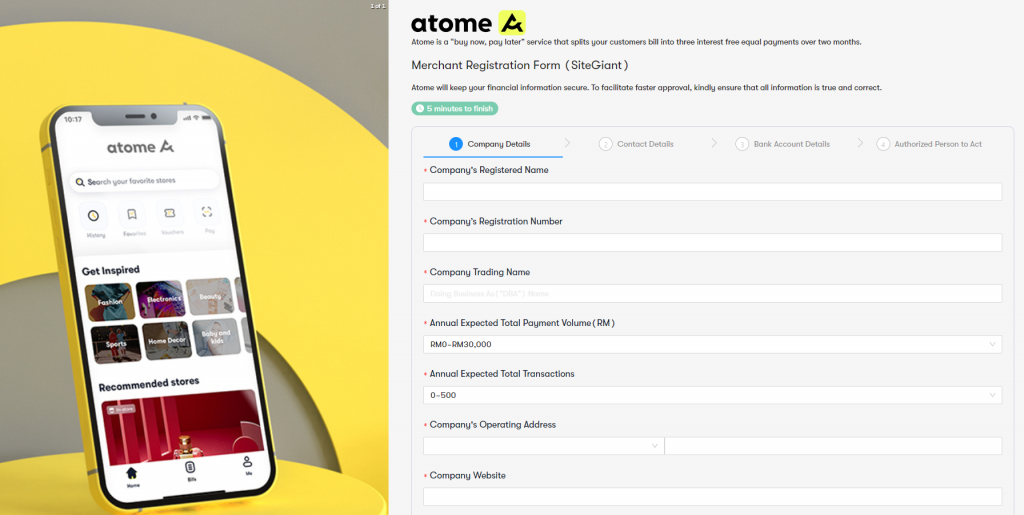
2. Register Atome Business Account
Sign up for a merchant account with Atome from HERE. Kindly send an email to [email protected] for any inquiries.
3. Set Up Atome Payment Gateway
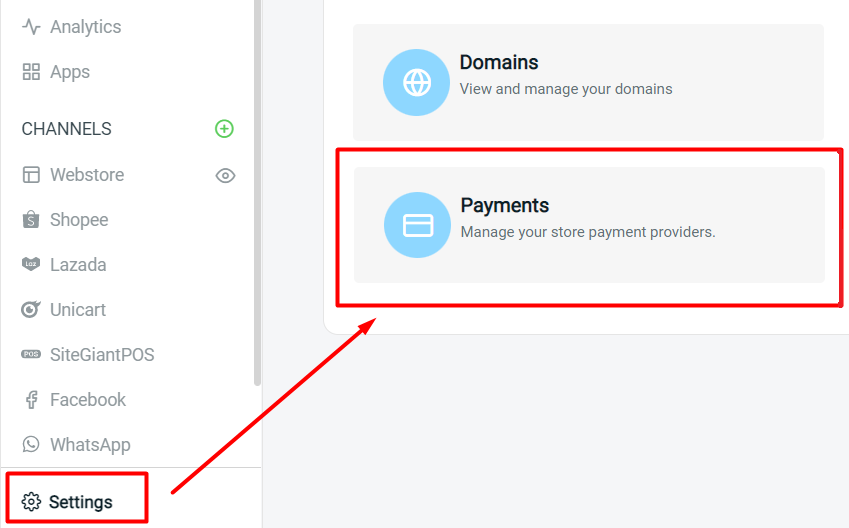
Step 1: Go to Settings > Payments
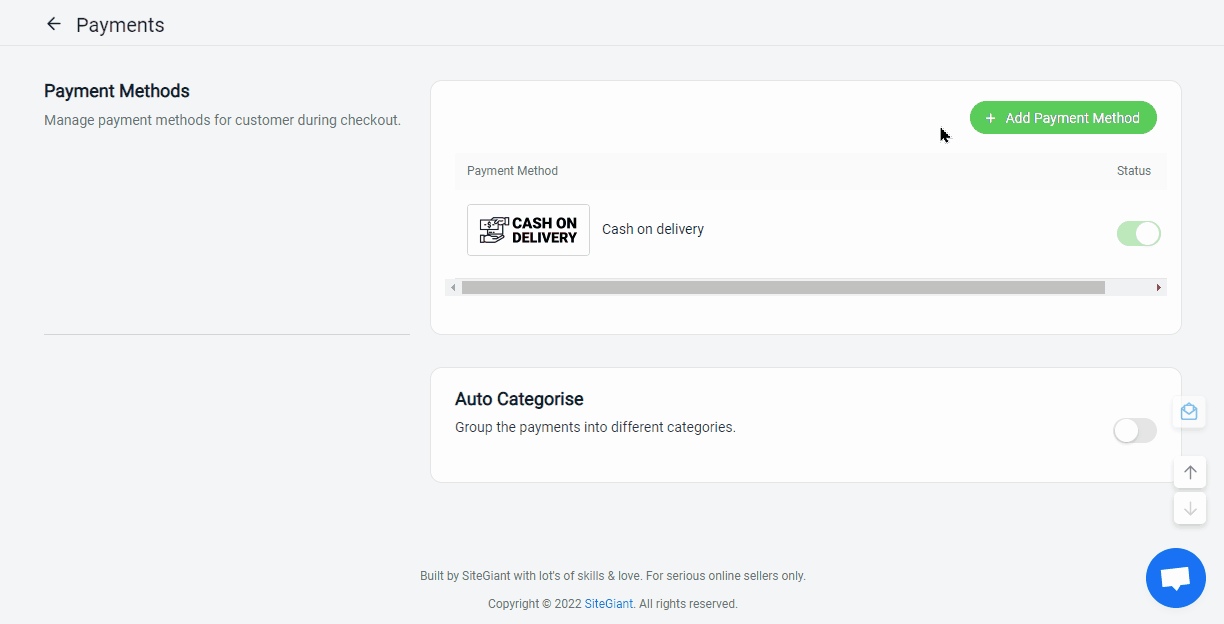
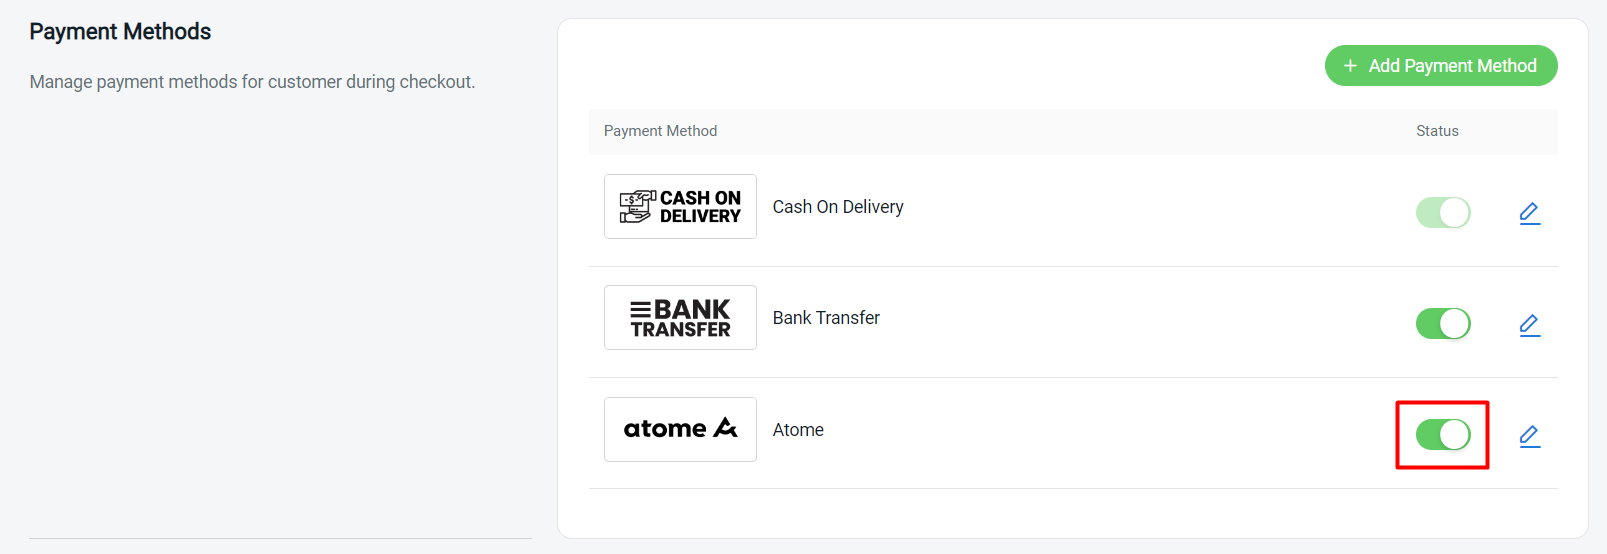
Step 2: Click the + Add Payment Method > select Atome > Add Payment Method
Step 3: Fill in Atome details such as Display Name, API Key, Password, Description, Customer Group, and Minimum Order Amount
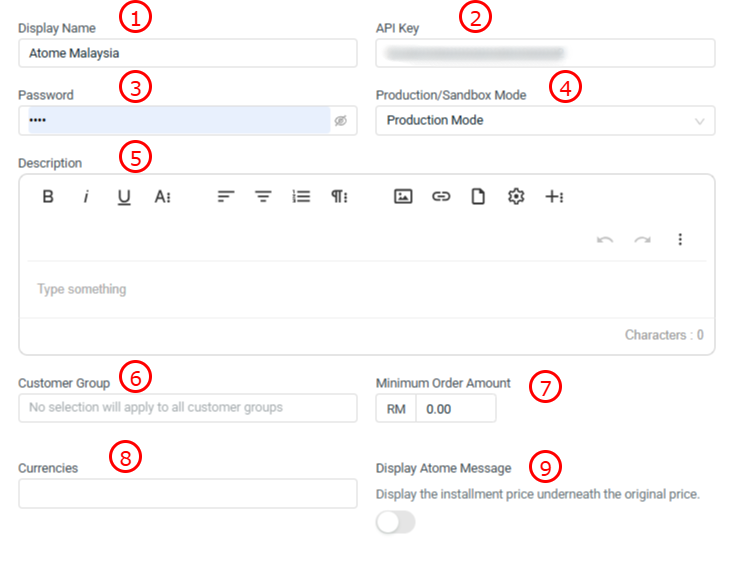
1. Display Name: The payment name to display in the Payment Method during the checkout process
2. API Key*: API Key that given by Atome
3. Password*: Merchant Secret that given by Atome
4. Production/Sandbox Mode: Switch to Production Mode if the payment method is ready to live.
5. Description: Extra information to be shown to the customer during checkout
6. Customer Group: The Customer Group that is applicable for this payment method (if no selection it will apply to all customer groups)
7. Minimum Order Amount: The order amount that needs to be reached to use this payment method
8. Currencies: Select the currencies that are applicable to this payment method.
9. Display Atome Message: The installment price will appear underneath the original price when the status is Toggle On.
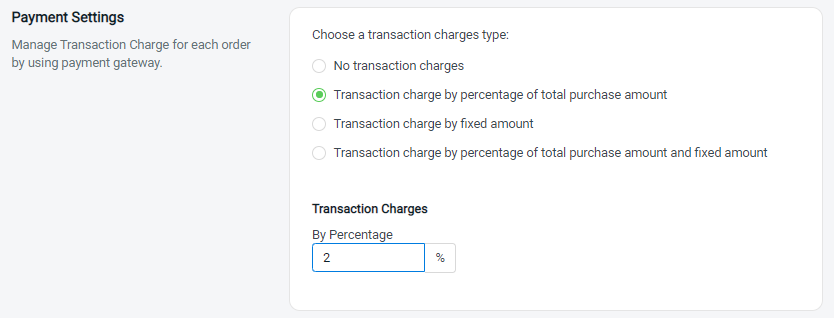
Step 4: You may set extra transaction charges applied to the customer at the Payment Settings (optional)
Step 5: Once done, click on the Add button at the top right corner > make sure the status of Atome is enabled
4. Test Checkout Via Atome (From Customer Perspective)
Step 1: You are highly recommended to try checkout on your Webstore to ensure the payment method is working as expected
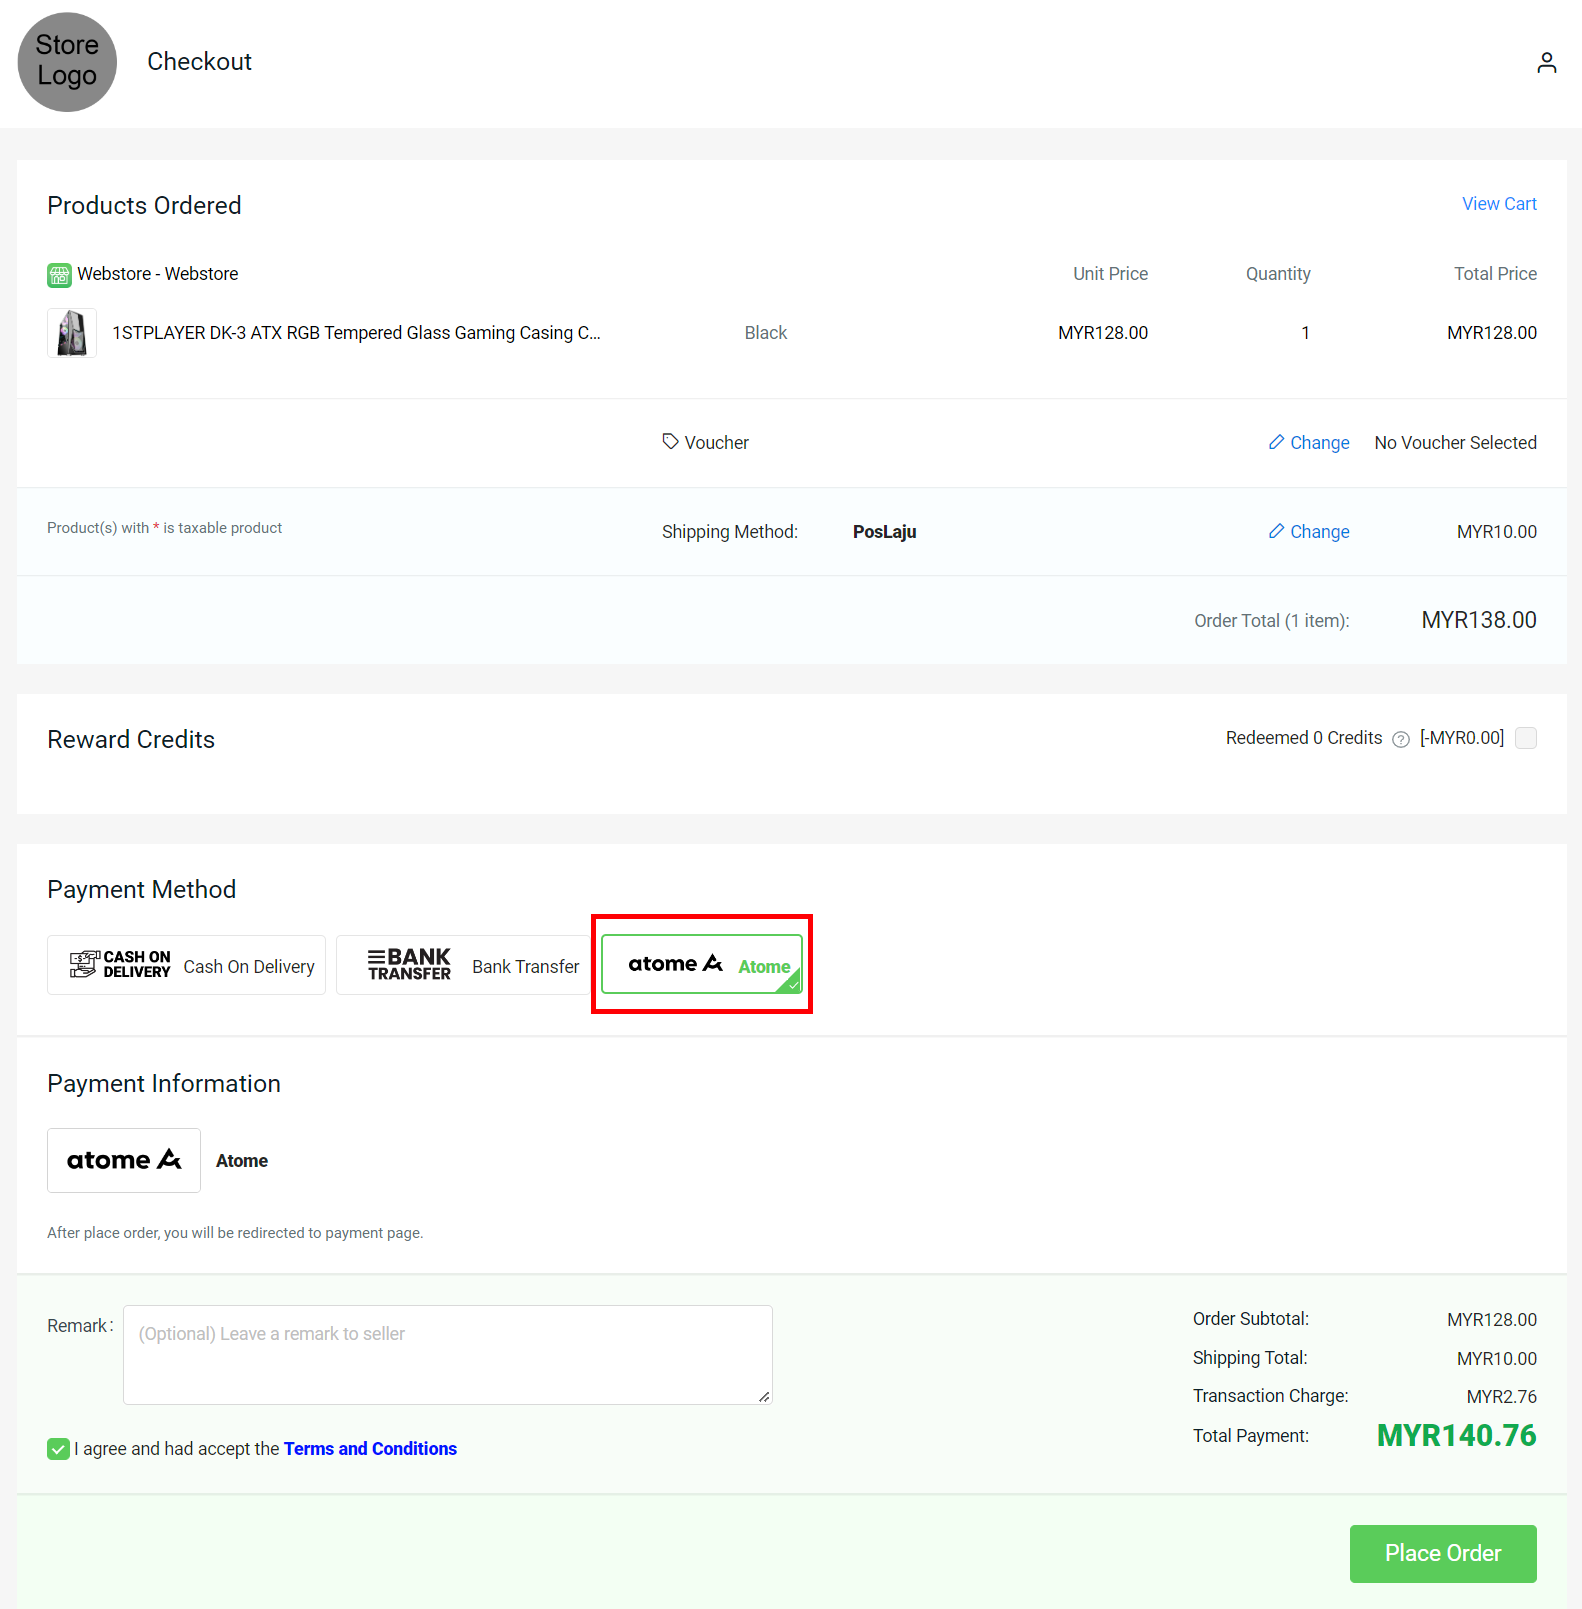
Step 2: If the page is redirecting to the Atome payment page, then you are successfully integrated with Atome