
1. Introduction
2. Get Billplz Integration Key
3. Set Up Billplz Payment Gateway
4. Test Checkout Via Billplz (From Customer Perspective)
1. Introduction
Billplz is a payment platform for organizations to pay and get paid fastest at the lowest cost possible. Billplz payment gateway accepts payments via multiple payment methods such as FPX online banking, credit card, Paypal, and eWallet.
📌Note:
Make sure you have a registered account with Billplz as you will need the Collection ID, API Key and XSignature Key to proceed with integration.

If you do not have a Billplz account yet, you may sign up for an account here.
2. Get Billplz Integration Key
There are 3 integration keys (Collection ID, API Key, and XSignature Key) to obtain from your Billplz account to integrate with your SiteGiant webstore.
Part I: Billplz Collection ID
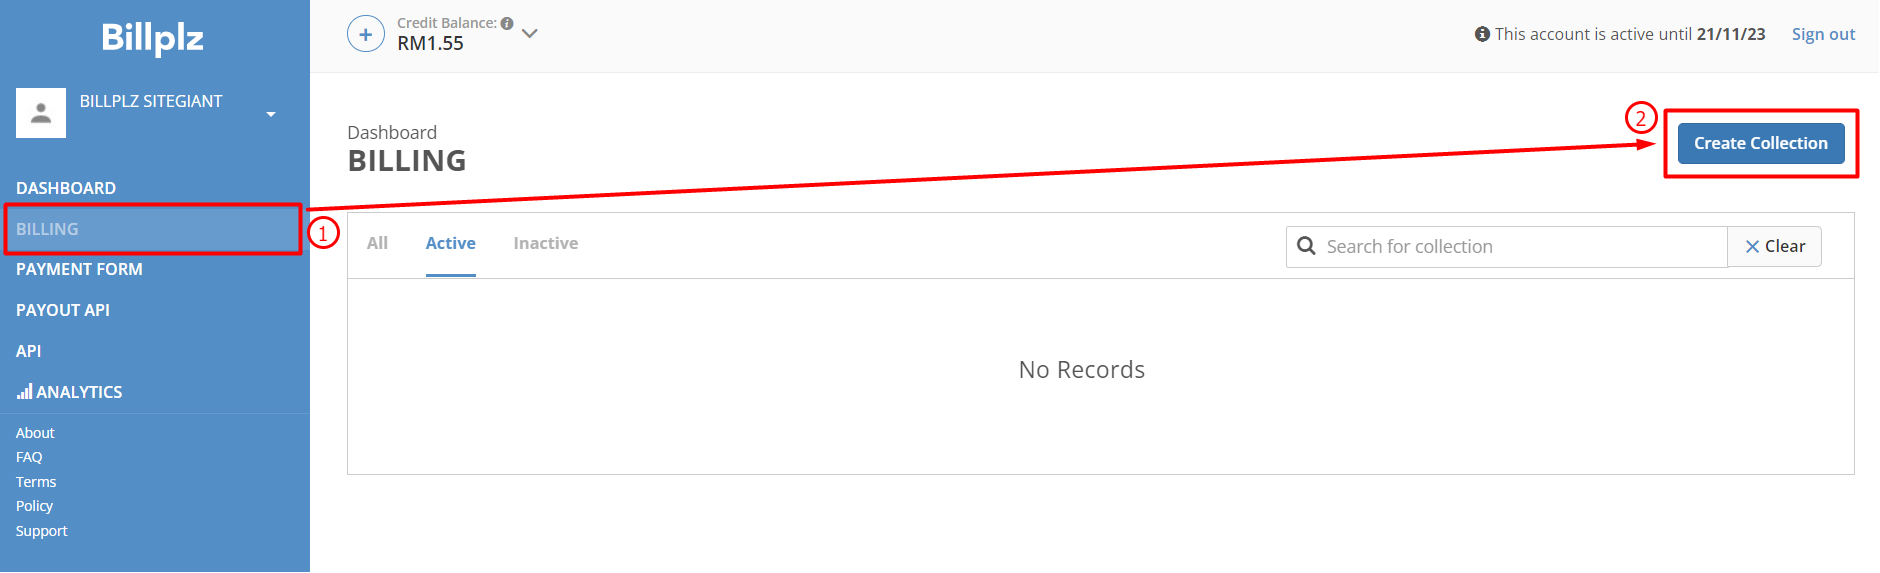
Step 1: Log in to your Billplz account > go to Billing > click on Create Collection button on the right
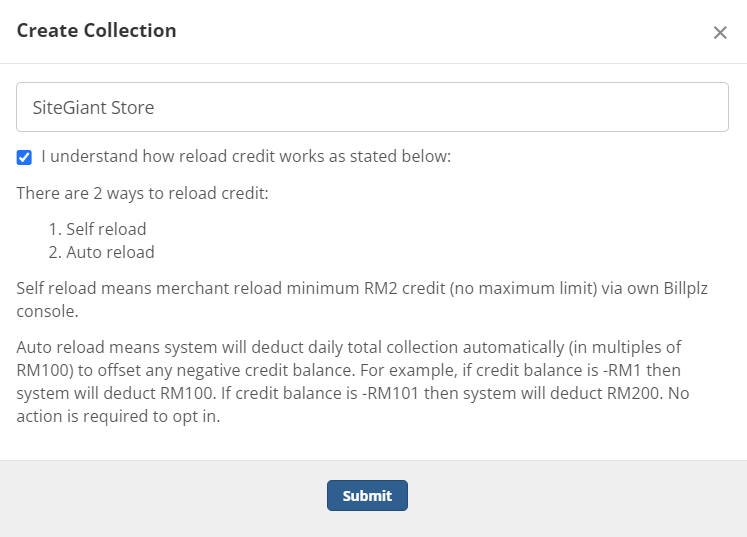
Step 2: Fill in your preferred Collection title > tick the checkbox and Submit
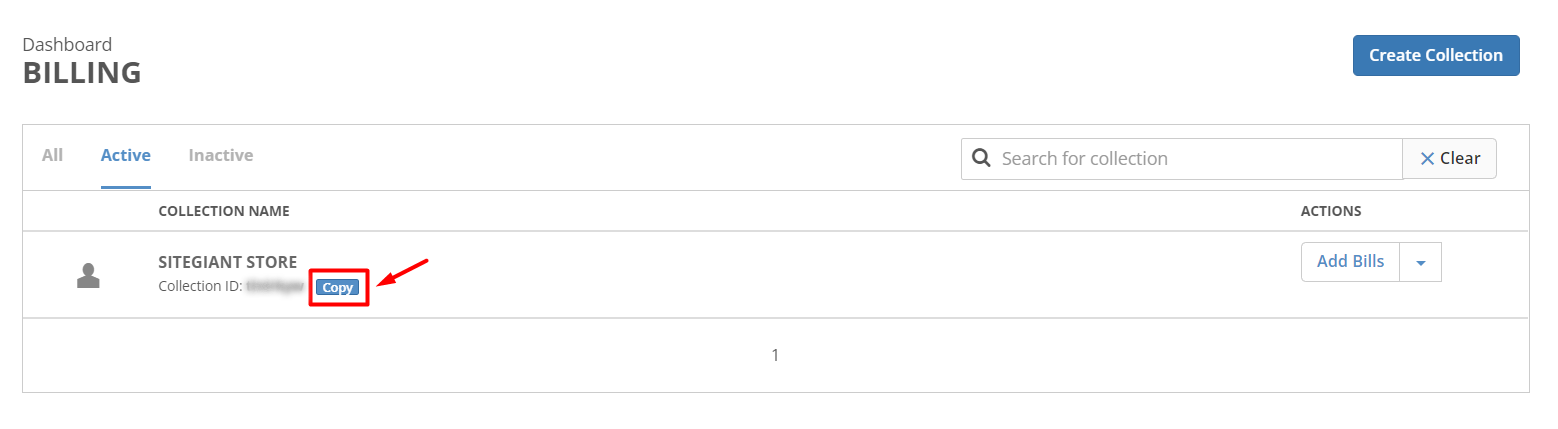
Step 3: Click on the Copy button to copy the Collection ID for later use
Part II: Billplz API Key
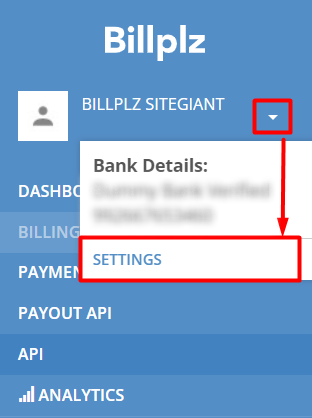
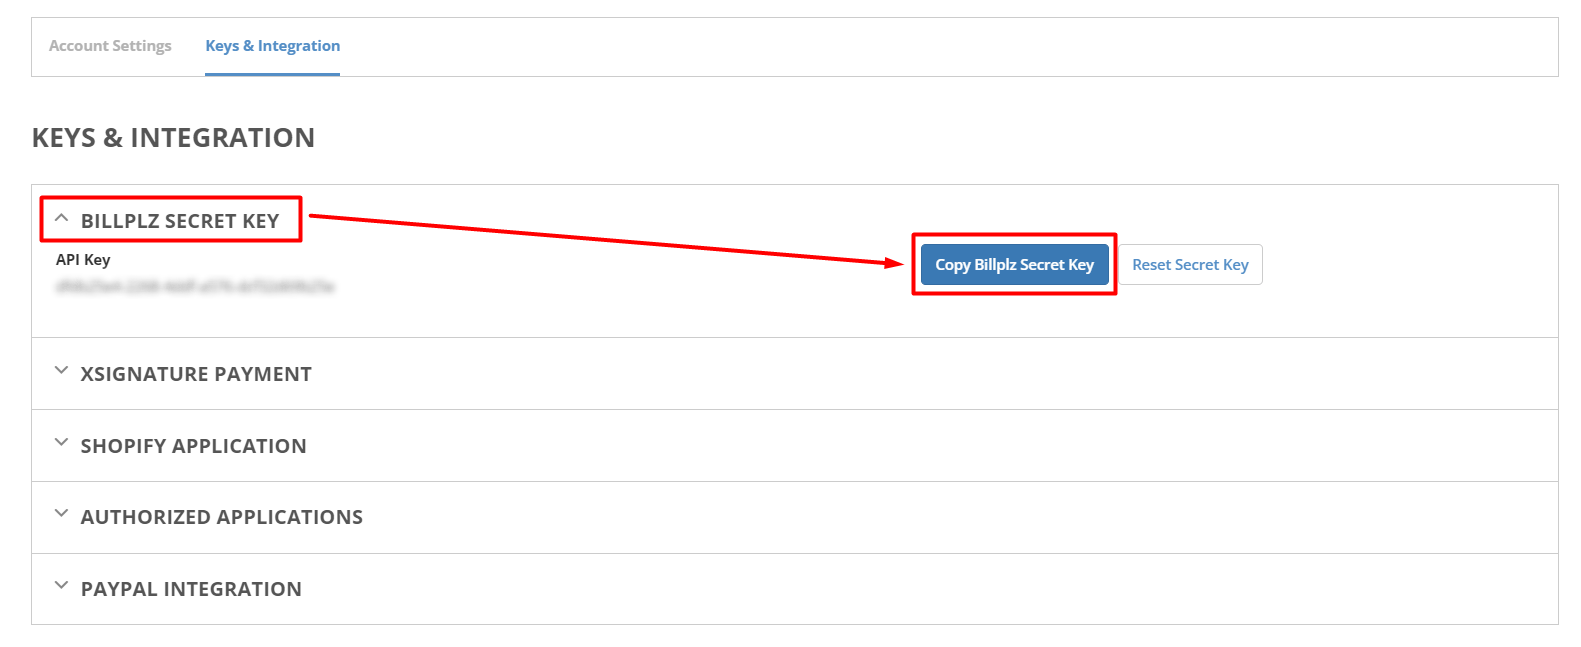
Step 1: Click on your username > choose Settings
Step 2: Under Keys & Integration, click on Billplz Secret Key and Copy Billplz Secret Key button for later use
Part III: Billplz XSignature Key
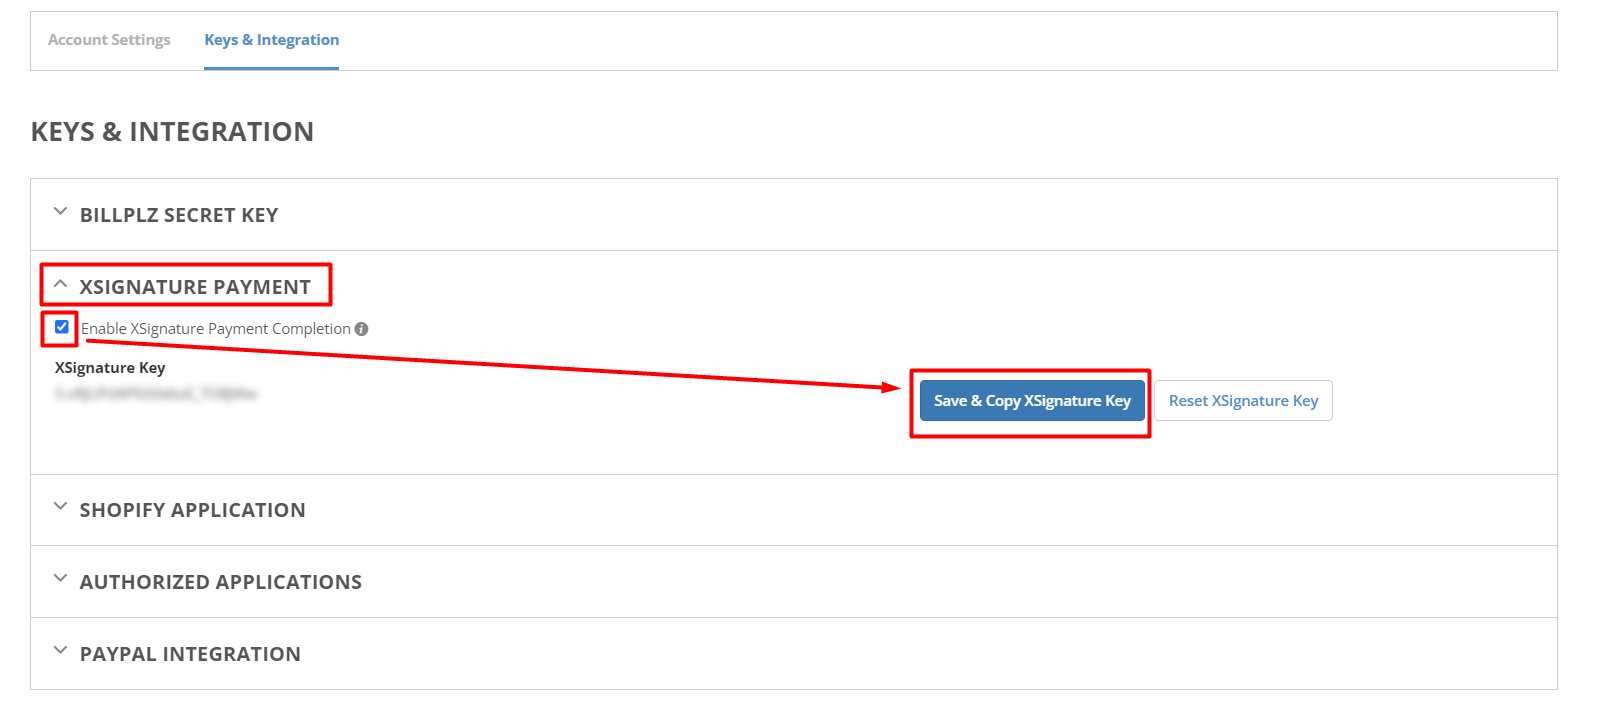
Step 1: Click on your username > choose Settings
Step 2: Under Keys & Integration, click on XSignature Payment > tick the box to enable the XSignature Payment Completion > click on Save & Copy XSignature Key button
3. Set Up Billplz Payment Gateway
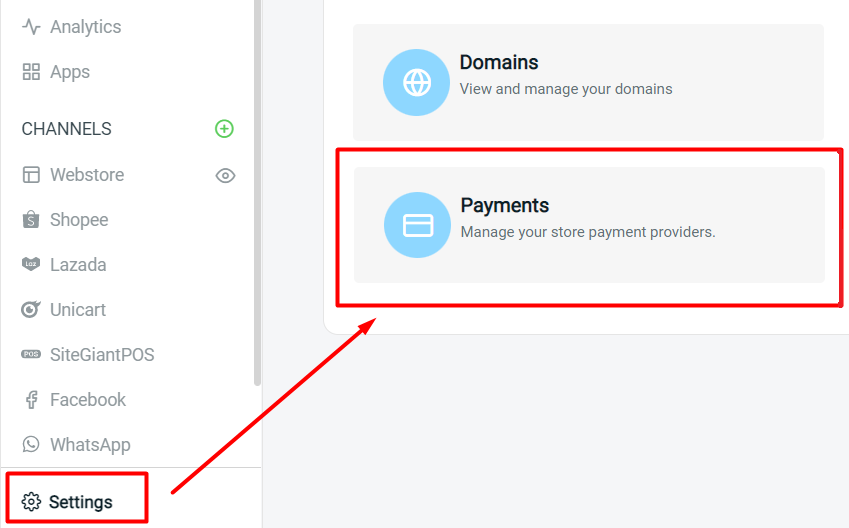
Step 1: Log in to your SiteGiant Seller Center > Go to Settings > Payments
Step 2: Click on + Add Payment Method button > select Billplz > Add Payment Method
Step 3: Fill in the Billplz details
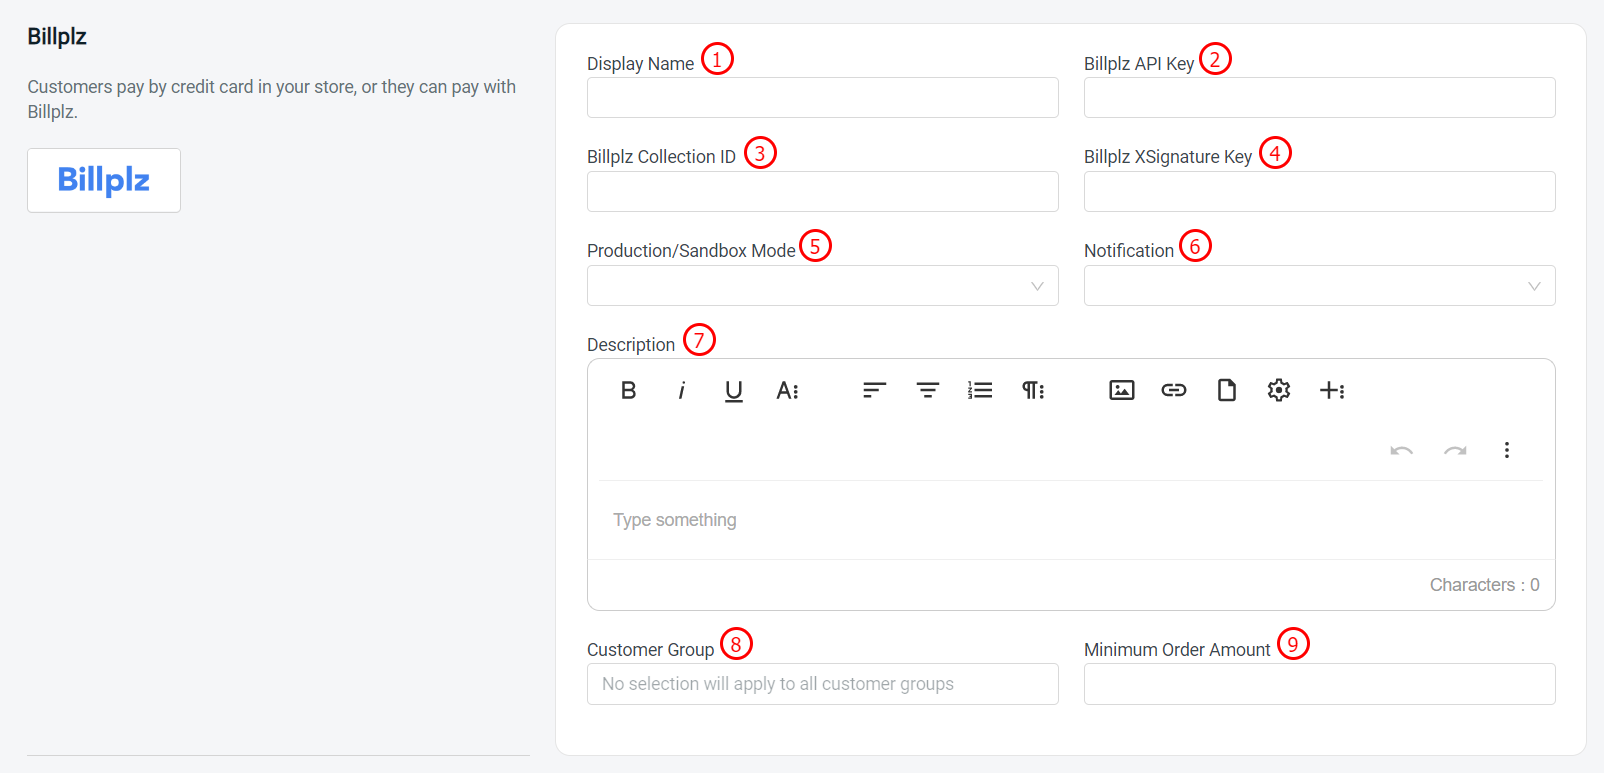
1. Display Name: The payment name to display in the Payment Method during the checkout process
2. Billplz API Key*: API Key that get from Billplz
3. Billplz Collection ID*: Collection ID that get from Billplz
4. Billplz XSignature Key*: XSignature Key that get from Billplz
5. Production/Sandbox Mode: Select 'Production' for the actual live transaction
6. Notification: Choose the notification method
7. Description: Extra information to be shown to the customer during checkout
8. Customer Group: The Customer Group that is applicable for this payment method (if no selection it will apply to all customer groups)
9. Minimum Order Amount: The order amount that needs to be reached to use this payment method
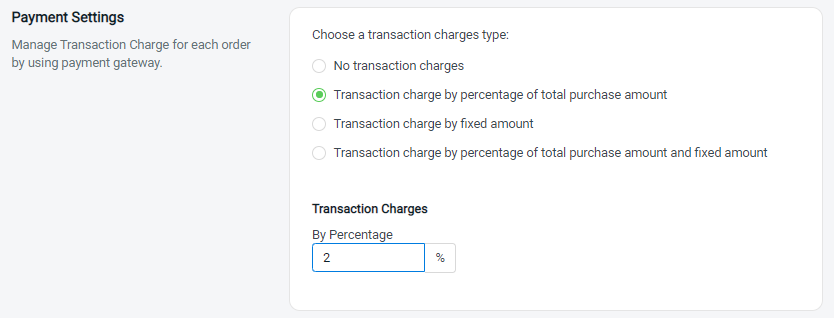
Step 4: You may set extra transaction charges applied to the customer at the Payment Settings (optional)
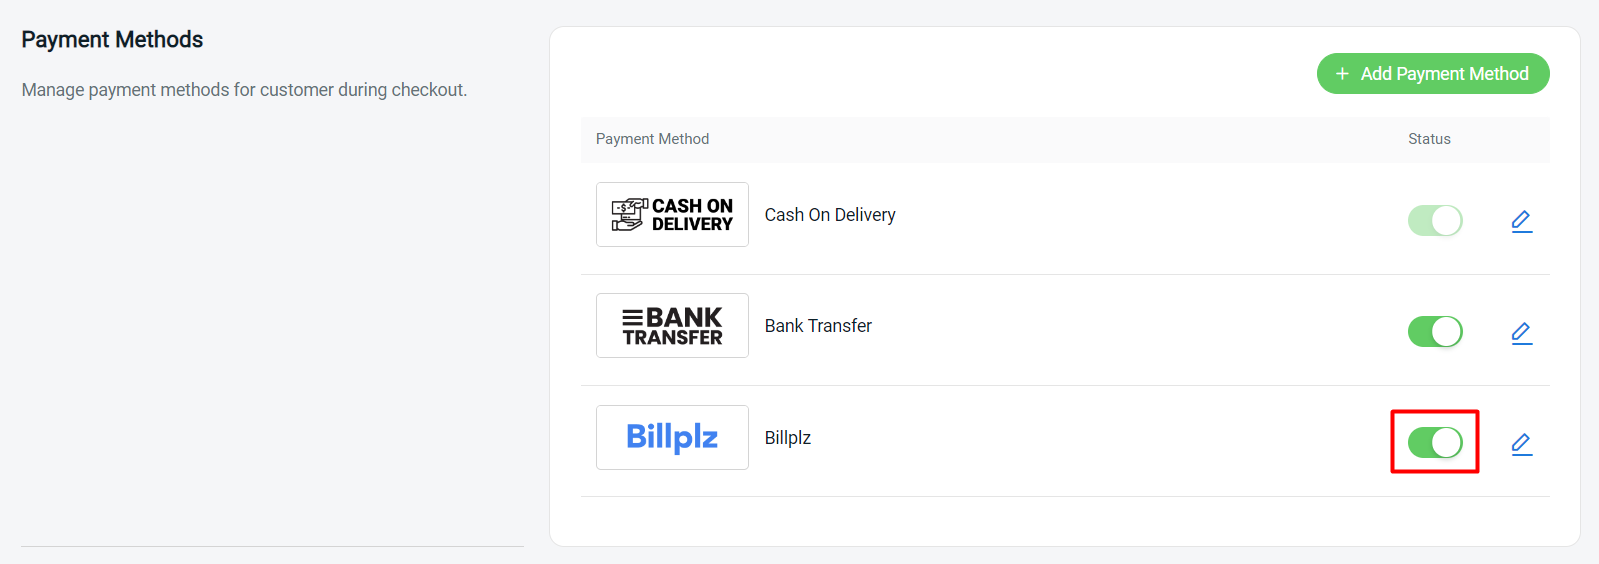
Step 5: Once done, click on the Add button at the top right corner > make sure the status of Billplz is enabled
Step 6: Back to dashboard and Clear Cache to see the changes on your Webstore.
4. Test Checkout Via Billplz (From Customer Perspective)
Step 1: You are highly recommended to try checkout on your Webstore to ensure the payment method is working as expected

Step 2: If the page is redirecting to the Billplz payment page, then you are successfully integrated with Billplz