1. Introduction
2. Arrange Shipment
3. Print Shipping Label
1. Introduction
When your customers place orders in your webstore and other channels, you will have to arrange shipment and ship it to customers by courier services. Now, you can fulfil webstore and others orders and print Shipping Label, Packing List, or Invoice based on the customizable settings in one place from SiteGiant!
📌Note: Before fulfill orders, please configure shipping label settings to integrate with courier services and customize the template of shipping label, packing list and invoice.
2. Arrange Shipment
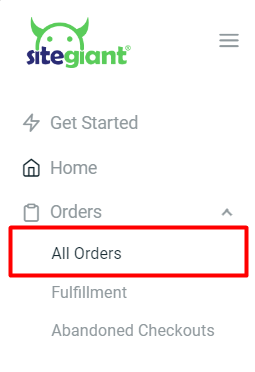
Step 1: Navigate to Orders > All Orders
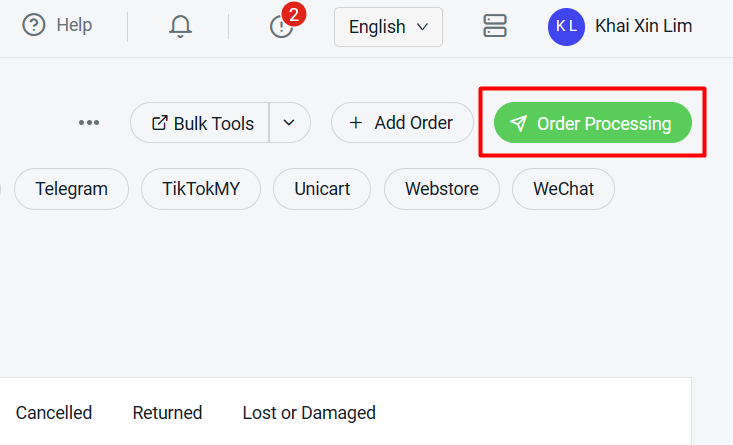
Step 2: Click on the Order Processing button
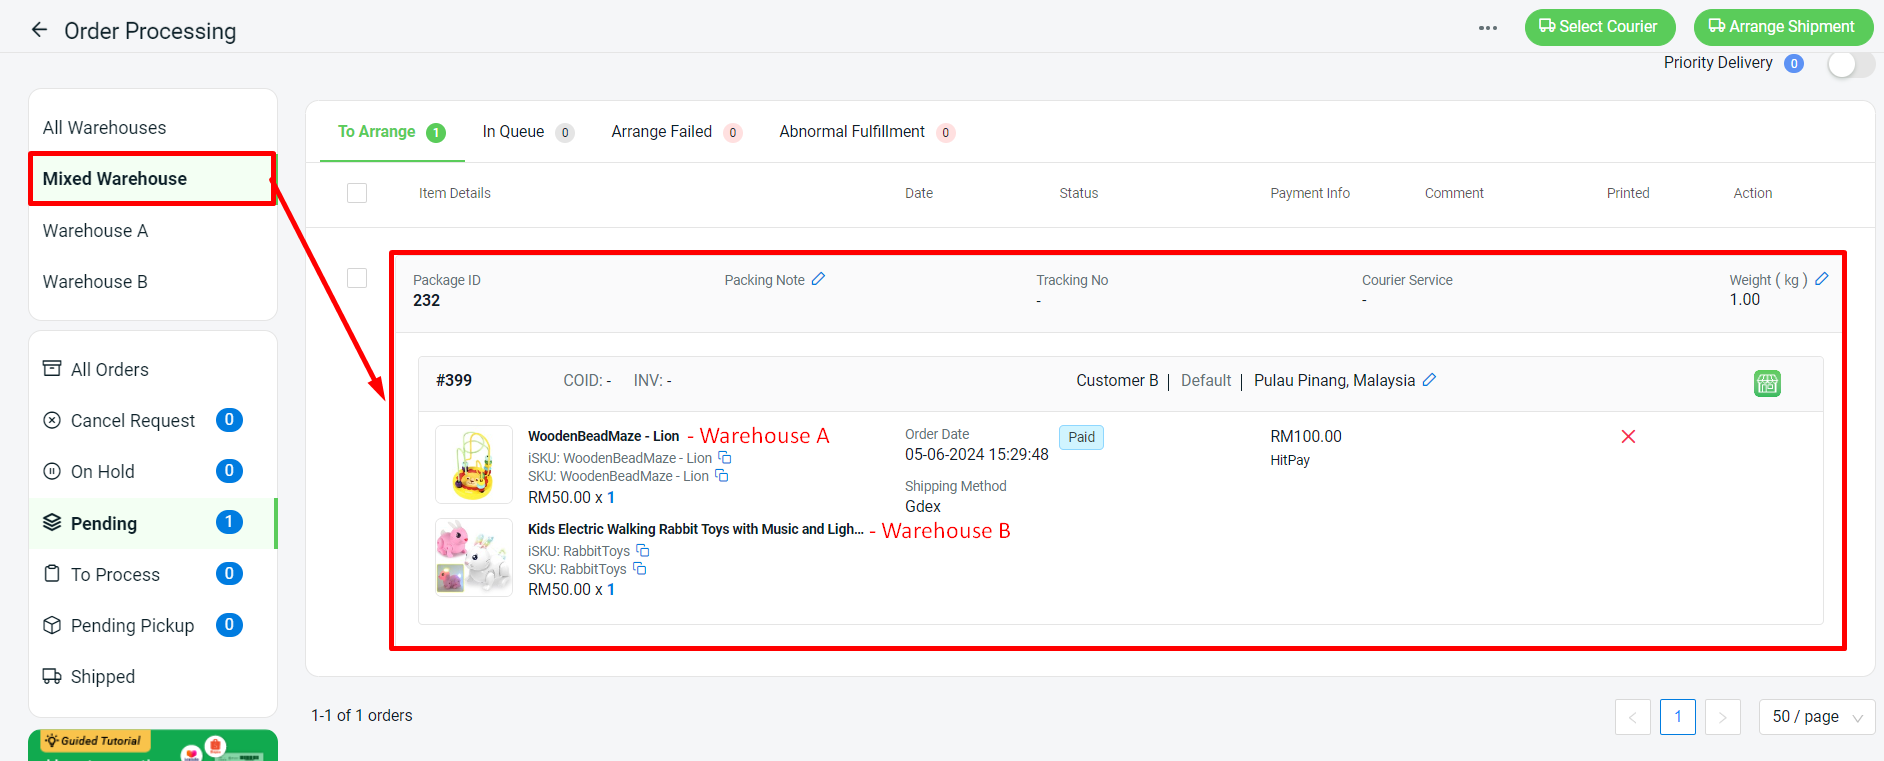
Step 3: Select Webstore and others > click Warehouse.

1. All Warehouse: It will include all orders, including those with no links item. However, once the item has been linked, it will appear under the relevant Warehouse tab as well. 2. Mixed Warehouse: It is for webstore orders. If an order has two items, one from Warehouse A and one from Warehouse B, the order will appear under this tab.3. Individual Warehouse: Individual warehouse will appear based on your Warehouse setting update. Learn more on How to Create Warehouse. Order will appear based on your default warehouse from the Sales Channel setting or Webstore Warehouse setting. If the webstore order has 1 item located in all warehouses(Warehouse A and Warehouse B), it will appear at the first warehouse that is set from webstore warehouse. Sales Channel Setting You can go to Setting > Sales Channel > Authorized Channel > Click Gear button on the related marketplace.
Webstore Warehouse Setting You can go to Webstore > Preferences > Webstore Settings section.
📌Note: The Warehouse Section will only appear if a merchant has set up two or more warehouses. It enables merchants to process orders according to warehouse location. If you only have one warehouse, proceed to Step 2, as the warehouse section will not appear on the page.
 3. Individual Warehouse: Individual warehouse will appear based on your Warehouse setting update. Learn more on
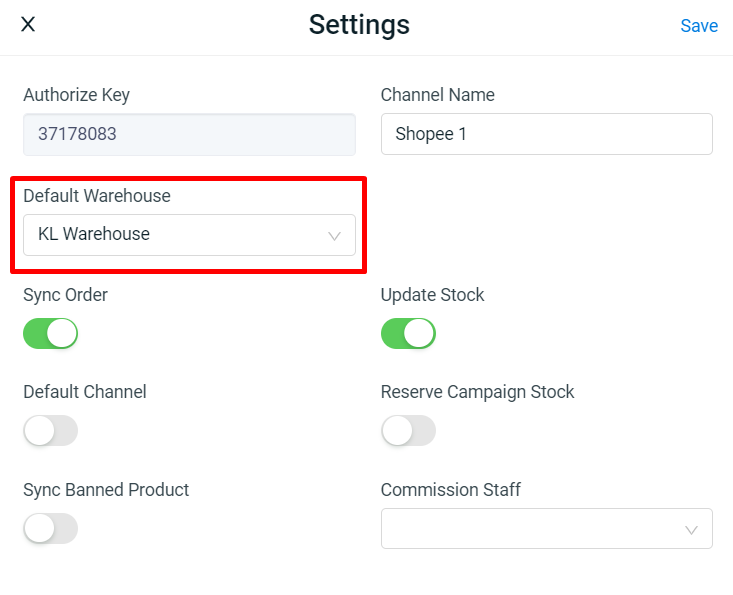

Step 4: Go to Pending > To Arrange tab > Select Courier.
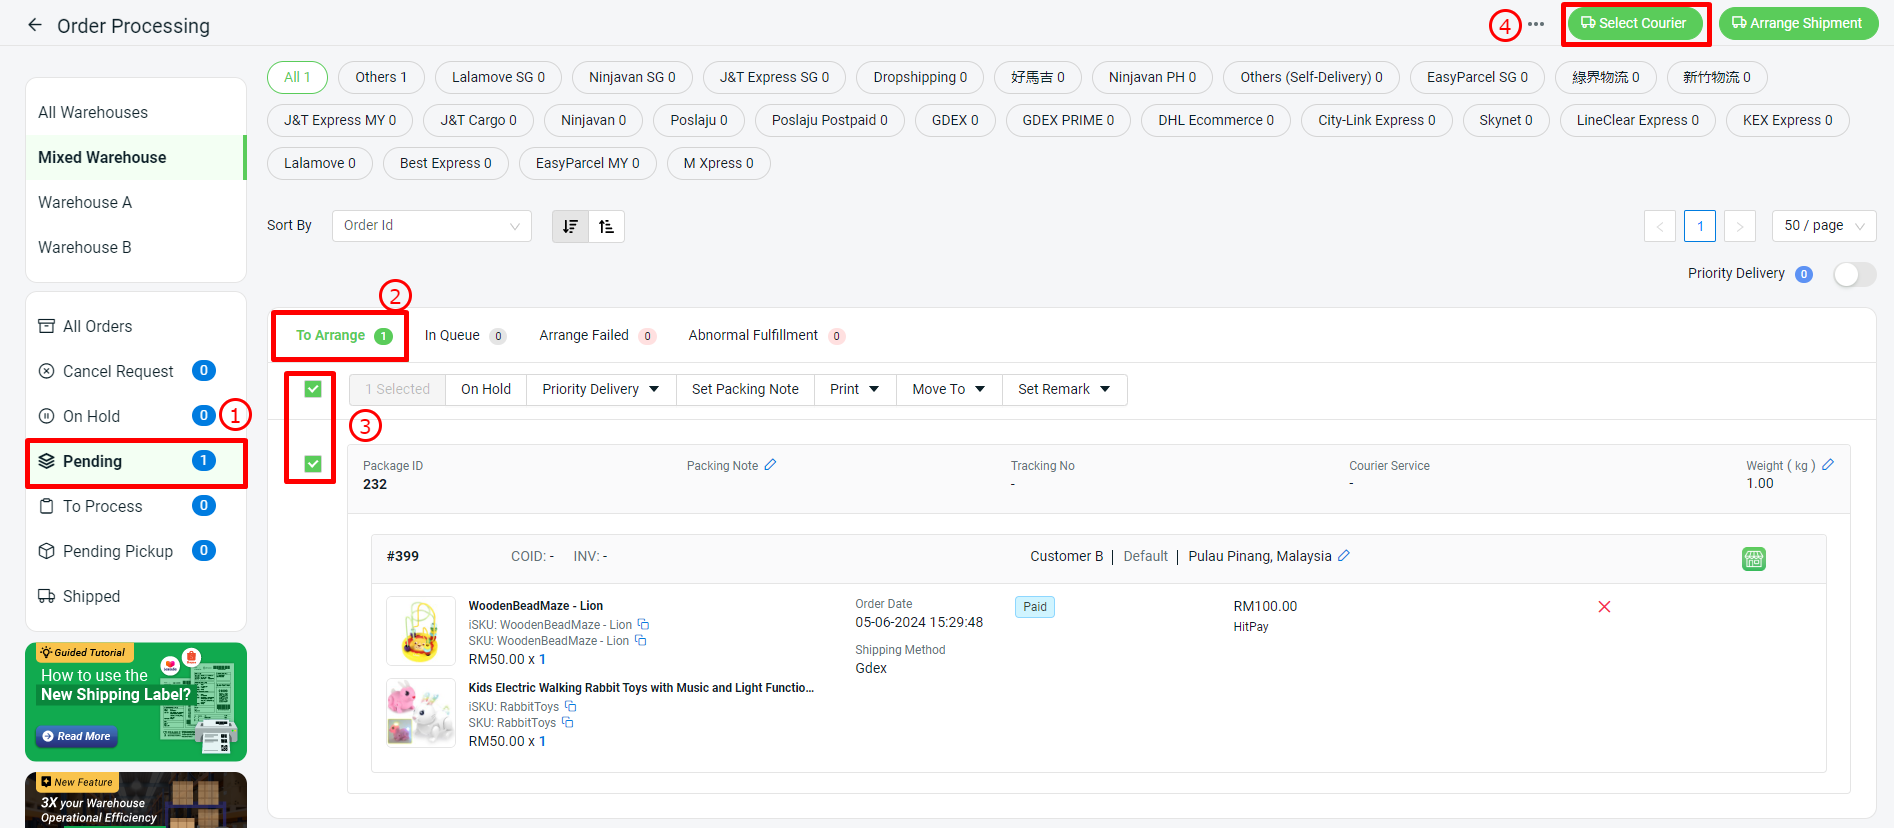
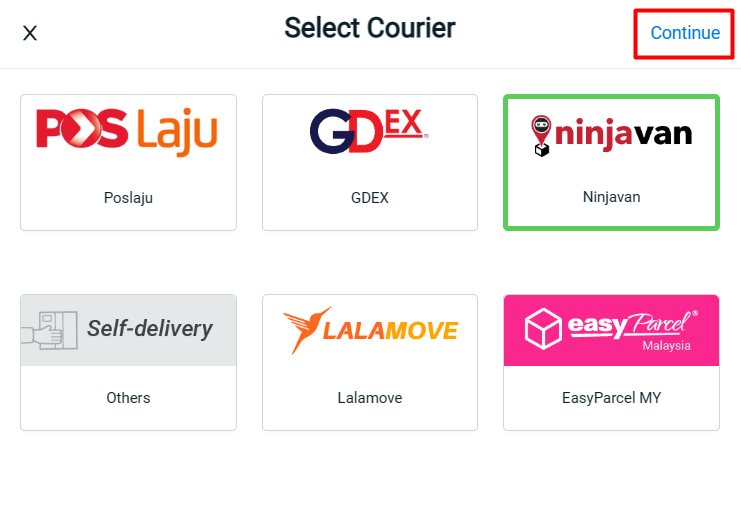
Step 5: Select the courier > Continue
Step 6: Select the order(s) again > click on Arrange Shipment button
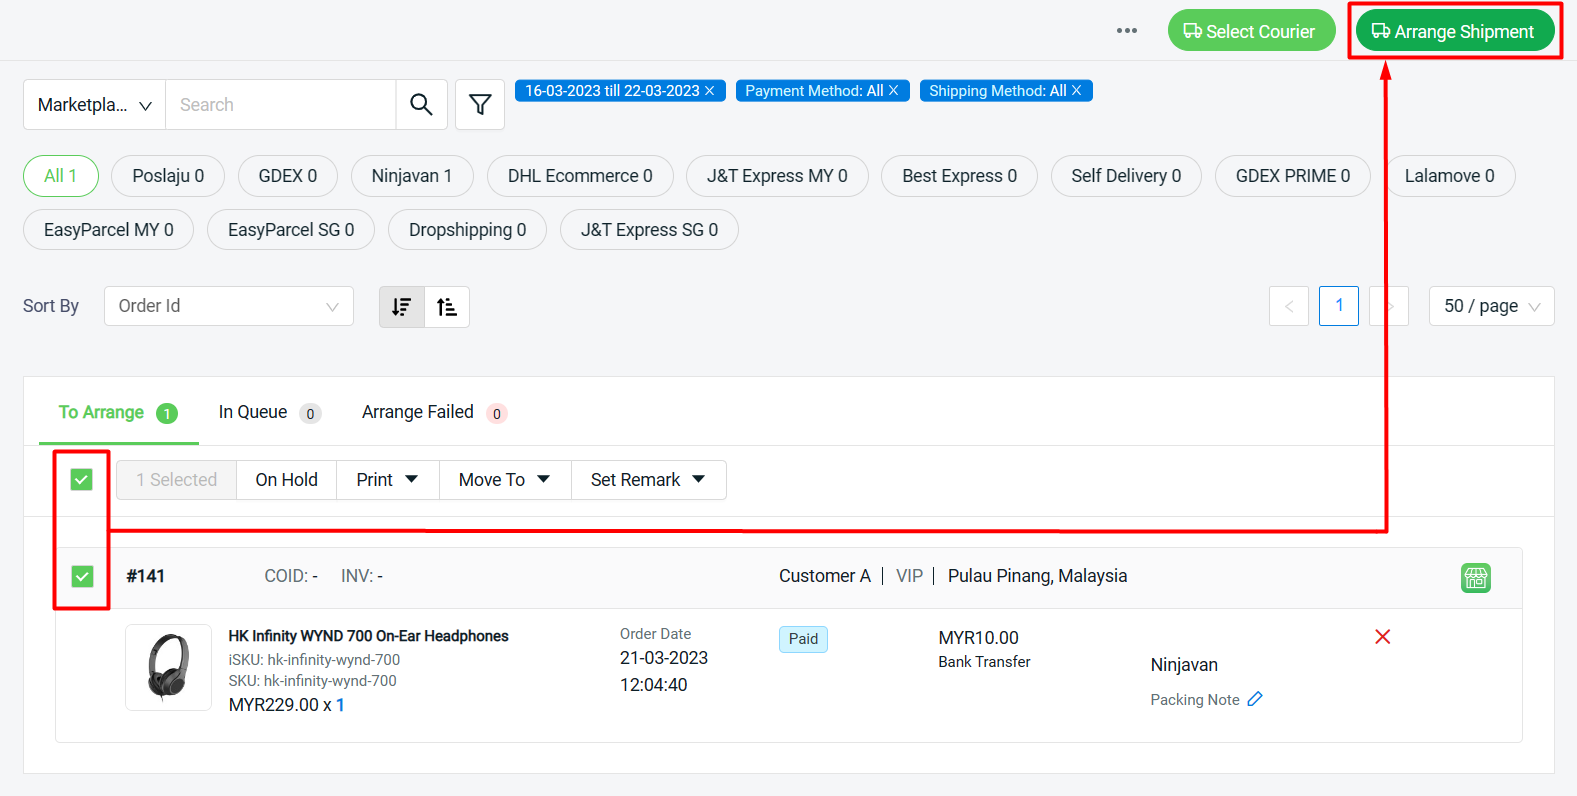
📌Note: Only order(s) with the same courier can arrange shipment together.
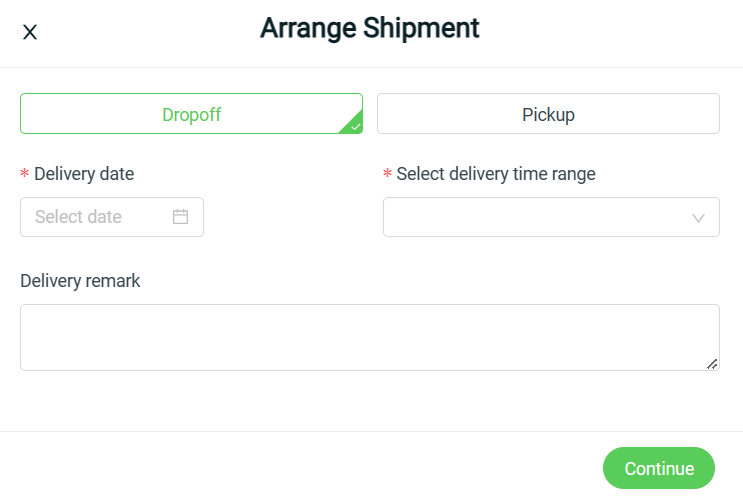
Step 7: Select Arrange Shipment Options for selected courier service e.g. Dropoff or Pickup, Delivery Date & Time Range etc. > Continue
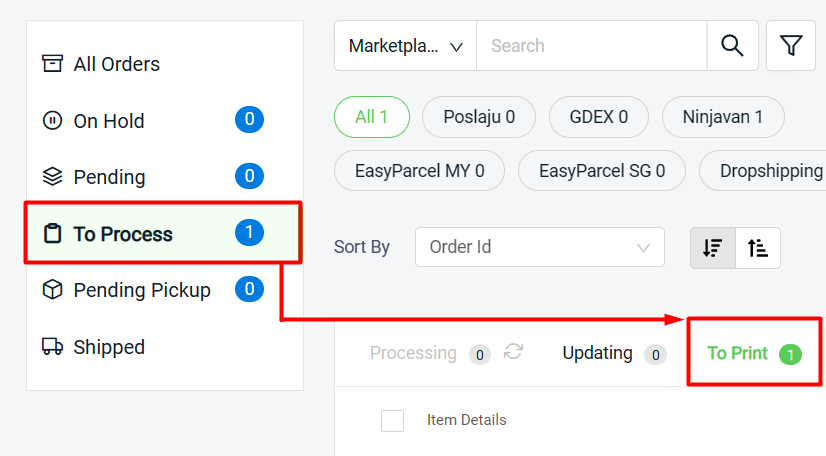
Step 8: The order will be in In Queue tab and will move to To Process once it is arrange successfully
3. Print Shipping Label
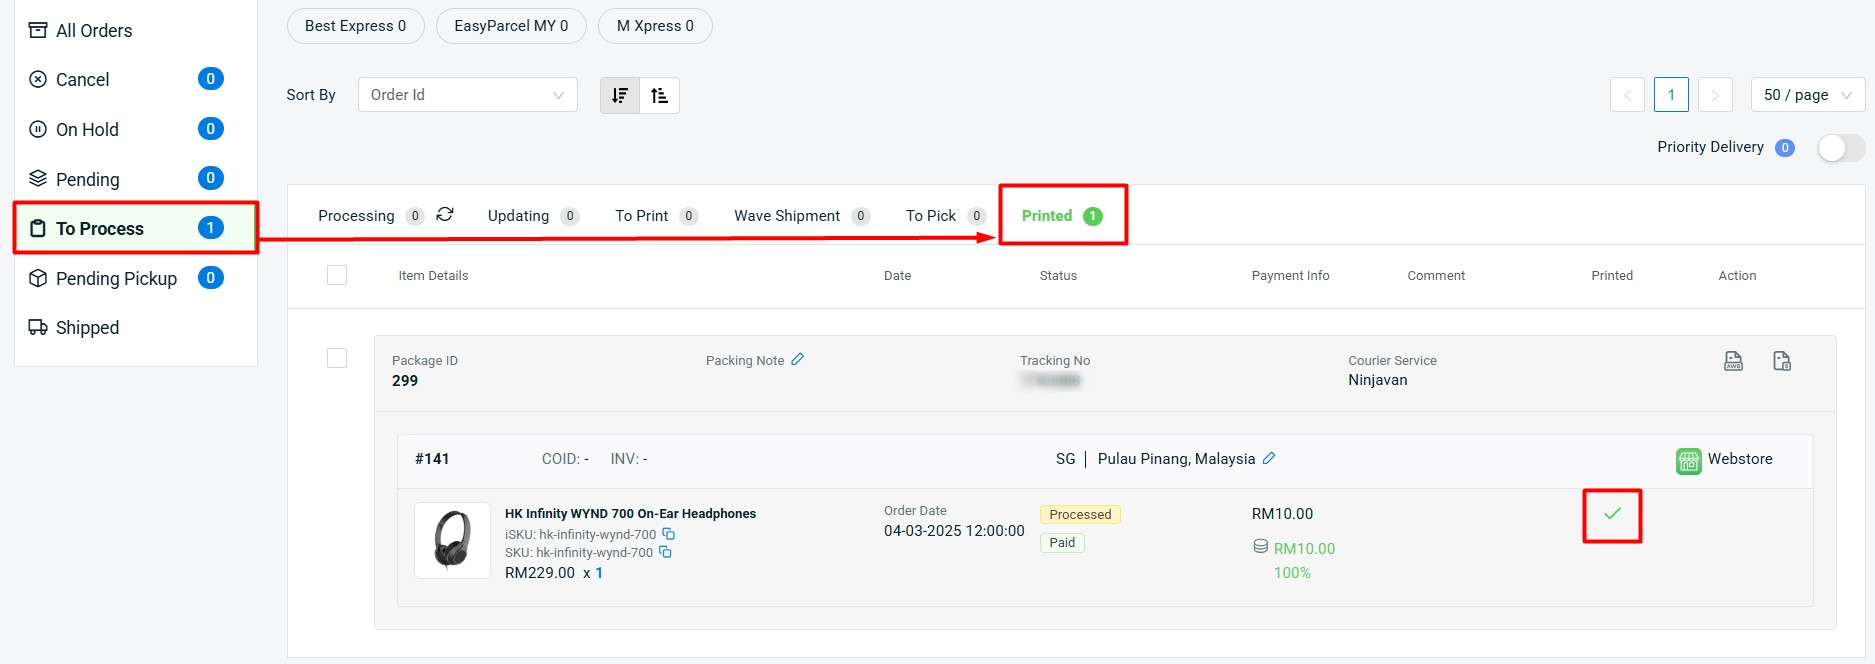
Step 1: Go to To Process > To Print tab
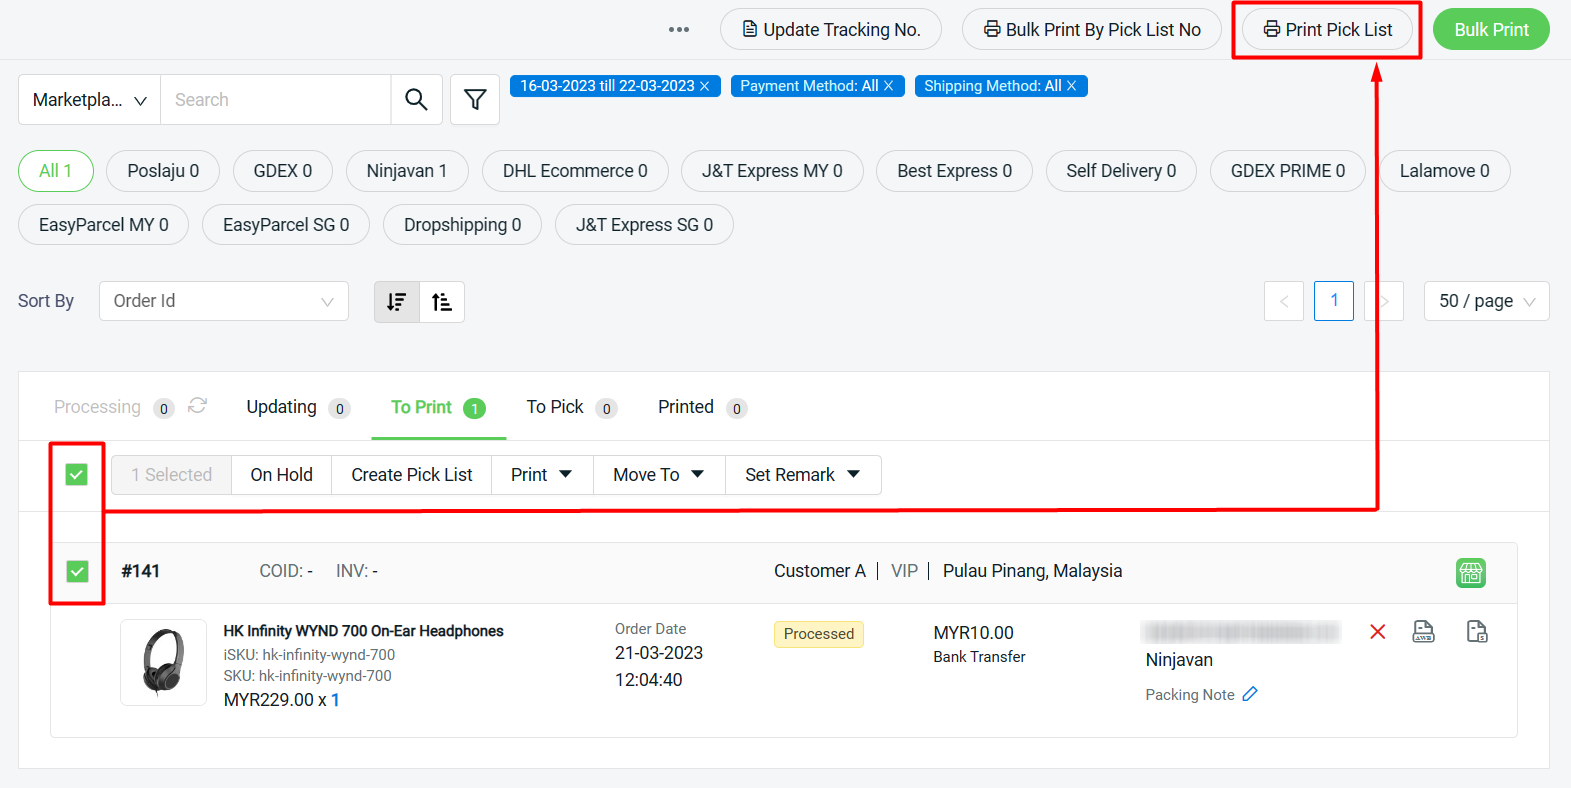
Step 2: You may select orders and print Pick List before printing out the shipping label (optional)
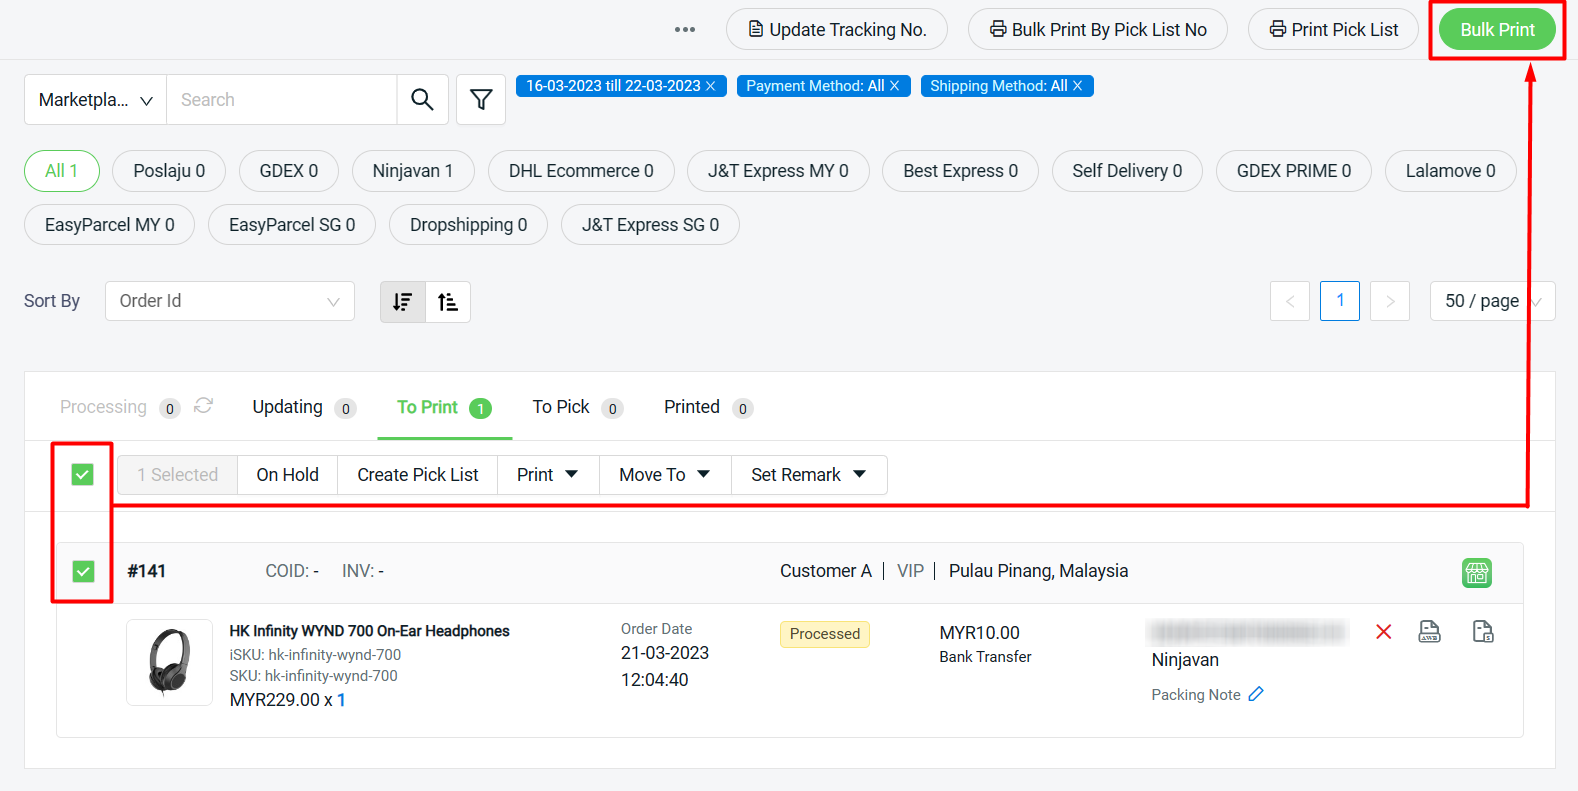
Step 3: Select the order(s) > click on Bulk Print button to print the shipping label
Step 4: Click on Print button from the preview page to print out the shipping label
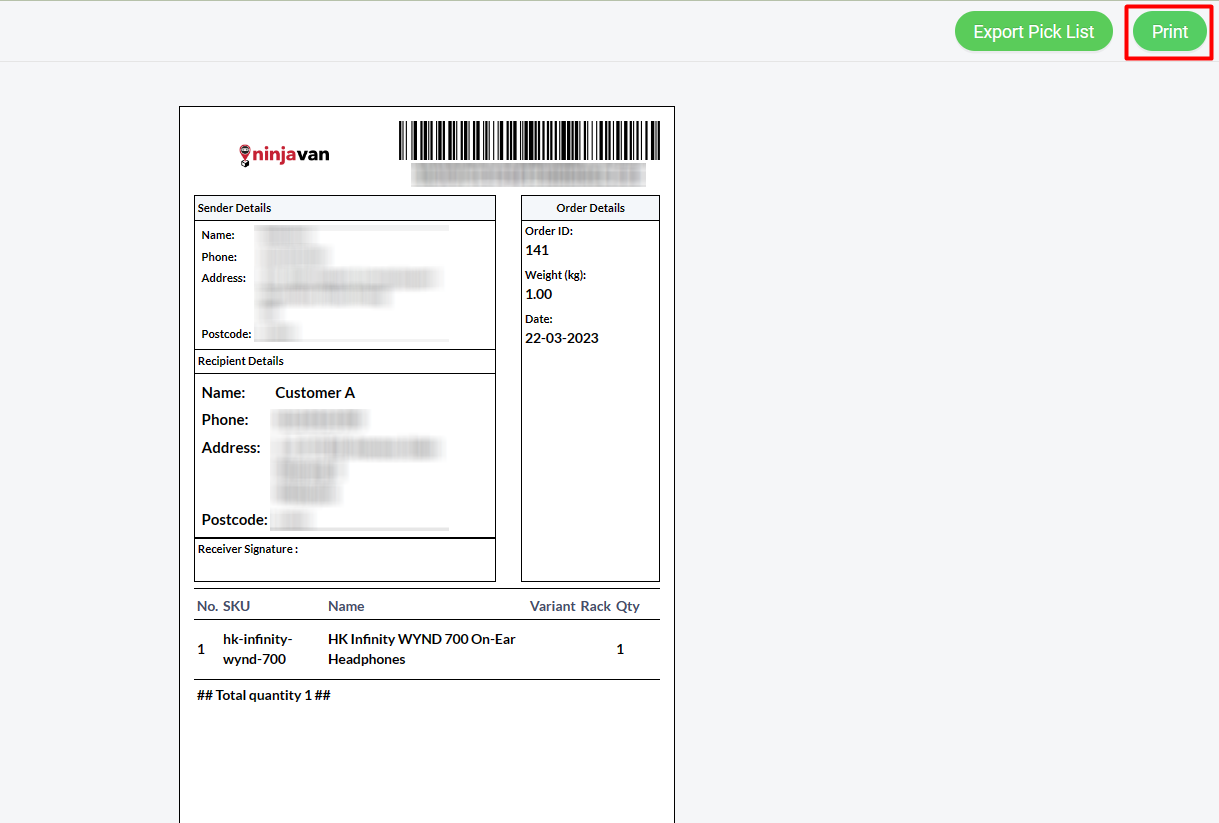
Step 5: The printed order(s) will move to To Process > Printed tab
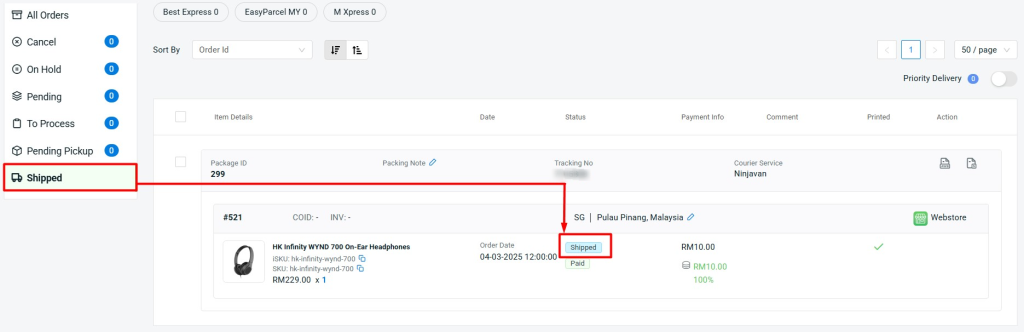
Step 6: Once the parcel has been shipped out, you may select the order(s) > Move To > Shipped > Move Package.
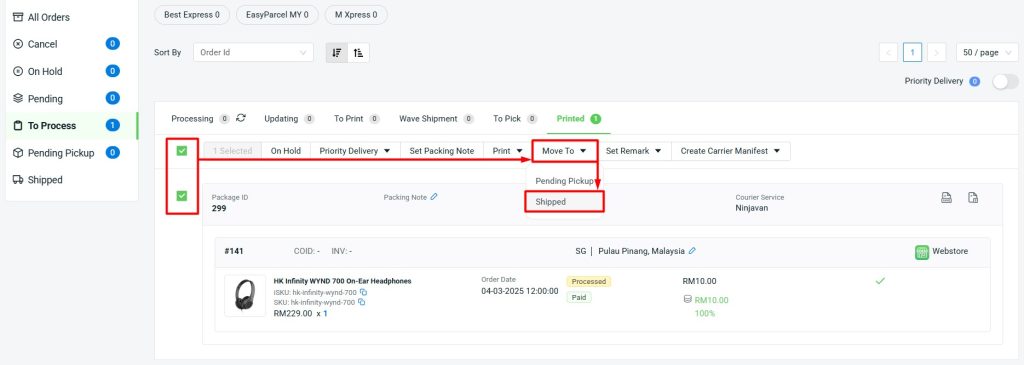
Step 7: The order(s) will move to Shipped tab with Shipped order status.