1. Introduction
2. Carrier Manifest Settings
3. Add Carrier Manifest
4. Add Carrier Manifest in Order Processing (Alternative)
5. Print Carrier Manifest
6. Additional Information
1. Introduction
Have you ever faced situations whereby you shipped out orders with cancelled status? Or you might have accidentally delivered the orders twice without knowing?
No worries, Carrier Manifest is now able to reduce your business loss by counter-checking your marketplace order statuses before sending them out for delivery and by keeping a record of all your shipped-out orders.
2. Carrier Manifest Settings
Step 1: Navigate to Orders > Fulfillment > Carrier Manifest.
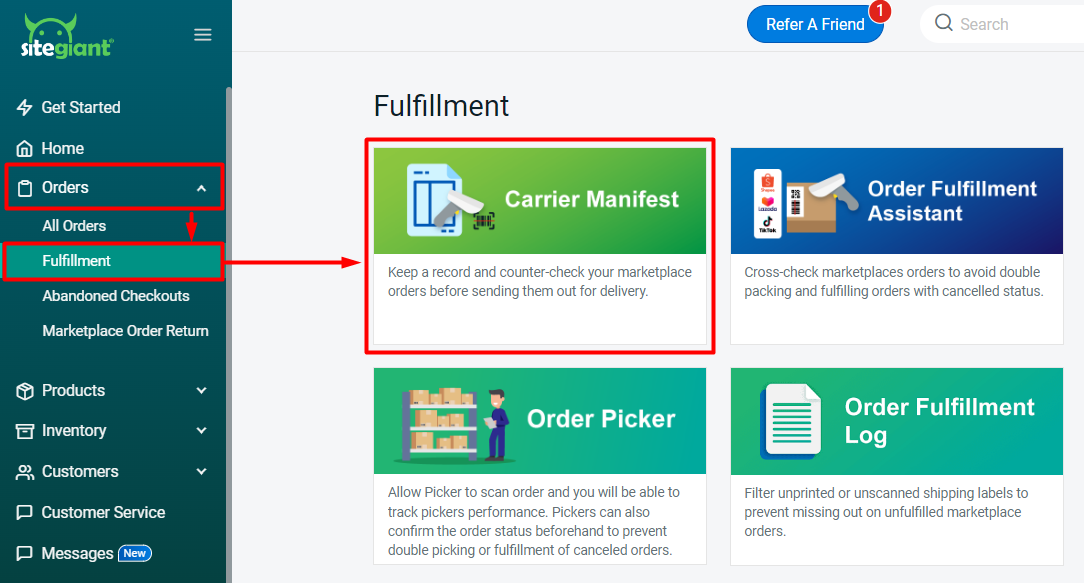
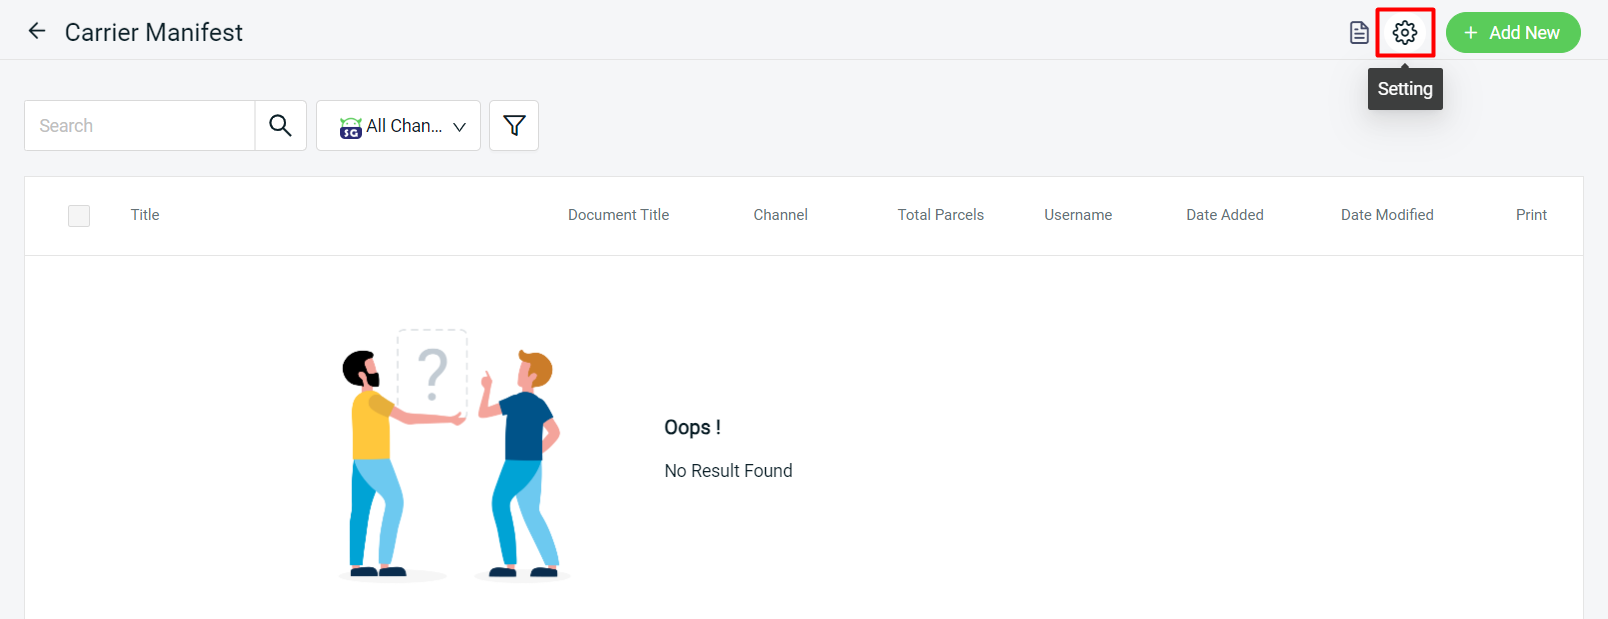
Step 2: Click on the Setting icon to configure the settings.
Step 3: Configure the settings based on your preferences > Save.
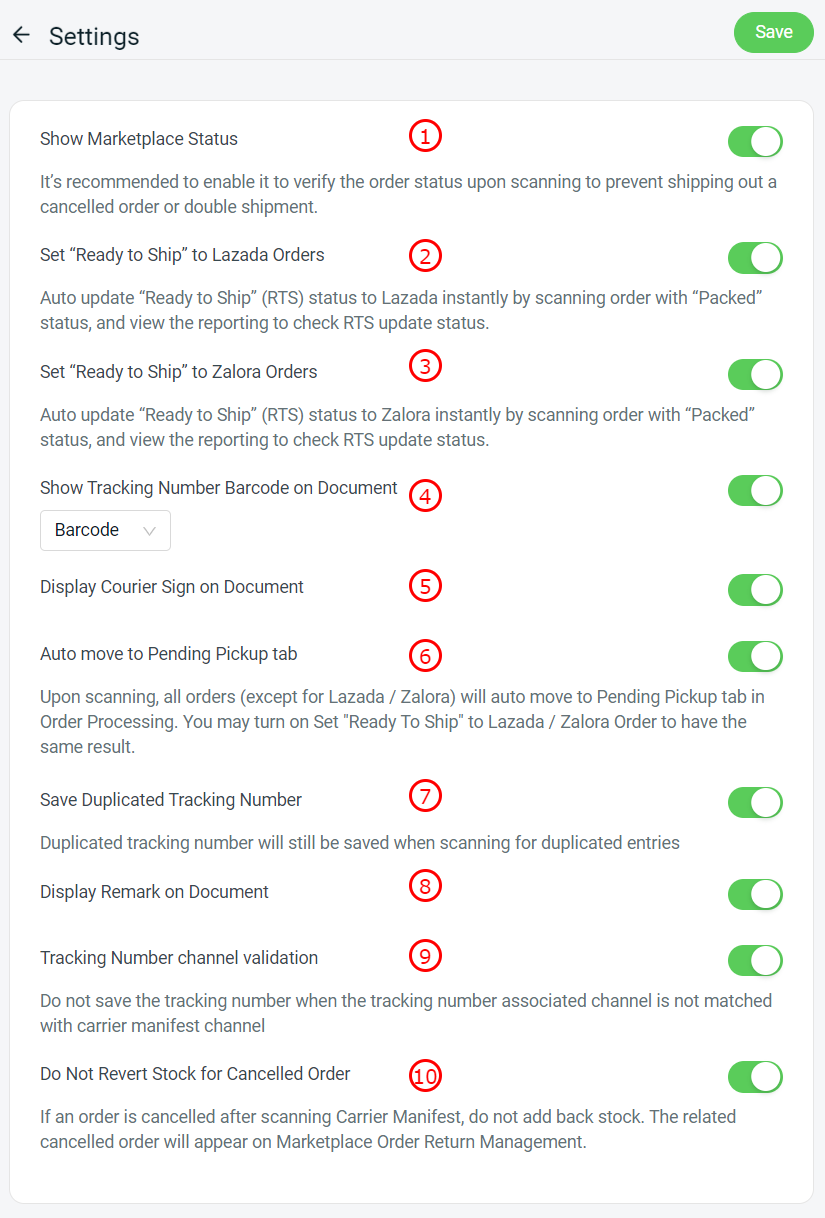
1. Show Marketplace Status: When enabled, the order status like Ready to Ship, Completed or Cancelled would be shown upon scanning.

2. Set "Ready to Ship" to Lazada Orders: Auto update Lazada order status from "Packed" to "Ready To Ship" status when scanning the order.

3. Set "Ready to Ship" to Zalora Orders: Auto update Zalora order status from "Packed" to "Ready To Ship" status when scanning the order.

4. Show Tracking Number Barcode on Document: Choose whether to show Barcode or QR code beside the tracking number when printing out the Carrier Manifest.

5. Display Courier Sign on Document: Add a signature section under the Carrier Manifest for the courier person to sign upon handling the parcels.

6. Auto move to Pending Pickup tab: Auto move all orders (except for Lazada and Zalora)to pending pickup when scanning the order.

7. Save Duplicated Tracking Number: If you disable the button, it will not save duplicated tracking numbers scanned previously within the same list and will prompt an alert with a beep sound.

8. Display Remark on Document: The remark that you are entering when created carrier manifest will appear during printing.

9. Tracking Number channel validation: By enabling the button, it will not save the tracking number in carrier manifest if selection of  sales channel couriers is not same as inside your order details.

10. Do Not Revert Stock for Cancelled Order: By default, the system will deduct stock when an order is cancelled after scanning the carrier manifest. By enabling the button, stock will not be updated automatically, and the cancelled order will appear in Marketplace order return management.
3. Add Carrier Manifest
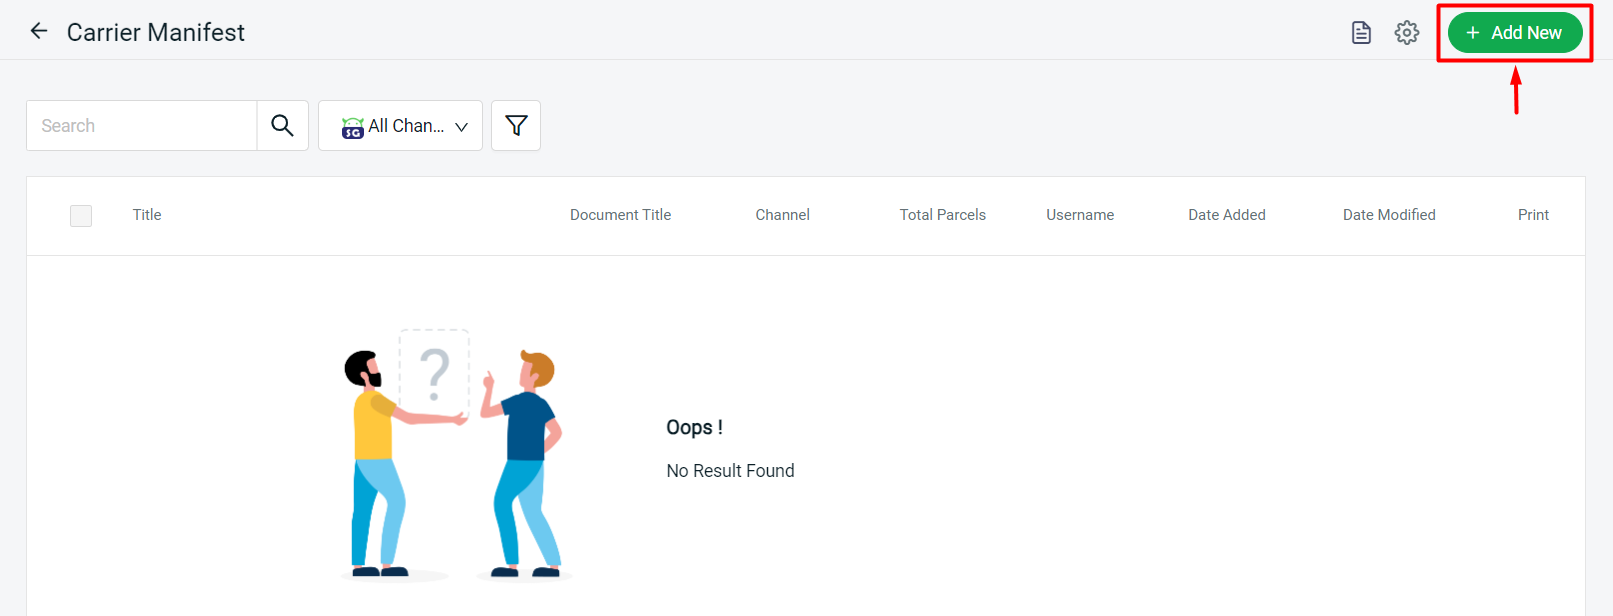
Step 1: Click on + Add New to create a new Carrier Manifest.
Step 2: Fill in the Basic info such as Title, Document Title, and Date > select the Channel and Courier Company > click on Start Scan below to start scanning your shipping label.
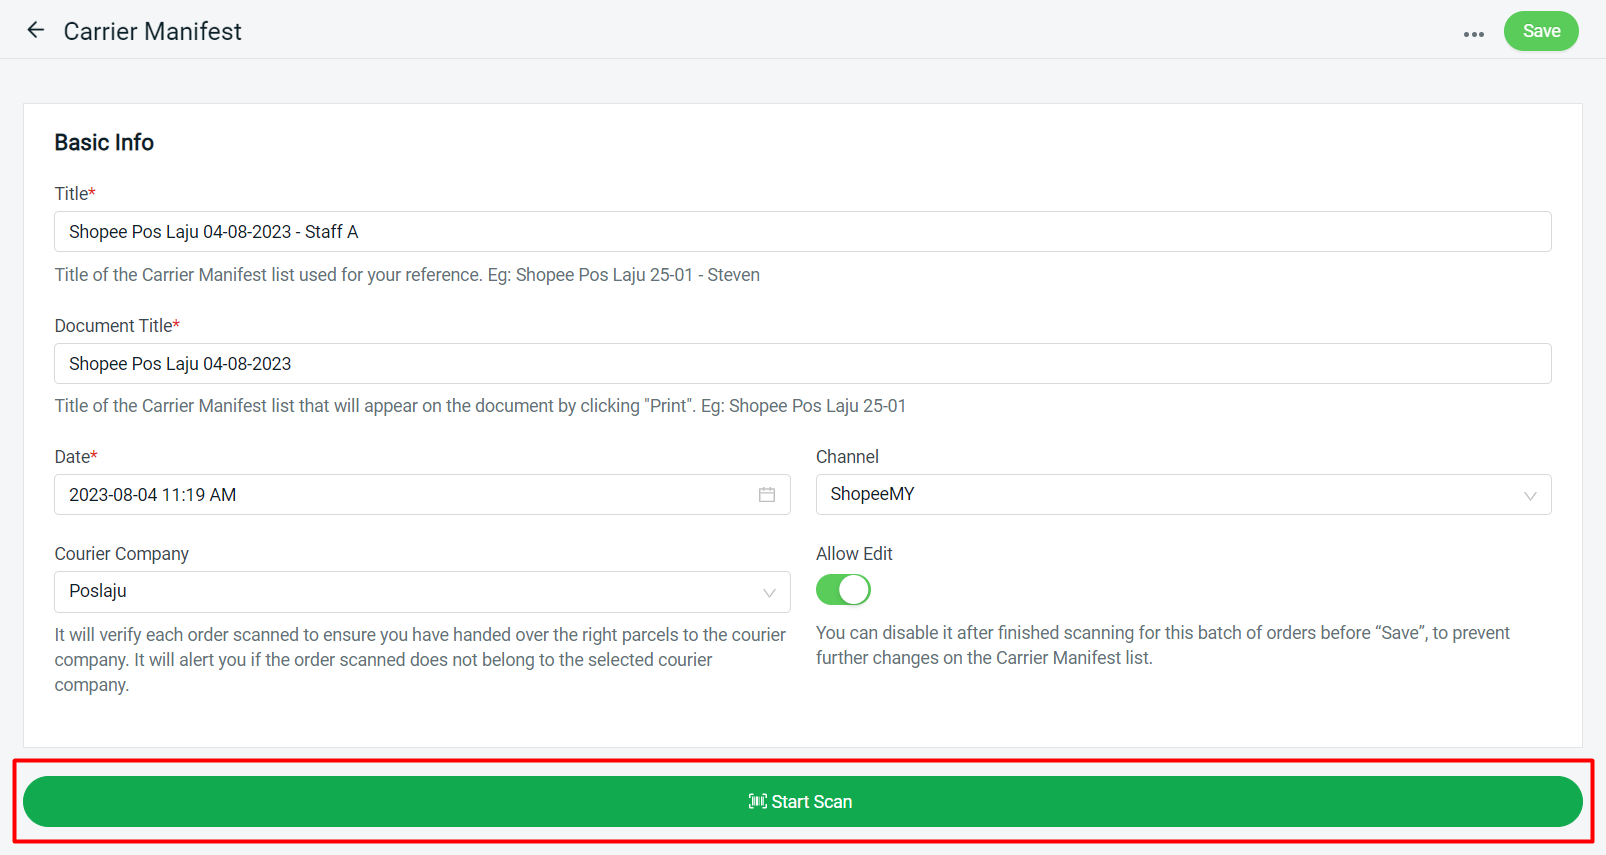
Step 3: The following section will appear and you may start to scan the tracking number on your shipping label. If you don’t have a barcode scanner, you can also enable Typing to type the tracking number manually. Enable Delete if you wish to remove the scanned tracking number from the list.

Step 4: Once you scan or type the tracking number, it will be listed below and the status of your order will be displayed.
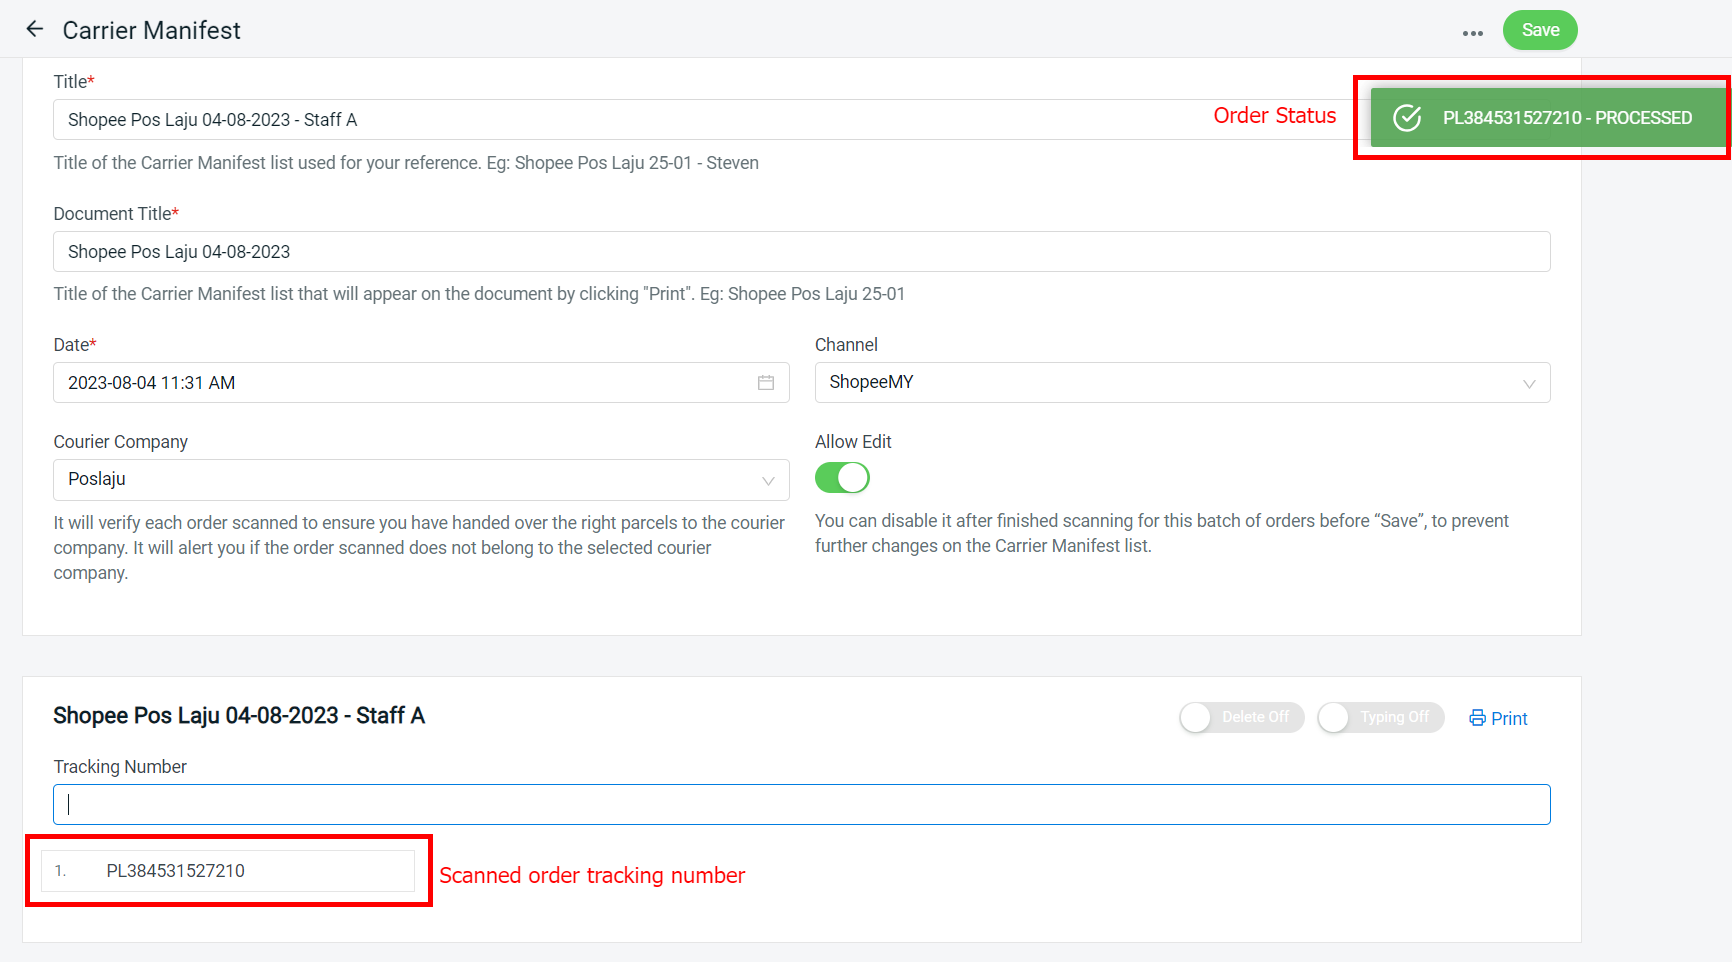
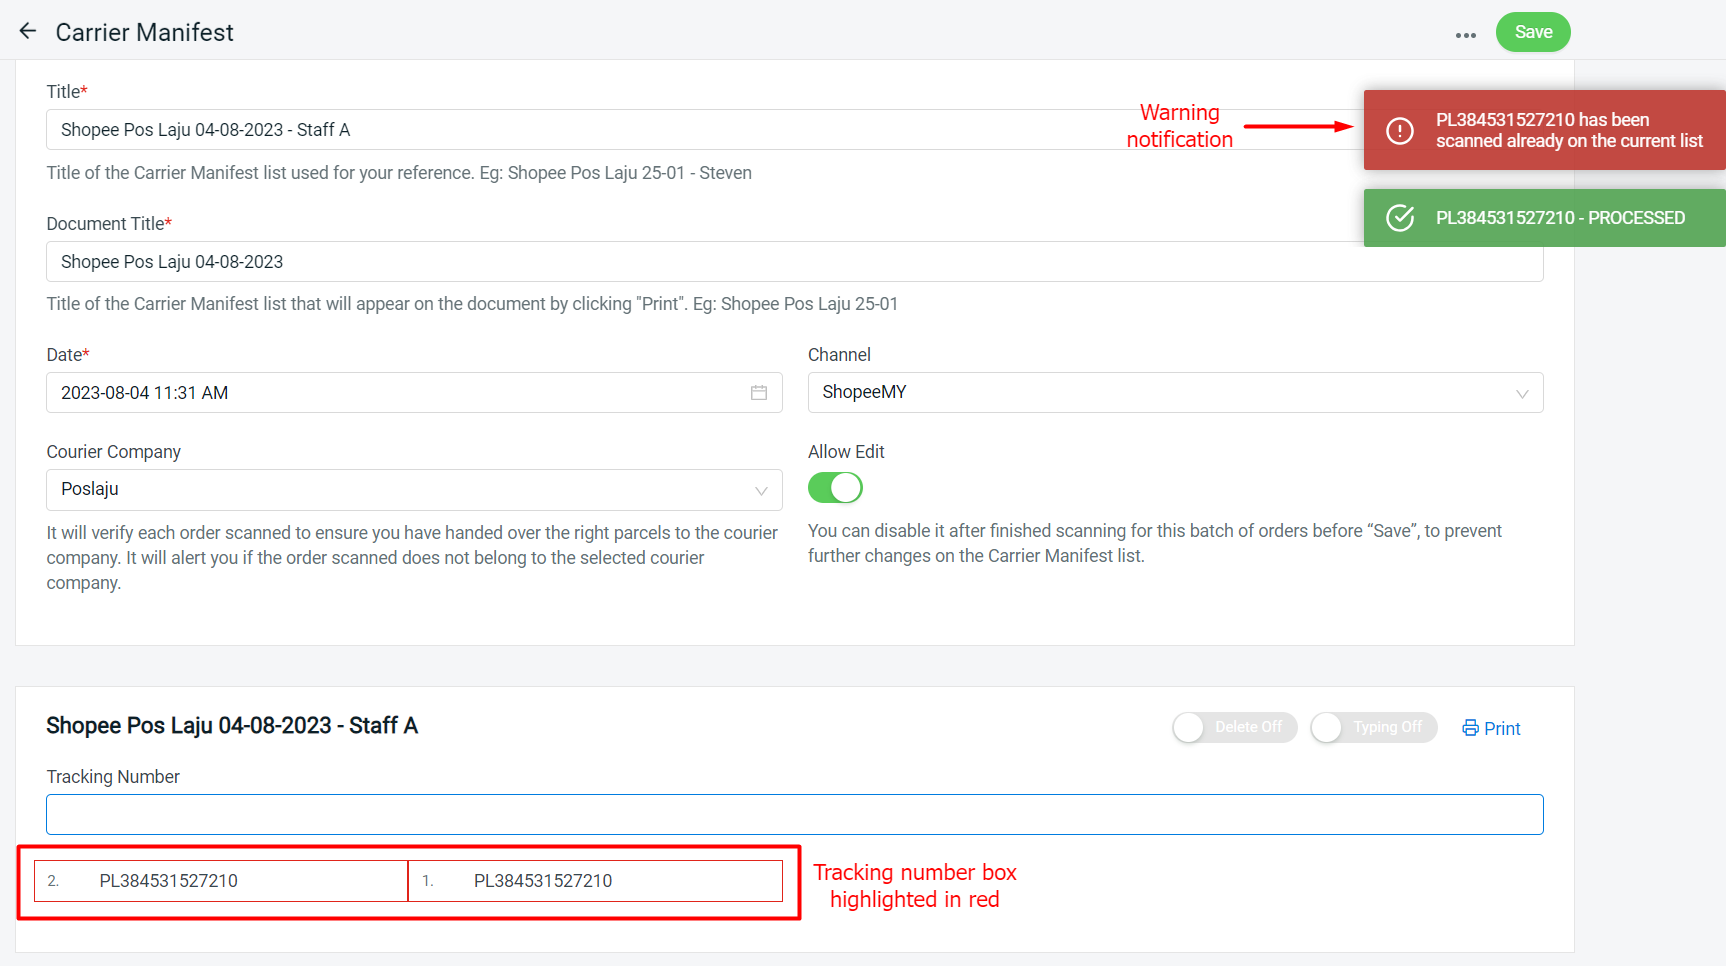
Step 5: When the order is scanned twice or more, a notification will pop up and inform you of a duplicated order.
Step 6: If the order has already been cancelled, the following status will pop up.
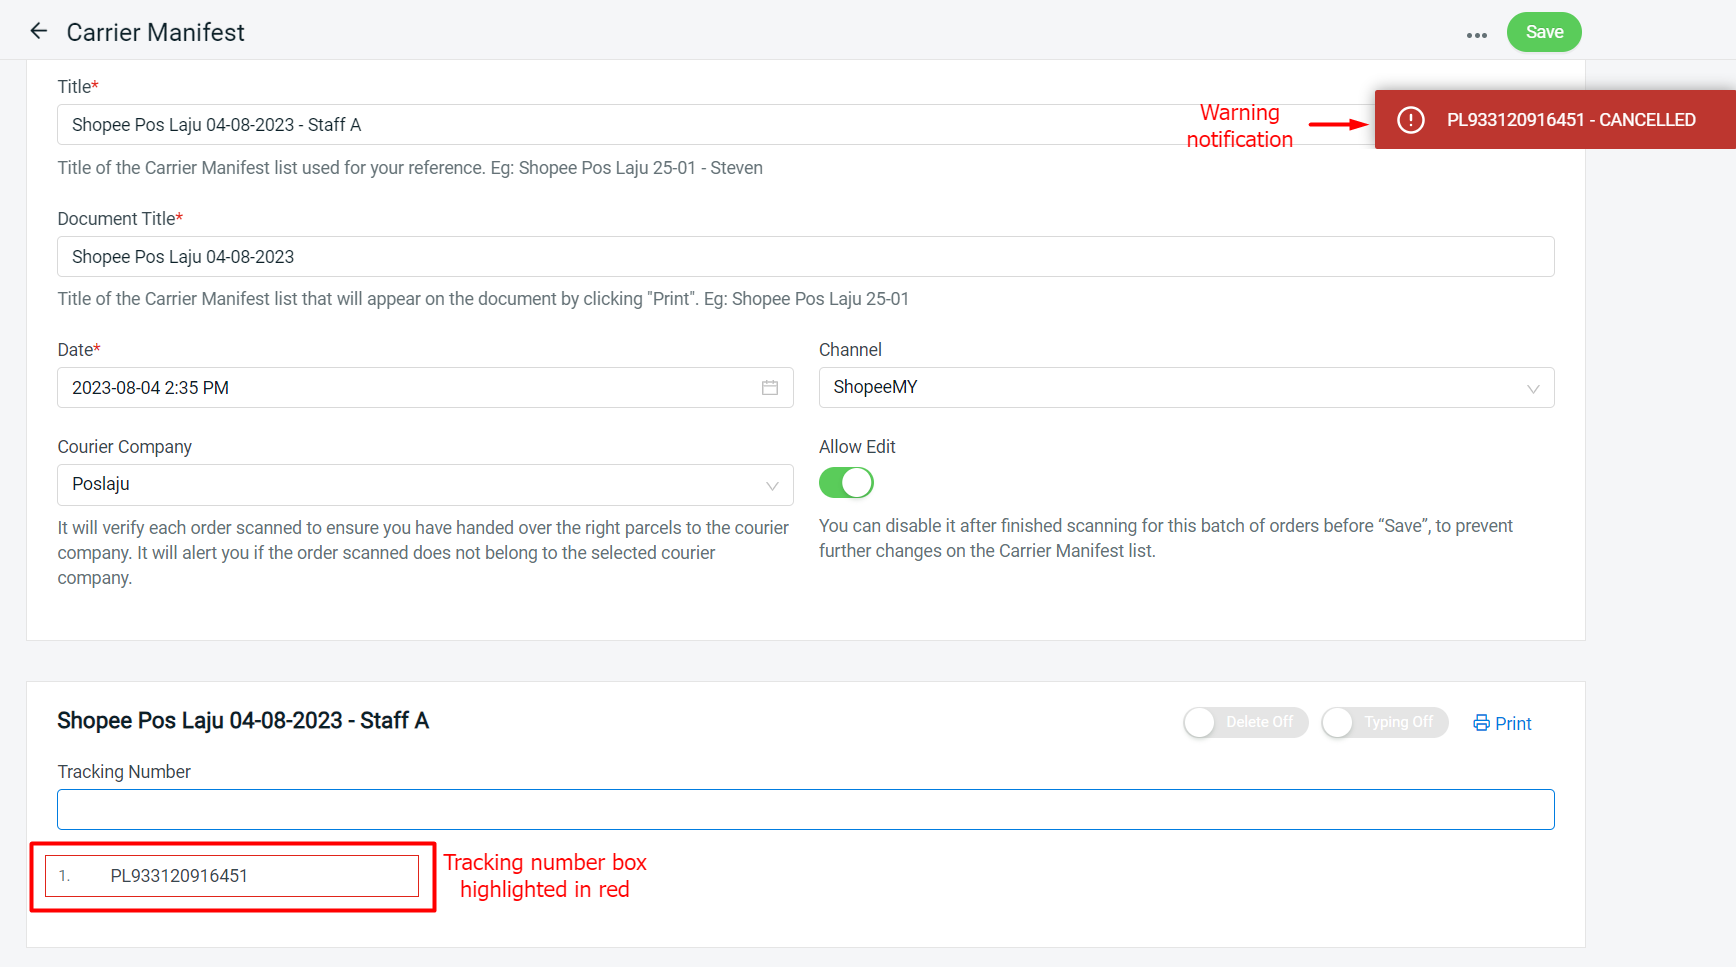
Step 7: If the tracking number scanned does not belong to the selected courier company, then the system will prompt an error warning message.
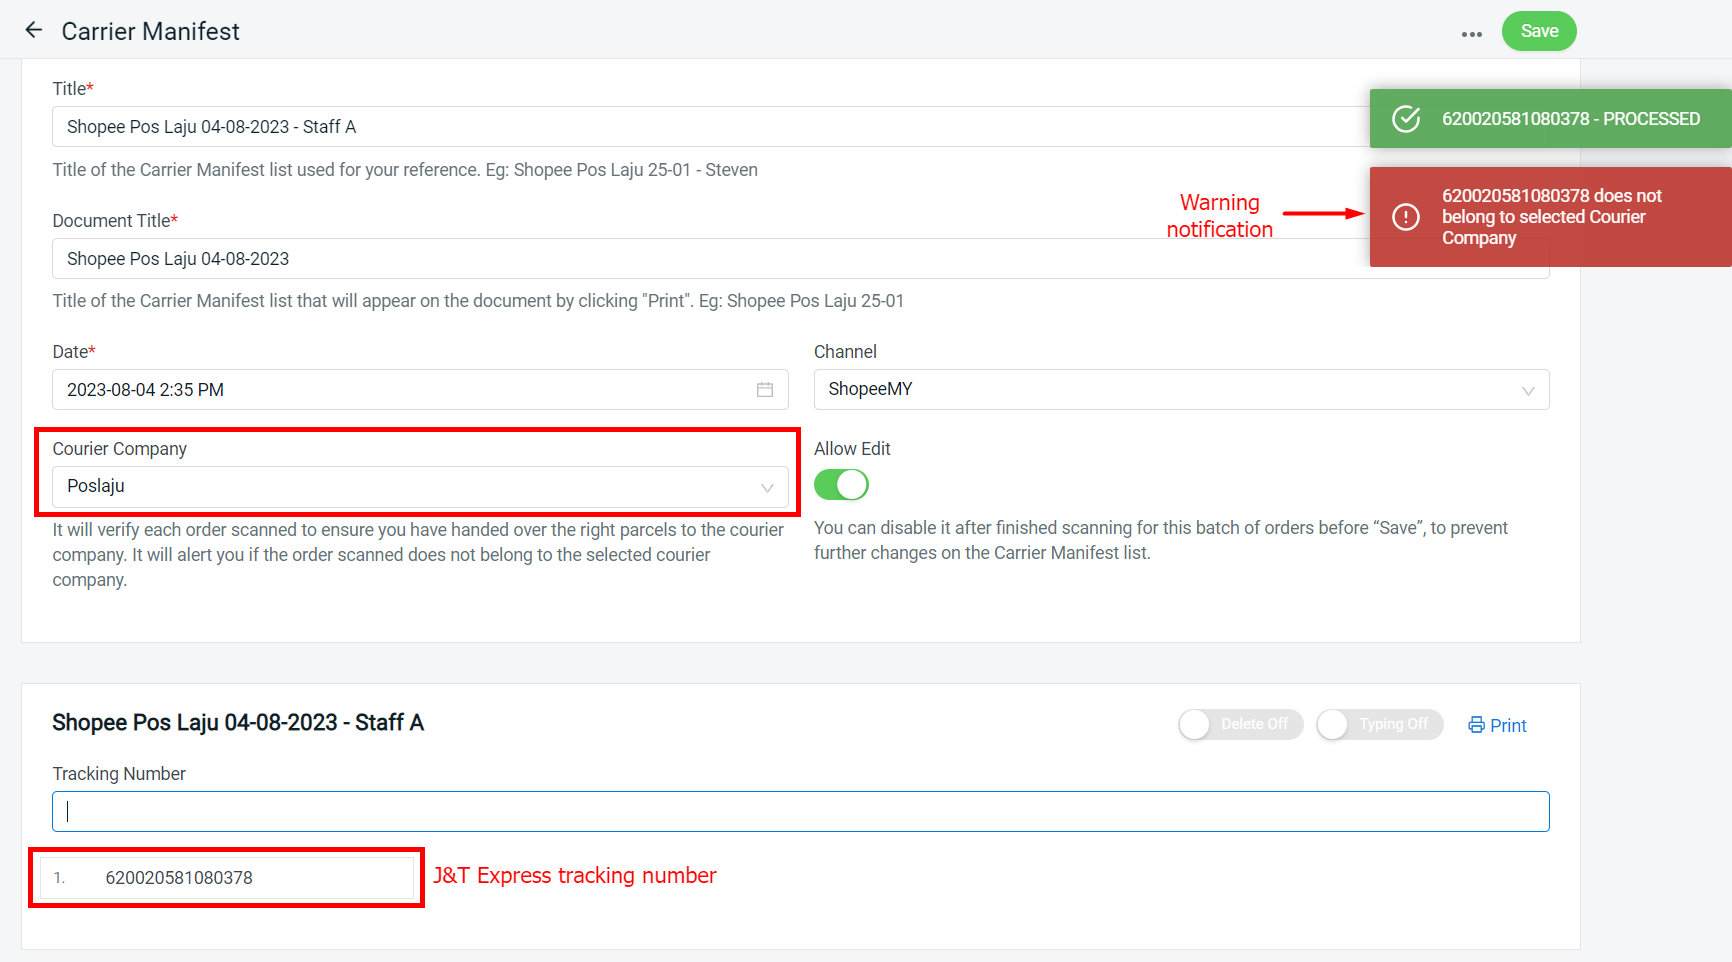
4. Add Carrier Manifest in Order Processing (Alternative)
Step 1: Navigate to Orders > All Orders > Order Processing.

Step 2: Go To Process > Printed > tick order > click Create Carrier Manifest (select Selected Orders/All Printed Orders).
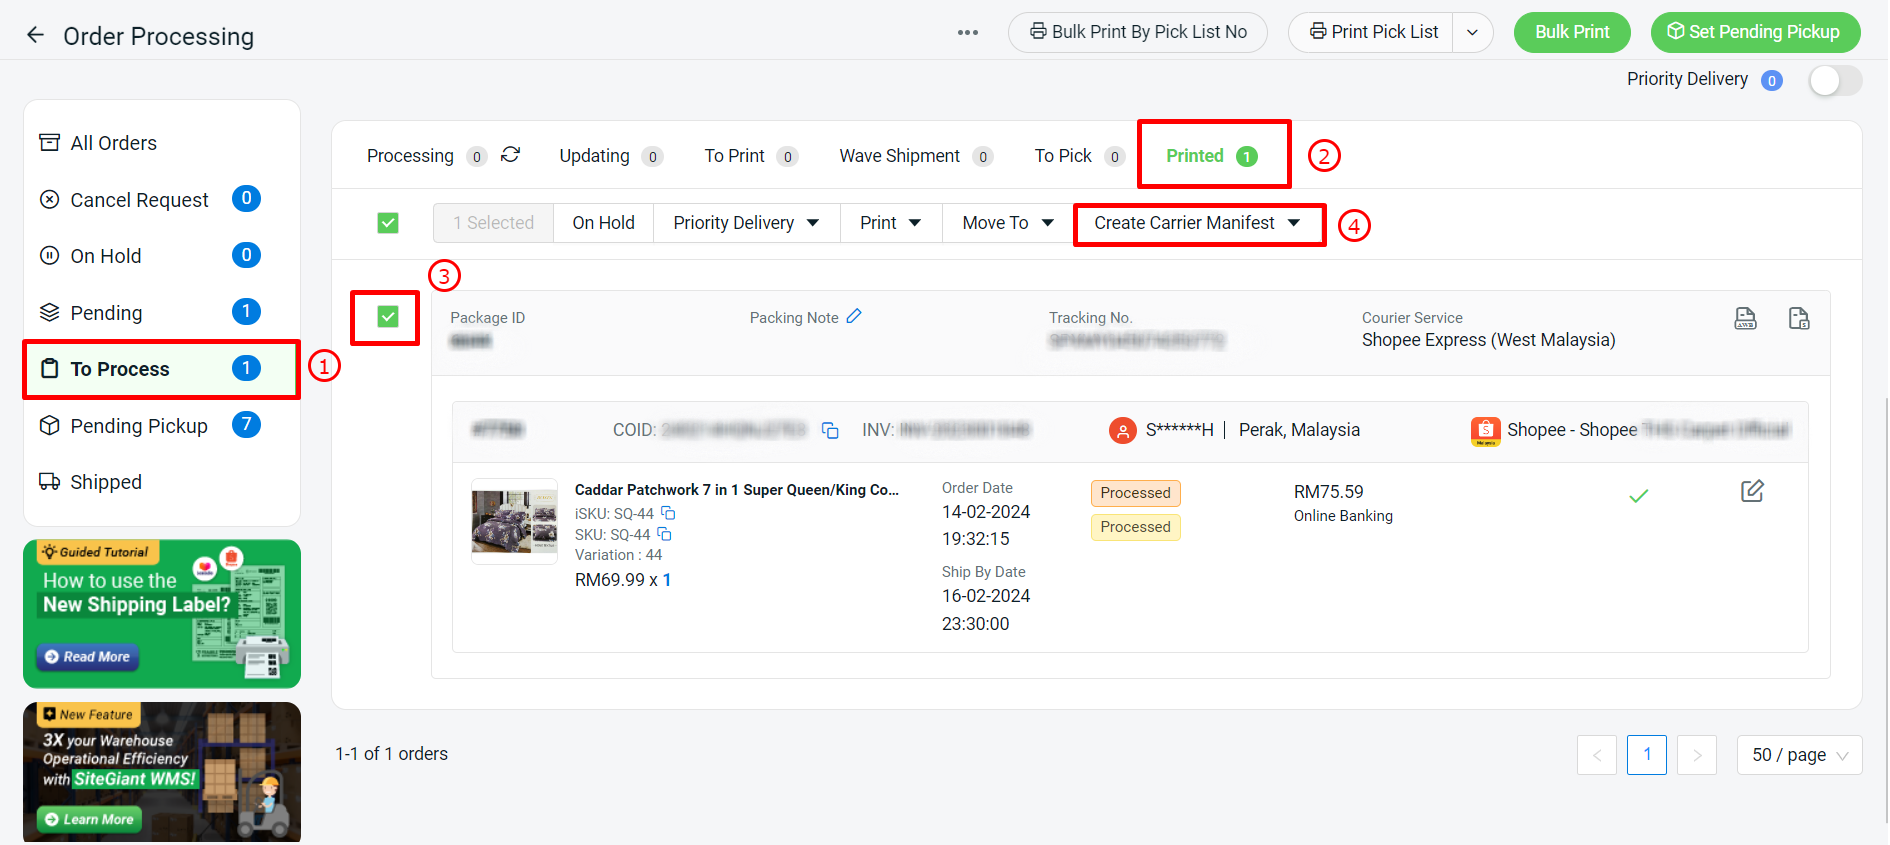
Step 3: You may select Create Carrier Manifest or Update Carrier Manifest > Save.
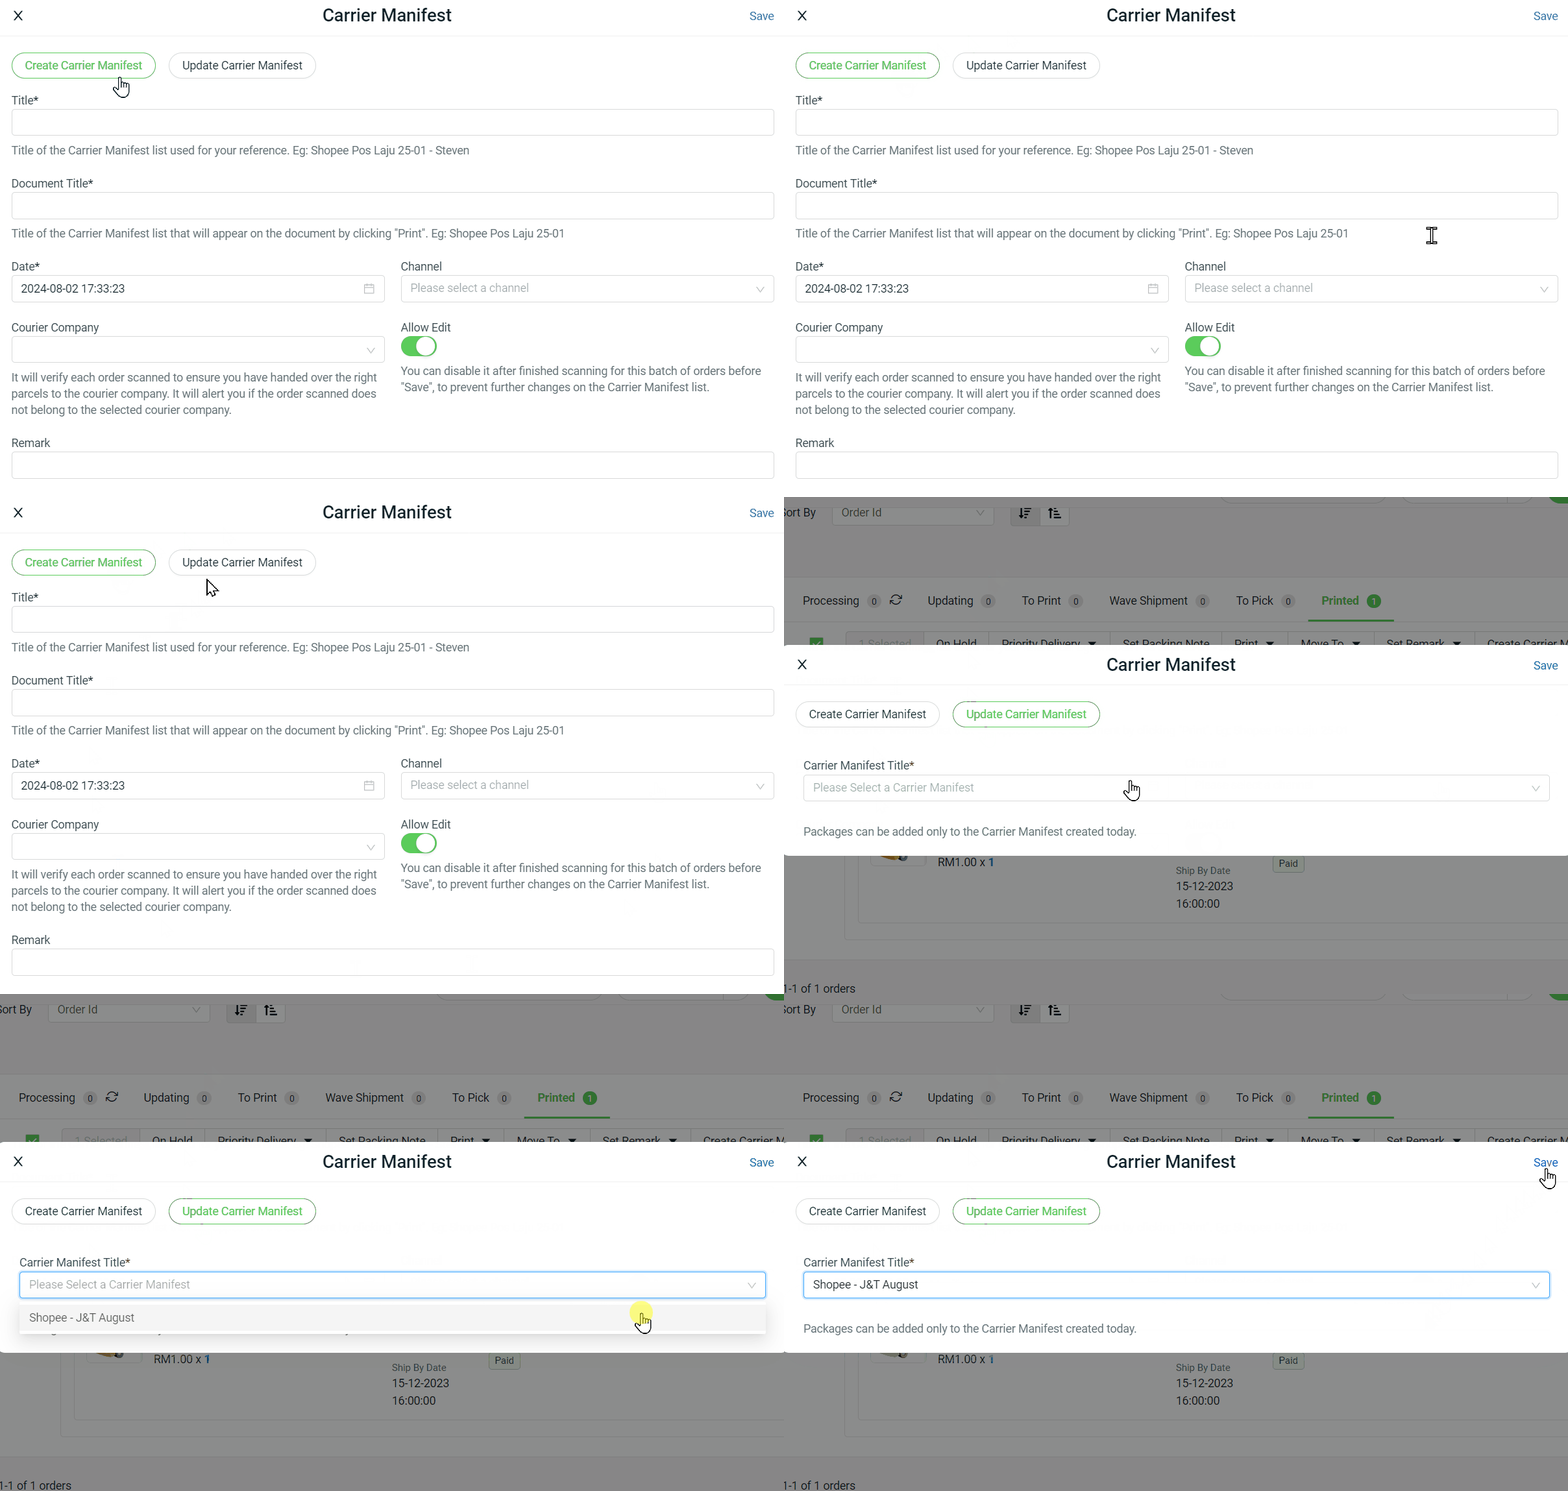
1. Create Carrier Manifest: The merchant can add order with generating the new carrier manifest.

2. Update Carrier Manifest: The merchant can add orders to the existing carrier manifest created that day.

📌Note: If you select an existing order in the carrier manifest, the order will not be created again.
5. Print Carrier Manifest
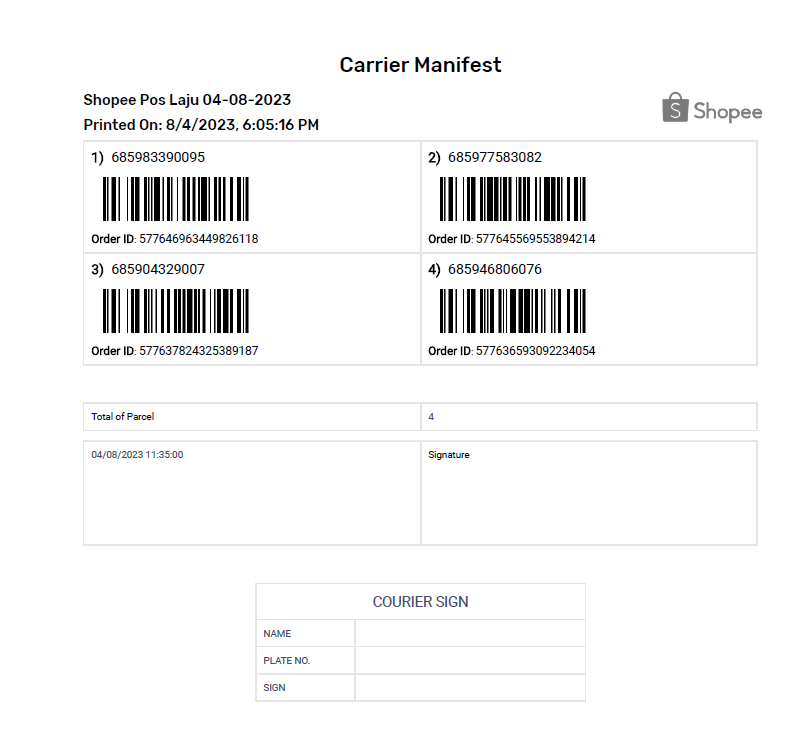
Step 1: Once done with all shipping labels scanning, click on Print to print out the carrier manifest.

Step 2: The carrier manifest will display the print date and total of the parcel for record and checking purposes. You may request the courier person to sign in the Courier Sign below as proof of parcel handling.
📝Additional Information
1. Export Carrier Manifest
Step 1: Click on More (…) > Export.

Step 2: Click on Download to download the Excel file.

Step 3: Order ID, date scanned, tracking number and marketplace order id will be exported out.

2. Export Carrier Manifest (in action column)
Step 1: Click the Export button > select either want to Export detail or Export for the Carrier Manifest data.

3. Order Fulfillment Log
You can use Carrier Manifest together with the Order Fulfillment Log to cross-check if any shipping label is missing to scan or ship. Learn More on How To Use Order Fulfillment Log.
