
1. Introduction
2. Create Webstore Listing
3. Bulk Create Webstore Listing
4. Additional Information
1. Introduction
Adding product in webstore listing to sell in your SiteGiant webstore. The more detailed the product content, the more confident customers would buy from you.
📌Note: You must have the inventory items ready before you can start creating your products. Learn more on How To Create Inventory Item.
2. Create Webstore Listing
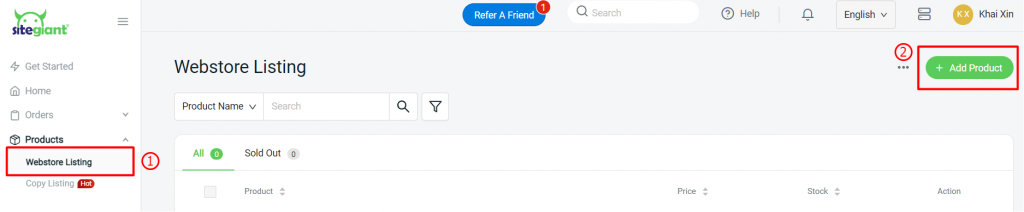
Step 1: Navigate to Products > Webstore Listing > + Add Product.
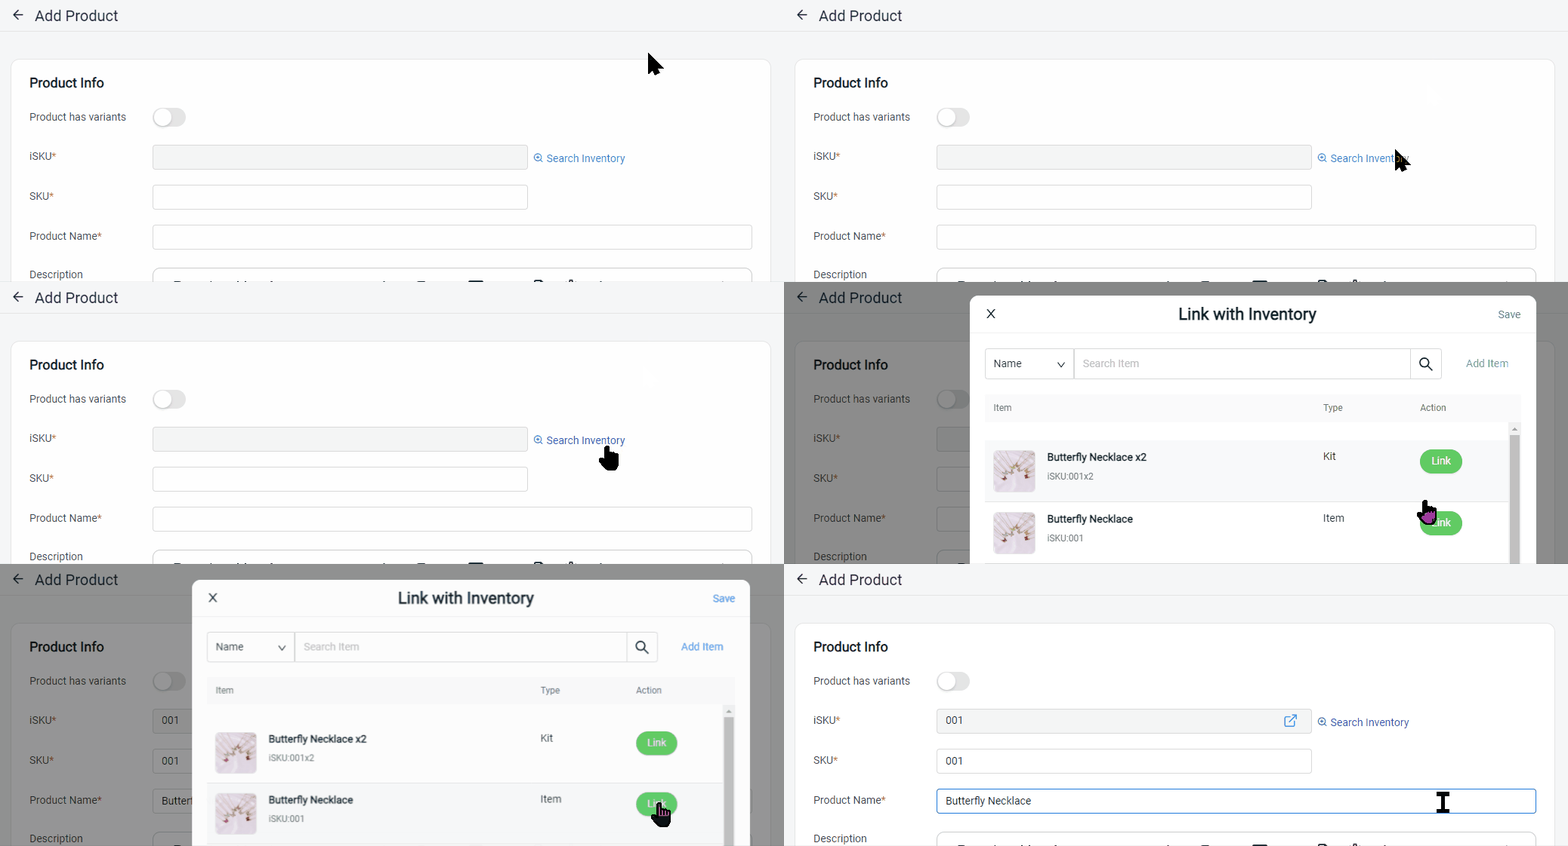
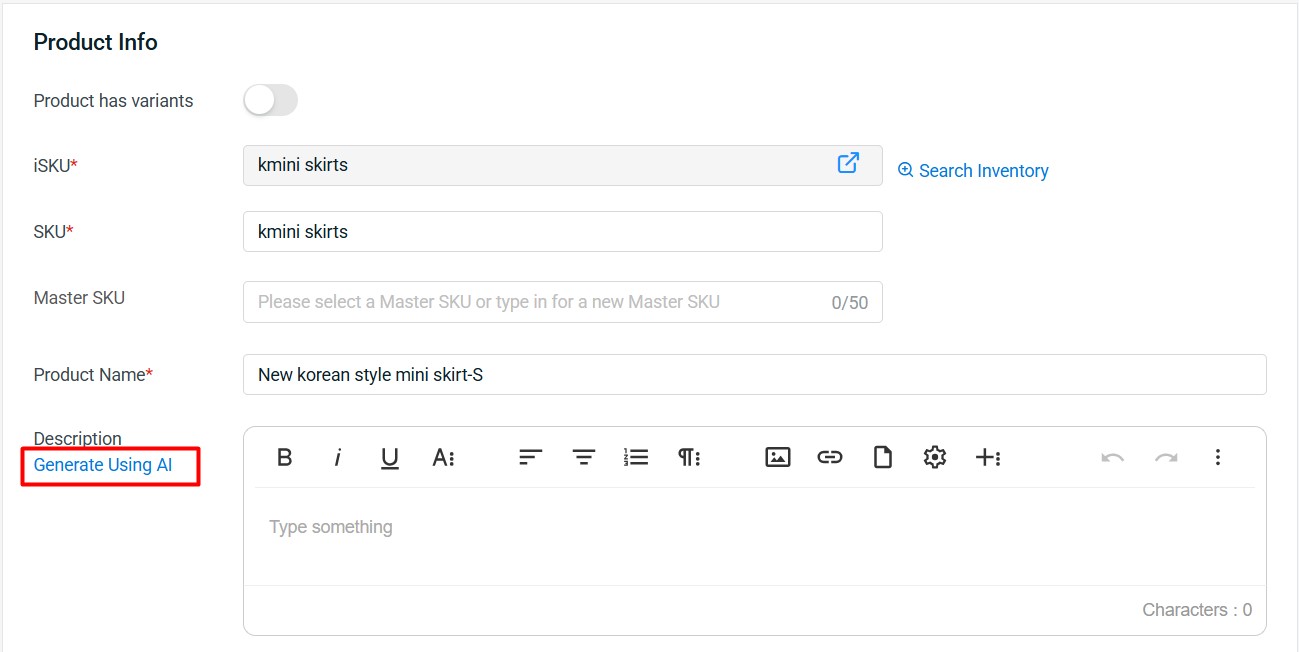
Step 2: Under Product Info, click Search Inventory and link with the inventory item that was created.
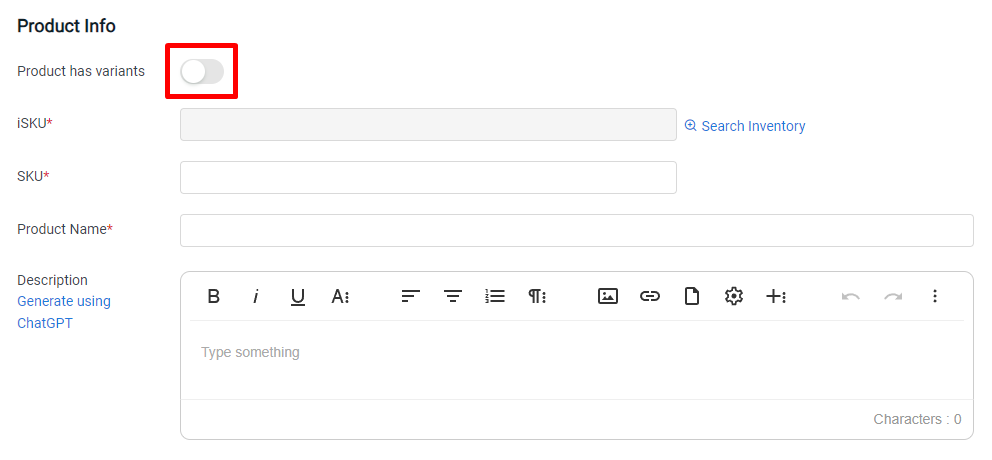
If the product have variant, kindly enable Product has variants. You can fill in the information at the variant section later.
📌Note:
1. You can also click on the Add Item after Search Inventory to create a new inventory item and link. Learn more
2. The Product SKU and Product Name will be auto-generated based on the inventory item. However, please note that SKU has to be unique and not duplicated with the existing webstore listing.
Step 3: Insert Product Description, Brand, Collections, Tags and Product Label.
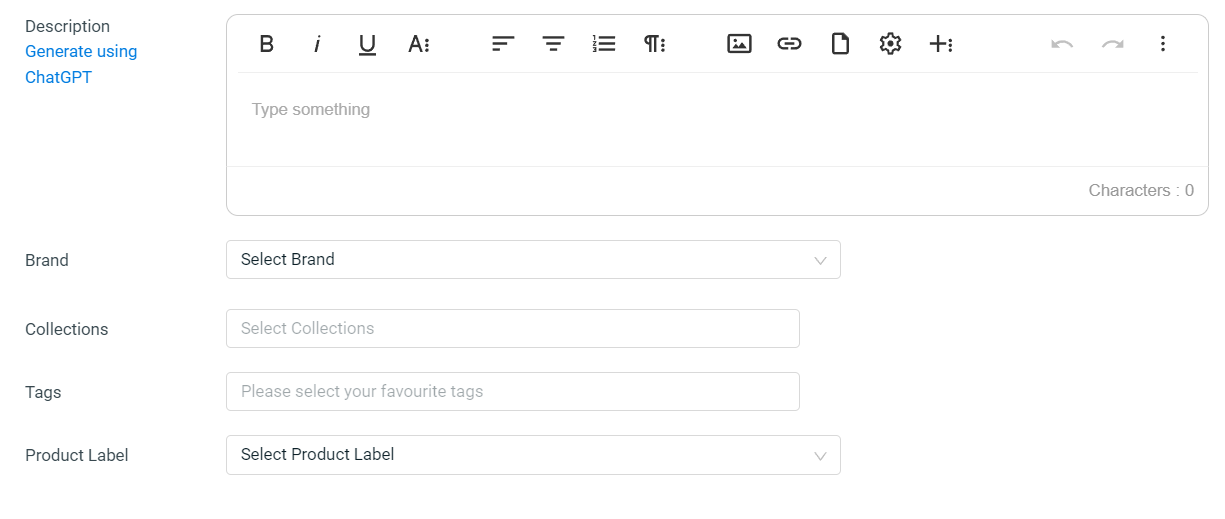
💡Tips: If you have no idea what to write in the Product Description, introduce you to the Generate using AI feature which require Top Up SiteGiant Wallet.
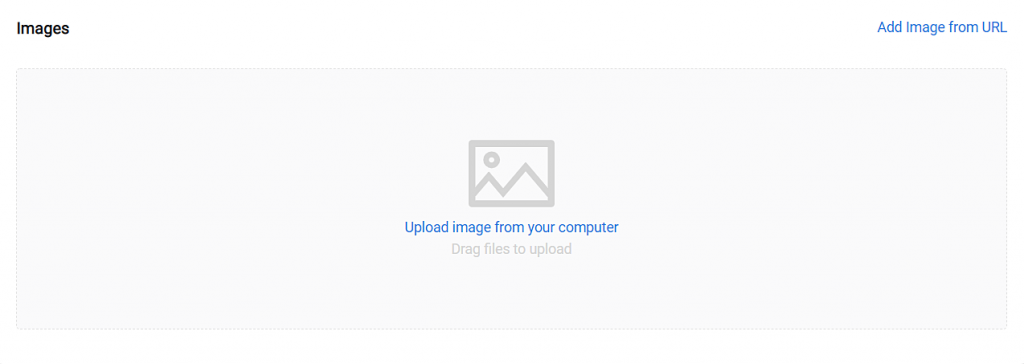
Step 4: Upload your product images (Recommended: Image size less than 2MB).
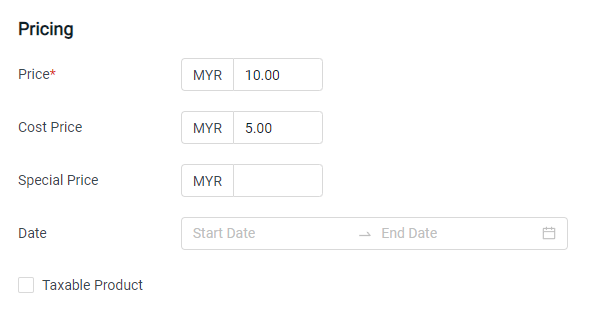
Step 5: For product that does not have variant, the Price and Cost Price will be auto-generated based on the selected inventory item. You can set the promotion price under Special Price and set the duration of the promotion. If is an all time promotion, kindly leave the date blank.
Step 6: The stock quantity will appear according to the inventory item selected.
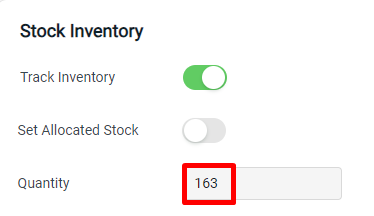
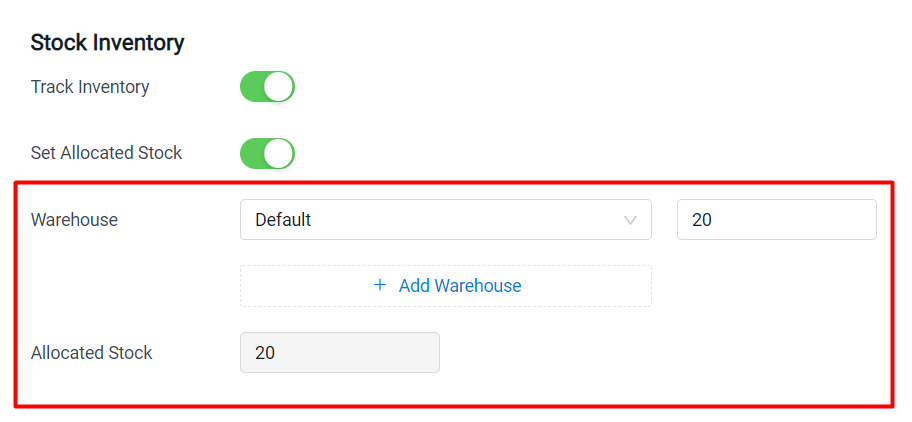
If you wish to allocate a certain quantity of stock to sell on the webstore, enable Set Allocated Stock.

Then, select the Warehouse and allocate the stock quantity.
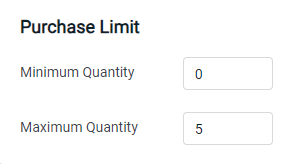
Step 7: You can set minimum and maximum quantity for the product.
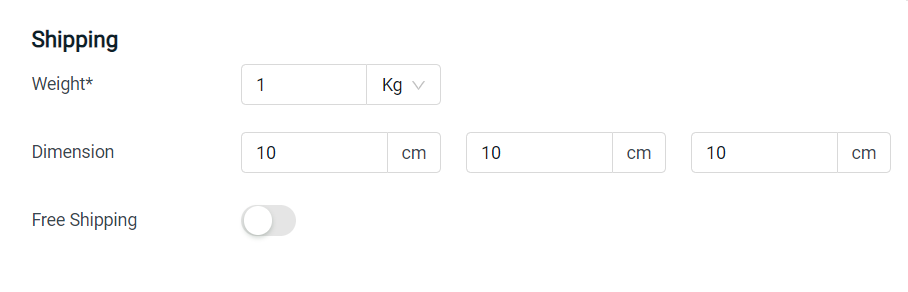
Step 8: The Weight and Dimension will be auto-generated based on the selected inventory item. If you wish to offer free shipping for this product, enable Free Shipping.
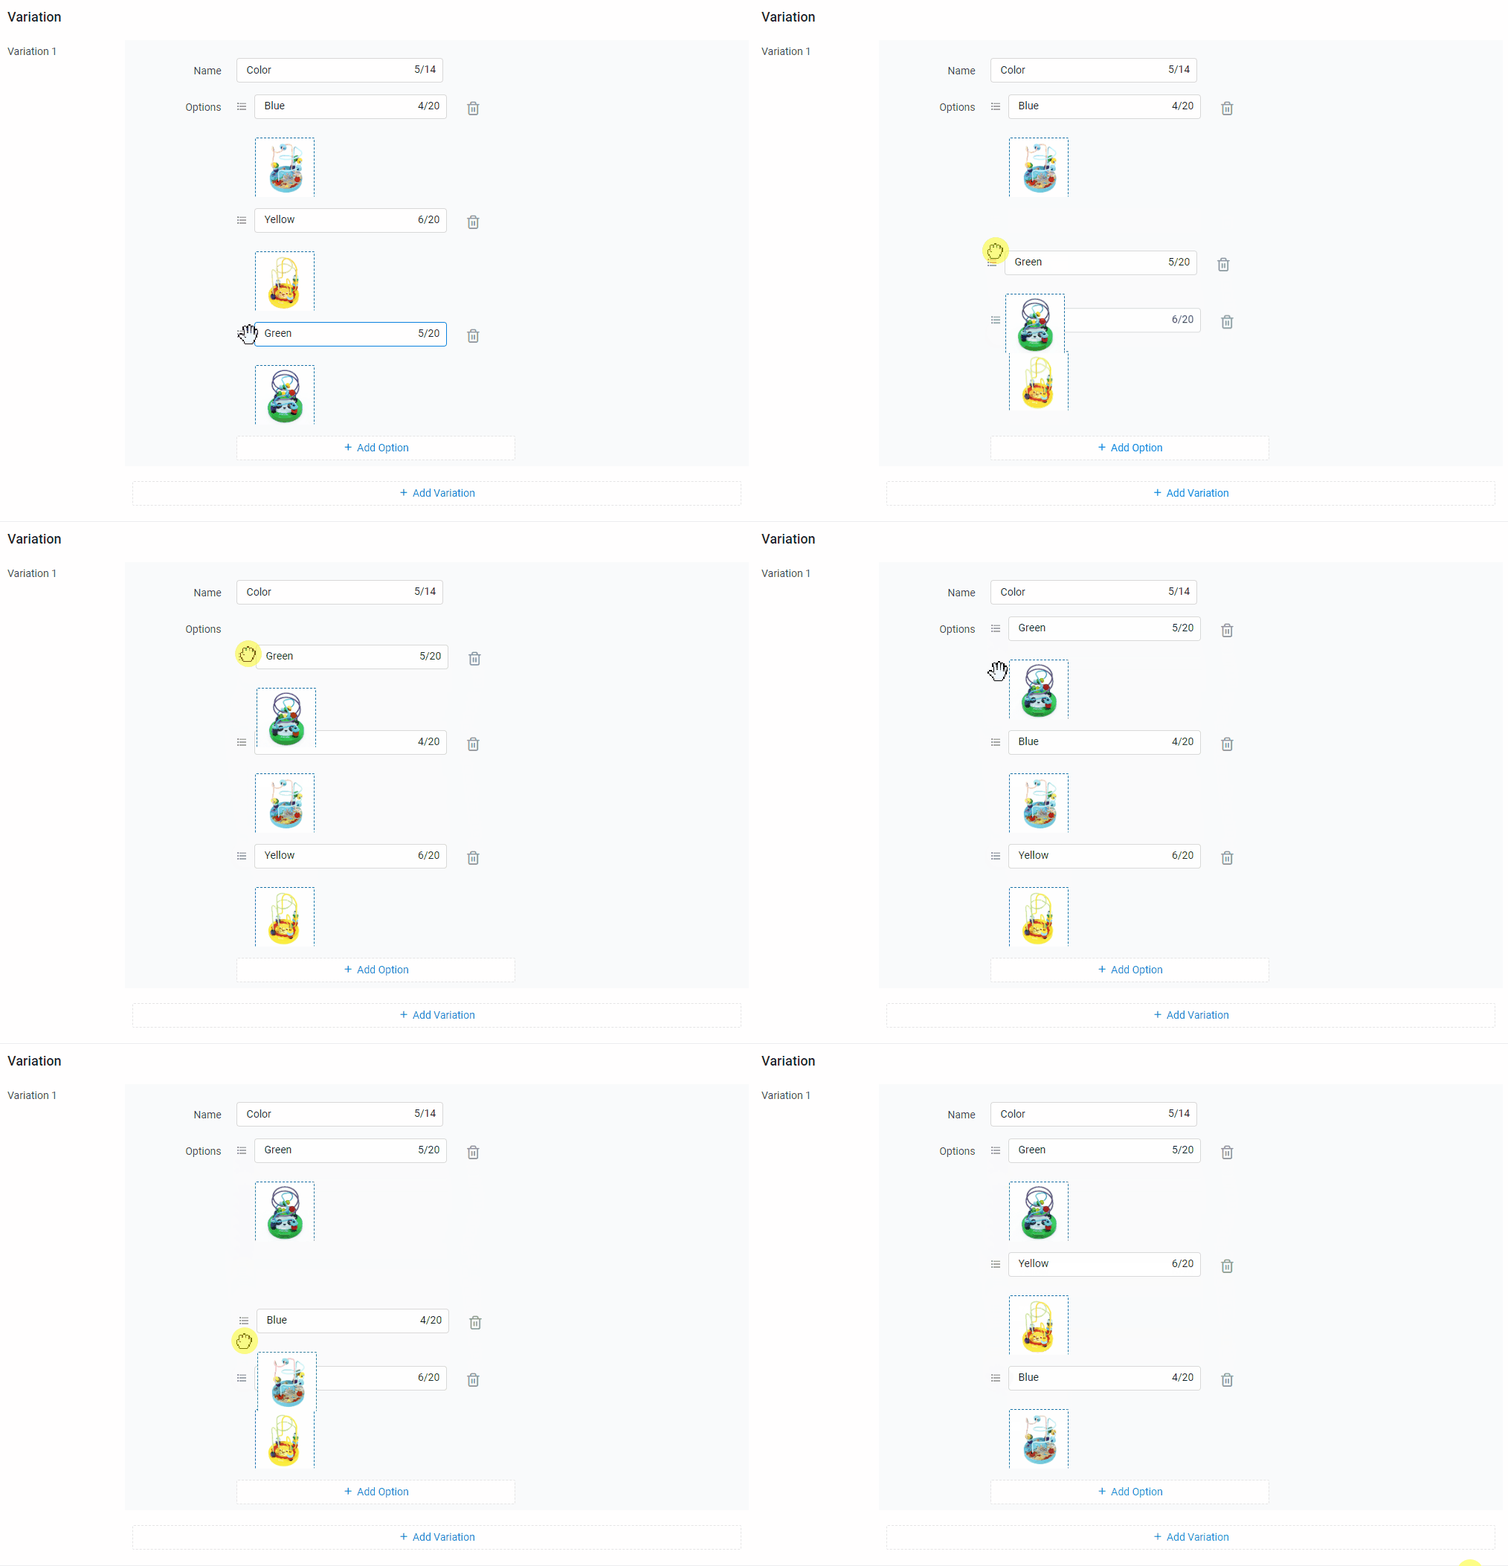
Step 9: As for the product that enables variant toggle, it will have a variation section. Insert your product variant name and variant options accordingly. You can click on the square box to insert the variant image.
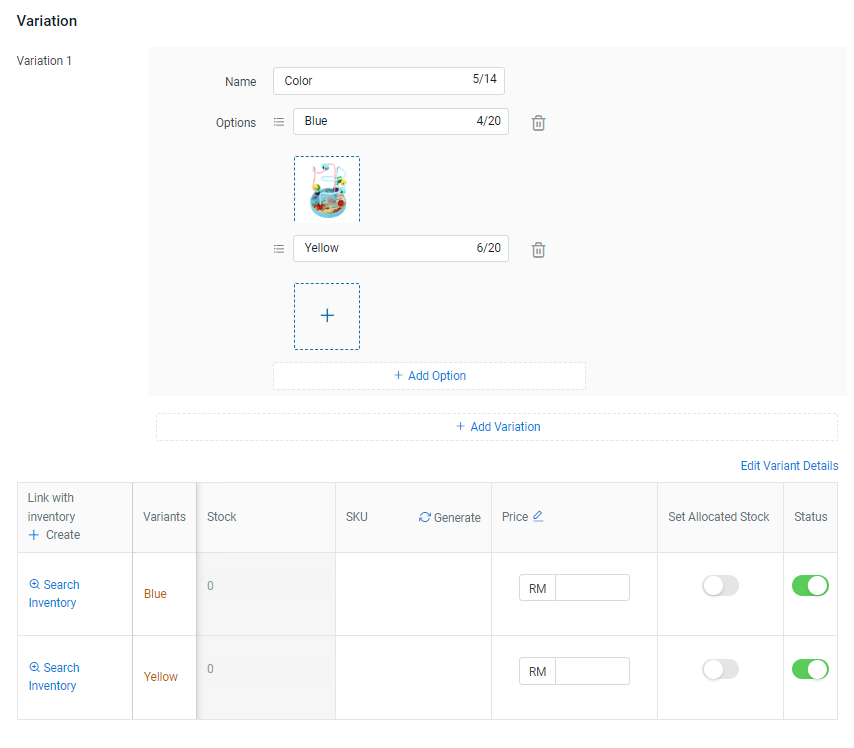
💡Tips: To adjust the sorting of the variants that have been updated, you can drag and drop the variant options.
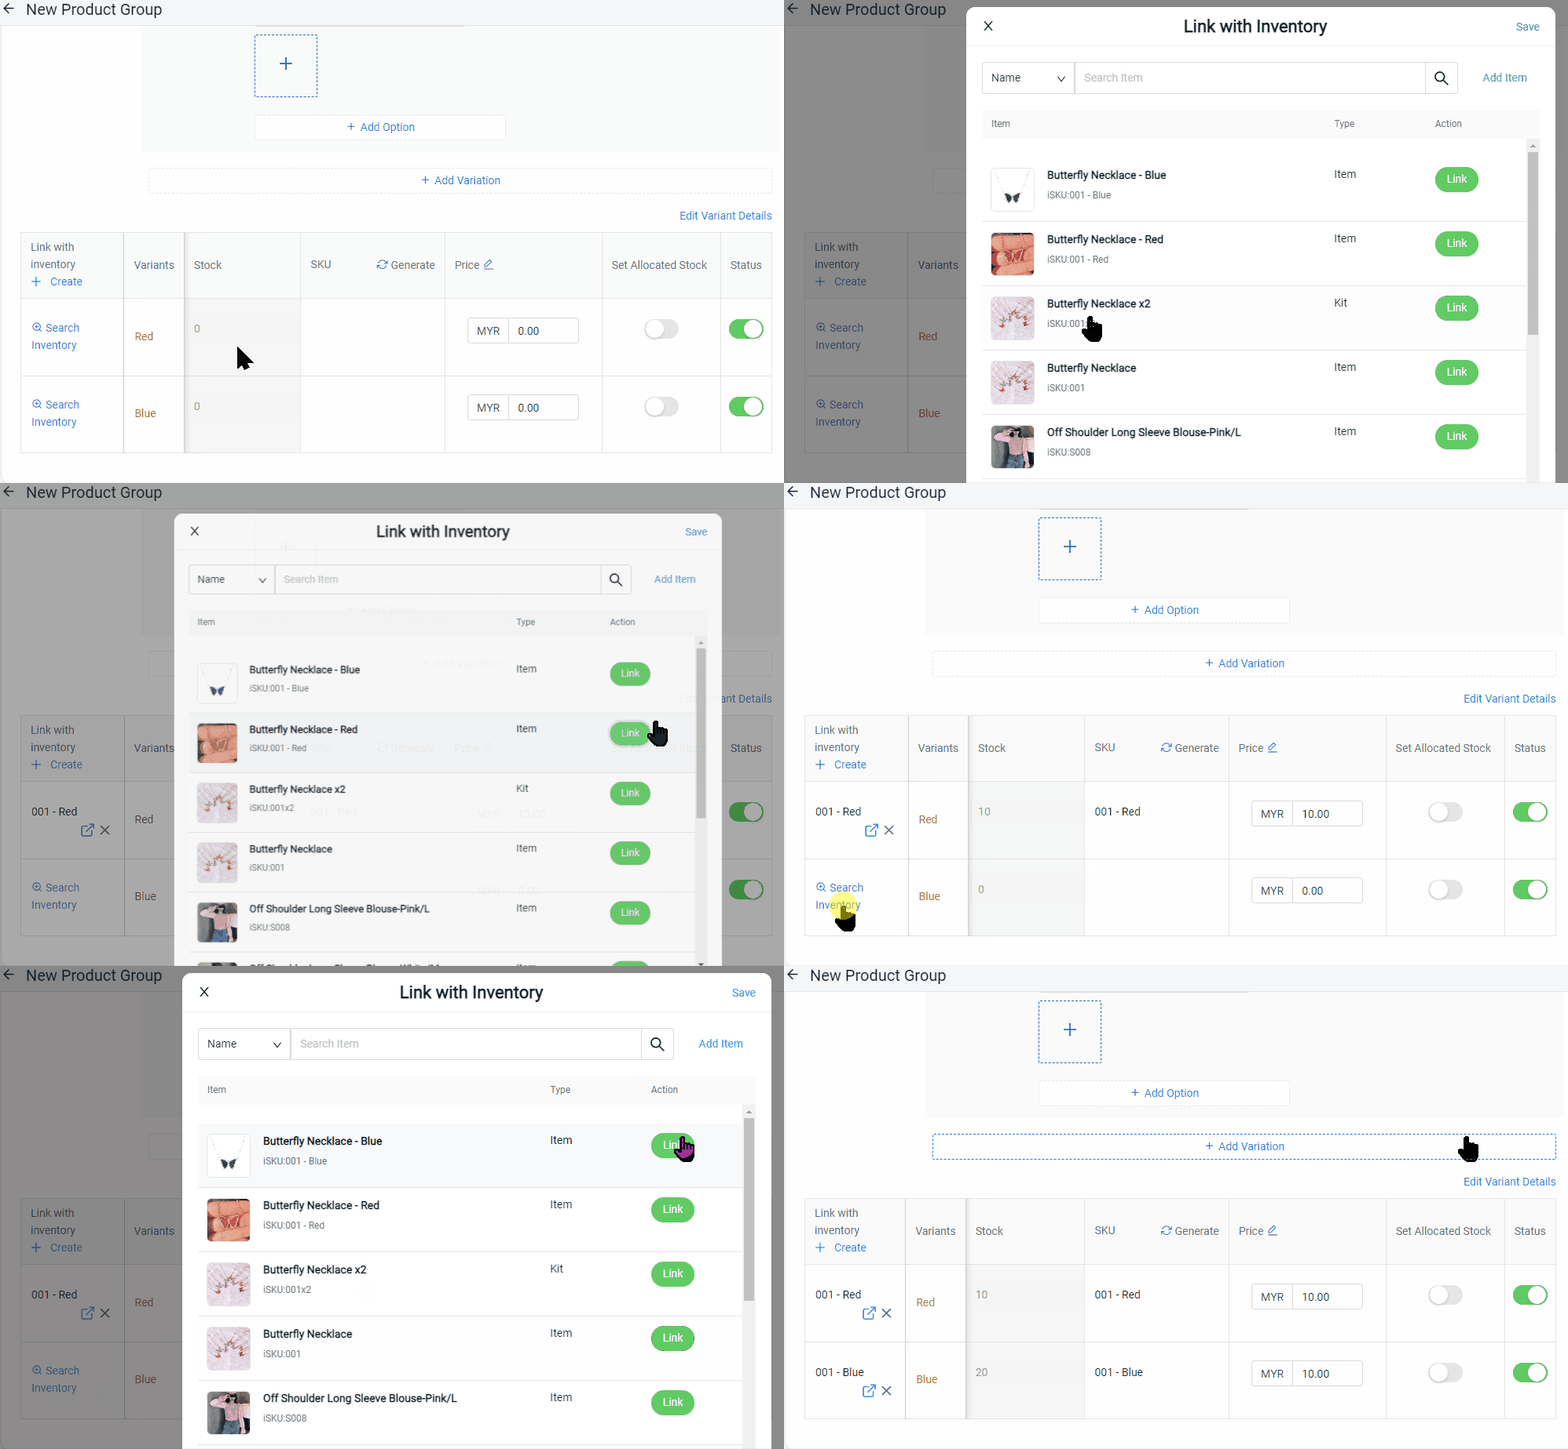
Step 10: Click Search Inventory and link with the inventory item that was created for each variant.
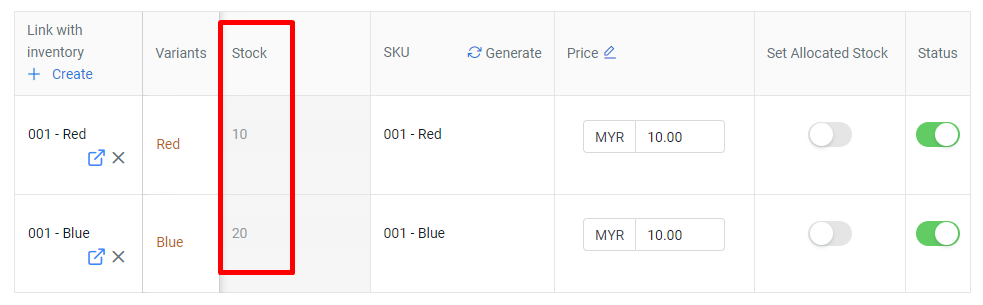
The Stock Quantity will be based on the sellable stock of the inventory item.
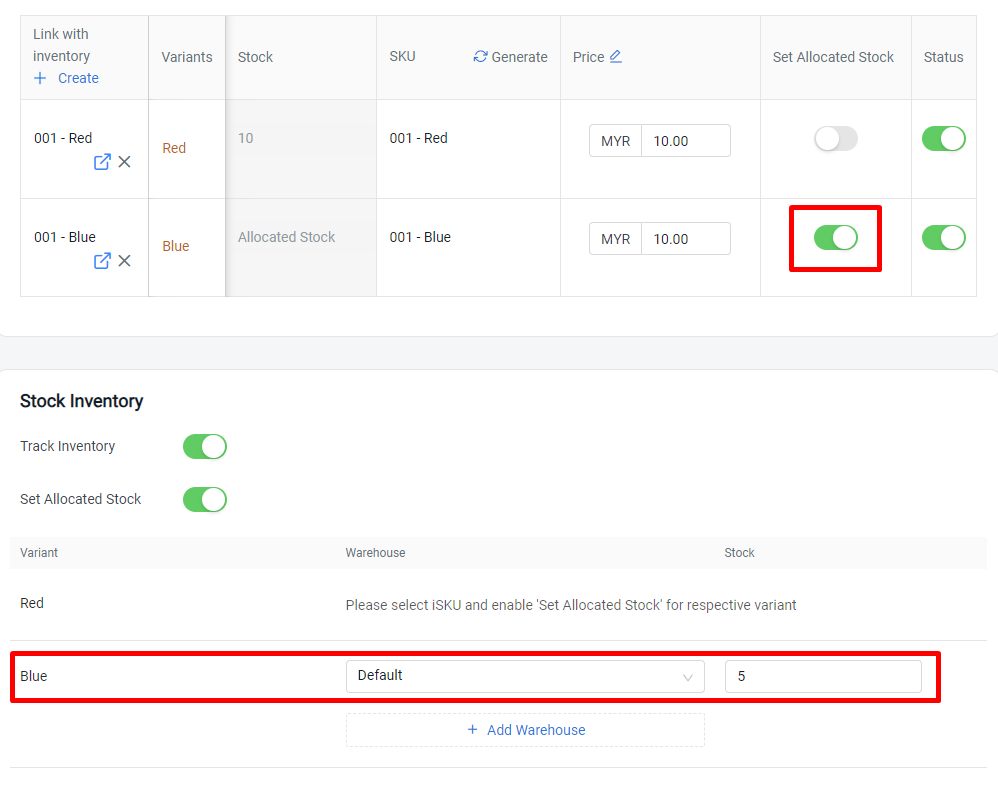
Step 11: If you wish to allocate a certain quantity of stock to sell on the webstore for ALL product variants, enable Set Allocated Stock at Stock Inventory section > allocate the stock quantity.
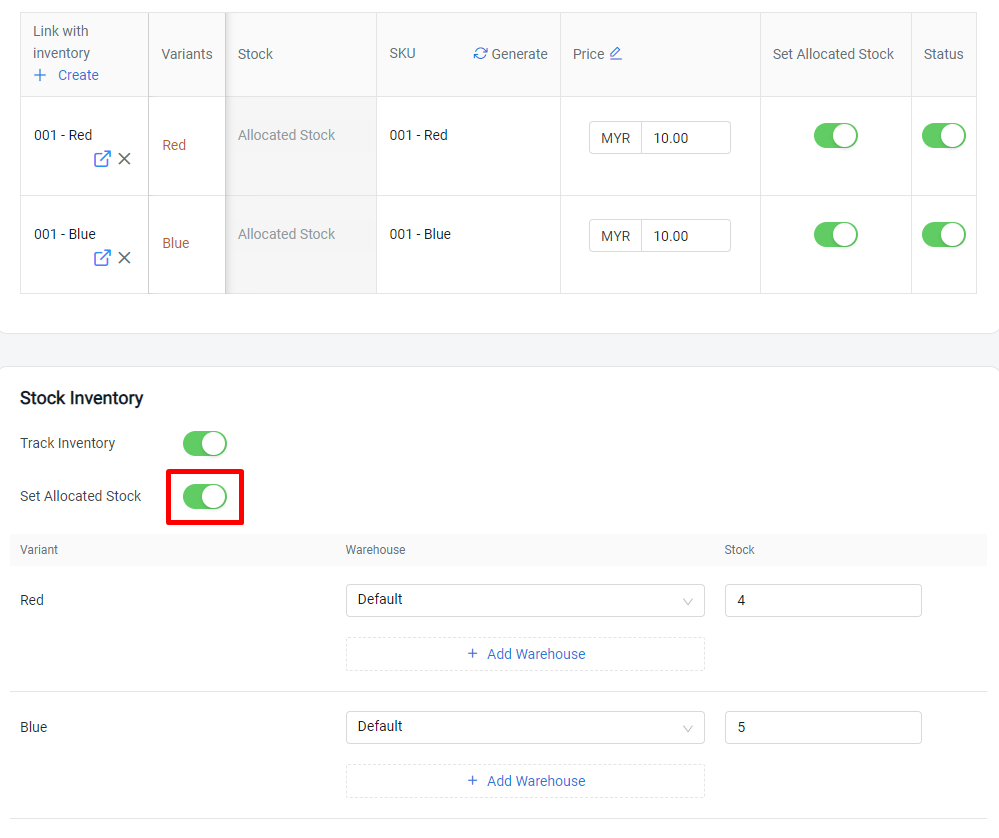
If you wish to allocate a certain quantity of stock to sell on the webstore for SELECTED product variants, enable Set Allocated Stock at the variant table > allocate the stock quantity at Stock Inventory section.
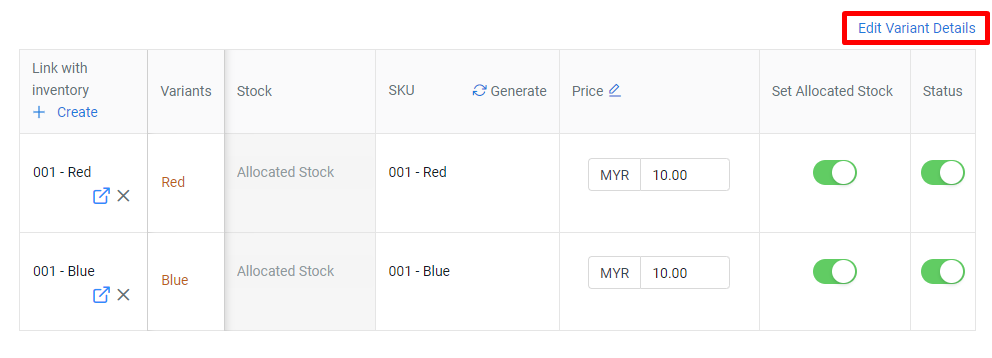
Step 12: Click on Edit Variant Details to edit more information.
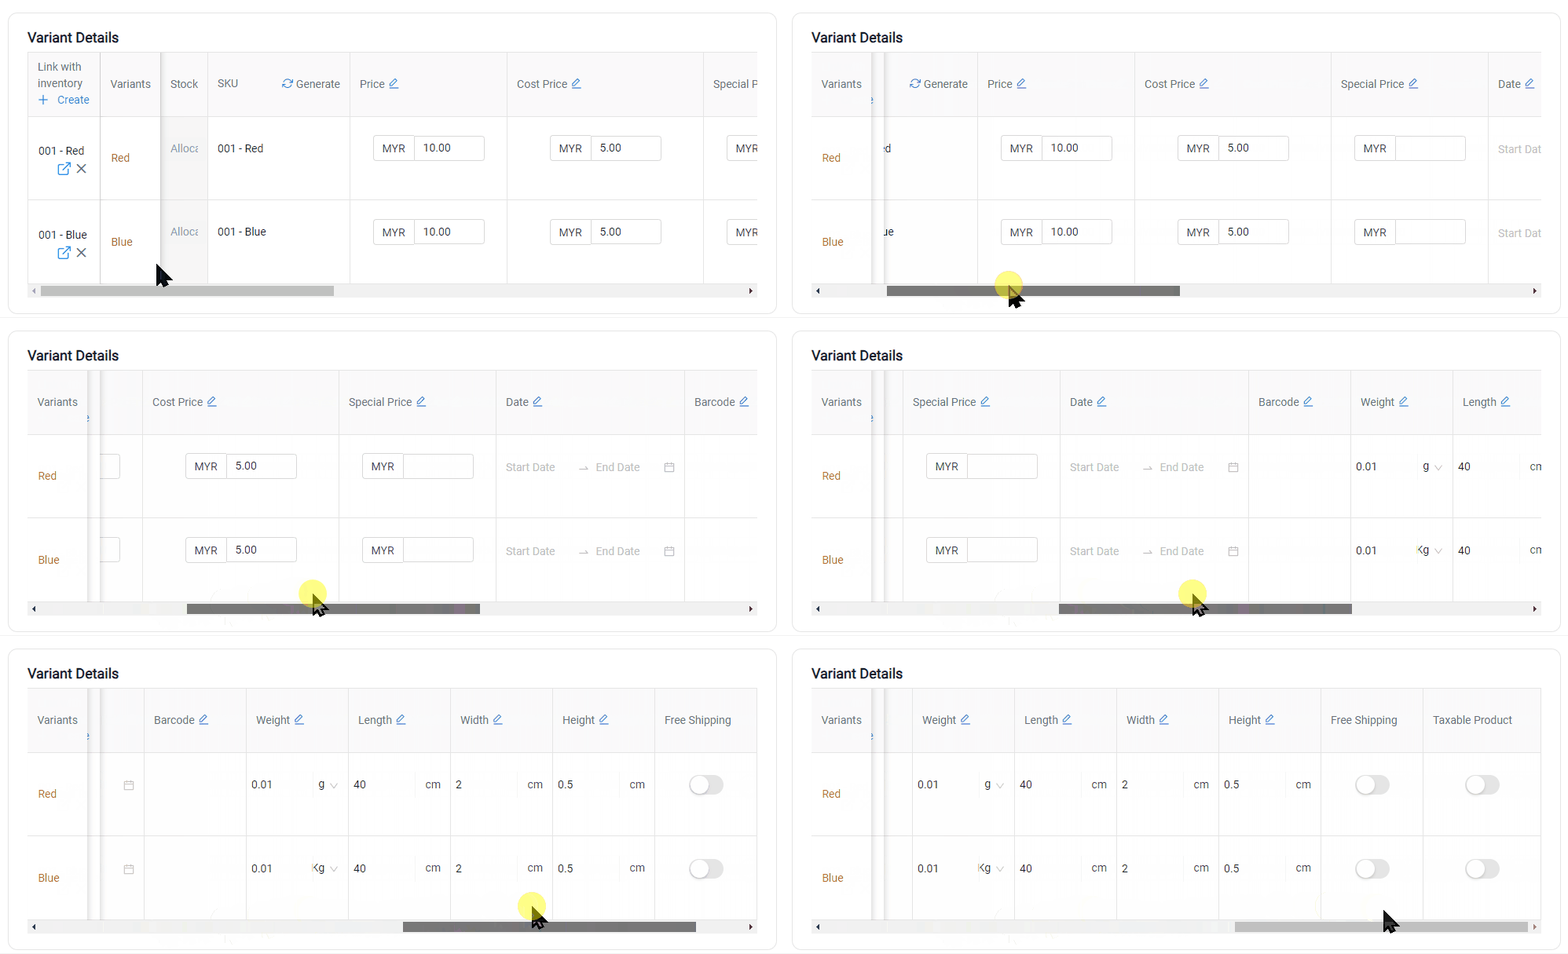
Step 13: You are able to edit Special Price and duration of the promotion, Weight and Dimension will be auto-generated based on the selected inventory item.
Step 14: Enable Related Product to recommend similar products to the product page.

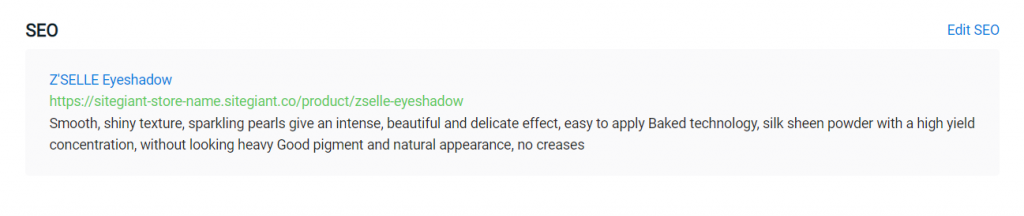
Step 15: SEO URL will be auto-generated based on the product name. Edit SEO to edit the URL and description.
Step 16: Set the product visibility whether publish immediately, private, schedule a specific time, or unpublish.
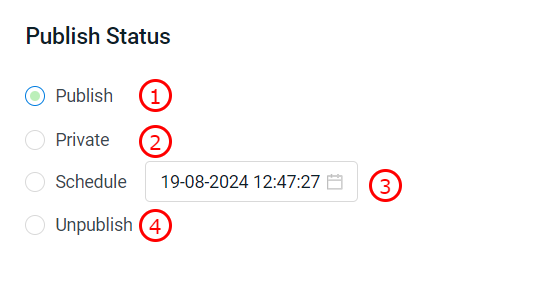
1. Publish: The product is live and visible to customers.

2. Private: The product is not visible on the platform. However, specific customers can access the product if they have the product's URL link.

3. Schedule: The product is set to launch at the scheduled time without the need for manual intervention.

4. Unpublish: The product is remove from the store or platform. Customer will not be able to access the product at all.
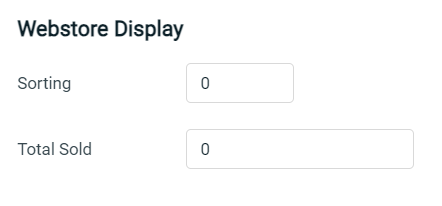
Step 17: You can sort the products using Sorting. 0 is the first number.
Total Sold amount able to add automatically when there is any webstore order been placed. You may key in the amount that you have sold for the product.
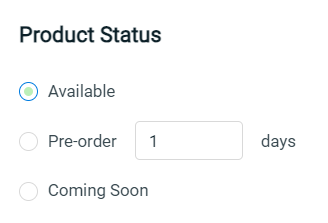
Step 18: Choose the product status whether is available, pre-order or coming soon.
Step 19: Save and done!
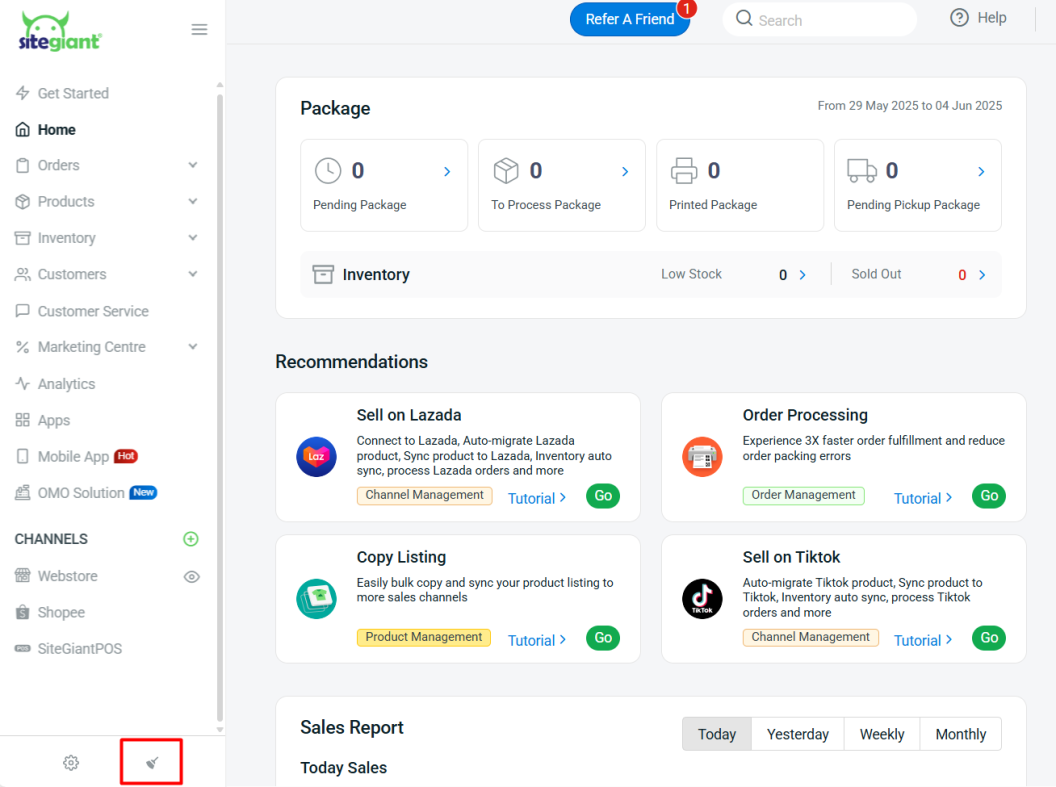
Step 20: Back to the dashboard and Clear Cache to see the changes on your Webstore.
3. Bulk Create Webstore Listing
Step 1: Navigate to Products > Webstore Listing > More(…) > Import Products.
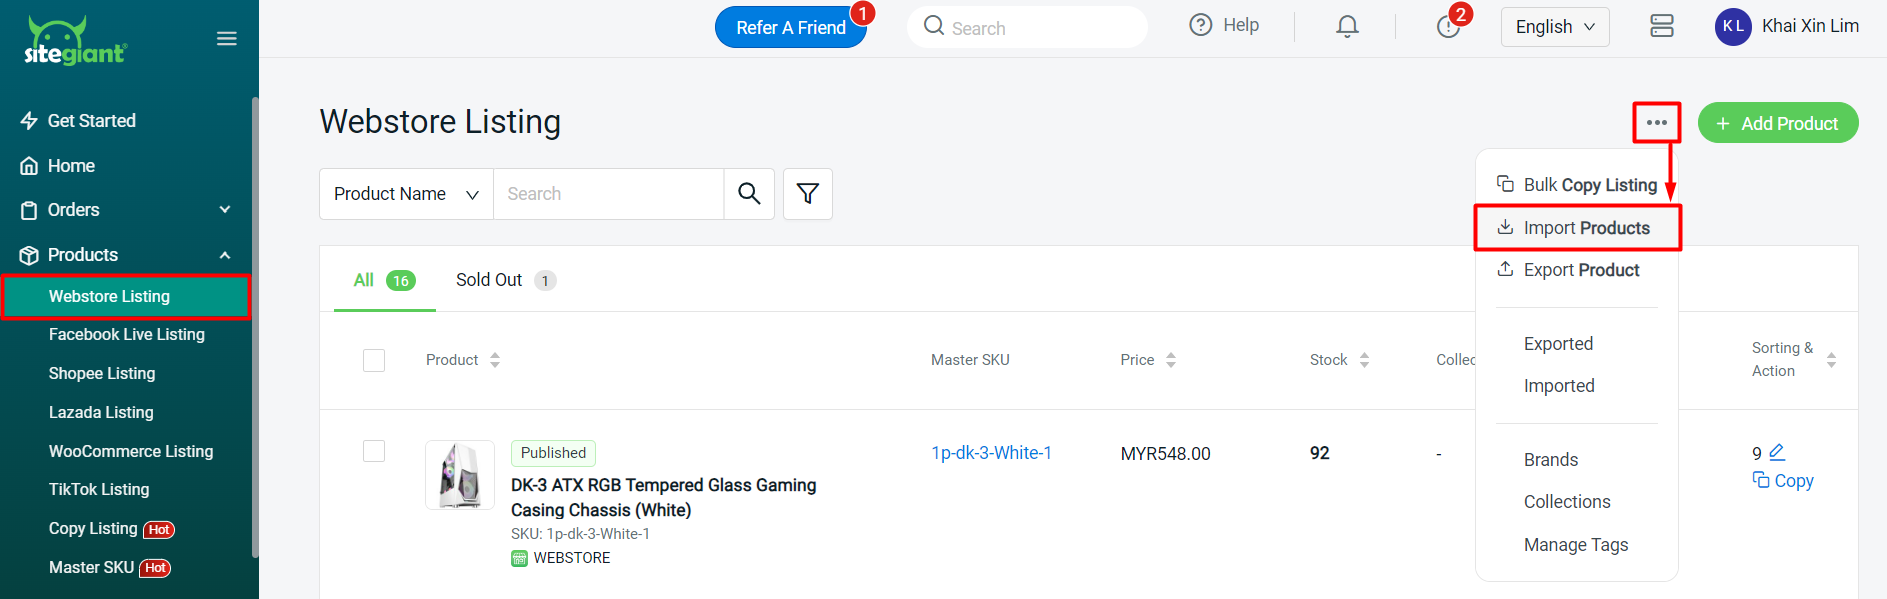
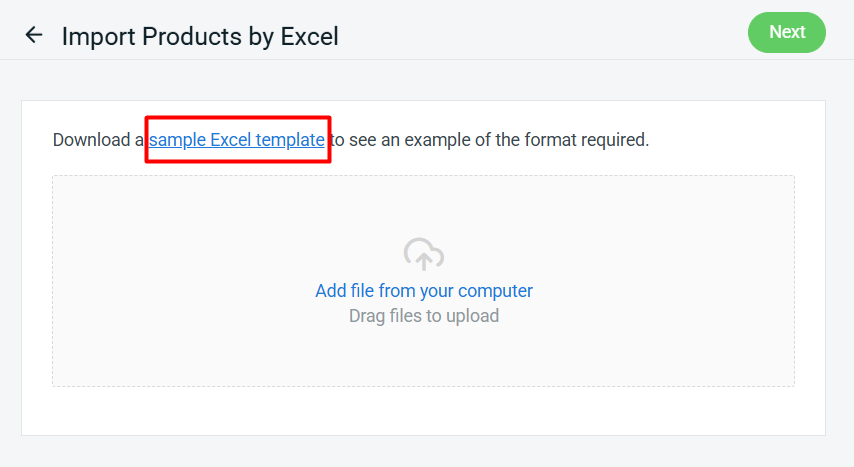
Step 2: Click the sample Excel template to download the Excel file for updates.
Step 3: Fill in the product details correctly.

📌Note: Column with * is required.
| Column | Description | Sample Data |
| parent_sku | Used to group product variants. Leave blank if there are no variants. | SH001 |
| type* | To indicate if it is a single or group product | product: single product group: with variants |
| name | The product name displayed on your store | Girl Sandals And Slipper |
| isku* | Linked inventory item SKU | SH001-Black |
| sku* | Product code | SH001-Black |
| collection | Collection name 📌Note: If you have a sub-collection, the format would be Main Collection > Sub-collection 1 > Sub-collection 2 | Without Sub-collection: Shoes With Sub-collection: Shoes > Girl > Sandal |
| brand | The product’s brand or manufacturer. | Niki |
| free_shipping | Indicates whether the product qualifies for free shipping | yes/no |
| option1 name | Name of the first product option | Color |
| option1 value | Value of the first variant option | Black/White/Red |
| option2 name | Name of the second product option | Size |
| option2 value | Value for the second option | S/M/L/XL |
| minimum_purchase_limit | The minimum quantity a customer must purchase | 2 |
| maximum_purchase_limit | The maximum quantity a customer can purchase in one order. | 10 |
| weight | The product weight | 2 |
| weight_unit | The unit of weight | g/kg/oc/lb |
| length | The product length | 2 |
| width | The product width | 2 |
| height | The product height | 2 |
| cost | Cost price of the product | 60 |
| price | Selling price of the product | 100 |
| discounted_price | The promotional or discounted selling price | 100 |
| discounted_price_date_start | Discount start date (YYYY-MM-DD) | 2023-10-01 |
| discounted_price_date_end | Discount end date (YYYY-MM-DD) | 2025-12-31 |
| inventory | Product quantity. Can leave it blank because it will use the iSKU quantity. | 50 |
| set_allocated_stock | Whether to enable allocated stock for the product | yes/no |
| allocated_stock | The quantity of stock reserved or allocated | 20 |
| total_sold | The total quantity sold of the product | 3 |
| description | Product specification content | Product Description |
| sorting | The display order of the product in listings. Lower numbers are usually shown first. | 0,1,2,3,4 |
| publish_status | Conditions to publish the product | publish / private / unpublish |
| taxable | Whether the product is taxable | yes/no |
| seo_page_title | The SEO title displayed in search engine results | Girl Sandals And Slipper |
| seo_meta_description | The SEO meta description used by search engines | Product meta description |
| seo_img_alt | The alt text for the product image, which improves SEO and accessibility | Girl Sandals And Slipper Alt |
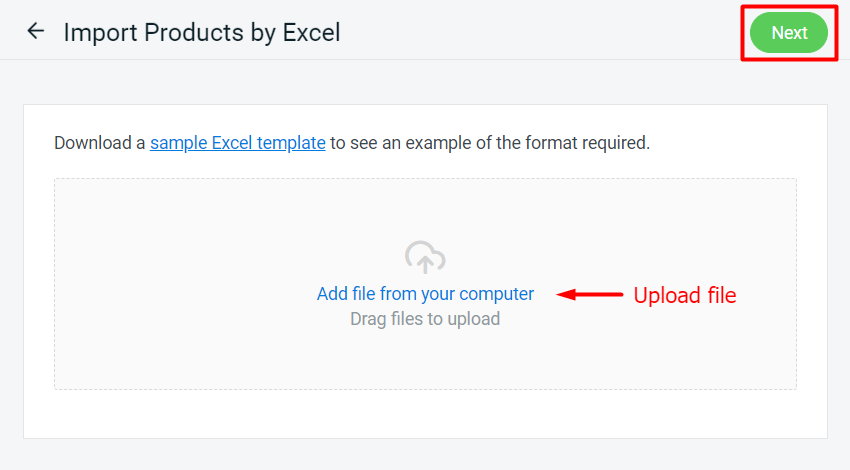
Step 4: Upload the Excel file > Next.
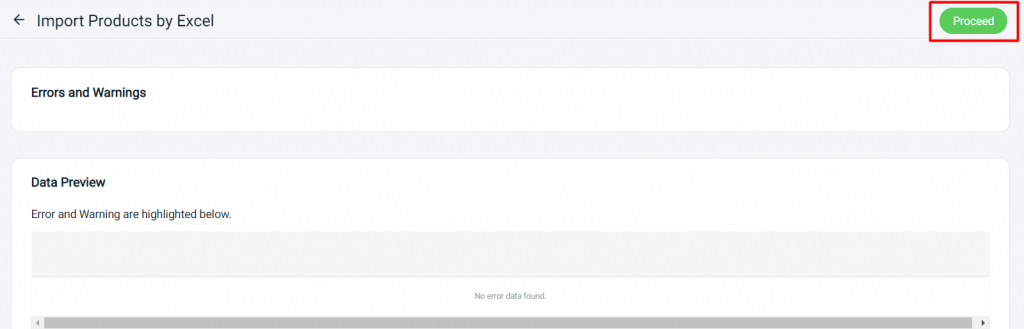
Step 5: If there are any errors in the uploaded Excel file, you will see the error message in Errors and Warnings and it will show the error column in the Data Preview. Amend the error column and reupload the file. Click on Proceed if the uploaded file does not have errors.
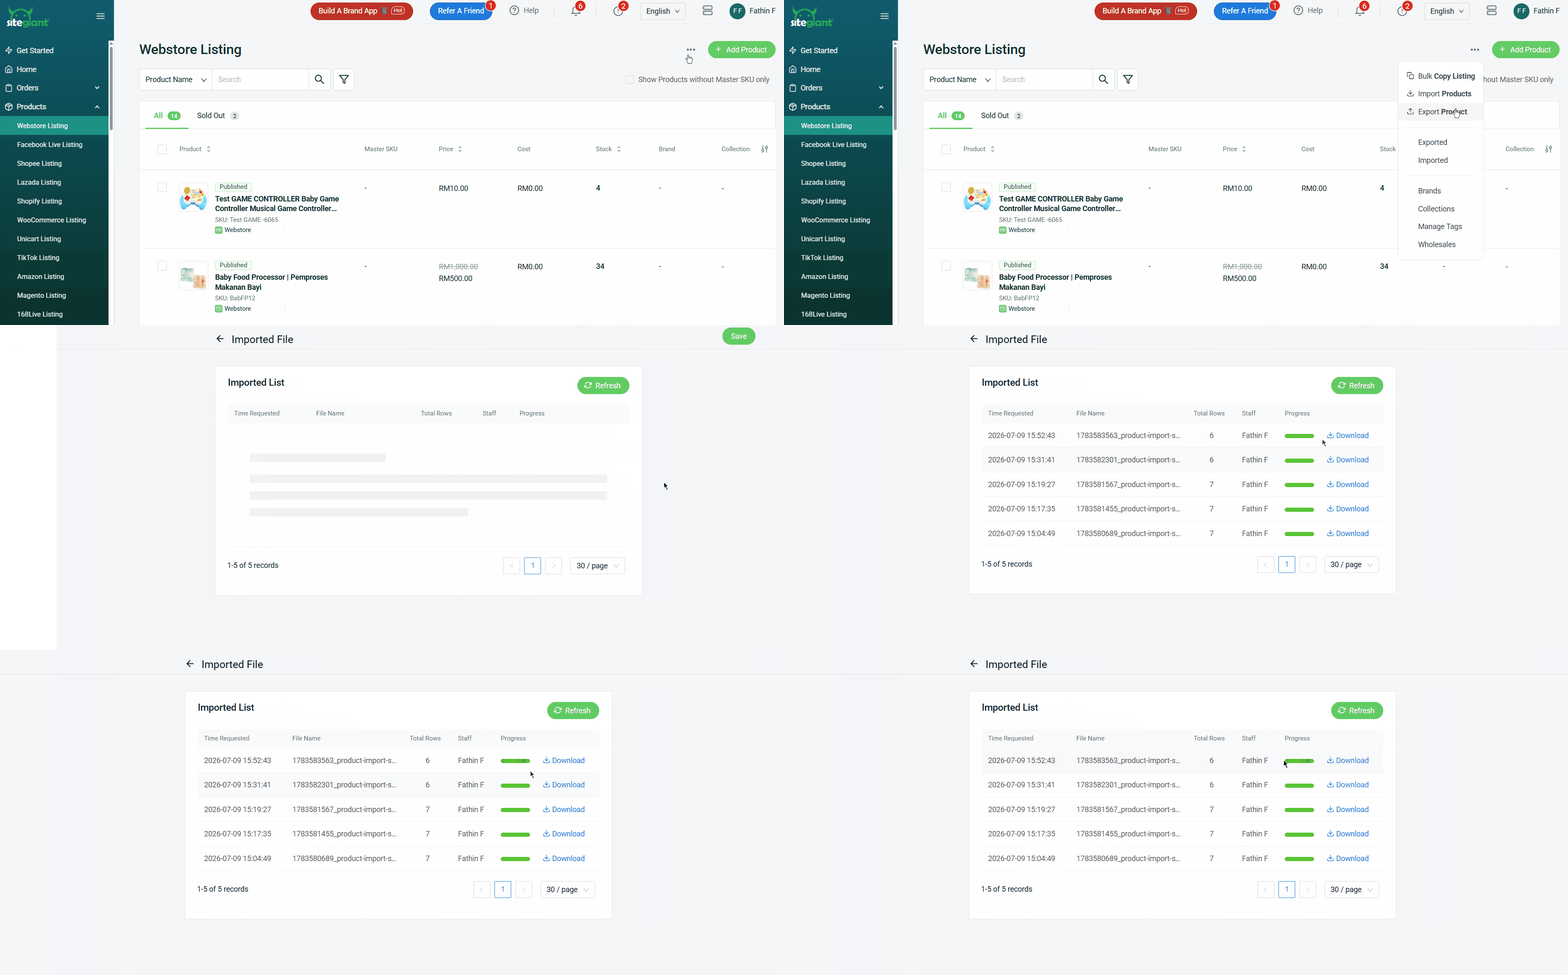
Step 6: Wait for the system to process the imported file. Go to More (…) > Imported. Once the progress bar turns green, it indicates that the file has been successfully uploaded.
📝Additional Information
1. Bulk Copy Listing
You can copy products from Webstore Listing to other marketplaces or from other marketplaces to Webstore Listing. Learn More