1. Introduction
2. Add Inventory Item
3. Bulk Create Inventory Item
1. Introduction
An inventory item refers to any product, material, or stock that your business needs to track, manage, and fulfill orders for. Creating and maintaining inventory items allows you to keep stock records accurate, monitor inventory levels across warehouses, and sync stock to your associated channels and marketplaces.
📌Note: Each individual inventory item can be associated with up to 500 product SKUs, Webstore listings are excluded from this limit.
2. Add Inventory Item
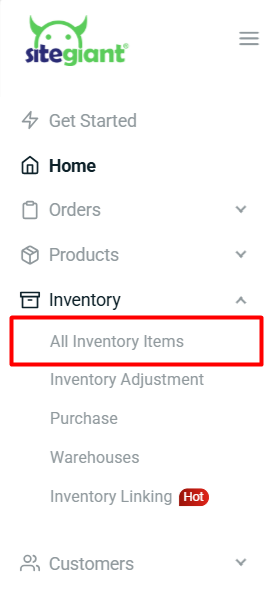
Step 1: Navigate to Inventory on the sidebar menu > All Inventory Items.
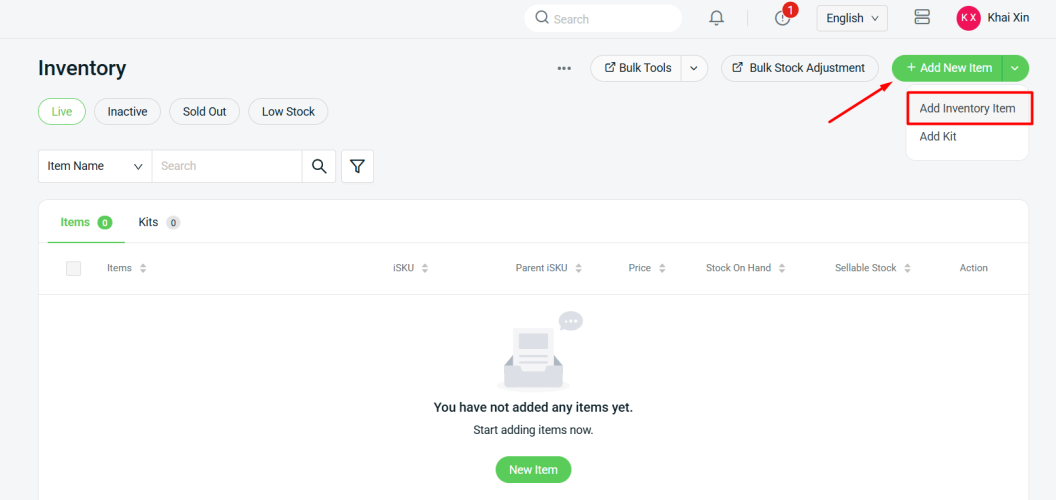
Step 2: Go to + Add New Item > Add Inventory Item.
Step 3: Fill in the Item Info accordingly.
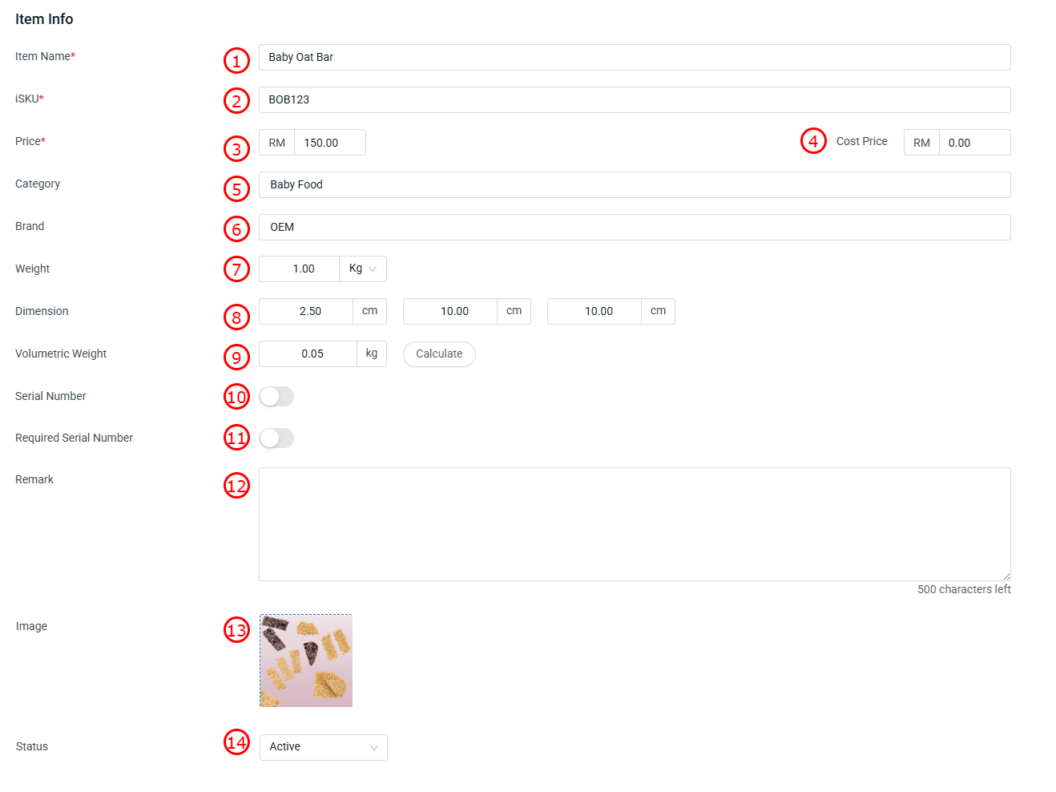
📌Note: Item info with * is required to fill in.

1. Item Name*: Name of the product or item.

2. iSKU*: Inventory stock keeping unit (unique item code).

3. Price*: Selling price of the item.

4. Cost Price: Purchase cost of the item.

5. Category: Item category or classification.

6. Brand: Brand of the item.

7. Weight: Actual weight of the item.

8. Dimension: Length, Width, Height of the item.

9. Volumetric Weight: Shipping weight based on size, used for logistics. Click on Calculate, system will automatically generate the data based on the dimensions.

10. Serial Number: Unique identifier assigned to each individual item. Learn more on How To Enable Serial Number Tracking For Inventory Item. (Only available to ERP Premium plan and above)

11. Required Serial Number: When enabled, system will prompt for serial number entry for this item when scanning order using Order Fulfillment Assistant. Learn more on How To Insert Serial Number And Print Out In Invoice.

12. Remark: Additional notes or description of the item.

13. Image: Upload the product image in JPG or PNG file. Recommended image size: 800 x 800 pixels and below 300KB.

14. Status: Allows you to change the status of a discontinued item to inactive. After changing the item status, you will no longer see it in the Live inventory item listing. Other than that, when updating Item Status or Stock Status for an item linked to a Kit, the alert "Kit detected for this item" will appear to notify merchants that they may need to apply the same status to the Kit separately to achieve the same effect.
Step 4: Under Warehouse Info section, choose the Warehouse* > Fill in Sellable Stock > set Reserved Stock (optional).
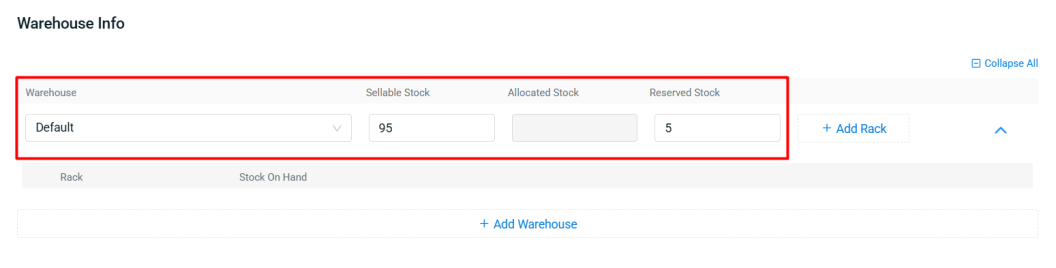
💡Tips: Learn more on How To Set Reserved Stock For Local Inventory.
Step 5: Click + Add Rack to assign the stock level to each rack.
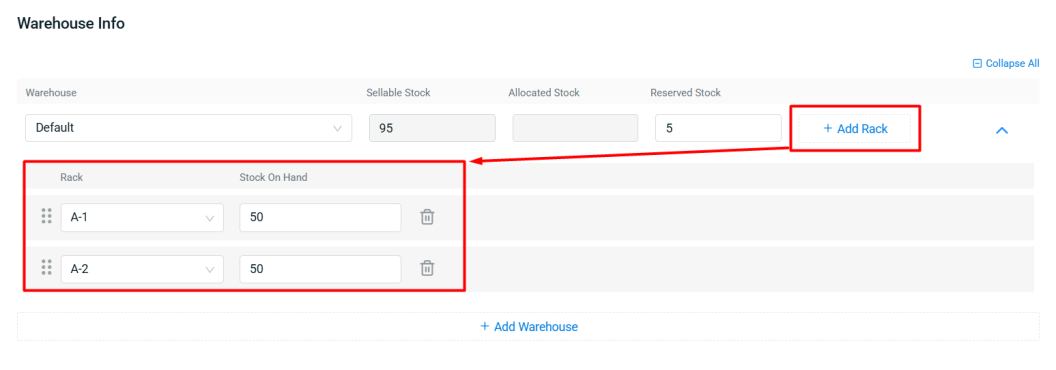
💡Tips: Learn more on How To Manage Rack Group And Rack.
Step 6: Click + Warehouse if the item is stored in multiple warehouses.
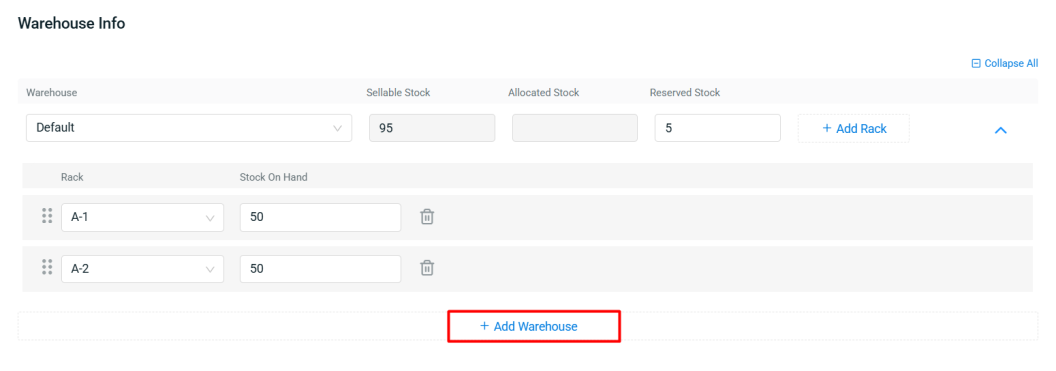
💡Tips: Learn more on How To Manage Warehouse.
Step 7: Click + Add UPC if the item has a UPC number.

💡Tips: Learn more on How To Update UPC.
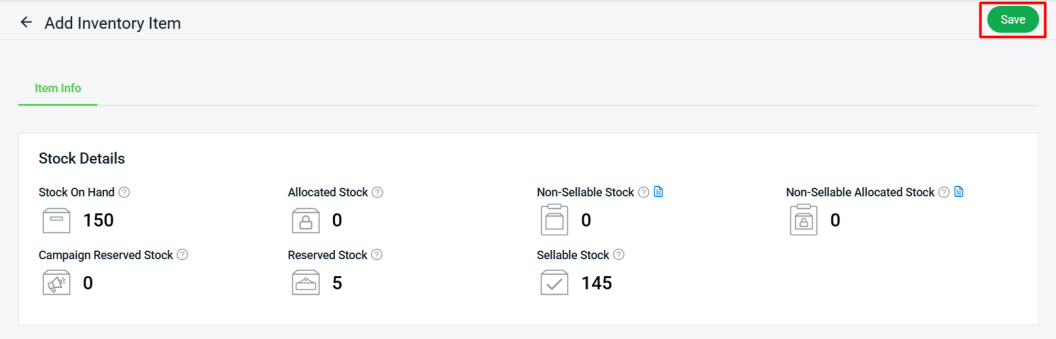
Step 8: Fill in the Restock Details accordingly.
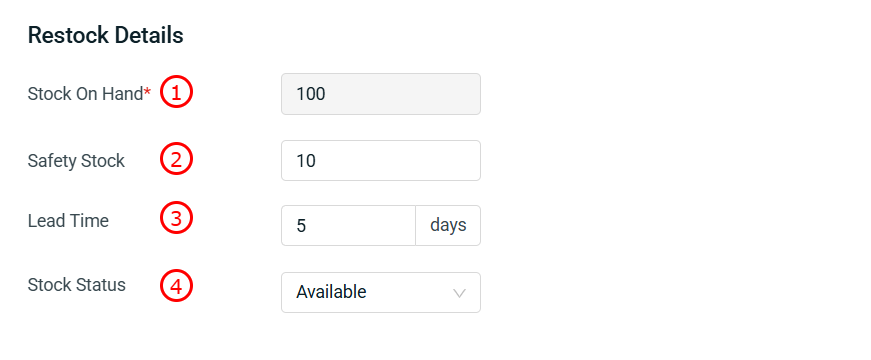
1. Stock On Hand: The total stock you have now in the warehouse(s).

2. Safety Stock: Minimum stock level for this item. When stock falls below this level, it will appear in Low Stock tab and may need restocking.

3. Lead Time: The number of days needed for the stock to arrive when restocking.

4. Stock Status: Controls how stock availability syncs to associated channel(s). By default is set as Available, stock syncs normally based on the sellable stock. If set to Out of Stock, system will force sync stock as 0 to associated channel(s), even if stock is available.
Step 9: Click Save to create item.
3. Bulk Create Inventory Item
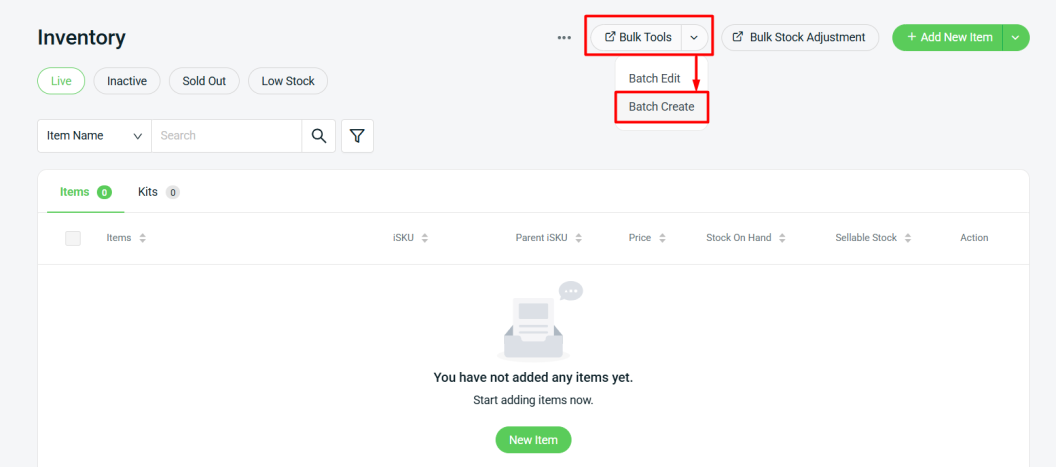
Step 1: Navigate to Inventory on the sidebar menu > All Inventory Items.
Step 2: Click Bulk Tools > Batch Create.
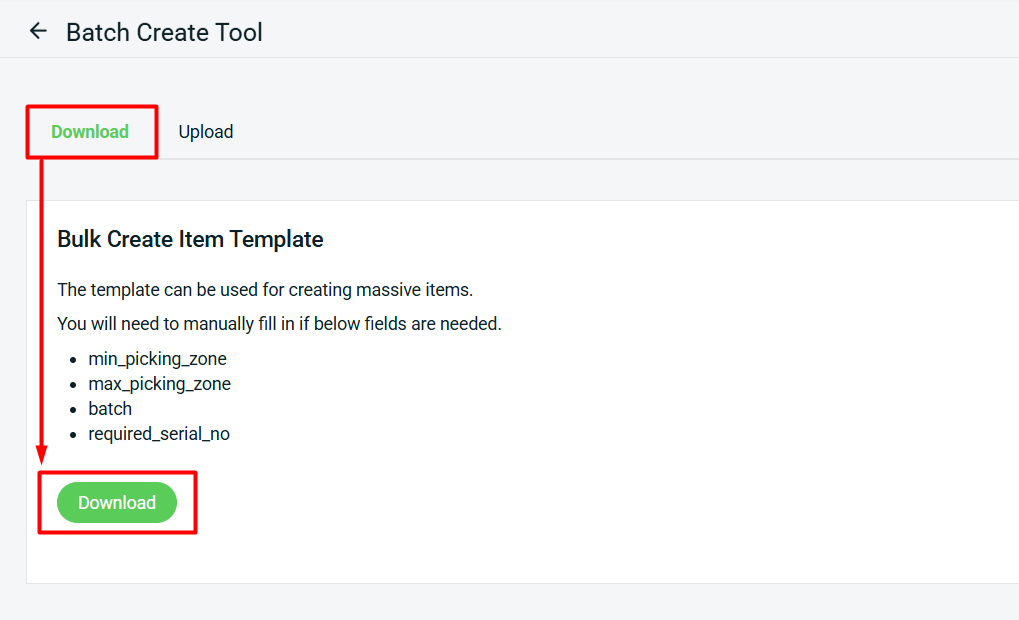
Step 3: Under Download tab, click the Download button to download the bulk create item Excel template.
Step 4: Fill in the inventory item details field in the Excel field.

📌Note: Column with * is required.
| Column | Description | Sample Data |
| name* | Name of the product or item | Fluffy Frog Plush Toy (6cm) |
| isku* | Unique code to identify inventory item | fluffy-frog-6cm |
| parent_isku | Code to group inventory item to manage together | Plush Toy |
| price* | Selling price of the item (without currency) | 99 |
| cost | Purchase cost of the item (without currency) | 60 |
| item_status* | Controls if the item is available | active / inactive |
| brand | Brand of the item | OEM |
| category | Item cateogry or classification | Toys |
| upc | Universal Product Code, for barcode scanning | 123456781252 |
| remark | Additional notes or description of the item | Gift packaging available upon request |
| weight | Actual weight of item | 1 |
| weight_unit* | Unit of measurement for weight | kg / g / oz / lb |
| length | Item length | 10 |
| width | Item width | 10 |
| height | Item height | 10 |
| volumetric_weight | Shipping weight based on size, used for logistics | 0.2 |
| safety_stock | Minimum stock level for this item to considered as low stock | 10 |
| lead_time | Number of days needed for the stock to arrive when restocking | 5 |
| stock_status* | Controls how stock availability syncs to associated channel(s) | available / out_of_stock |
| warehouse* | Storage location of the item | Default |
| rack | Specific rack, shelf, or area within the warehouse | A-1 |
| stock_on_hand* | Total stock you have now in the warehouse | 100 |
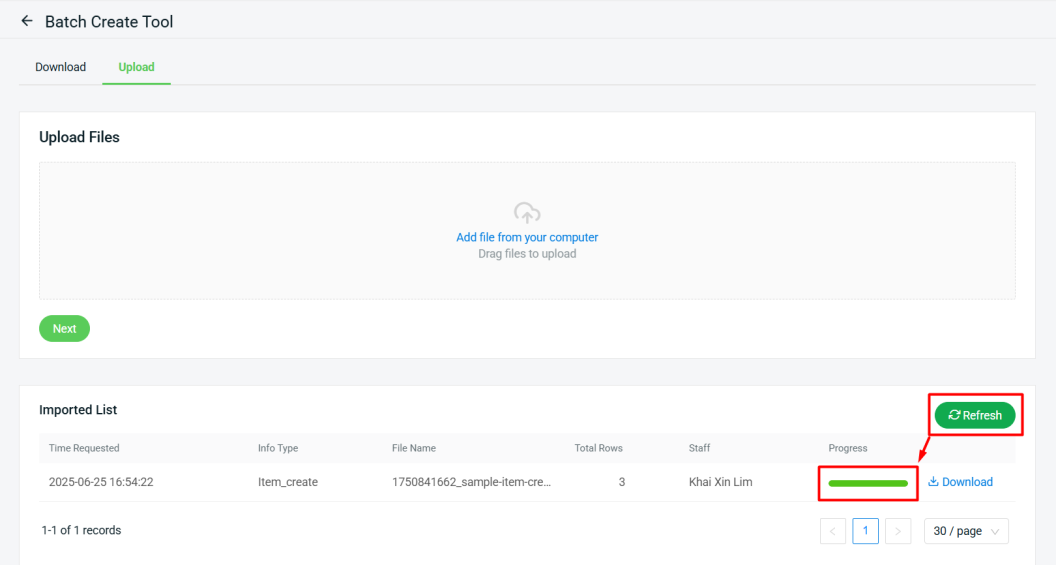
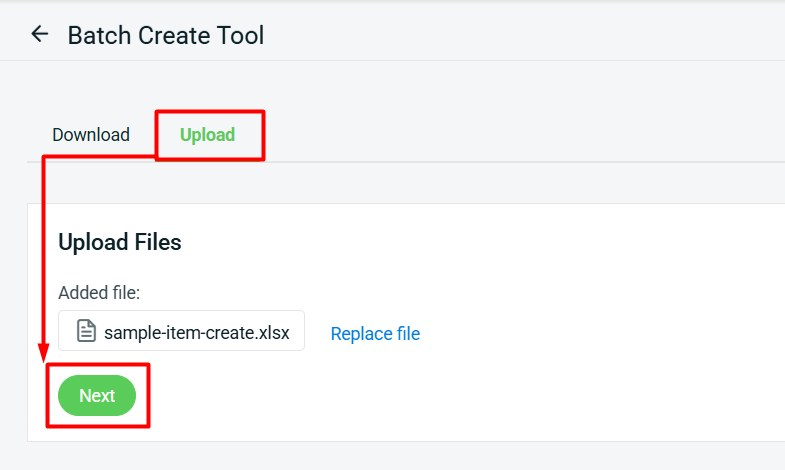
Step 5: Back to SiteGiant Batch Create Tools page > go to Upload tab > upload the Excel file > Next.
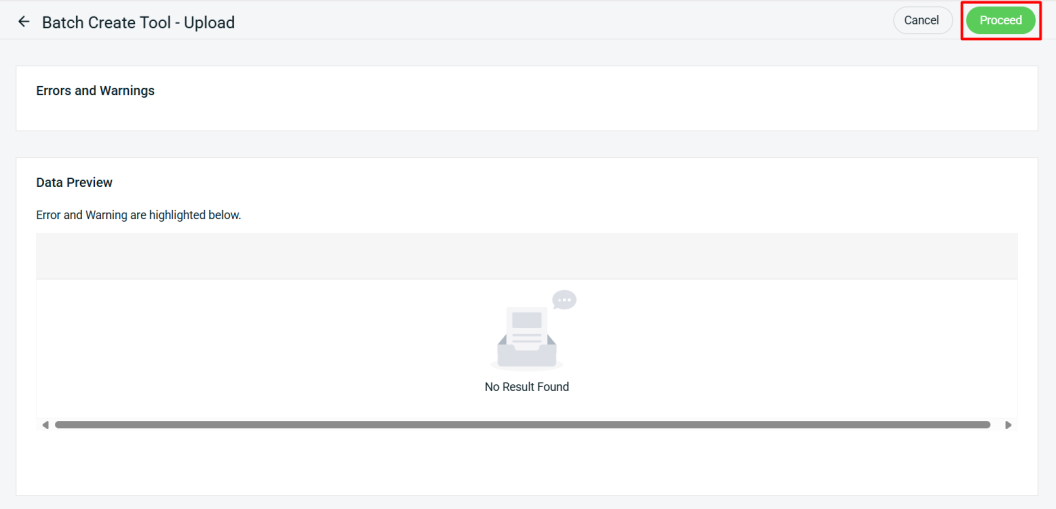
Step 6: If there are any errors in the Excel uploaded, you will see the error message in Errors and Warnings and it will show the error column in the Data Preview. Amend the error column and reupload the file. Click on Proceed if the file uploaded does not have errors.
Step 7: Click Refresh after some time, the data is successfully imported when the progress bar turns to green.