
1. Introduction
2. Assign Item With Rack
1. Introduction
Assign your item with a rack for a better reference of stock location when doing the order fulfillment. The rack location of the item will be shown at the Packing List or Pick List.
2. Assign Item With Rack
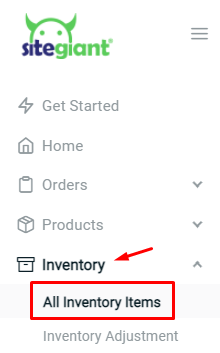
Step 1: Go to All Inventory Items on SiteGiant dashboard menu
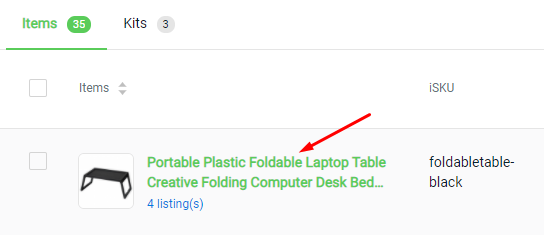
Step 2: Click on the inventory item name
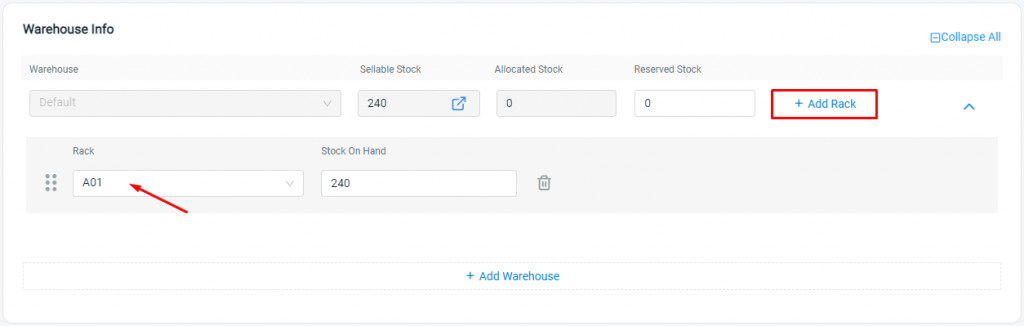
Step 3: Click + Add Rack > select the Rack from the list
📌Note: Click here to learn about how to create rack
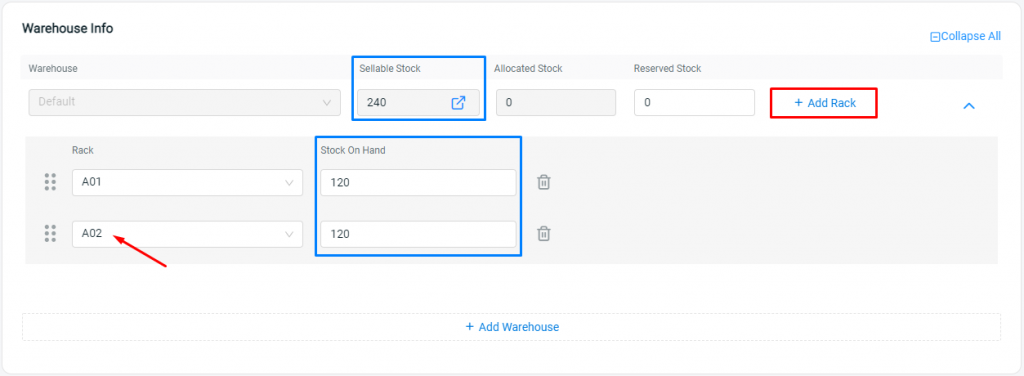
Step 4: If your inventory items have multiple racks, you may click + Add Rack again and distribute the stock level into each rack
📌Note: You may drag and drop to move the rack sequence. Stock will be deducted from the first rack when the order is placed.
Step 5: Save the item once done the update