
1. Introduction
2. Create Order Manually (Customer Info)
3. Create Order Manually (Order Details)
4. Additional Information
1. Introduction
Most of the time, you’ll be receiving orders automatically when customers place orders through your webstore. However, in some cases, you may receive orders through other sources such as Walk in Customer, WhatsApp, Facebook Messenger, Instagram, etc. Hence, to keep track of your orders and inventory, you may manually create these custom orders on the platform.
2. Create Order Manually (Customer Info)
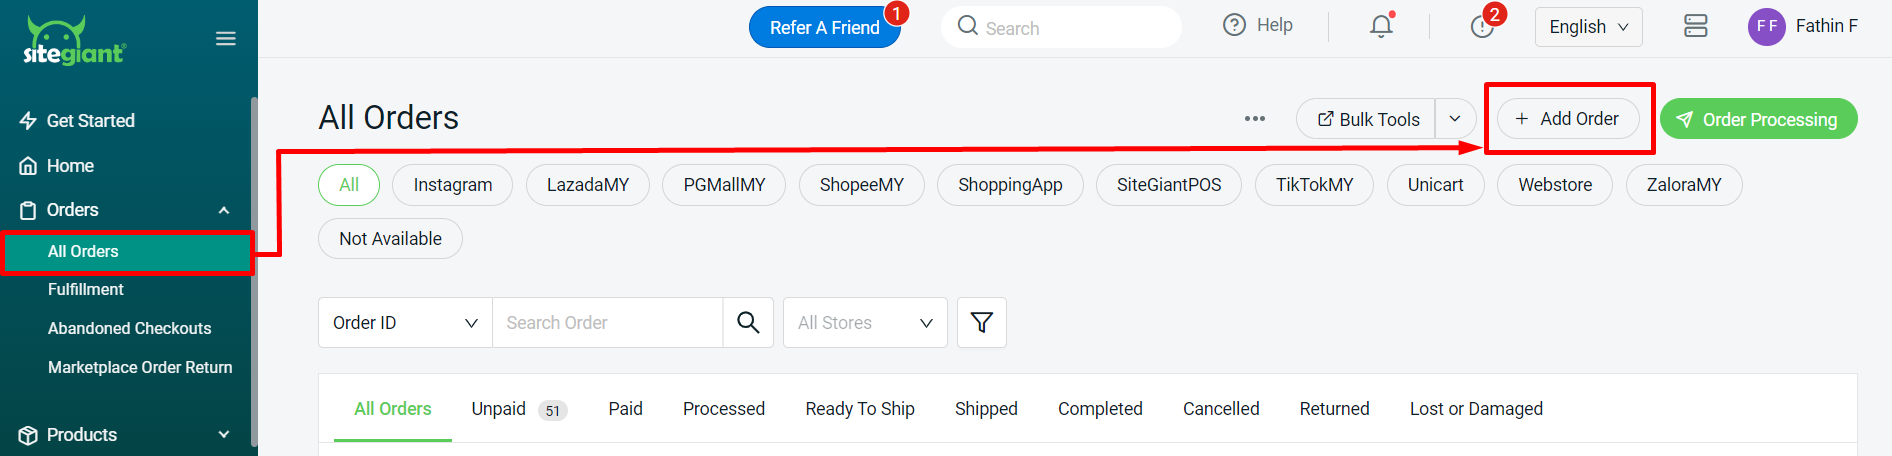
Step 1: Navigate to Orders > All Orders > + Add Order
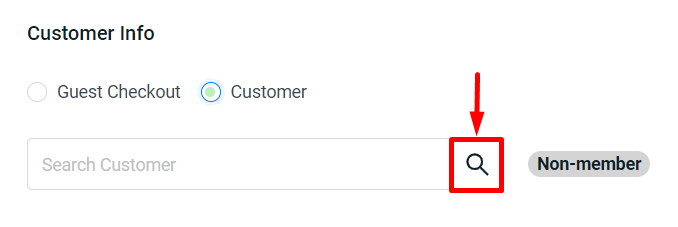
Step 2: Under Customer Info, you will see Guest Checkout and Customer.
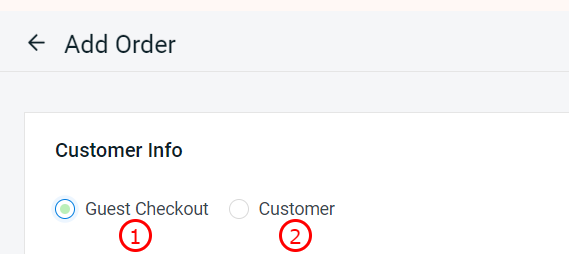
1. Guest Checkout: You can manually add orders without creating a customer account. You can directly enter customer information on the page. Aside from that, the seller can use this Guest Checkout to create an instant order without the customer's information. However, the seller must ensure that the City/Postcode shipping address is correctly filled out.
2. Customer: You can create new customer or select existing customer record in your account.
Guest Checkout
Step 1: Enter the customer’s Billing Address details accordingly > click the Save button.
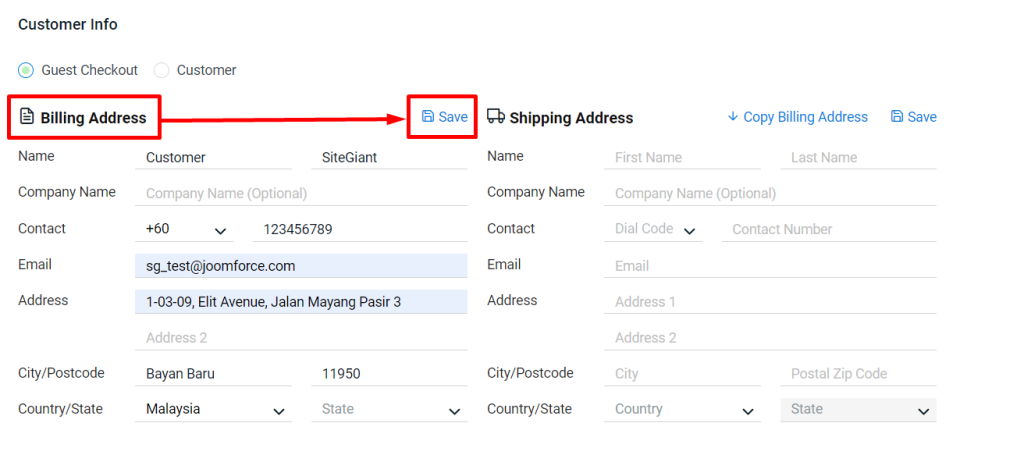
Step 2: You can enter the Shipping Address manually or use the Copy Billing Address button to make it faster > once done, click Save.
📌Note: Please ensure that you enter a City/Postcode in the Shipping Address field to enable the shipping option.
Customer
Step 1: Click on Search Customer to insert the customer details.
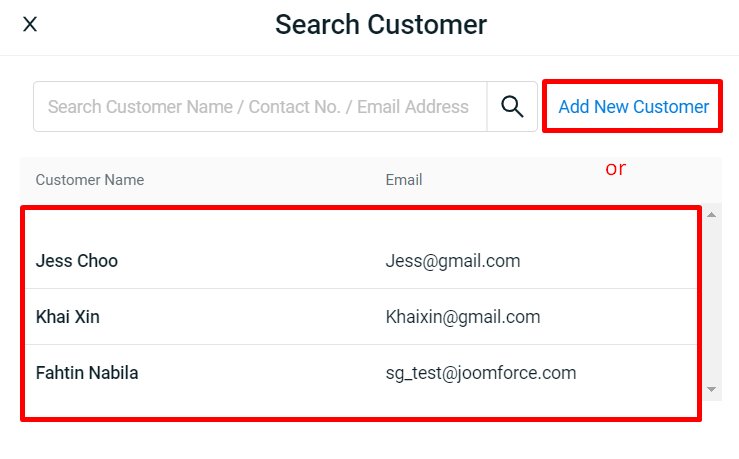
Step 2: You can either Add New Customer or select a customer from your existing customer list.
Step 3: The customer’s Membership and Customer Group are displayed when you select their name.
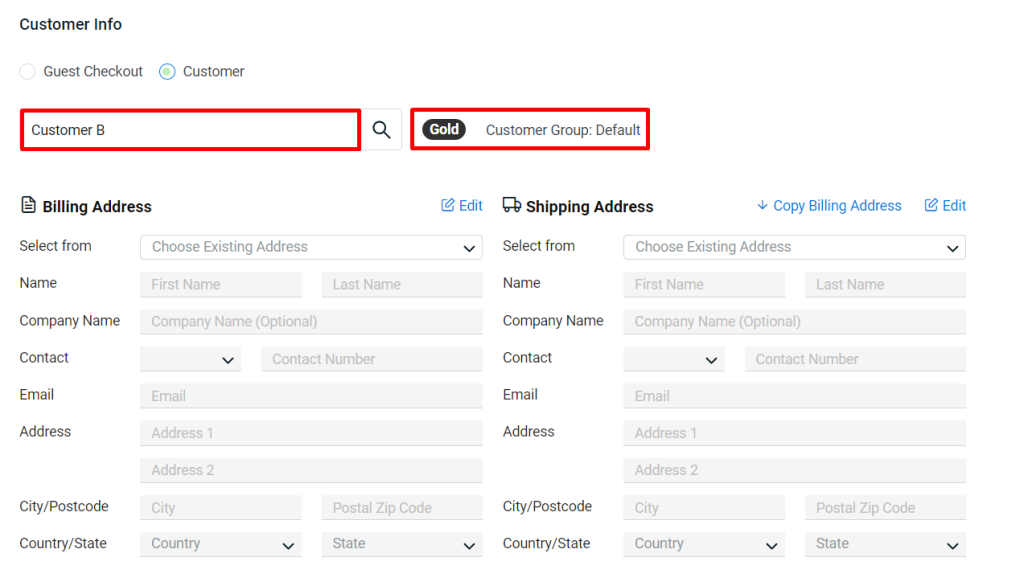
💡Tips: Learn more on How to Create Membership and How to Create Customer Group.
Step 4: Select Billing Address > select Shipping Address or use Copy Billing Address button to update the Shipping Address. You may use the Edit button to adjust the details as well.

📌Note: The address will only appear if the seller or the customer has updated it in the customer’s account.
3. Create Order Manually (Order Details)
Step 1: Under Order Details, you have the choice of selecting/adding a product from the list by clicking on +Add Custom Sale, +Add Inventory Item, or +Add Product.
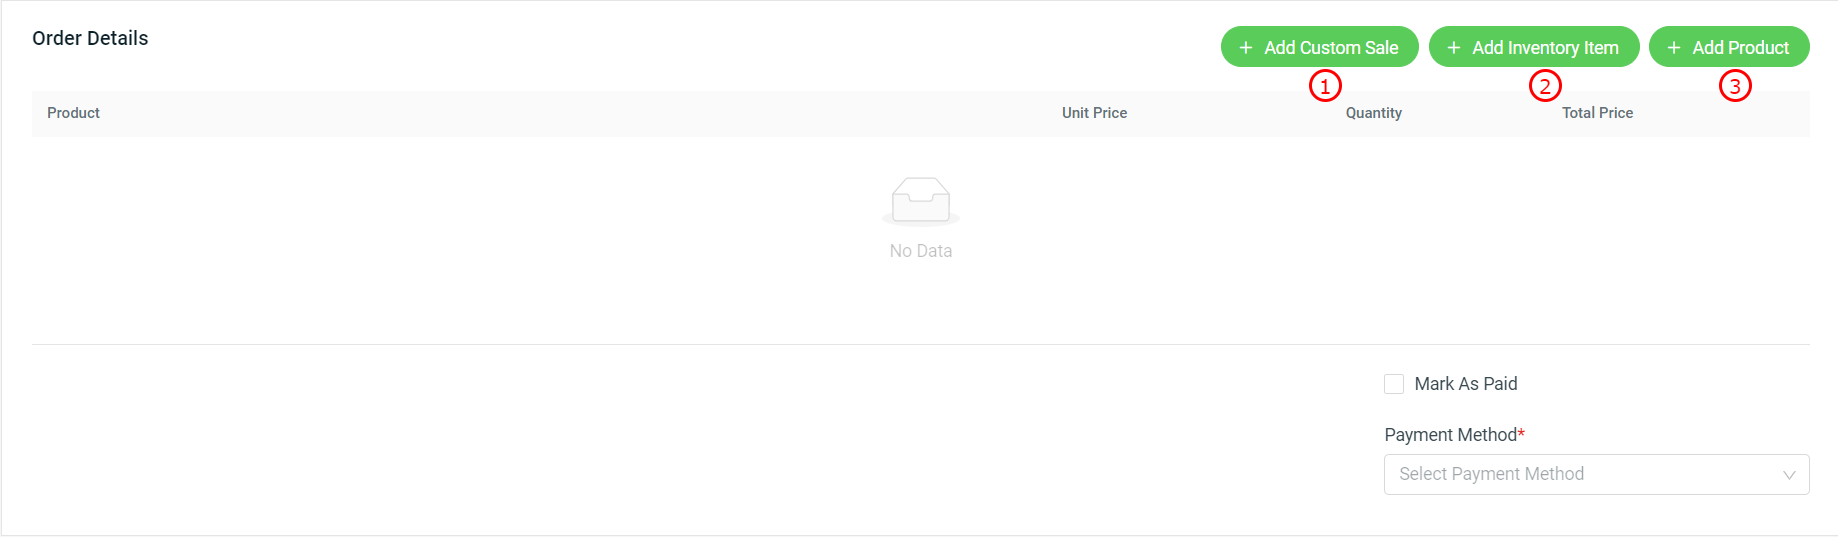
1. +Add Custom Sale: You can add sales for products that are not on your product list or inventory.(Note: Custom sales products will not be automatically added to your webstore listing).2. +Add Inventory Item: You can add products to the order based on your inventory item listing. The product can be selected by Item or Kit.
3. +Add Product: You can add products to the order based on your webstore listing. The product can be selected based on All Product, Discounted Price, etc.
 2. +Add Inventory Item: You can add products to the order based on your inventory item listing. The product can be selected by Item or Kit.
 3. +Add Product: You can add products to the order based on your webstore listing. The product can be selected based on All Product, Discounted Price, etc.

Step 2: After adding the product, it will show the customer’s order history below the Last Selling Price.
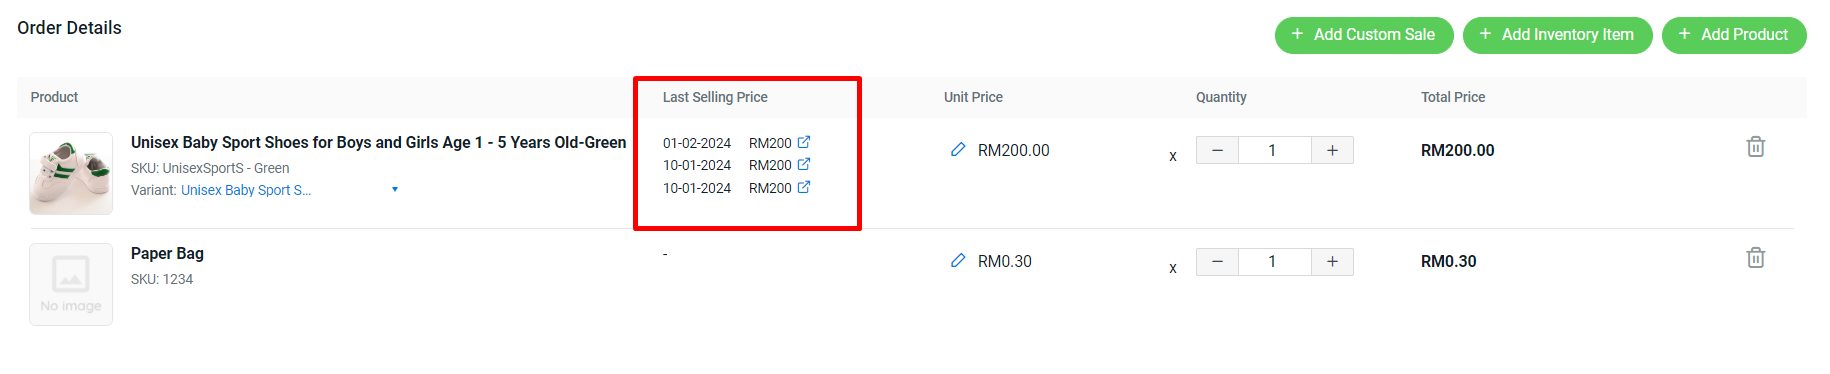
📌Note: The Last Selling Price will only show the last three dates of customer purchases.
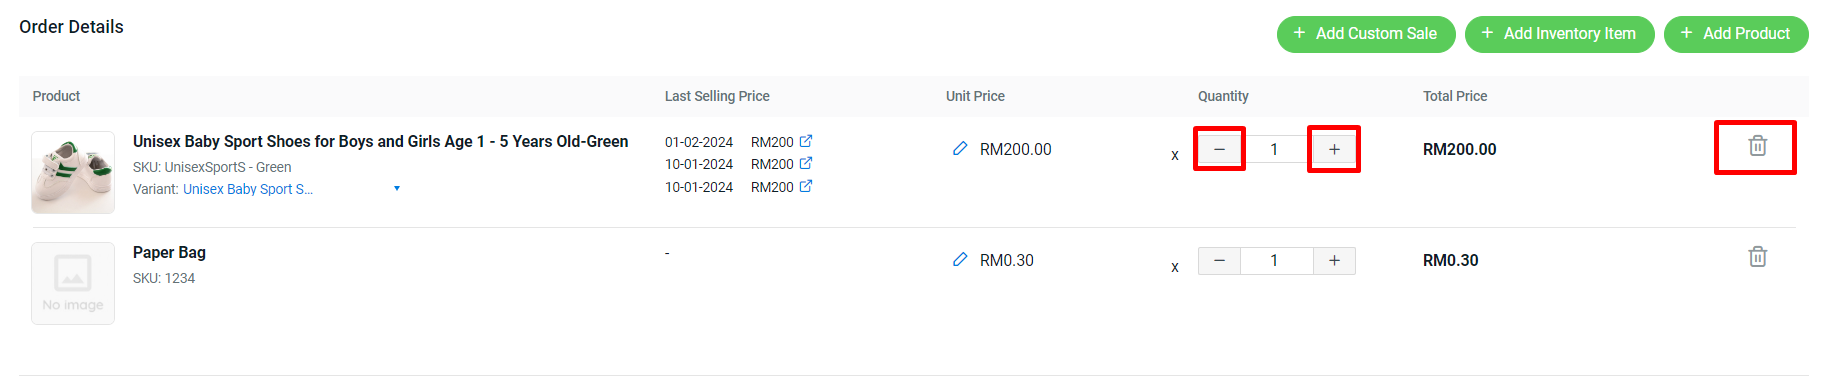
Step 3: The quantity can be adjusted by clicking the -/+ button. If you accidentally added the wrong product, you can remove it from the Order Details by clicking the delete button.
Step 4: You can fill out the Order Details as follows.
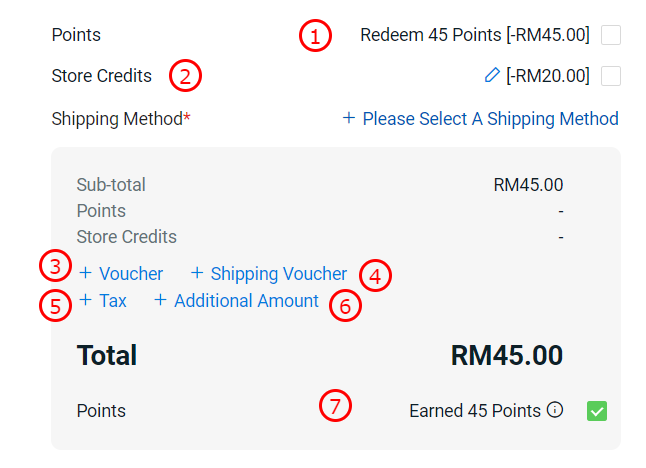
1. Redeemed Points: It is a collection of points earned by the customer from previous purchases. You can tick the box if the customer wants to redeemed it.
2. Store Credits: You could previously reward customers with Store Credits to use on future purchases. If the customer wants to use it, you can tick the box.
3. Voucher: You can select the voucher that you are created for your customer at Marketing Centre.
4. Shipping Voucher: You can select the shipping voucher that you are created for your customer at Marketing Centre.
5. Tax: Tax will be auto-fill in based on your tax settings.
6. Additional Amount: Seller may wish to provide a discount to selected customer or product only. Then, can use this additional amount to reduce the price.
7. Earned Points: You can tick box under earned points if want reward the point to your customer after they are purchasing.
📌Note: If you use Guest Checkout to place an order, your redeemed and earned points and store credits will not be displayed under order details.
Step 5: Click the Shipping Fee button > select Shipping Method > Save.
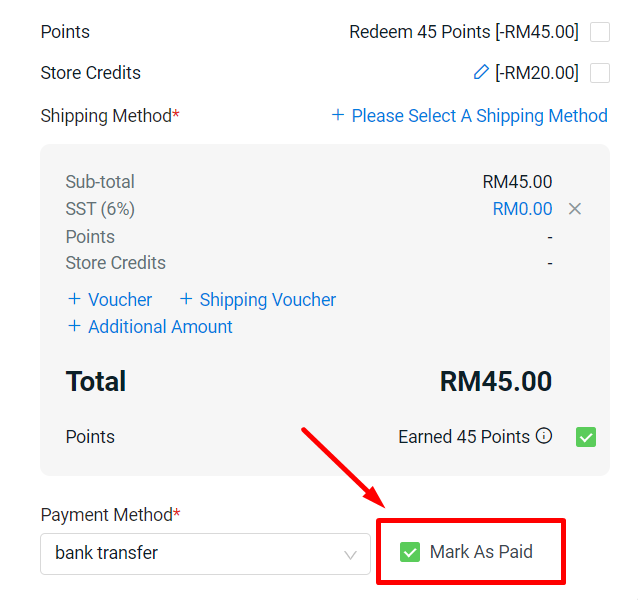
Step 6: Select the related Payment Method.
📌Note: If you choose Pickup as your shipping method, Cash On Delivery will be deactivated.
Step 7: If the customer has made an advance payment, you can tick the Mark As Paid button. (optional)
Step 8: You may add Customer Note for staff and customer’s reference > update Packing Note > upload the Attachments if there is any payment proof provided by the customer.

Step 9: Once all the setting is already done, click Create.

4. Additional Information
1. Currency Setting
You can choose your preferred currency before adding the product to the order. This is because the product’s price will be based on your chosen currency.
💡Tips: Learn more on How to Manage Currencies.