1. Introduction
2. Edit Inventory Item With Excel
1. Introduction
This feature allows you to edit inventory information and details in bulk and upload the Excel file so that you don’t have to edit the inventory one by one.
2. Edit Inventory Item With Excel
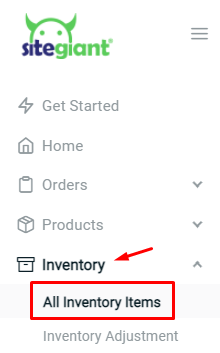
Step 1: Navigate to Inventory > All Inventory Items.

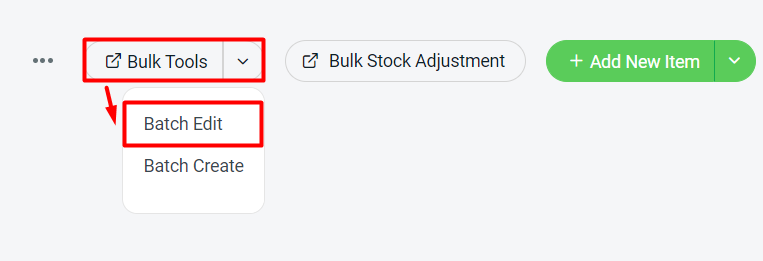
Step 2: Click on Bulk Tools > choose Batch Edit.

Step 3: Under download, select info type as Basic Info > you can choose to filter by category or brands > Generate.

Step 4: Download the generated excel file (zipped).

Step 5: Modify the item details in the excel file > Save.

📌Note: Column with * is Not Editable.
| Column | Description | Sample Data |
|---|---|---|
| name | Item name | Nestle maggi |
| *ISKU | Item SKU | nestle-maggi |
| *is_kit | Identify whether the item is an individual item or bundle kit | no: item yes: kit |
| parent_iSKU | The parent iSKU for item grouping | NP001 |
| price | Price of the item | 220 |
| *stock_on_hand | Stock that you currently have on hand | 100 |
| *sellable_stock | Stock that is sellable to the sales channels | 99 |
| cost | Cost of the item | 79 |
| item_status | The item status | active/inactive |
| length | (Dimension) Length of the item | 2 |
| width | (Dimension) Width of the item | 2 |
| height | (Dimension) Height of the item | 5 |
| weight | Weight of the item | 1 |
| volumetric_weight | Dimentional weight of your item | 0.02 |
| weight_unit | Weight measurement | g / kg / oz / lb |
| safety_stock | The minimum amount of stock which considered in low quantity | 10 |
| lead_time | The number of days needed to restock your items | 7 |
| category | Item category | Nestle |
| brand | Item brand | Nestle |
| UPC | Item Universal Product Code | 1022532015 |
| stock_status | The stock availability status | available / out_of_stock |
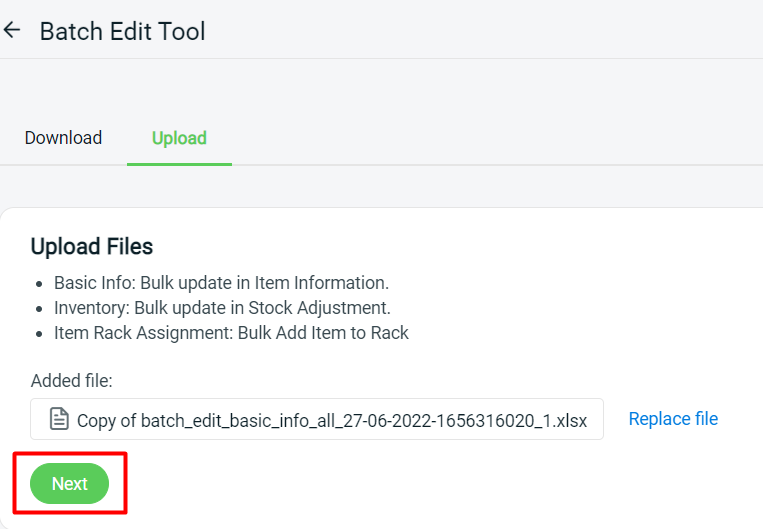
Step 6: Back to SiteGiant Batch Edit Upload page > upload the Excel file > Next.

Step 7: If there are any errors in the Excel uploaded, you will see the error message in Errors and Warnings and it will show the error column in the Data Preview. Amend the error column and reupload the file. Click on Proceed if the file uploaded does not have errors.

