
1. Introduction
2. GTO Report Setting
3. Generate and Submit GTO Report
1. Introduction

SiteGiant POS GTO Report can help you to automatically generate and submit your store’s daily Gross Turnover (GTO) report to the mall’s server.
This ensures smooth compliance with mall requirements while saving time, reducing errors, and letting you focus on running your business.
Currently, SiteGiant POS supports GTO report integration for the following malls:
Malaysia
- Sunway Velocity
- Sunway Pyramid
- Sutera Mall
- Gurney Plaza
- Queensbay Mall
- 1 Utama
- IOI City Mall
- Pavilion Bukit Jalil
Singapore
- Guoco Tower
This is an add-on feature.
2. GTO Report Setting
For Sunway Velocity, Sunway Pyramid, Sutera Mall, IOI City Mall, Pavilion Bukit Jalil, and Guoco Tower
Step 1: Navigate to SiteGiant POS channel on the sidebar menu > select the SiteGiant POS channel > Manage GTO Report > GTO Report Setting.
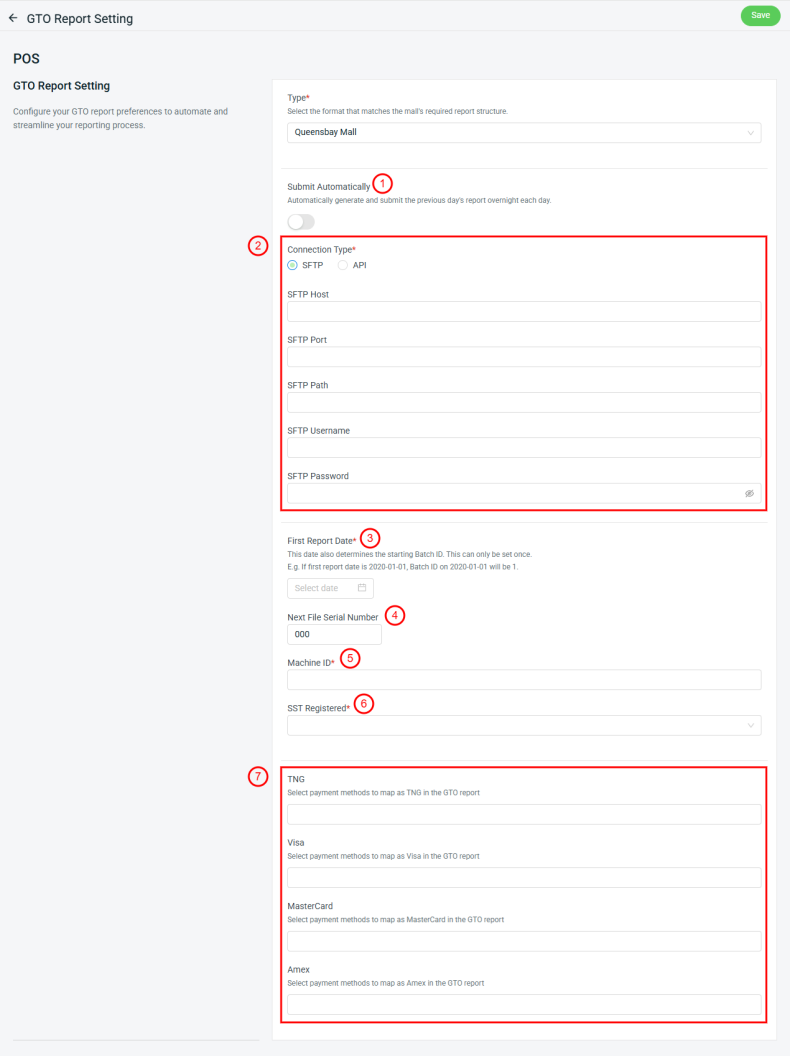
Step 2: Select your Mall Type > fill in the setting as shown below:
1. Submit Automatically: Enable this for system to automatically generate and submit previous day's GTO report to the mall's server overnight each day.

For example:
Today is 1/11/2025. If I enable this option today, then on the next day, which is 2/11/2025, the system will automatically generate and submit my GTO report on 1/11/2025 to the mall server at 3am.

2. Connection setting: Choose the appropriate connection type and fill in the details needed for connection.

3. First Report Date: Choose the first report date that will also be used as your starting Batch ID.

4. Machine ID: Fill in the Machine ID number that was assigned by your Mall Management.

5. SST/GST Registered: Choose Y if your company is SST/GST registered, else may choose N instead.

6. Payment Methods Mapping: You may map your SiteGiant POS payment methods with the payment methods of TNG/NETS, Visa, MasterCard, and Amex, for their amount to be displayed accordingly in the GTO report.
Step 3: Click Save once done.
For Gurney Plaza and Queensbay Mall
Step 1: Navigate to SiteGiant POS channel on the sidebar menu > select the SiteGiant POS channel > Manage GTO Report > GTO Report Setting.
Step 2: Select your Mall Type > fill in the setting as shown below:
1. Submit Automatically: Enable this for system to automatically generate and submit previous day's GTO report to the mall server overnight each day.

For example:
Today is 1/11/2025. If I enable this option today, then on the next day, which is 2/11/2025, the system will automatically generate and submit my GTO report on 1/11/2025 to the mall server at 3am.

2. Connection setting: Choose the appropriate connection type and fill in the details needed for connection.

3. First Report Date: Choose the first report date that will also be used as your starting Batch ID.

4. Next File Serial Number: By default, the starting serial number will be 000 for your first GTO report submission.

5. Machine ID: Fill in the Machine ID number that was assigned by your Mall Management.

6. SST Registered: Choose Y if your company is SST registered, else may choose N instead.

7. Payment Methods Mapping: You may map your SiteGiant POS payment methods with the payment methods of TNG, Visa, MasterCard, and Amex, for their amount to be displayed accordingly in the GTO report.
Step 3: Click Save once done.
For 1 Utama
Step 1: Navigate to SiteGiant POS channel on the sidebar menu > select the SiteGiant POS channel > Manage GTO Report > GTO Report Setting.
Step 2: Select your Mall Type > fill in the setting as shown below:
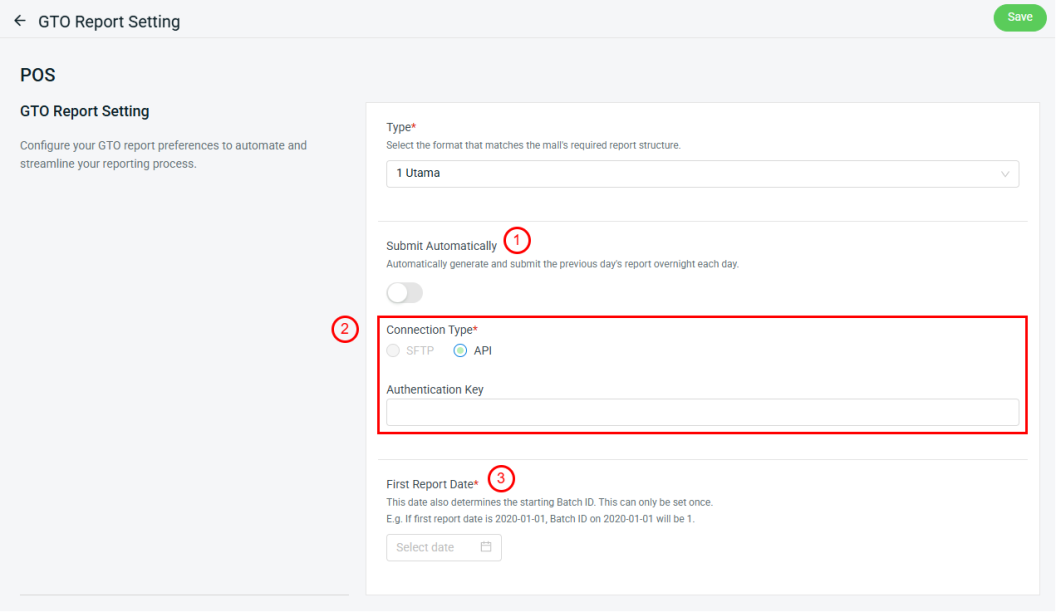
1. Submit Automatically: Enable this for system to automatically generate and submit previous day's GTO report to the mall server overnight each day.

For example:
Today is 1/11/2025. If I enable this option today, then on the next day, which is 2/11/2025, the system will automatically generate and submit my GTO report on 1/11/2025 to the mall server at 3am.

2. Connection setting: Choose the appropriate connection type and fill in the details needed for connection.

3. First Report Date: Choose the first report date that will also be used as your starting Batch ID.
Step 3: Click Save once done.
3. Generate and Submit GTO Report
📌Note: This section is about manually generating and submitting the GTO Report. If you have enabled auto submission in your GTO Report settings, then this part can be skipped.
For All Malls Except for 1 Utama
Step 1: In the GTO Report page, click … > Generate GTO Report > select the date(s) that you wish to generate report for > tick Submit generated report (may skip this if wish to generate report only) > Generate.
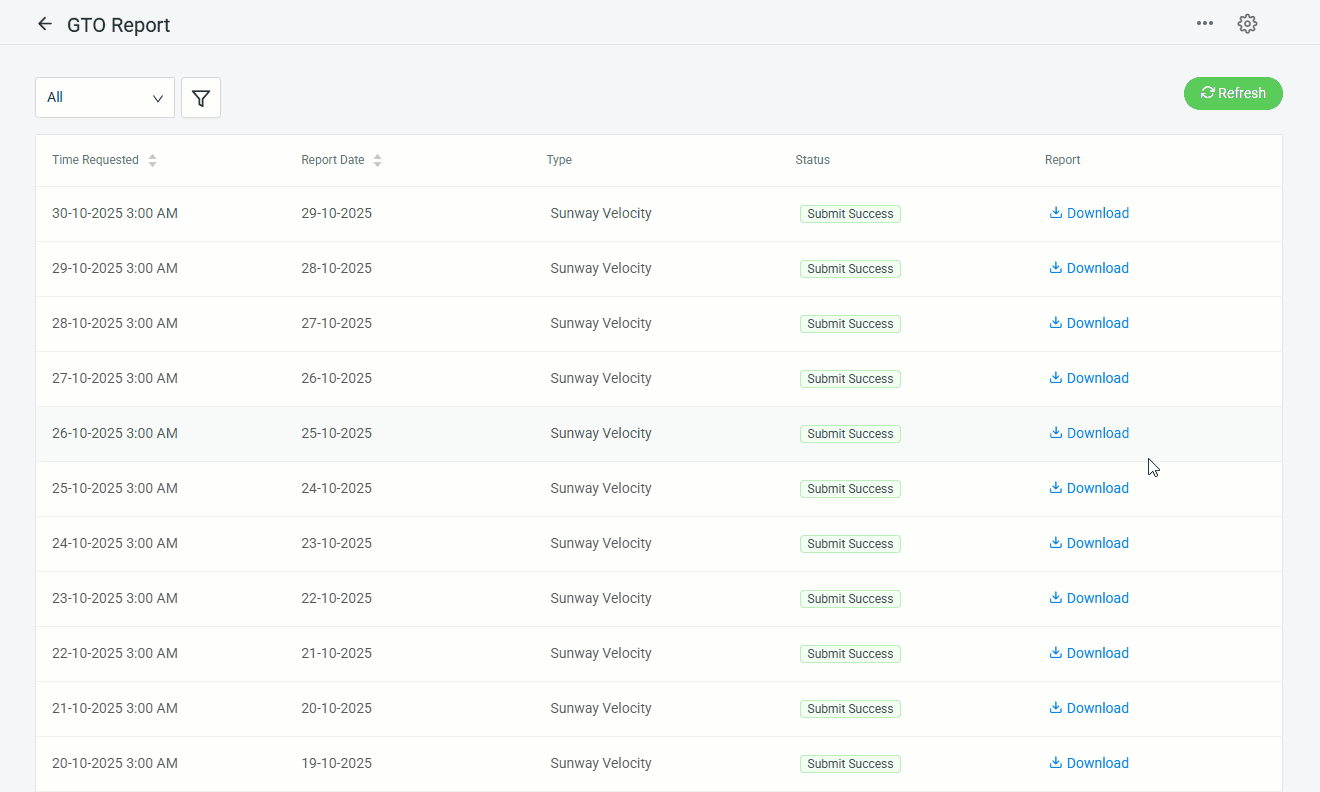
Step 2: After generate, you may click Download to see the generated report.

For 1 Utama
Step 1: In the GTO Report page, click … > Generate GTO Report > select the date(s) that you wish to generate report for > tick Submit generated report (may skip this if wish to generate report only) > Generate.
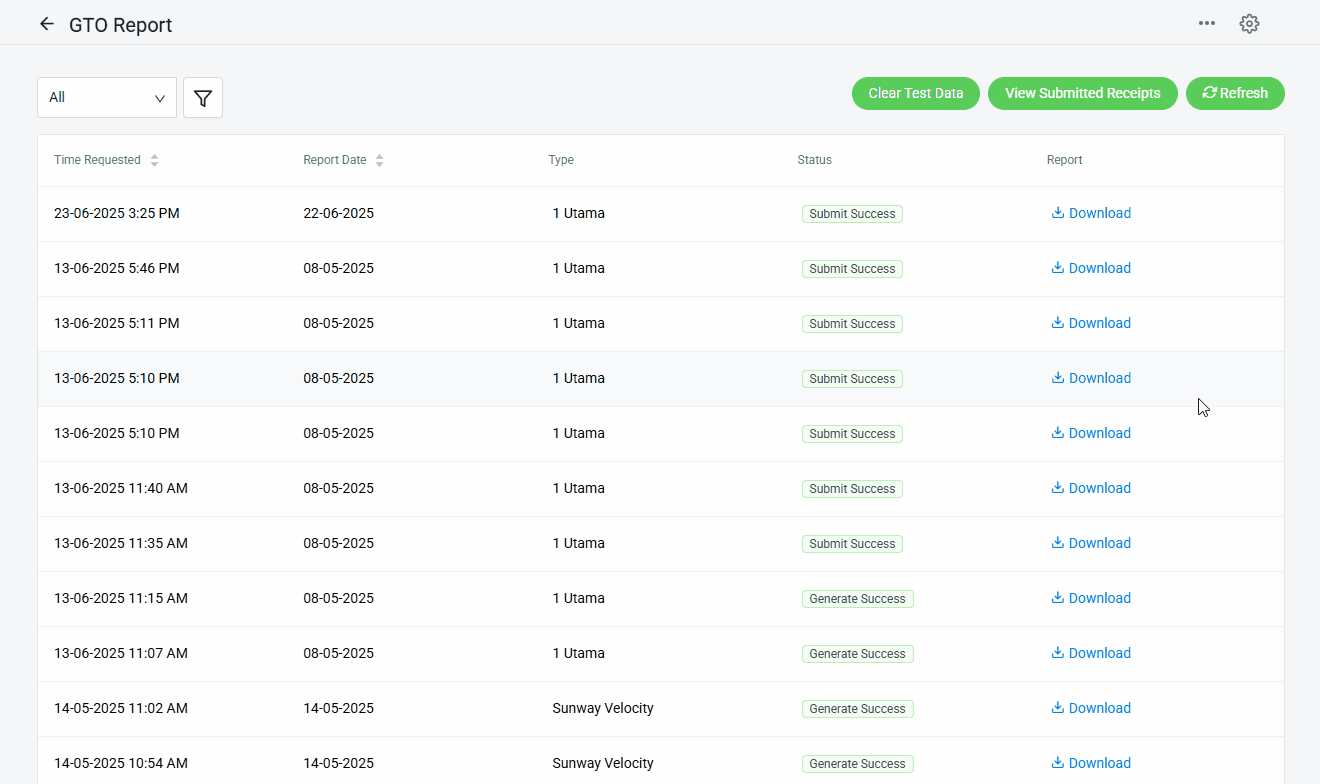
📌Note: During report generation, you may enable for Test Mode if you wish to submit the report as test data first.
Step 2: After generate, you may click Download to see the generated report.

Step 3: You may also view the submitted receipts by clicking on View Submitted Receipts > enter receipt date range > Submit.
📌Note: The submitted receipts listed inside will contain for both test and actual receipts data. You may click Clear Test Data to remove the test receipts data submitted so far.