1. Introduction
2. Add Advanced Shipping Notice
3. Import Restock Products
4. Receive And Stock In
5. Mark As Completed
6. Additional Information
1. Introduction

Advanced Shipping Notice (ASN) is a feature that helps you manage incoming items or Purchase Order items before they arrive at the warehouse. It allows you to create ASN in advance, making it easier to receive shipments, verify quantities, and stock in items when they arrive. Using ASN helps track incoming inventory more efficiently and ensures smoother warehouse operations.
This feature is only available in SiteGiant ERP Premium Plan and above.
2. Add Advanced Shipping Notice
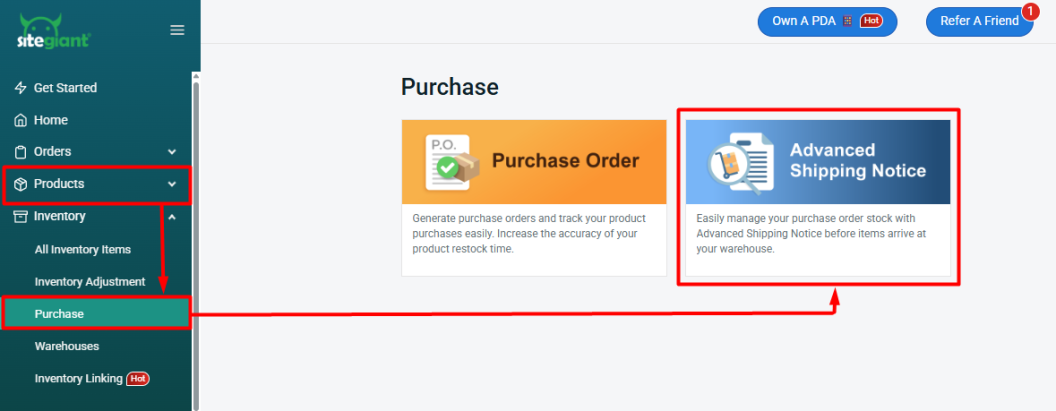
Step 1: Navigate to Products on the sidebar menu > Purchase > Advanced Shipping Notice.
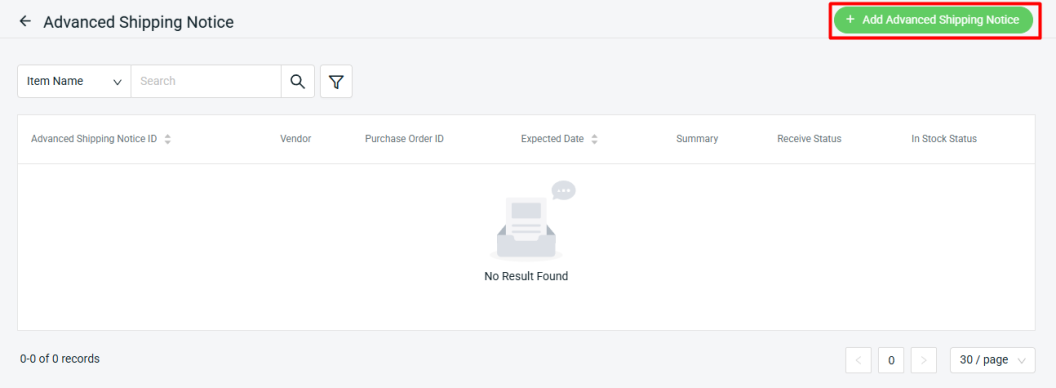
Step 2: Click + Add Advanced Shipping Notice.
Step 3: Fill in the ASN Details.

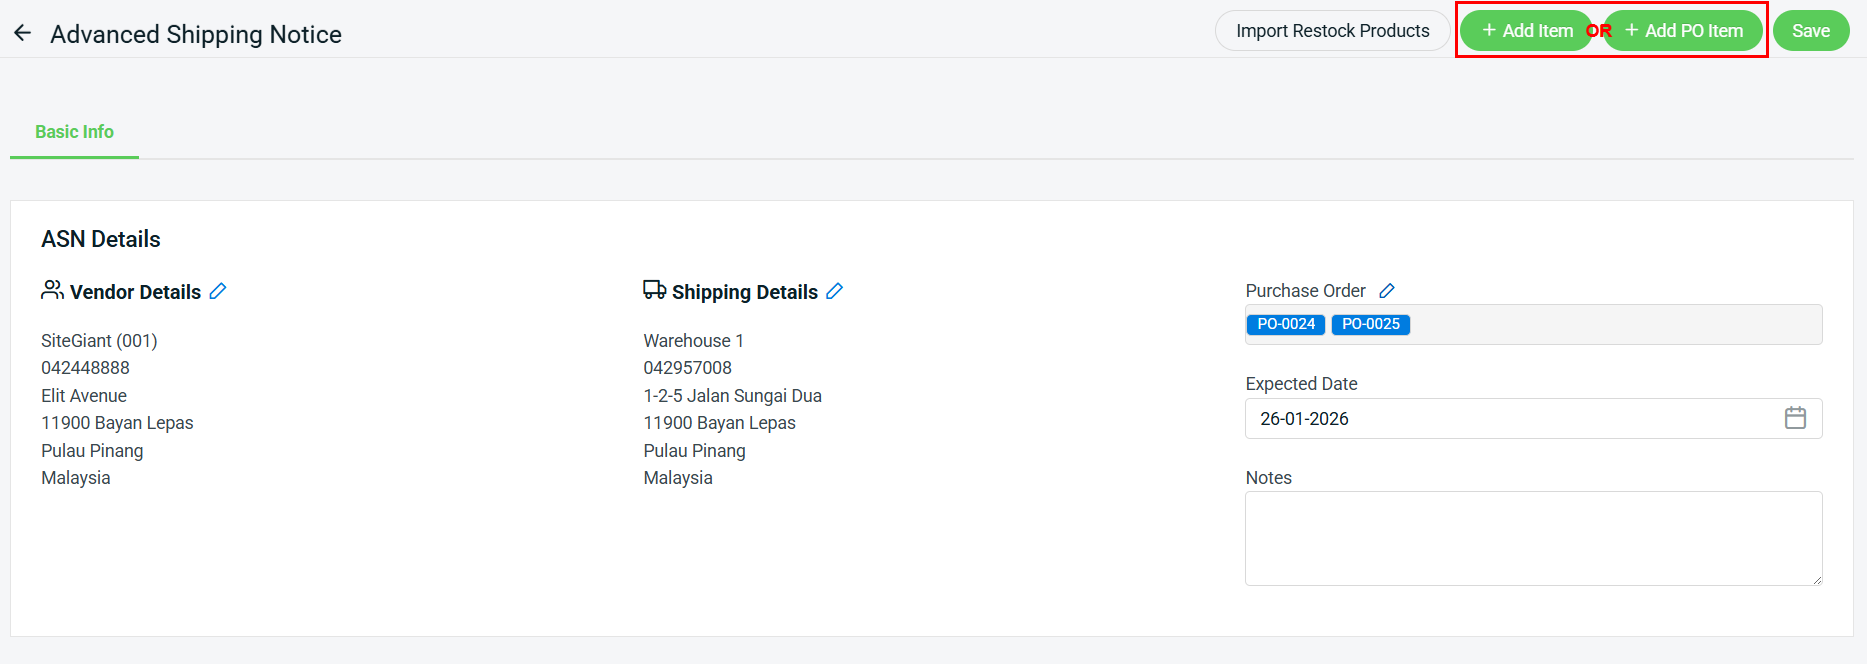
1. Purchase Order: Click edit Purchase Order and select either a single or multiple Purchase Orders to link them to an ASN. You can also rearrange the selected Purchase Order sequence to determine which Purchase Order items will be stocked in first.📌Note: After a Purchase Order (PO) is linked to an ASN, all item(s) for that PO must be handled through the ASN.
 📌Note: After a Purchase Order (PO) is linked to an ASN, all item(s) for that PO must be handled through the ASN.
Step 4: Click + Add Item or + Add PO Item if you have selected the Purchase Order in the ASN Details.
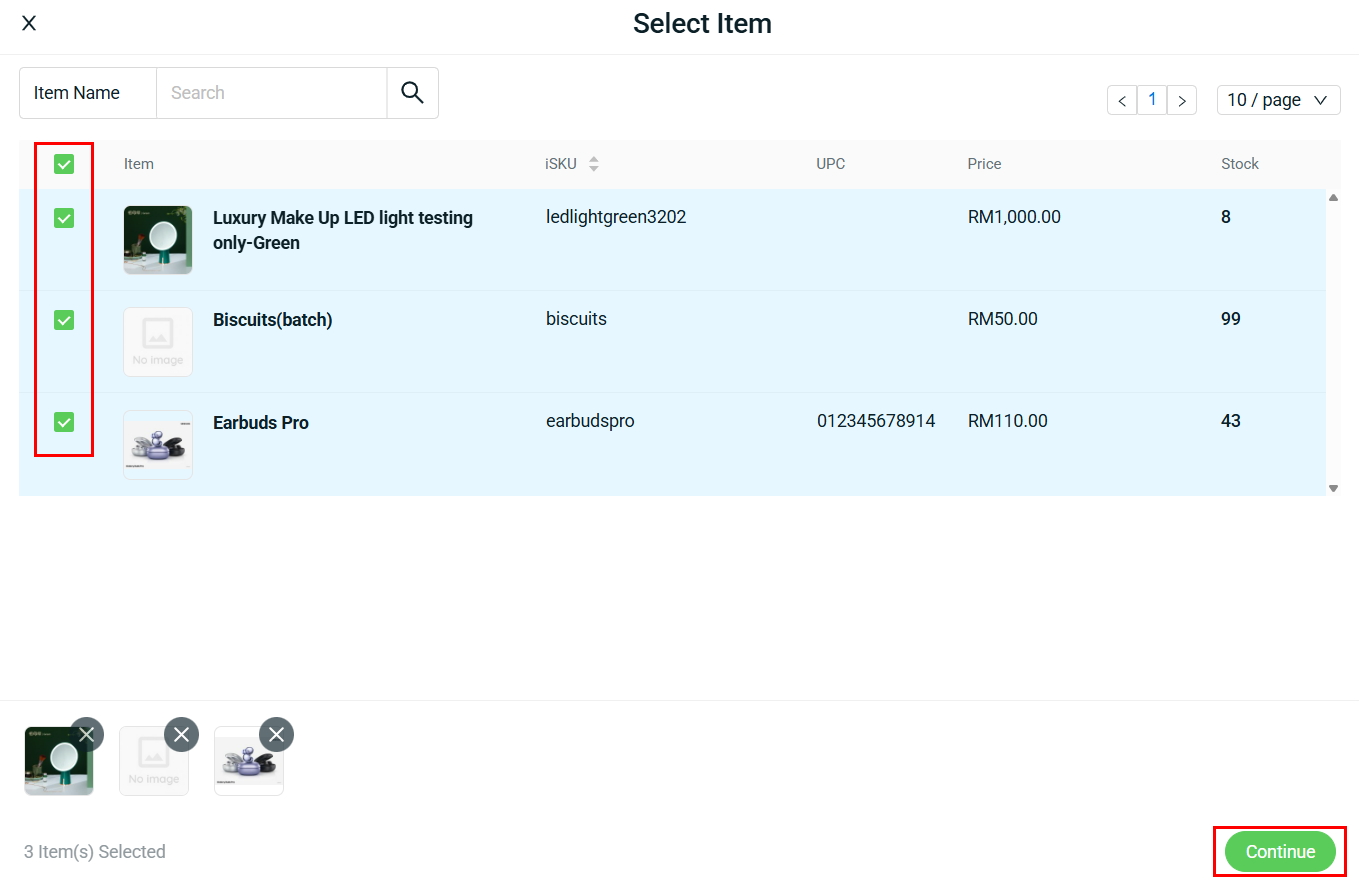
Step 5: Select the item(s) > Continue.
Step 6: Fill in the Supplier SKU (optional) and Quantity.
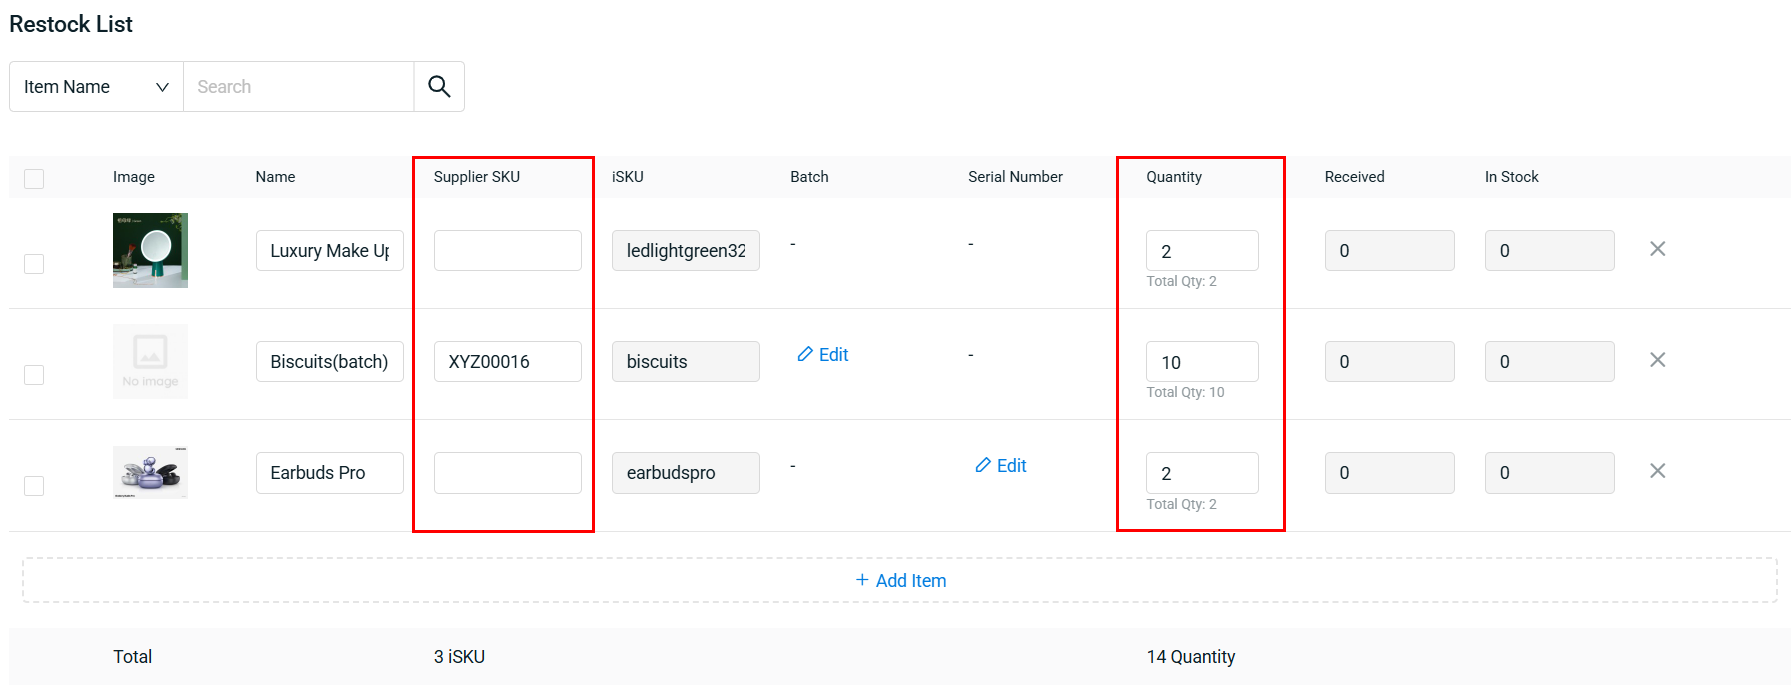
Step 7: Click the Save button to create the Advanced Shipping Notice.

3. Import Restock Products
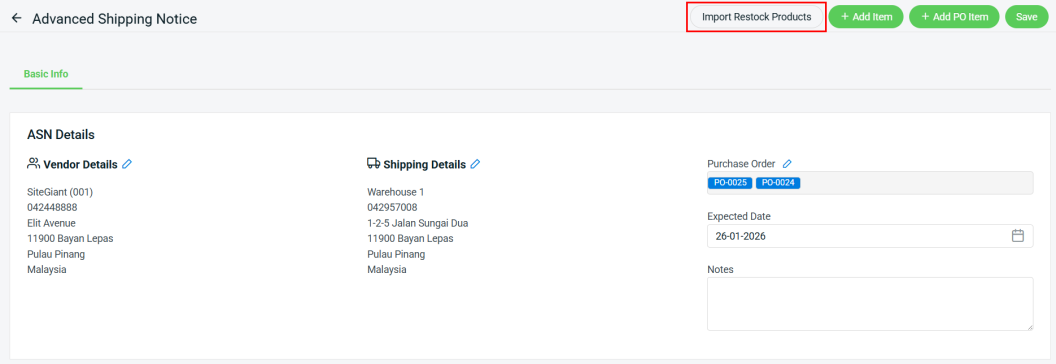
Step 1: You can also bulk add items to Restock List by using Import Restock Products.
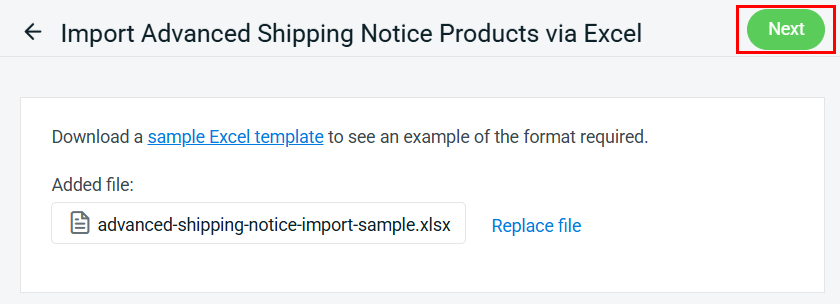
Step 2: Download the sample Excel template.

Step 3: Fill in the column in the Excel template according to the format > save the Excel file.

📌Note: You are required to create iSKU in Inventory first before filling in the ‘isku’ column.
💡Tips: Learn more on How To Create Inventory Item
Step 4: Back to SiteGiant Advanced Shipping Notice Import page > upload the Excel file > Next.
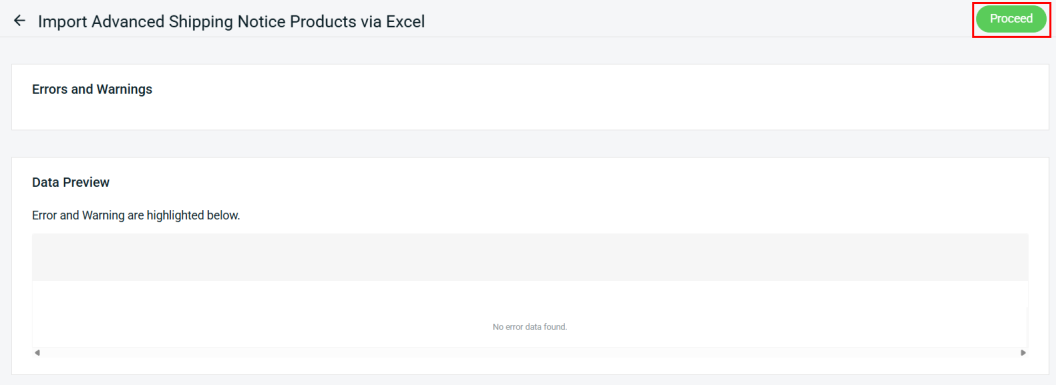
Step 5: If there are any errors in the Excel uploaded, you will see the error message in Errors and Warnings, and it will show the error column in the Data Preview. Amend the error column and reupload the file. Click on Proceed if the file uploaded does not have errors.
Step 6: Click Done once the file is successfully imported.

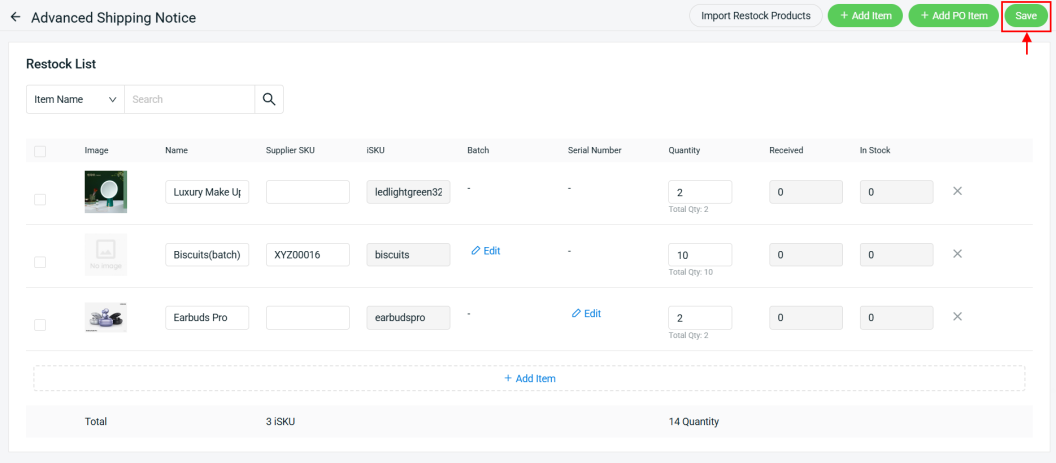
Step 7: The imported products will be listed in the Restock List > click Save to create the Advanced Shipping Notice.
4. Receive And Stock In
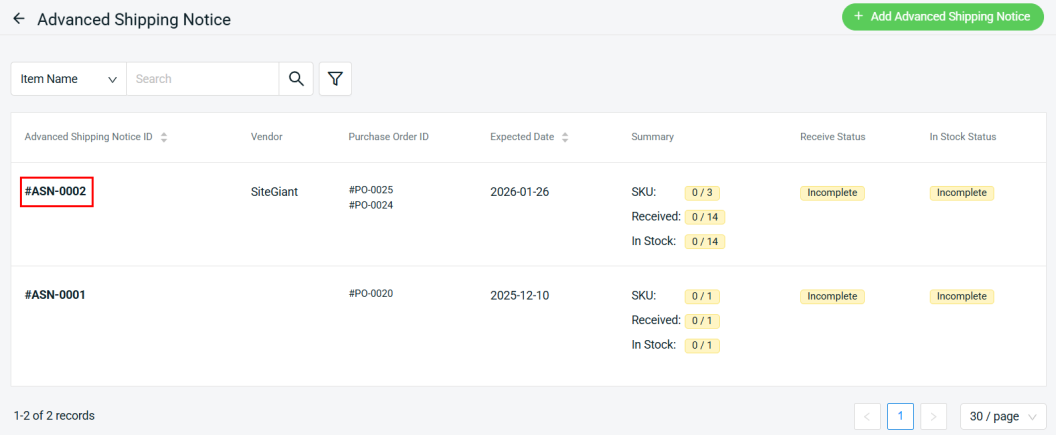
Step 1: Click the Advanced Shipping Notice ID.
Step 2: Click on the More(…) button of each product > select the received status for the product.
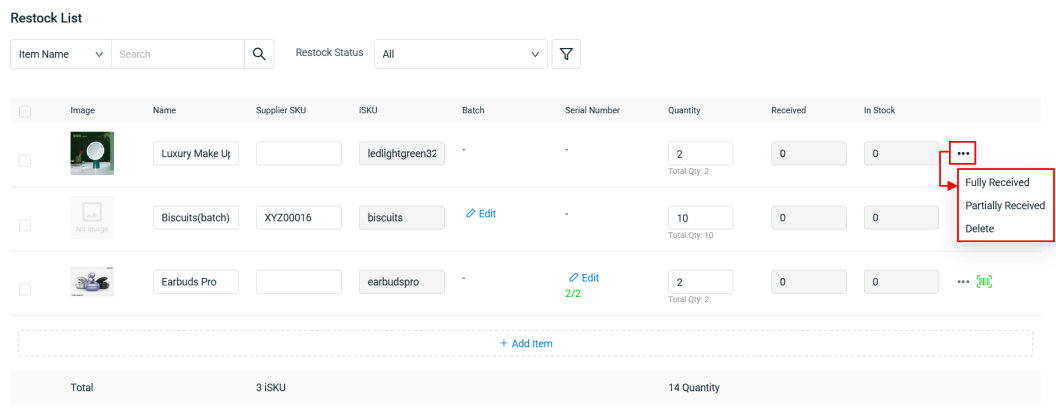
📌Note:
Fully Received: The stock is fully delivered to your warehouse
Partially Received: The stock is partially delivered, enter the quantity received to keep track
Delete: Remove the product from the Advanced Shipping Notice
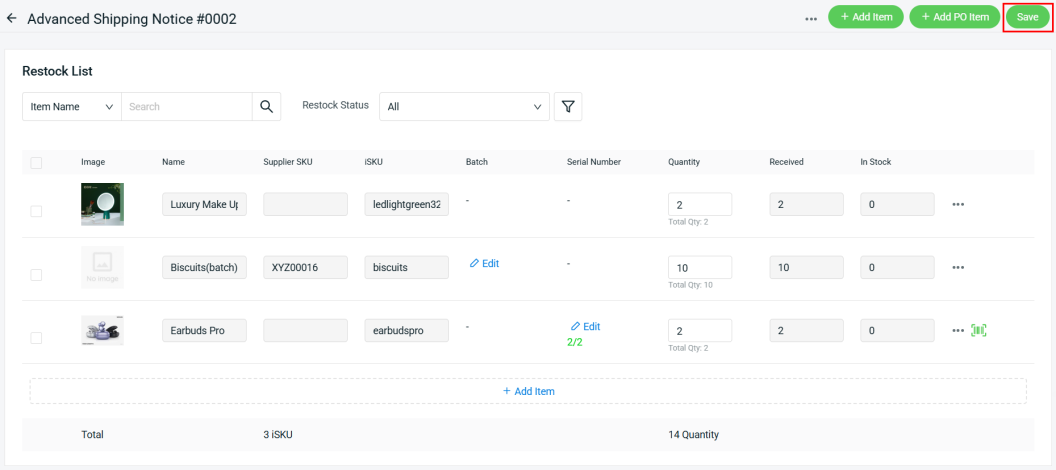
Step 3: Click on the Save button to keep the changes made.
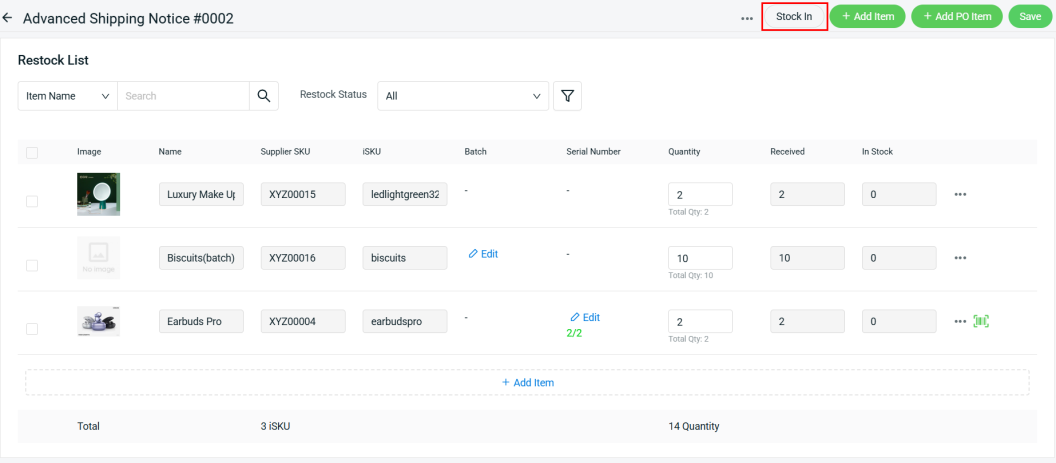
Step 4: View the Advanced Shipping Notice again > perform Stock In for the items to add the stock into Inventory.
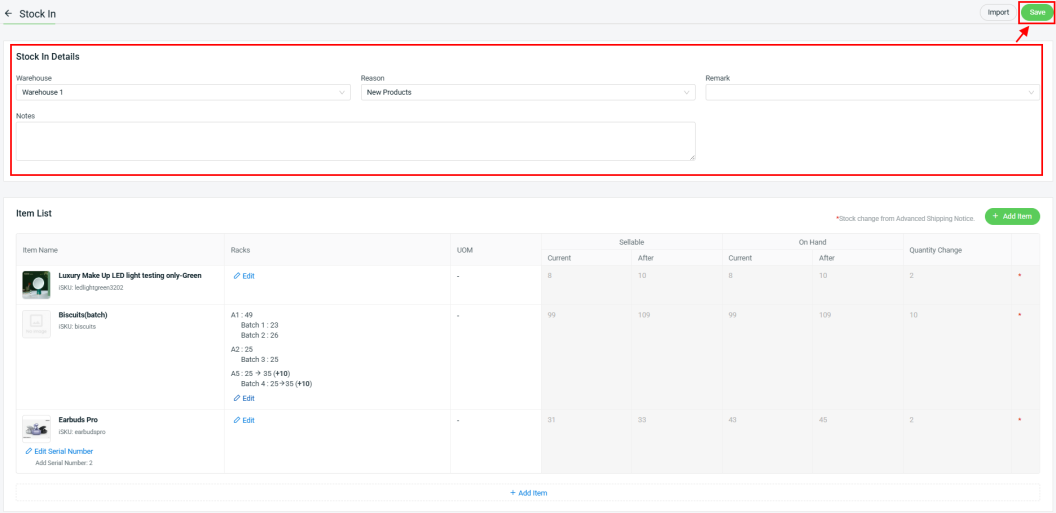
Step 5: Fill in the Stock In Details > Save.
Step 6: Return to the Advanced Shipping Notice (ASN) page. The Summary column will reflect the Received and In Stock quantities.
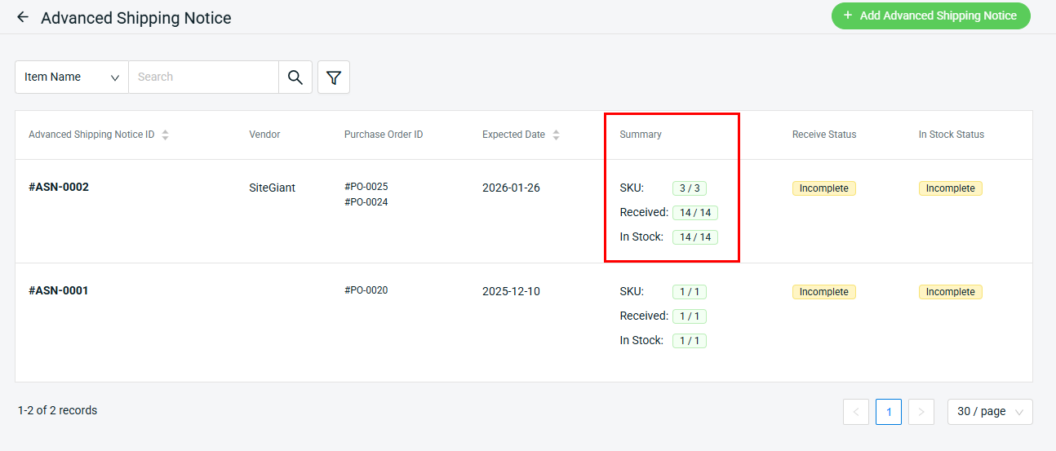
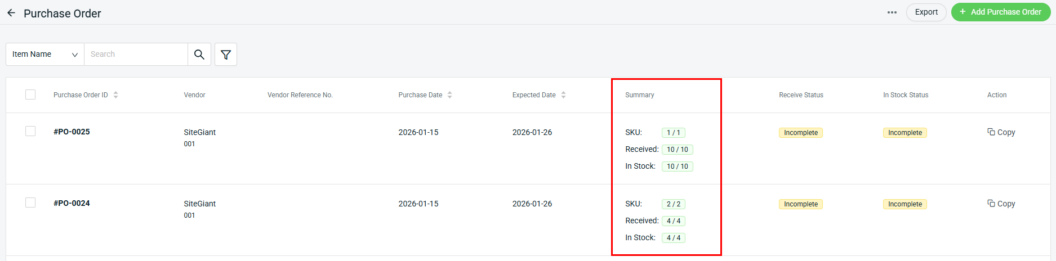
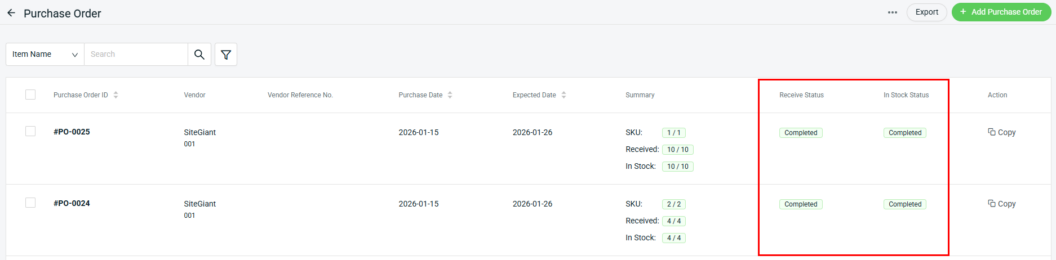
📌Note: If the Purchase Order (PO) is linked to an ASN, the Summary of Received and In Stock quantities on the Purchase Order page will also be updated accordingly.
5. Mark As Completed
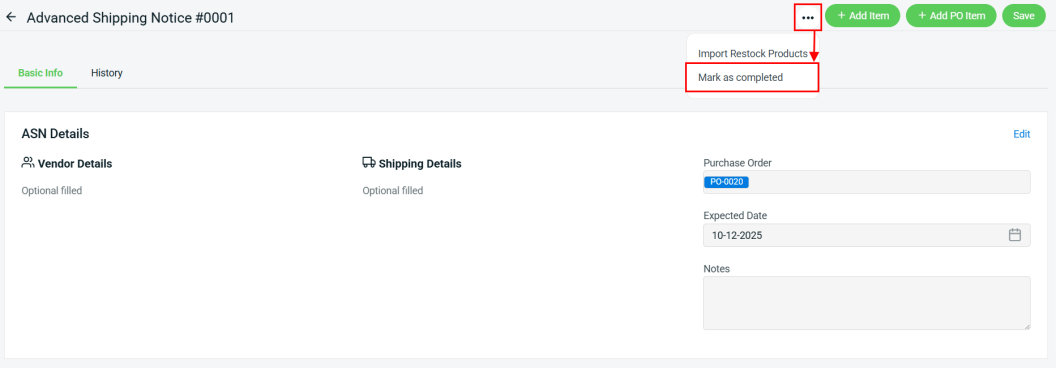
Step 1: Once all the item(s) had fully received and stock in, click on More(…) button > select Mark as completed button to complete the Advanced Shipping Notice.
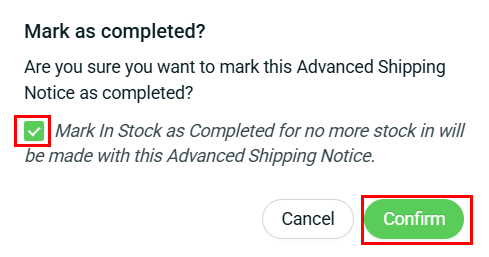
Step 2: Tick Mark In Stock as Completed if no stock in will be performed, then click Confirm to proceed.
Step 3: Return to the Advanced Shipping Notice (ASN) page. The Receive and In Stock status column will show a Completed status.
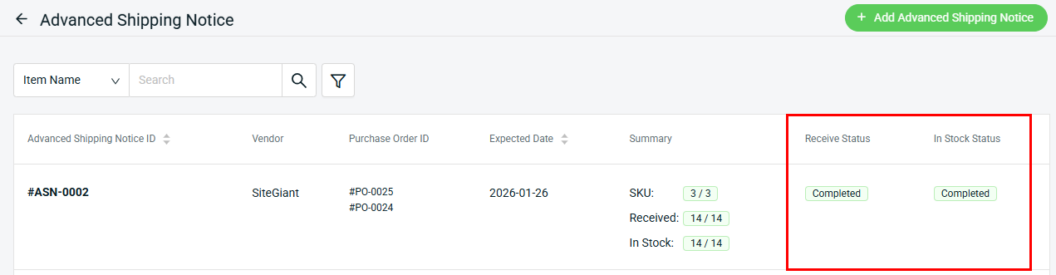
📌Note: If the Purchase Order (PO) is linked to an ASN, the Received and In Stock Status on the Purchase Order page will also be updated automatically.
📝Additional Information
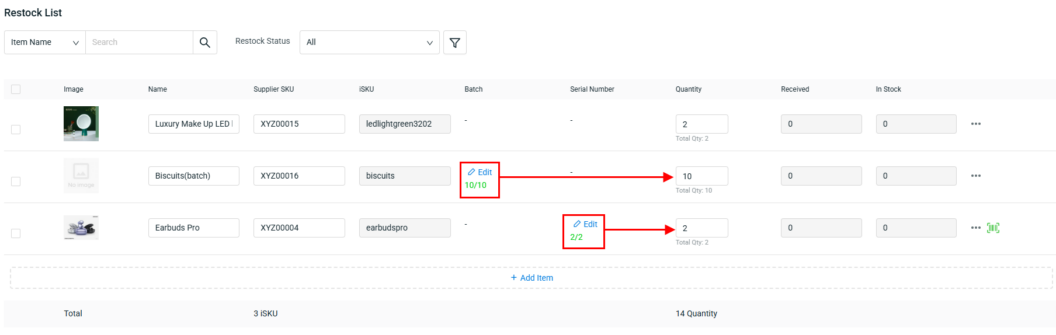
1. Pre-fill Batch and Serial Number (optional)
If an item has enable Batch Mode or Required Serial Number in All Inventory Items, you may pre-fill the Batch or Serial Number in advance to streamline the process before Stock In.
💡Tips: Learn more on How To Manage Inventory with Batch Number and How To Enable Serial Number Tracking For Inventory Item
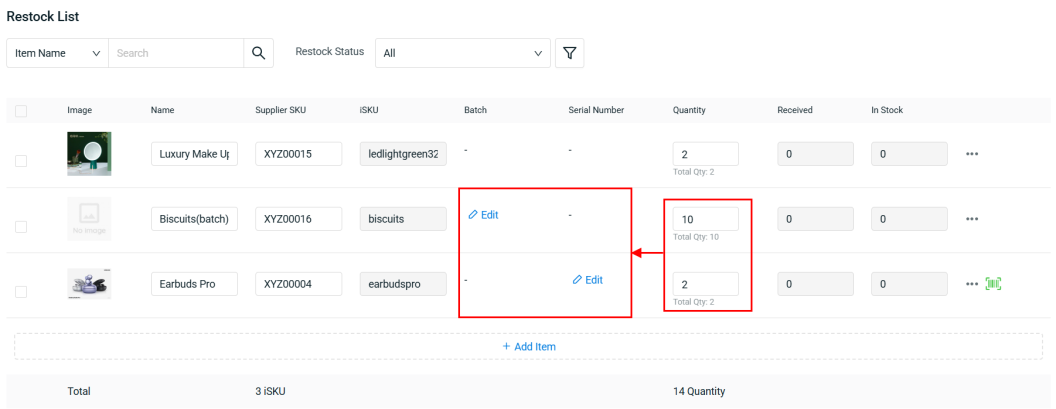
Step 1: After the item Quantity has been added, click the Edit button in Batch or Serial Number column.
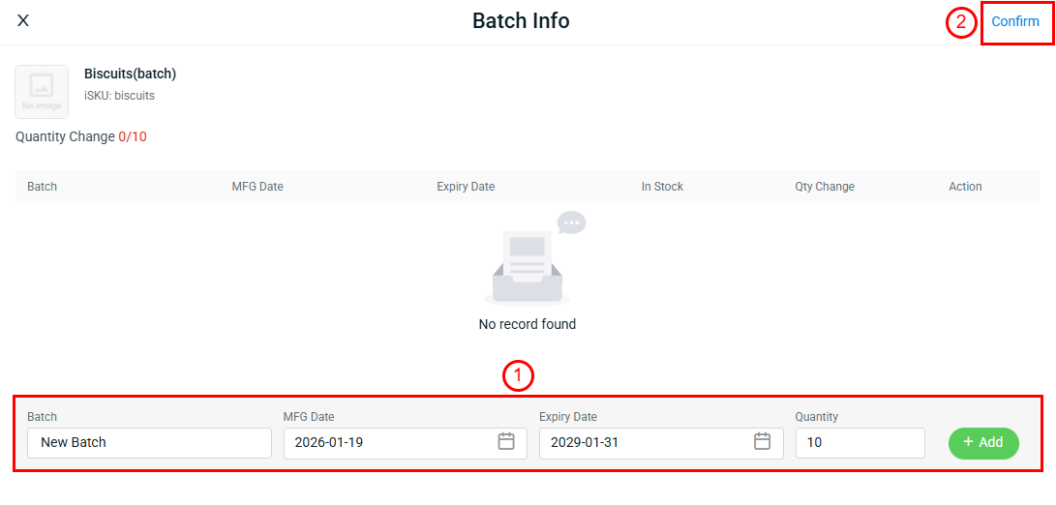
Step 2: For Batch item, enter a new batch name or select an existing one > enter the Quantity > click Add > Confirm.
Step 3: For Serial Number items, enter the new Serial Number > Add and click Confirm.
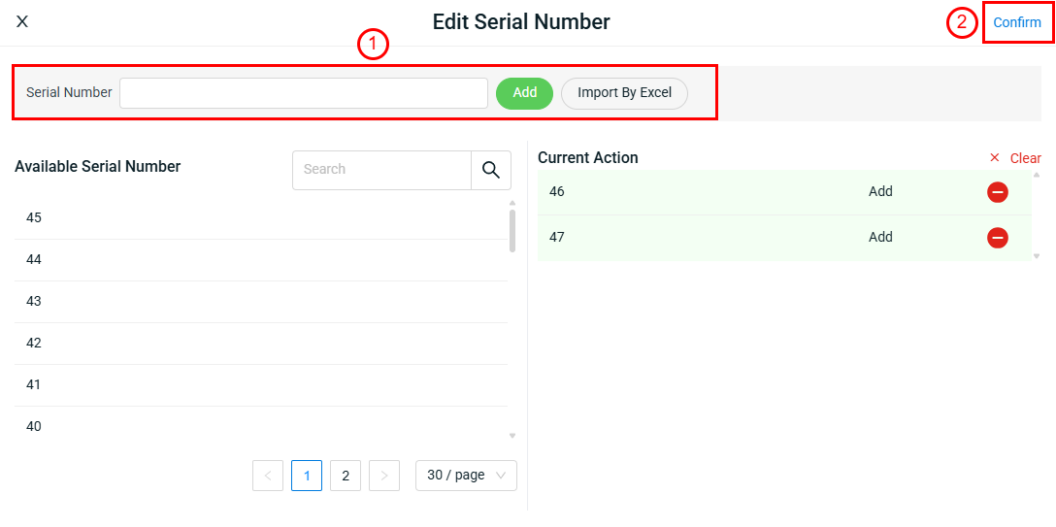
📌Note: The Batch quantity or the number of Serial Numbers added must match the Quantity entered.