1. Introduction
2. Set Up Order Delivery Date
3. From Customer Perspective
1. Introduction

Are you running a time-sensitive business like florist and food delivery that needs to be delivered within a specific time period? With Order Delivery Date, customers can select their preferred delivery date and time interval when placing orders from your Webstore.
2. Set Up Order Delivery Date
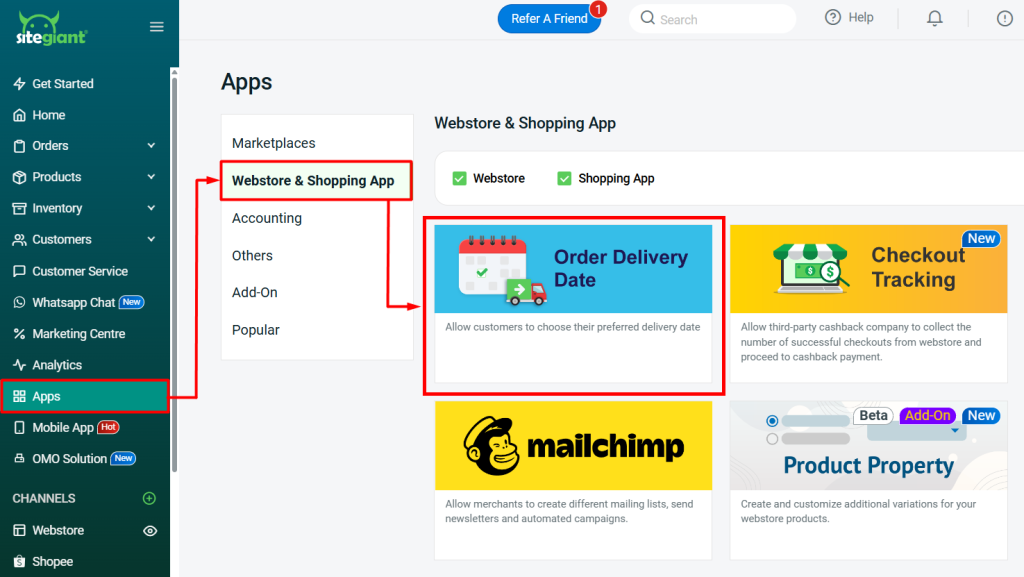
Step 1: Navigate to Apps on the sidebar menu > Webstore & Shopping App > Order Delivery Date.
Step 2: Enable the Status > configure the Settings.
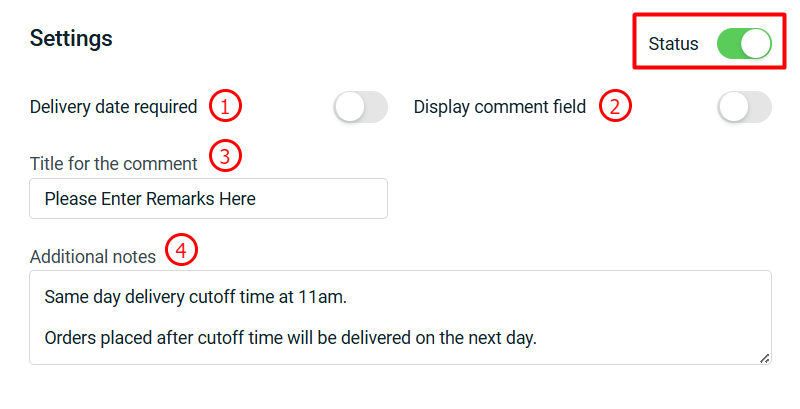
1. Delivery date required: If the status is ON, customers are required to select a date and time to proceed with checkout.

2. Display comment field: If the status is ON, customers are required to leave their comments or remarks in the comment field to proceed with checkout.

3. Title for the comment: The title for the comment field.

4. Additional notes: Special notes or remarks that need customers to take note.
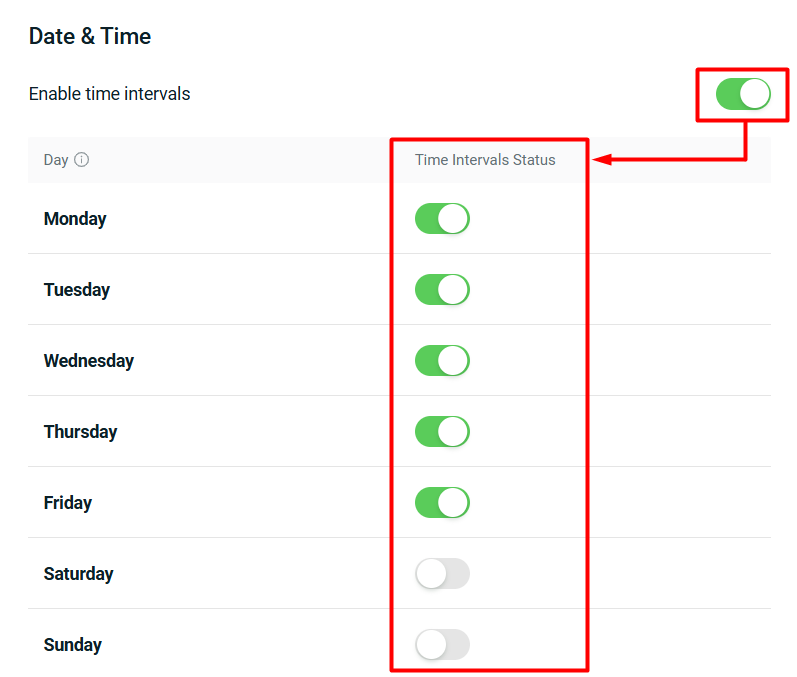
Step 3: Under Date & Time section, you may enable time intervals status if you wish to set up delivery timeslots > choose the Day that applicable of time intervals.
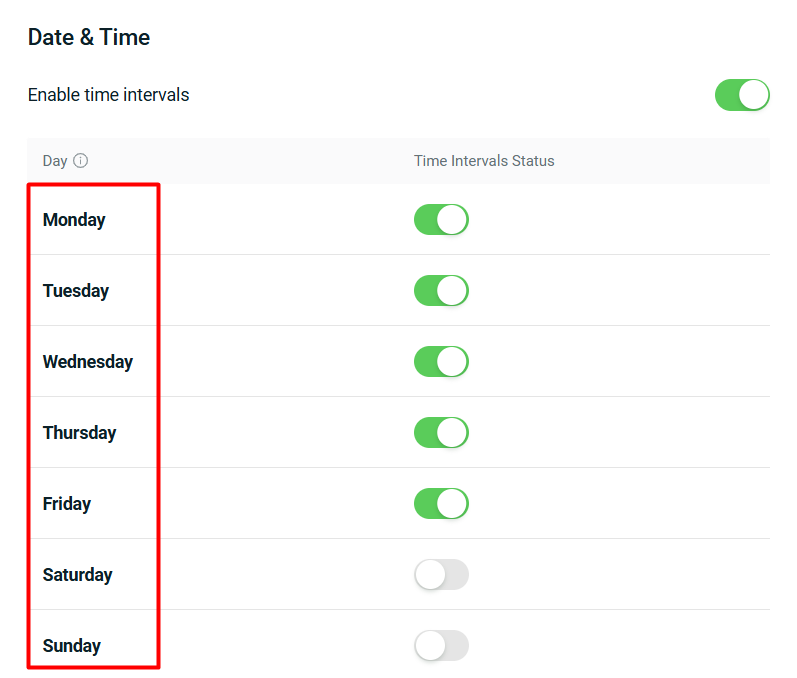
Step 4: Click on Day to manage the time intervals settings.
Step 5: Edit the delivery time intervals for the day based on your availabilities > Save.

1. Same day delivery end time: Latest time by which an order must be placed to delivery on the same day.

2. Orders Limit: Limit orders that can be placed within the same day. If the number of deliveries reaches the order limit, customers will need to select another day for the delivery.

3. Copy the time intervals to (days): Copy the same time intervals to another day.

4. Add Range: Add the time range that available for the delivery.
Step 6: Configure the settings for the Date & Time.
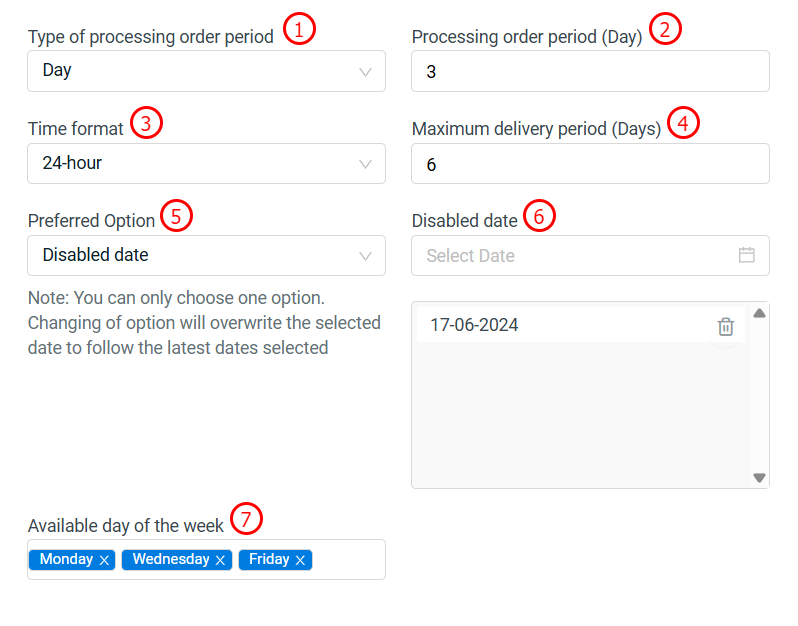
1. Type of processing order period: Time required by seller to prepare the order, by Day or Hour.

2. Processing order period: Based on the type chosen, set the day or hour required. For example set to 3 days, if the customer placed an order on 1st of January, the delivery date for the customer to select would be on 4th of January onwards.

3. Time format: The way in which time is represented, by 12-hour or 24-hour.

4. Maximum delivery period (Days): The furthest future date customers can choose for delivery. Leave empty if no limit. For example set to 6 days, if the customer placed an order on 1st of January, the maximum delivery date for the customer to select is until 7th of January.

5. Preferred Option: Choose Disabled date if there is certain date that not support for delivery like during public holiday etc. Choose Available date if there is only certain date that you allow customer to choose.

6. Disabled date/ Available date: Based on the preferred option chosen, add the date to the list.

7. Available day of the week: Specific days in a week when your delivery service is operational. Leave empty if no limit. For example if select Monday, Wednesday and Friday only, the others day will be greyed out and cannot be selected.
Step 7: Click Save once done configure.
Step 8: Back to dashboard and Clear Cache to see the changes on your Webstore.
3. From Customer Perspective
Step 1: Navigate to Cart > Next > select the available Delivery Date, Delivery Time and Comment > Check Out > final confirm the order details > Check Out.
