1. Introduction
2. Configure Qoo10 Shipping Label Settings
3. Arrange Shipment
4. Print Shipping Label
5. Set Pending Pickup (On Delivery)
1. Introduction
Once you have integrated your Qoo10 Seller Center with SiteGiant, your orders from Qoo10 will be synced to SiteGiant, allowing you to easily arrange shipment and generate shipping labels with customizable settings.
2. Configure Qoo10 Shipping Label Settings
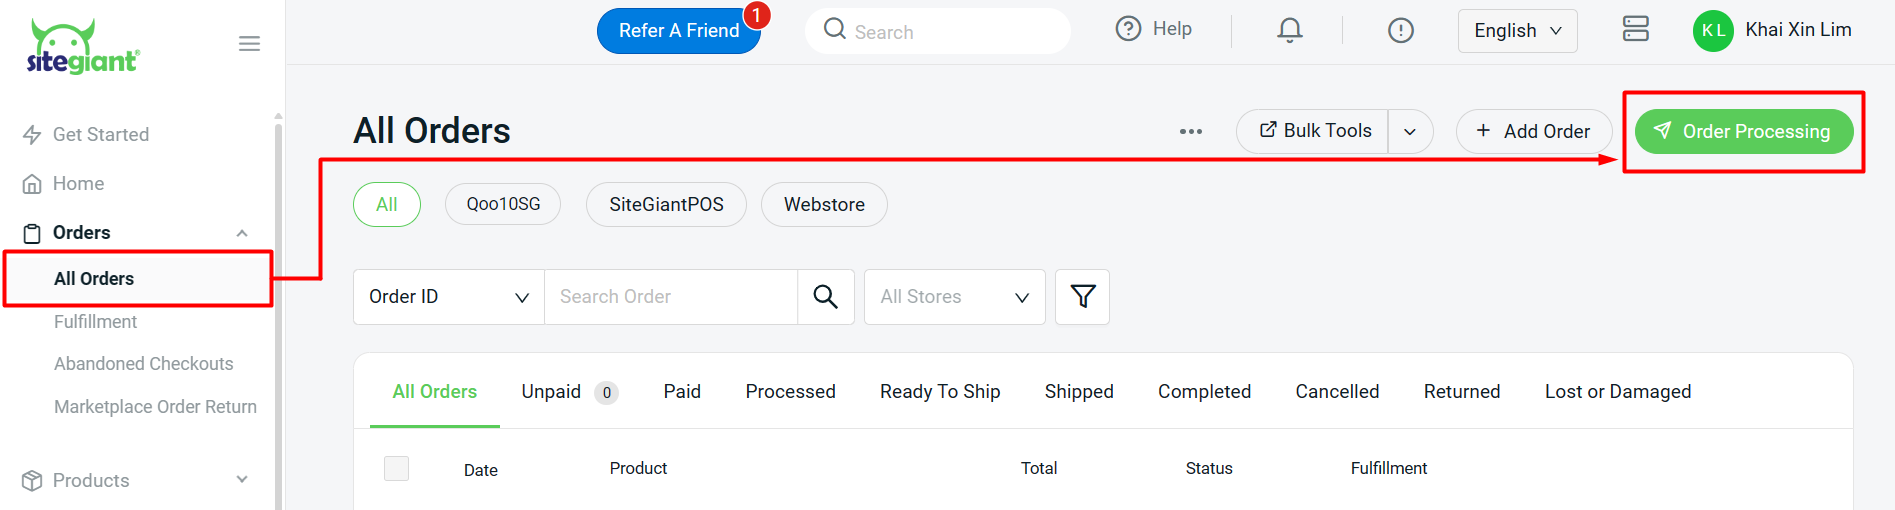
Step 1: Navigate to Orders > All Orders on the sidebar menu > click Order Processing.
Step 2: Click More (…) > Shipping Label Settings.

Step 3: Under General, you can set the Item Display method in Order Processing. This setting will apply to all marketplaces including Webstore & others.
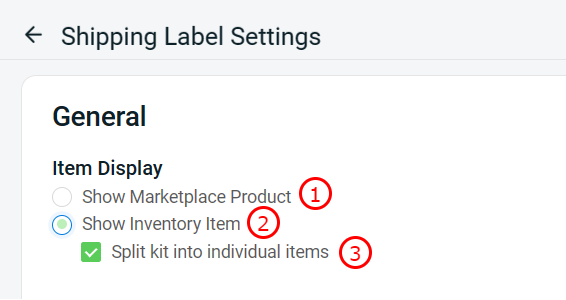
1. Show Marketplace Product: The product name under the order details will display the marketplace product name.2. Show Inventory Item: If the product is linked with SiteGiant Inventory, the inventory item name will be displayed under order details.
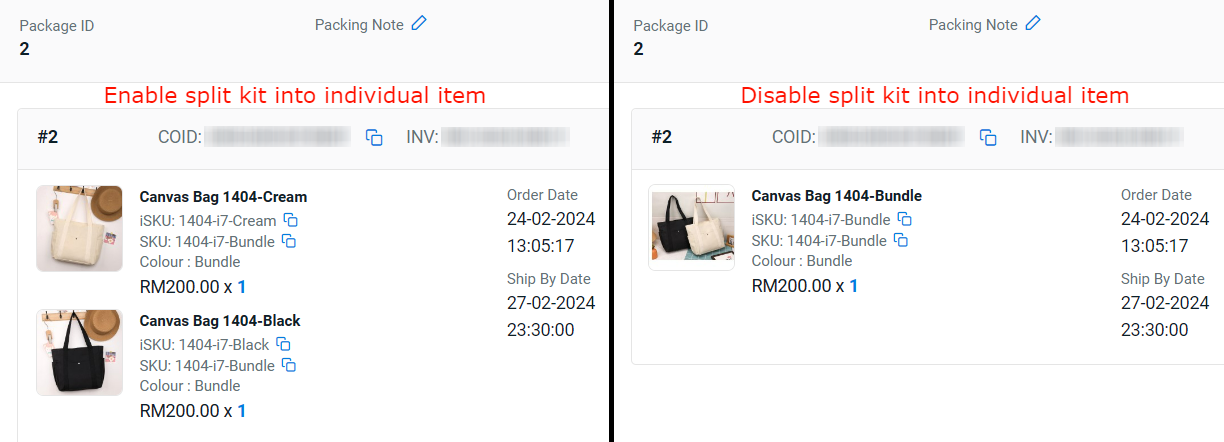
3.Split kit into individual items: Enable to show every single item in a Kit.
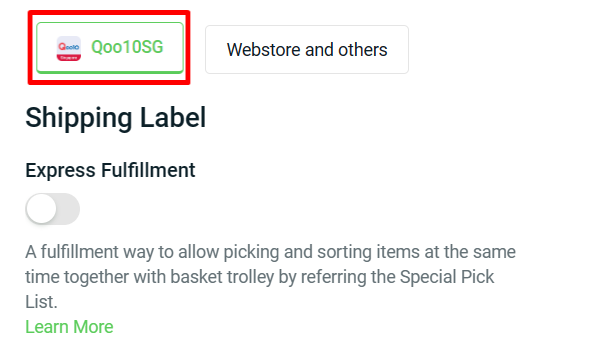
Step 4: Select the Qoo10SG channel > you can enable Express Fulfillment status to ease your fulfillment process
Step 5: Go to General > choose set order status to Seller Confirm or On Delivery while Arrange Shipment.
📌Note: If you set the status to On Delivery, kindly ensure your parcel is packed and ready for the handover process to the Qoo10SG Logistics team.
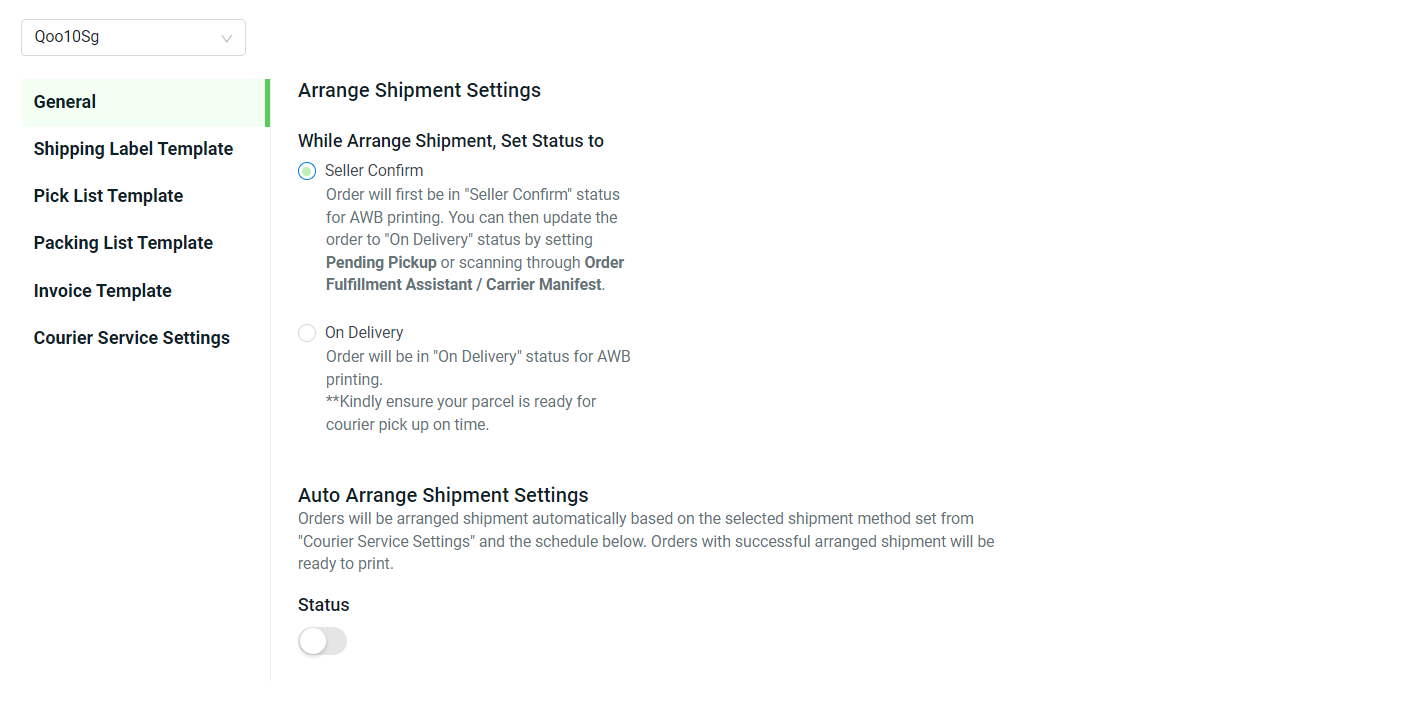
Step 6: You may enable the Auto Arrange Shipment Settings status to let the system Arrange Shipment automatically for the orders based on the scheduled timeslot.
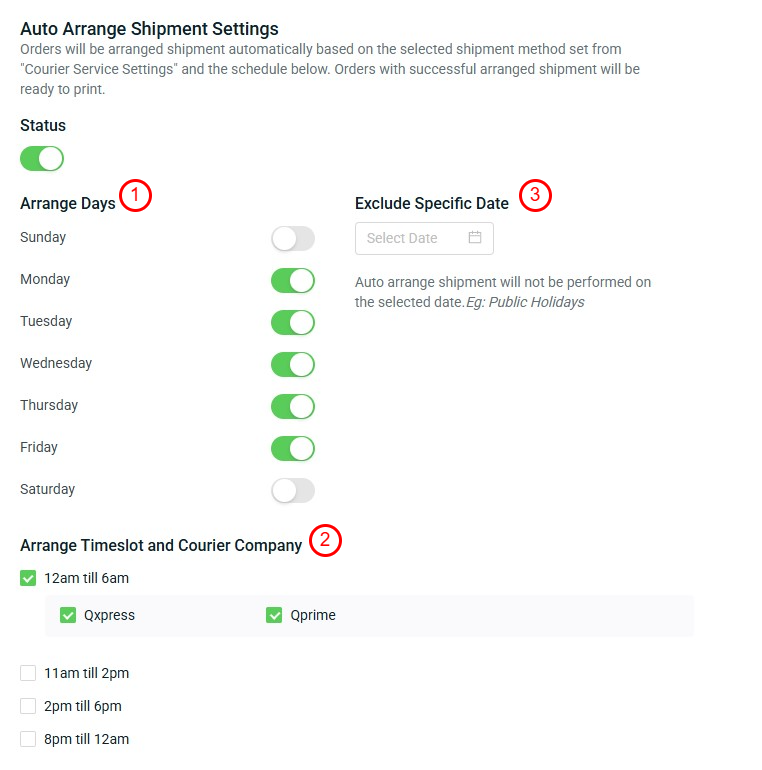
1. Arrange Days: Select the working days you want your orders to be automatically arranged for shipment.

2. Arrange Timeslot and Courier Company: Schedule an auto-arranged timeslot for the selected day and tick the courier company to be arranged in the scheduled timeslot.

📌 Note: Different timeslots can be arranged by different courier company.

3. Exclude Specific Date: Auto arrange shipment will not be performed on the selected date.
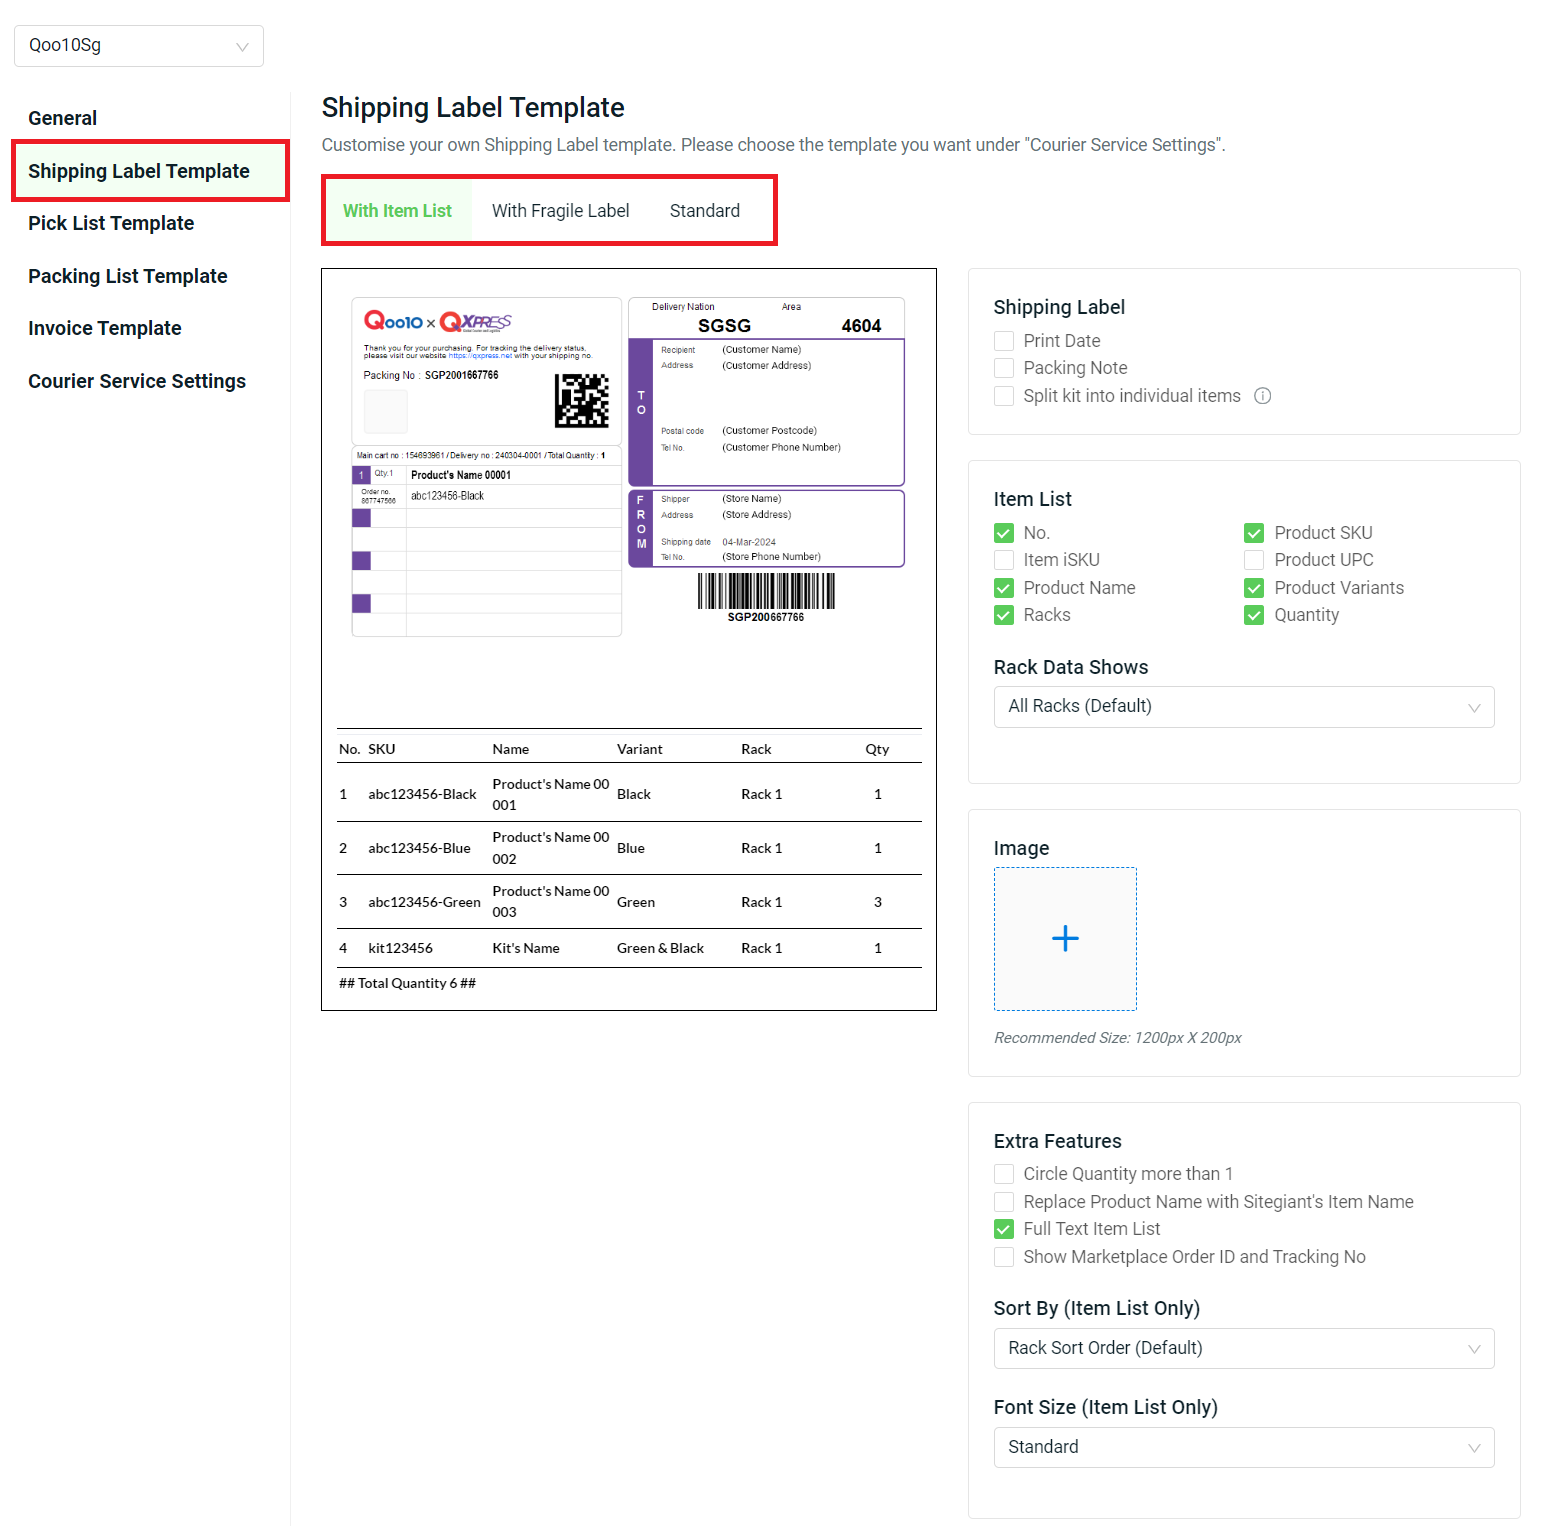
Step 7: Go to Shipping Label Template. You can choose the template and customize your preferred fields to show in the Shipping Label.
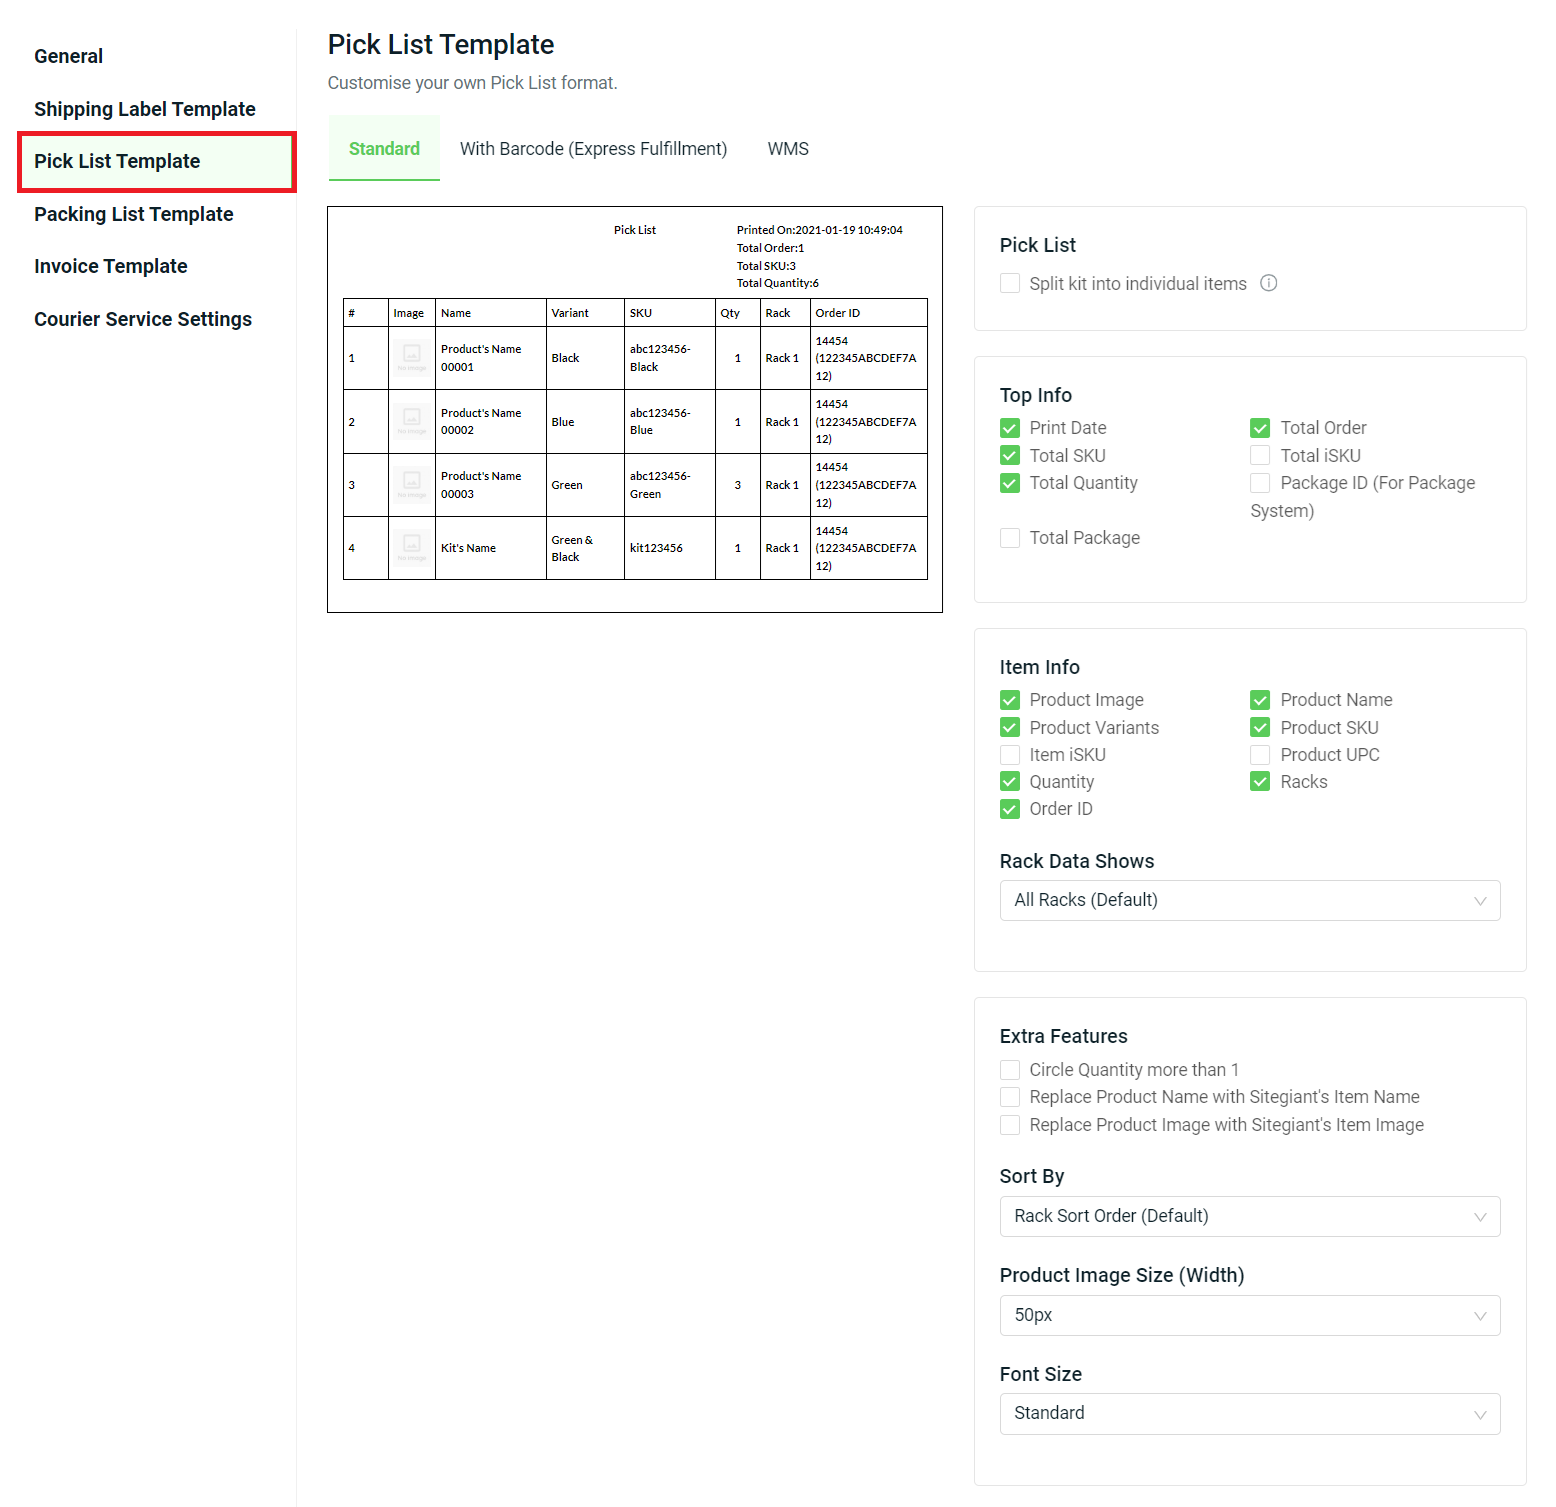
Step 8: Move on to the Pick List Template. A Pick List is a document used to guide your warehouse pickers during the item picking process. It is printed separately with the shipping label. You can customize your own Pick List template.
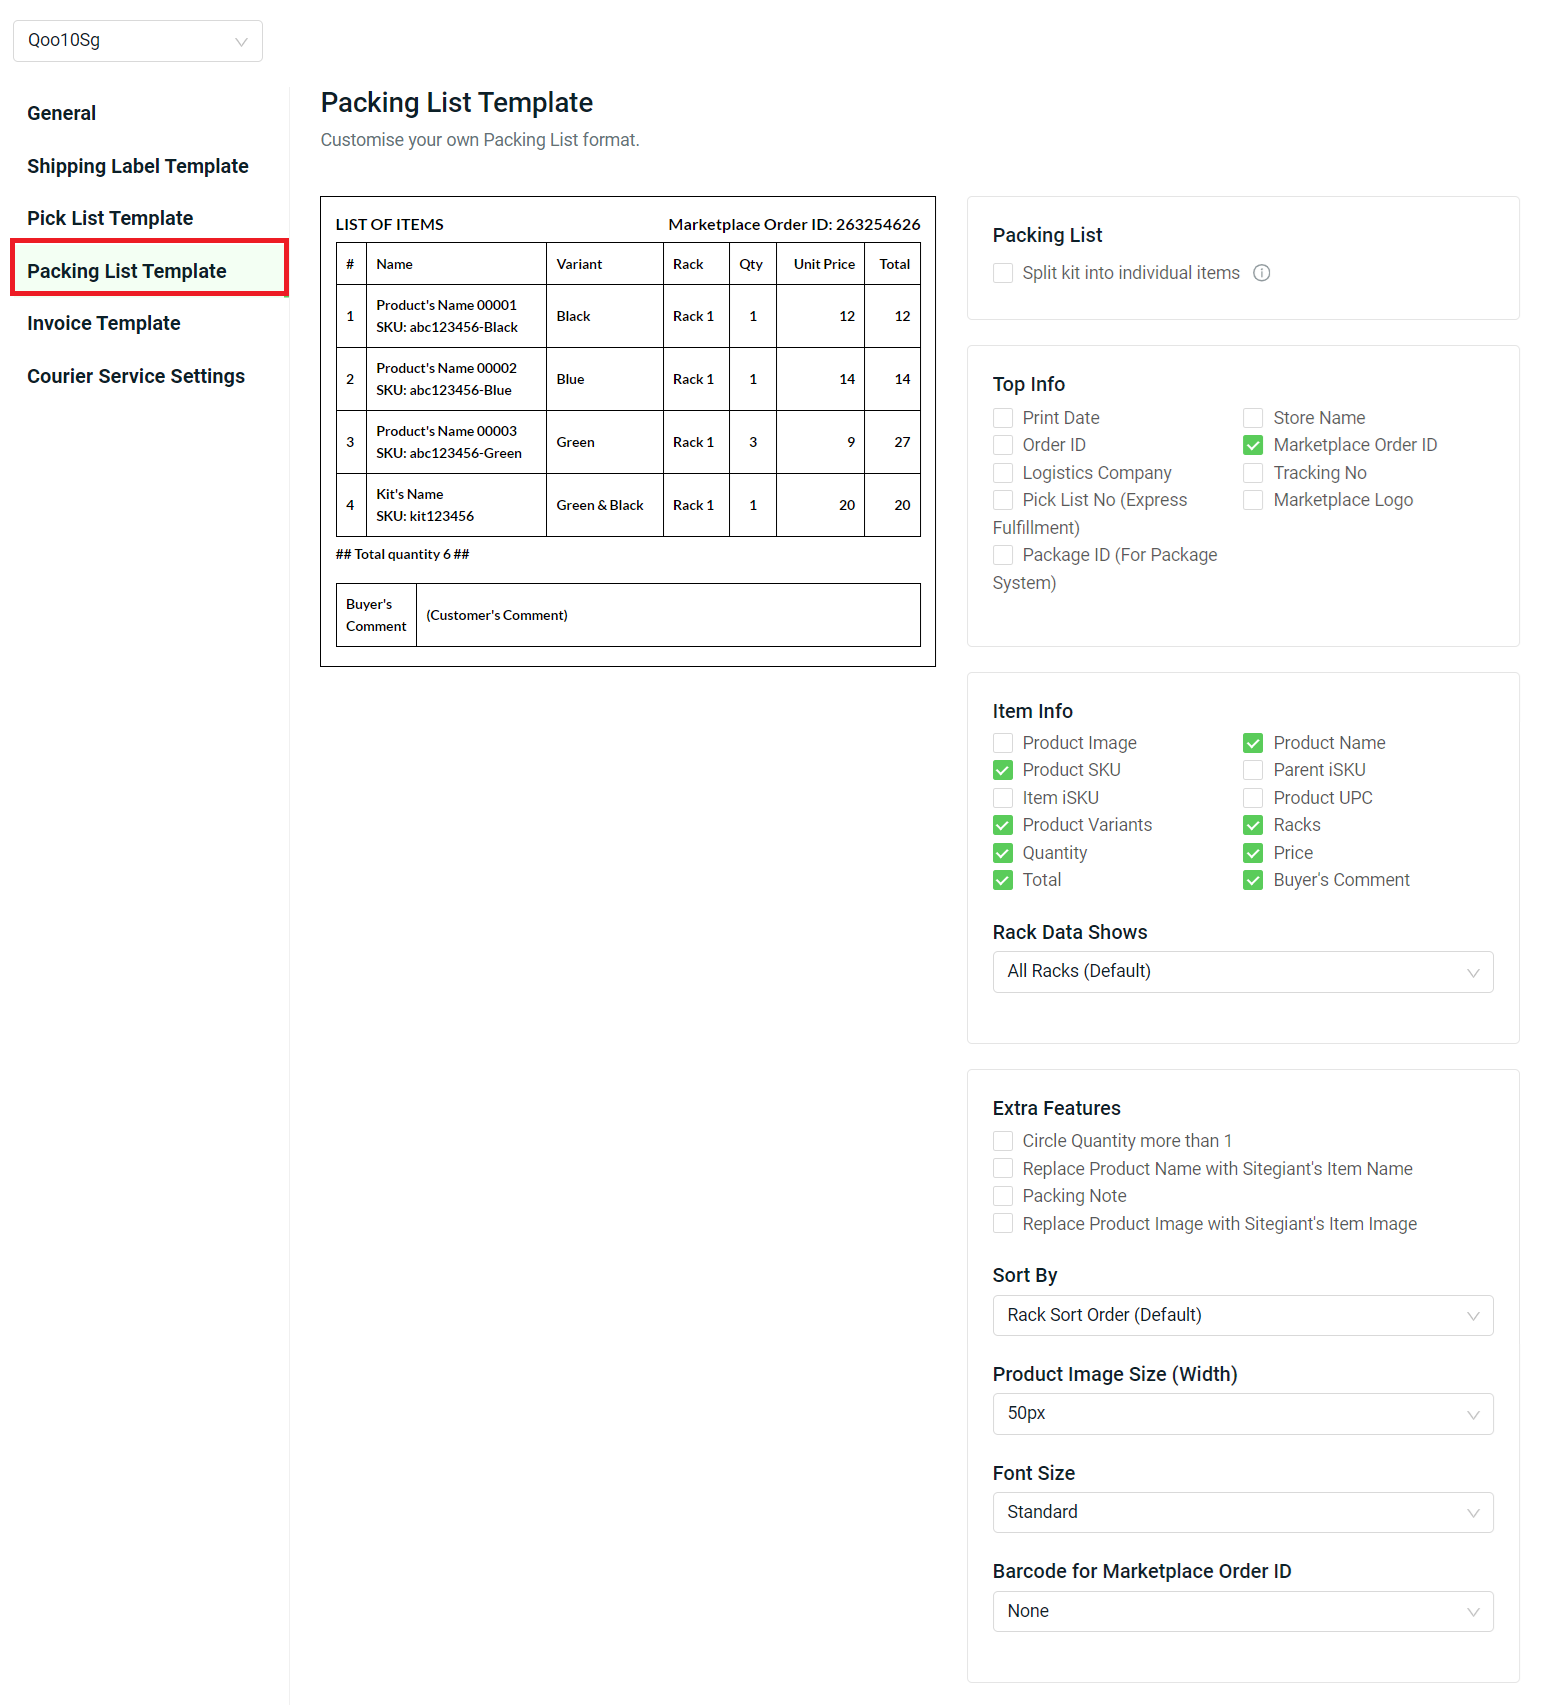
Step 9: Navigate to Packing List Template. A packing List is a document that accompanies a package and provides detailed information about the contents of the package. You can customize your own Packing List template.
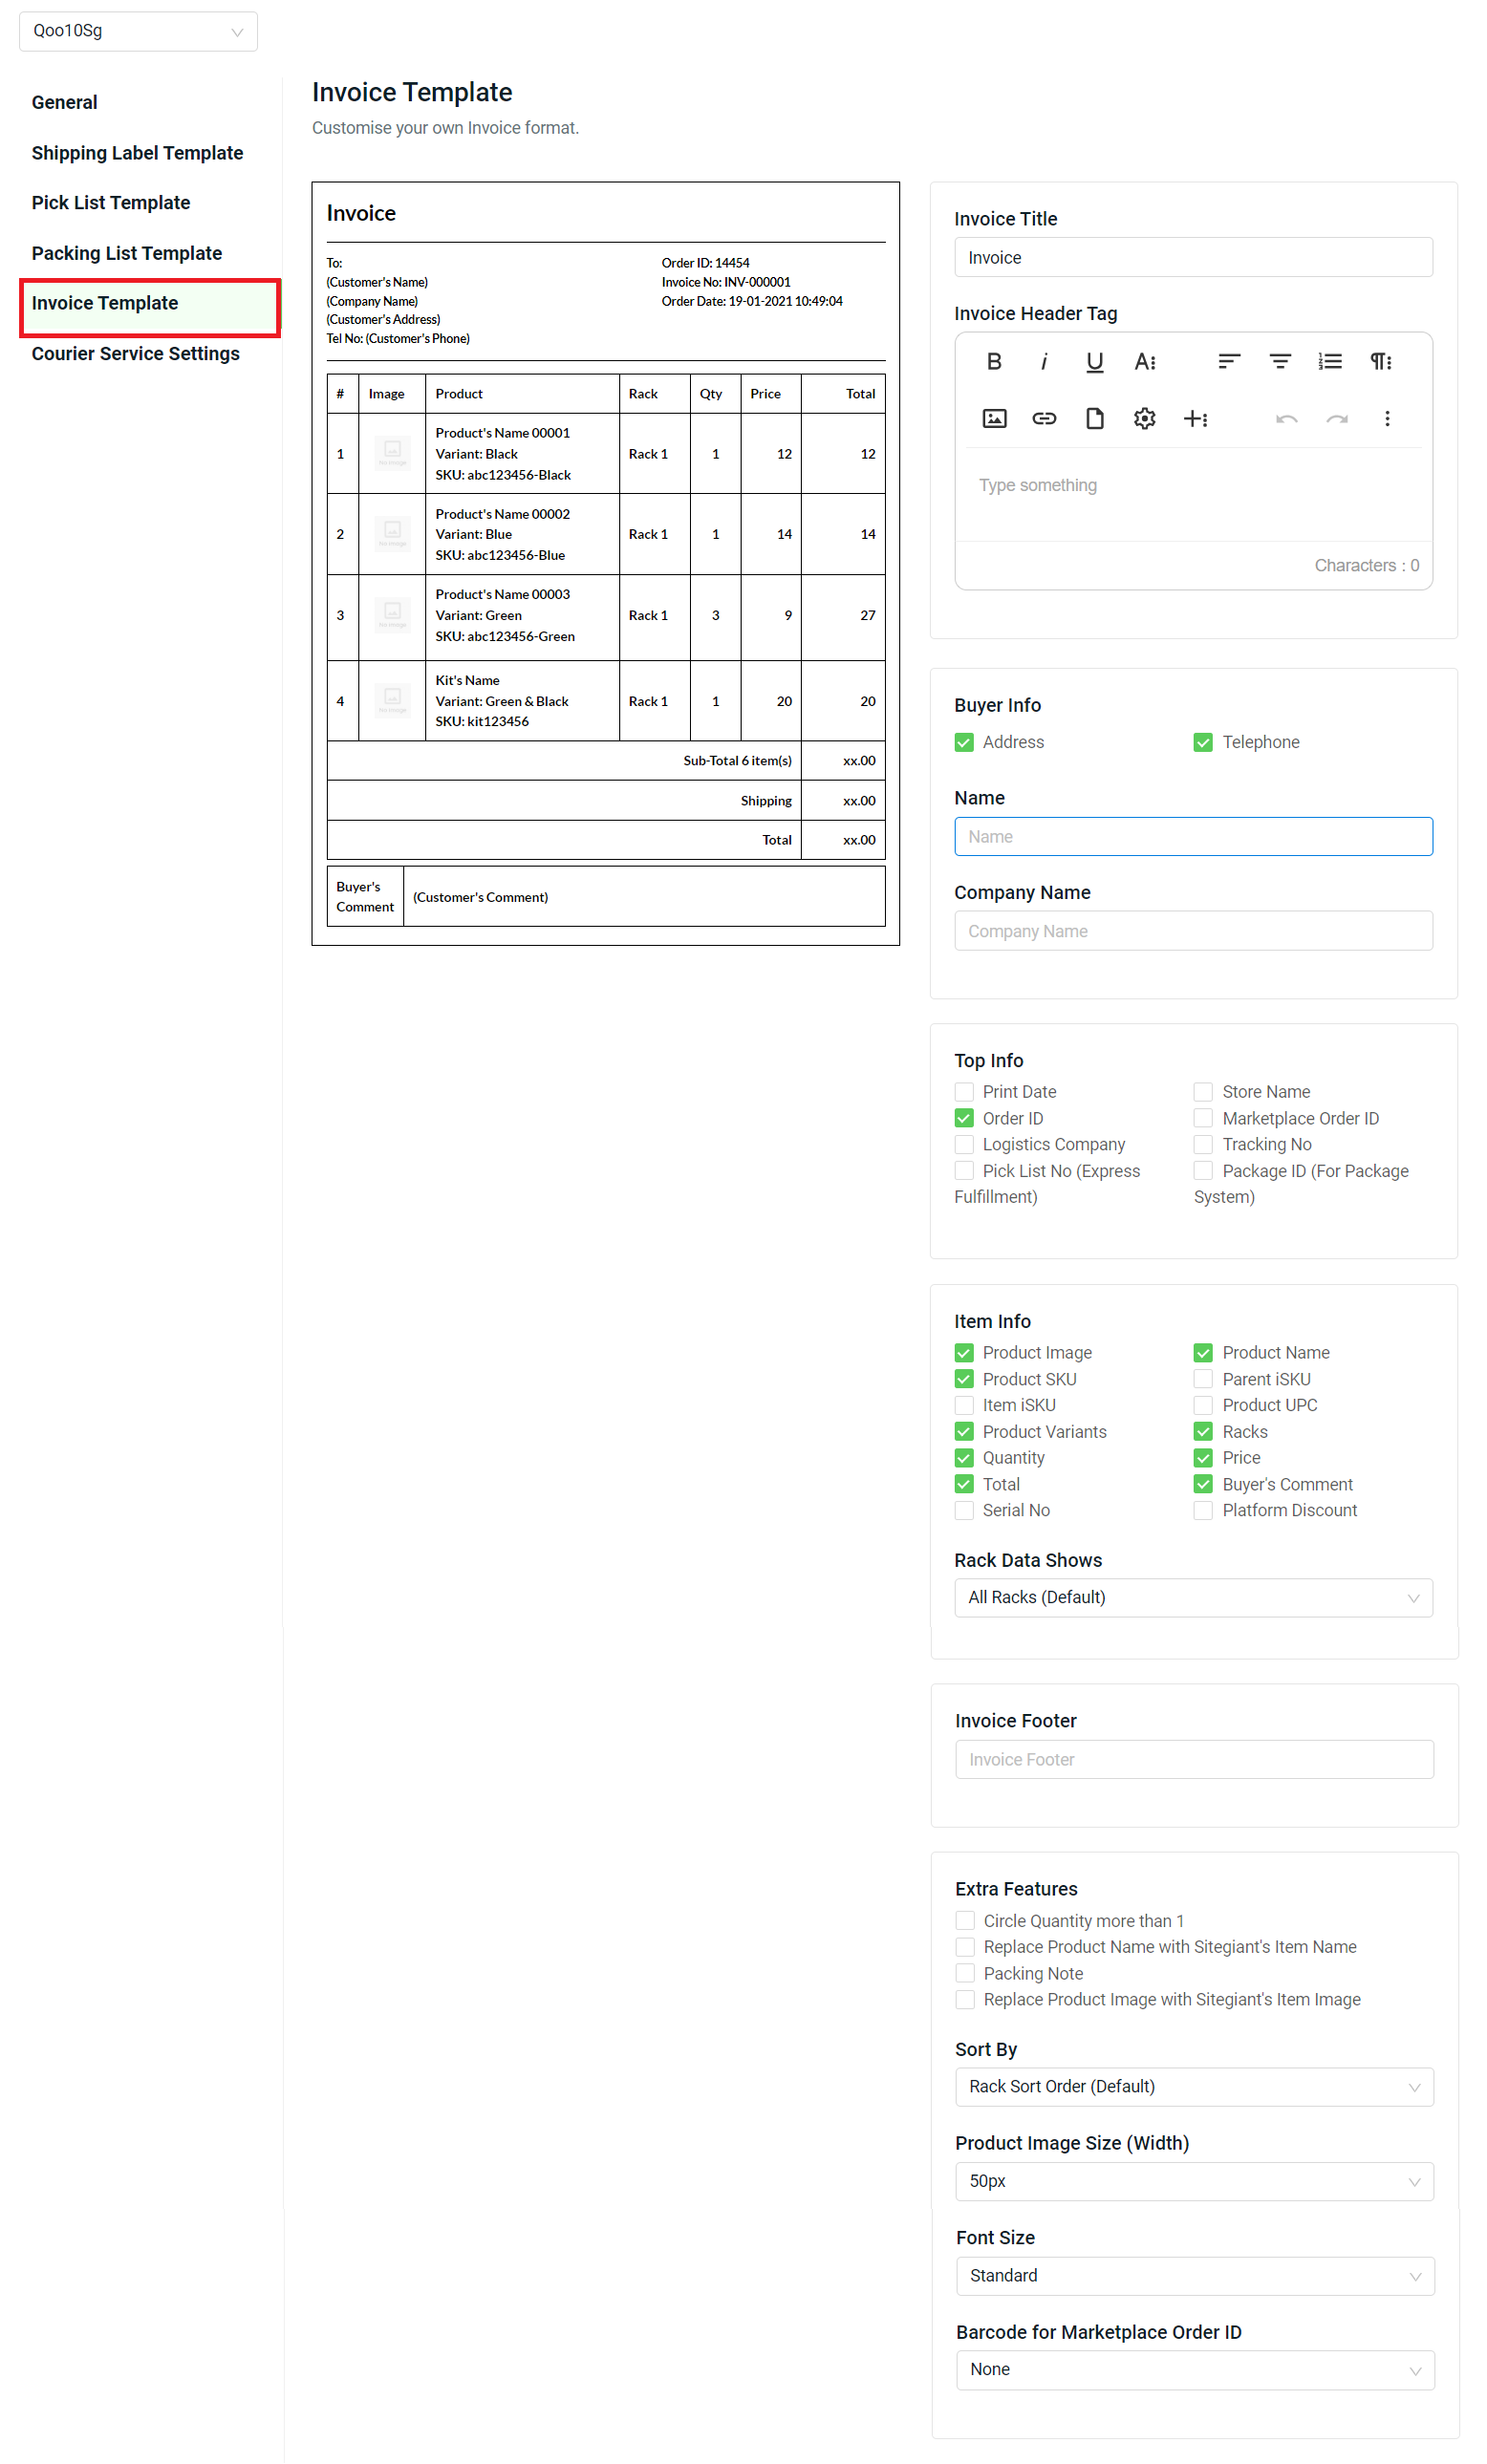
Step 10: Go to Invoice Template. An invoice is a document provided to the customer as proof of purchase or a formal payment request. You can customize your own Invoice template.
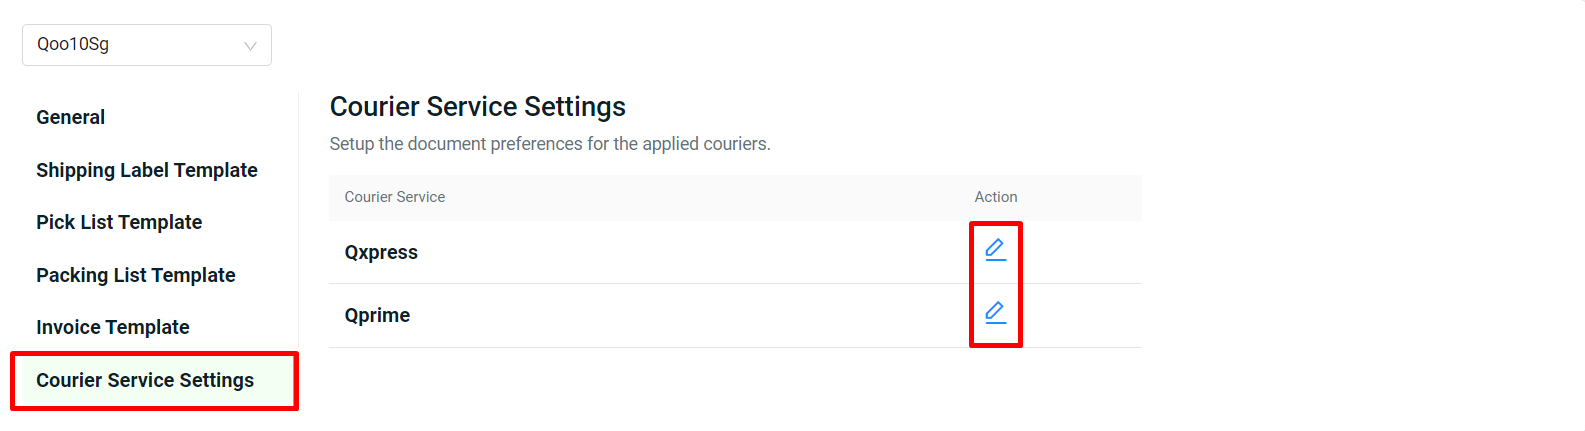
Step 11: Go to Courier Service Settings. Click on Edit icon to set up the shipping label template and document for the applied courier services.
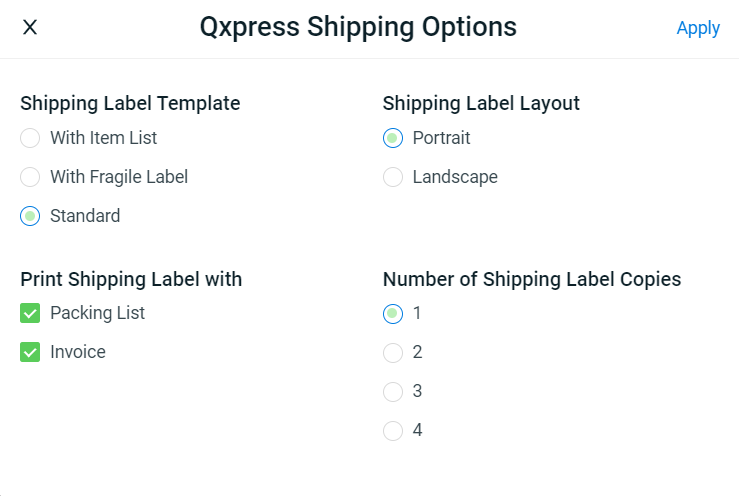
Step 12: Choose Shipping Label Template and Number of Shipping Label Copies > select the documents that you wish to print along with Shipping Label > Apply.
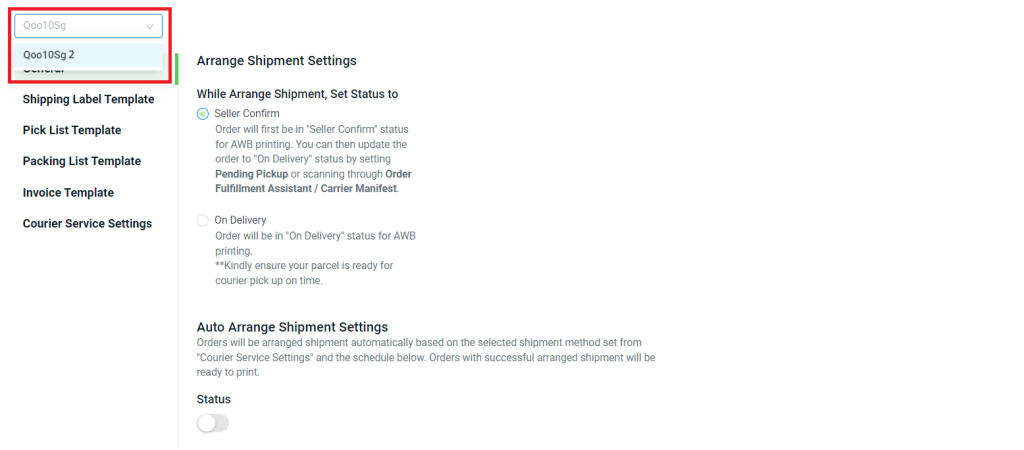
Step 13: If you have multiple Qoo10SG stores, you can switch the store channel and configure all the shipping label settings for the selected store.
Step 14: With multiple stores, you can perform Copy Settings from one store to another store to save time for settings configuration.
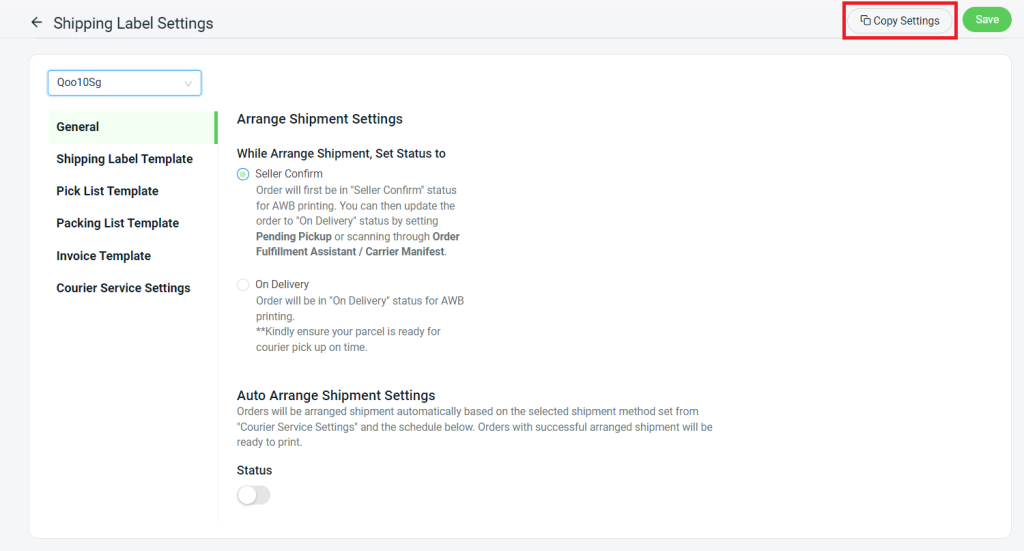
Step 15: Save the Shipping Label Settings once done with the configuration.
3. Arrange Shipment
Step 1: Select Marketplaces to display orders from all marketplaces or select only Qoo10SG to view Qoo10SG orders > select Warehouse.
📌Note: You can arrange orders from different marketplaces together at the same time.
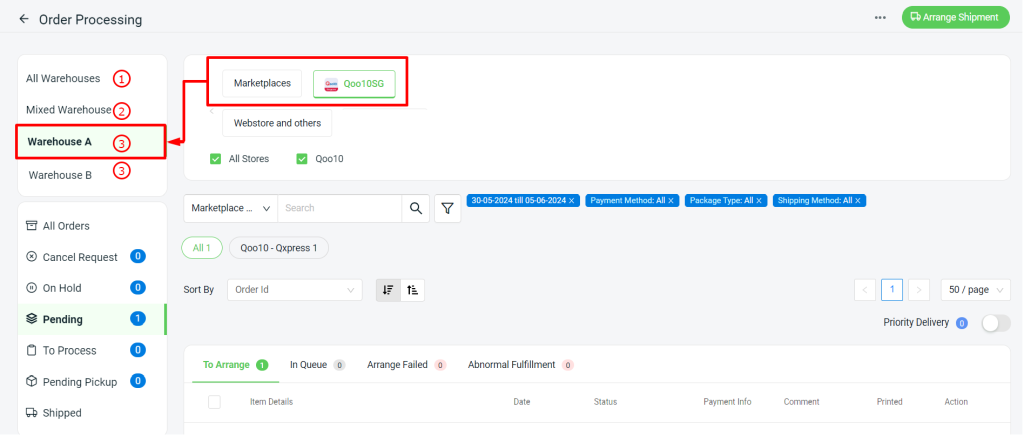
1. All Warehouse: It will include all orders, including those with no links item. However, once the item has been linked, it will appear under the relevant Warehouse tab as well. 2. Mixed Warehouse: It is for webstore orders. If an order has two items, one from Warehouse A and one from Warehouse B, the order will appear under this tab.3. Individual Warehouse: Individual warehouse will appear based on your Warehouse setting update. Learn more on How to Create Warehouse. Order will appear based on your default warehouse from the Sales Channel setting or Webstore Warehouse setting. If the webstore order has 1 item located in all warehouses(Warehouse A and Warehouse B), it will appear at the first warehouse that is set from webstore warehouse. Sales Channel Setting You can go to Setting > Sales Channel > Authorized Channel > Click Gear button on the related marketplace.
Webstore Warehouse Setting You can go to Webstore > Preferences > Webstore Settings section.
📌Note: The Warehouse Section will only appear if a merchant has set up two or more warehouses. It enables merchants to process orders according to warehouse location. If you only have one warehouse, proceed to Step 2, as the warehouse section will not appear on the page.
Step 2: Go to Pending section > To Arrange tab > select the order(s) you wish to arrange shipment > click Arrange Shipment.
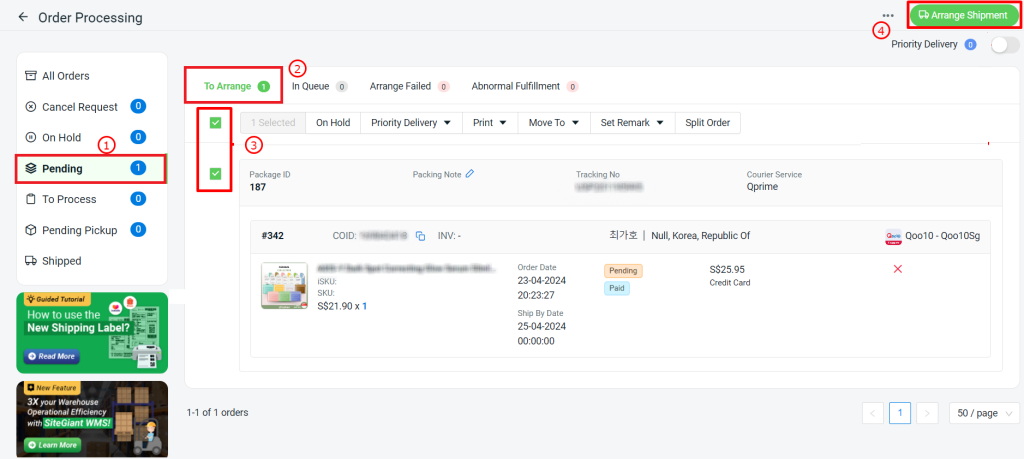
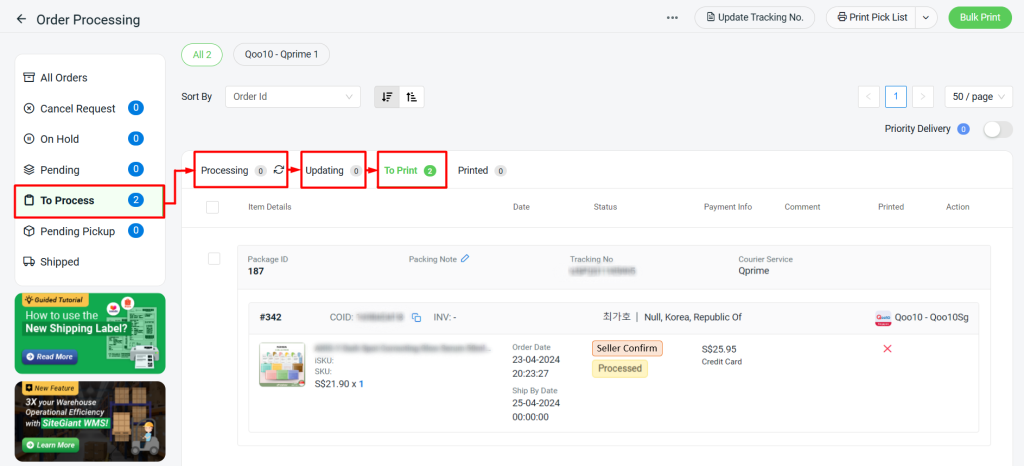
Step 3: Refresh the page. The order will move to the In Queue tab to process, and then go to To Process section > Processing tab to get the tracking number > Updating tab and finally To Print tab. The order status will change to Seller Confirm or On Delivery according to your settings.
4. Print Shipping Label
Step 1: You may print the Pick List for the item picking process before printing out the shipping label. Select order(s) > Print Pick List > Print Selected or Print All. (optional)
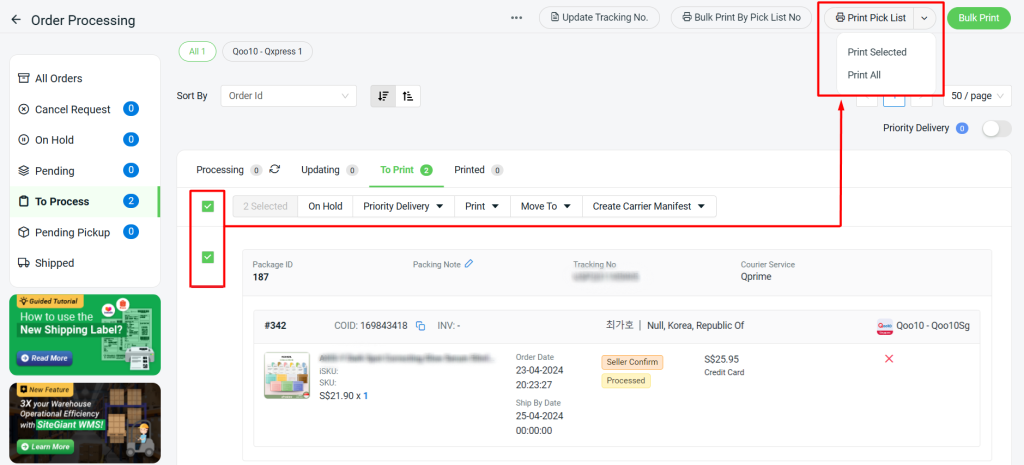
Step 2: Select order(s) > Bulk Print to print the shipping labels.
📌Note: Bulk Print shipping labels need to be performed by each marketplace.
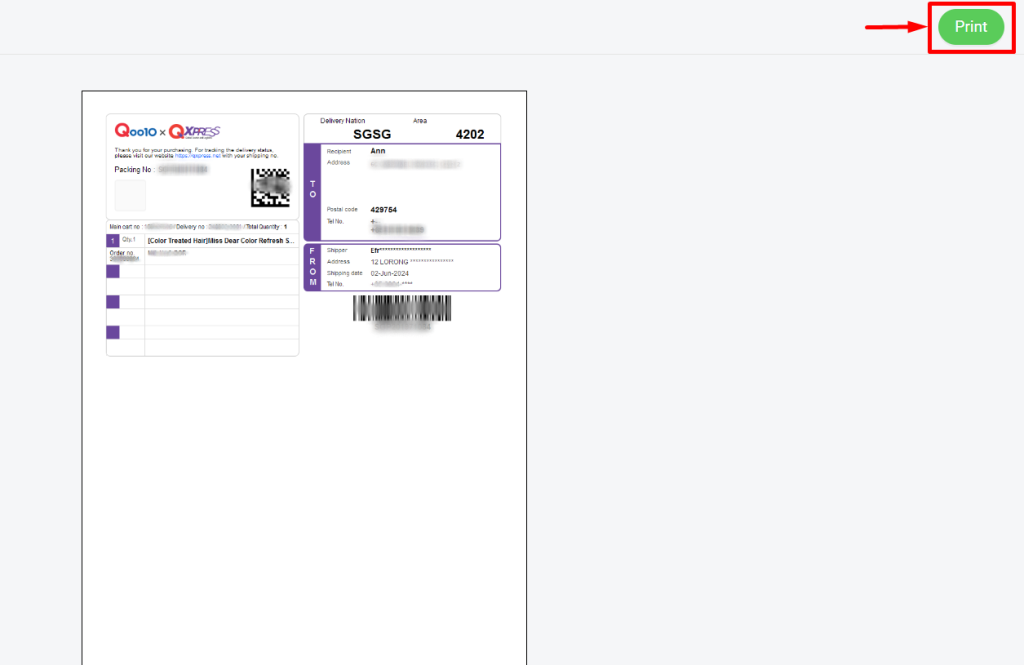
Step 3: Wait for the shipping label preview to load > click Print to proceed.
Step 4: Refresh the page. All the printed orders will moved to Printed tab.
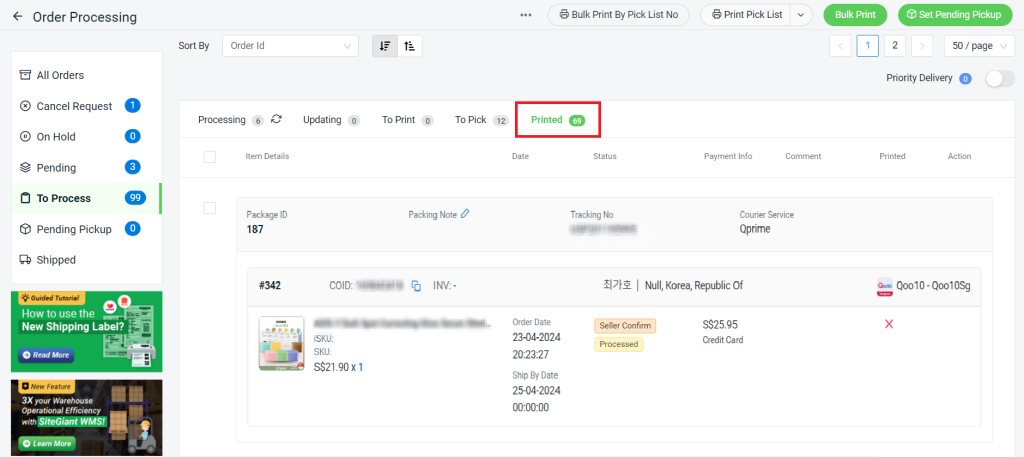
5. Set Pending Pickup (On Delivery)
📌Note: You may skip this step if your orders are set to On Delivery status while Arrange Shipment.
Step 1: Once you have done the order packing process, go to Printed tab > select the order(s) > click Set Pending Pickup.
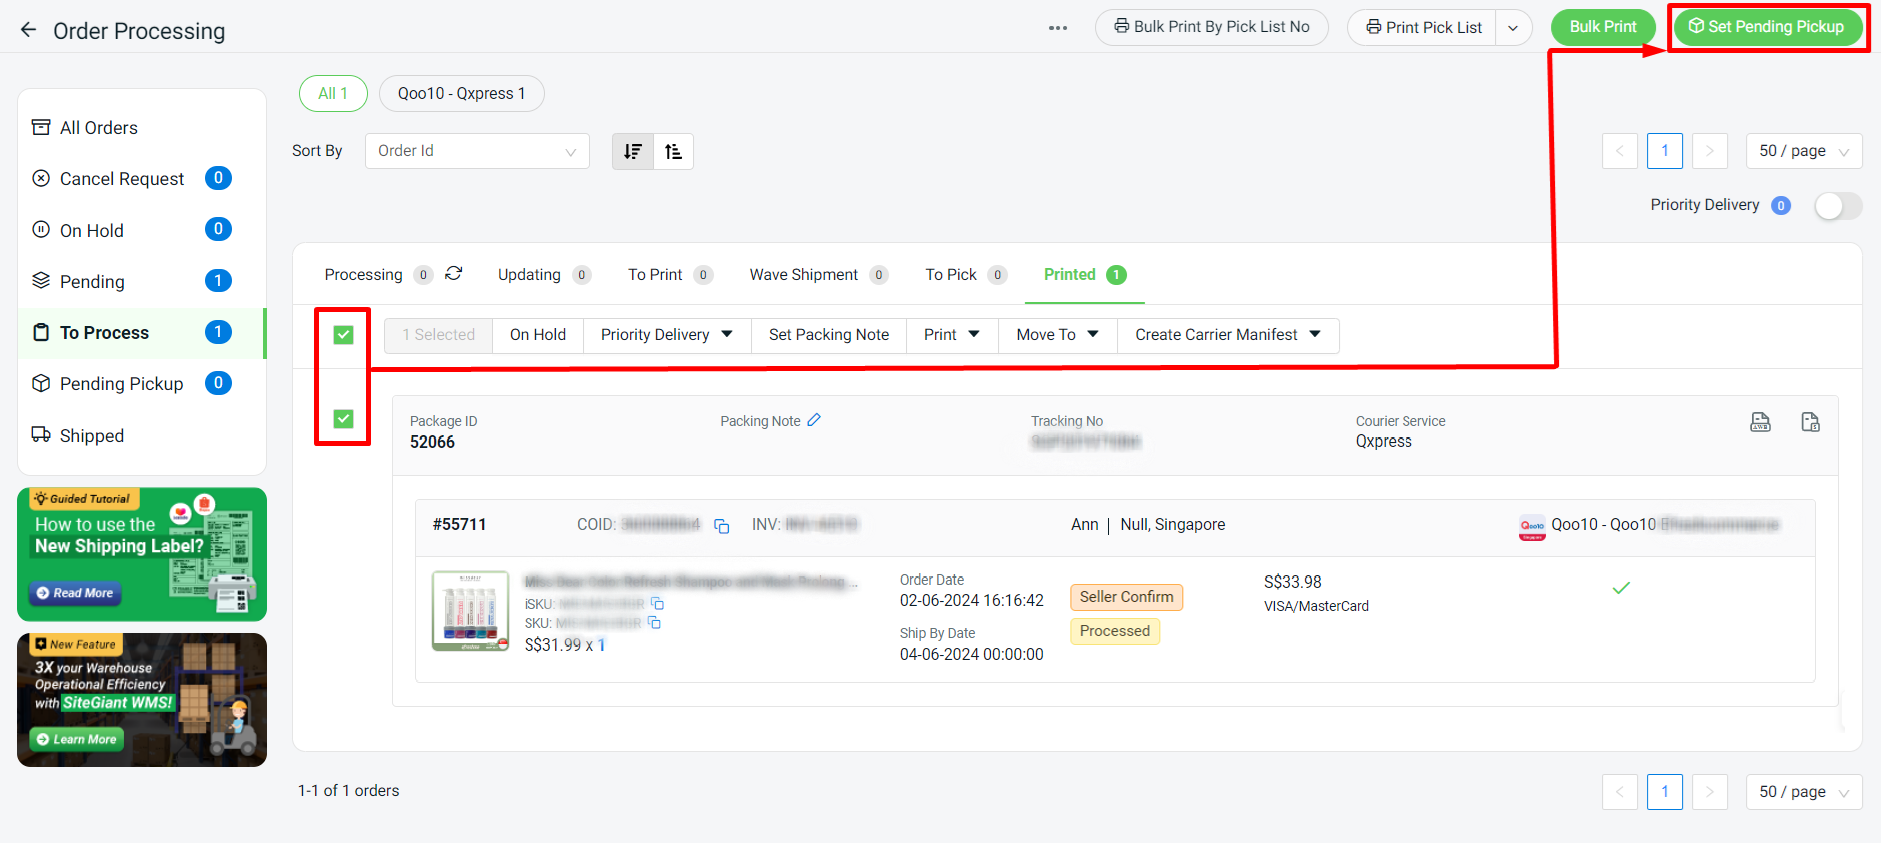
Step 2: The order will move to Pending Pickup section > Pending Pickup tab. The order status will change to On Delivery.
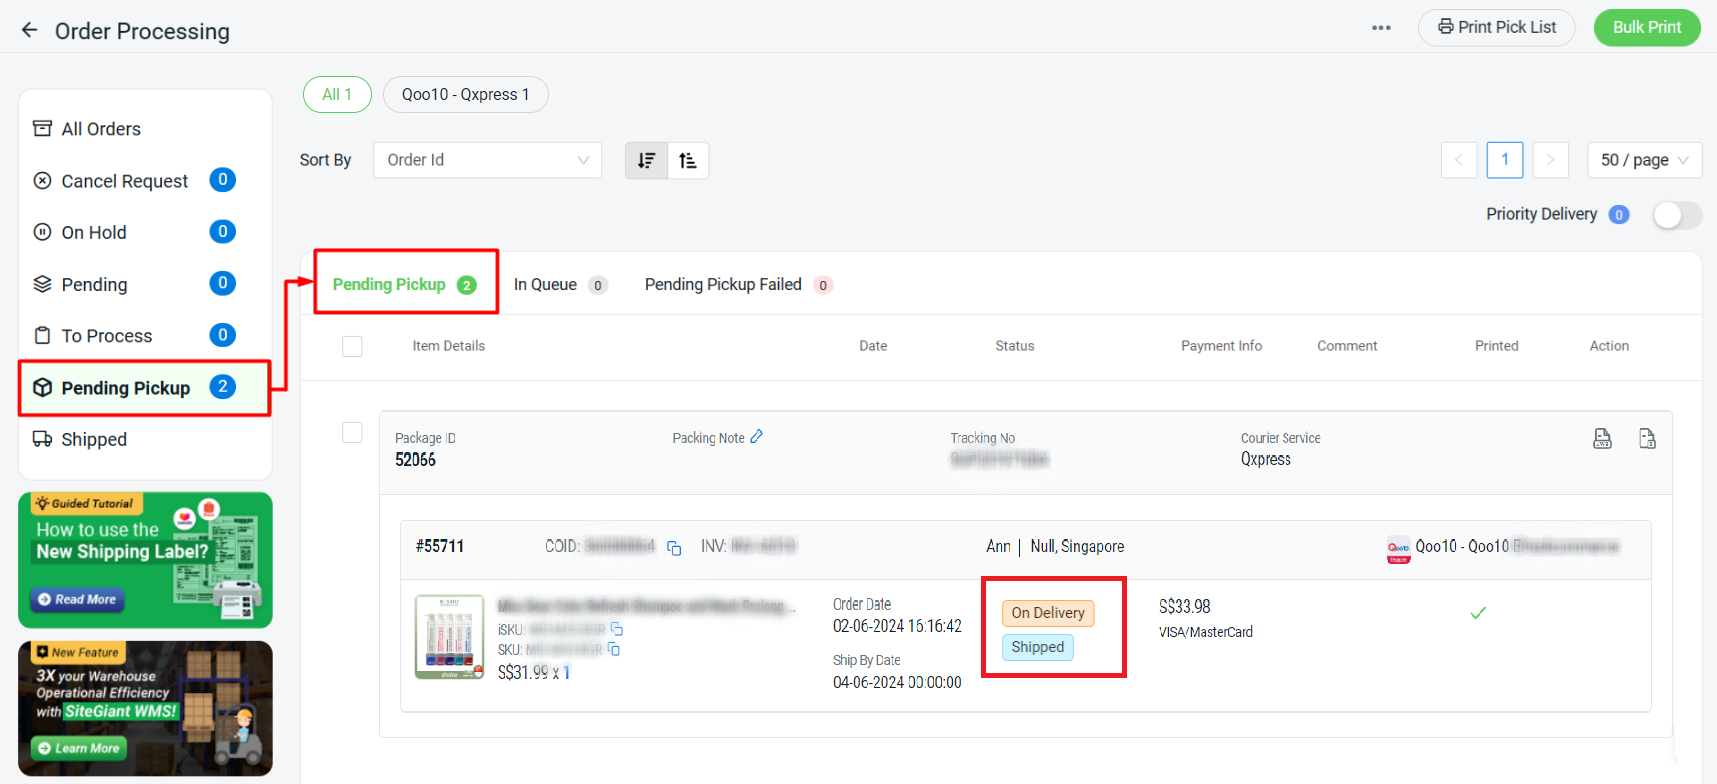
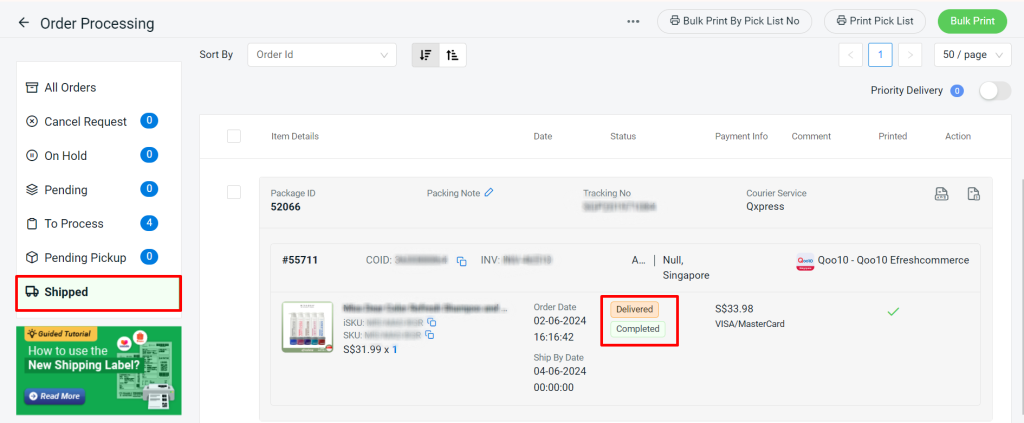
Step 5: When the order status is updated to Delivered from Qoo10SG the order will automatically move to the Shipped tab.