1. Introduction
2. Install Google Analytics 4
1. Introduction
Google Analytics 4 is an analytics service that helps you analyze your SiteGiant webstore traffic. It provides reports of your webstore performance such as the number of visitors, the most visited pages, the active time of visitors, the country of visitors, the traffic sources, and more to deliver better results.
2. Install Google Analytics 4
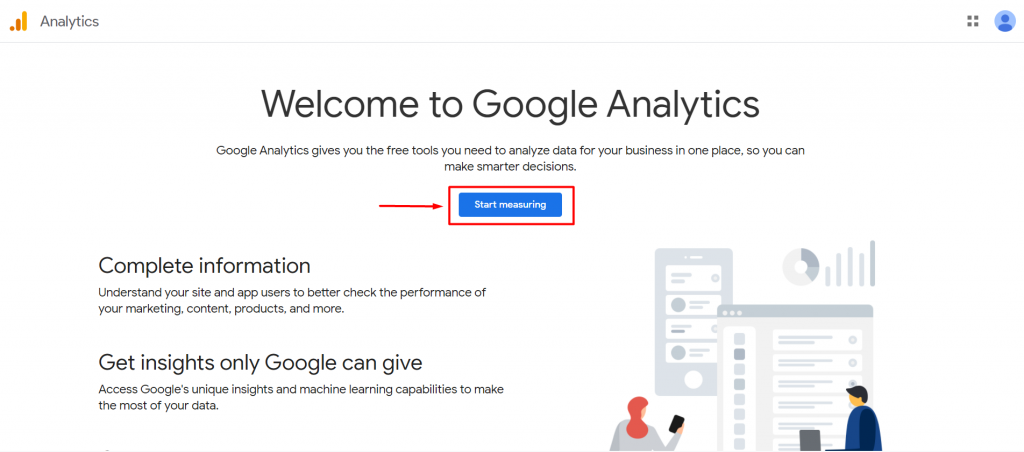
Step 1: Sign up and log in to Google Analytics with your Google account (Gmail) > click on Start Measuring from the welcome page.
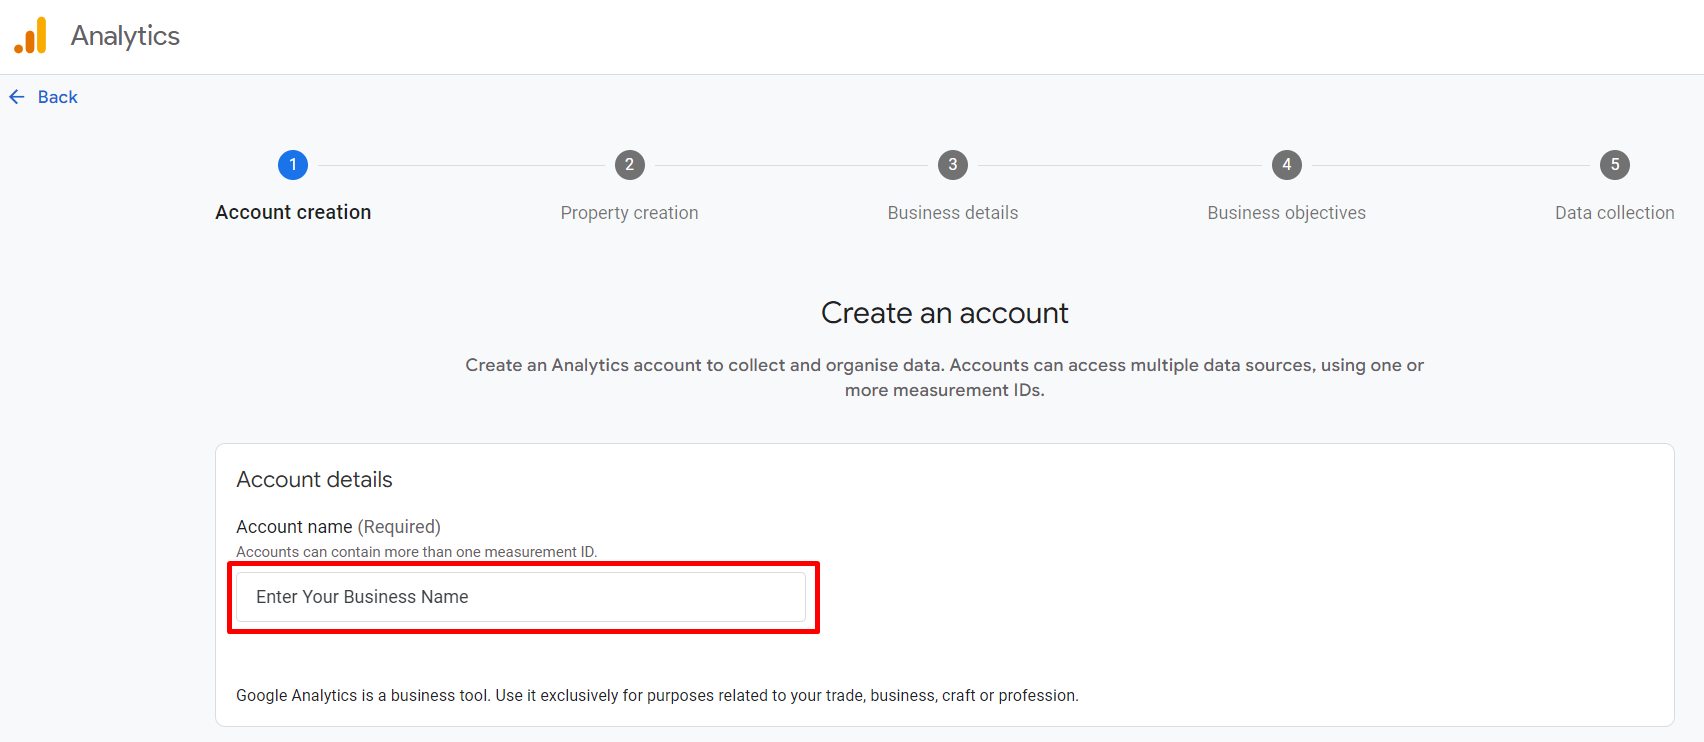
Step 2: Fill in your Account Name in the Account details field.
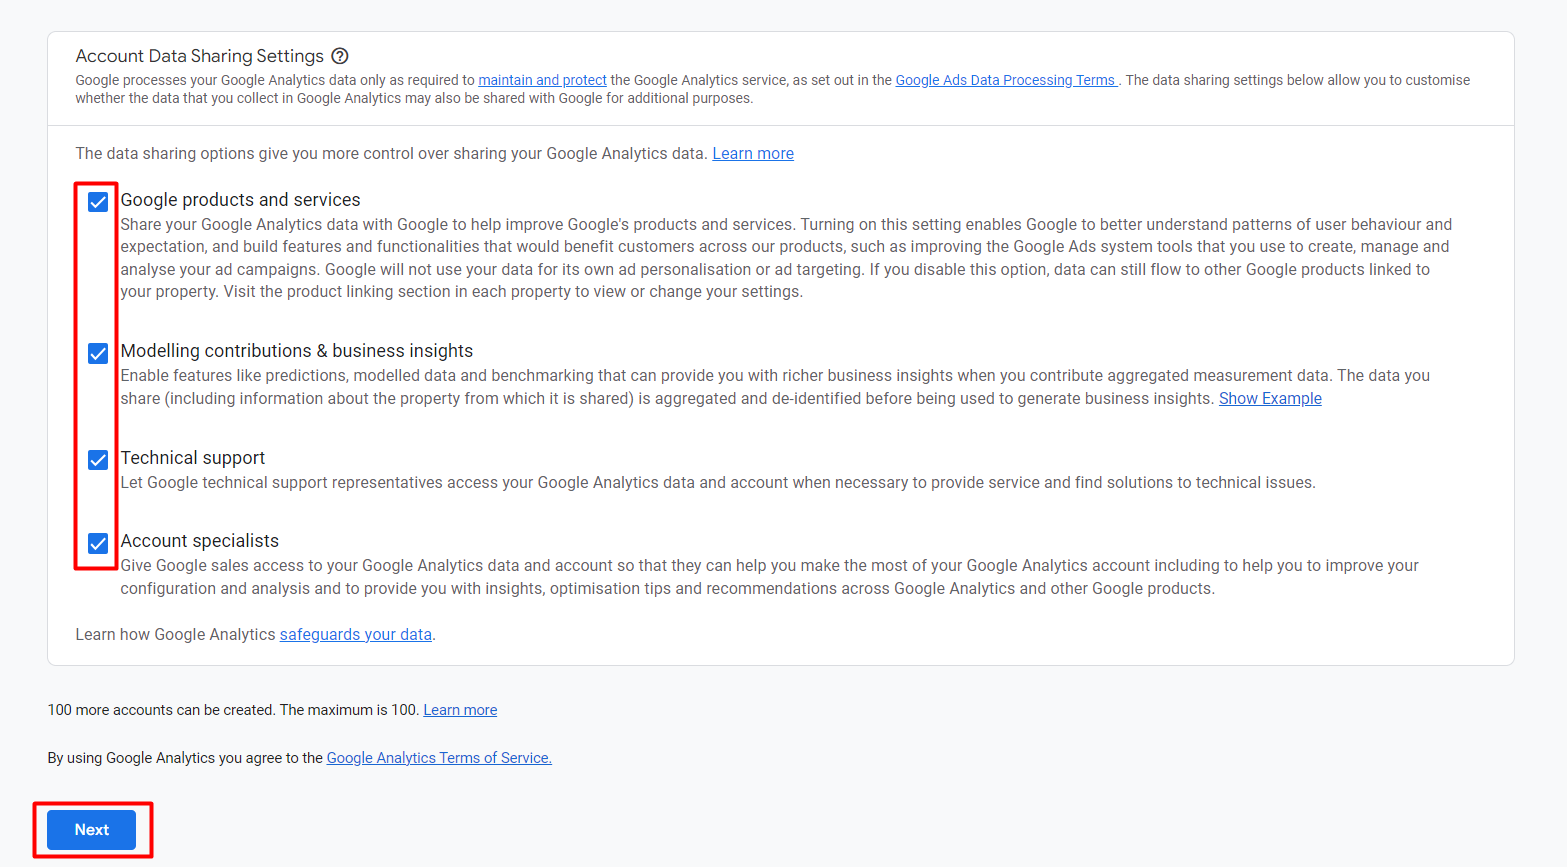
Step 3: Enable all the Account Data Sharing Settings > Next.
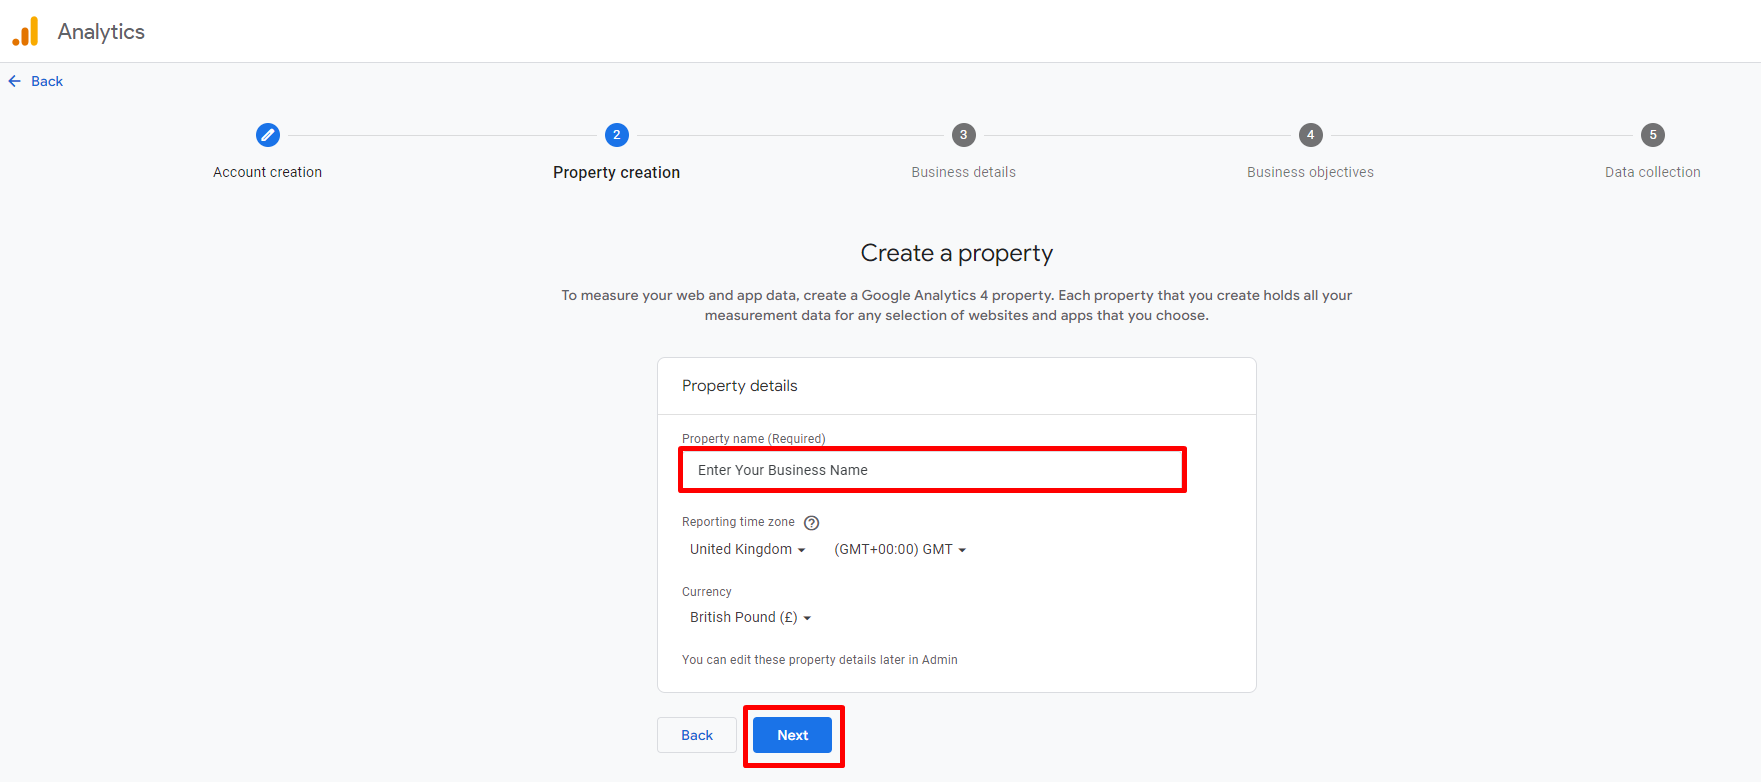
Step 4: Fill in your Property Name > choose the time zone of Malaysia time > choose currency as Malaysian Ringgit (MYR) > Next.
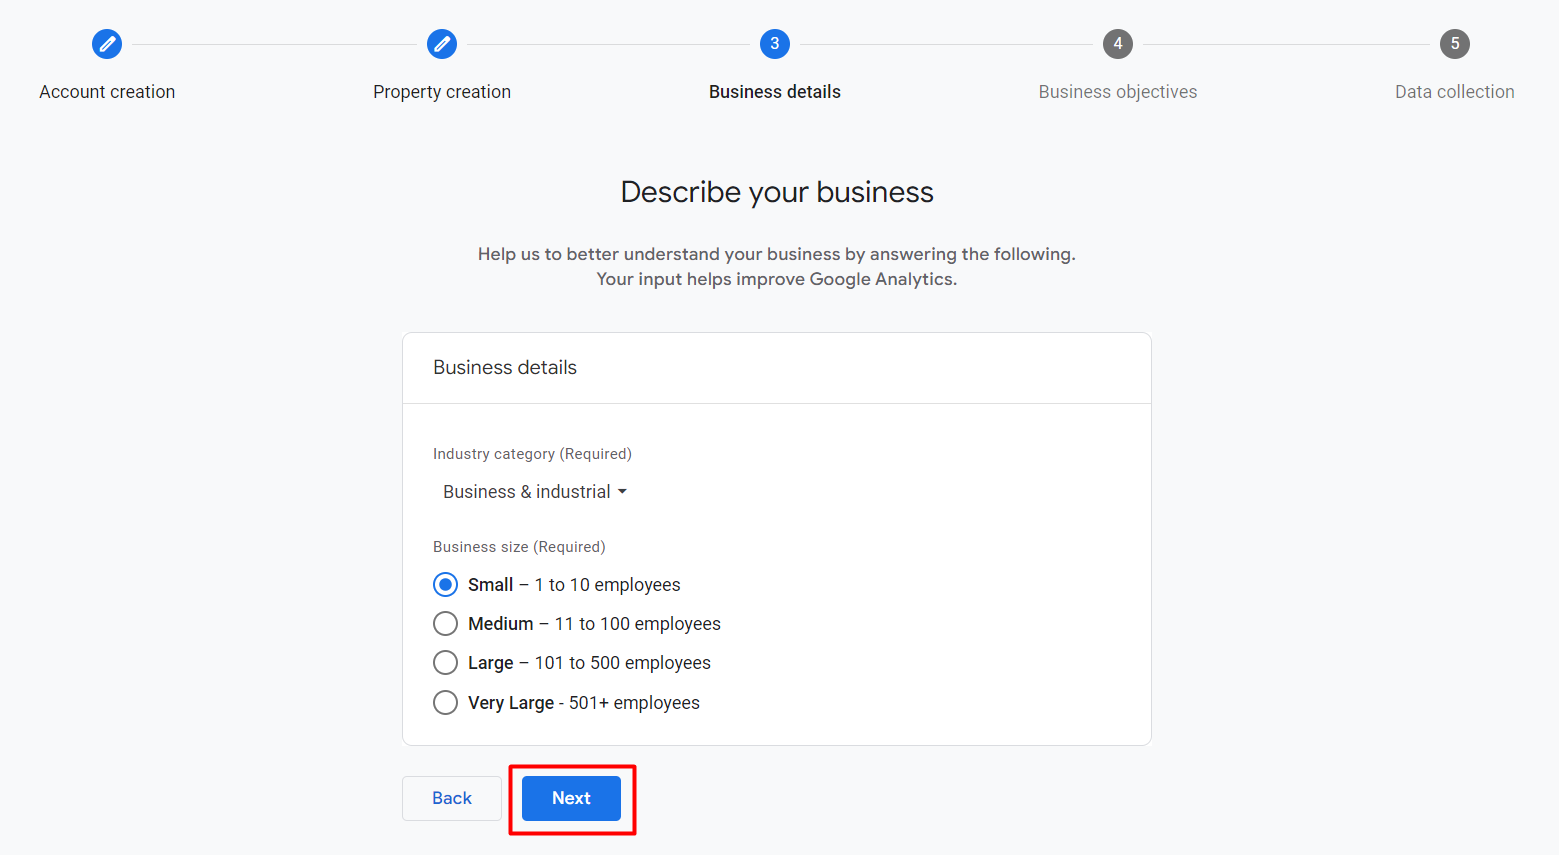
Step 5: Select the Industry category and Business size > Next.
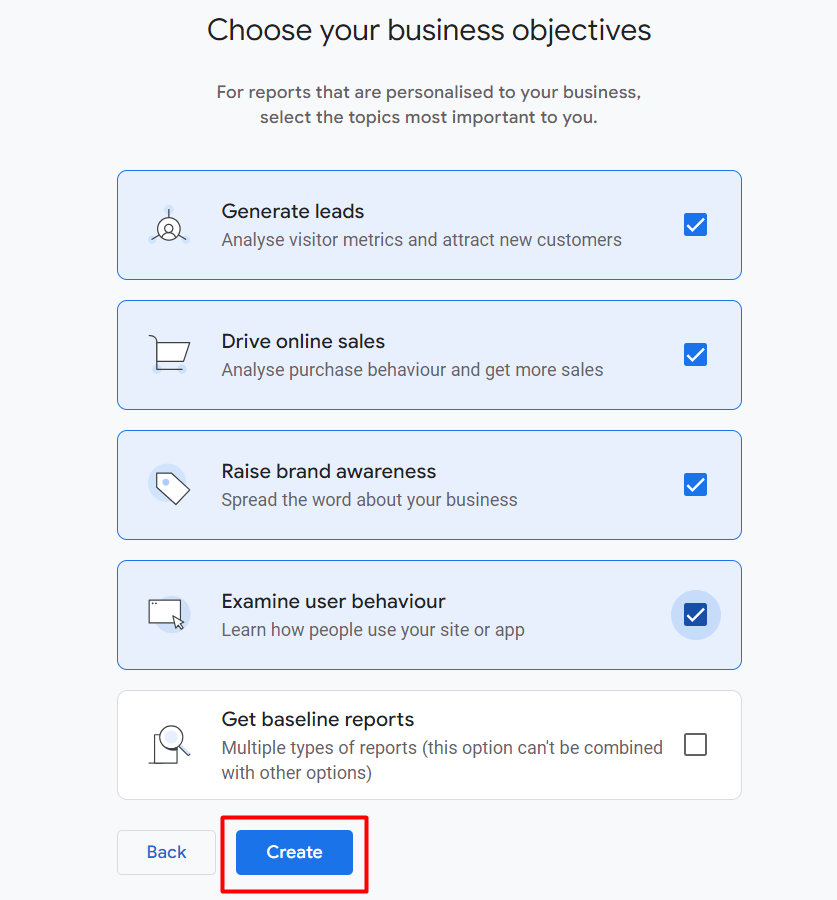
Step 6: Choose the Business Objectives most important to you > Create.
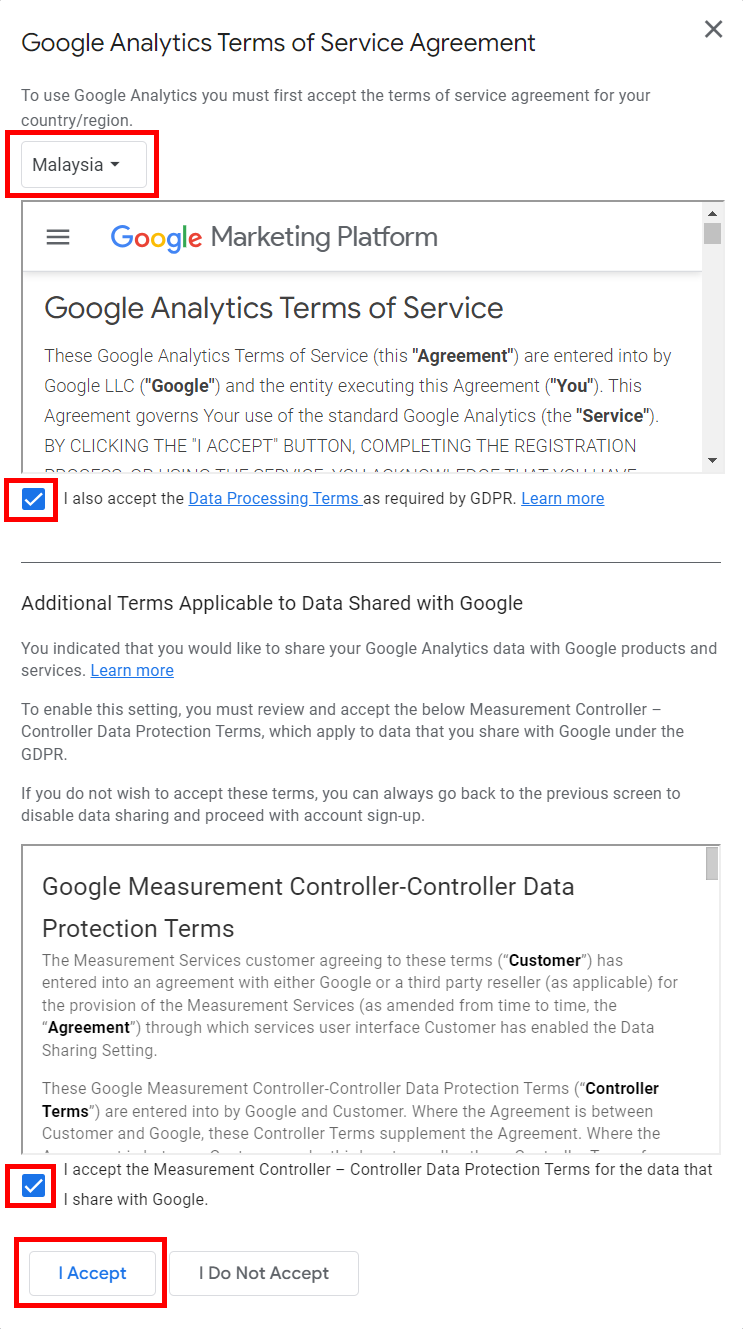
Step 7: Select Malaysia > tick to accept the Data Processing Terms and also Additional Terms Applicable to Data Shared with Google > click the I Accept button to create Google Analytics Account.
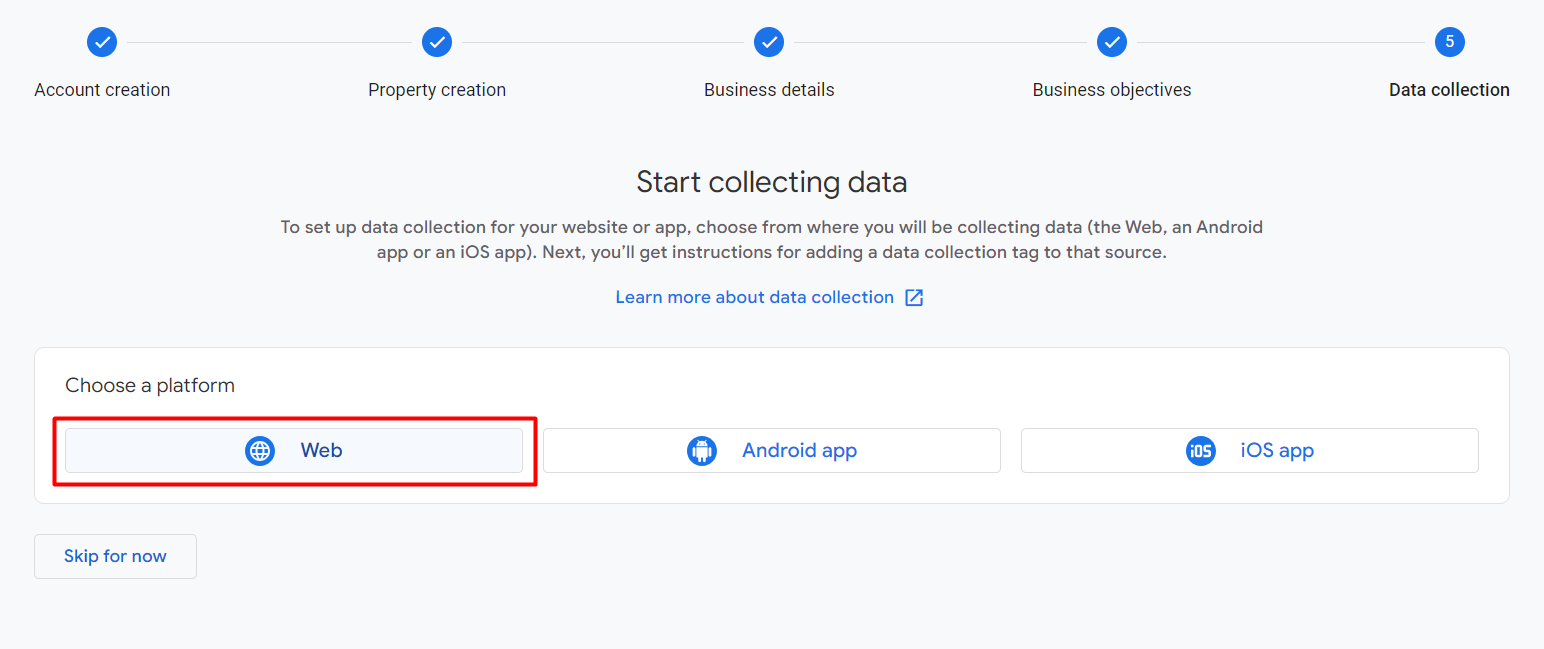
Step 8: Choose Web as the platform for Data Collection.
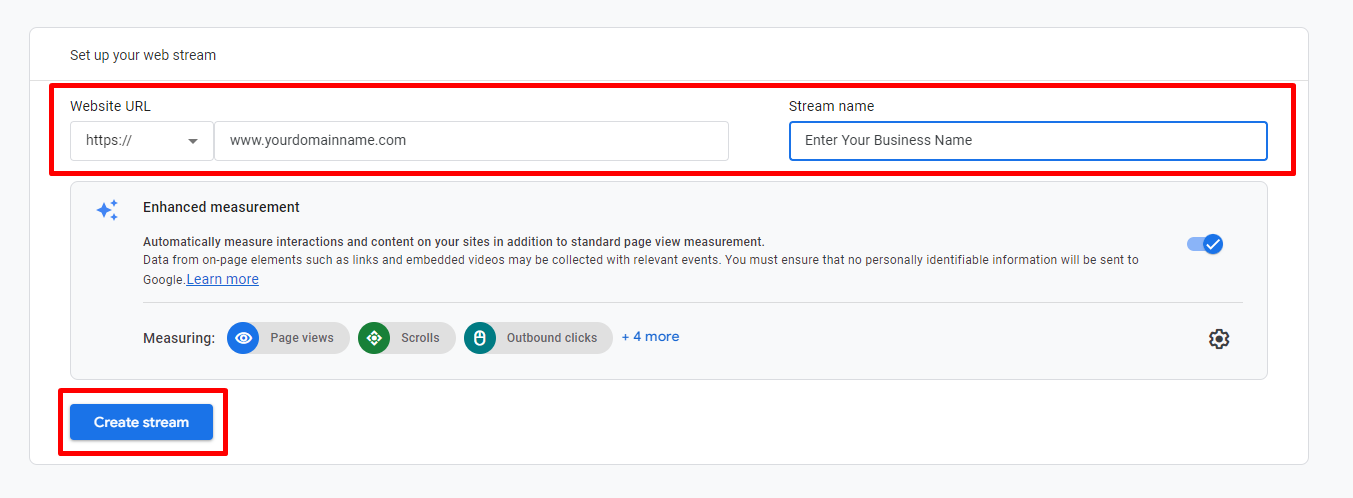
Step 9: Fill in your Website URL and set a Stream Name > Create Stream.
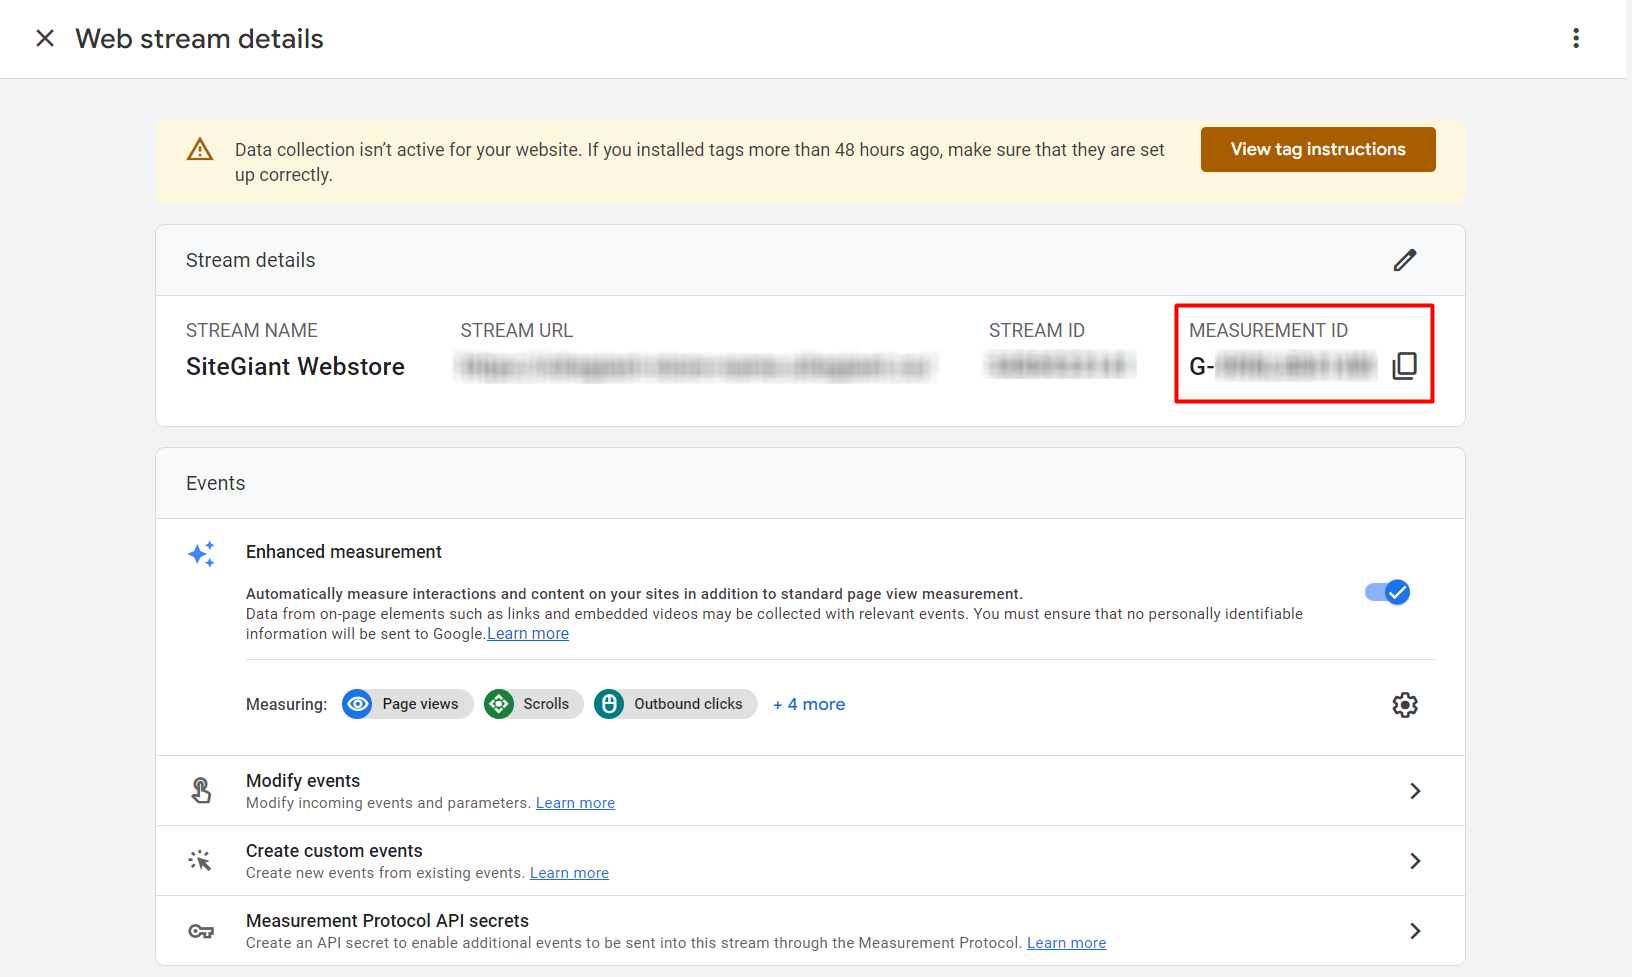
Step 9: Once the web stream is created, copy the Measurement ID for later use.
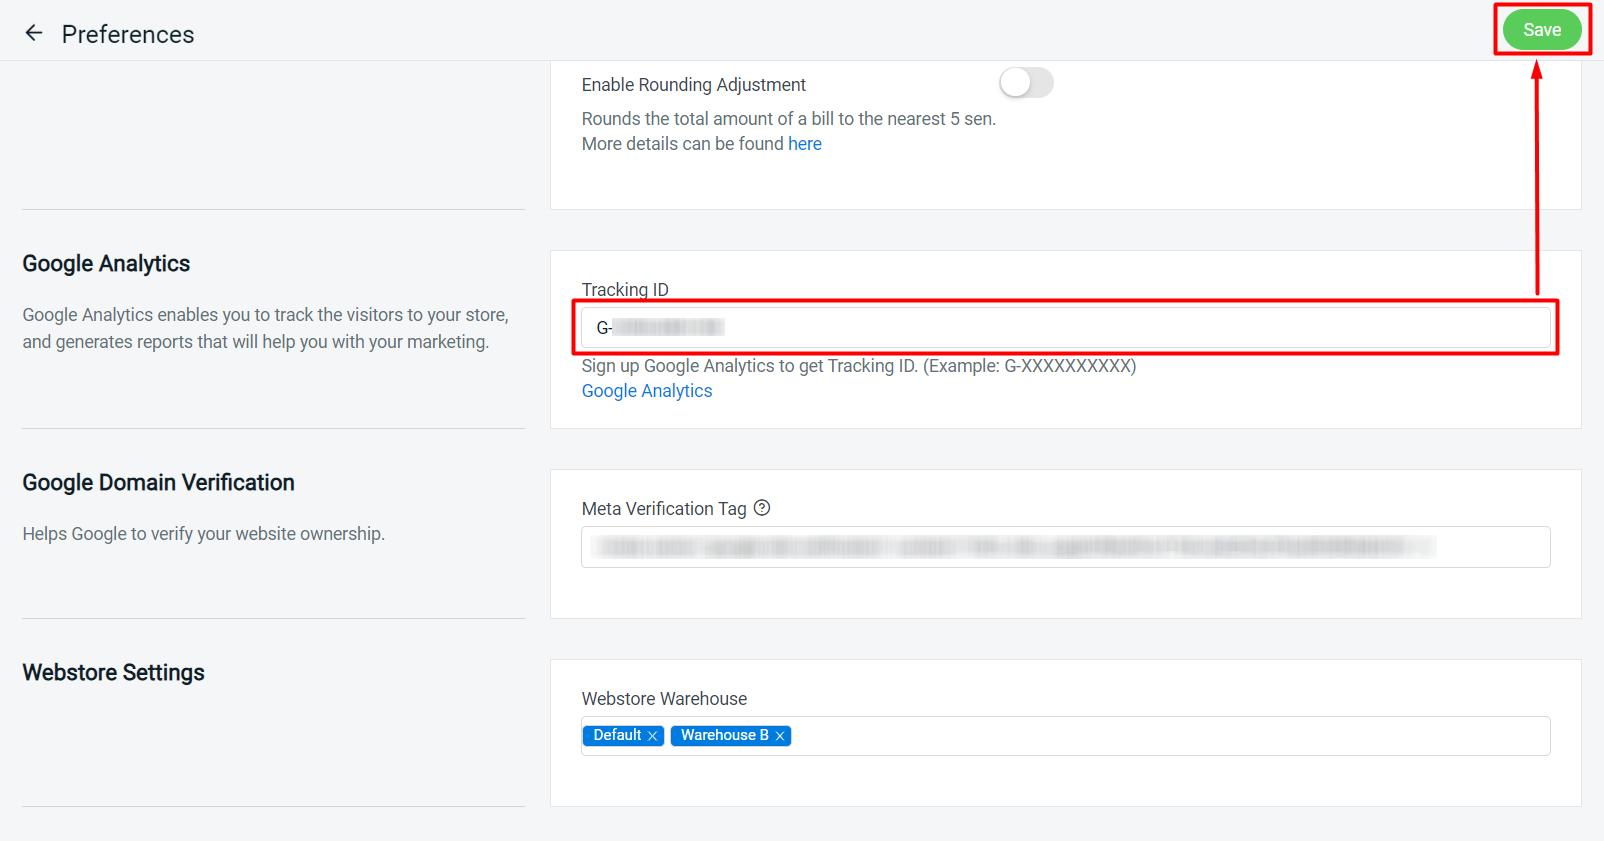
Step 10: Log in to SiteGiant Seller Center > Navigate to Webstore > Preferences.

Step 11: Scroll down to the Google Analytics section > paste the Measurement ID > Save.
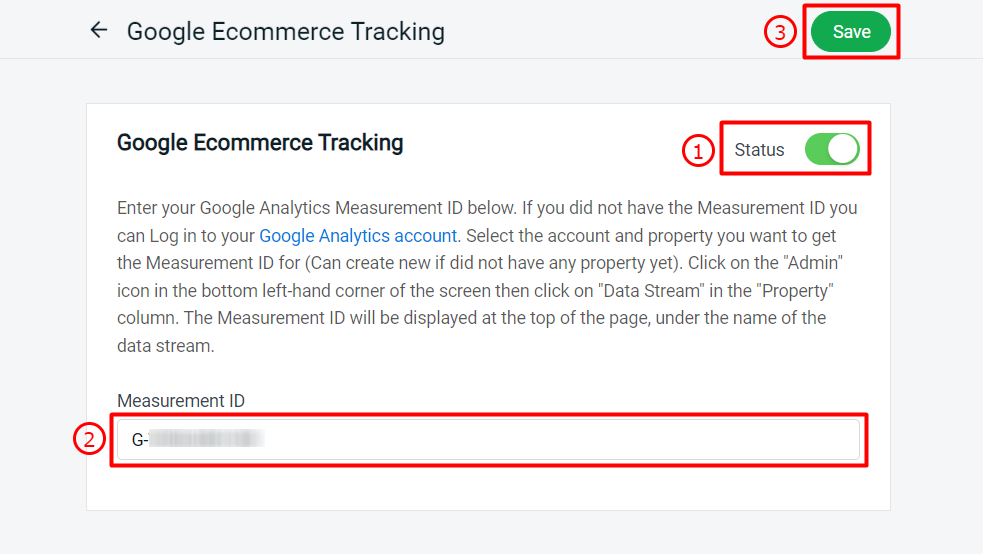
Step 12: If you wish to gather detailed information about your customers’ behaviour, navigate to Apps > Webstore > Google Ecommerce Tracking.
Step 13: Enable the Status > paste the Measurement ID > Save.
📌Note: Google Analytics can take up to 24 hours to process data to ensure its accuracy.
Step 14: Back to dashboard and Clear Cache to see the changes on your Webstore.