1. Introduction
2. Shipping Label Settings
3. General Settings
4. Shipping Label Template
5. Pick List Template
6. Packing List Template
7. Invoice Template
8. Courier Service Settings
9. Additional Information
1. Introduction
Customize your Shopee and Lazada Shipping Label by configuring the setting on General, Shipping Label Template, Pick List Template, Packing Listing Template, Invoice Template, and the Courier Service Settings.
2. Shipping Label Settings
Step 1: Go to All Orders from the Orders menu > Order Processing
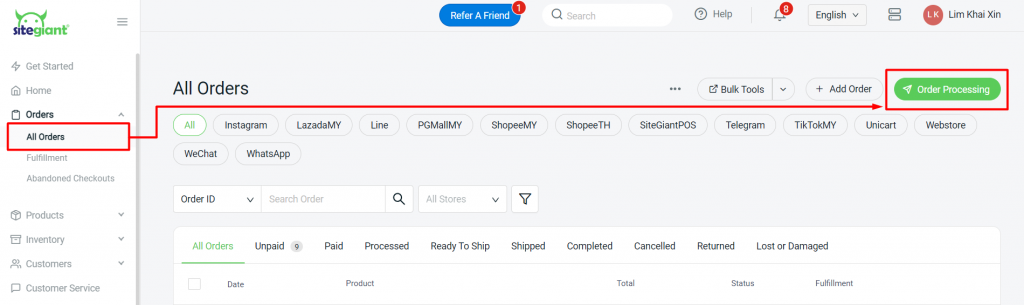
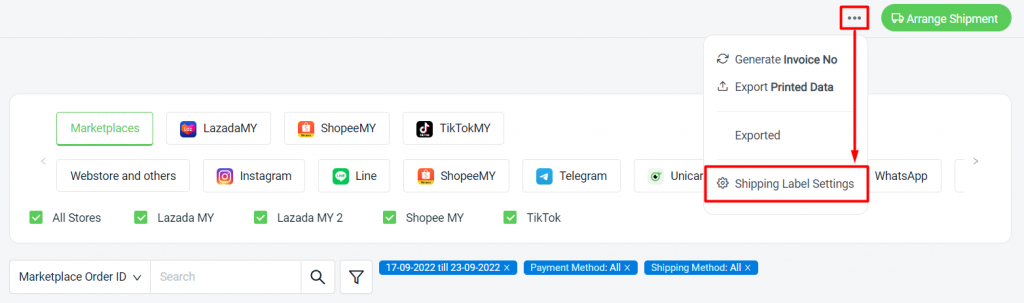
Step 2: Click on More (…) > Shipping Label Settings
Step 3: Select LazadaMY or ShopeeMY to customize the settings for each marketplace > You can enable the Express Fulfillment status to ease your fulfillment process
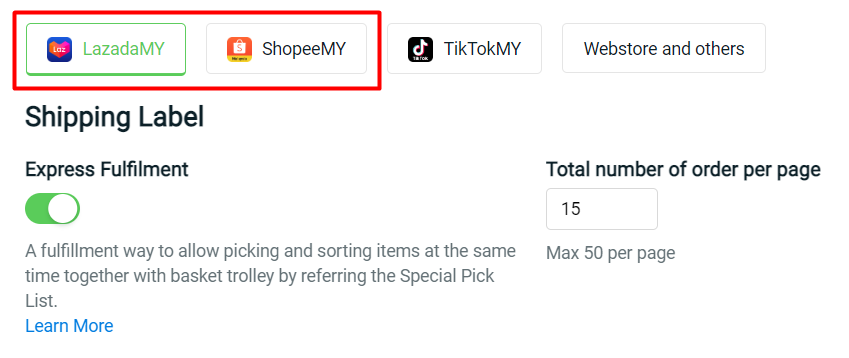
💡Tips: How To Process Order With Express Fulfillment
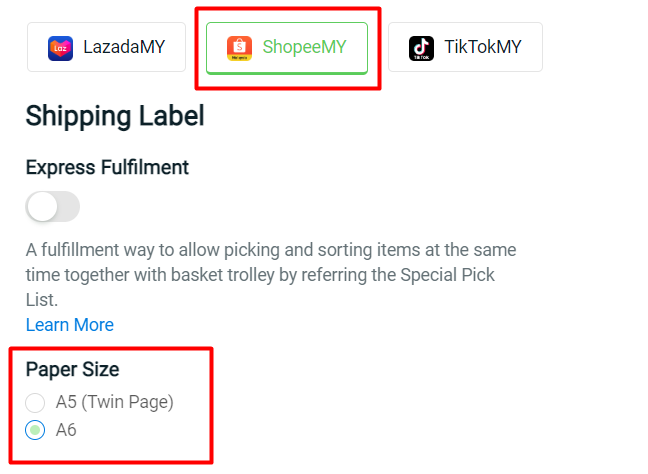
Step 4: For Shopee, you can choose to print out the Shipping Label paper in A5 (Twin Page) or A6 size on a single page
3. General Settings
Step 1: For Lazada, choose a Default Shipping Provider > set status to Packed or Ready to Ship while Arrange Shipment
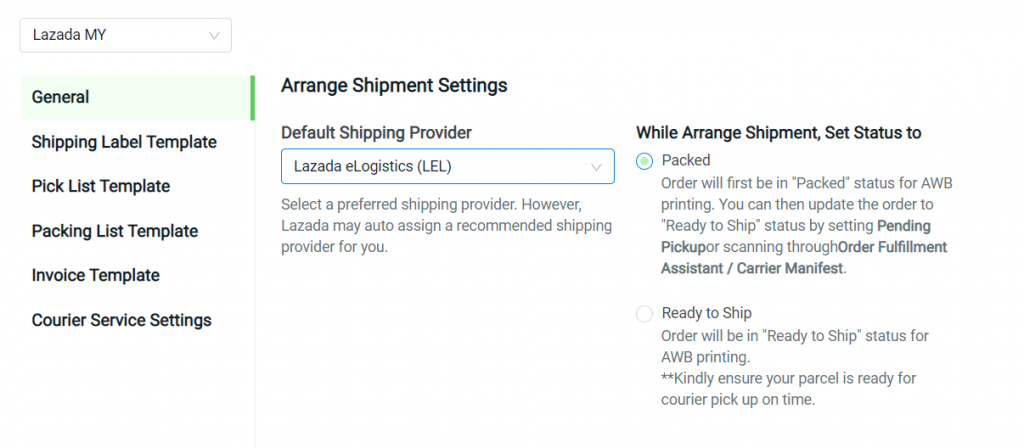
📌Note: If you set the status to Ready to Ship, kindly ensure your parcel is ready for the handover process to the courier. Or else, there will be a penalty of Lazada Package Not Ready (PNR)
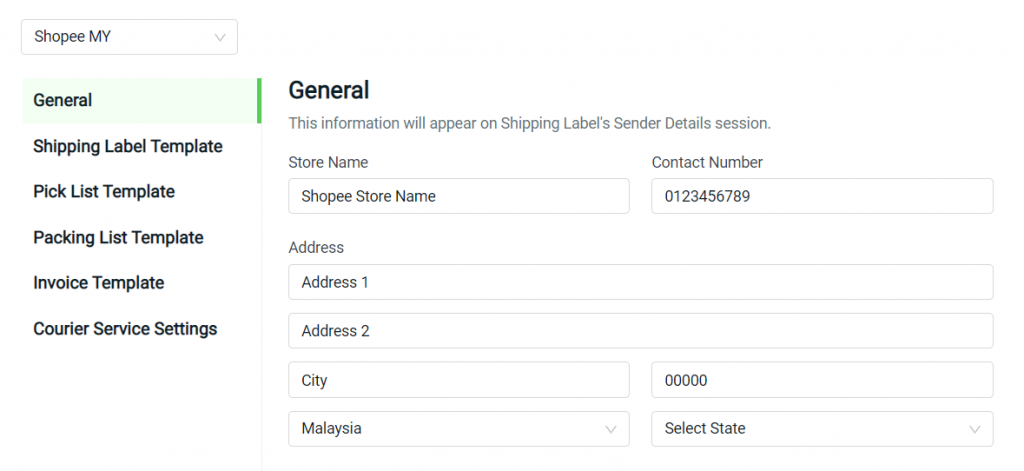
Step 2: For Shopee, fill in the Store Name, Contact Number, and Address as the Shipping Label’s Sender Details
Step 3: You may enable the Auto Arrange Shipment Settings status to let the system Arrange Shipment automatically for the orders based on the scheduled timeslot
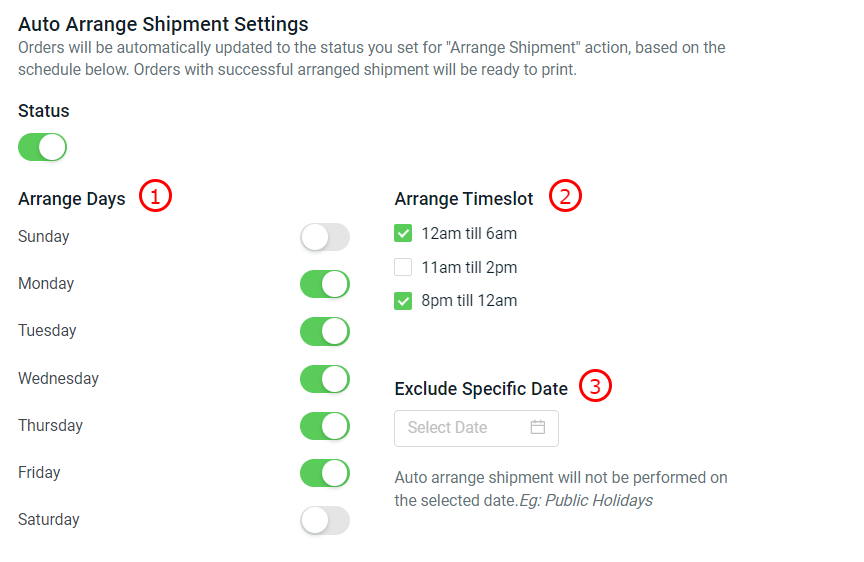
1. Arrange Days: Select the working days you want your orders to be automatically arranged for shipment.
(📌Note: To use Auto Arrange Shipment, you must set the Arrange Shipment Method to Pickup or Dropoff in the Courier Service Settings.)

2. Arrange Timeslot: Schedule auto arrange shipment timeslot for the day you have selected.
(📌Example: If Arrange Days are Monday to Friday, when there's a new order on Friday at 9 pm, during the 8pm to 12am timeslot, it will automatically arrange pickup for the first available timeslot on Monday provided by the Shopee API.)

3. Exclude Specific Date: Auto arrange shipment will not be performed on the date you have selected, such as Chinese New Year / Hari Raya Aidilfitri.
4. Shipping Label Template
Step 1: Choose and customize your preferred Shipping Label template
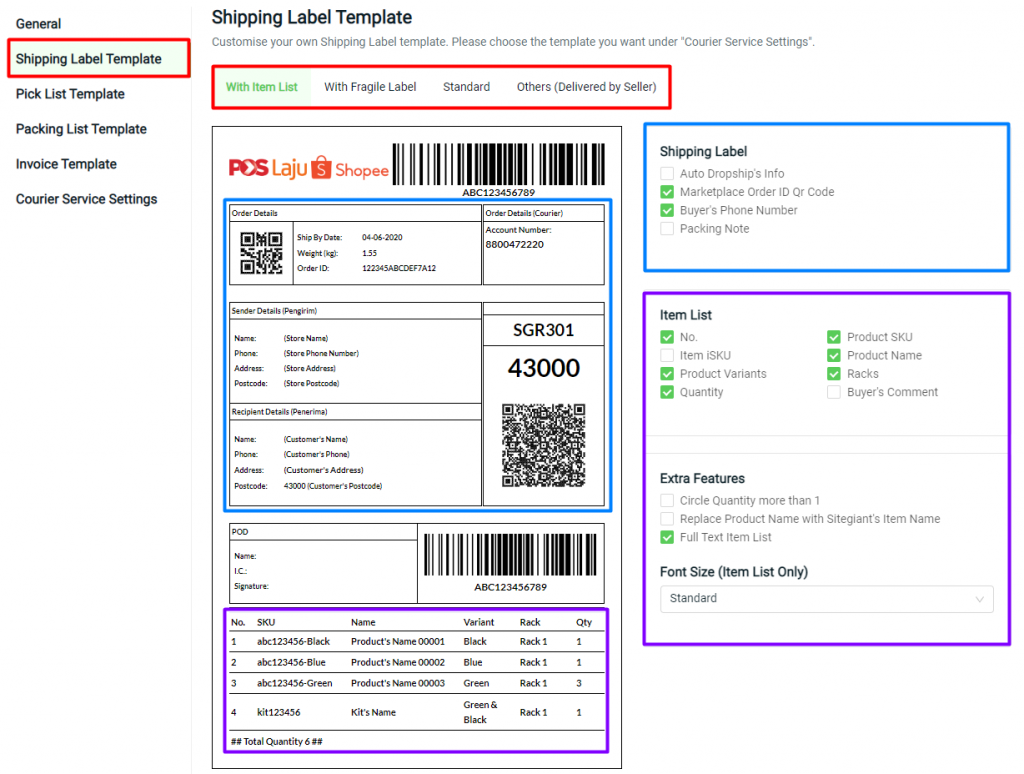
📌Note: Auto Dropship’s Info is only for Shopee CRM – How To Change Shopee Shipping Label Sender Information For Dropship
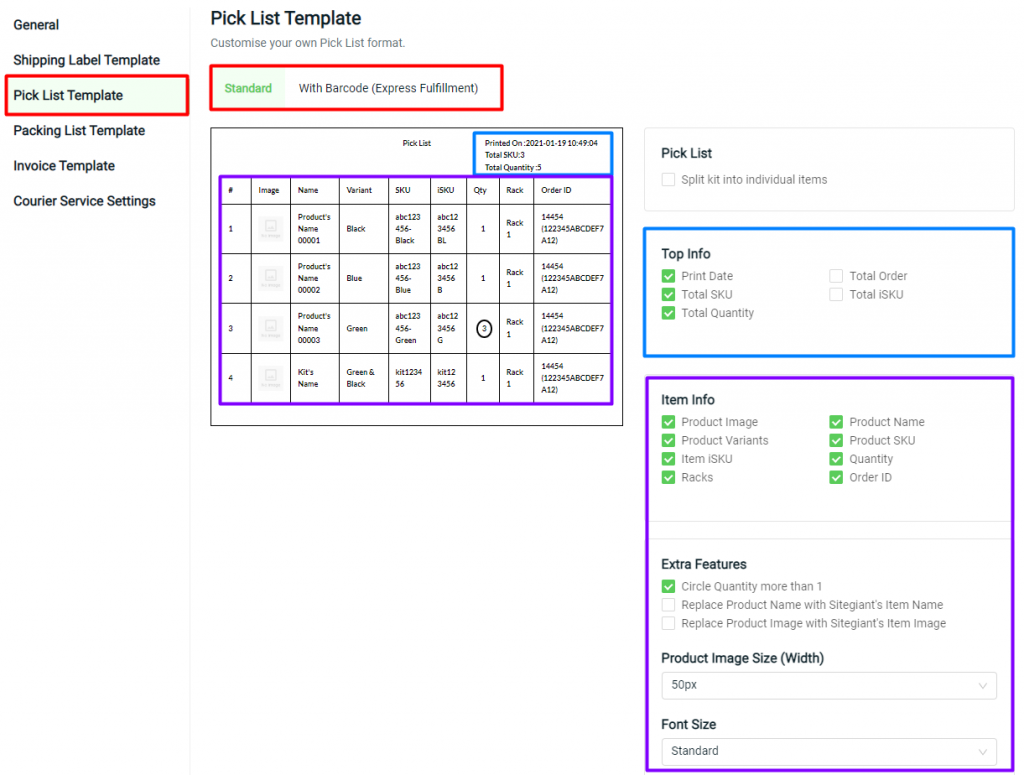
5. Pick List Template
Pick List is a long list of items on the selected order, which is printed separately with the shipping label. You can use Pick List to ease your item picking process
Step 1: Customize the Pick List Template
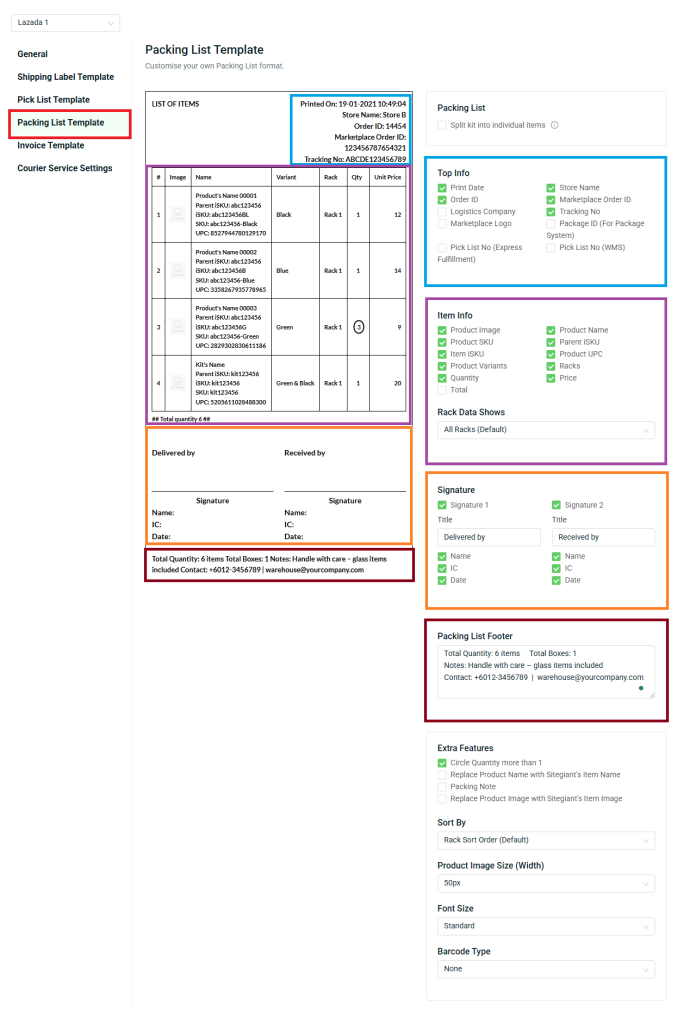
6. Packing List Template
Step 1: Customize the Packing List information
7. Invoice Template
Step 1: Customize the Invoice template
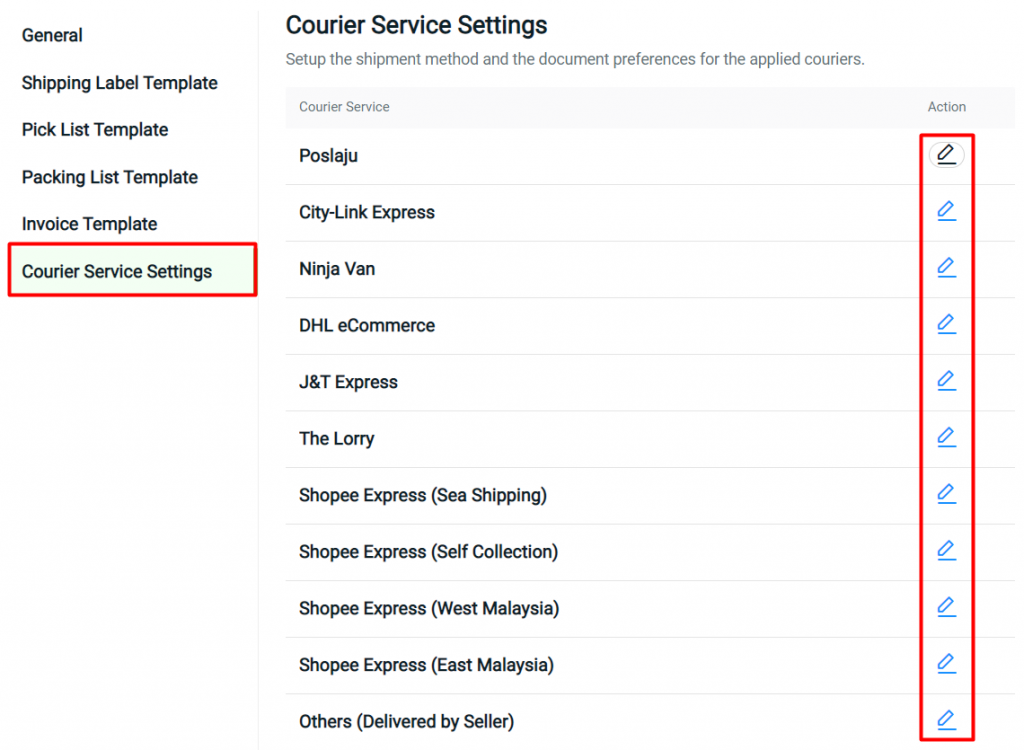
8. Courier Service Settings
Step 1: Click on the Edit icon to set up the shipping label template and documents for the applied courier service
Step 2: For Shopee, choose the Arrange Shipment Method and Header Logo
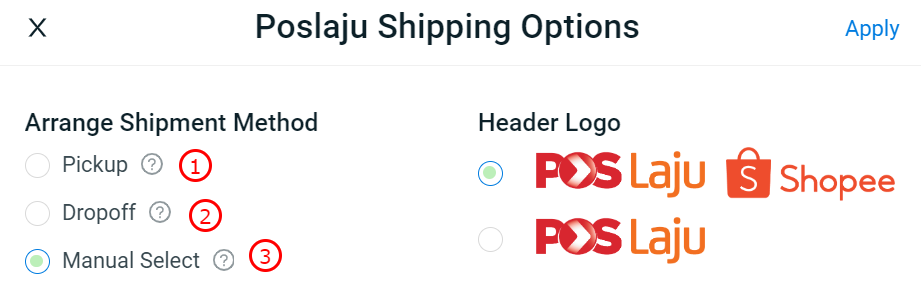
1. Pickup: Orders will be arranged for pickup directly based on the nearest pickup timeslot and default pickup address during arrange shipment.
2. Dropoff: Orders will be arranged for dropoff directly during arrange shipment.
3. Manual Select: Able to choose between dropoff or pickup with available timeslots during arrange shipment. (Highly recommended to use this method for pickup because it allows you to choose the preferred pickup timeslot and change pickup address if necessary.)
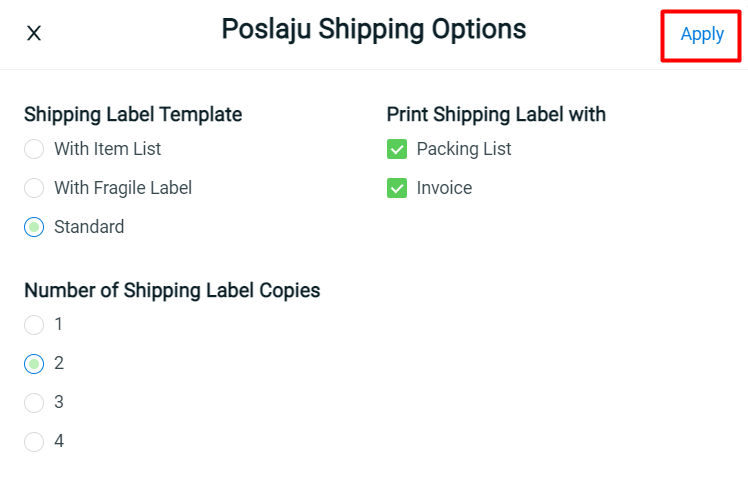
Step 3: Choose the Shipping Label Template > choose if you wish to print Shipping Label with Packing List, Invoice, or both > select the Number of Shipping Label Copies > Apply
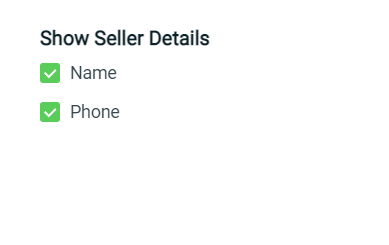
Step 4: For certain Courier Service, you can choose whether to show or hide the seller details such as Name and Phone in the Shipping Label
📝Additional Information
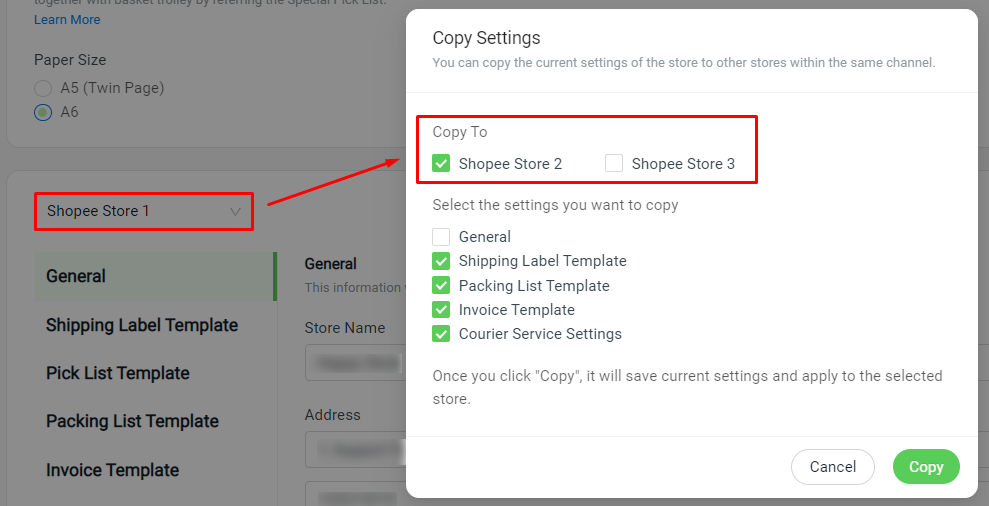
1. Copy Settings
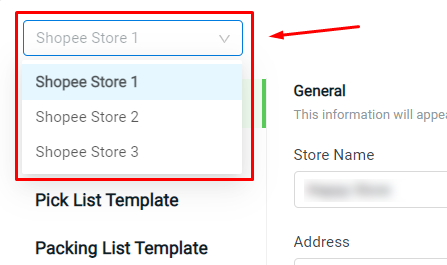
Step 1: If you have multiple Shopee or Lazada stores, you can change the store channel here
Step 2: With multiple stores, you can also perform Copy Settings from store to store, to save time for settings configuration
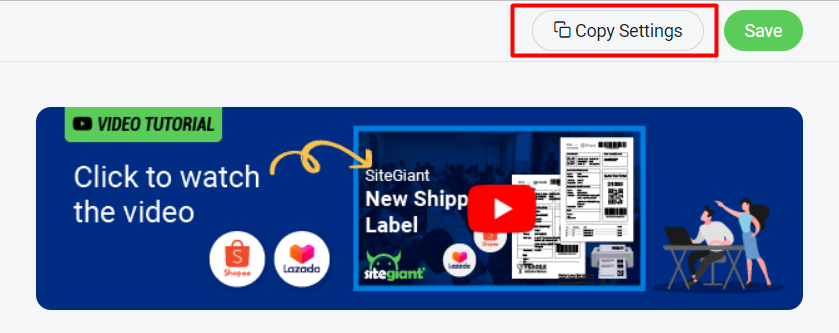
Step 3: Choose the store to be Copy To > select the template settings > Copy
Step 4: Save the Shipping Label Settings once done the configuration