
1. Introduction
2. Item Rack Assignment
3. Additional Information
1. Introduction
Assign your item with a rack for a better reference of stock location when doing the order fulfillment. The rack location of the item will be shown on the Packing List or Pick List.
Use Excel to update and bulk import the data for the item rack assignment.
2. Item Rack Assignment
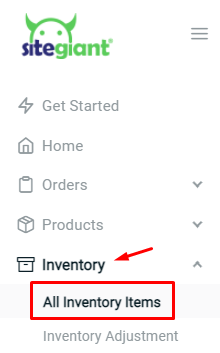
Step 1: Navigate to Inventory > All Inventory Items
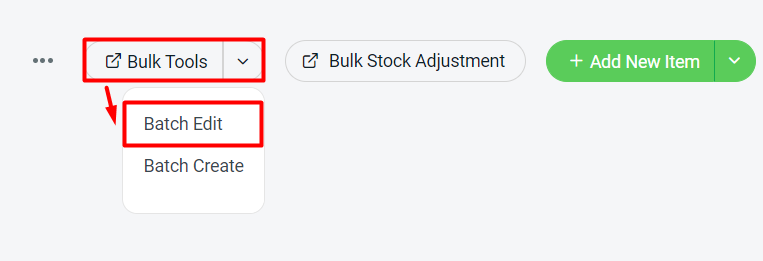
Step 2: Click on Bulk Tools > choose Batch Edit
Step 3: Under download, select info type as Item Warehouse / Rack Assignment > choose the warehouses > you can choose to filter by category or brands > Generate
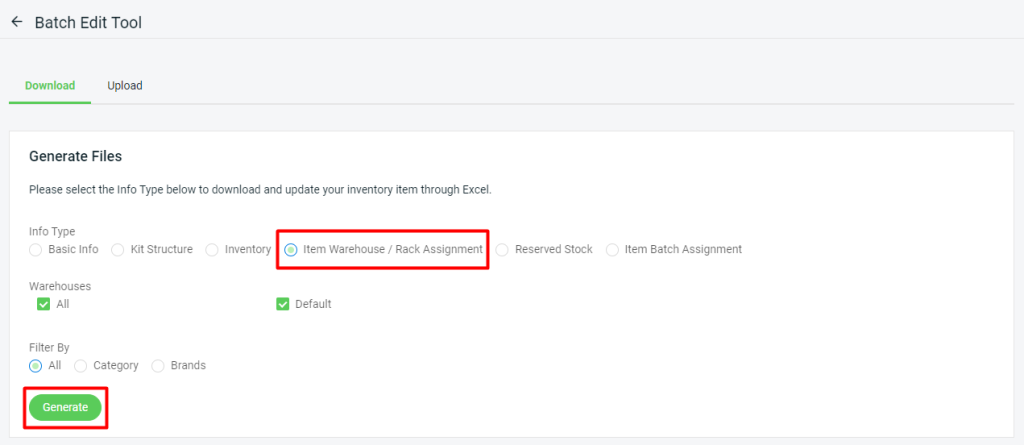
Step 4: Download the generated excel file (zipped)

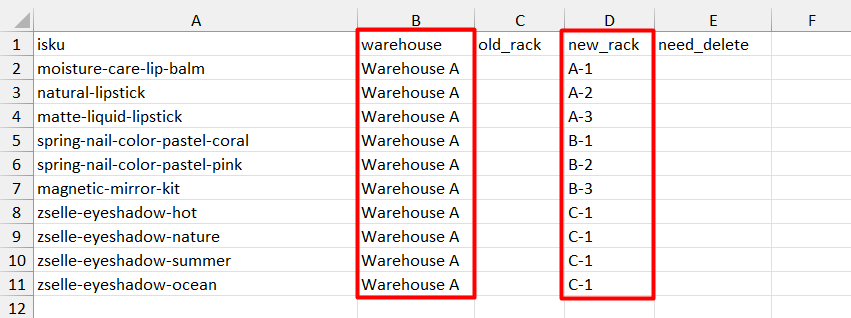
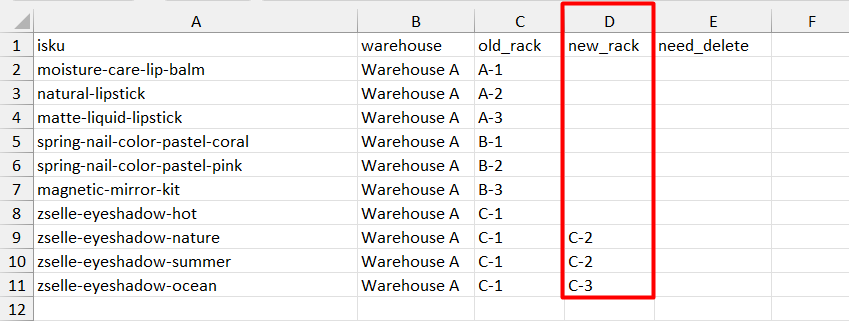
Step 5: To assign new rack, insert the warehouse and assign the rack in new_rack column
📌Note: Warehouse and Rack must be created before assigning the Rack. Refer to How to Manage Warehouse & How to Manage Rack Group and Rack
Step 6: To change rack, insert the new rack name in new_rack column
Step 7: To unassign items from rack, enter delete in need_delete column
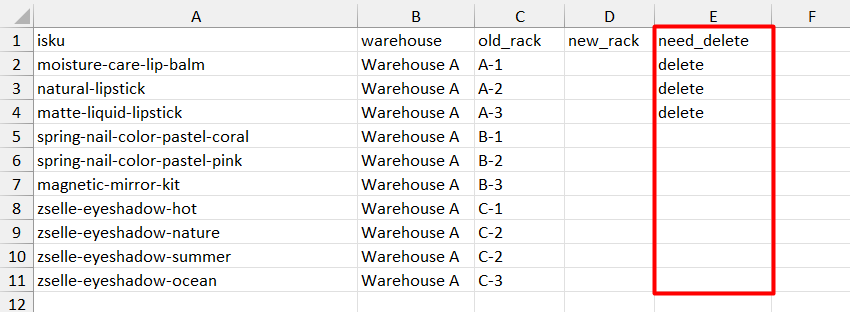
📌Note: The stock on hand quantity of the selected rack must be in ‘0’ in order to unassign items from the rack
Step 8: Set picking zone for item with multiple racks. (optional)

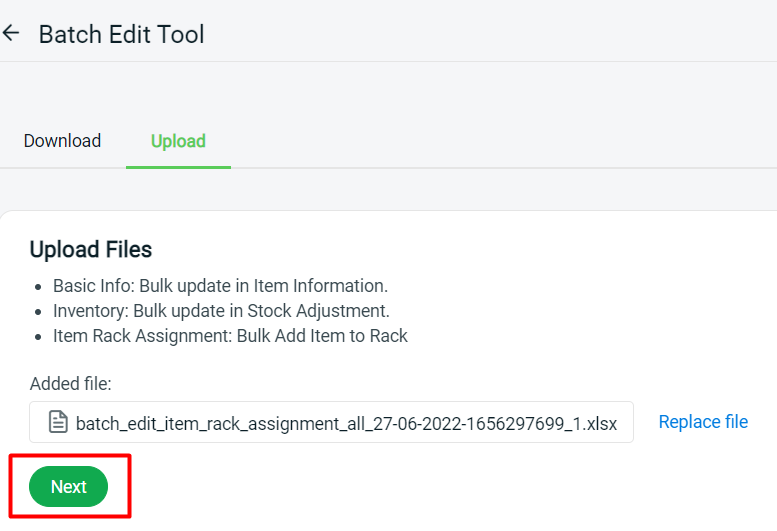
Step 9: Back to SiteGiant Batch Edit Upload page > upload the Excel file > Next
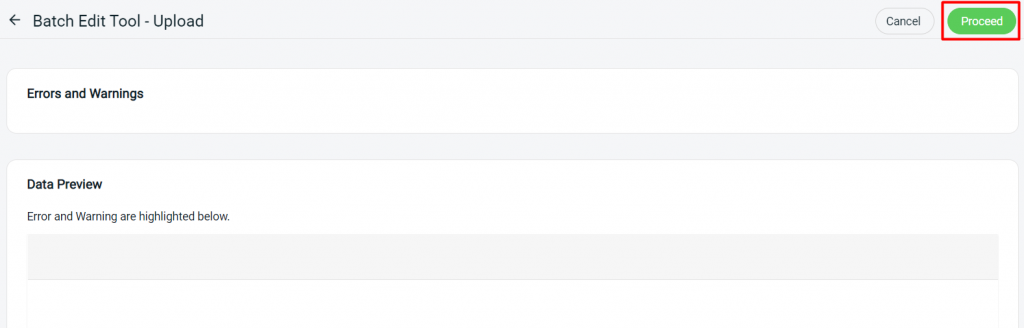
Step 10: If there are any errors in the Excel uploaded, you will see the error message in Errors and Warnings and it will show the error column in the Data Preview. Amend the error column and reupload the file. Click on Proceed if the file uploaded does not have errors.
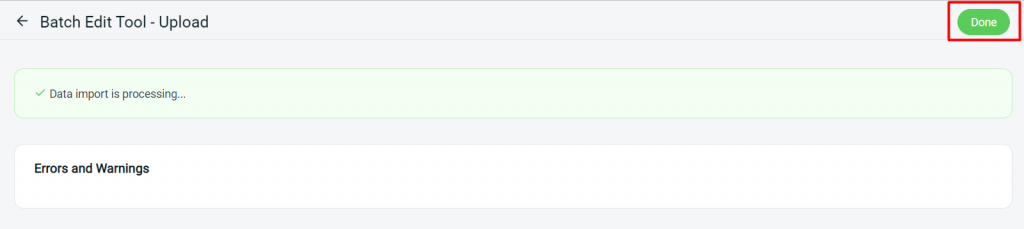
Step 11: Click Done to complete the process
📝Additional Information
1. Merge Item Rack Stock
If you have assigned more than one rack to an item and wish to remove one while transferring the stock to the remaining rack, please refer to the steps below.
Step 1: Currently, there are two racks assigned to one item: Rack A with 100 units of stock and Rack B with 50 units of stock. These rack names will be updated under the old_rack column.

Step 2: You can update Rack B under the old_rack column and assign Rack A as the new rack if you wish to remove Rack B and merge its stock into Rack A.
