
1. Introduction
2. Set Up Fiuu Payment Gateway
3. Update URL Callback In Fiuu Account
4. Test Checkout Via Fiuu (From Customer Perspective)
1. Introduction

Fiuu provides the payment channel in Malaysia that you will need to smoothen your payment process for your business. Fiuu accepts payment methods from Credit Card, FPX Online Banking, and E-wallet which are used widely.
📌Note:
Make sure you have a registered account with Fiuu as you will need the Merchant ID, Verify Key, and Secret Key to proceed with integration.

If you do not have a Fiuu account yet, kindly email support@sitegiant.my and we will connect you to the Fiuu representative to proceed with your Fiuu merchant account application.
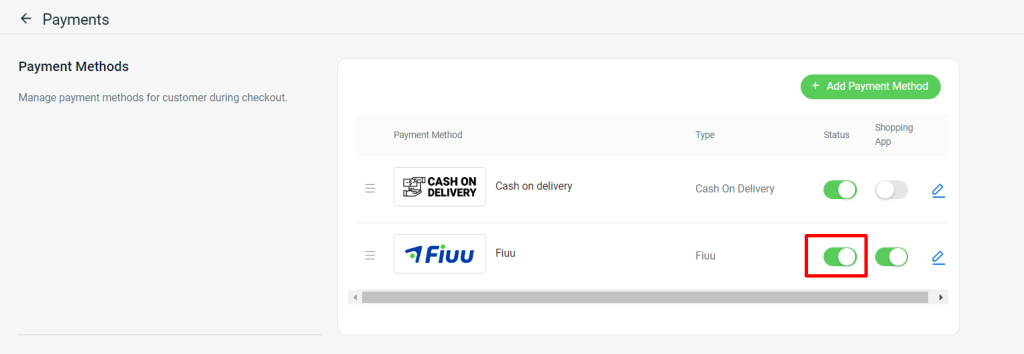
2. Set Up Fiuu Pay Payment Gateway
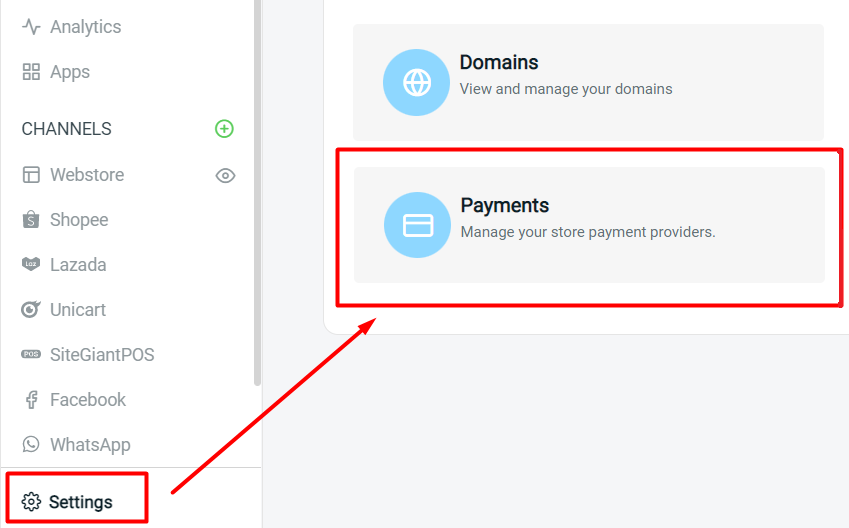
Step 1: Go to Settings > Payments
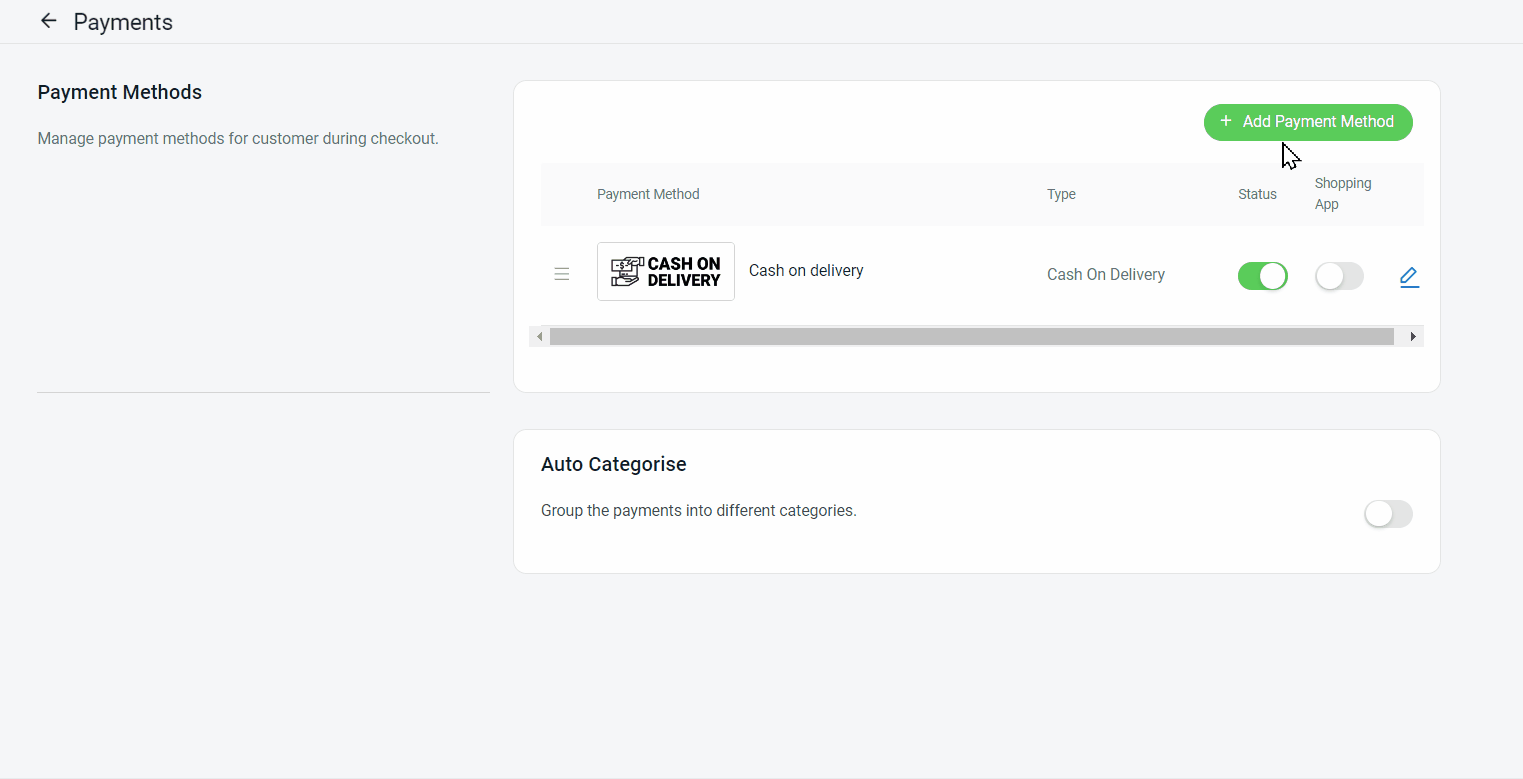
Step 2: Click on + Add Payment Method button > select Fiuu > Add Payment Method
Step 3: Fill in Fiuu Pay details such as Display Name, Merchant ID, Verify Key, Secret Key, Description, Customer Group, and Minimum Order Amount
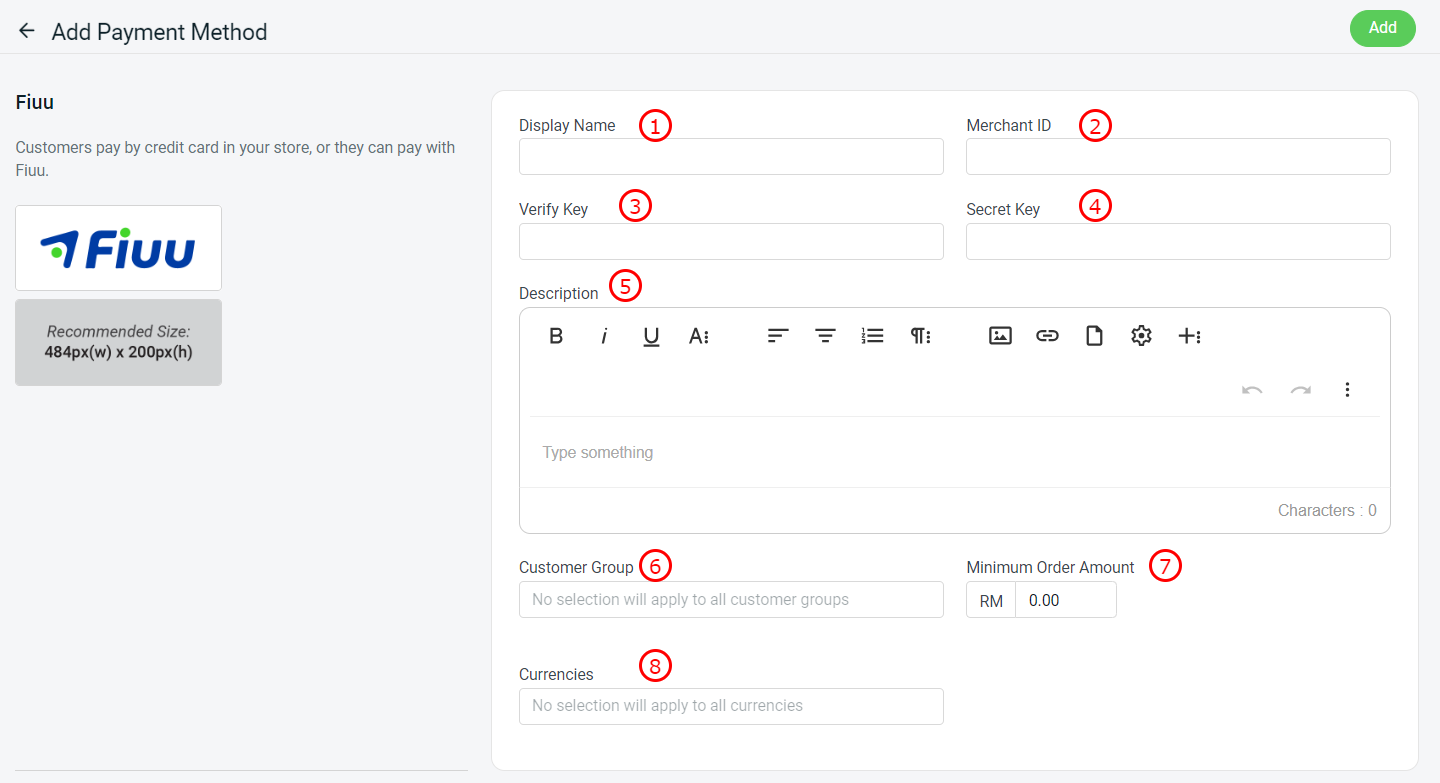
1. Display Name: The payment name to display in the Payment Method during the checkout process
2. Merchant ID*: Merchant Admin given by Fiuu
3. Verify Key*: Verification Key given by Fiuu
4. Secret Key*: Secret Key given by Fiuu
5. Description: Extra information to be shown to the customer during checkout
6. Customer Group: The Customer Group that is applicable for this payment method (if no selection it will apply to all customer groups)
7. Minimum Order Amount: The order amount that needs to be reached to use this payment method
8. Currencies: The Currencies that is applicable for this payment method (if no selection it will apply to all currencies)
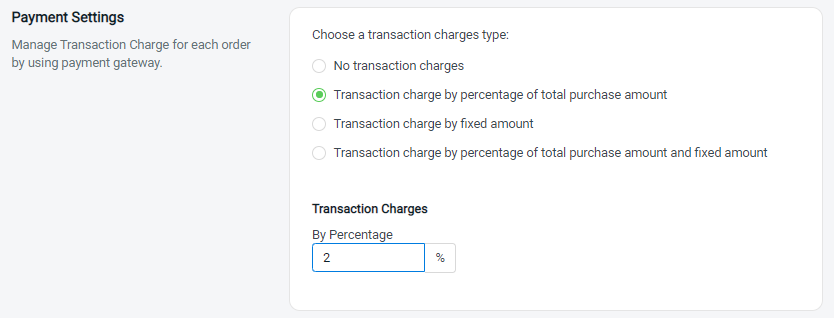
Step 4: You may set extra transaction charges applied to the customer at the Payment Settings. (optional)
Step 5: Once done, click on the Add button at the top right corner > make sure the status of Fiuu is enabled
3. Update URL Callback In Fiuu Account
Step 1: Log in to Fiuu Dashboard > navigate to Transactions on the sidebar menu > click Settings.

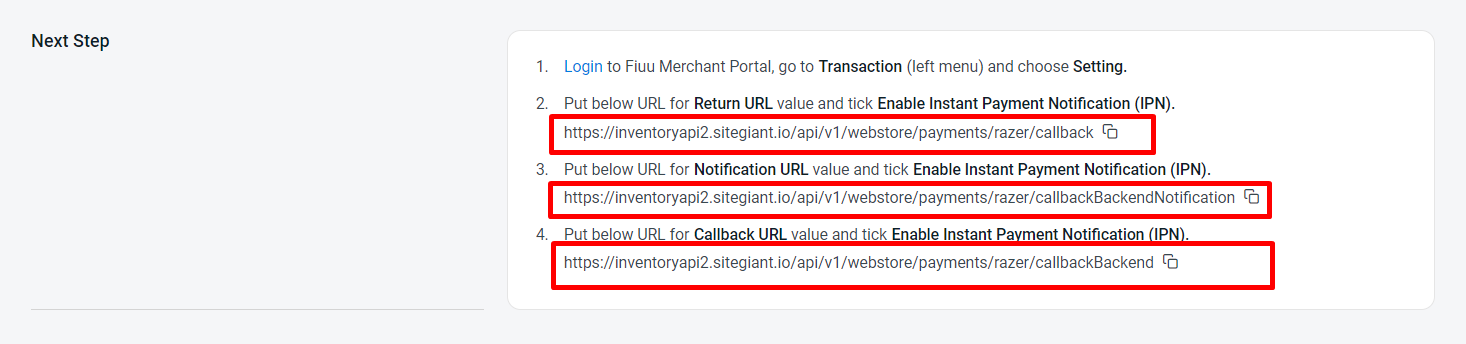
Step 2: Copy the URL (see 📌Note) from SiteGiant in the Fiuu Return, Notification, and Callback URL field.
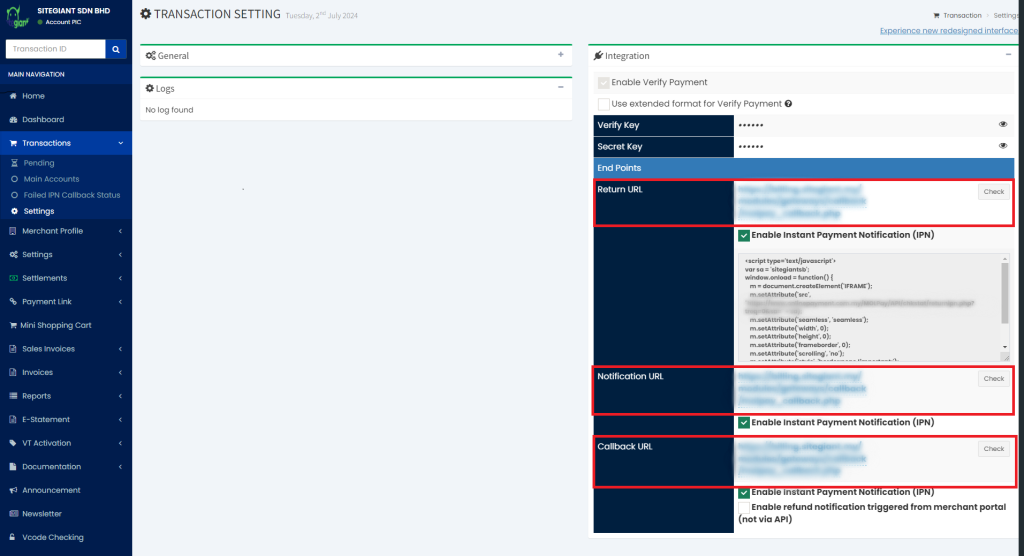
📌Note:
 The URL link will be provided in the Next Step section of the Fiuu payment settings.
4. Test Checkout Via Fiuu (From Customer Perspective)
Step 1: You are highly recommended to try checkout on your Webstore to ensure the payment method is working as expected
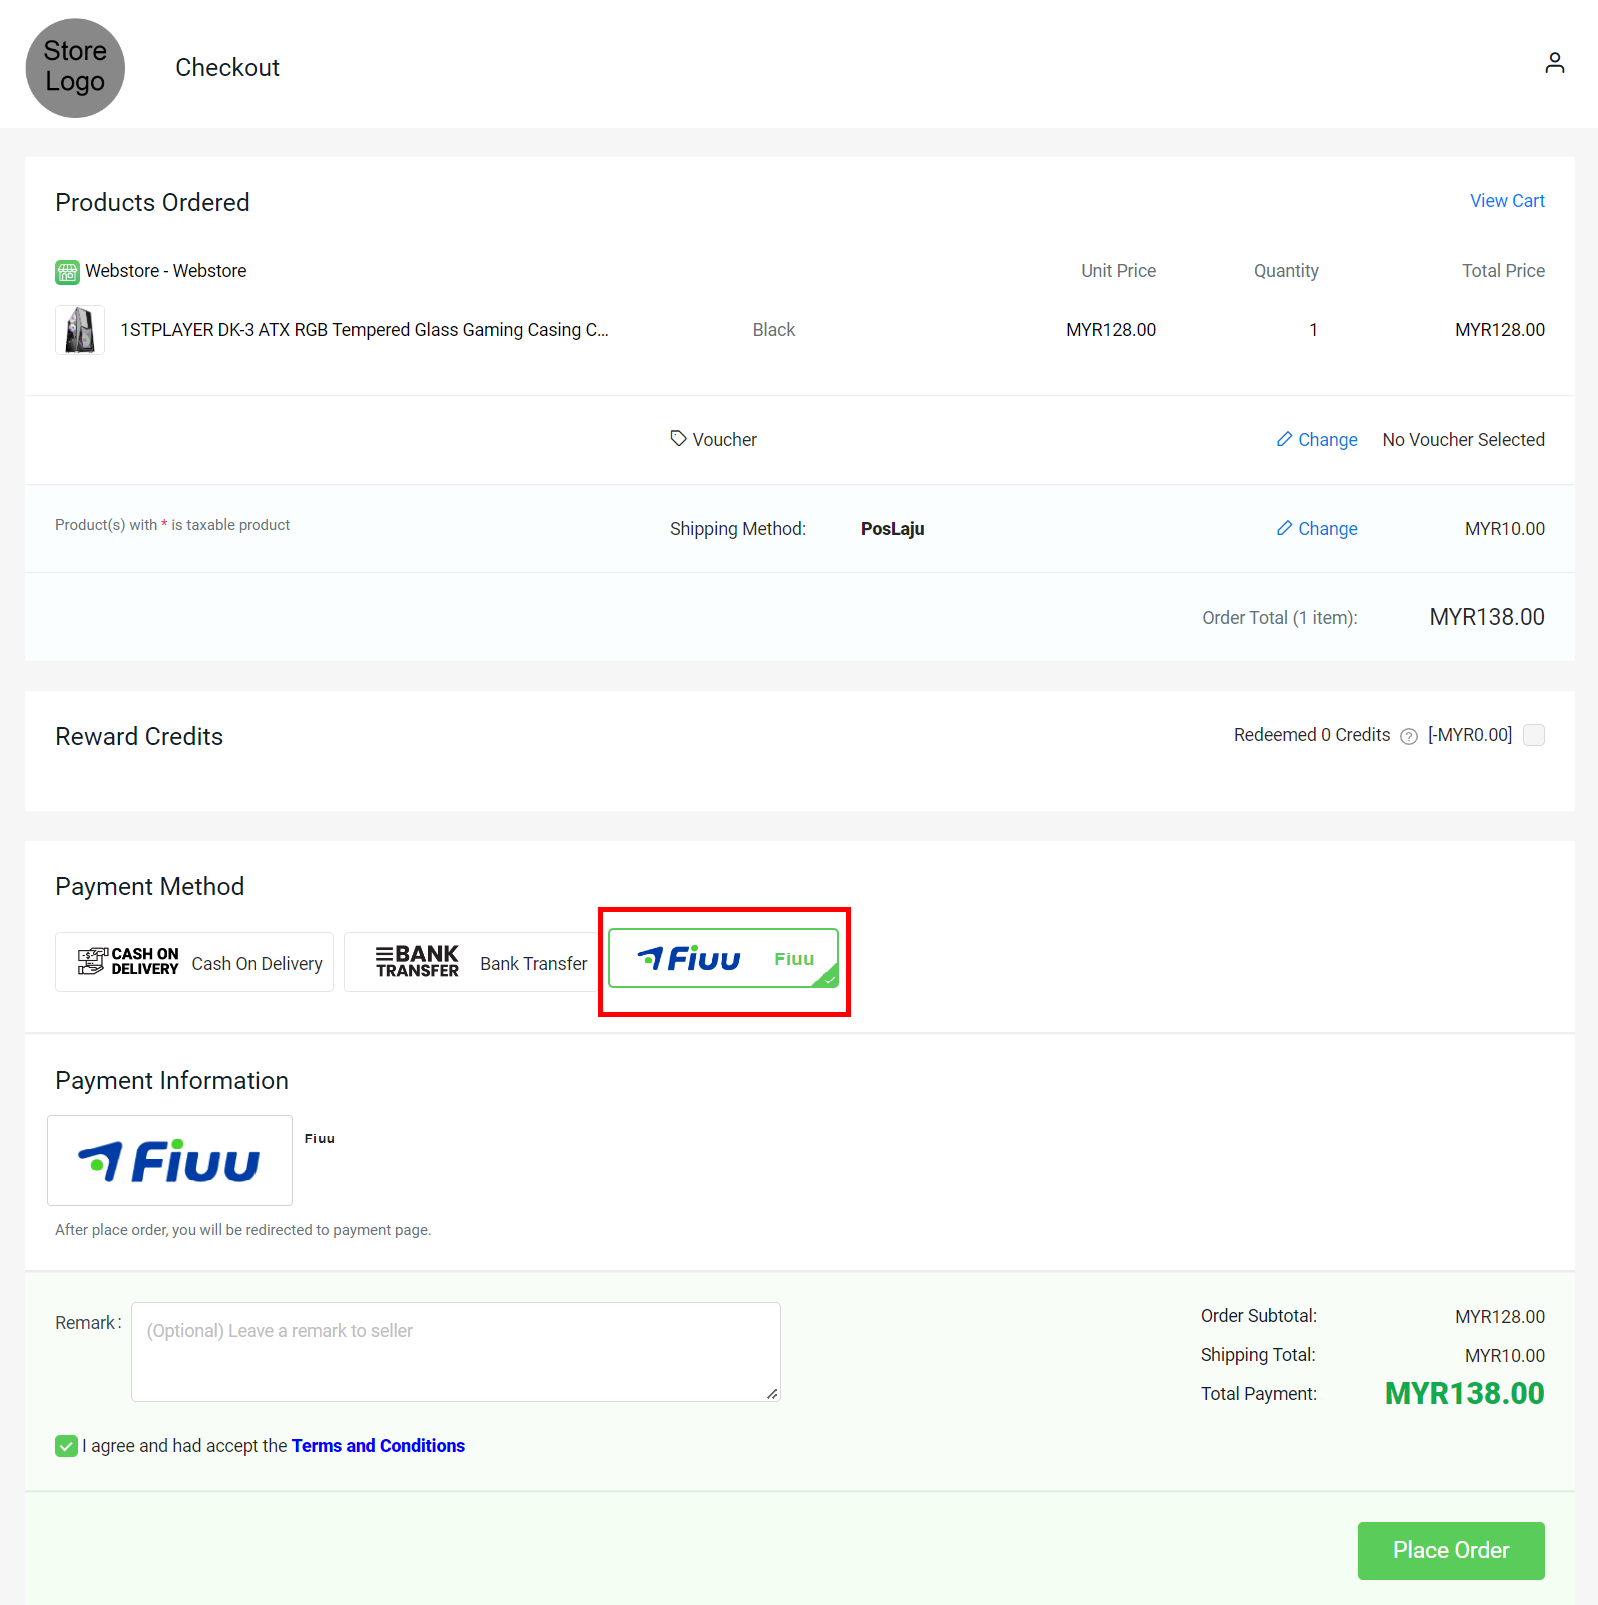
Step 2: If the page is redirecting to the Fiuu payment page, then you are successfully integrated with Fiuu