
1. Introduction
2. Create New Product
1. Introduction
Once integrates WooCommerce WordPress with SiteGiant, you can create the product listing in SiteGiant and publish it to WooCommerce WordPress.
2. Create New Product
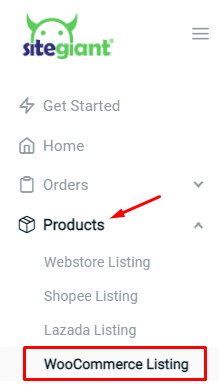
Step 1: Go to Products > WooCommerce Listing
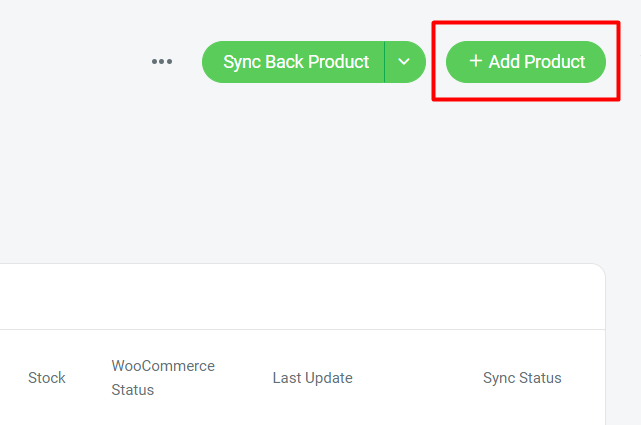
Step 2: Click on the Add Product button
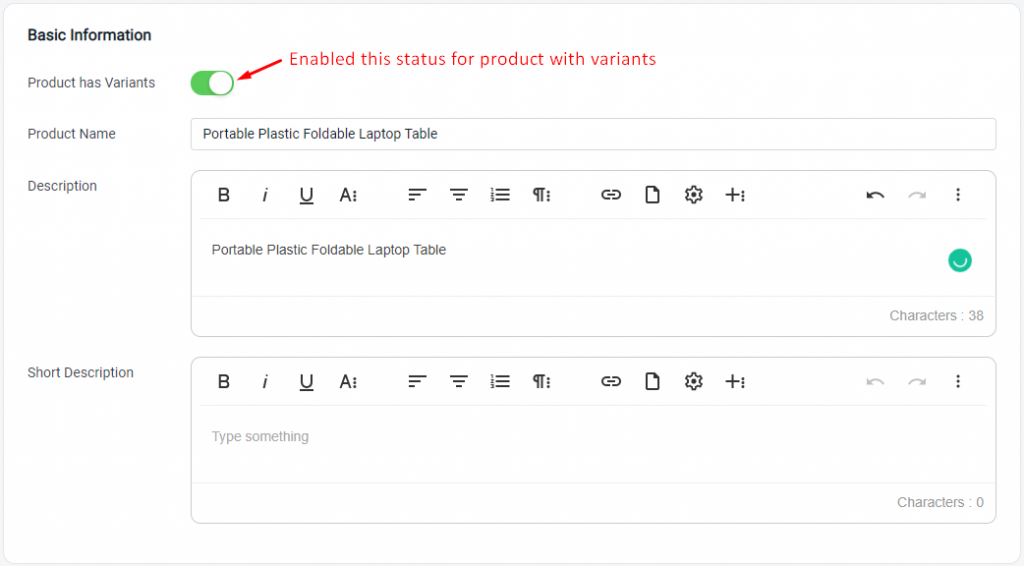
Step 3: Fill in the basic information and enable the Product has Variants status
📌Note: If your existing product in WooCommerce contains a custom description using script or CSS, once it is synced back to SiteGiant, you will see the "Use Custom Code in Description" button appear.Disable: You will be able to edit the product description as plain text (without any script or CSS). Enable: The custom description with script or CSS will remain, but you can only update the description directly in your WooCommerce account. Then, you can sync back the product to SiteGiant.
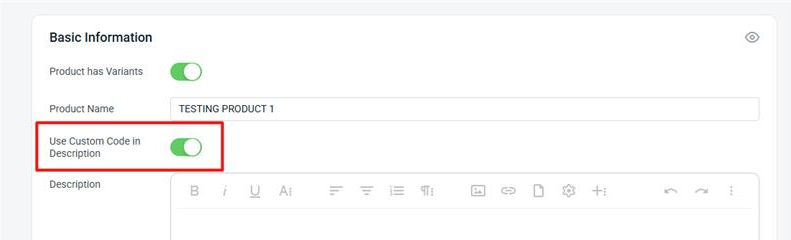 Disable: You will be able to edit the product description as plain text (without any script or CSS).
Enable: The custom description with script or CSS will remain, but you can only update the description directly in your WooCommerce account. Then, you can sync back the product to SiteGiant.
Disable: You will be able to edit the product description as plain text (without any script or CSS).
Enable: The custom description with script or CSS will remain, but you can only update the description directly in your WooCommerce account. Then, you can sync back the product to SiteGiant.Step 4: Upload product images

Step 5: Choose the Tax Status and Tax Class

Step 6: Fill in the Parent SKU at the Inventory session

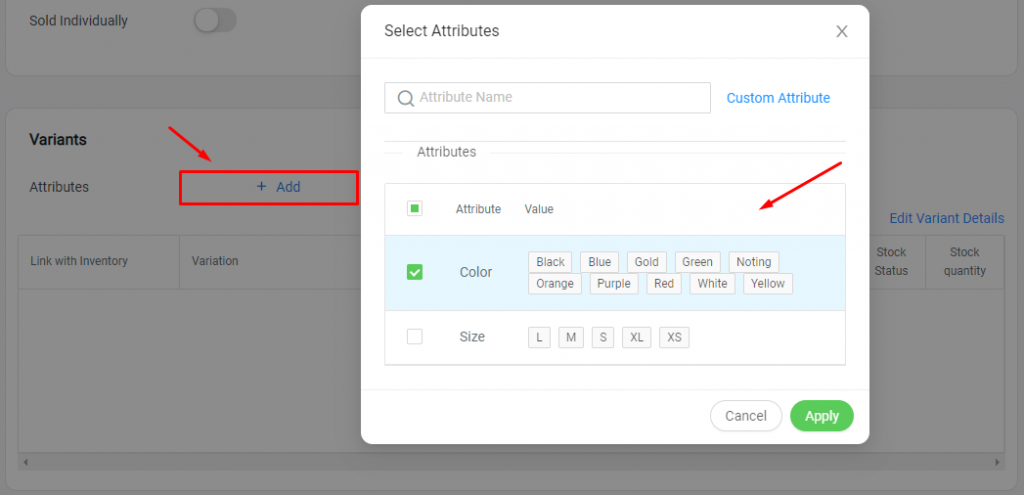
Step 7: Click Add at the Attributes, and select the attributes or use the custom attribute
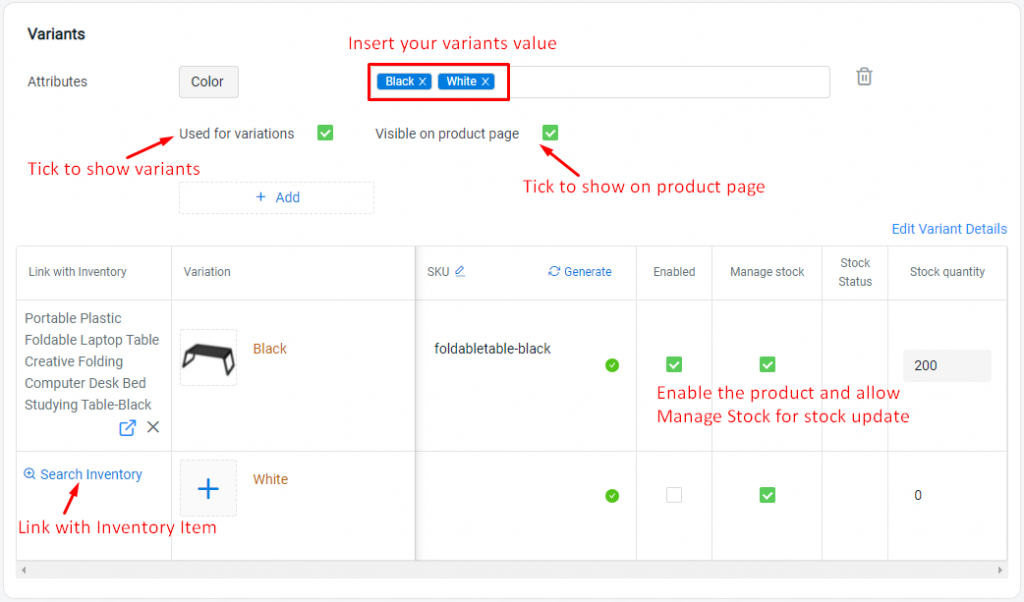
Step 8: Fill up all the details for variations (Note: The Stock Quantity will be auto-inserted based on the linked inventory stock)
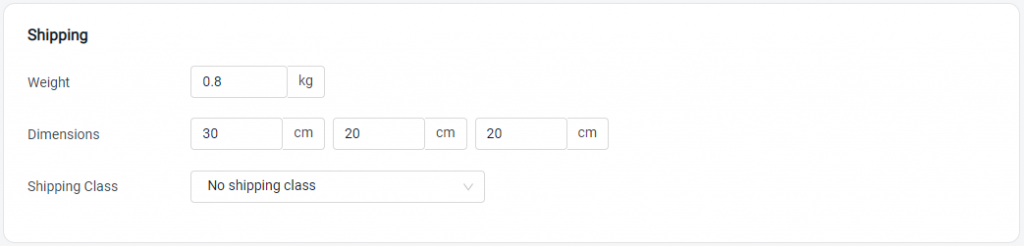
Step 9: Update the Shipping details
Step 10: Set Categories to group products with similar features, and set Tags for related products to each other.

Step 11: Set the Publish status of the product when sync to WooCommerce

Step 12: Click Save on your product to publish it to your WooCommerce store. If you do not intend to publish immediately, you can click Save As Draft

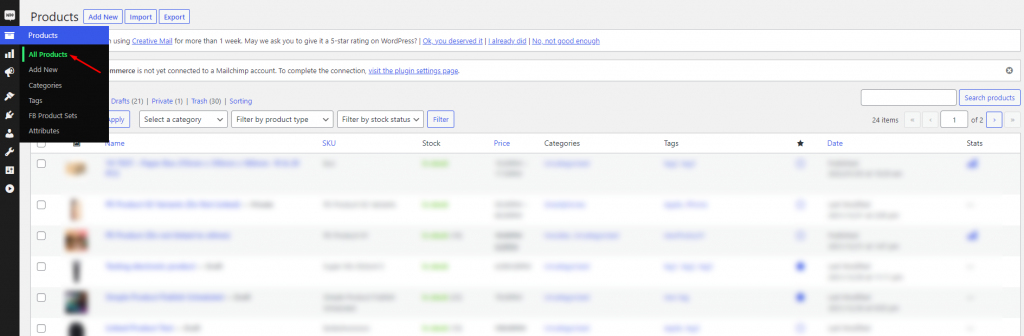
Step 13: You may find your product on the All Products menu of WooCommerce WordPress
📝Additional Information
1. Bulk Copy Listing
You can copy products from Webstore Listing to WooCommerce Listing or vice versa. Learn More