
1. Introduction
2. Set Up Mailchimp Pop-Up Signup Form
3. From Customer Perspective
1. Introduction

A pop-up signup form helps you connect with your customers. Design it to fit your brand, and add a special offer or discount to help grow your audience and boost your sales. This is a great way for you to grow your contacts and when you do your email marketing from MailChimp, those customers who subscribed through your webstore will receive these emails.
2. Set Up Mailchimp Pop-Up Signup Form
💡Tips: You may refer to Mailchimp’s official guide on designing and editing a pop-up form in Mailchimp – Add a Pop-Up Signup Form to Your Website.
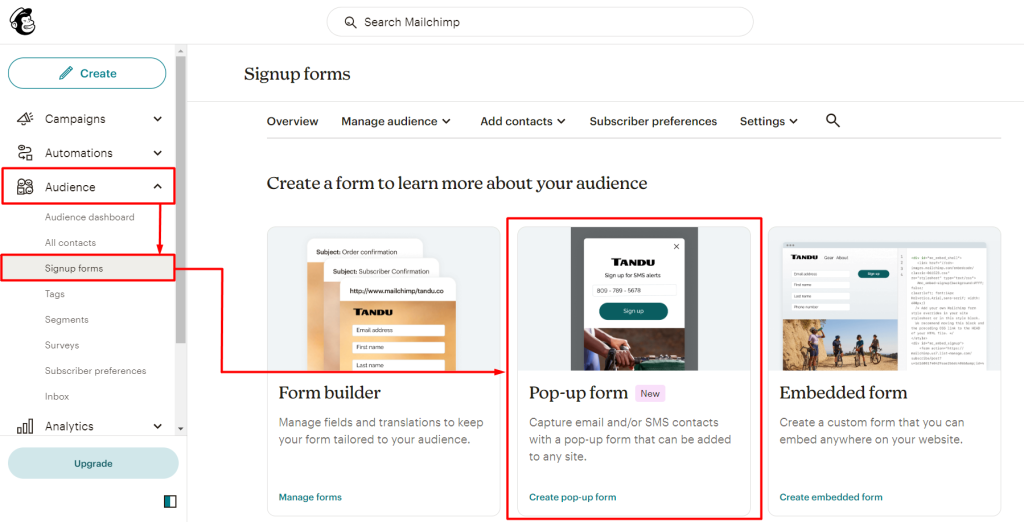
Step 1: Log in to your Mailchimp account > navigate to Audience > Signup forms > Pop-up form.
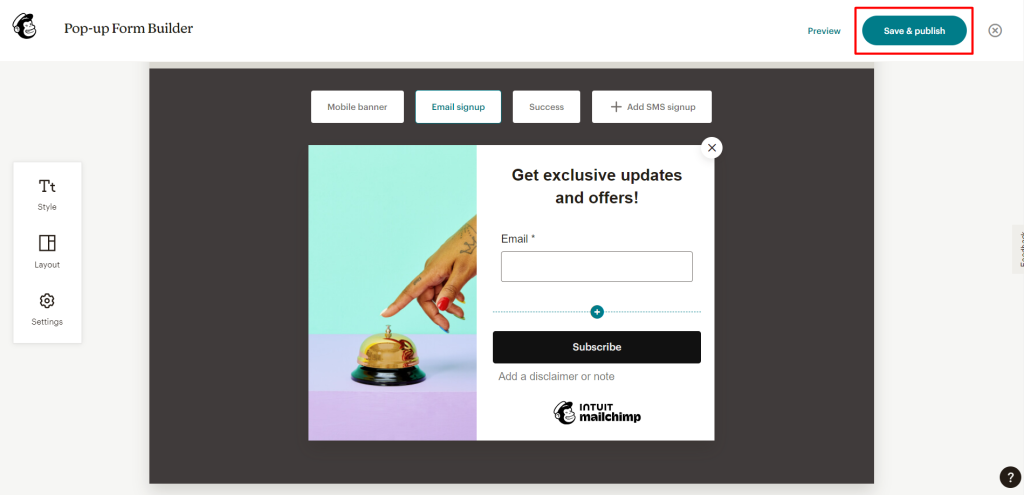
Step 2: Customize the layout of your pop-up form > Save & publish.
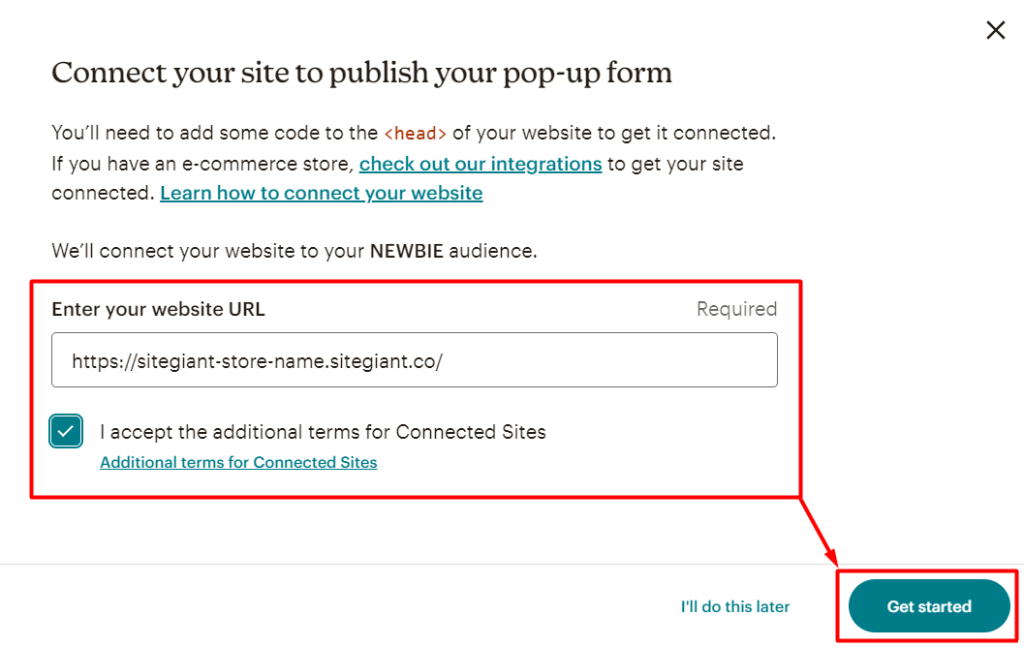
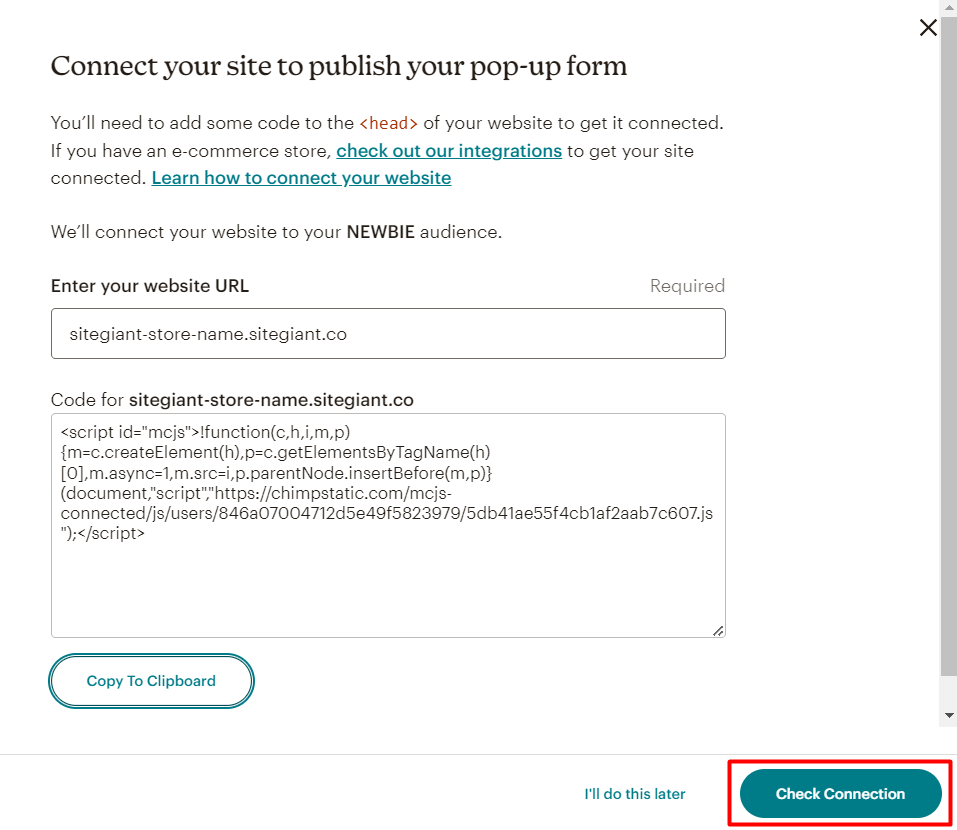
Step 3: A modal window will pop up to connect your webstore with the pop-up form > enter your webstore URL > tick “I accept the additional terms for Connected Sites” > Get started.
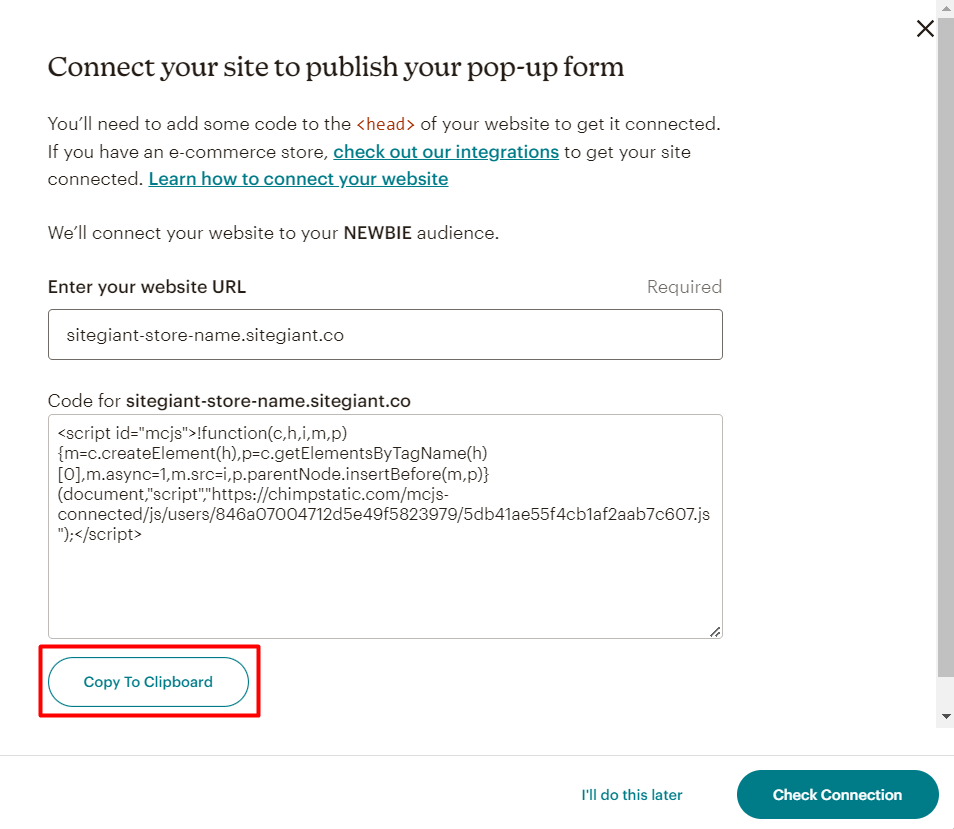
Step 4: Click Copy To Clipboard to copy the code.
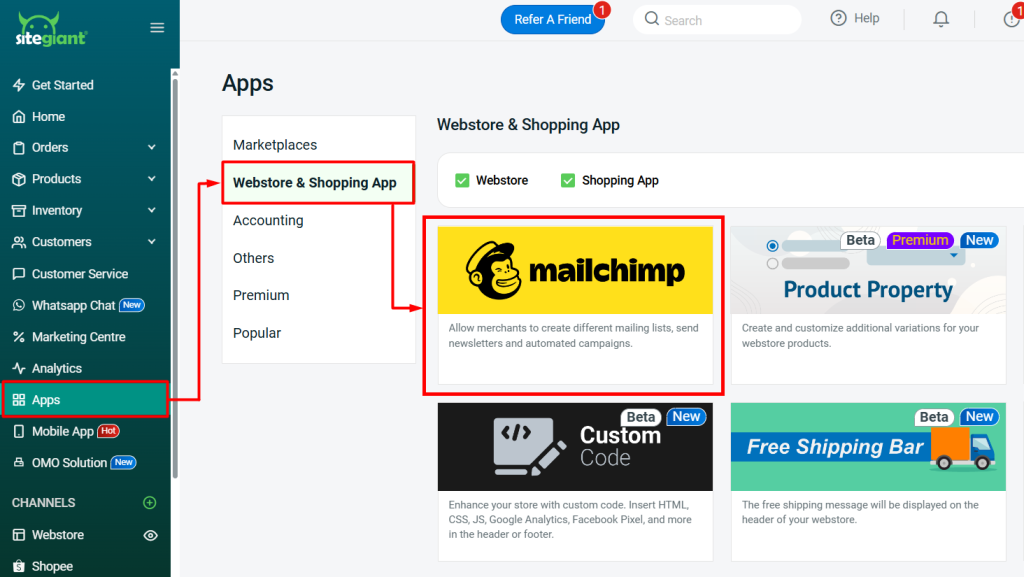
Step 5: Open a new tab on your browser and log in to SiteGiant Seller Center > navigate to Apps on the sidebar menu > Webstore & Shopping App > Mailchimp.
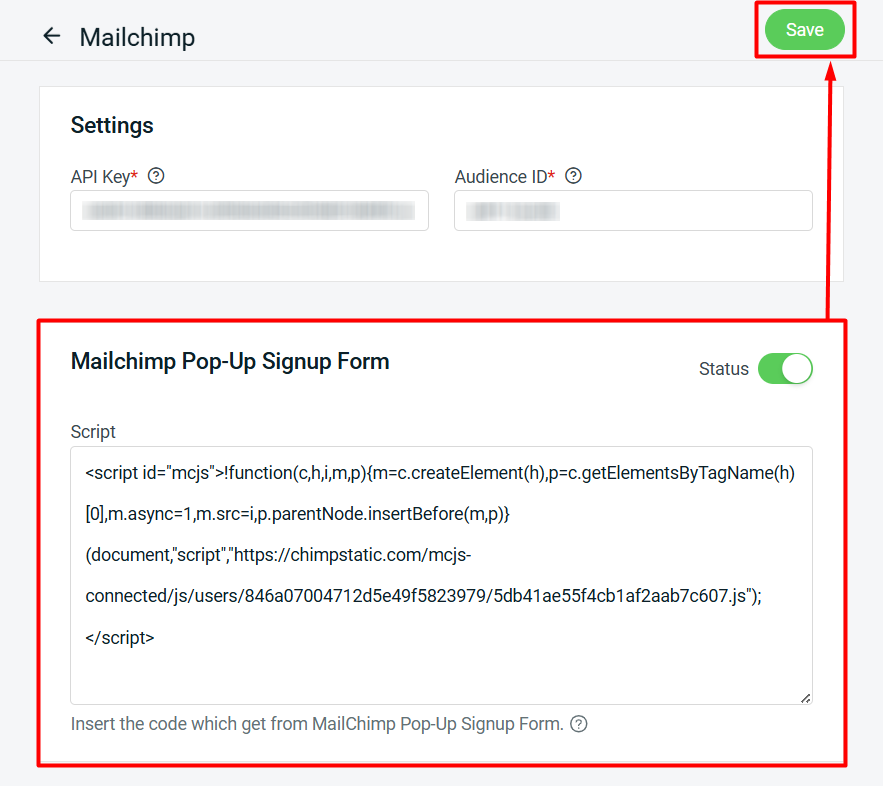
Step 6: Enable the status of the Mailchimp Pop-Up Signup Form > paste the code copied into the Script field > Save.
Step 7: Back to Mailchimp > Check Connection.
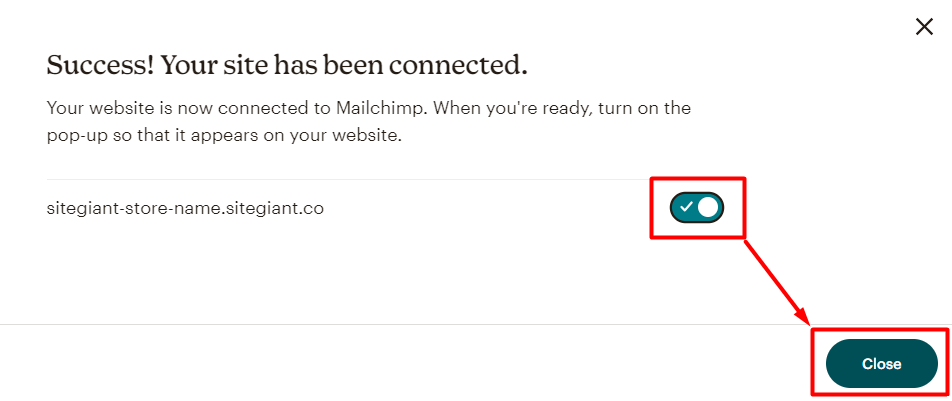
Step 8: Once connected successfully, enable the status > Close.
3. From Customer Perspective
Step 1: Your pop-up form will display when someone visits your webstore. If they choose to fill out and submit your form, they will be added to your Mailchimp audience as subscribed contact.
