1. Introduction
2. Retrieve API Key And Audience ID
3. Set Up Mailchimp Integration
4. Add Newsletter Subscribe Form In Webstore Footer
1. Introduction

You can send a newsletter or announcements about your upcoming promotions or news via your email like Gmail, Hotmail, or Outlook. However, sending out the email in bulk is inconvenient, you would have to manually import all your subscribers’ emails to your email list individually.
Introducing Mailchimp Newsletter. Mailchimp is a leading email marketing software for e-commerce businesses. It enables merchants to create and manage mailing lists, newsletters, and automated campaigns and send them to customers.
2. Retrieve API Key And Audience ID
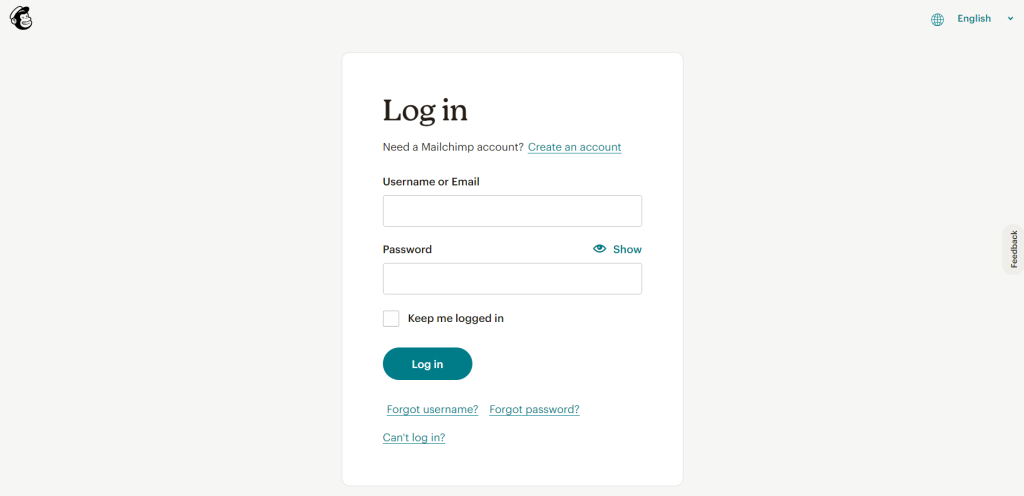
Step 1: Sign Up and Log In to your Mailchimp account.
Step 2: Click the username on the top right > Account & billing > Extras > API keys.
Step 3: Scroll down to Your API keys section > Create A Key.
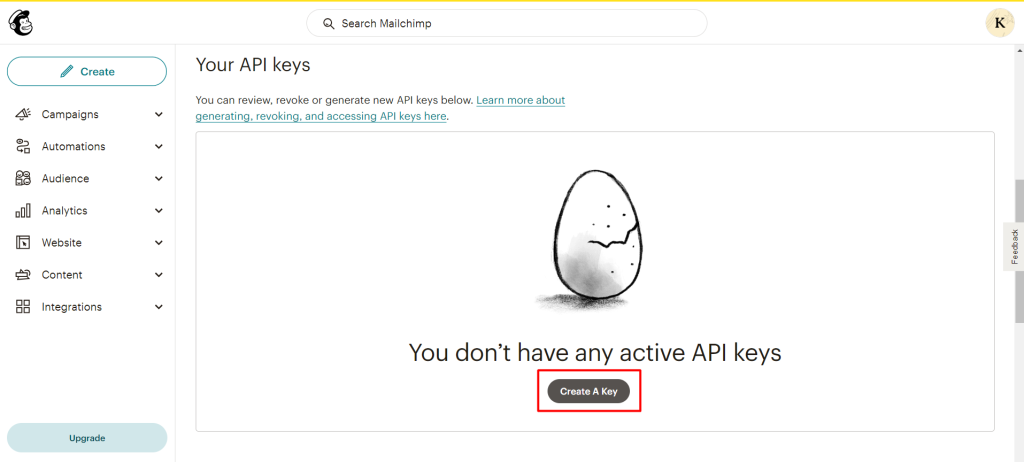
Step 4: Set an API Key Name > Generate Key.
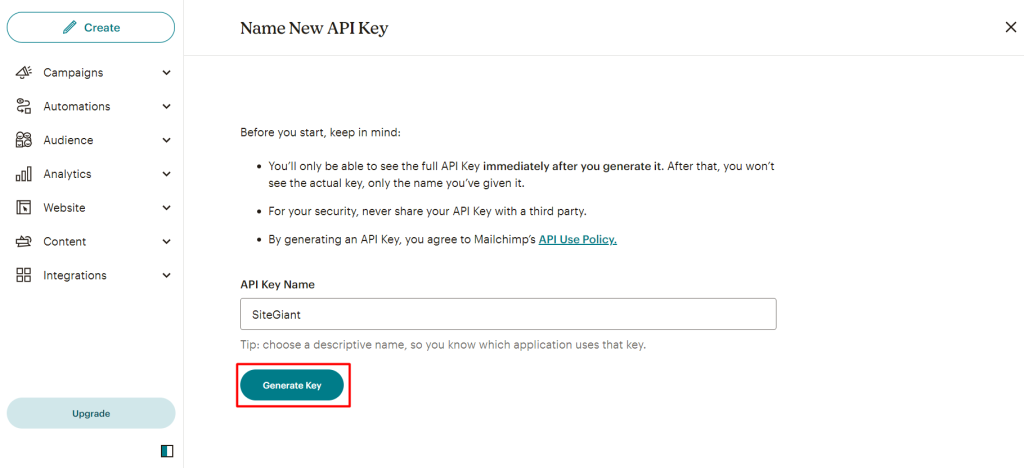
Step 5: Copy the API Key for later use > Done.
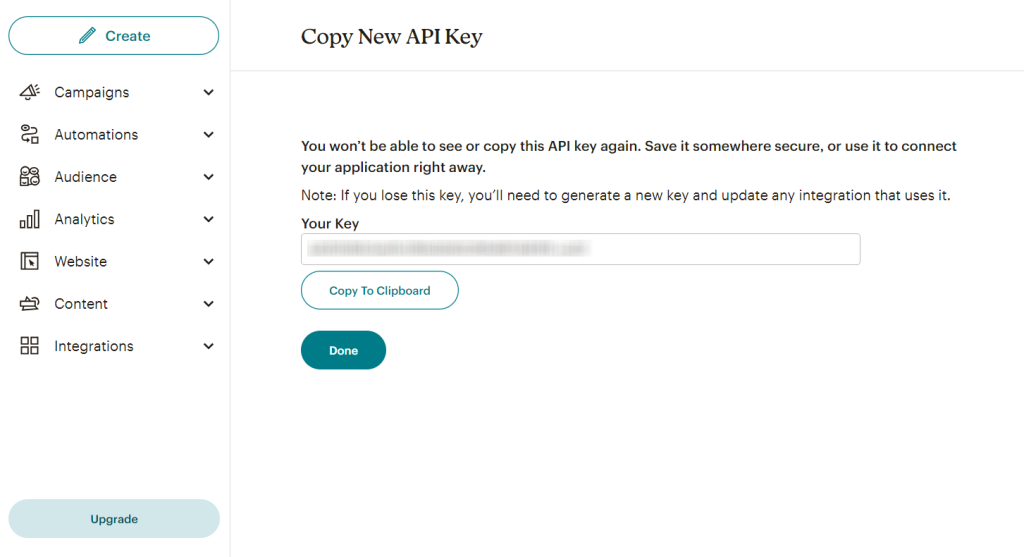
📌Note: You’ll only be able to reveal the API Key once. Copy and save the API Key in a secure place.
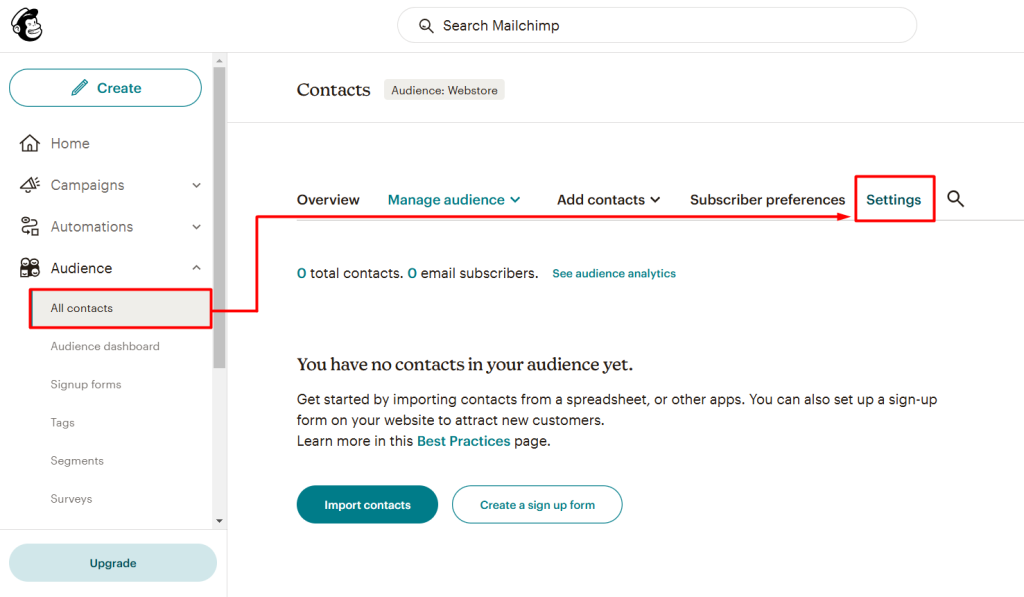
Step 6: Navigate to Audience > All contacts > Settings.
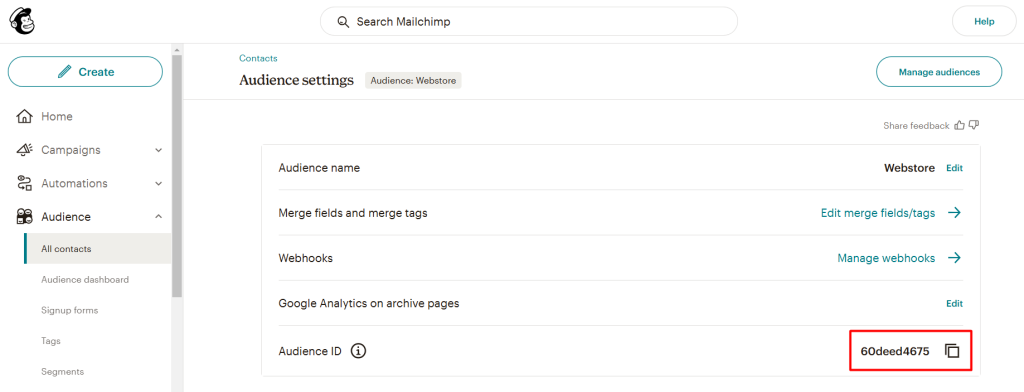
Step 7: Copy the Audience ID for later use.
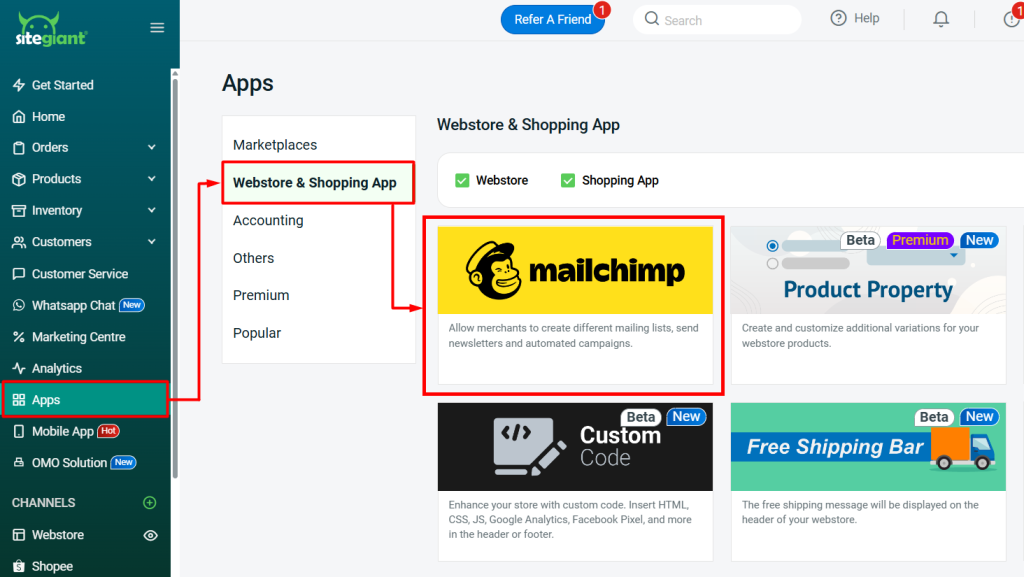
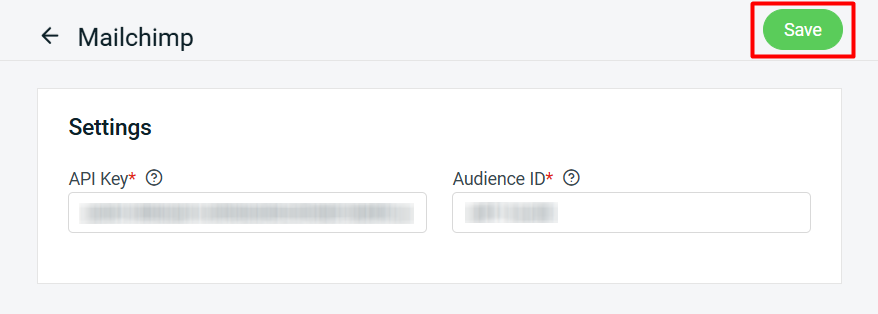
3. Set Up Mailchimp Integration
Step 1: Log in to SiteGiant Seller Center > navigate to Apps on the sidebar menu > Webstore & Shopping App > Mailchimp.
Step 2: Paste the API Key and Audience ID to the respective field > Save.
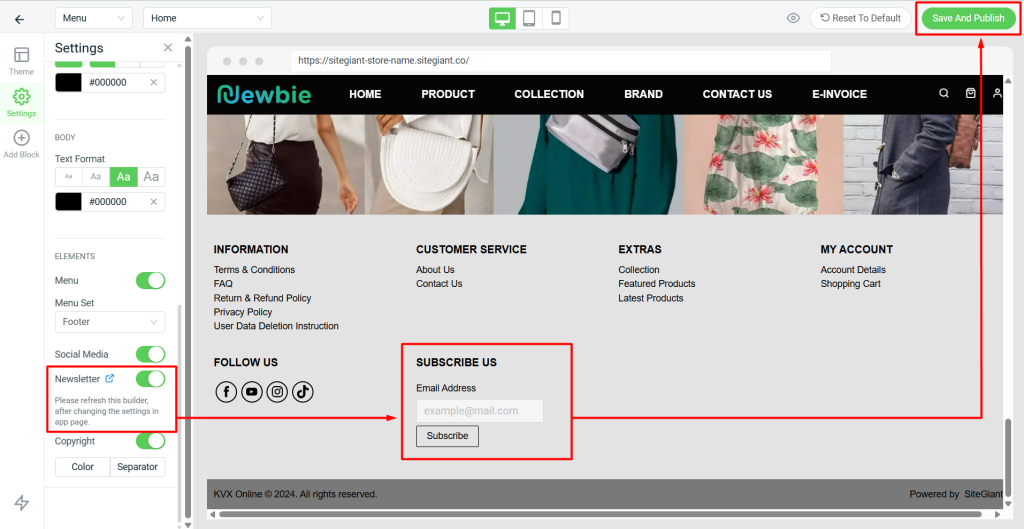
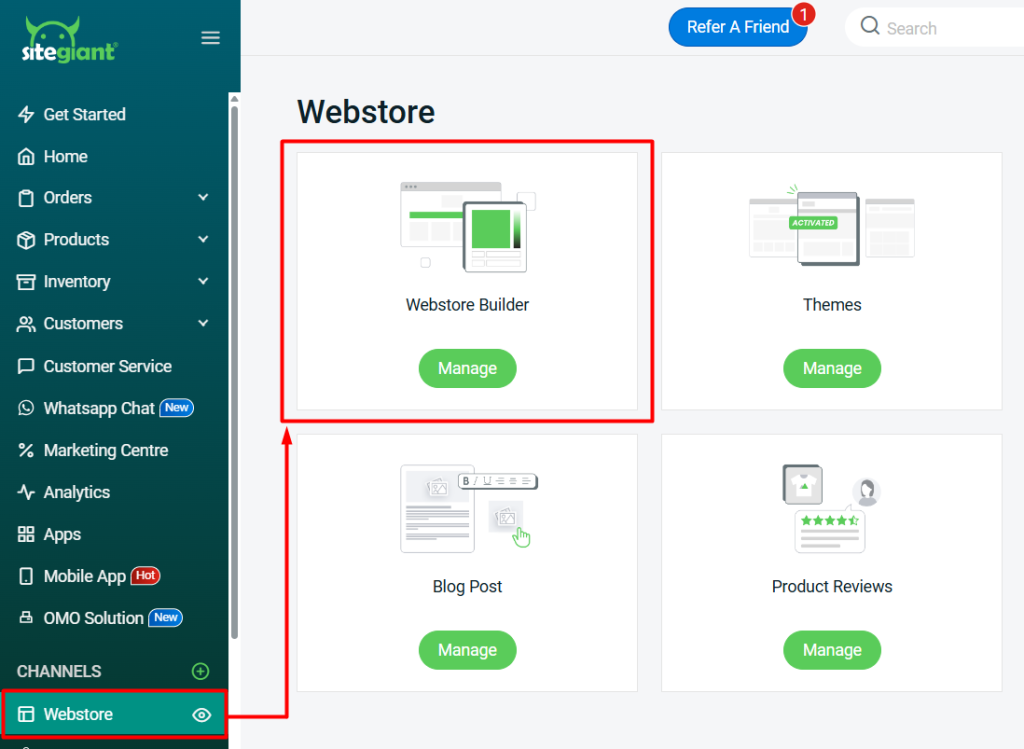
4. Add Newsletter Subscribe Form In Webstore Footer
Step 1: Navigate to Webstore on the sidebar menu > Webstore Builder.
Step 2: Go to Settings > Footer > Change Layout > choose Layout 3, Layout 4, or Layout 5.
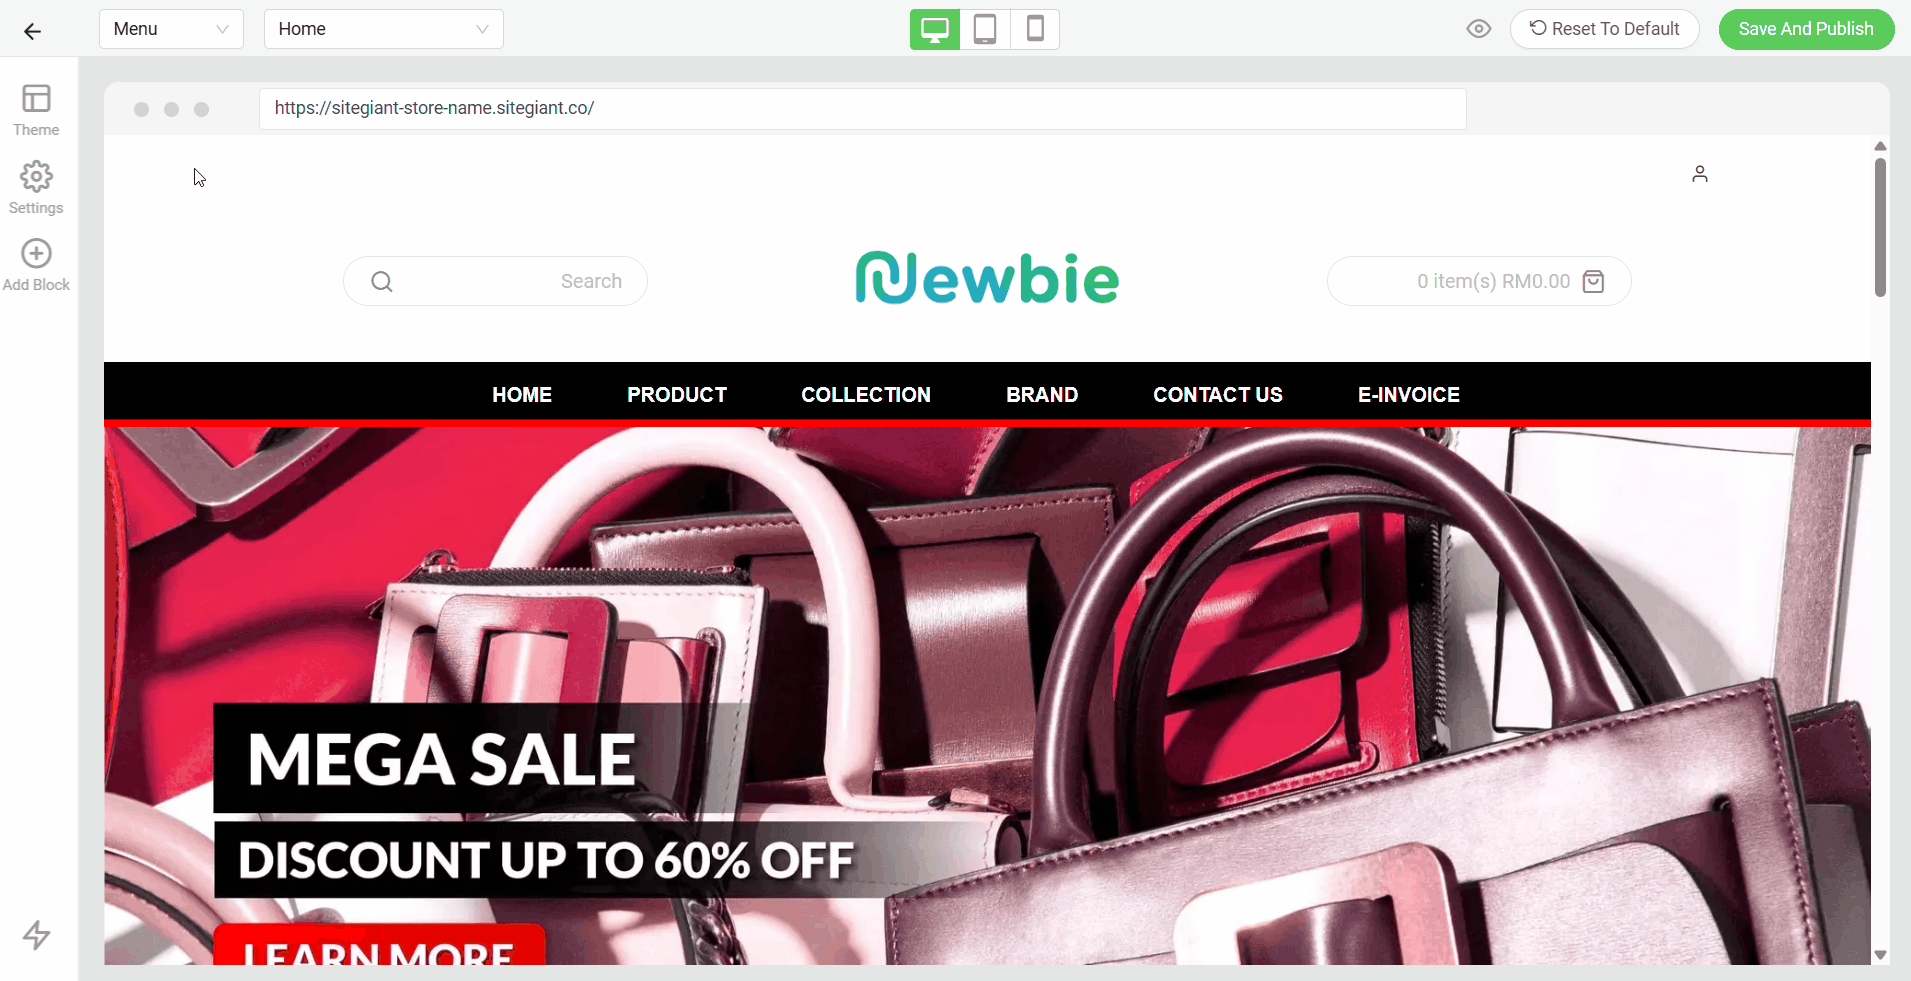
Step 3: Scroll down to Elements section > Enable Newsletter status > the newsletter subscribe form will appear at the footer > Save And Publish.