1. Introduction
2. Add Vendor Profile
3. Automatic Cost Update Setting
4. Add Purchase Order
5. Import Restock Products
6. Receive And Stock In
7. Mark As Completed
8. Additional Information
1. Introduction
A purchase order is a commercial source document that is issued when placing an order with vendors or suppliers. When there’s a dispute, a disagreement about payment, quality standards, or even performance, you need a document for reference. This feature will help you to create purchase orders and track your product purchases easily.
2. Add Vendor Profile
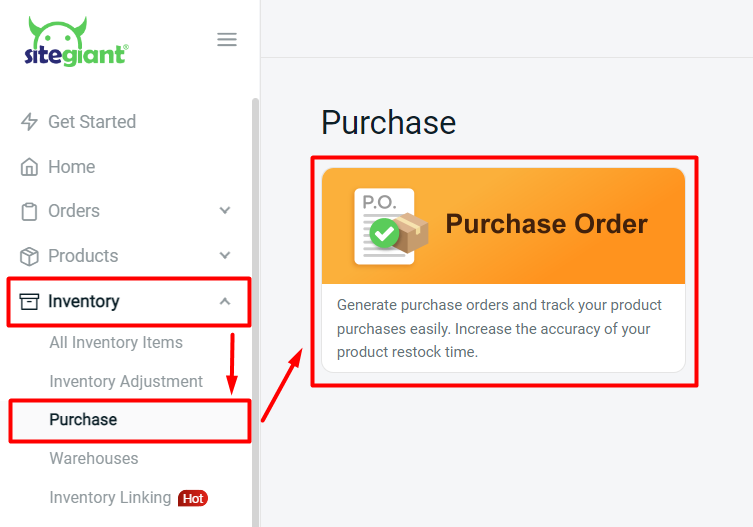
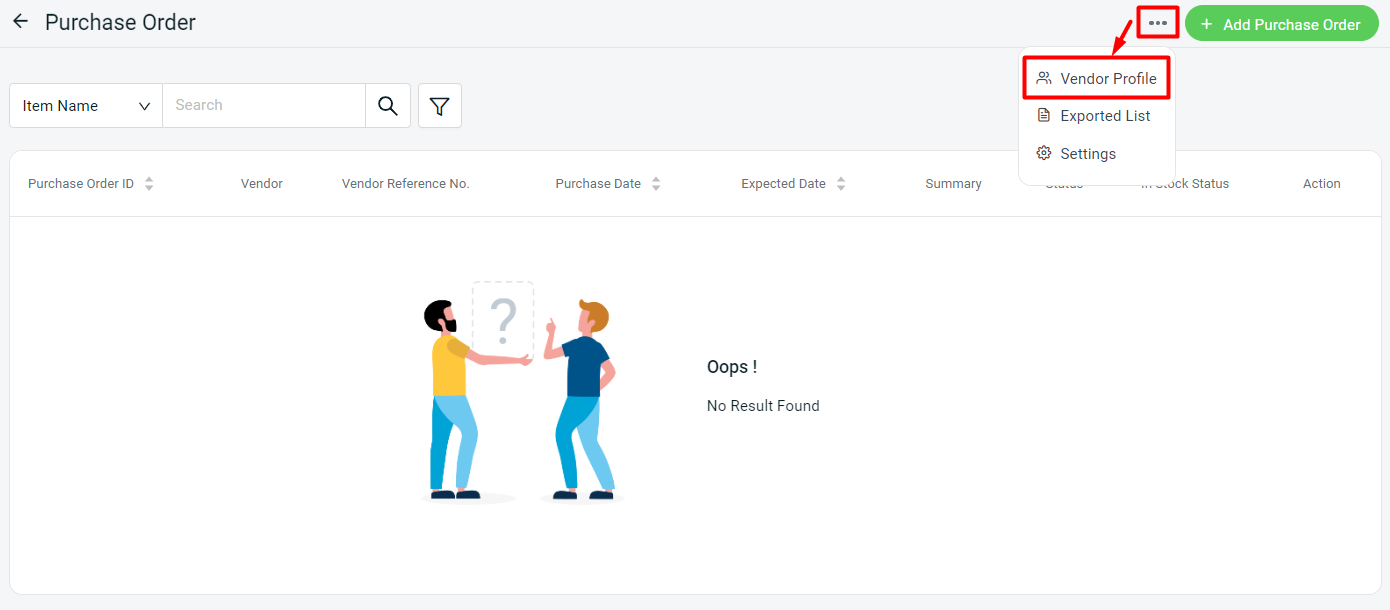
Step 1: Go to Inventory > Purchase > Purchase Order.
Step 2: Click on the More(…) button > Vendor Profile > + Add Vendor.
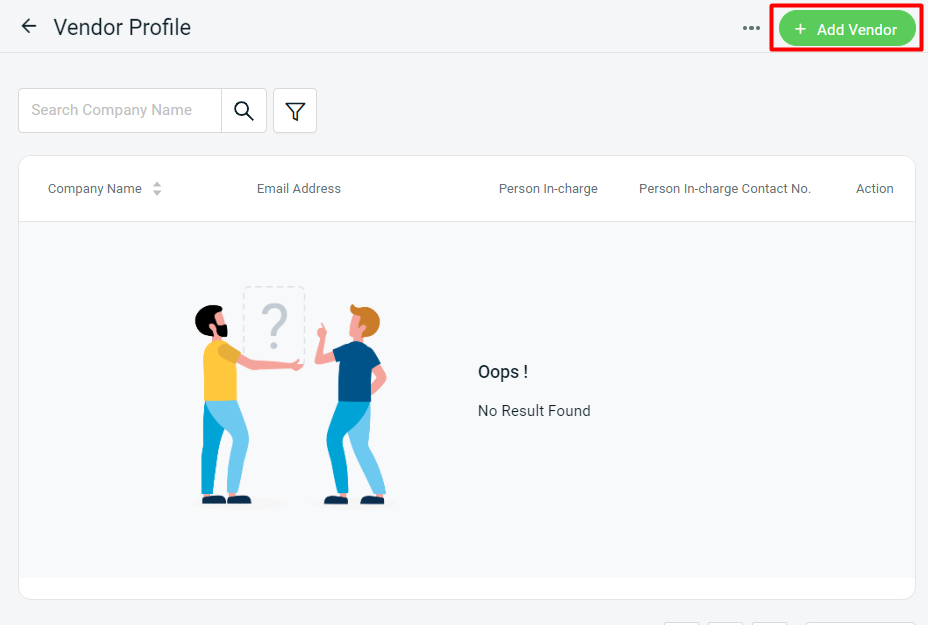
Step 3: Fill in the Vendor Details > Save.

3. Automatic Cost Update Setting
Step 1: Click on the More(…) button > Settings.

Step 2: Toggle on the Status > select Automatic cost update on stock in.
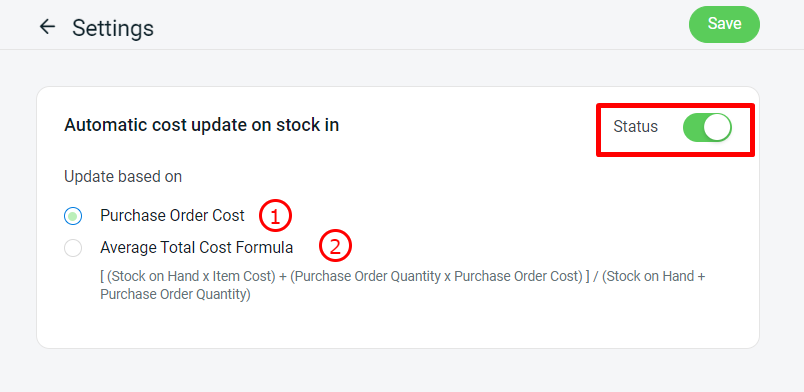
1. Purchase Order Cost: The cost will be updated according to the cost of your inventory items during stock in.

2. Average Total Cost Formula: The cost will be adjusted according to the formula provided. You will be able to view the average total cost after performing the stock in. Then, this updated cost for the new item will be reflected accordingly.
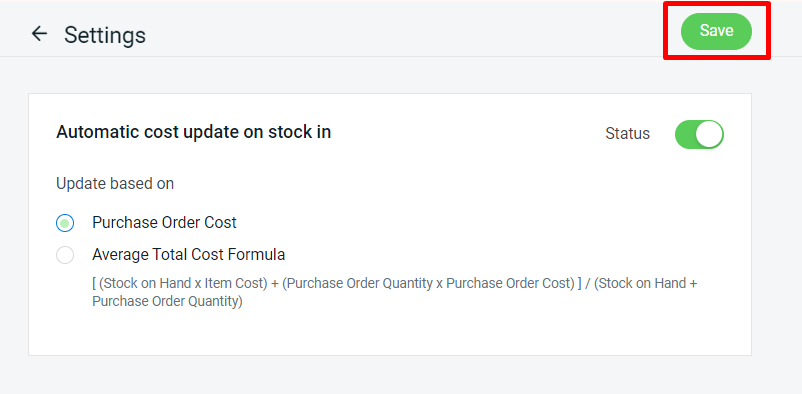
Step 3: Click the Save button.
4. Add Purchase Order
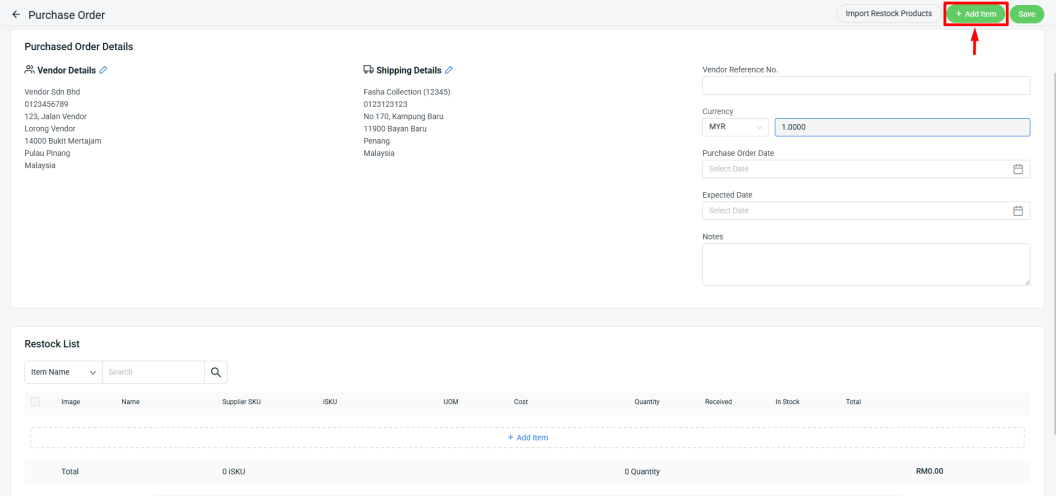
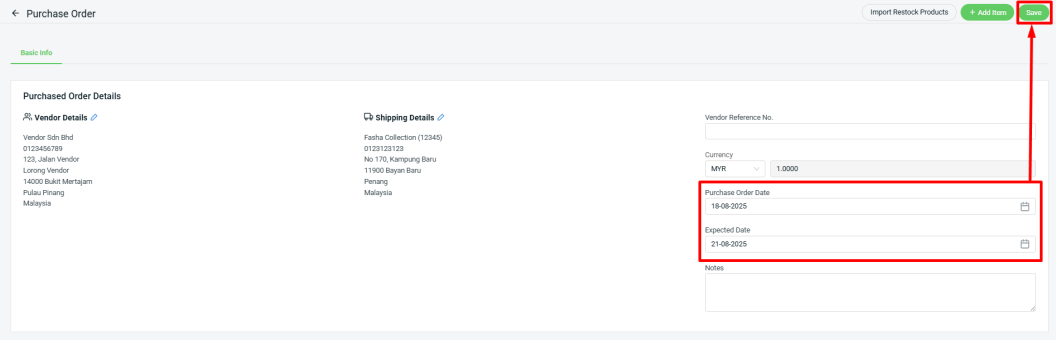
Step 1: Click on + Add Purchase Order.
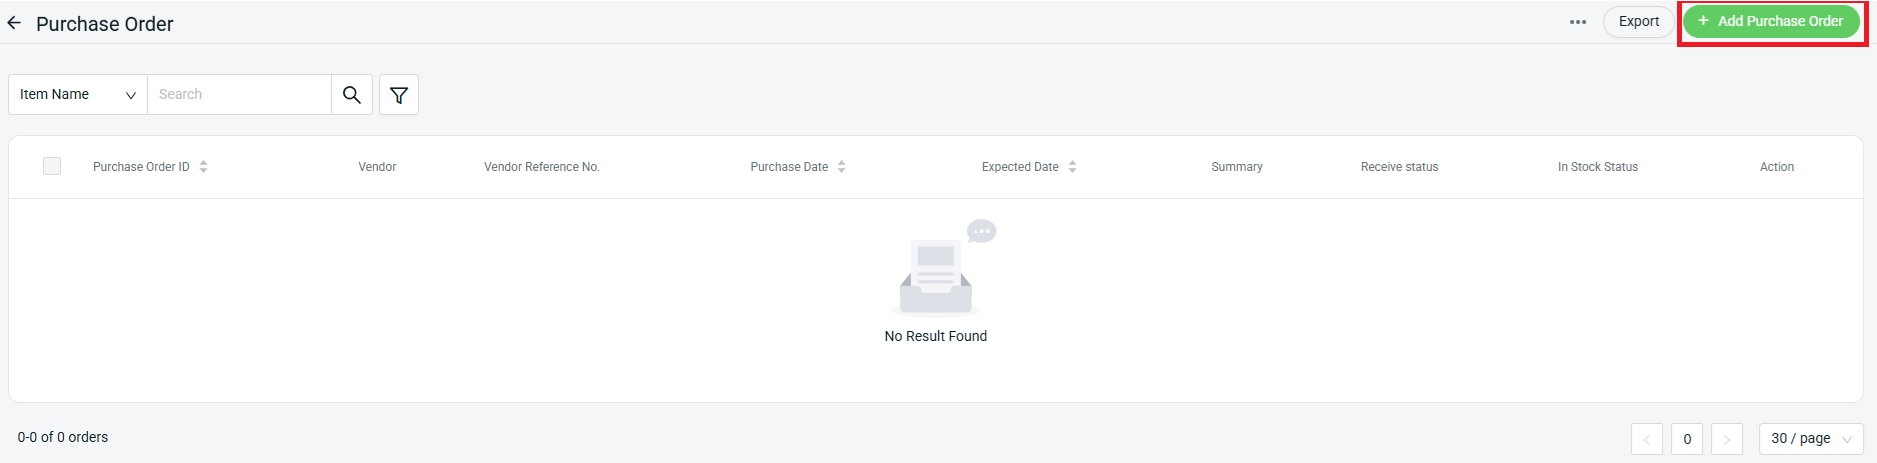
Step 2: Fill in the Purchased Order Details.
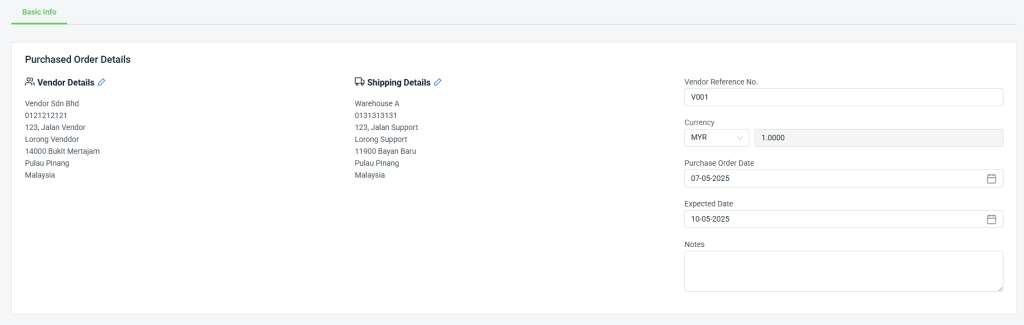
📌Note: The currency cannot be changed after the Purchase Order has been created.
Step 3: Click on + Add Item.
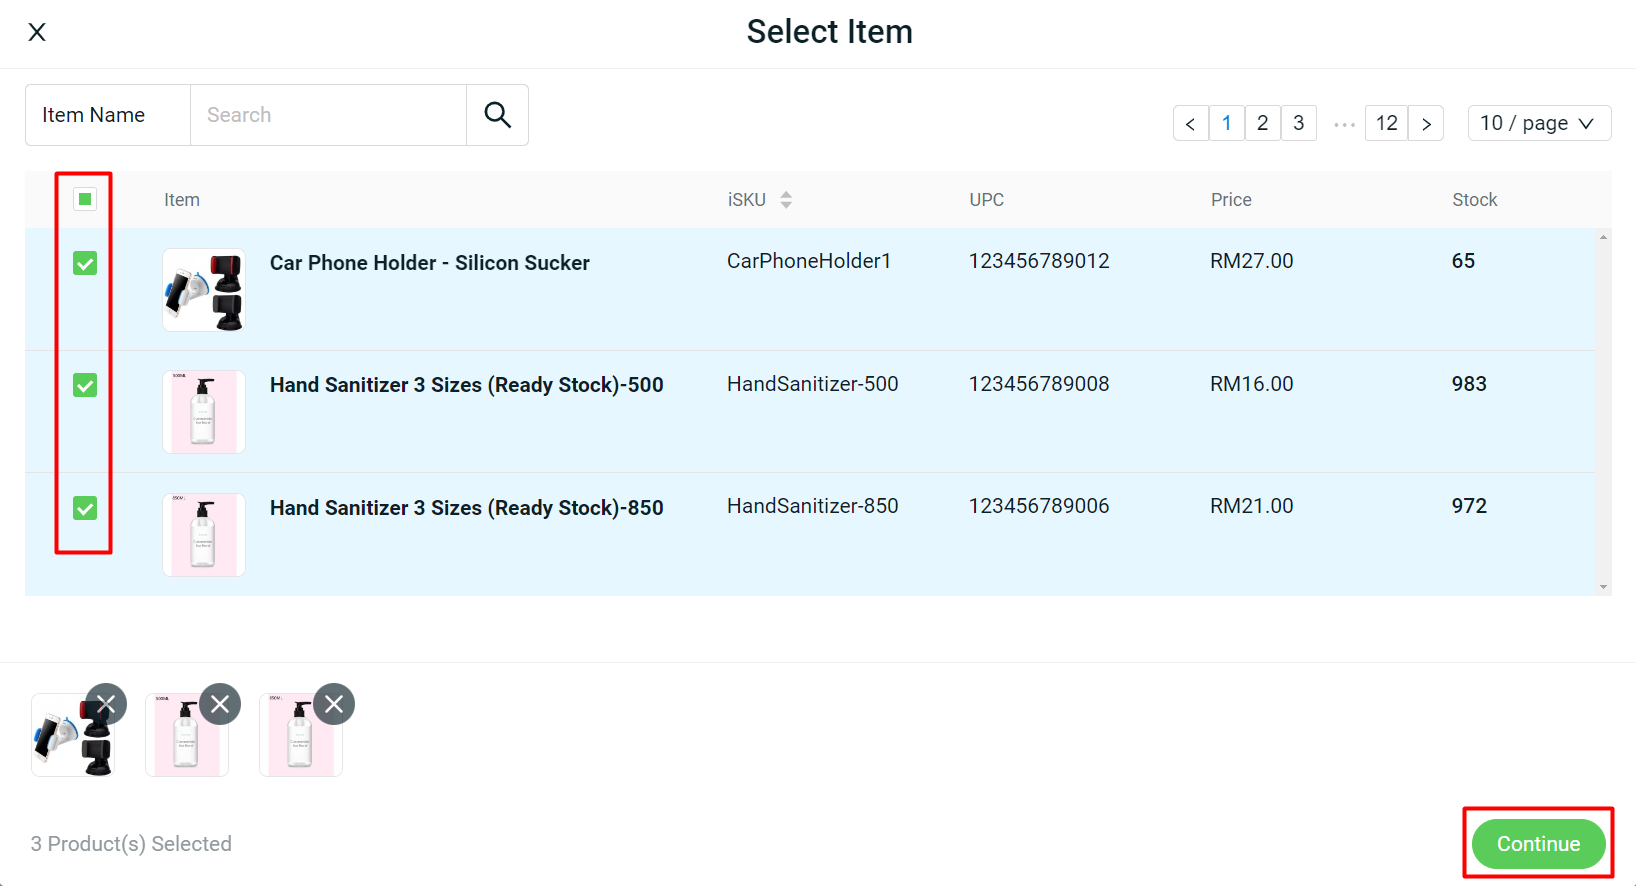
Step 4: Select the item(s) from your Inventory Item List > Continue.
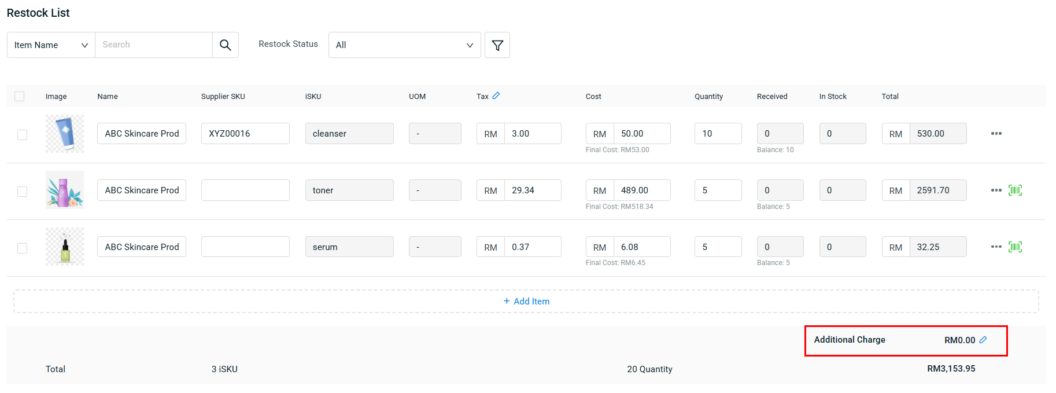
Step 5: Fill in the Supplier SKU for self-reference (optional) > fill in the Cost, Tax and Quantity.
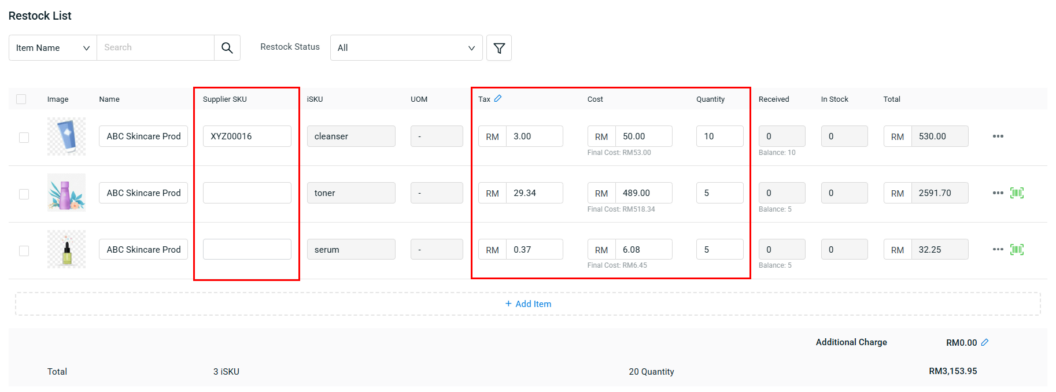
📌 Note: You can click the edit icon to update the Tax (%) in bulk.

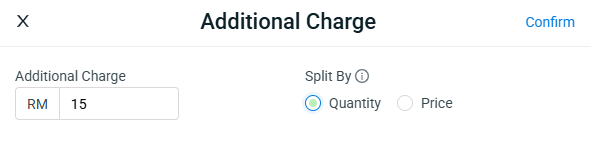
Step 6: If your Purchase Order includes Additional Charges such as shipping or other fees, click the Additional Charge edit button.
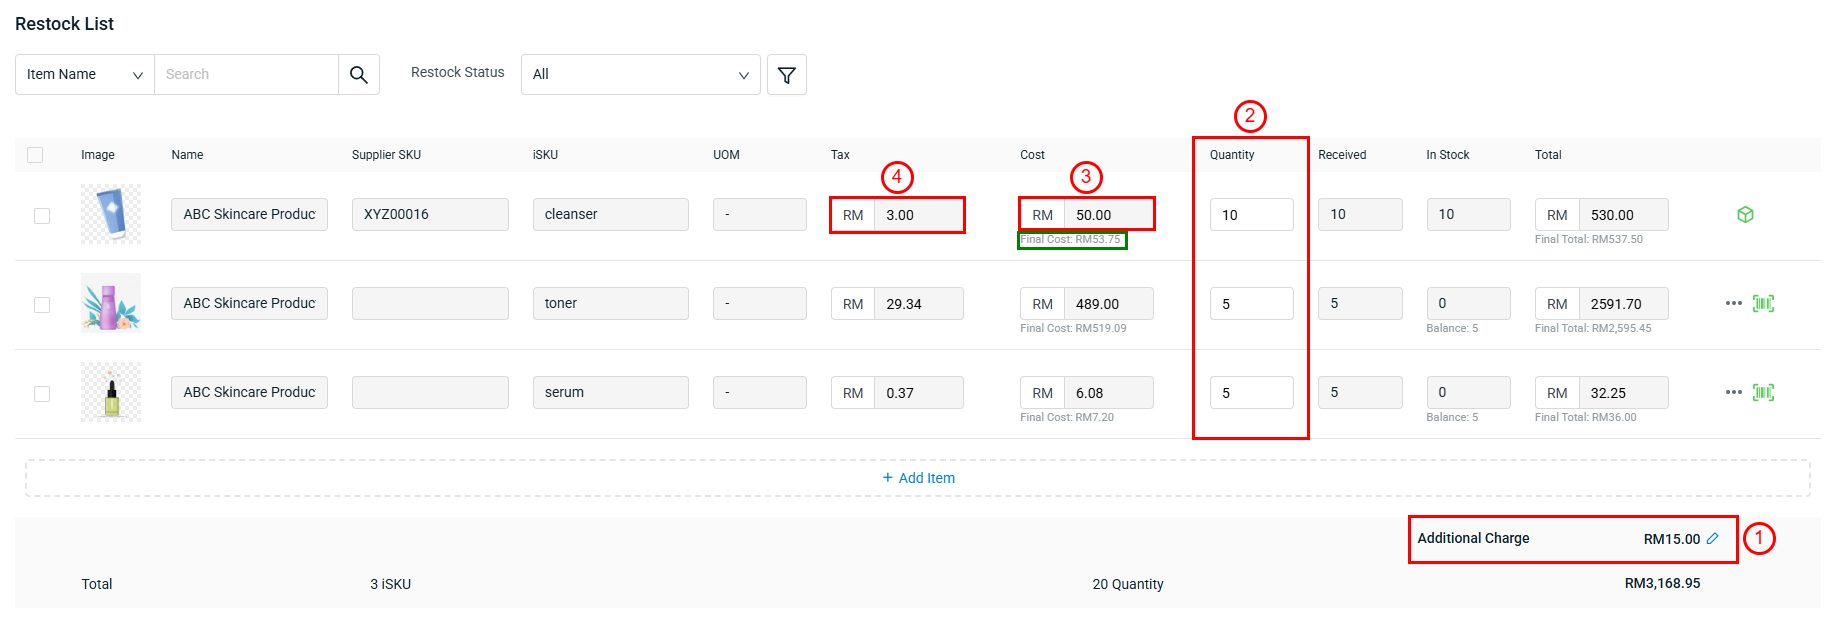
Step 7: Update the Additional Charge amount and select how you would like these charges to be distributed to each item final cost, based on Quantity or Price. Once completed, click Confirm..
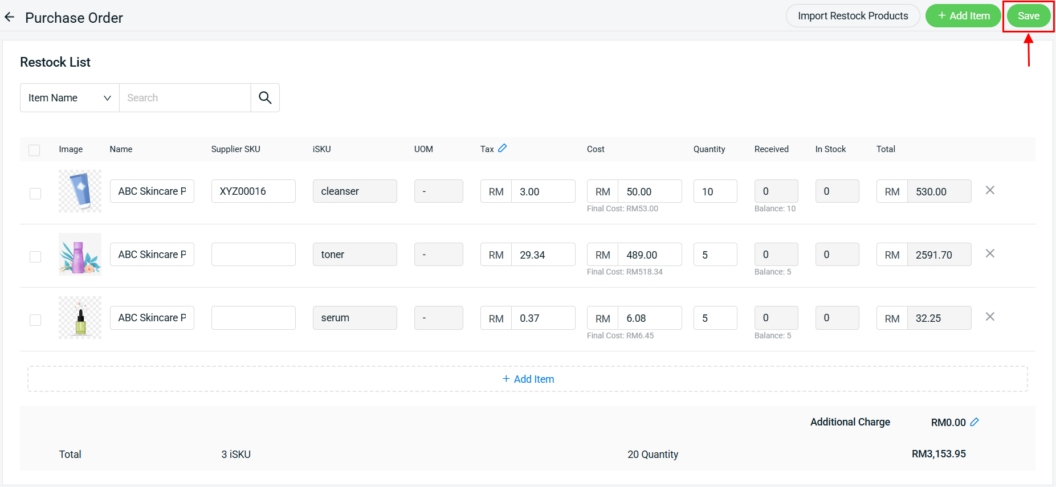
Calculation of Final Cost:
1. Split by Quantity:
[Additional Charge ÷ Total Qty] + Cost + Tax = Final Cost
Example for iSKU cleanser: [15 ÷ 20] + 50 + 3 = 53.75
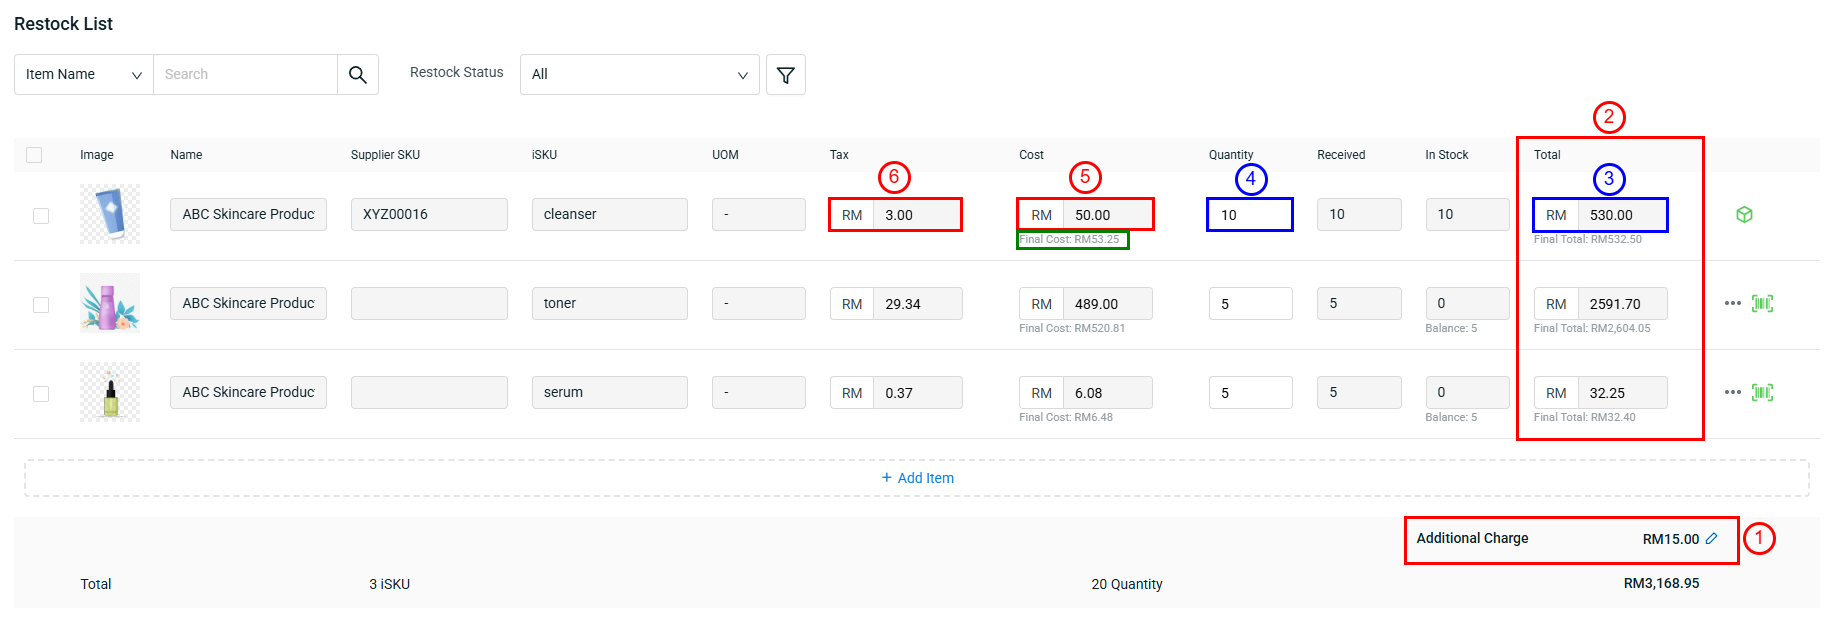
2. Split by Price:
[Additional Charge ÷ Total Cost × Total cost per item ÷ Per item Qty] + Cost + Tax = Final Cost
Example for iSKU cleanser: [15 ÷ (530 + 2591.70 + 32.25) × 530 ÷ 10] + 50 + 3 = 53.25
Step 8: Click the Save button to create the Purchase Order.
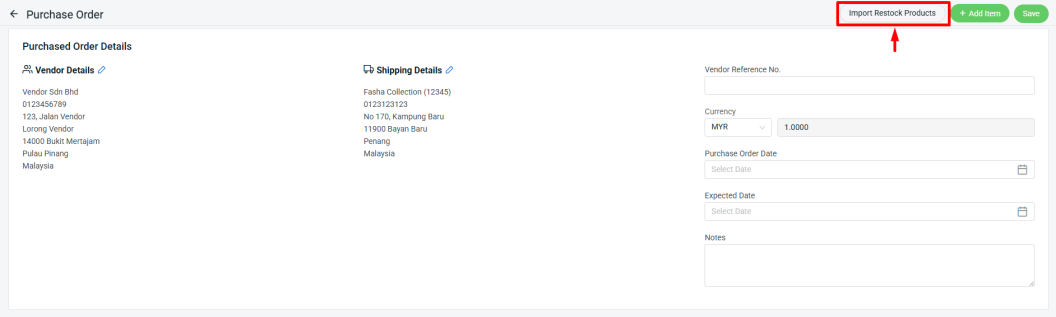
5. Import Restock Products
Step 1: You can also bulk add items to Restock List by using Import Restock Products.
Step 2: Download the sample Excel template.
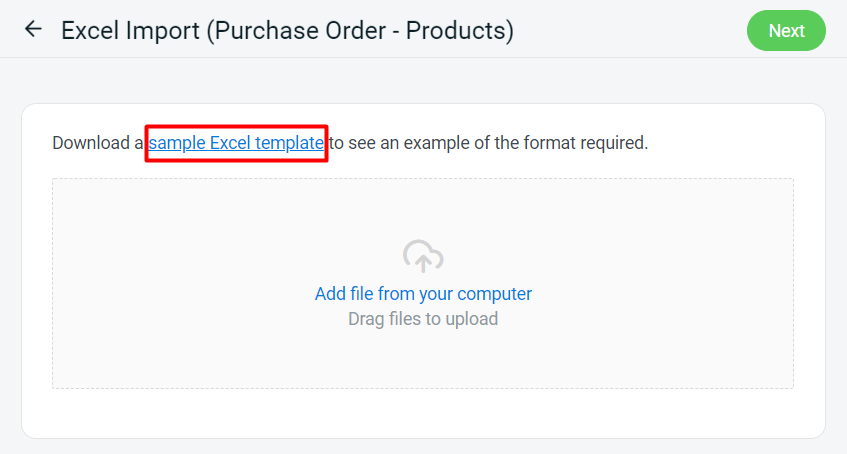
Step 3: Fill in the column in the Excel template according to the format > save the Excel file.

📌Note: You are required to create iSKU in Inventory first before filling in the ‘isku’ column.
💡Tips: Learn more on How To Create Inventory Item
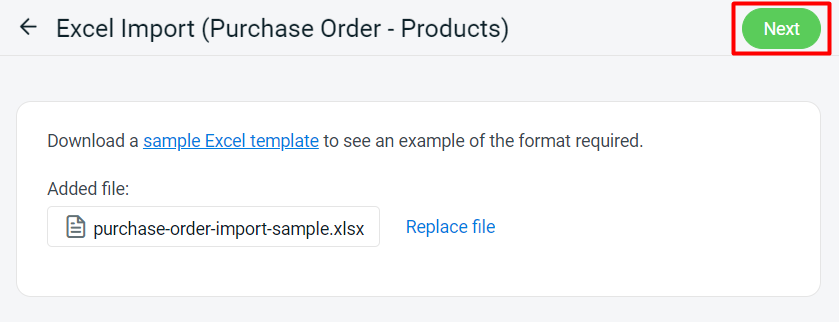
Step 4: Back to SiteGiant Purchase Order Import page > upload the Excel file > Next.
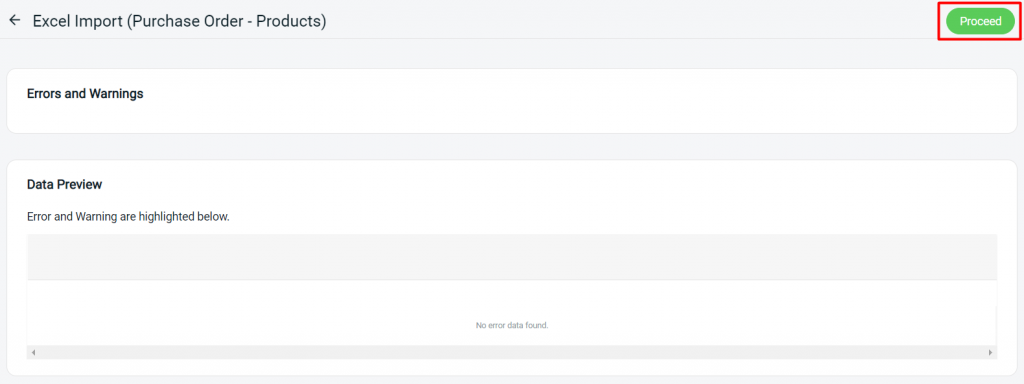
Step 5: If there are any errors in the Excel uploaded, you will see the error message in Errors and Warnings, and it will show the error column in the Data Preview. Amend the error column and reupload the file. Click on Proceed if the file uploaded does not have errors.
Step 6: Click Done once the file is successfully imported.

Step 7: The imported products will be listed in the Restock List > click Save to create the Purchase order.
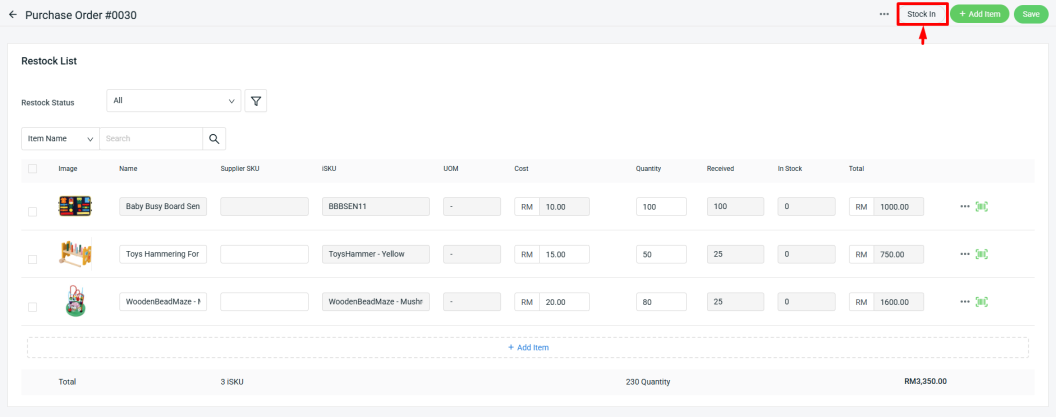
6. Receive And Stock In
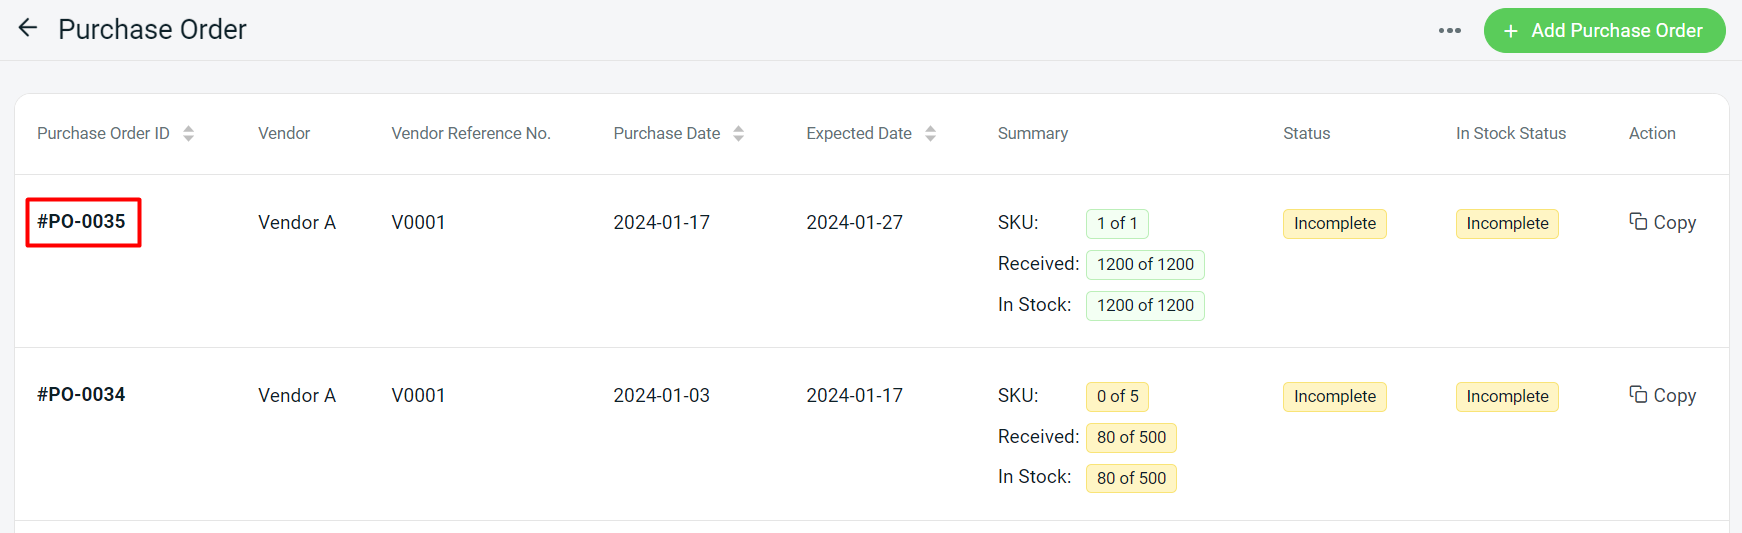
Step 1: Click on the Purchase Order ID to view the Purchase Order.
Step 2: Click on the More(…) button of each product > select the received status for the product.
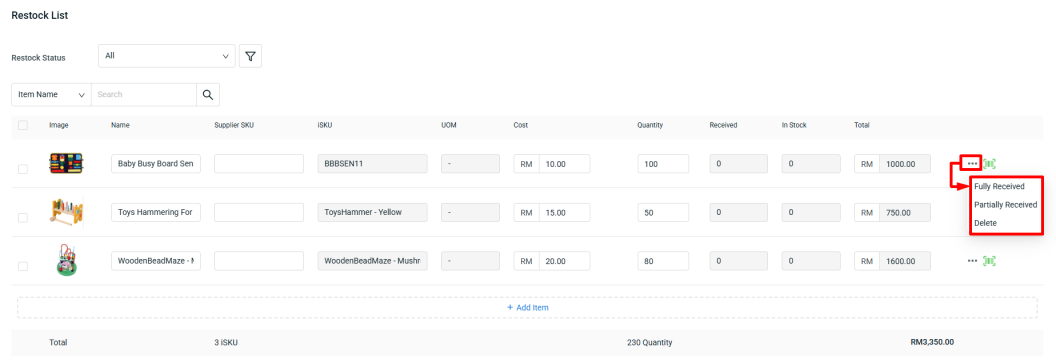
📌Note:
Fully Received: The stock is fully delivered to you
Partially Received: The stock is partially delivered, then enter the quantity received to keep track
Delete: Remove the product from the Purchase Order
Step 3: Click on the Save button to keep the changes made.
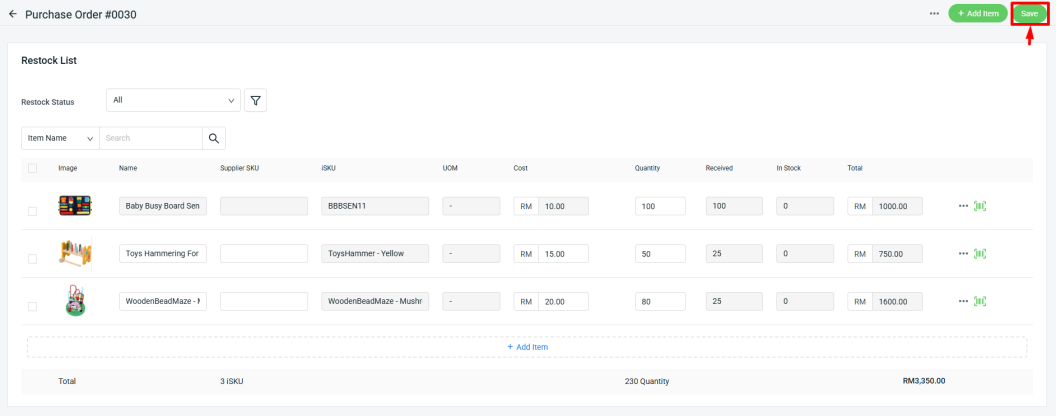
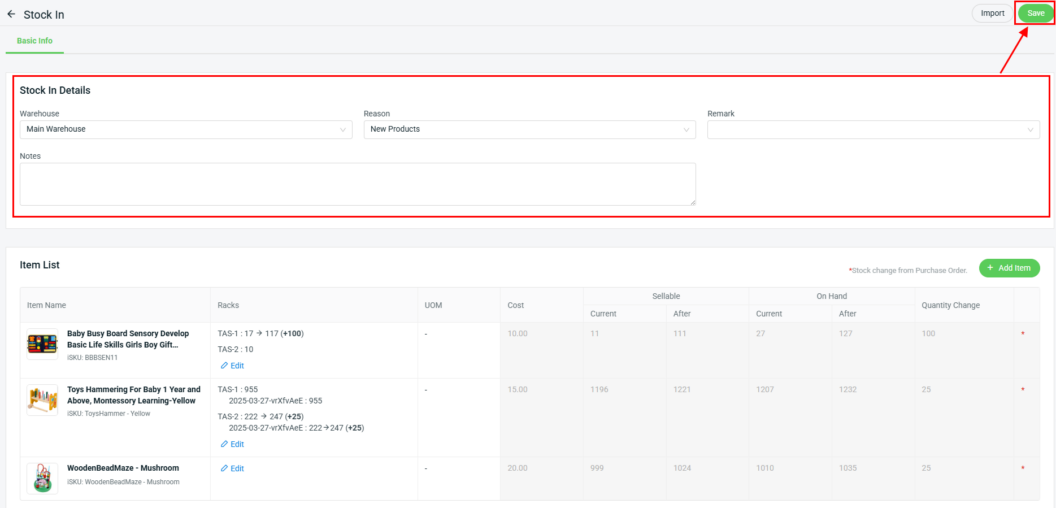
Step 4: View the Purchase Order again > perform Stock In for the items to add the stock into Inventory.
Step 5: Fill in the Stock In Details > Save.
7. Mark As Completed
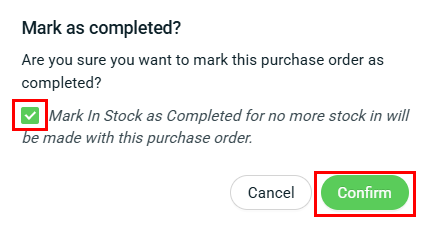
Step 1: Once all the item(s) had fully received and stock in, click on More(…) button > select Mark as completed button complete the Purchase Order.

Step 2: Tick Mark In Stock as Completed if no stock in will be performed, then click Confirm to proceed.
📝Additional Information
(i) Print Purchase Order
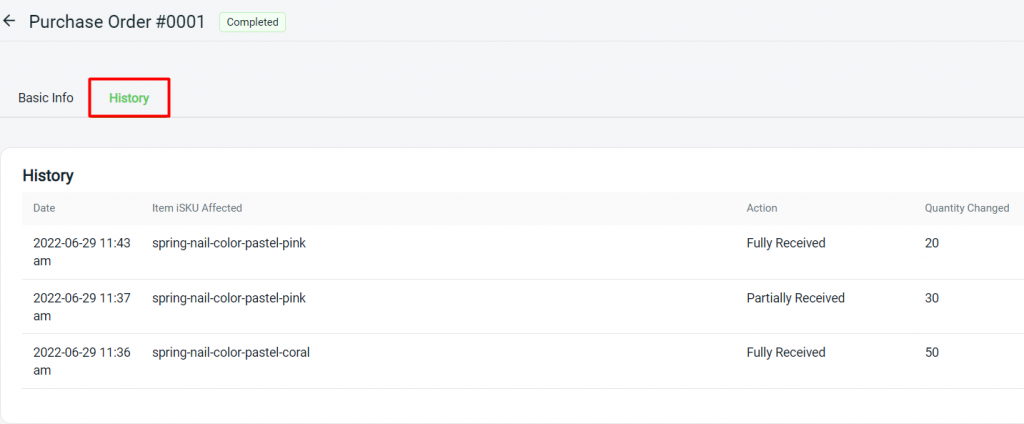
1. You can print out the Purchase Order by clicking on More(…) button > Print.
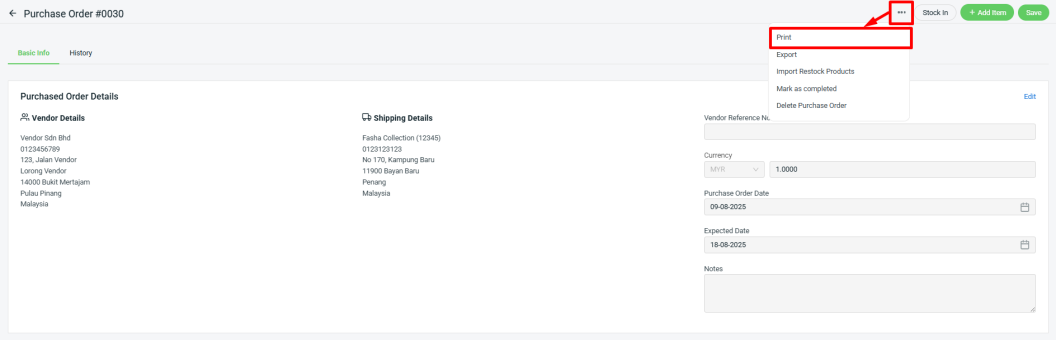
2. You can check the History of the action taken of the Purchase Order.
(ii) Duplicate Existing Purchase Order
Step 1: You may duplicate existing Purchase Order by clicking on Copy.
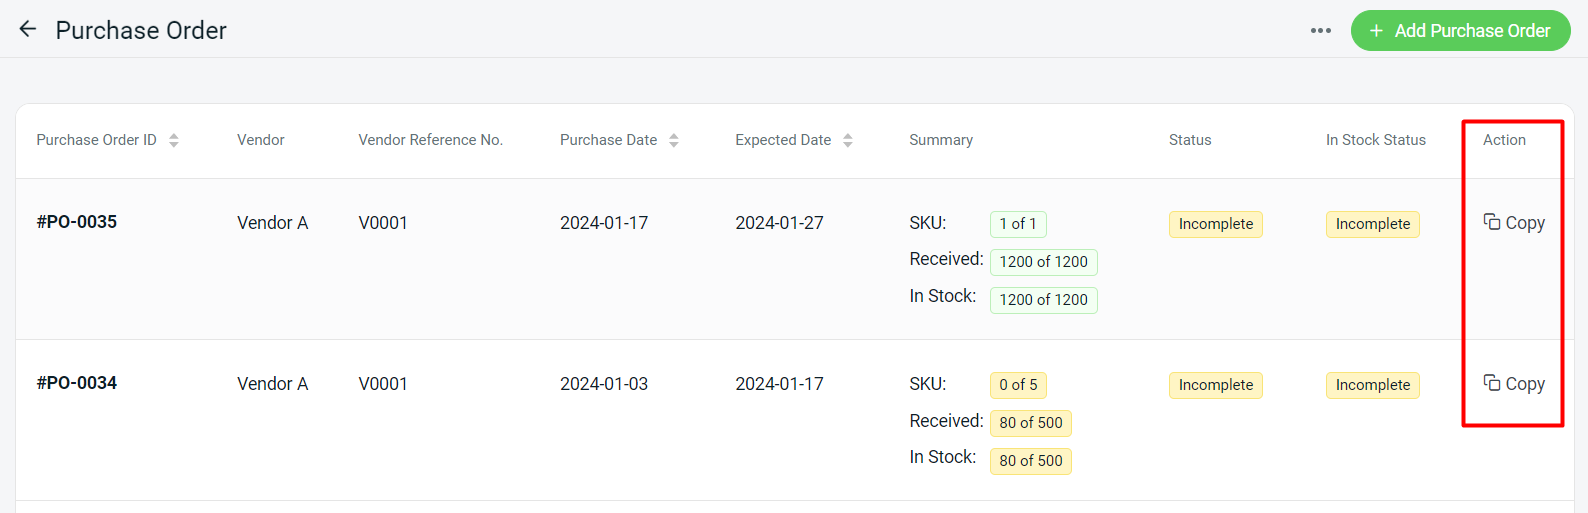
Step 2: Select the Purchase Order Date & Expected Date > Save.
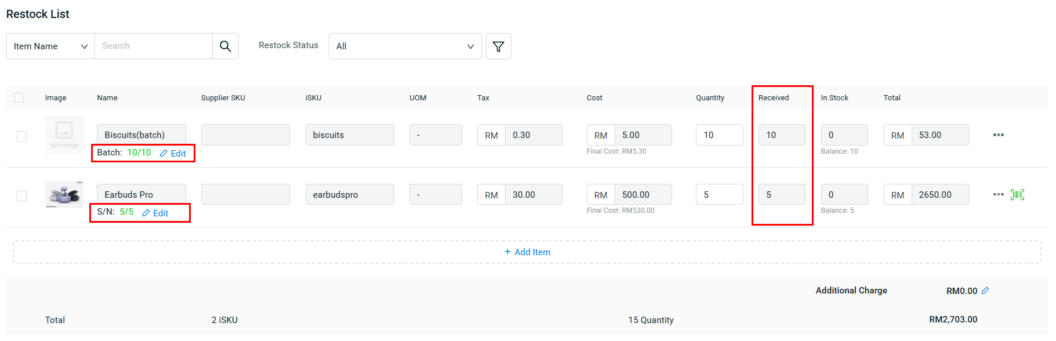
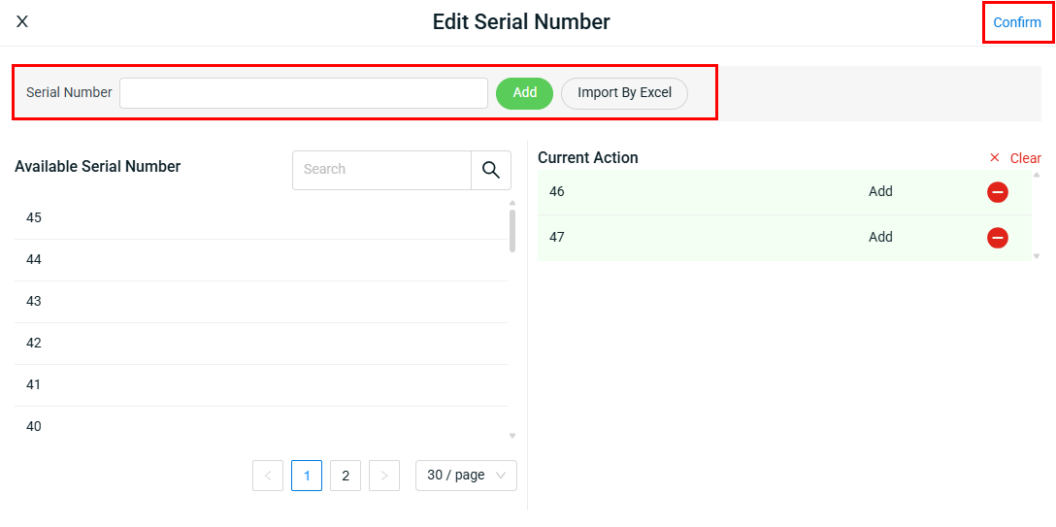
(iii) Pre-fill Batch and Serial Number (optional)
If an item has enable Batch Mode or Required Serial Number in All Inventory Items, you may pre-fill the Batch or Serial Number in advance to streamline the process before Stock In.
💡Tips: Learn more on How To Manage Inventory with Batch Number and How To Enable Serial Number Tracking For Inventory Item
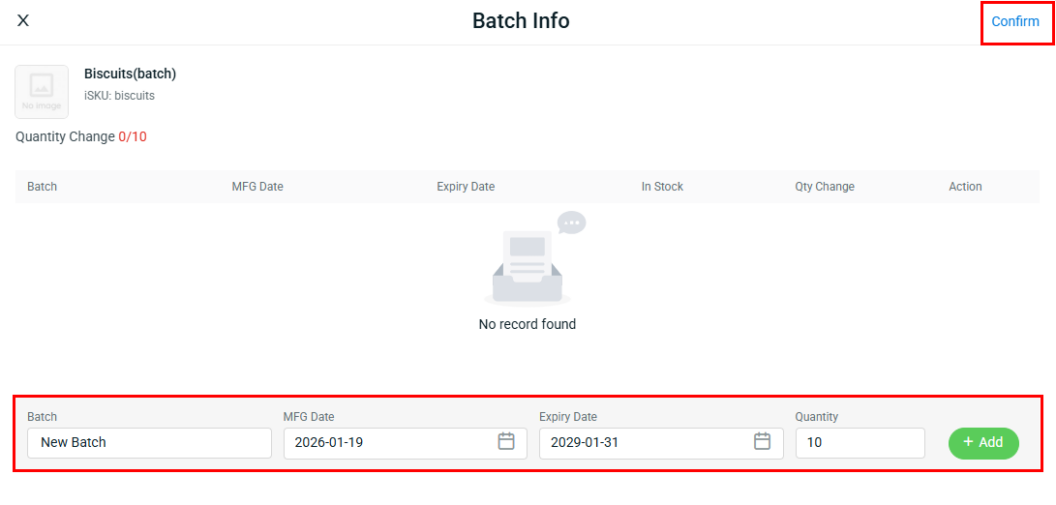
Step 1: After the item has been received, click the Edit button for Batch or Serial Number(S/N) below the item name.

Step 2: For Batch item, enter a new batch name or select an existing one > enter the Quantity > click + Add > Confirm.
Step 3: For Serial Number items, enter the new Serial Number > Add and click Confirm.
📌Note: The Batch quantity or the number of Serial Numbers added must match the Quantity Received.