1. Introduction
2. Top Up SiteGiant Wallet (Token)
3. Usages Of SiteGiant Wallet (Token)
4. Purchase More Orders
5. Purchase Quota
6. My Add-On Apps
1. Introduction
SiteGiant Wallet is a versatile virtual currency designed to enhance the merchant experience. It enables businesses to send OTP verification SMS for secure customer data, implement marketing automation for efficient customer outreach, and utilize AI content generation for tailored marketing materials. This integrated solution streamlines communication and boosts engagement, making it an invaluable tool for merchants looking to optimize their operations and connect with customers effectively.
2. Top Up SiteGiant Wallet (Token)
Step 1: Navigate to Settings > My Account (SiteGiant Wallet).

Step 2: Click Top Up.

Step 2: Select a Top Up value > Confirm & Pay.

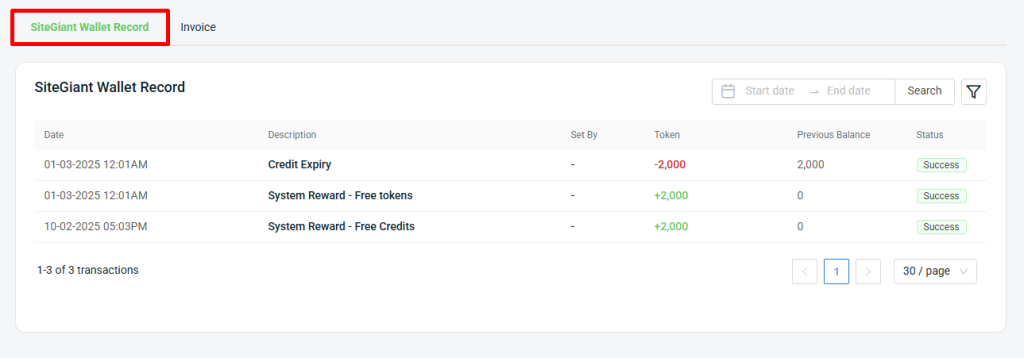
Step 3: You will be redirected to the payment gateway to complete the transaction. Once the transaction is successful, the token will be added to your SiteGiant Wallet. Click SiteGiant Wallet Record to check your purchased token record.
3. Usages Of SiteGiant Wallet (Token)
I. Activate OTP Verification
Add a powerful layer of protection with a one-time password (OTP) sent right to the customer’s phone for seamless sign-ups and logins. Here are the steps to enable the OTP Verification feature on your Webstore.
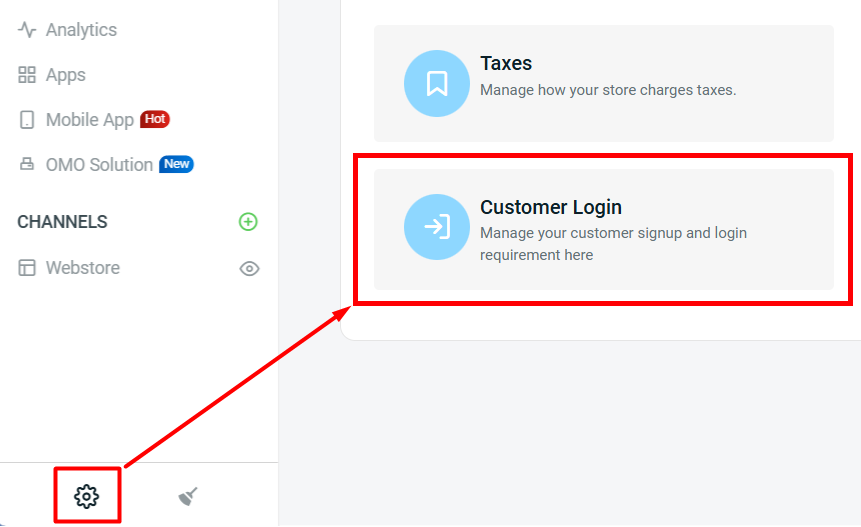
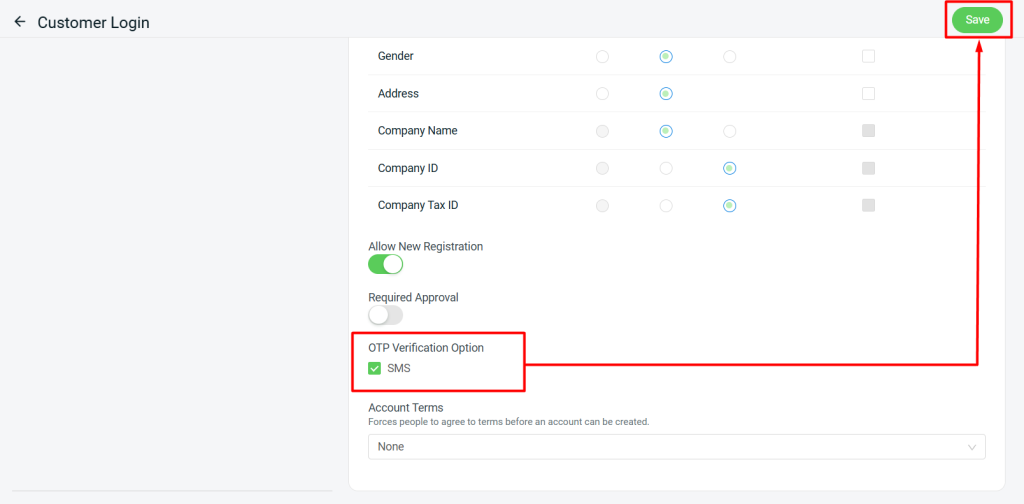
Step 1: Navigate to Settings > Customer Login.
Step 2: Enable SMS under OTP Verification Option > Save.
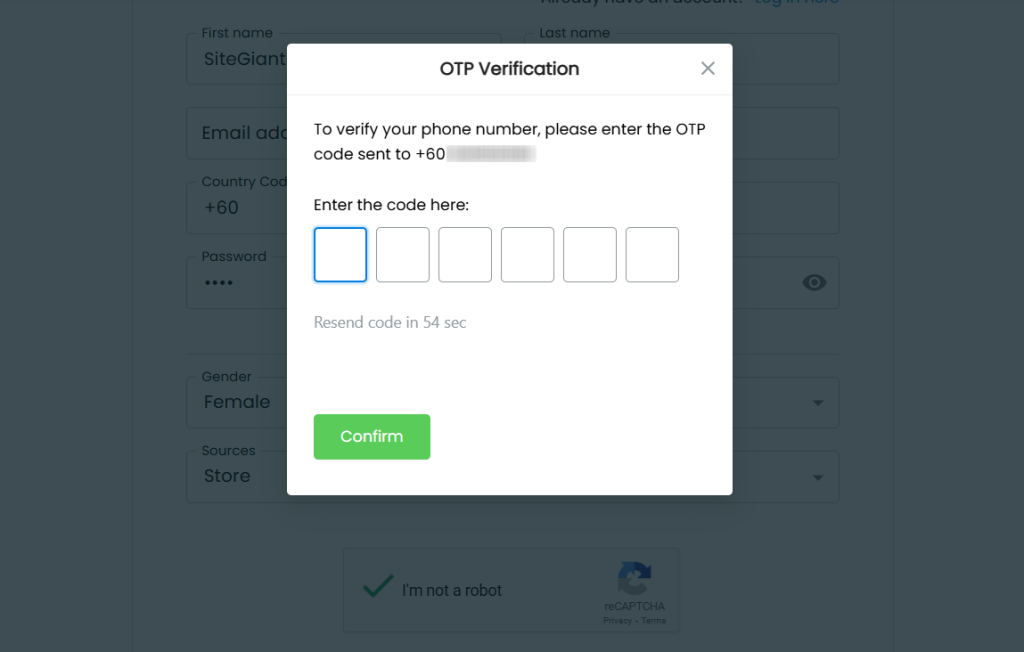
Step 3: When customer sign ups and login to their account using phone number, they will receive an OTP code through SMS to verify their identity.
II. Marketing Automation
Effectively engage customers through automated marketing communications via push notifications, email, and SMS. SiteGiant Wallet token credits will be applied when sending emails and SMS to the target audience.
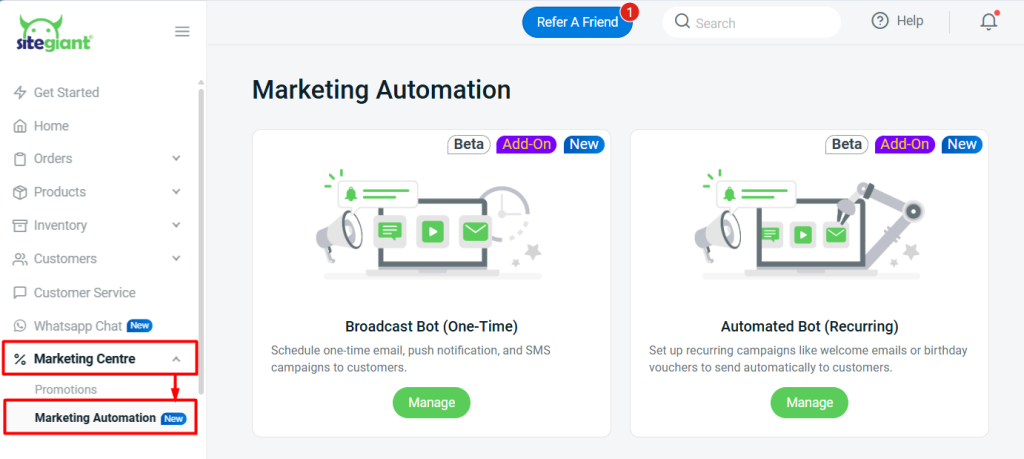
Step 1: Navigate to Marketing Centre > Marketing Automation > choose Broadcast Bot for one-time blasting or Automated Bot for recurring events.
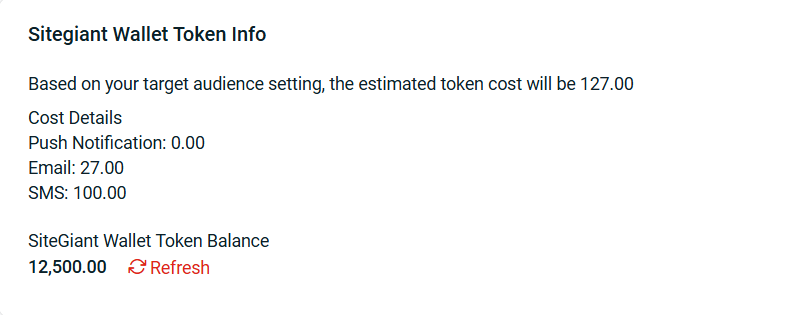
Step 2: Based on the target audience setting, the system will estimate the token cost required to send Email and SMS.
💡Tips: Learn more on How To Use Marketing Automation.
III. AI Content Generation
With AI integration, you can generate product descriptions in seconds, allowing you to focus more on running your business.
Step 1: Go to any Product Listing > + Add Product.
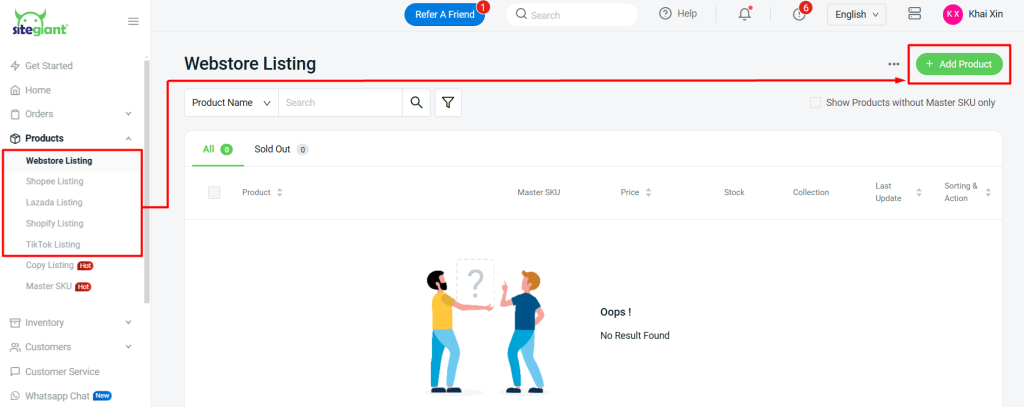
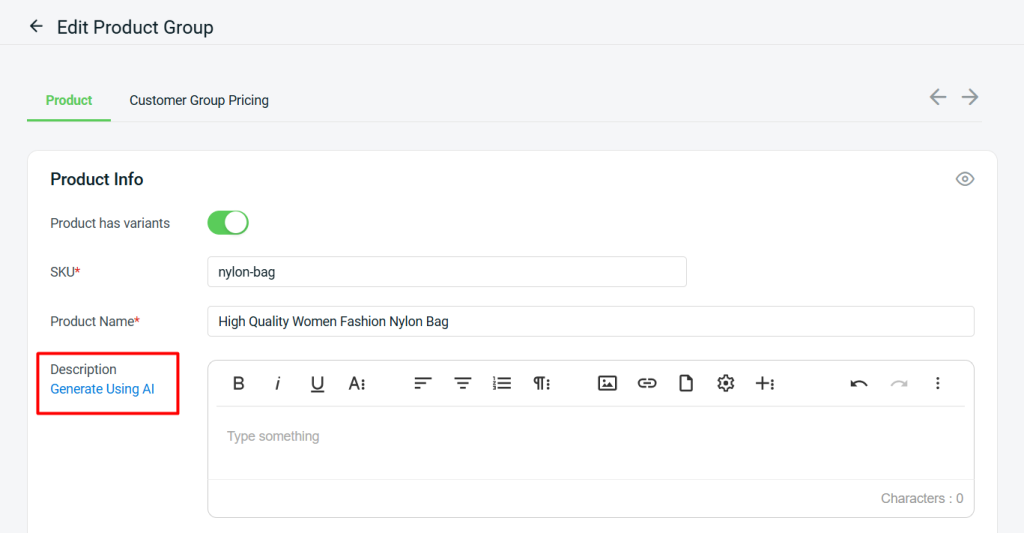
Step 2: Click on Generate Using AI under Description.
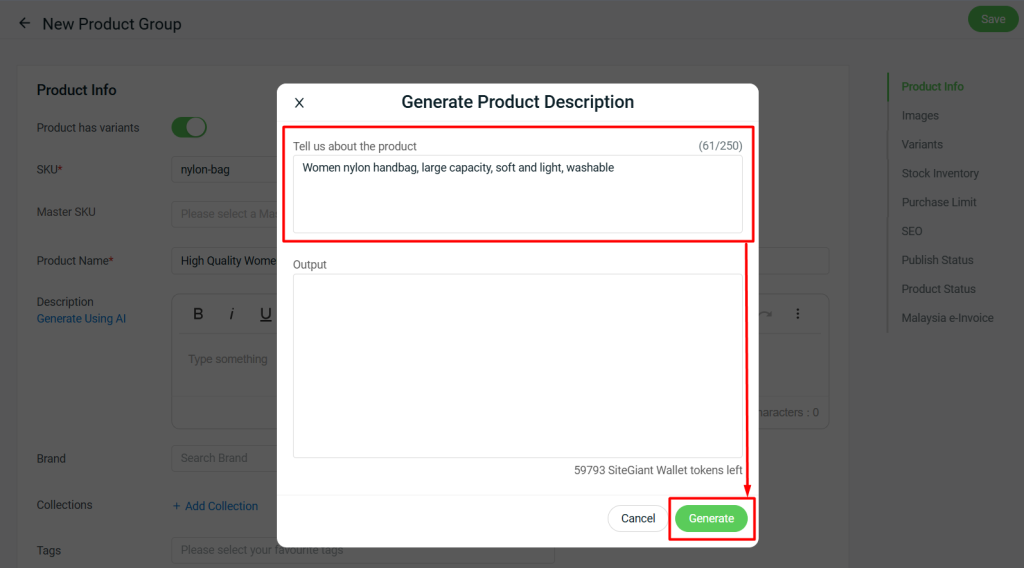
Step 3: Input the keyword of the product and click Generate.
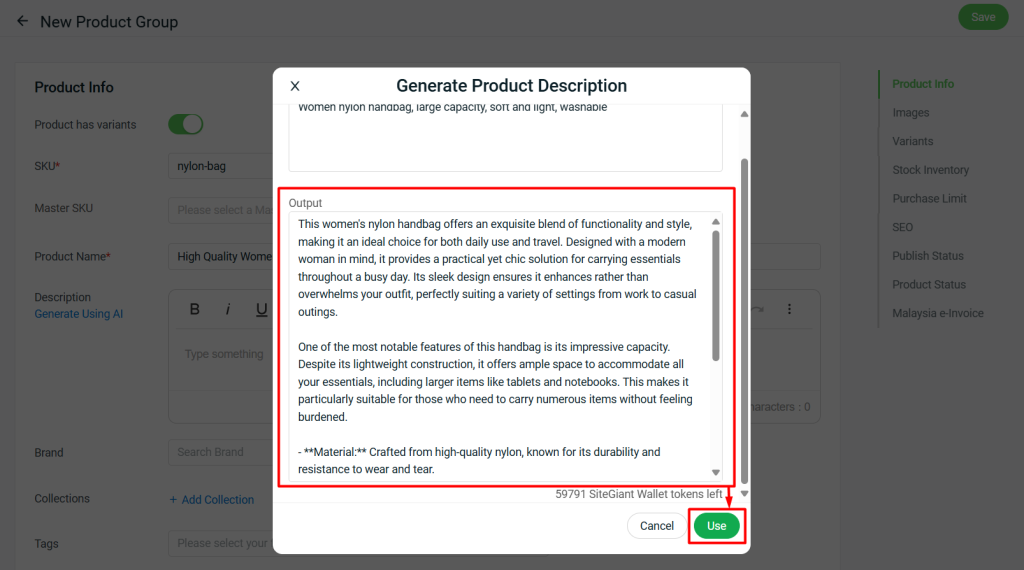
Step 4: The generated product description will displayed at Output, click Use to apply.
IV. AI Business Analyst
AI Business Analyst is a powerful tool designed to streamline data analysis by effortlessly processing and interpreting system queries related to customers, channels, and items.
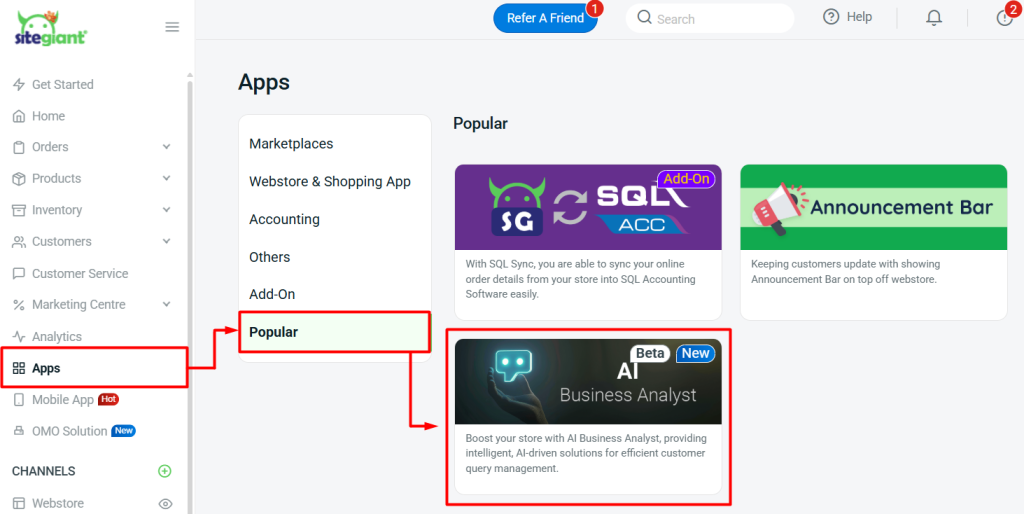
Step 1: Navigate to Apps on the sidebar menu > Popular > AI Business Analyst.
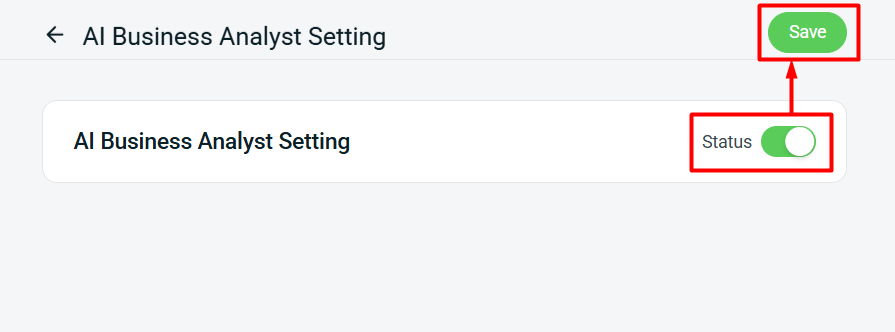
Step 2: Enable AI Business Analyst Setting Status > Save.
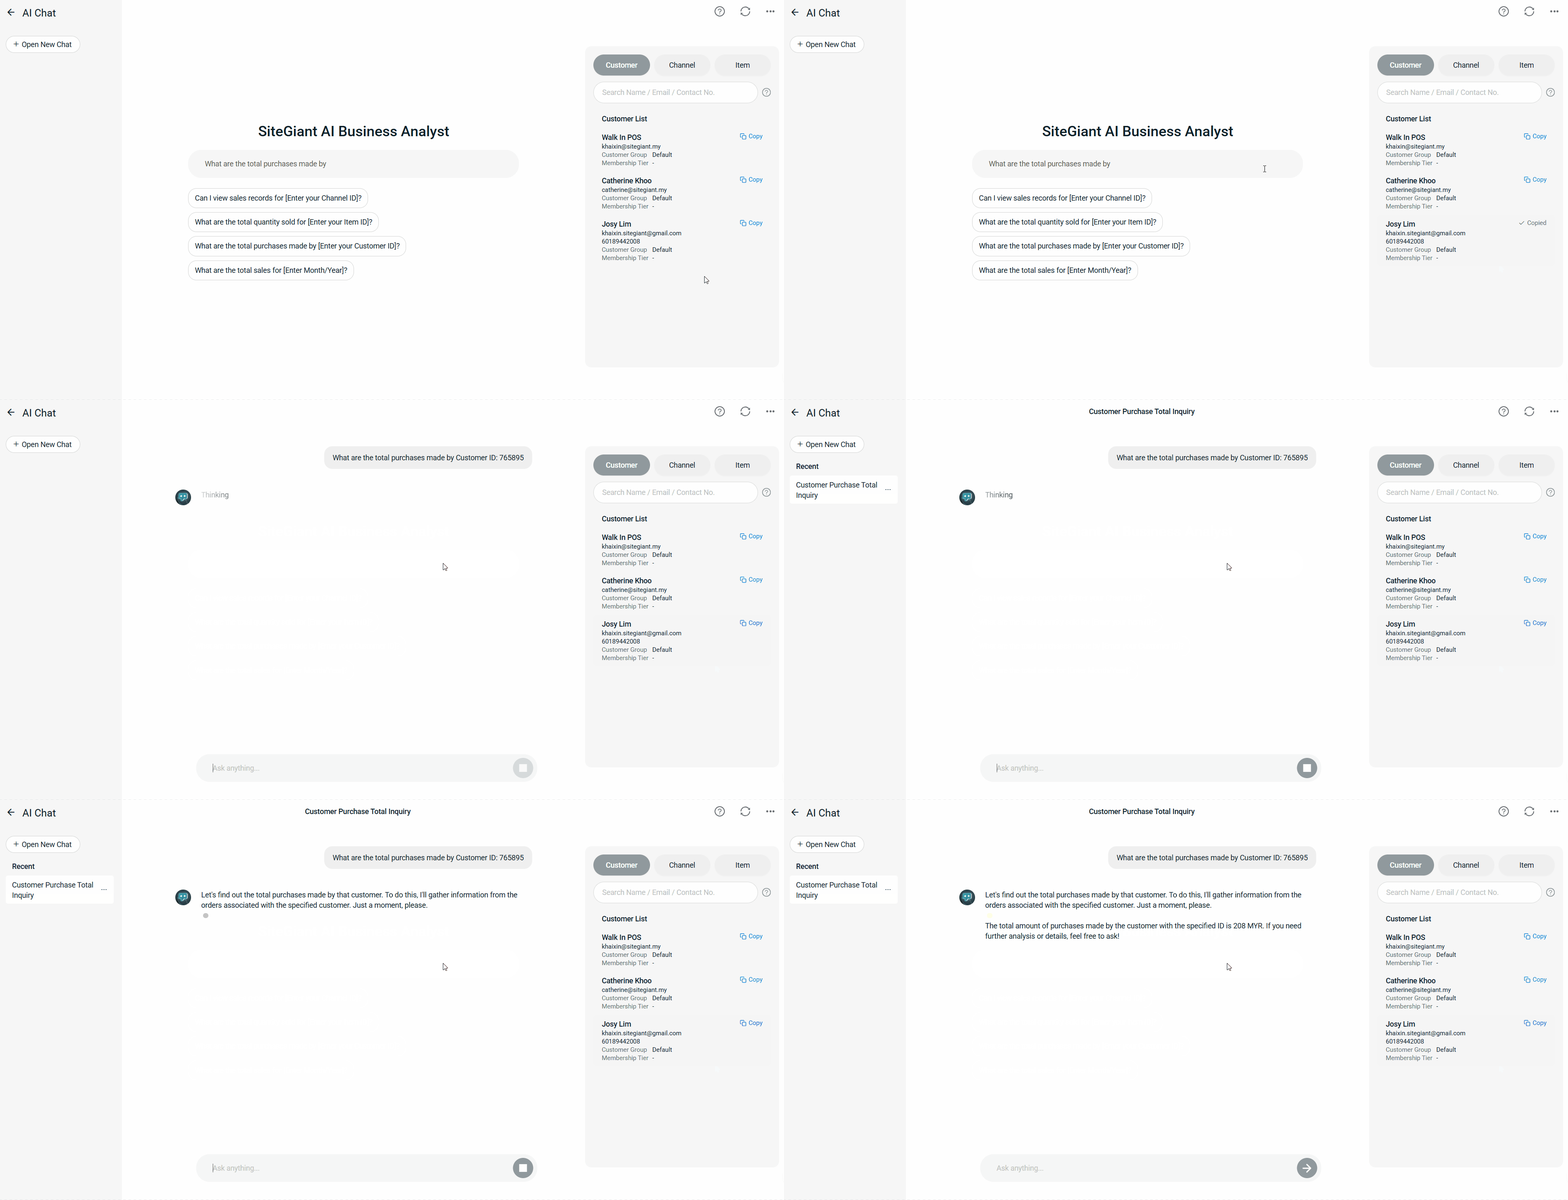
Step 3: You can type your questions related to customers, channels, or items in the AI chatbox with the corresponding unique ID. The unique ID can be copied from the right-hand panel.
💡Tips: Learn more on How To Gain Business Insights With AI Business Analyst.
4. Purchase More Orders
Customers can purchase additional orders if their package order limit has been reached.
Step 1: Navigate to Settings > My Account (SiteGiant Wallet).

Step 2: Click Purchase More Orders.

Step 3: Select a Purchase Add-On Order Package > Confirm & Pay.

📌Note: Please contact our support team once you have purchased the order quota to unlock your order.
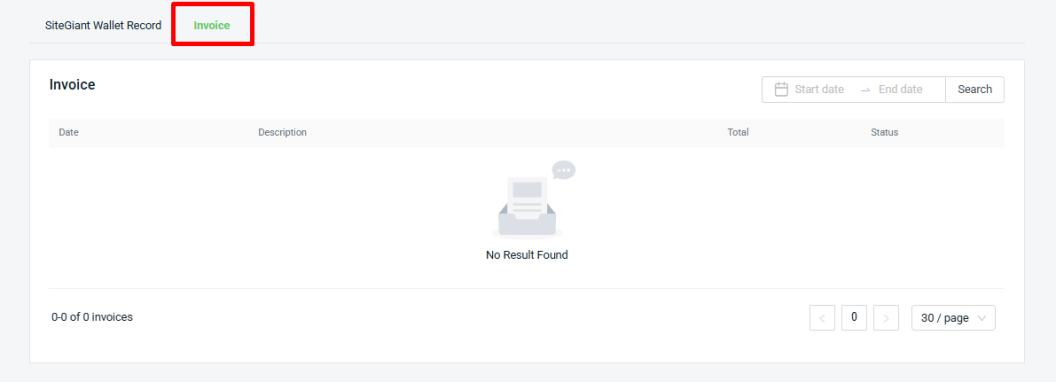
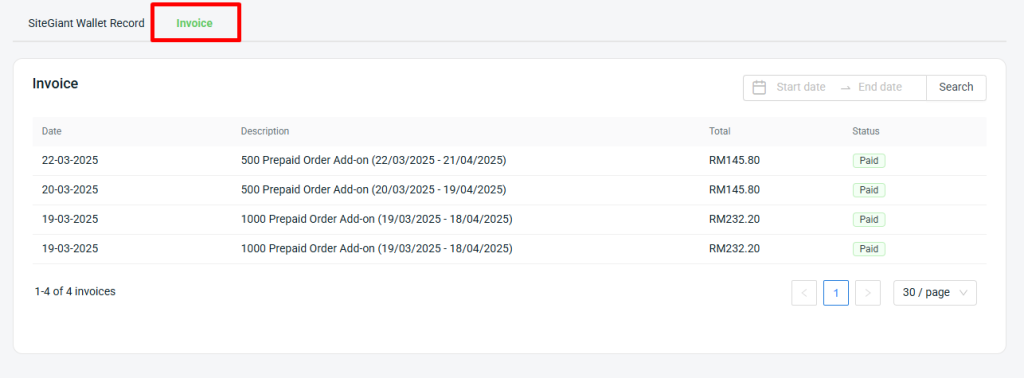
Step 4: You will be redirected to the payment gateway to proceed with the transaction. Once the transaction is successful, the Purchase Order will be added. Click Invoice to check your Purchase Order record.
5. Purchase Quota
Step 1: Navigate to Settings > My Account (SiteGiant Wallet).

Step 2: Click Purchase Quota.

Step 3: Select the Quota Item Quantity > click Confirm & Pay.

Step 4: You will be redirected to the payment gateway to proceed with the transaction. Once the transaction is successful, the Purchase Quota will be added. Click Invoice to check your Purchase Quota record.

6. My Add-On Apps
Step 1: Navigate to Settings > My Account (SiteGiant Wallet).

Step 2: Click My Add-On Apps.

Step 3: Select the Add-On Apps that you wish to purchase > click Subscribe.

📌Note: Currently, under My Add-On Apps, only Marketplace Platform Chat + Log and AI Sales & Inventory are available. To purchase other Add-On Apps, you may reach out to our sales team.
Step 4: Select the Payment Method for the app > Confirm & Pay.

Step 5: You will be redirected to the payment gateway to proceed with the transaction. Once the transaction is successful, the Add-On App subscription will be added. Click Invoice to check your subscription.
