1. Introduction
2. Create Shipping Profile
3. Apply Shipping Profile
4. Case Study
1. Introduction
A Shipping Profile is a custom shipping rule that can apply to specific products and locations. This feature will allow sellers to classify their products by the courier service that they are using.
2. Create Shipping Profile
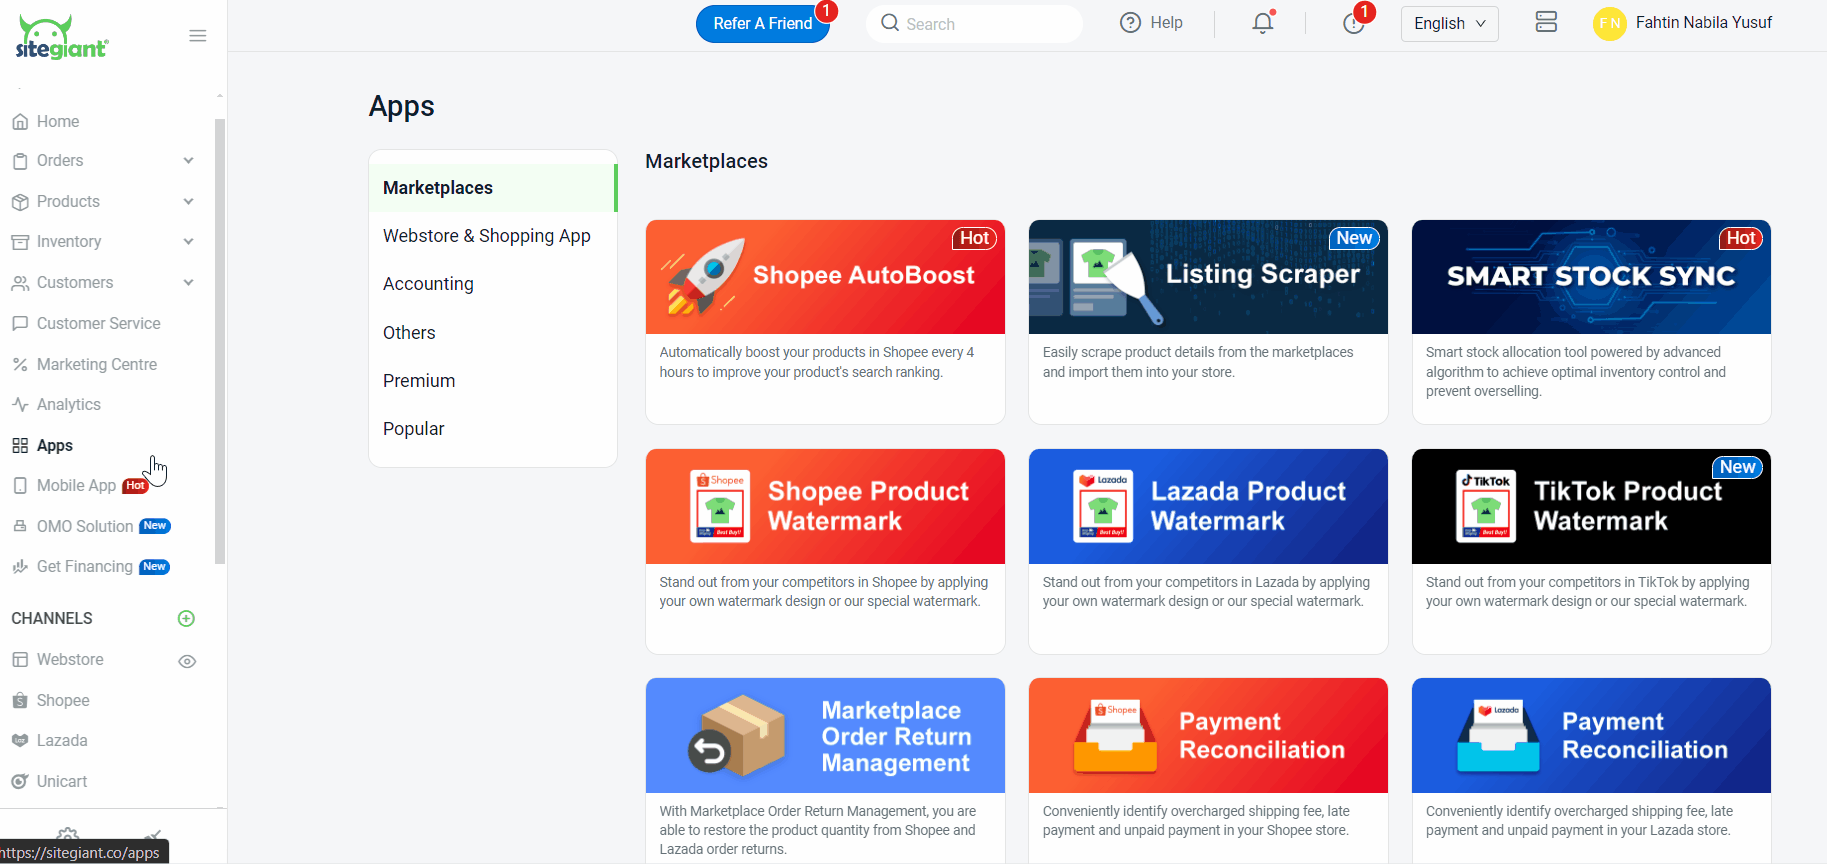
Step 1: Navigate to Apps on the sidebar menu > Webstore & Shopping App > Shipping Profile.
Step 2: Under the Shipping Profile section, tick Split Checkout by Shipping Profile (Optional) > click on + Add New Shipping Profile.
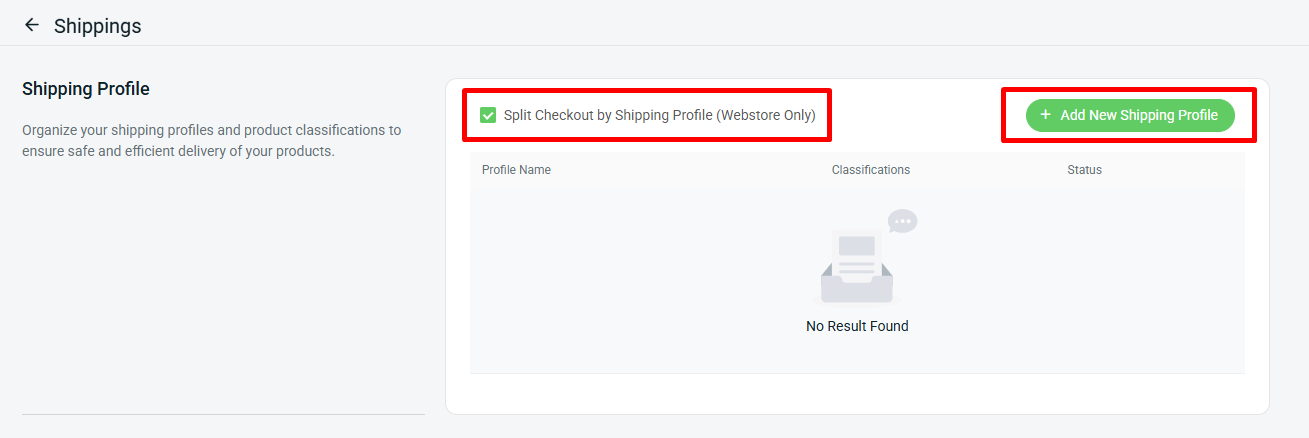
📌Note: Split Checkout by Shipping Profile is a checkout process where the system separates the products in a customer’s order based on the shipping profiles assigned to each product.
If the cart contains products from multiple shipping profiles, the customer must check out each group separately.
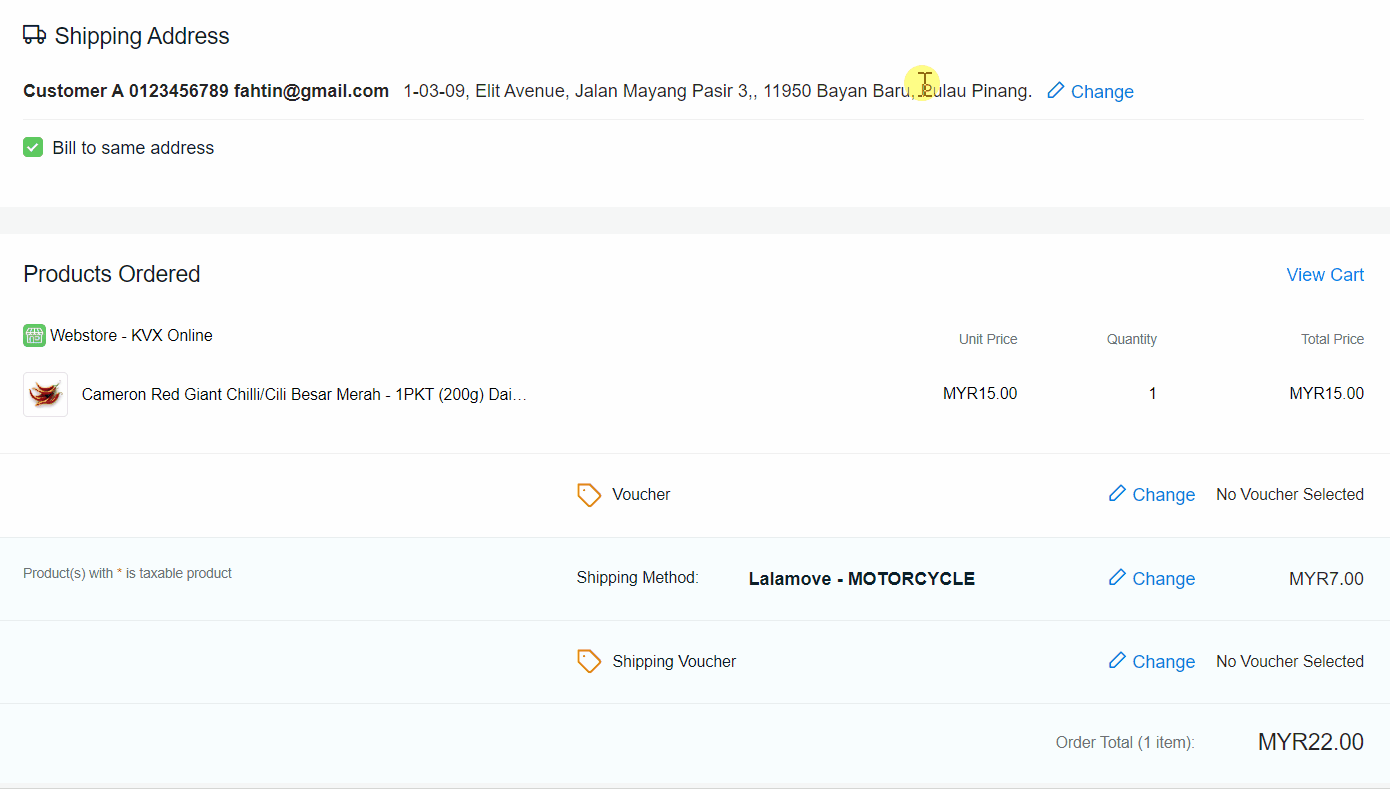
From customer perspective:
Webstore
Shopping App


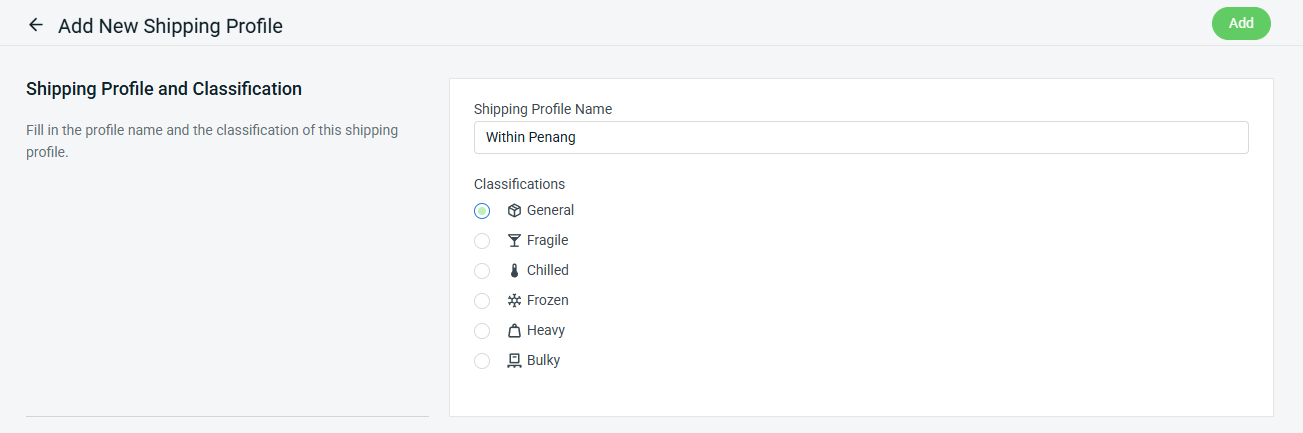
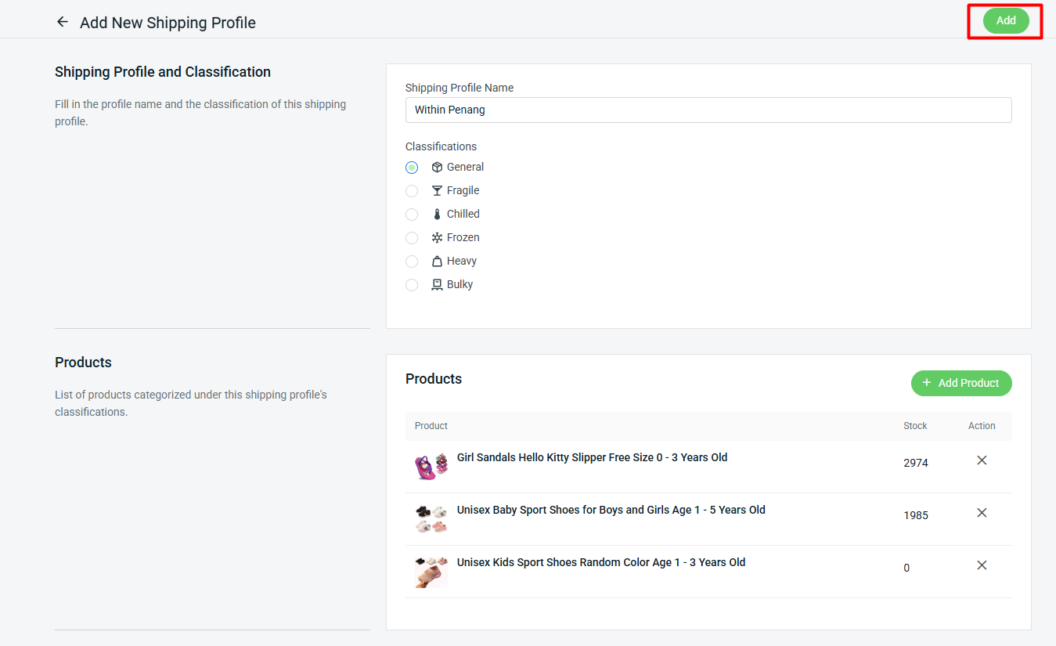
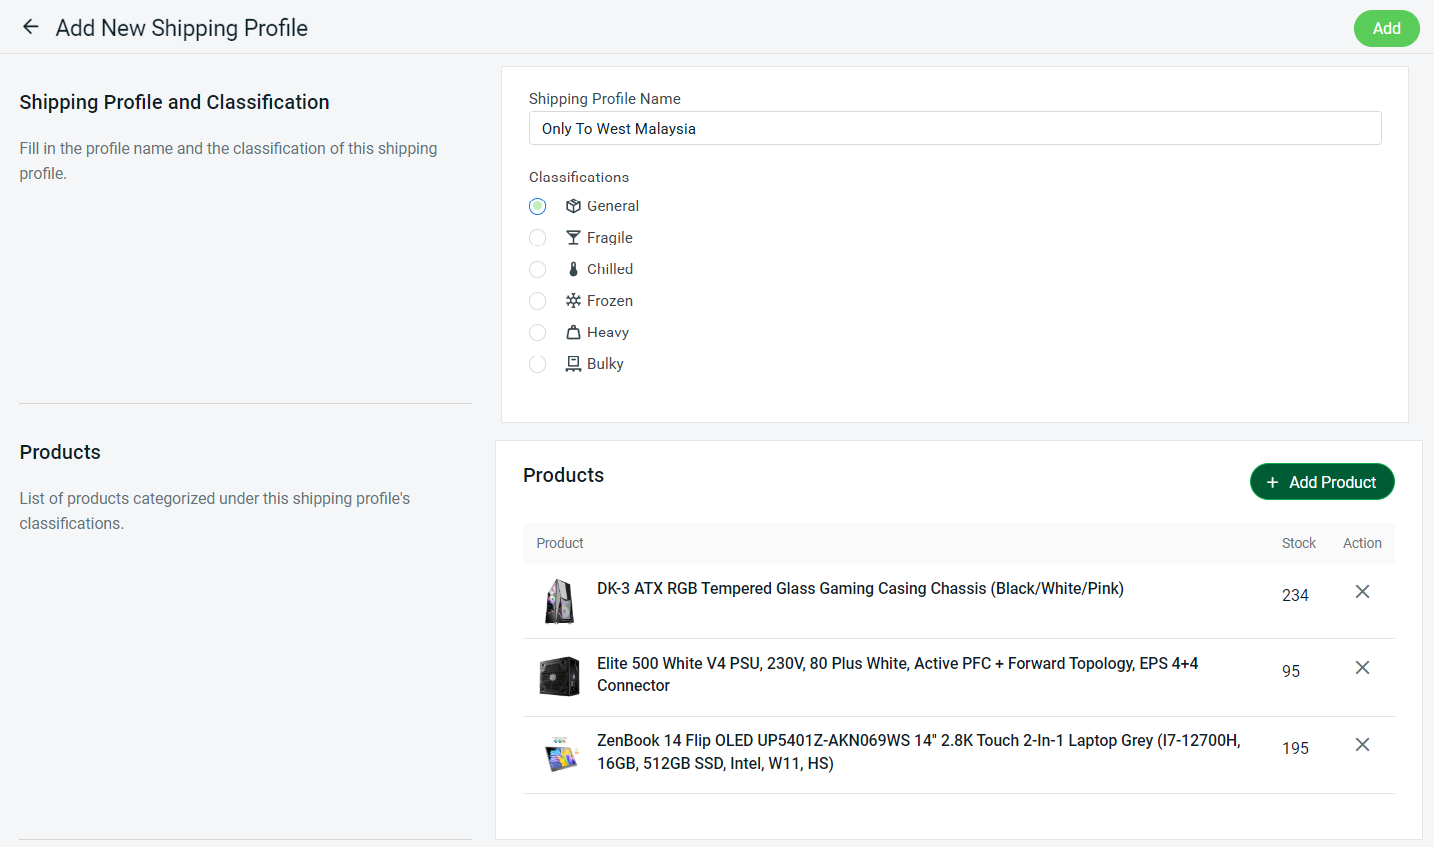
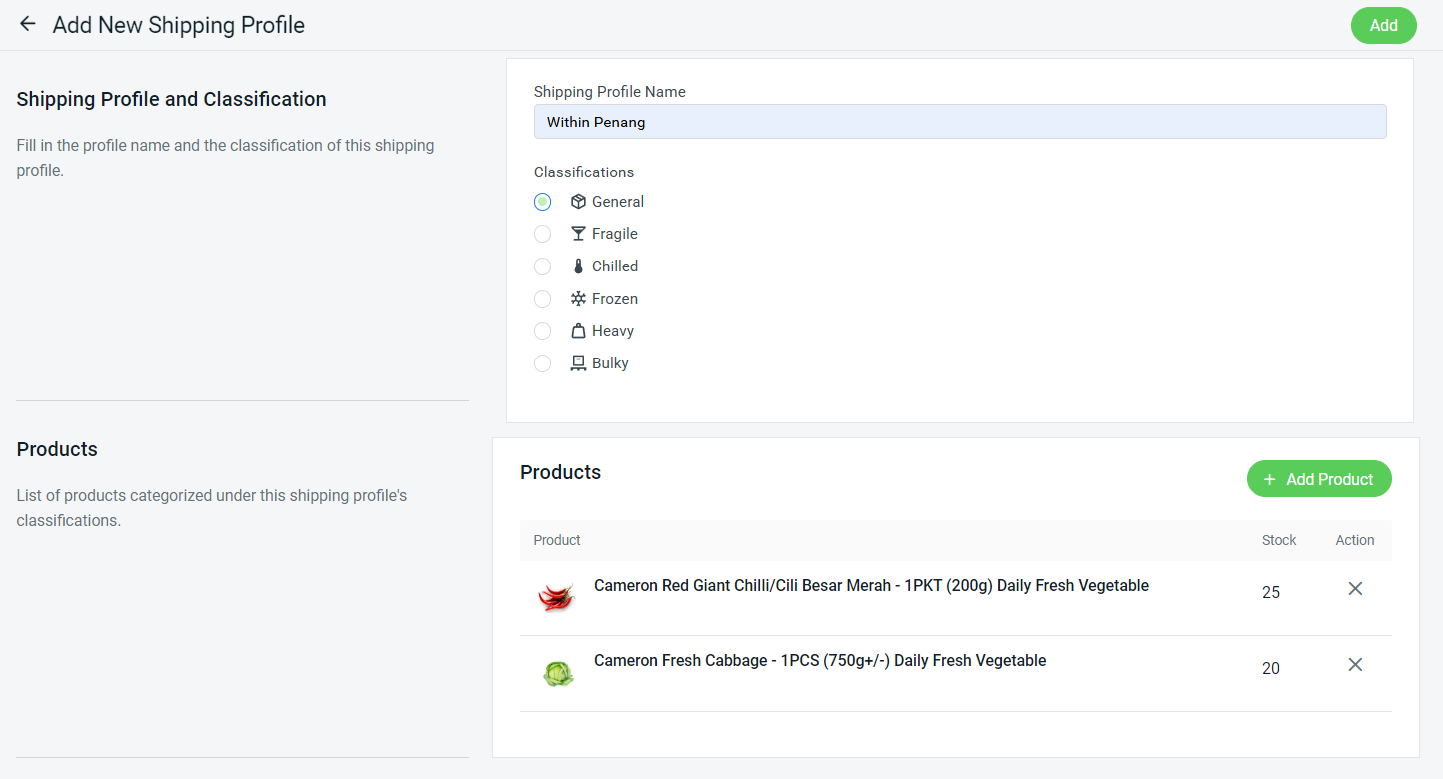
Step 3: Enter the Shipping Profile Name > select the Shipping Profile Classifications.
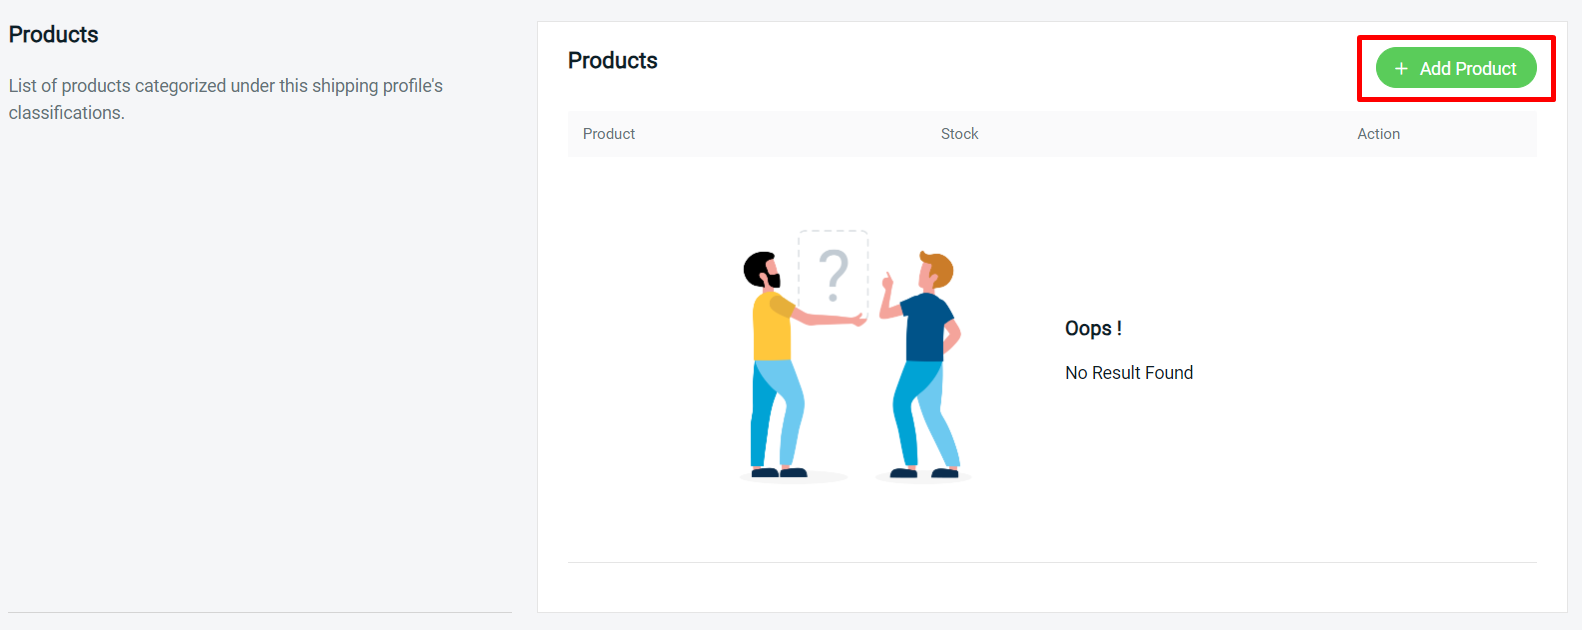
Step 4: Click on + Add Product to select the related product.
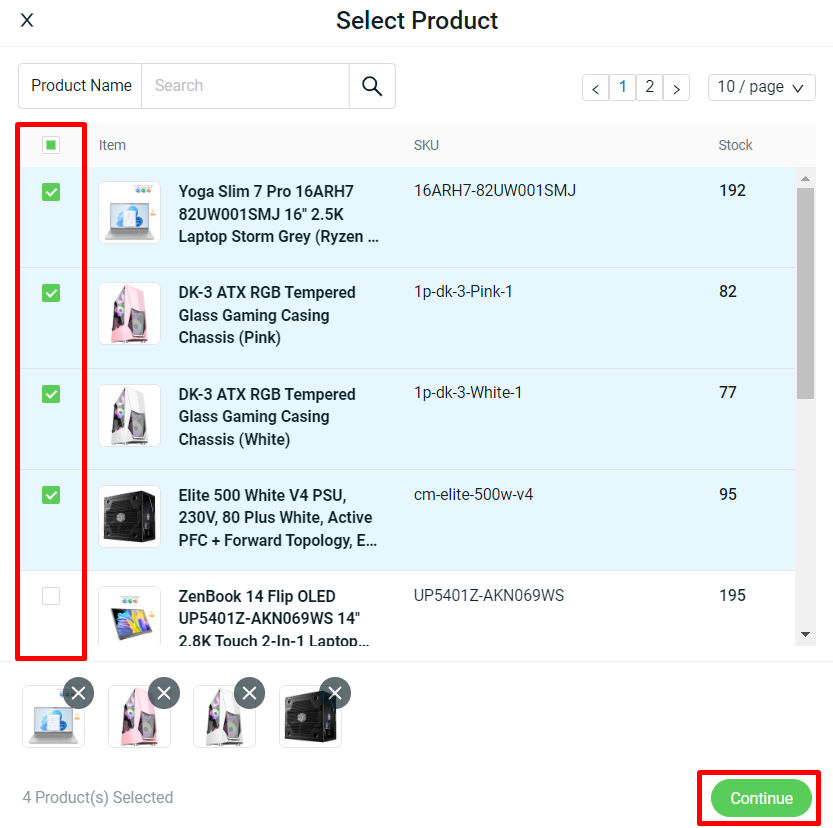
Step 5: Choose the Products > click on the Continue button to add.
Step 6: Click Add to create your Shipping Profile.
Step 7: You can Toggle Off the status if do not want to apply the shipping profile. Besides, you may click the Edit icon if want to make amendments to your shipping profile info.

3. Apply Shipping Profile
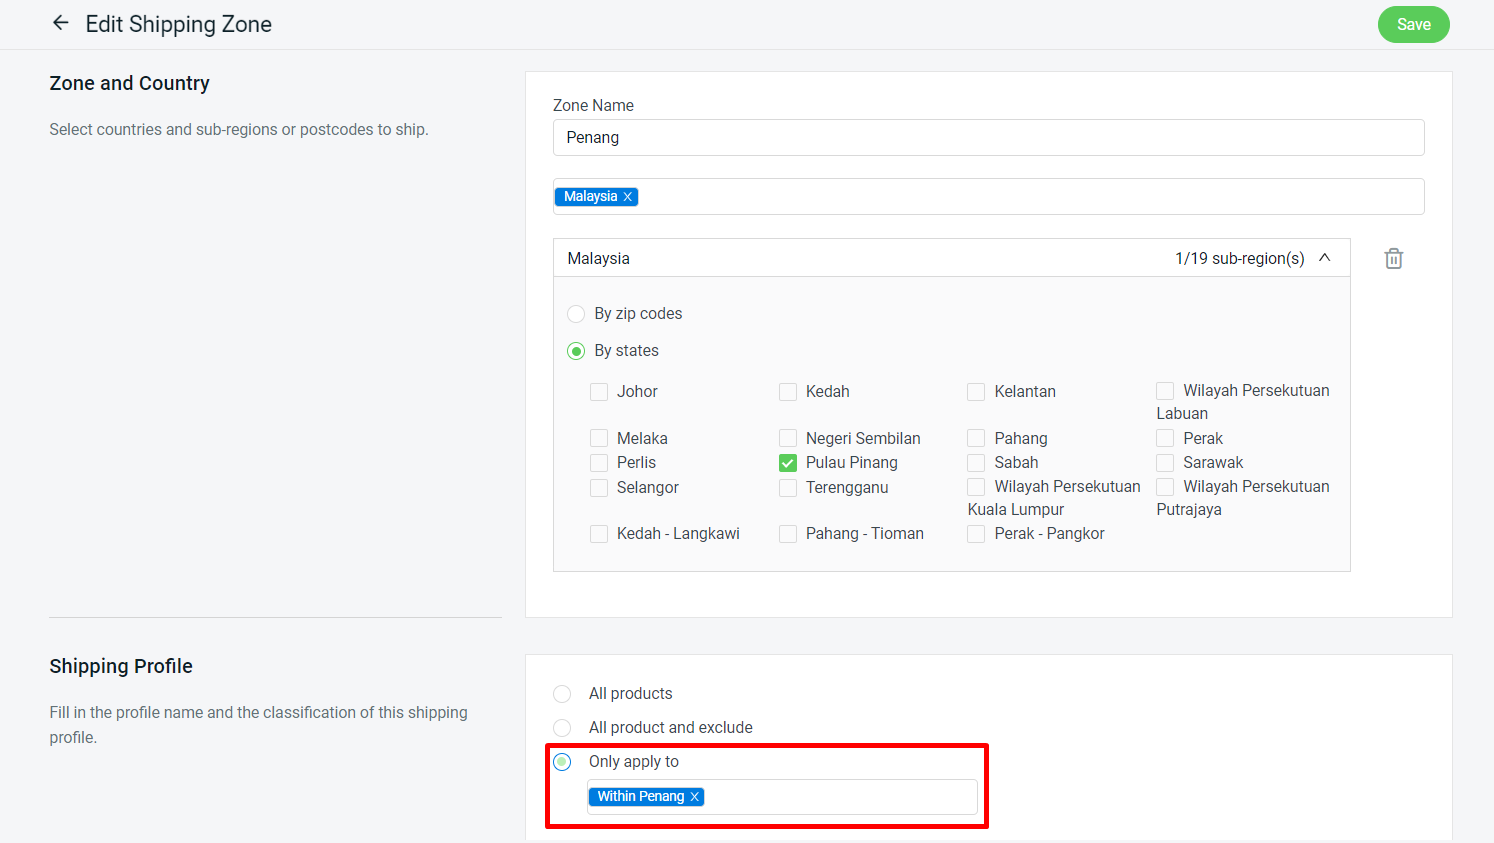
Step 1: Click on + Add Shipping Zone if you want to create a new shipping zone to apply the shipping profile. Otherwise, you can click the Edit icon to apply the shipping profile.
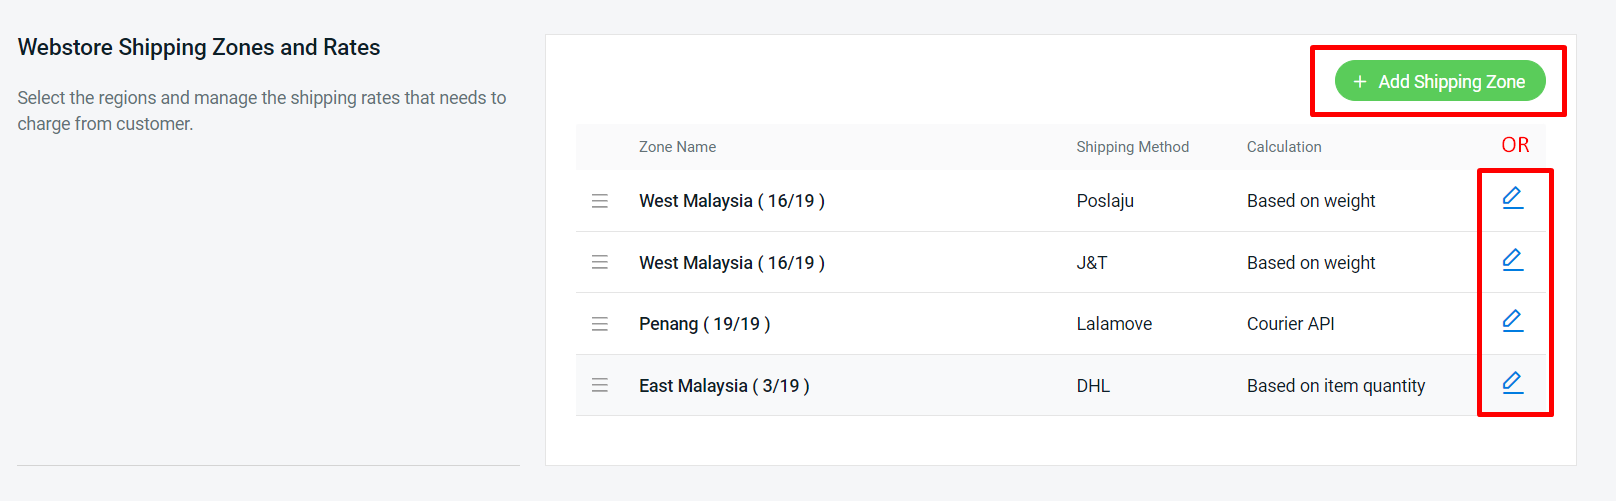
Step 2: Scroll down to the Shipping Profile to apply for this shipping zone.
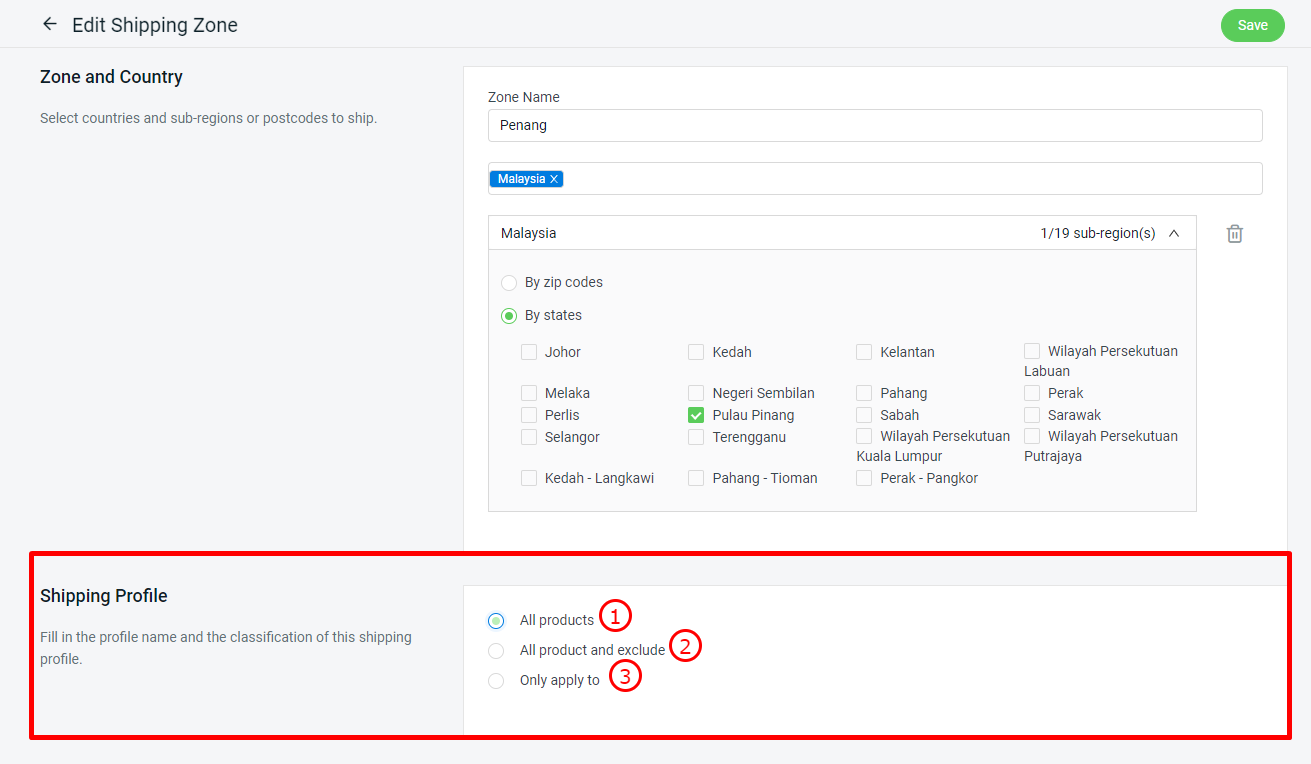
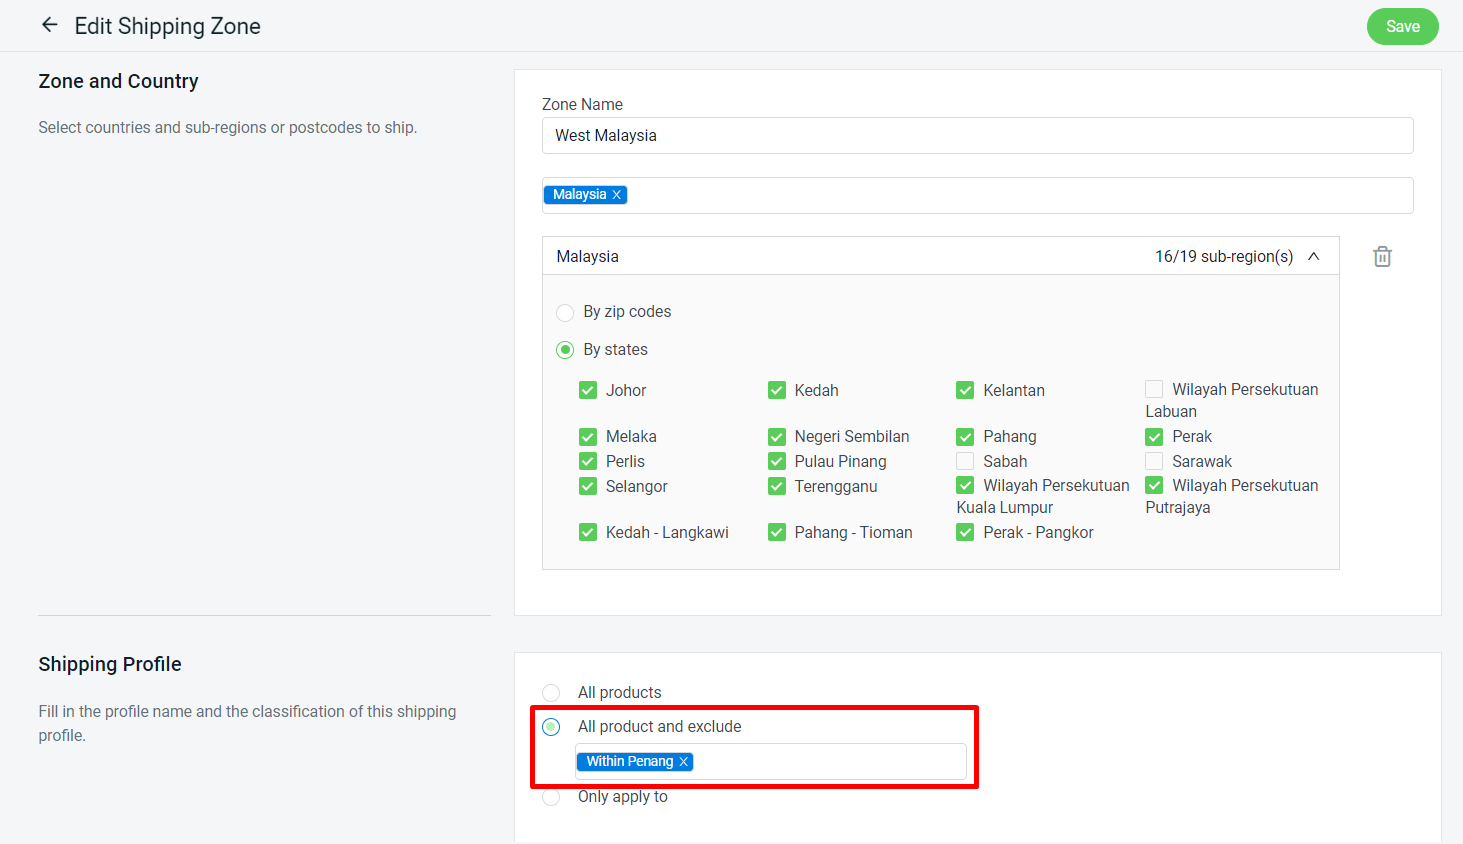
1. All products: The shipping fee will apply to all your products in the webstore listing. 2. All product and exclude: The shipping method will apply to all products except the products added in the selected Shipping Profile.3. Only apply to: The shipping method will only apply to the products added in the selected Shipping Profile.
 3. Only apply to: The shipping method will only apply to the products added in the selected Shipping Profile.

Step 3: Once all the settings are done, click Save.
💡Tips: Learn more about How to Create a Shipping Method.
Step 4: Back to dashboard and Clear Cache to see the changes on your Webstore.
4. Case Study
Scenario 1:
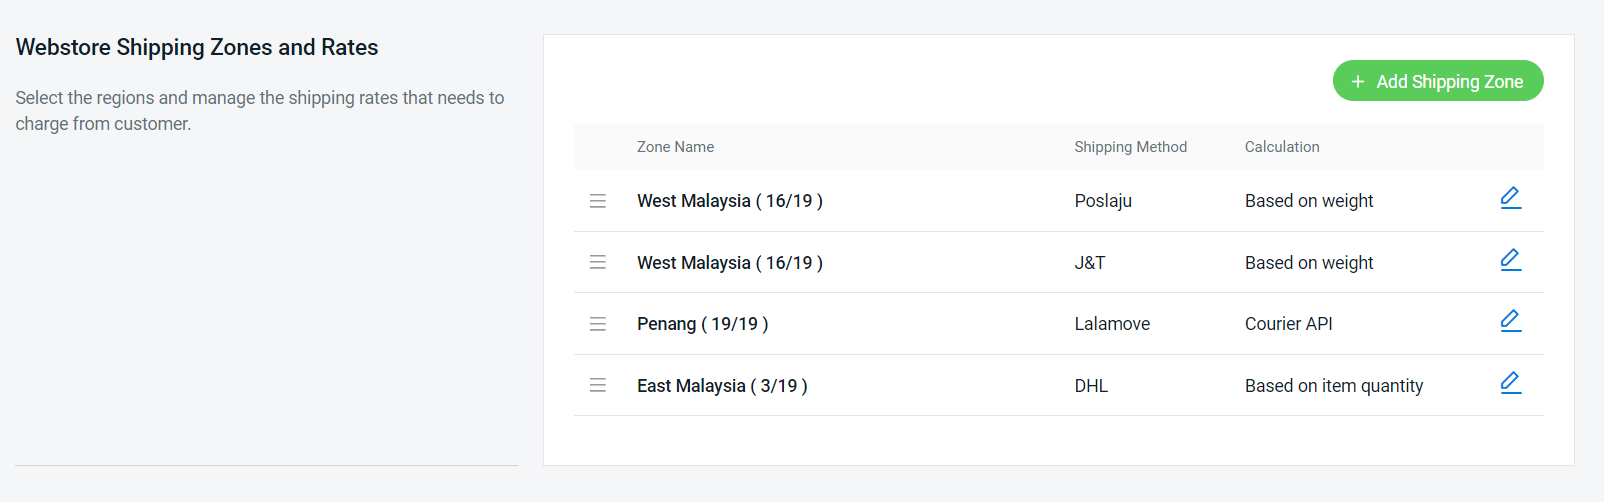
Products that you sell can only be shipped to West Malaysia. You are using Lalamove for Penang only, PosLaju and J&T courier services for West Malaysia, and DHL courier service for shipments to East Malaysia in your shipping settings.

Solution:
Step 1: Set a Shipping Profile for these products.
Step 2: Go to East Malaysia shipping method > under Shipping Profile, set All product and exclude (Only to West Malaysia) > Save.
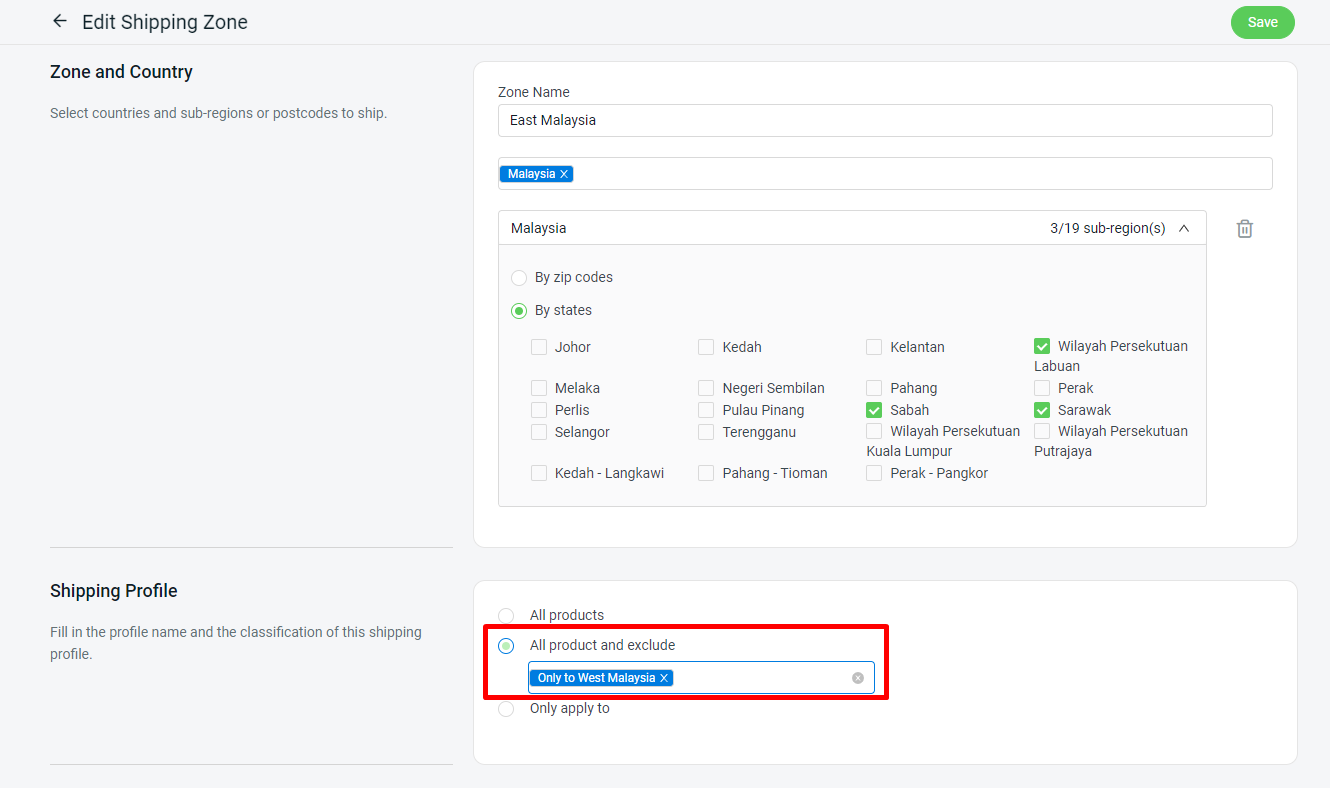
From Customer Perspective:
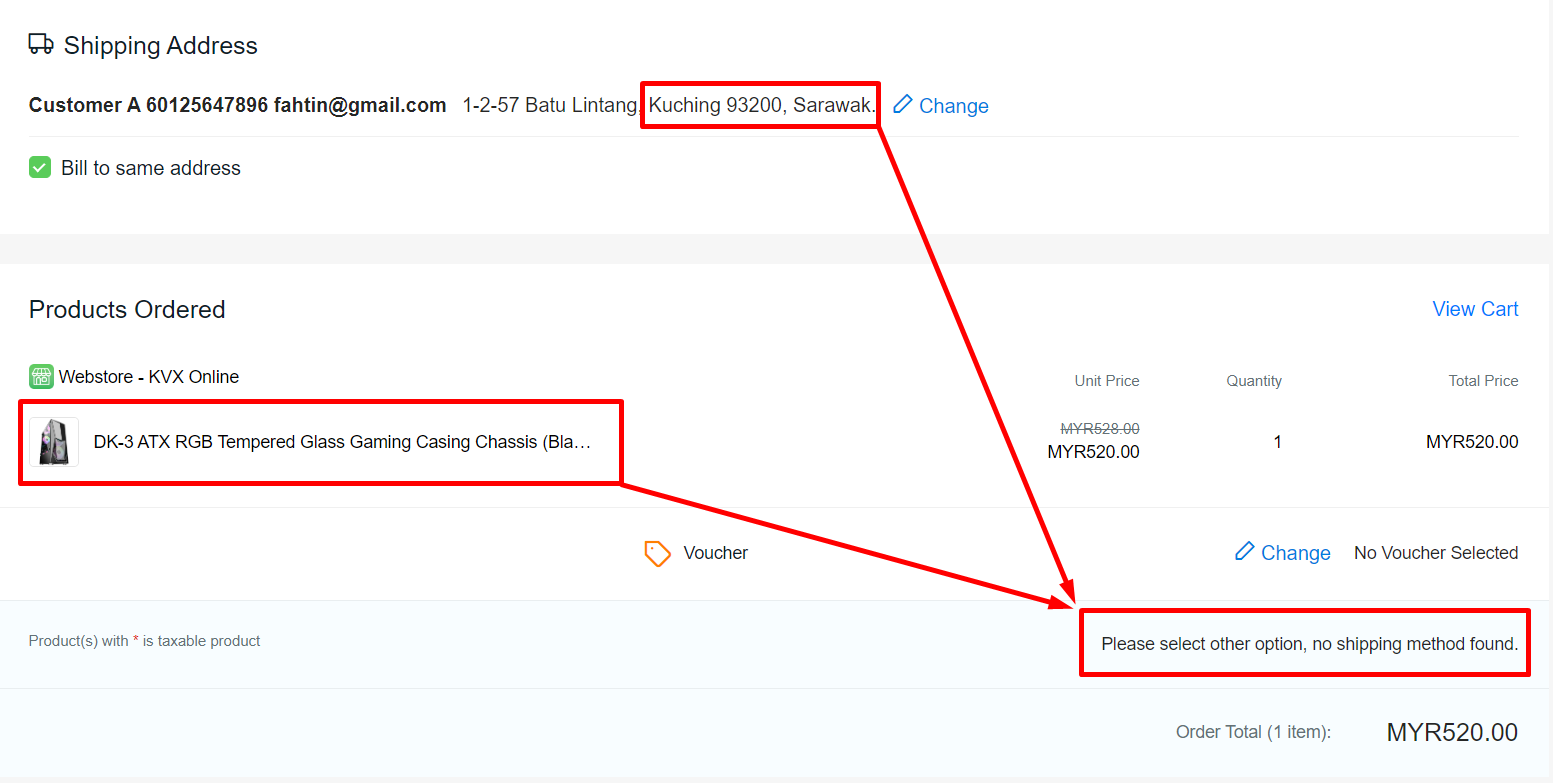
There won’t be a Shipping Method found if the customer checkout with a product that is updated to the Only to West Malaysia shipping profile and their shipping address is in East Malaysia.
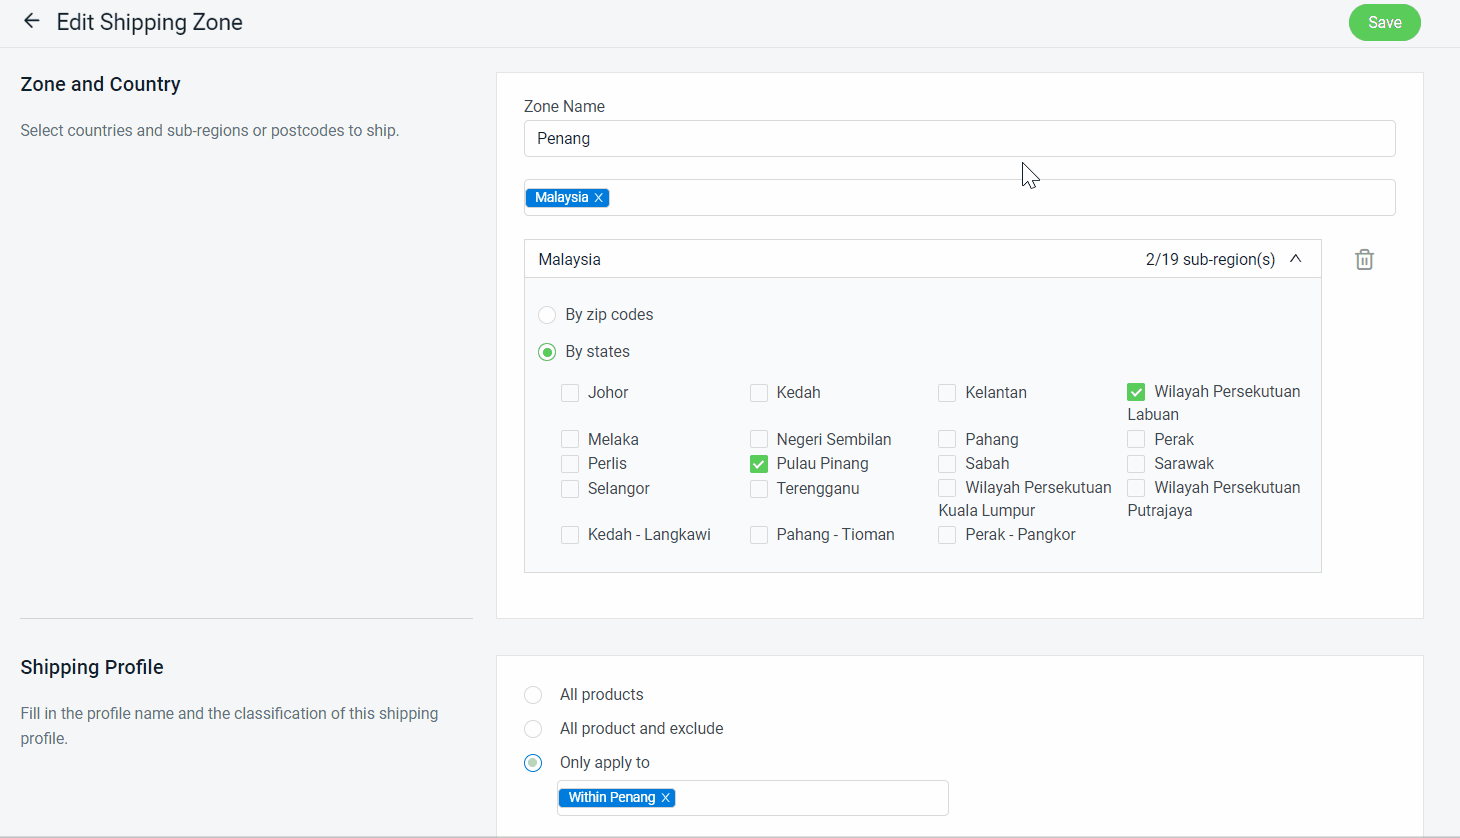
Scenario 2:
You are a vegetable or chilled food seller who only wants to deliver within the state, and the only courier service you want to apply is Lalamove. You are using Lalamove for Penang only, PosLaju and J&T courier services for West Malaysia, and DHL courier service for shipments to East Malaysia in your shipping setting options.
Solution:
Step 1: Set a Shipping Profile for these products.
Step 2: Go to West Malaysia and East Malaysia shipping method > under Shipping Profile, set All product and exclude > Save.
Step 3: Go to Penang shipping method > under Shipping Profile, set Only apply to (Within Penang) > Save.
From Customer Perspective:
Lalamove courier service will apply for the Shipping Method when the customer checkout with products under the Within Penang shipping profile and a Penang shipping address.