
1. Introduction
2. Retrieve Shopify Client ID
3. Set Up Shopify Store Integration
4. Additional Information
1. Introduction
Are you a seller on Shopify looking for a way to manage and expand your e-commerce sales?
We are introducing to you the Shopify Sync tool! It is the perfect tool that you’ll need to conveniently migrate all your Shopify orders, products and inventories into SiteGiant. Plus, quickly list them in other marketplaces such as Shopee, Lazada and TikTok to boost sales.
📌Note: Before the integration, please make sure that you have at least one product listed in your Shopify Store.
2. Retrieve Shopify Client ID
I. Create App
Step 1: Log in to your Shopify Store.
Step 2: Navigate to Settings on the sidebar menu.

Step 3: Go to Apps > Develop apps.

Step 4: Click Build apps in Dev Dashboard.

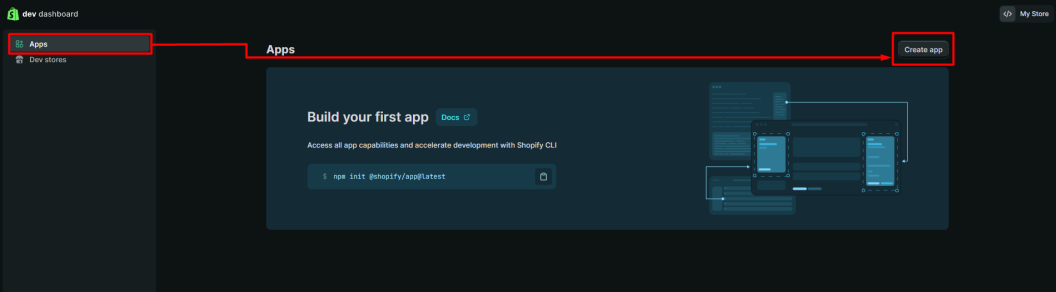
Step 5: Select Apps > Create app.
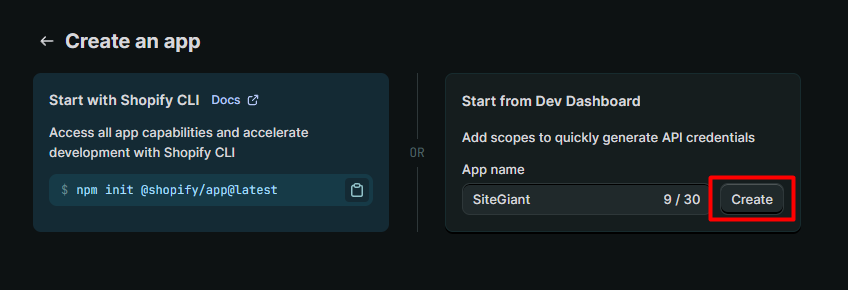
Step 6: Enter the App name > Create.
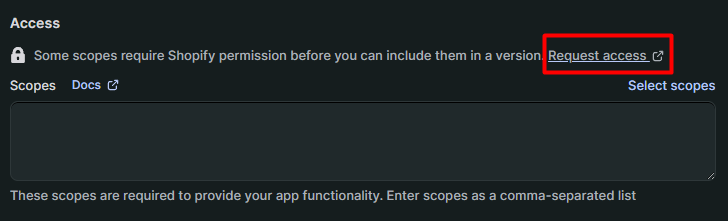
Step 7: Update App URL under the URLs section > untick the Embed app in Shopify admin > update Request access > click Select scopes > Release.
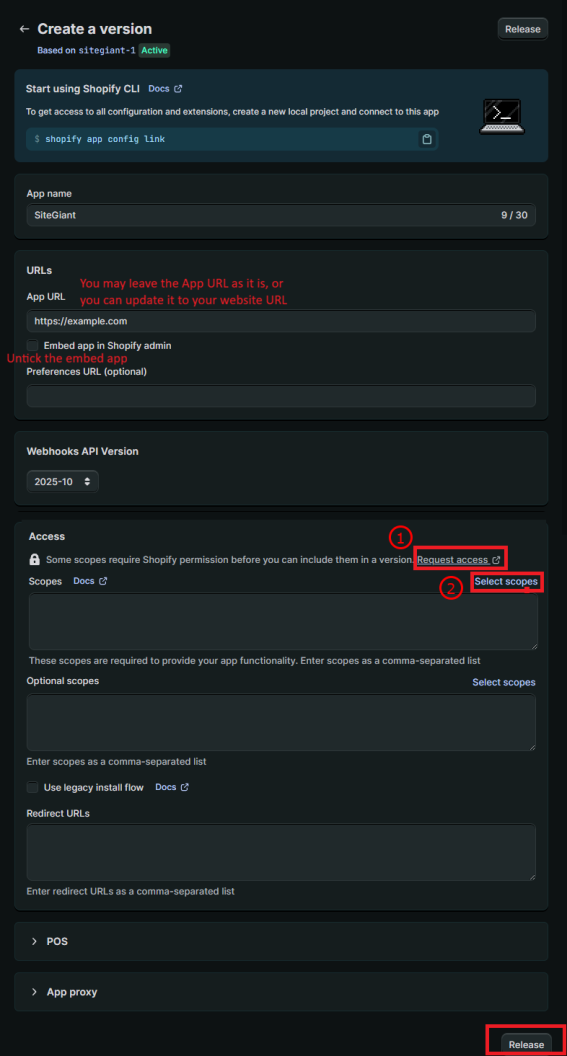
1. Request access: You may skip this step if you do not see the Request Access button. Step 1: Click Request access.Step 2: Go to Api access requests > click Request access under Protected customer data access.
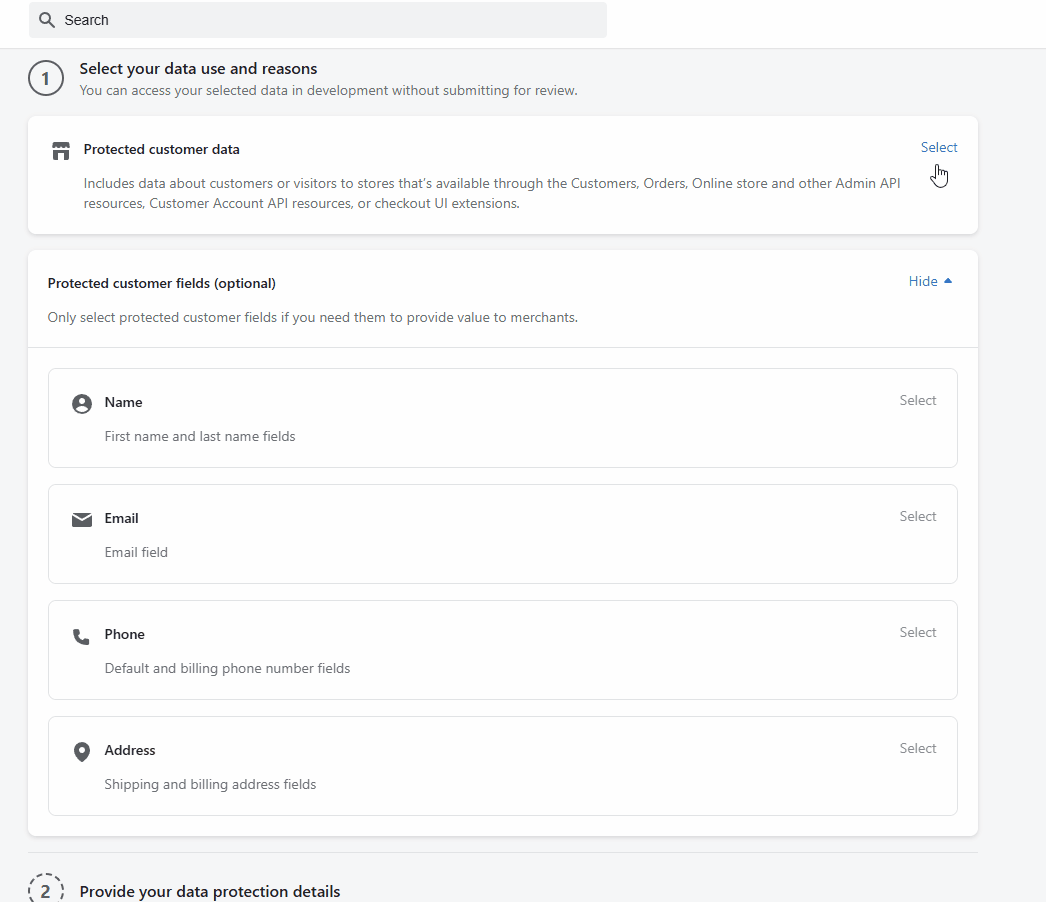
Step 3: Select Protected customer data (Customer service, Store management, App functionality, Analytics, Personalization, Marketing or advertising) > Save > update data protection details (tick all Yes)> Save.
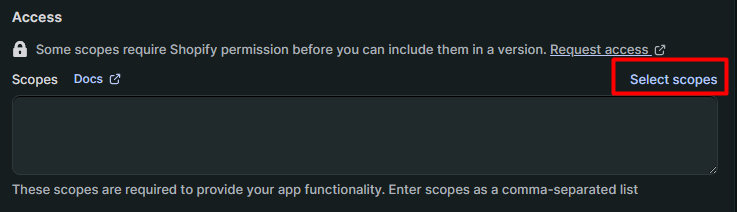
2. Select scopes: Only update the scopes under the Admin Api. Step 1: Click Select scopes.
Step 2: Select Admin API from the dropdown list > tick all scopes under Admin API (scroll down to the last scope) > click Done.
 Step 2: Go to Api access requests > click Request access under Protected customer data access.
 Step 3: Select Protected customer data (Customer service, Store management, App functionality, Analytics, Personalization, Marketing or advertising) > Save > update data protection details (tick all Yes)> Save.
 2. Select scopes: Only update the scopes under the Admin Api.
Step 1: Click Select scopes.
2. Select scopes: Only update the scopes under the Admin Api.
Step 1: Click Select scopes.
 Step 2: Select Admin API from the dropdown list > tick all scopes under Admin API (scroll down to the last scope) > click Done.

Step 8: Click the Release button to proceed.

II. Install App
Step 1: Go to Home > click Install app.
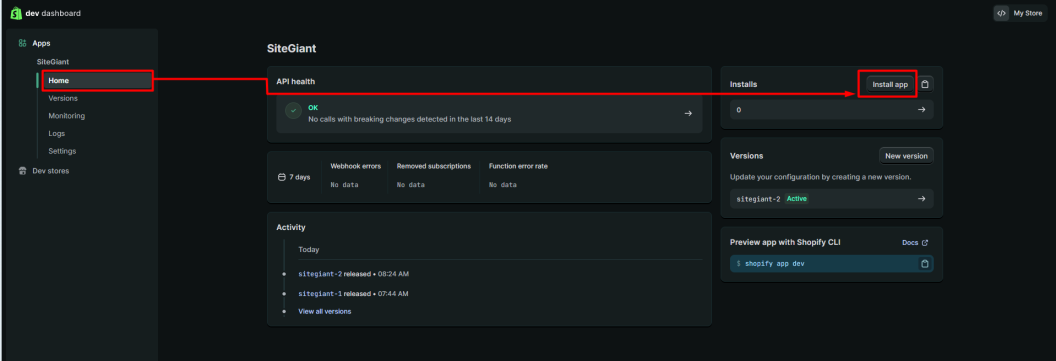
Step 2: Click the Install button.
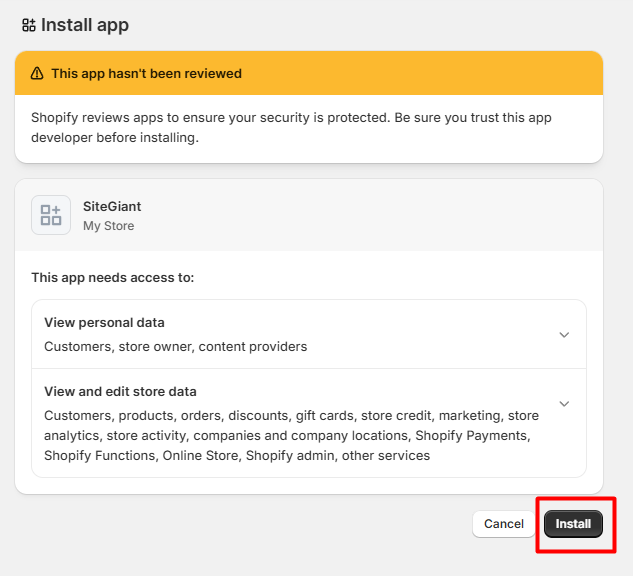
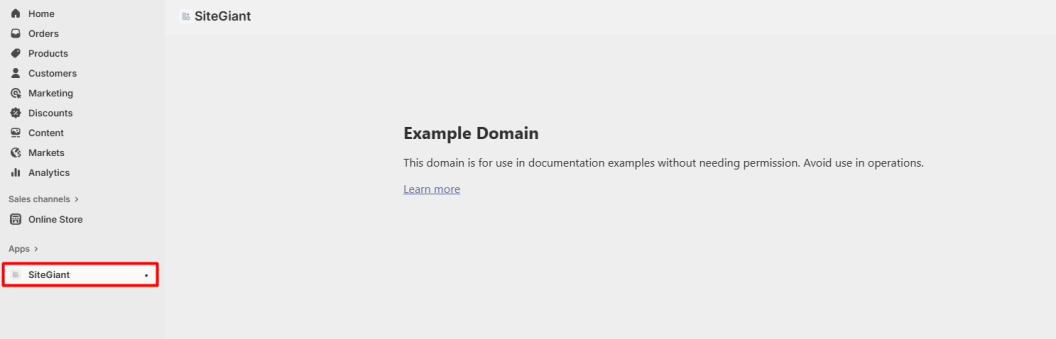
Step 3: Once you reach this page, the app should be successfully installed under Shopify.
III. Shopify Client ID
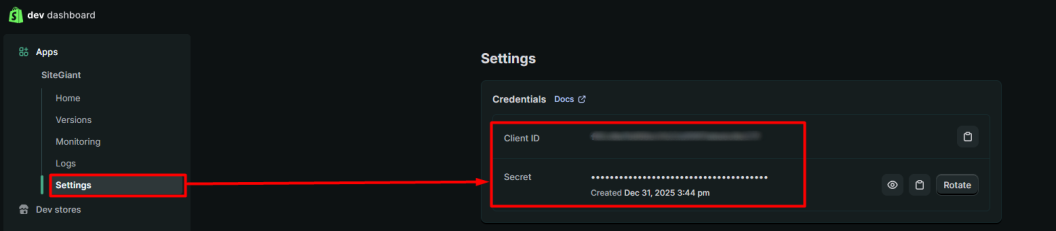
Step 1: Go back to the Dev Dashboard page > under Created Apps, click Settings > copy the Client ID and Secret Key to be used later.
3. Set Up Shopify Store Integration
Step 1: Log in to your SiteGiant Seller Center > add [+] channels > choose Shopify > click Connect To A New Sales Channel.
Step 2: Enter the Channel Name and Shop Name > tick Dev Dashboard > paste the Client ID and Secret Key that were copied earlier > Connect.

You have now successfully integrated your Shopify Store with SiteGiant!
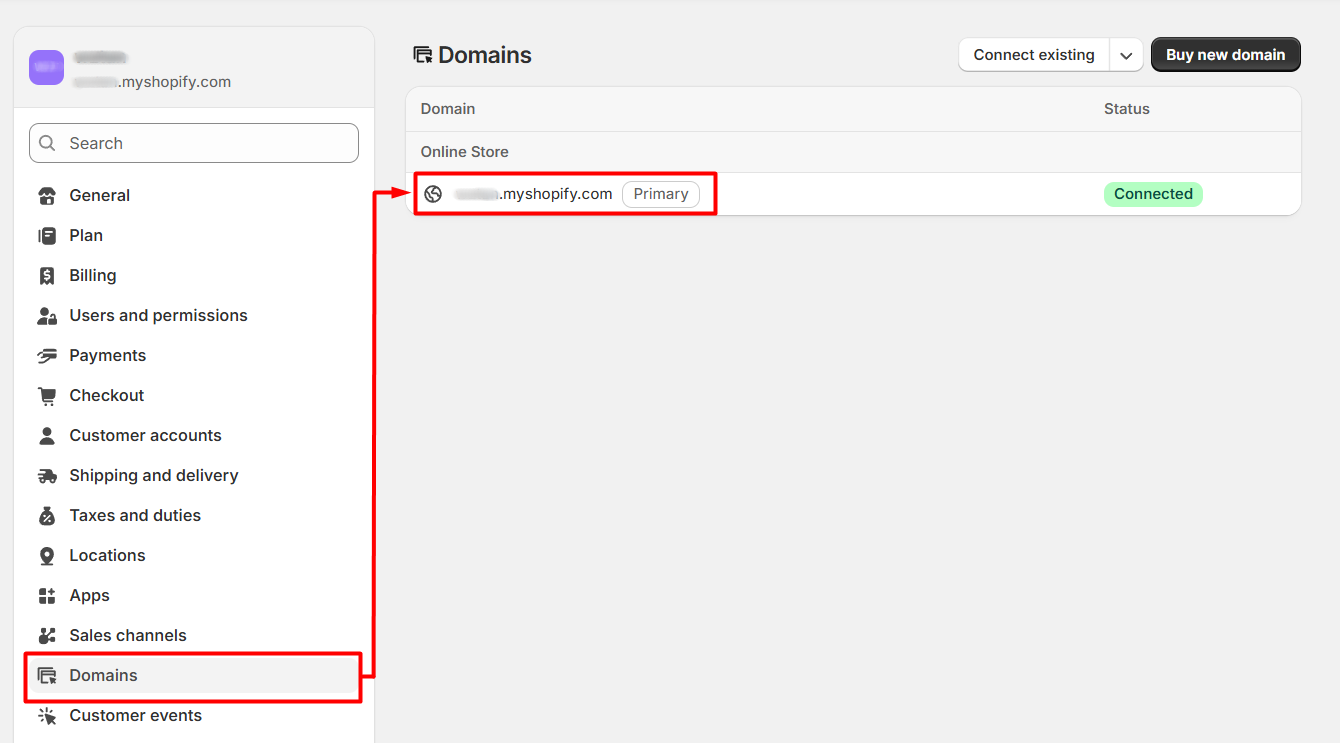
📌Note: 1. You can retrieve the Shop Name in Shopify Store > Settings > Domains > use the domain that starts with yourdomain.myshopify.com.2. If you have multiple domains in Shopify, please copy the Shop Name from the URL (https://admin.shopify.com/store/shopname/settings/domains) and paste it in SiteGiant.
 2. If you have multiple domains in Shopify, please copy the Shop Name from the URL (
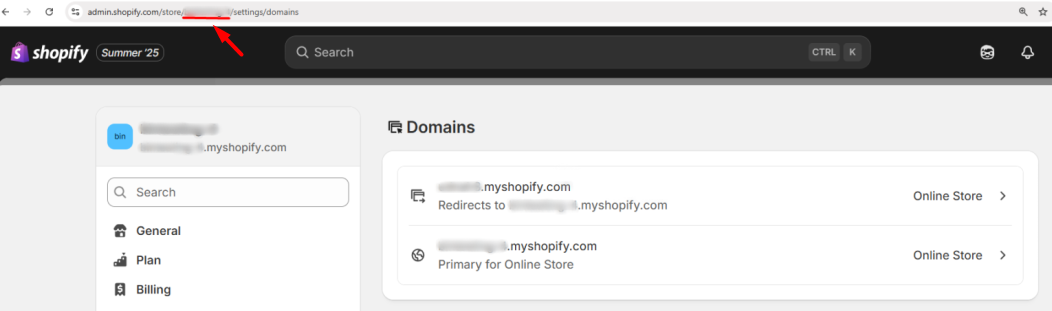
📝Additional Information
1. Sales Channel Settings
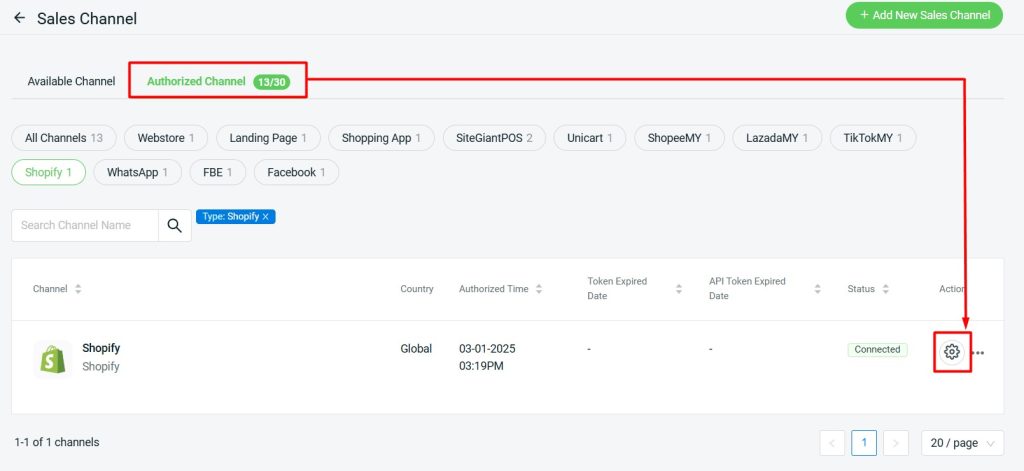
After successfully integrating the Shopify Store, you can click the Settings icon on the Authorized Channel page to make changes > Save.
i) Rename the Channel Name.
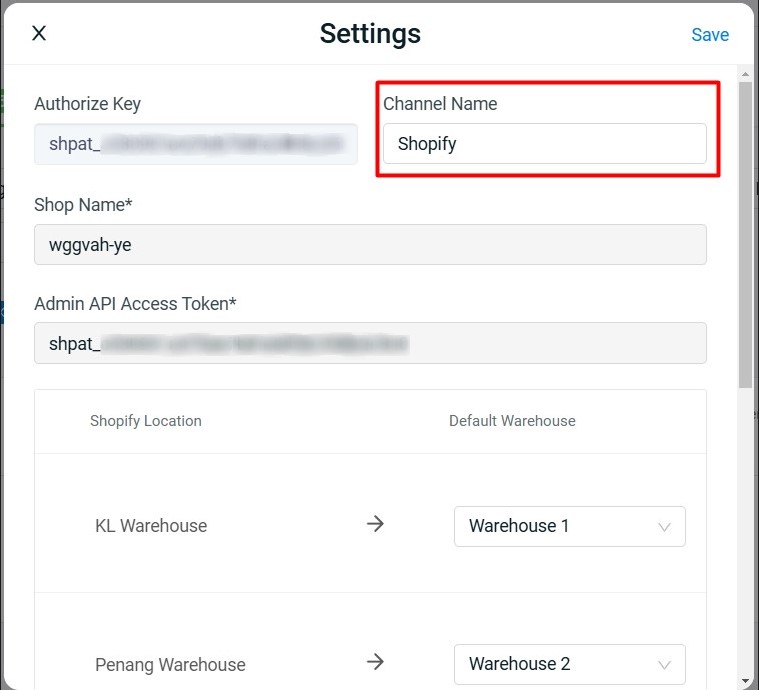
ii) Set the Shopify Location to map with one or multiple Default Warehouses in SiteGiant.

iii) Enable Fulfillment Notification if you wish to notify Shopify customers after orders are fulfilled in SiteGiant.
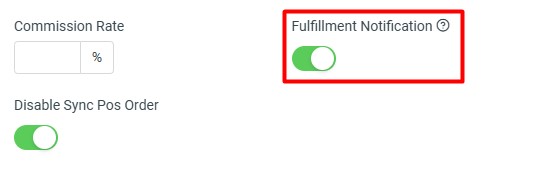
💡Tips: May refer to How To Print Webstore And Others Shipping Label
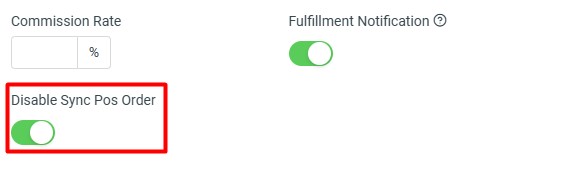
iv) Enable Disable Sync Pos Order if you do not wish your Shopify Pos Order sync back to SiteGiant.
2. Shopify Listing
Your existing products in the Shopify Store will be synced back to Products > Shopify Listing automatically. You may add or edit products, perform Bulk Inventory Linking to centralize the product stock quantities with SiteGiant Inventory or perform Bulk Copy Listing to copy the products to list in other marketplaces.
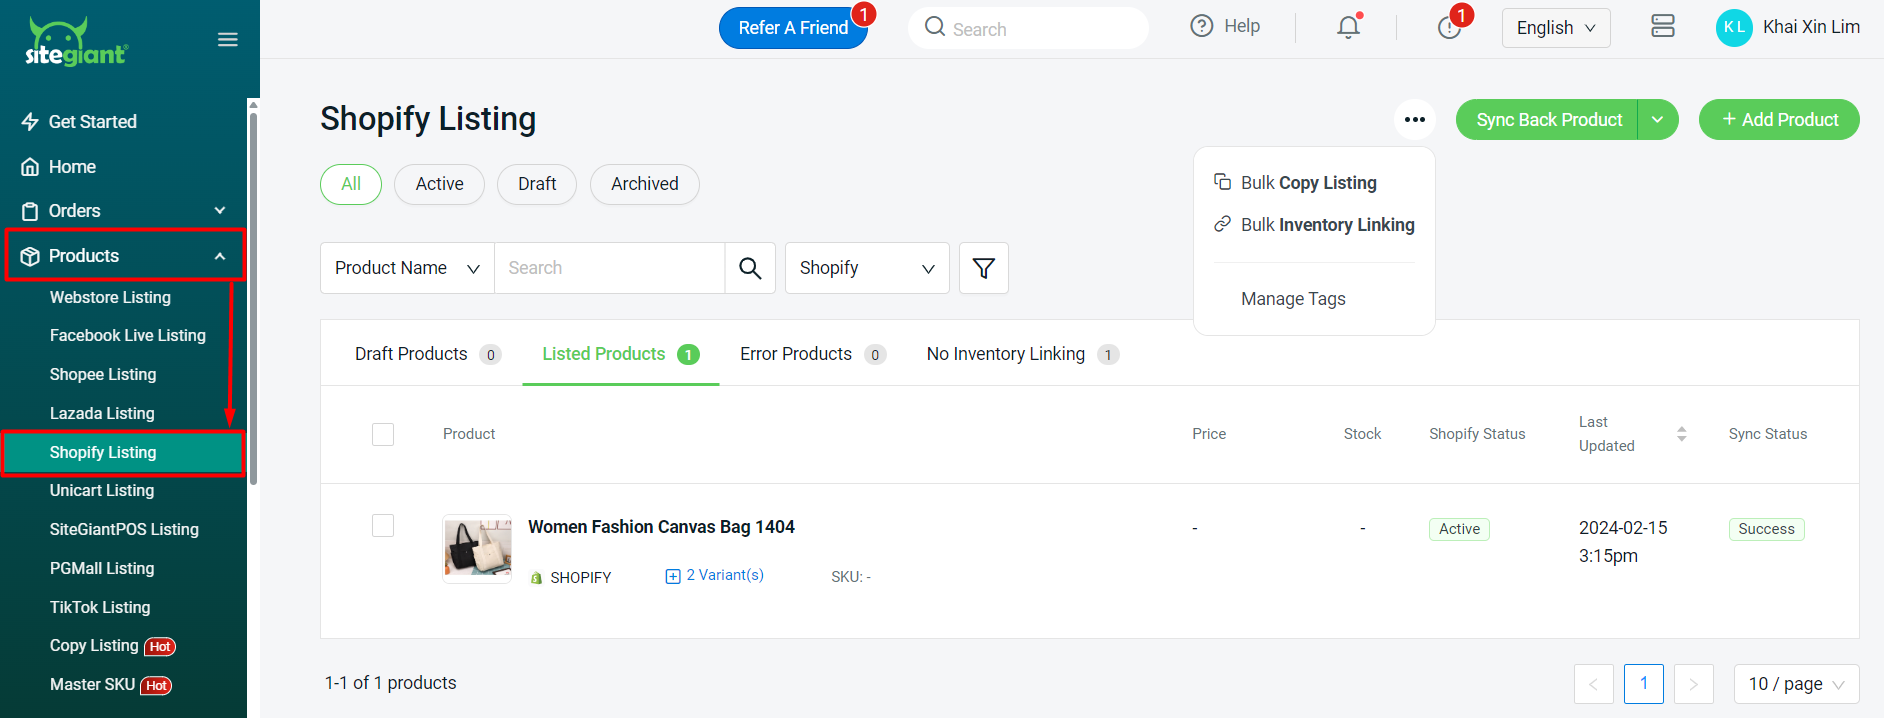
📌Note: If you wish to copy Shopify products to marketplaces such as Lazada, Shopee and TikTok, you will need to copy to Webstore Listing first, then copy again from Webstore to these marketplaces.
