1. Introduction
2. Set Up DHL Express Integration
3. Arrange Shipment With DHL Express
4. Print DHL Express Commercial Invoice, Shipping Label & Waybill Document
1. Introduction
DHL Express empowers businesses to manage both local and international deliveries with speed and reliability. SiteGiant system can now integrate with DHL Express to provide you with the option of arranging DHL Express shipment for your Webstore and others orders.
This can save you from the hassle of manually inputting the shipping details. For shipments that have been arranged successfully, you can print out their respective shipping labels, waybill documents and commercial invoices from SiteGiant as well.
📌Note: Please make sure you already registered an account with DHL Express for integration purposes. If you do not have an account yet, may proceed to register here.

After that, you may login to your DHL Express account and reach out to your DHL Express consultant to request for the necessary credentials needed for the integration.
This feature is available for the Add-On only.
2. Set Up DHL Express Integration
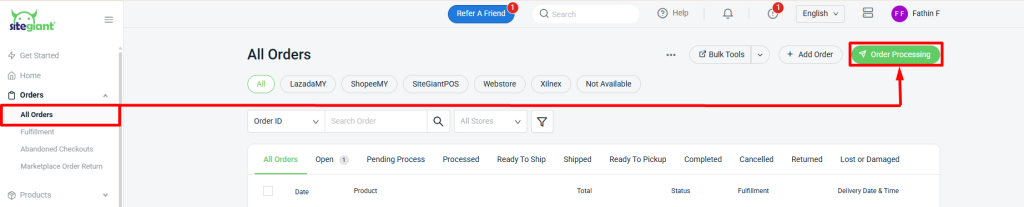
Step 1: Go to Orders > All Orders > click Order Processing.
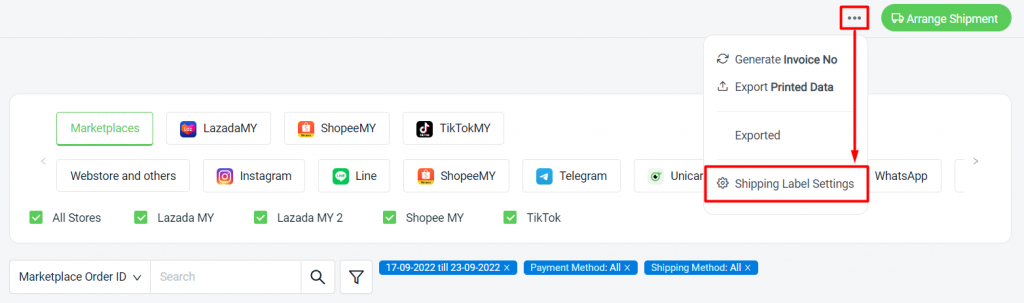
Step 2: Click on More (…) > Shipping Label Settings.
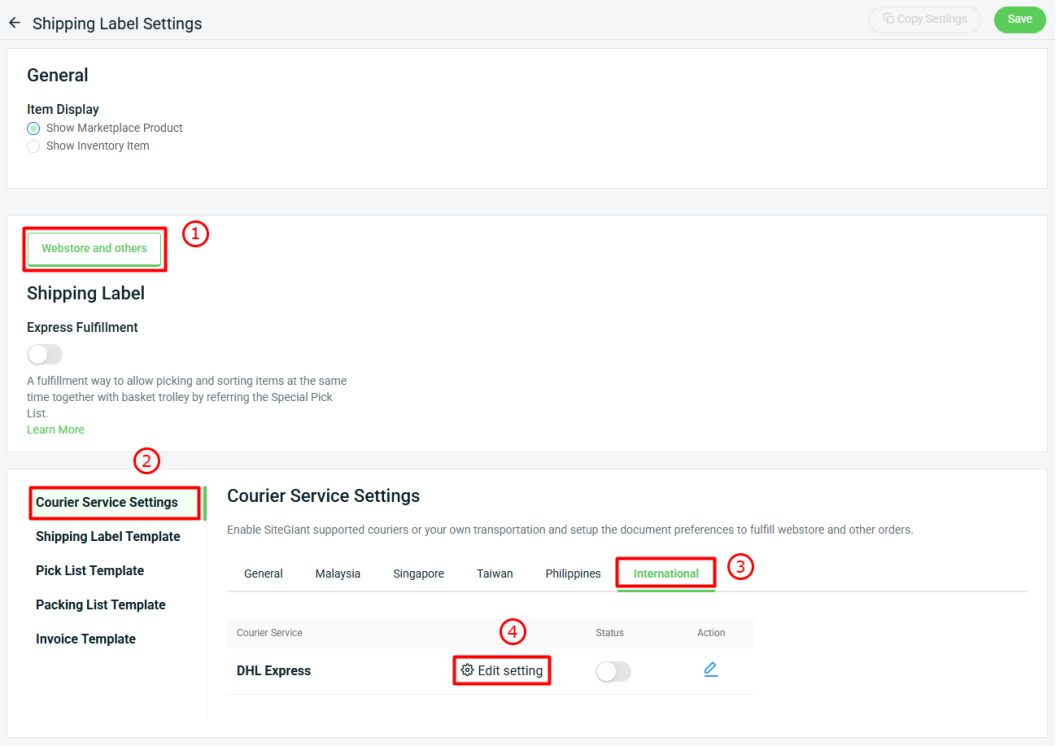
Step 3: Select Webstore and others > Courier Service Settings > International > Edit Setting for DHL Express.
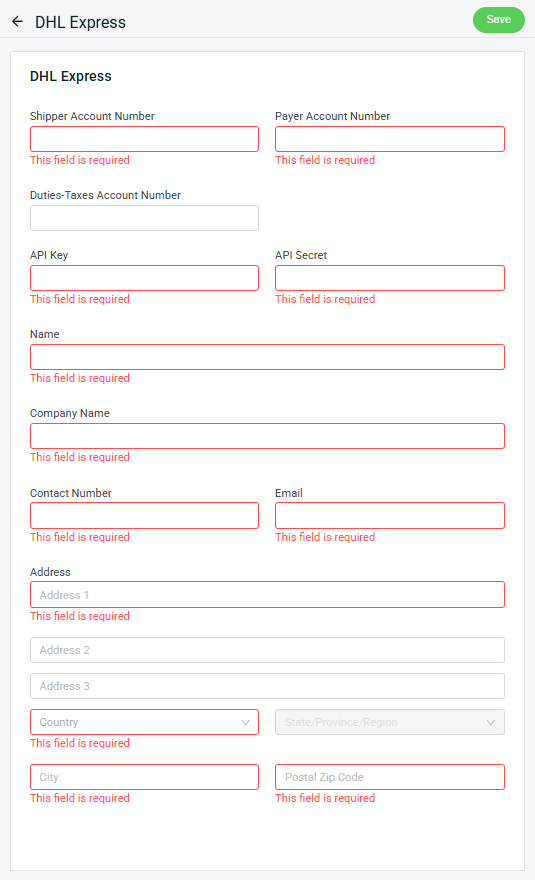
Step 4: Fill in the DHL Express details as shown below.
⚠️Important: Please ensure that the details filled in are valid as per the details maintained in your DHL Express account to avoid getting any API-related errors during shipment arrangement.
DHL Express Basic Information
DHL Express Shipment and Custom Details + Tax Registration
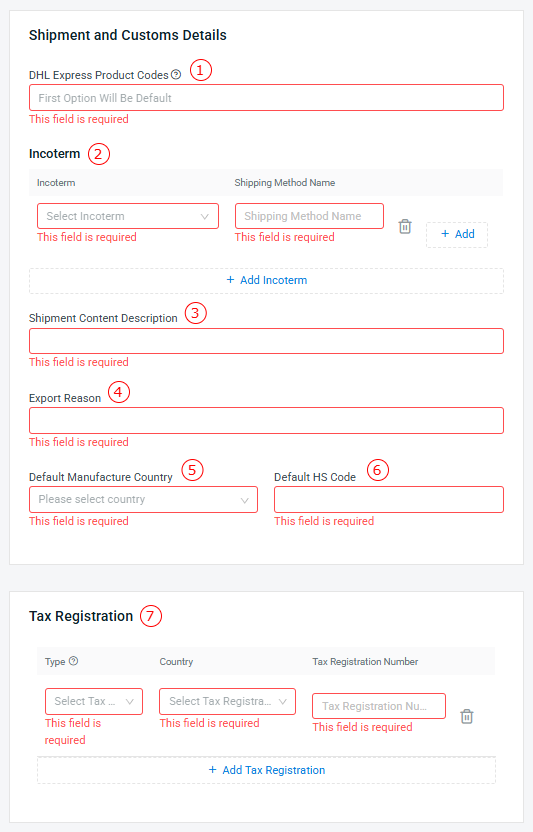
1. DHL Express Product Codes: Select the Product Codes that are relevant for your DHL Express shipment. The selected Product Codes will then be available for your selection during shipment arrangement.2. Incoterm: If Incoterm is required for your DHL Express shipment, you may map the relevant incoterm with its corresponding shipping method. For example, below is my Incoterm settings:
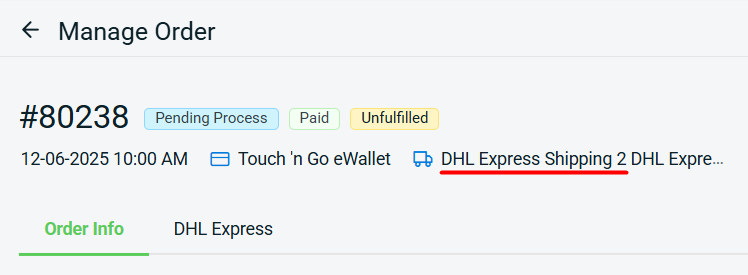
The shipping method name for the order below is DHL Express Shipping 2
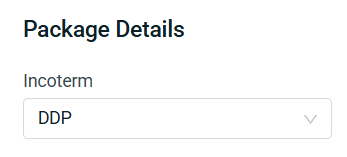
Hence, in the DHL Express tab from order details page, the incoterm from the package details will be pre-selected with the DDP incoterm.
📌Note: If a shipping method is being mapped with multiple incoterms, then only the first mapped incoterm will be pre-selected. 3. Shipment Content Description: Fill in a general description of your shipment content that will be shown in the waybill document. 4. Export Reason: Fill in a general export reason that will be shown in the commercial invoice. 5. Default Manufacture Country: Set a default manufacture country that will be applied to all your products in DHL Express shipment. 6. Default HS Code: Set a default HS Code that will be applied to all your products in DHL Express shipment. 7. Tax Registration: You can maintain the tax profile needed for shipment to different countries here, if necessary.
 2. Incoterm: If Incoterm is required for your DHL Express shipment, you may map the relevant incoterm with its corresponding shipping method.
For example, below is my Incoterm settings:
2. Incoterm: If Incoterm is required for your DHL Express shipment, you may map the relevant incoterm with its corresponding shipping method.
For example, below is my Incoterm settings:
 The shipping method name for the order below is DHL Express Shipping 2
 Hence, in the DHL Express tab from order details page, the incoterm from the package details will be pre-selected with the DDP incoterm.
 📌Note: If a shipping method is being mapped with multiple incoterms, then only the first mapped incoterm will be pre-selected.
3. Shipment Content Description: Fill in a general description of your shipment content that will be shown in the waybill document.
4. Export Reason: Fill in a general export reason that will be shown in the commercial invoice.
5. Default Manufacture Country: Set a default manufacture country that will be applied to all your products in DHL Express shipment.
6. Default HS Code: Set a default HS Code that will be applied to all your products in DHL Express shipment.
7. Tax Registration: You can maintain the tax profile needed for shipment to different countries here, if necessary.
📌Note: If a shipping method is being mapped with multiple incoterms, then only the first mapped incoterm will be pre-selected.
3. Shipment Content Description: Fill in a general description of your shipment content that will be shown in the waybill document.
4. Export Reason: Fill in a general export reason that will be shown in the commercial invoice.
5. Default Manufacture Country: Set a default manufacture country that will be applied to all your products in DHL Express shipment.
6. Default HS Code: Set a default HS Code that will be applied to all your products in DHL Express shipment.
7. Tax Registration: You can maintain the tax profile needed for shipment to different countries here, if necessary.Step 5: Click Save after finish filling in all required fields.
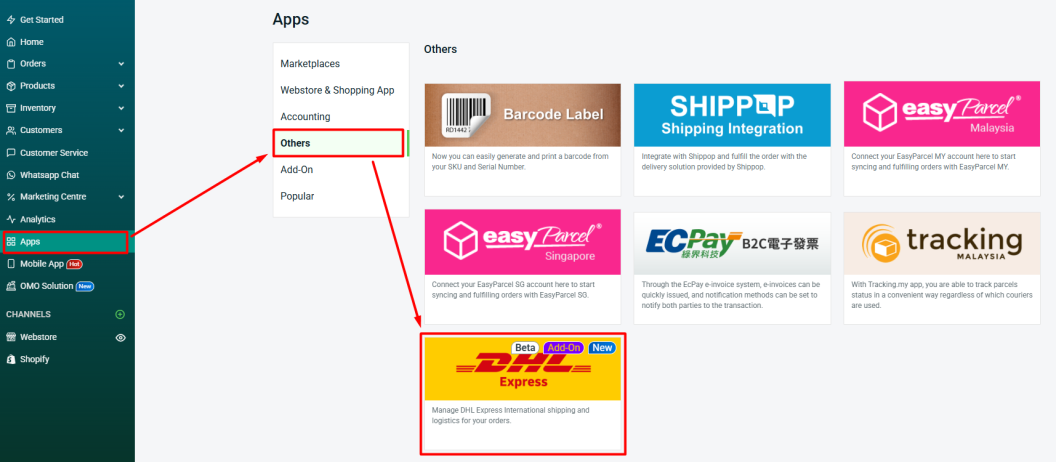
📌Note: This DHL Express Settings page can also be accessed from Apps > Others > DHL Express.
Step 6: Return back to the Shipping Label Settings page, click the Edit icon of DHL Express > go through the DHL Express Shipping Options > Apply .
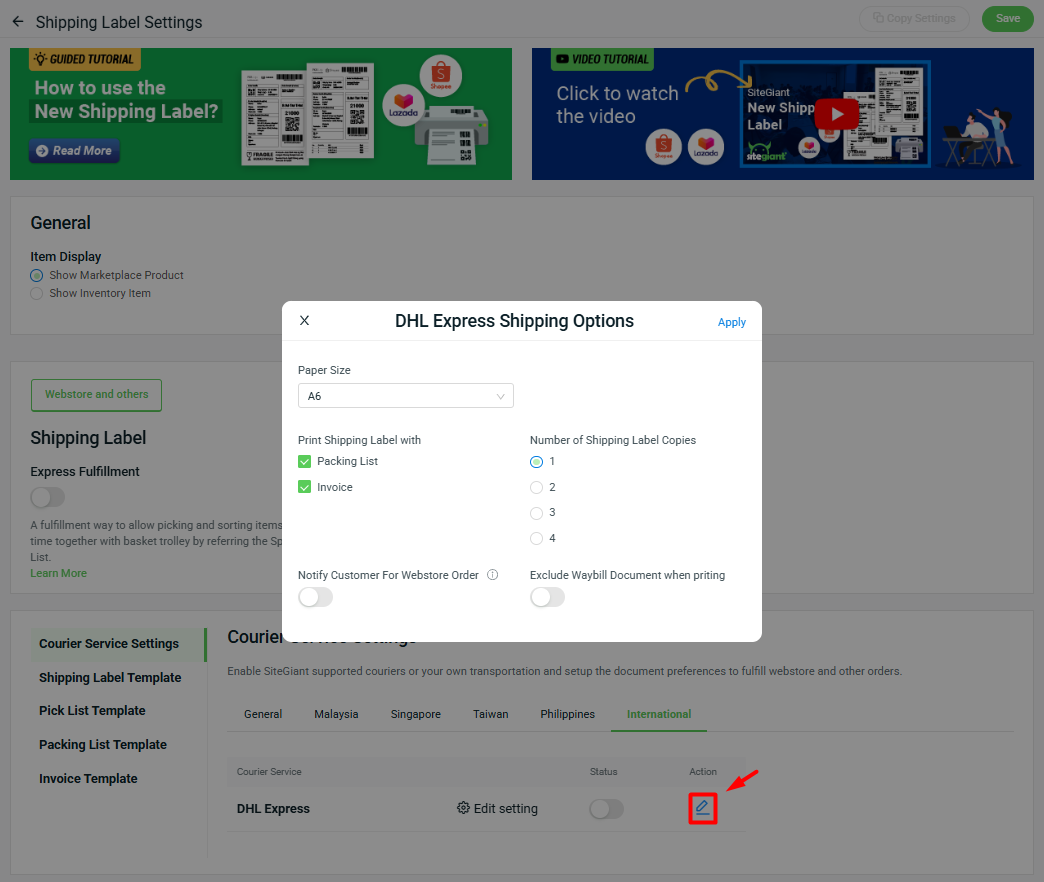
Step 7: Once done, click on the Save button on the top right. You are now successfully integrated DHL Express with SiteGiant!
3. Arrange Shipment With DHL Express
Step 1: Go to Orders > All Orders > click Order Processing.
Step 2: Select Webstore and others > Pending section.
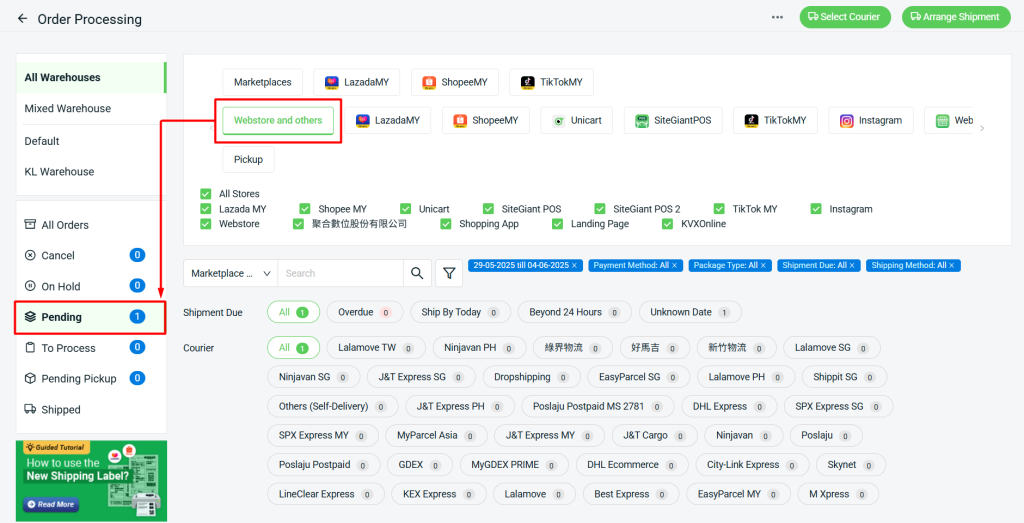
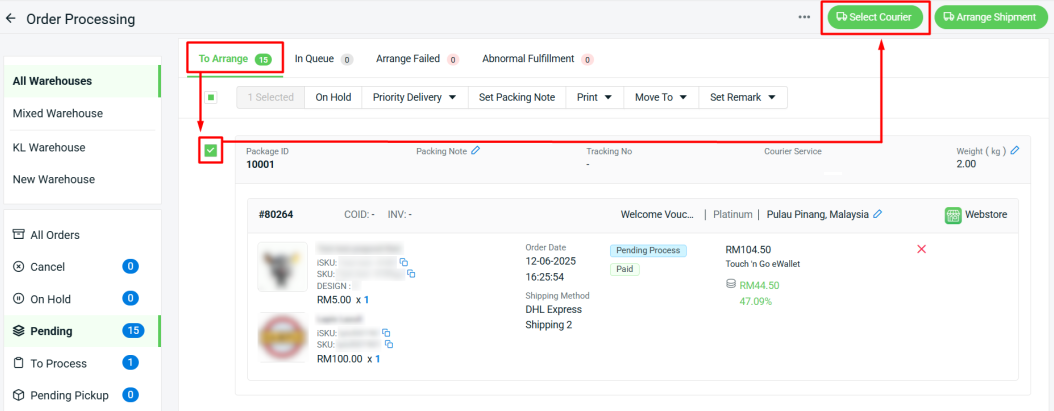
Step 3: Go to To Arrange tab > select the order(s) > Select Courier.
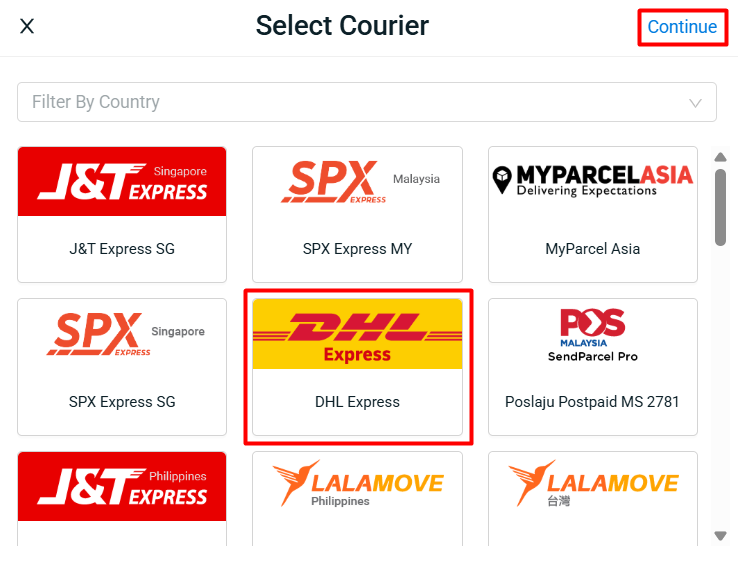
Step 4: Select DHL Express courier > click Continue.
Step 5: Prior to shipment arrangement, you can go to your order details page > click DHL Express tab > go through and modify the details that will be used for shipment arrangement. (Optional)
⚠️Important: The following details can only be modified while the fulfillment status of the package is still at Open status.
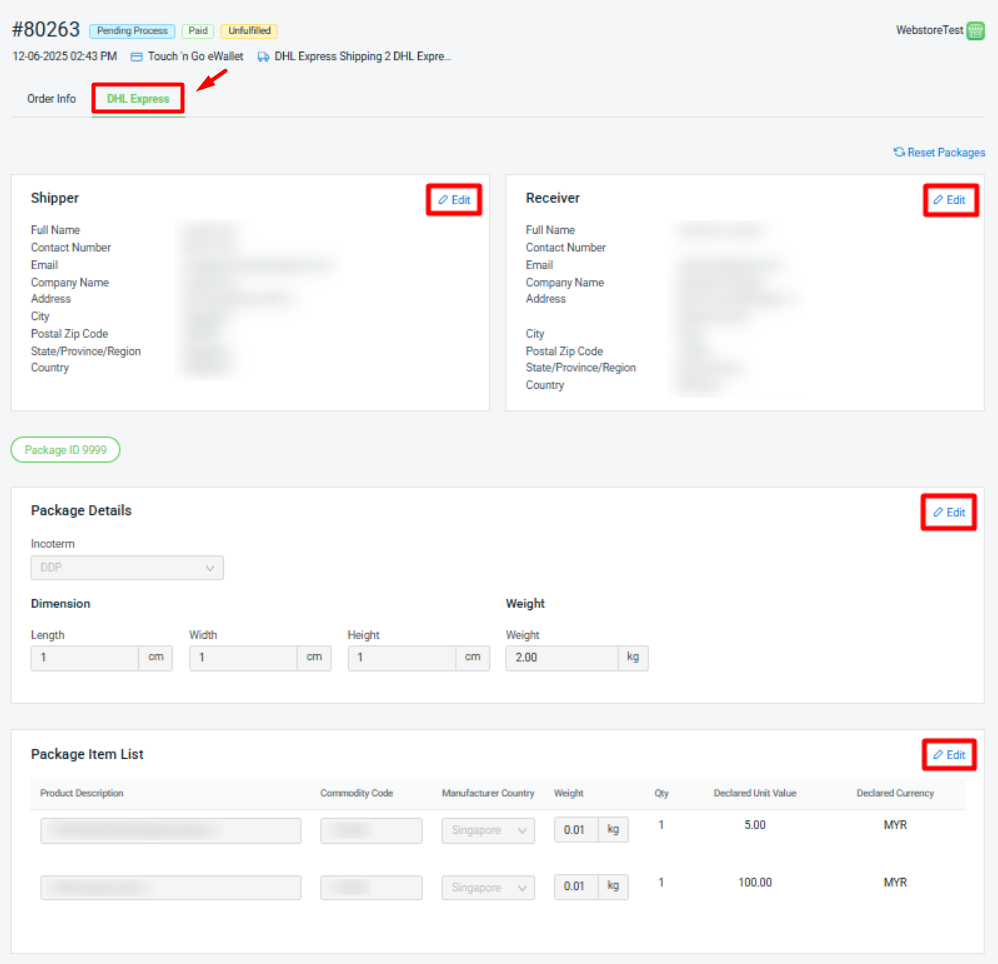
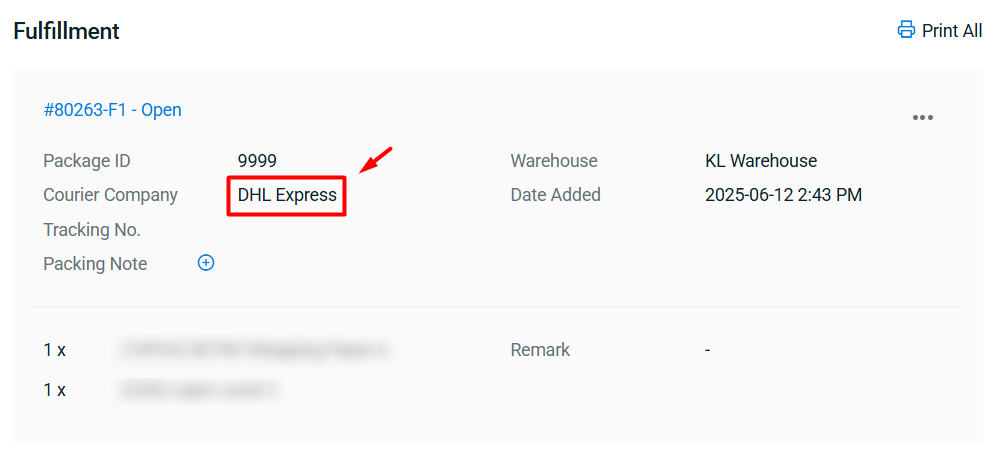
📌Note: The DHL Express tab from order details page will only be available when the courier company of your order package is set as DHL Express.
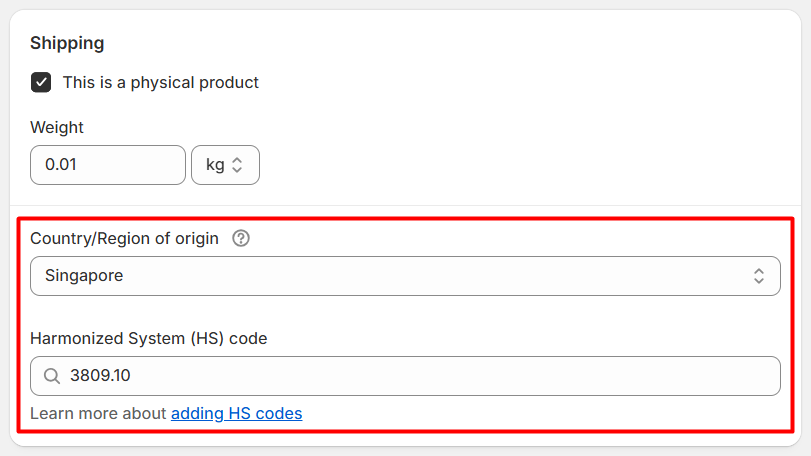
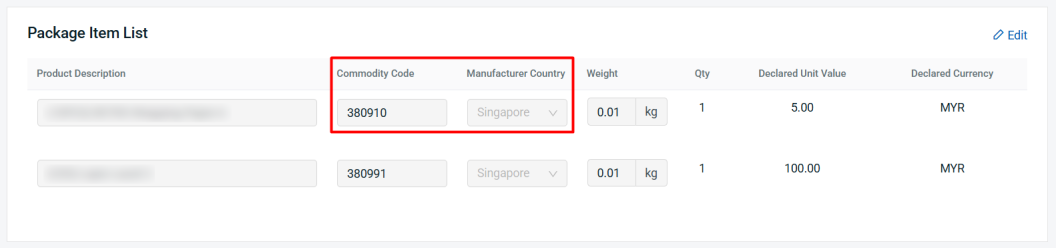
💡Tips: If your SiteGiant ERP is integrated with Shopify, then you may maintain the Country/Region of origin and HS code of your Shopify products from their edit product page.
By doing so, both info can be mapped to the Commodity Code and Manufacturing Country fields from the Package Item List section when your Shopify orders are synced back to SiteGiant ERP.
Step 6: Select the order(s) again > click on the Arrange Shipment button.
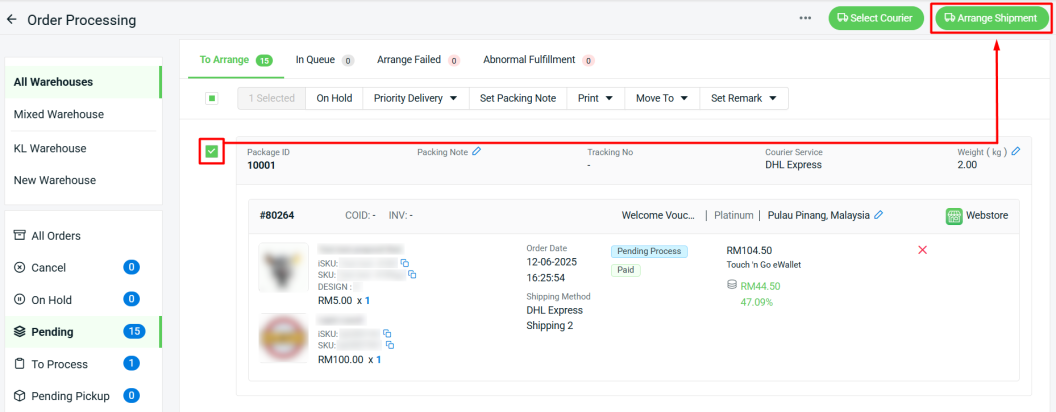
📌Note: Only order(s) with the same courier can be arranged for shipment together.
Step 7: Go through the Arrange Shipment options > click Continue.
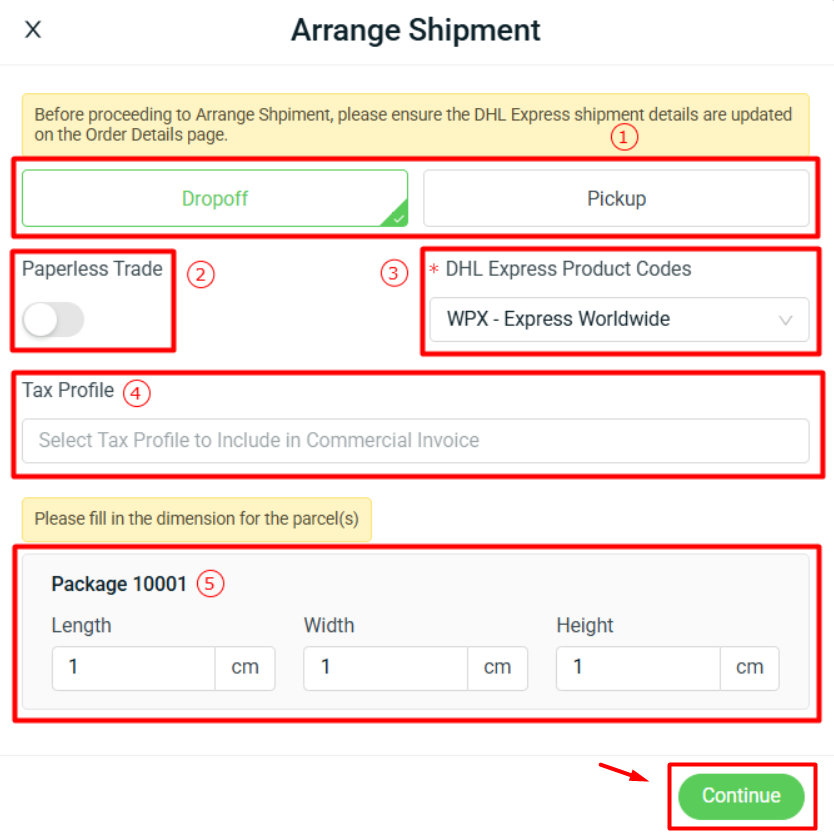
1. Arrange Shipment Option - Choose between Dropoff or Pickup method. Pick Up Date will be required for Pickup method.

2. Paperless Trade - Turn on to enable paperless trade, whereby custom required documentations can be submitted digitally.

3. DHL Express Product Codes - Select the right product code for your DHL Express shipment.

4. Tax Profile - You may select for the tax profile that you have maintained in your DHL Express Settings page, if needed.

5. Package Dimension - Fill in the correct package dimension for your DHL Express shipment.
Step 8: The order will be in the In Queue tab and will move to To Process once it is arranged successfully.
4. Print DHL Express Commercial Invoice, Shipping Label & Waybill Document
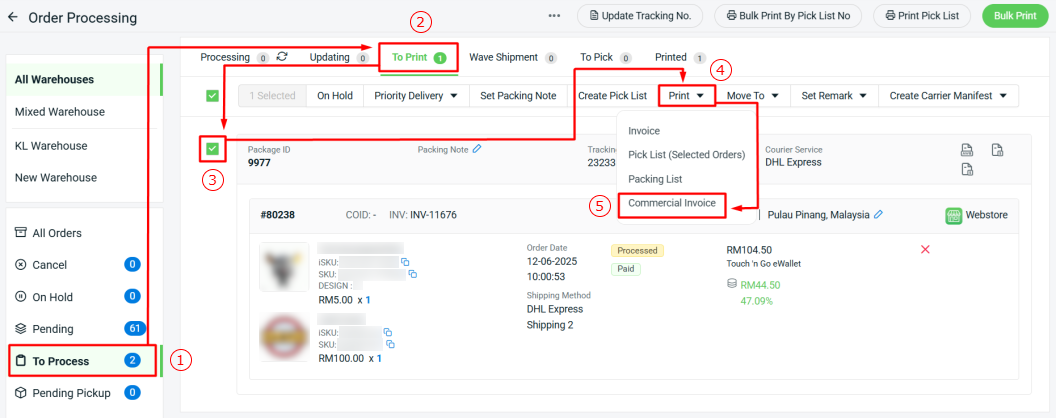
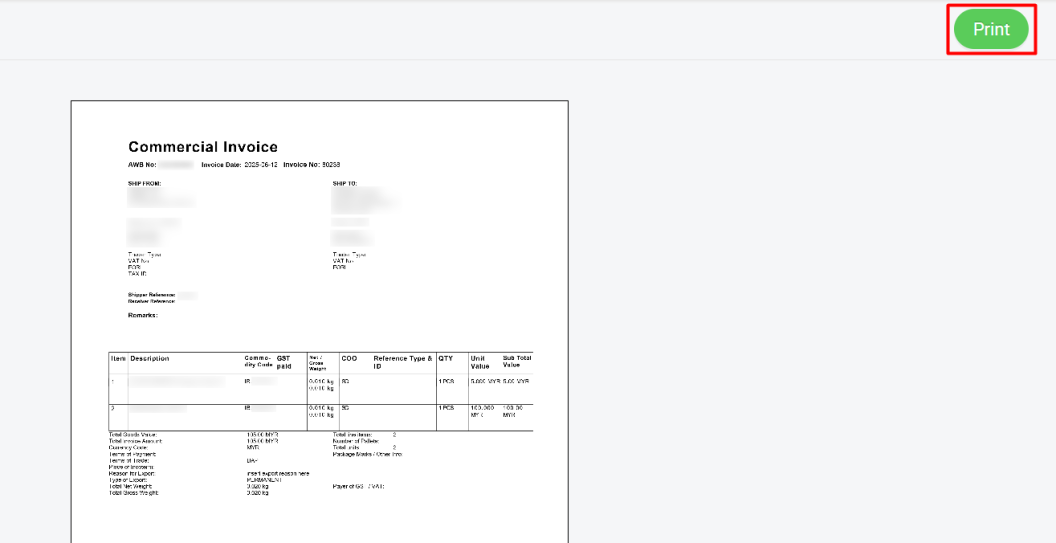
Step 1: Go to To Process section > To Print tab > select the order(s) > Print > Commercial Invoice.
Step 2: Click Print button from the preview page to print out the commercial invoice.
Step 3: Go back to the To Process section > To Print tab > select back the order(s) > Bulk Print.
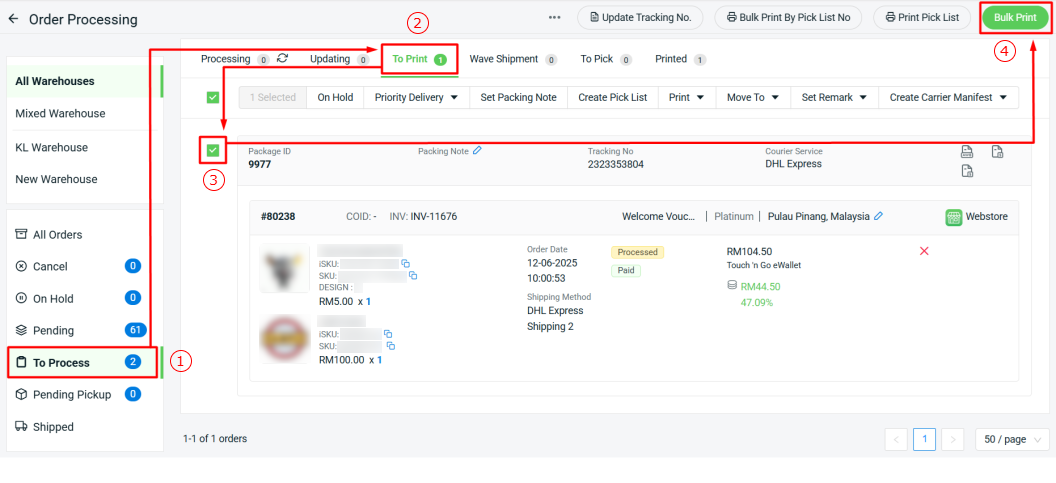
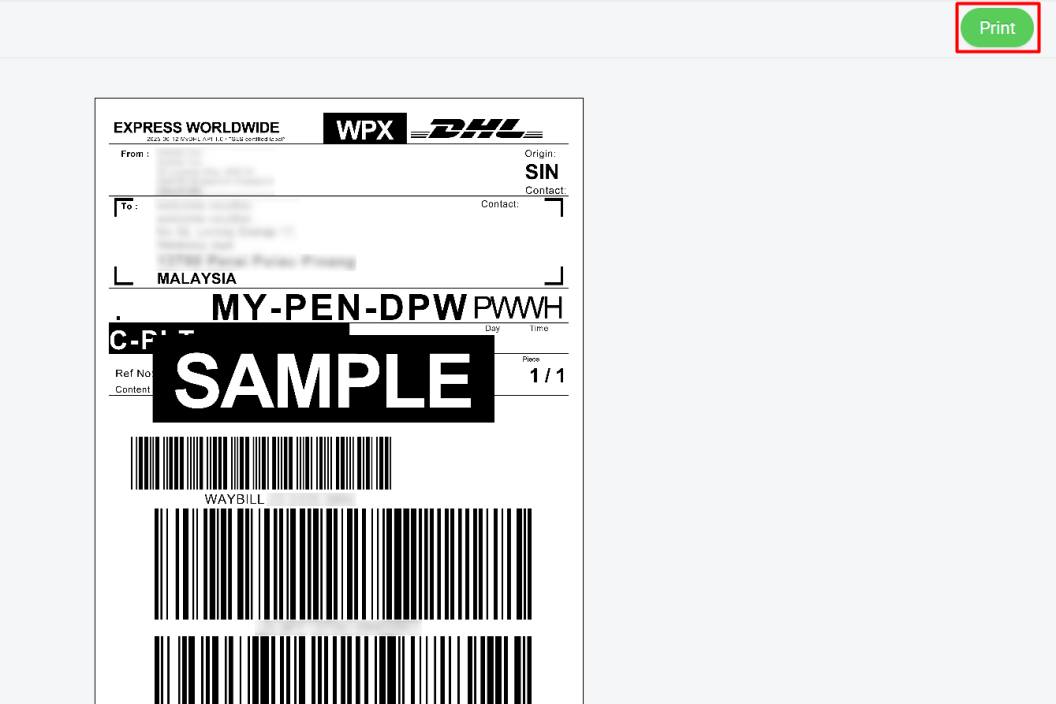
Step 4: Click Print button from the preview page to print out the shipping label and waybill document.
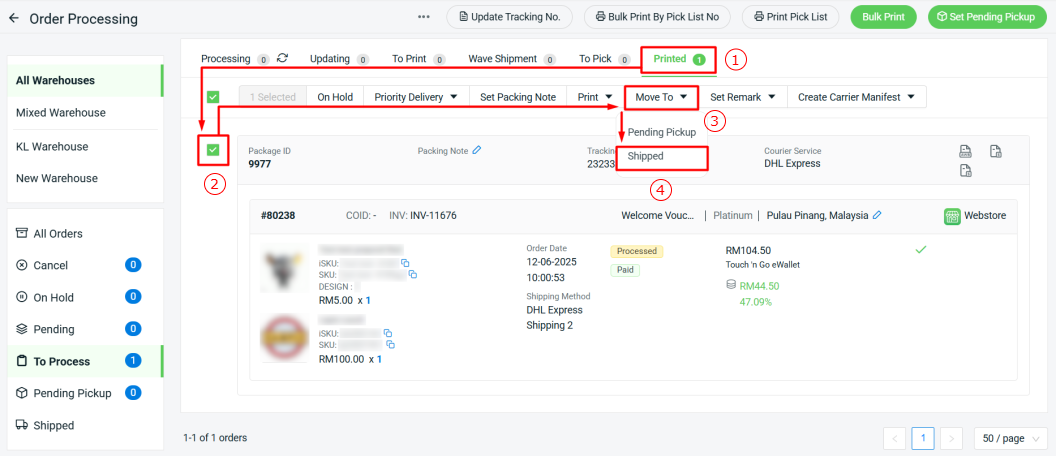
Step 5: The printed order(s) will move to Printed tab. Once the parcel has been shipped, you may move the order(s) to Shipped.