
1. Introduction
2. Customize Email Templates
1. Introduction
Email is an essential part of any business to communicate and notify customers. Instead of sending out the system-preset email content to your customer, you can have your own customized content for the notification email.
2. Customize Email Templates
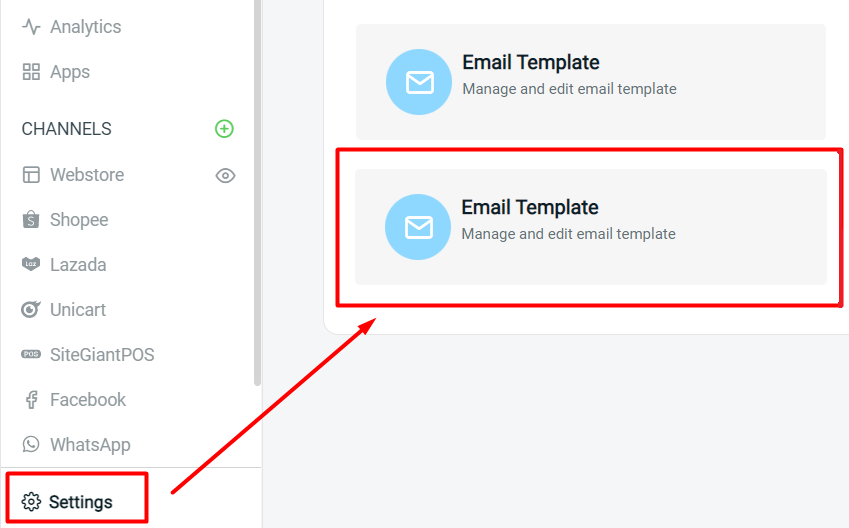
Step 1: Go to Settings > Email Template.
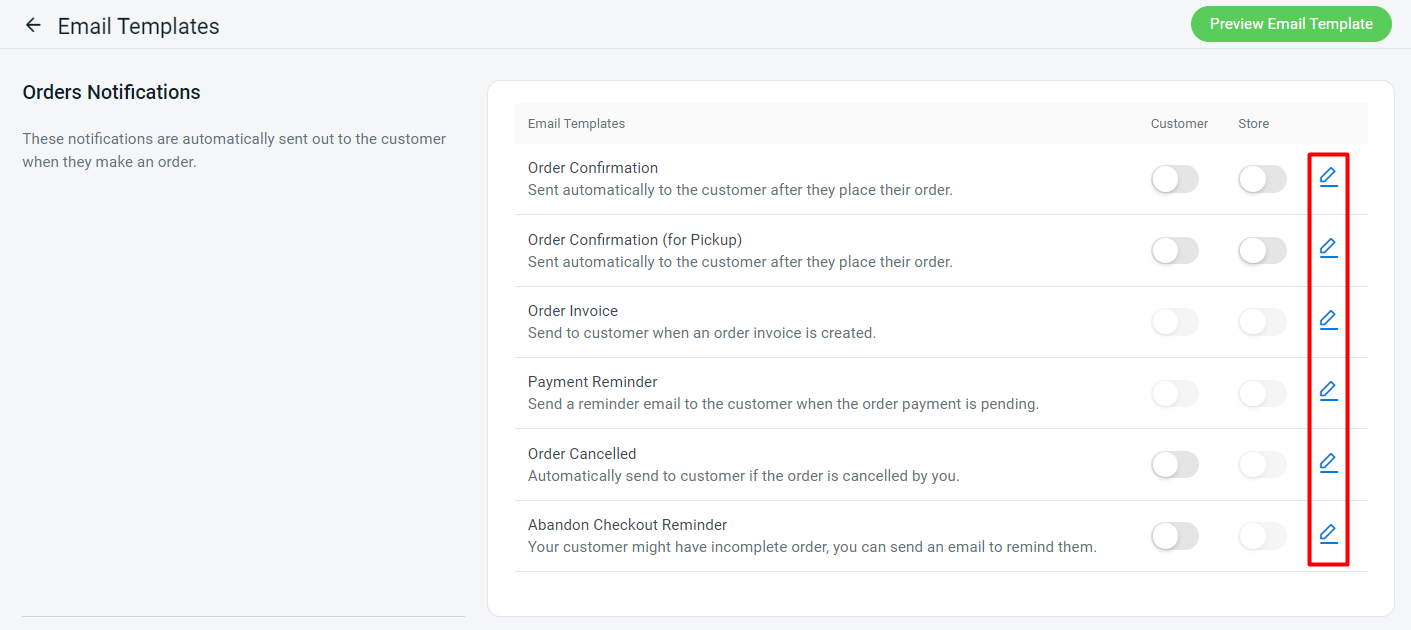
Step 2: Click on the Edit icon to change the template.
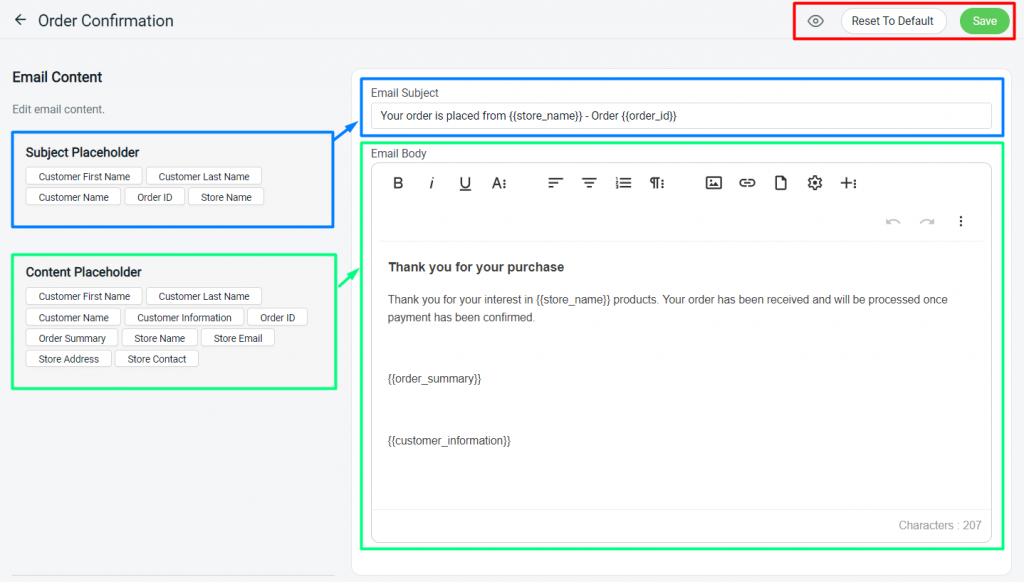
Step 3: Edit the email subject and email body with Placeholders which will insert the information based on the details > you can choose to Preview /Reset To Default /Save the changes.
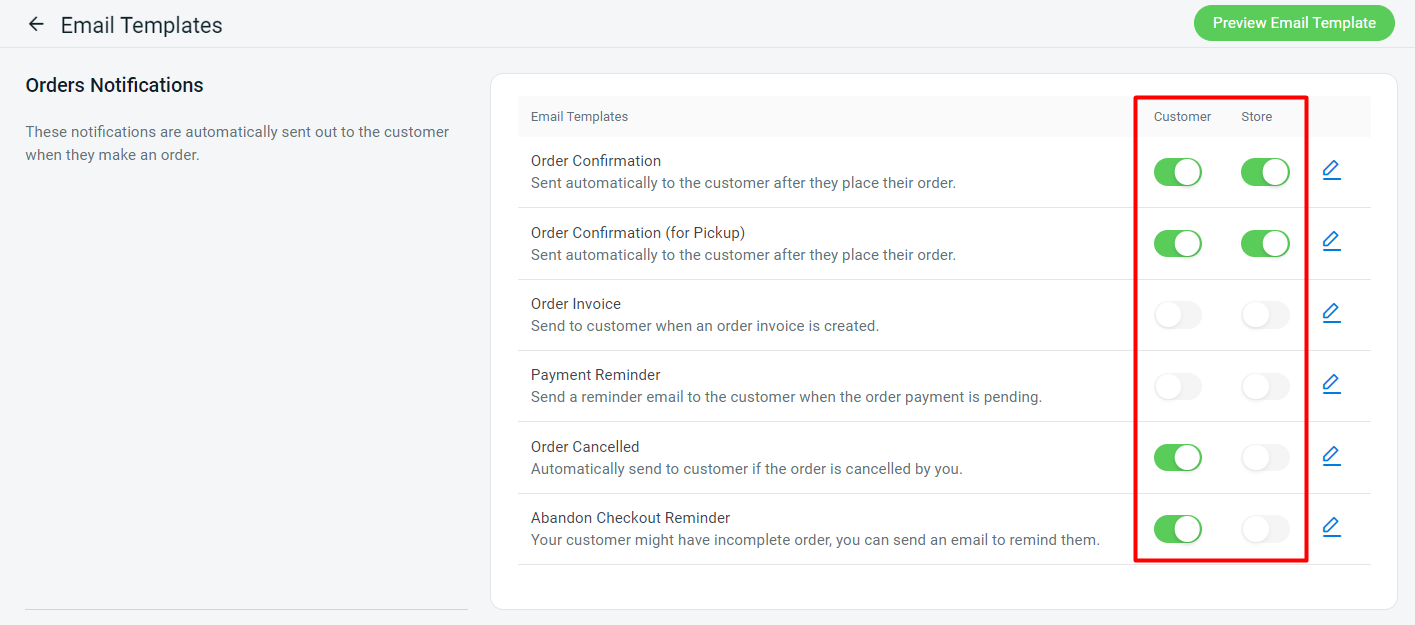
Step 4: Enable the status, allowing you to send a customized email template to customers when they trigger the events. The store owner will also receive a notification at the same time.
📌Note: Some notifications are not enabled by default.