1. Introduction
2. Add Kit
3. Bulk Create Kit
1. Introduction
An Inventory Kit allows you to group several individual items together and manage them as a single product for sales, stock deduction, and fulfillment. For example, A “Gift Box” kit contains 1 Teddy Bear + 1 Mug + 1 Greeting Card. When sold, stock for all three items is deducted accordingly.
⚠️Important Note:
You must have individual inventory items before creating a kit. If you have not created the inventory items, refer to How to Create Inventory Item. You can also perform Bulk Inventory Linking to add inventory items from the marketplaces.

📌Note: Each individual inventory item can be associated with up to 500 product SKUs, Webstore listings are excluded from this limit.
2. Add Kit
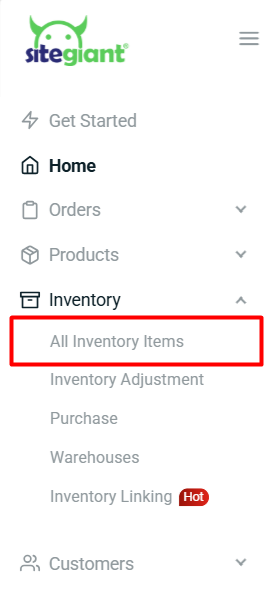
Step 1: Navigate to Inventory on the sidebar menu > All Inventory Items.
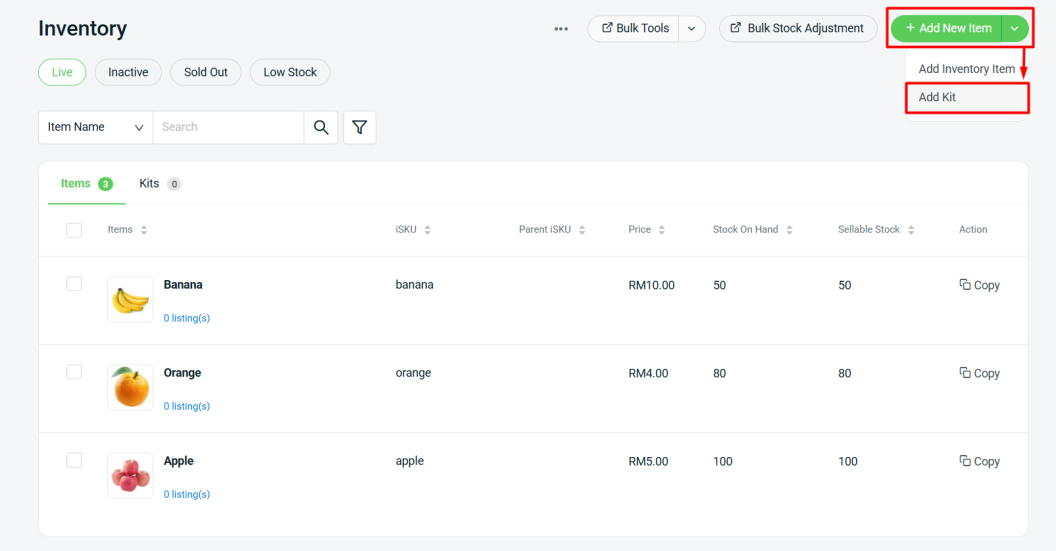
Step 2: Go to + Add New Item > Add Kit.
Step 3: Fill in the Kit Info accordingly.
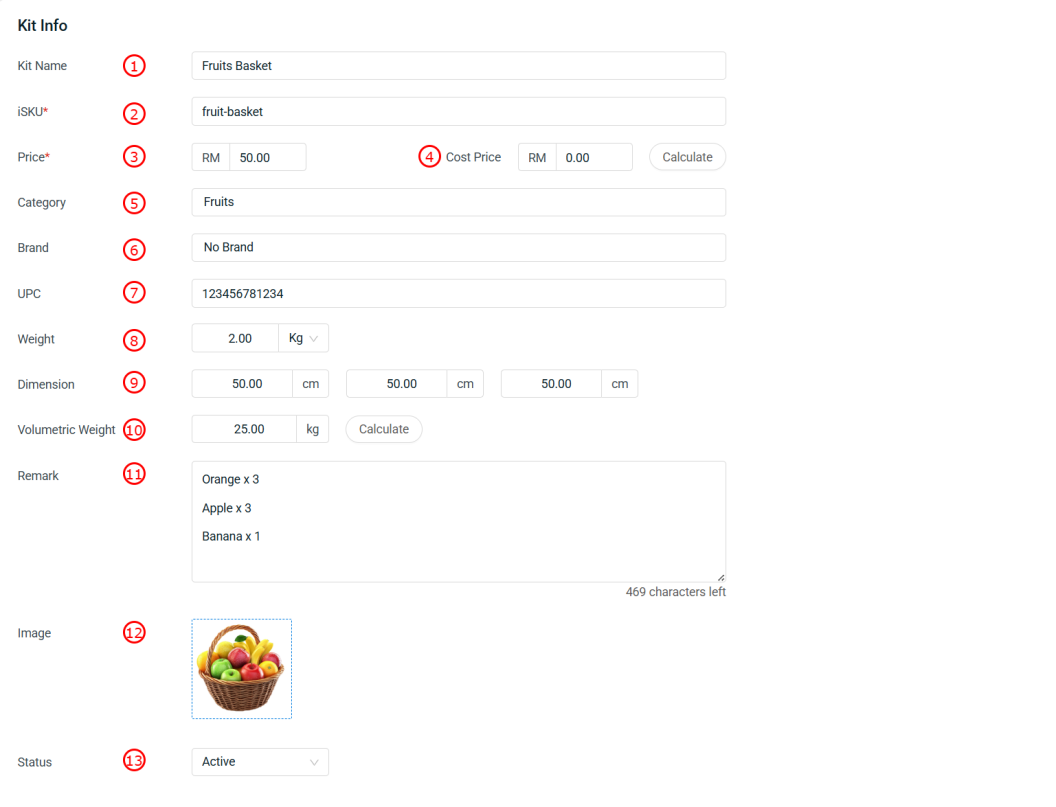
📌Note: Kit info with * is required to fill in.

1. Kit Name*: Name of the product or kit.

2. iSKU*:Inventory stock keeping unit (unique item code).

3. Price*: Selling price of the kit.

4. Cost Price: Purchase cost of the item. Click on Calculate after added the item list, system will automatically generate based on the cost of the items added.

5. Category: Kit category or classification.

6. Brand: Brand of the kit.

7. UPC: Universal Product Code, for barcode scanning.

8. Weight: Actual weight of the kit.

9. Dimension: Length, Width, Height of the kit.

10. Volumetric Weight: Shipping weight based on size, used for logistics. Click on Calculate, system will automatically generate the data based on the dimensions.

11. Remark: Additional notes or description of the kit.

12. Image: Upload the product image in JPG or PNG file. Recommended image size: 800 x 800 pixels and below 300KB.

13. Status: Allows you to change the status of a discontinued item to inactive. After changing the item status, you will no longer see it in the Live inventory item listing.
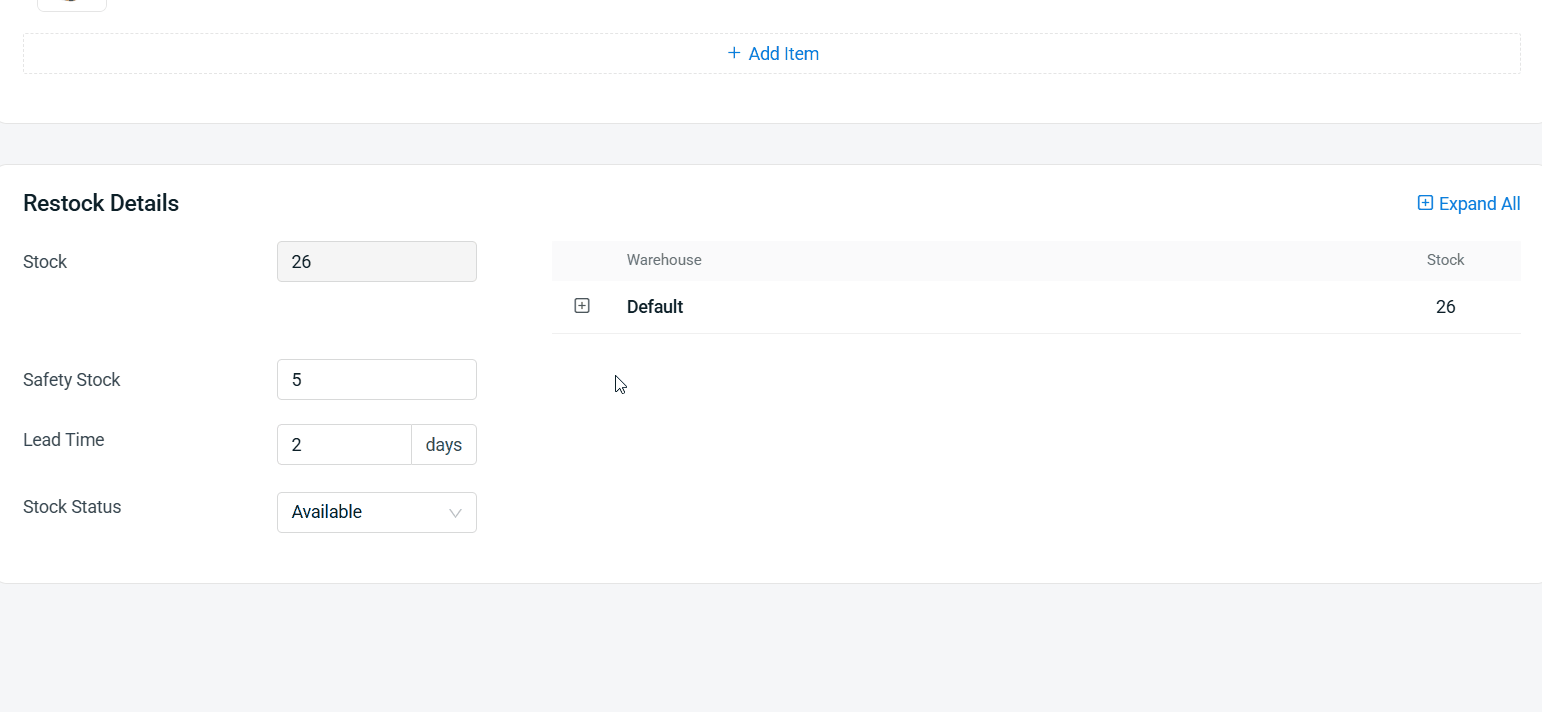
Step 4: Go to Item List tab > + Add Item > Select the item that make up this kit > adjust the Quantity if necessary.
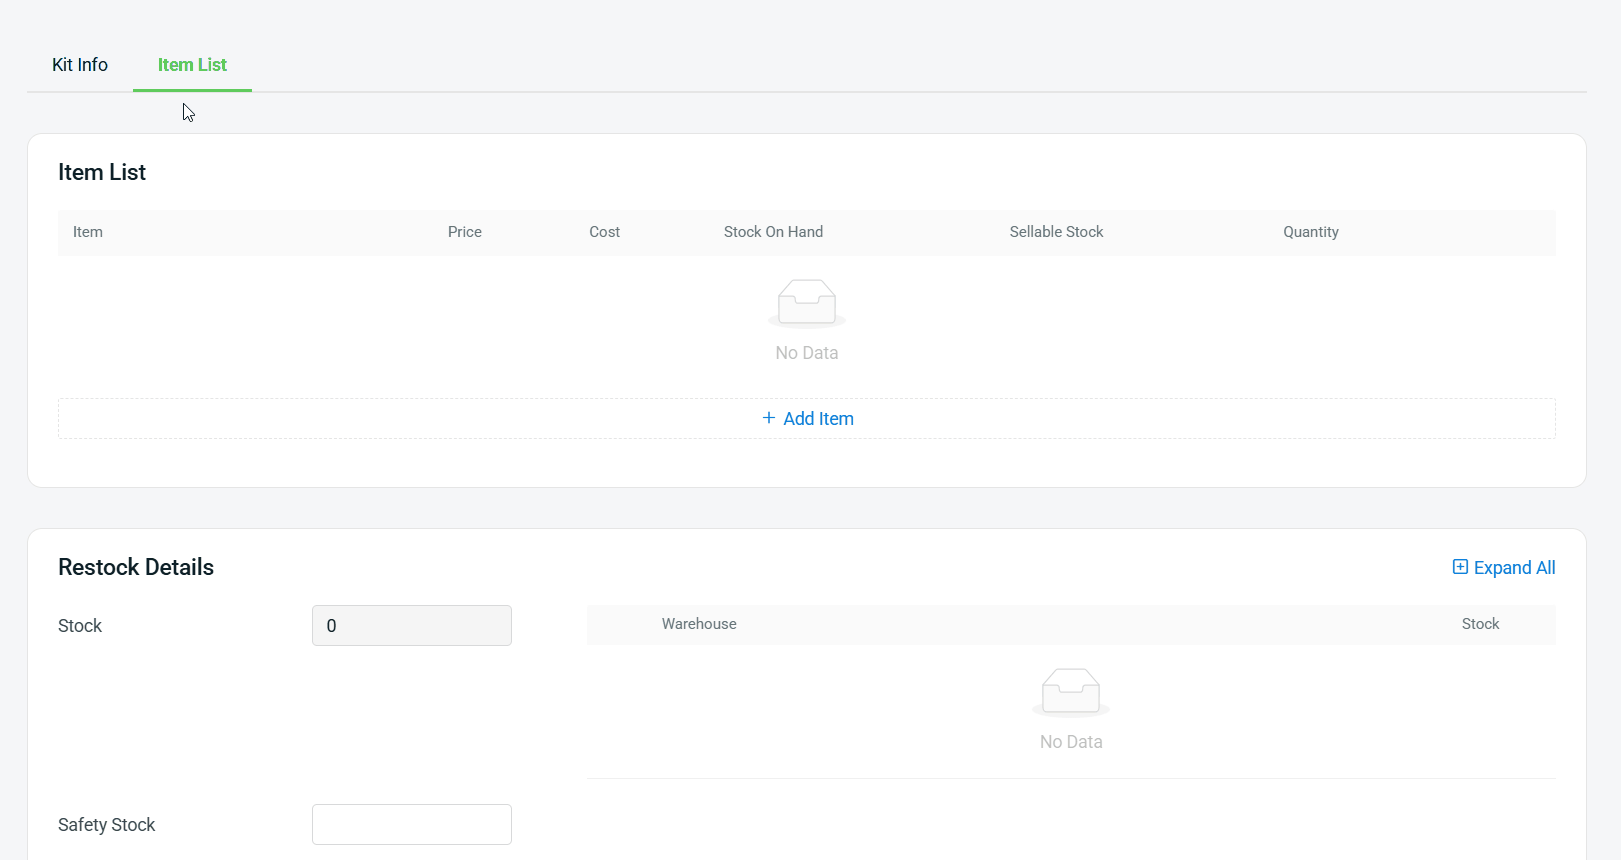
Step 5: Fill in the Restock Details accordingly.
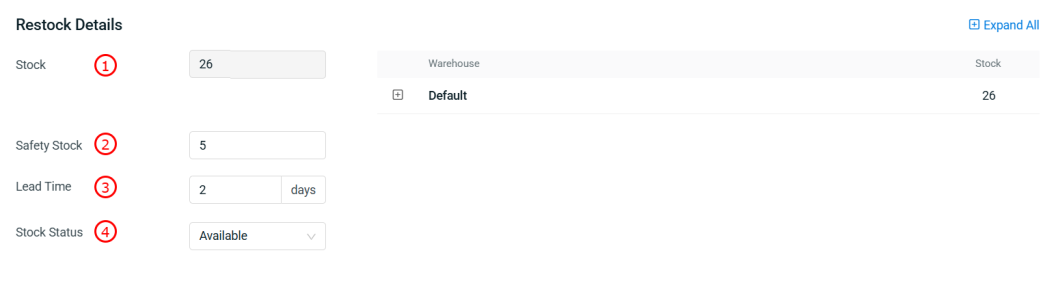
1. Stock: The stock of kit depends on the sellable stock of the selected items. The system will calculate how many stock can be assembled based on the lowest sellable stock among the included items.

2. Safety Stock: Minimum stock level for this item. When stock falls below this level, it will appear in Low Stock tab and may need restocking.

3. Lead Time: The number of days needed for the stock to arrive when restocking.

4. Stock Status: Controls how stock availability syncs to associated channel(s). By default is set as Available, stock syncs normally based on the sellable stock. If set to Out of Stock, system will force sync stock as 0 to associated channel(s), even if stock is available.
Step 6: Click + to expand the Warehouse column > click + Add Rack to assign the stock level to each rack.
💡Tips: Learn more on How To Manage Rack Group And Rack.
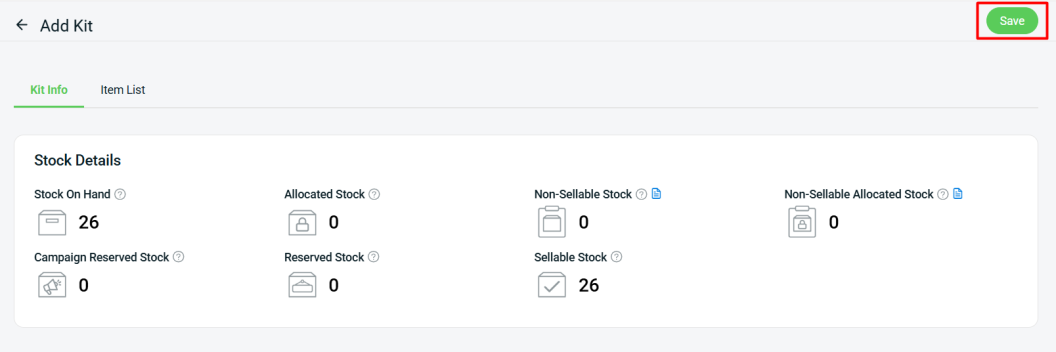
Step 7: Click Save to create kit.
3. Bulk Create Kit
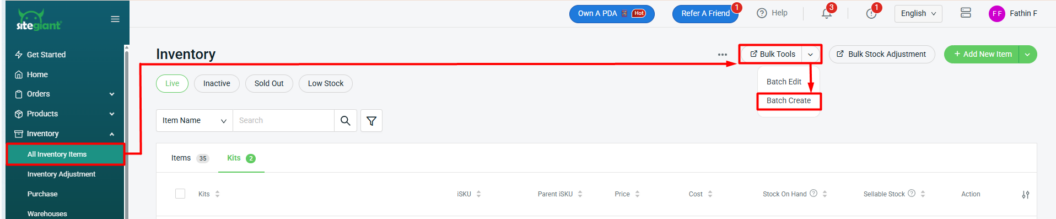
Step 1: Navigate to Inventory in the sidebar menu > All Inventory Items > click Bulk Tools > select Batch Create.
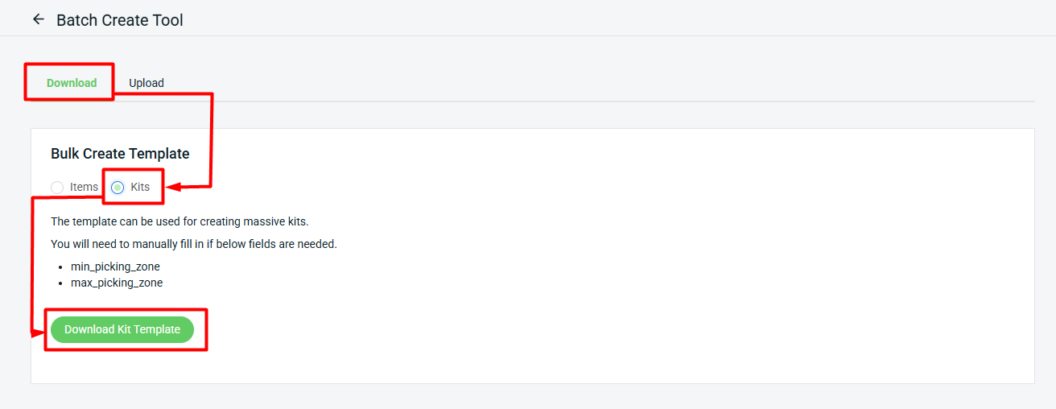
Step 2: Under the Download tab, select Kits > Download Kit Template.
Step 3: Fill in the inventory item details in the Excel.

📌Note: Column with * is required.
| Column | Description | Sample Data |
| kit_name * | Name of the kit | Baby Puree Starter Set |
| kit_isku * | Unique code to identify kit | baby-puree-starter |
| parent_isku | Code to group the kit to manage together | Baby Set |
| price * | Selling price of the kit | 150 |
| cost | Purchase cost of the kit | 80 |
| item_status * | Controls if the kit is available | active/inactive |
| brand | Brand of the kit | OEM |
| category | Item category or classification | Baby Feeding |
| upc | Universal Product Code, for barcode scanning | 78403122644 |
| remark | Additional notes or description of the kit | Ensure all items are included |
| weight | Actual weight of kit | 2.5 |
| weight_unit | Unit of measurement for weight | kg / g / oz / lb |
| length | Kit length | 15 |
| width | Kit width | 15 |
| height | Kit height | 8 |
| volumetric_weight | Shipping weight based on size, used for logistics | 0.36 |
| safety_stock | Minimum stock level for this item to considered as low stock | 10 |
| lead_time | Number of days needed for the stock to arrive when restocking | 5 |
| stock_status * | Controls how stock availability syncs to associated channel(s) | available/out_of_stock |
| item_name * | The item name assigned under the Kit | Baby Smoothie Cubes |
| item_isku * | The item’s unique code that is assigned under the Kit | baby-smoothie |
| quantity * | The quantity of the item that will be assigned under the Kit 📌Note: If only one item is assigned to the kit, please update the quantity to a minimum of 2. | 1 |
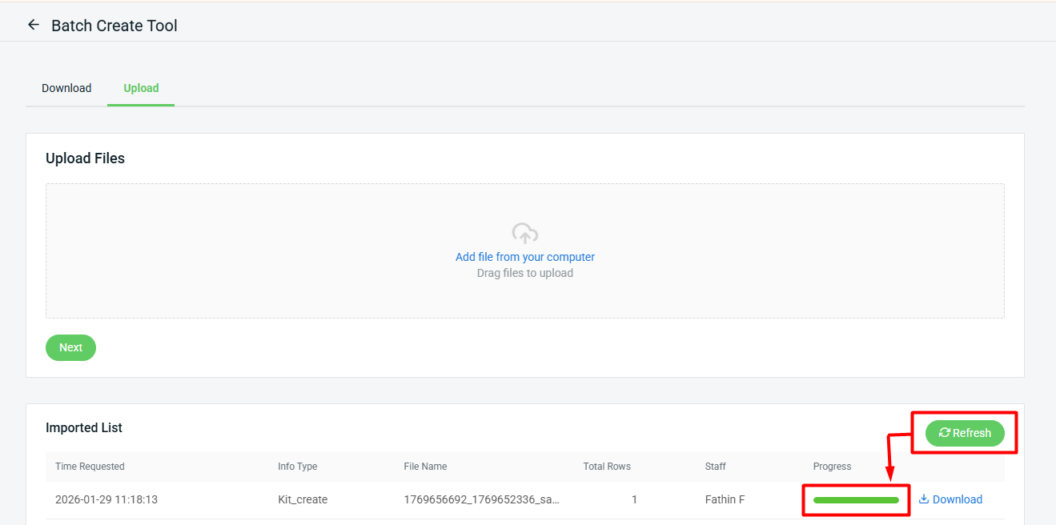
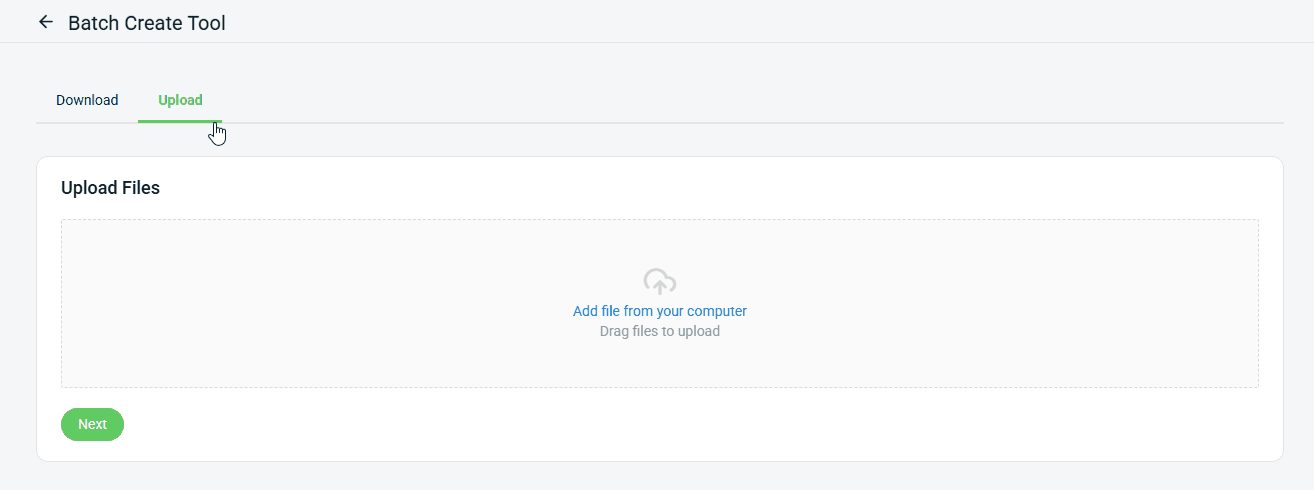
Step 4: Back to SiteGiant Batch Create Tools page > go to Upload tab > click Add file from your computer > Upload File > Next.
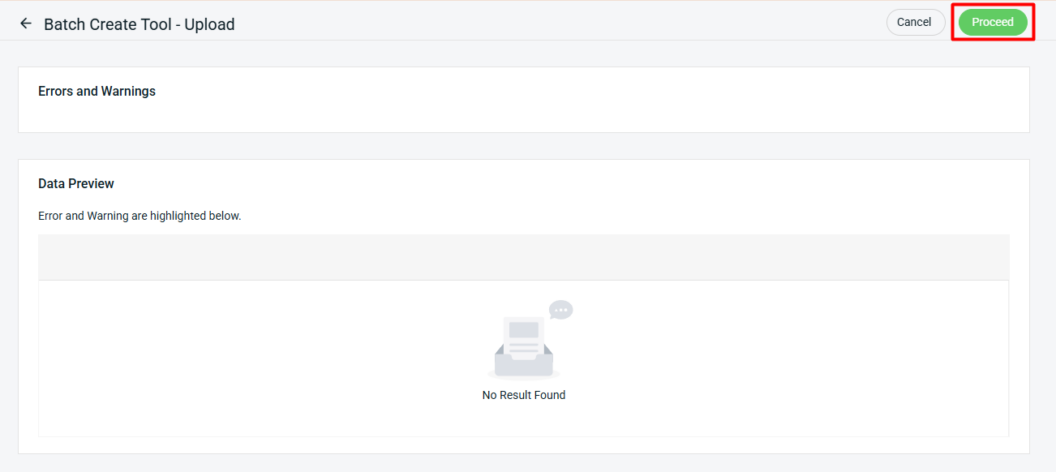
Step 5: If there are errors in the uploaded Excel file, the error message will appear under Errors and Warnings, and the error column will be shown in Data Preview. Please correct the errors and reupload the file. If there are no errors, click Proceed to continue.
Step 6: Click Refresh after a while. The data is successfully imported when the progress bar turns green.