
1. Introduction
2. Create New Project
3. Configure OAuth Consent Screen
4. Configure OAuth Clients
5. Set Up Google Login Integration
6. Additional Information
1. Introduction
With Google Login, customers can quickly register on your webstore using their Google account with a simple click. Without the need to fill out the registration form and remember the password, it could help speed up the customer checkout process.
2. Create New Project
Step 1: Sign in to Google Cloud API Console > click on Select a project > New Project.
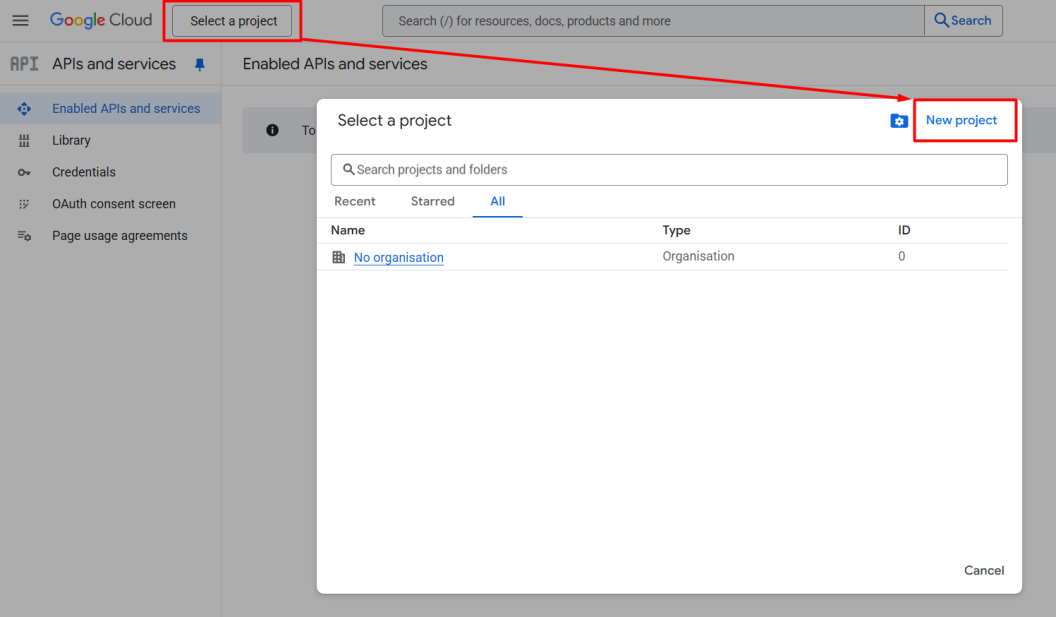
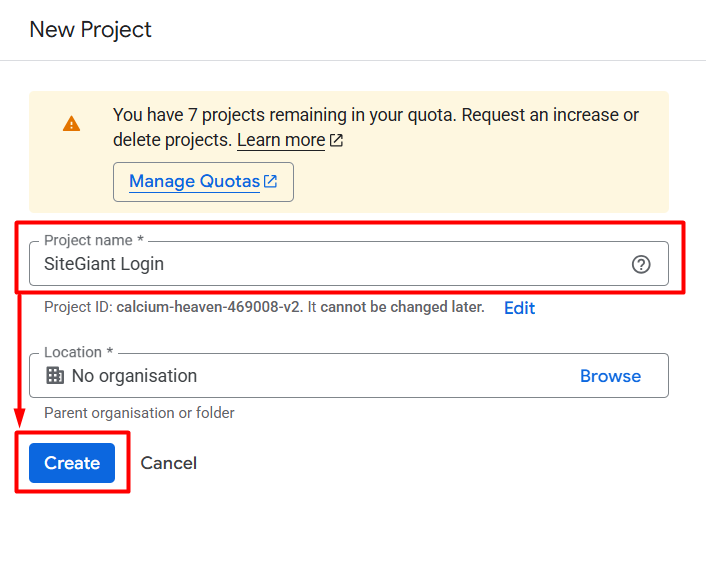
Step 2: Insert the Project name > Create.
3. Configure OAuth Consent Screen
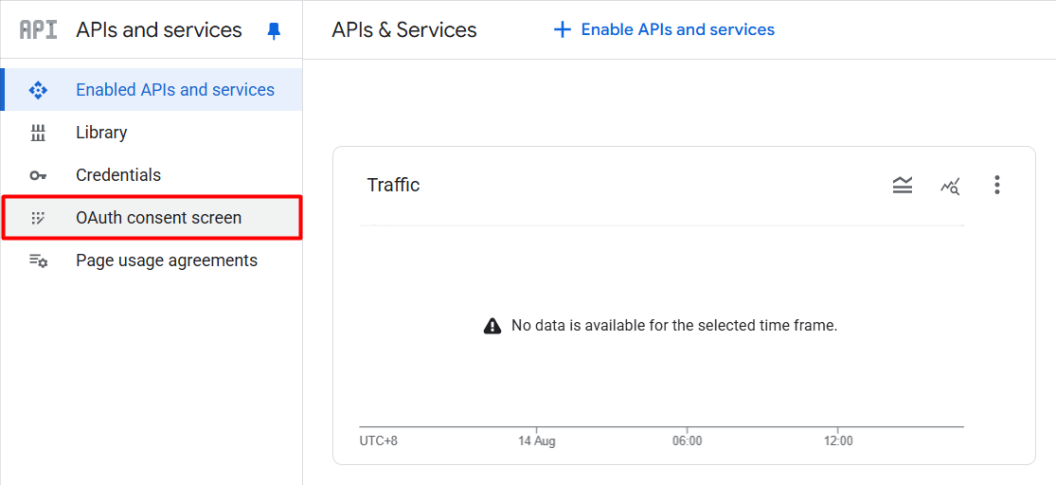
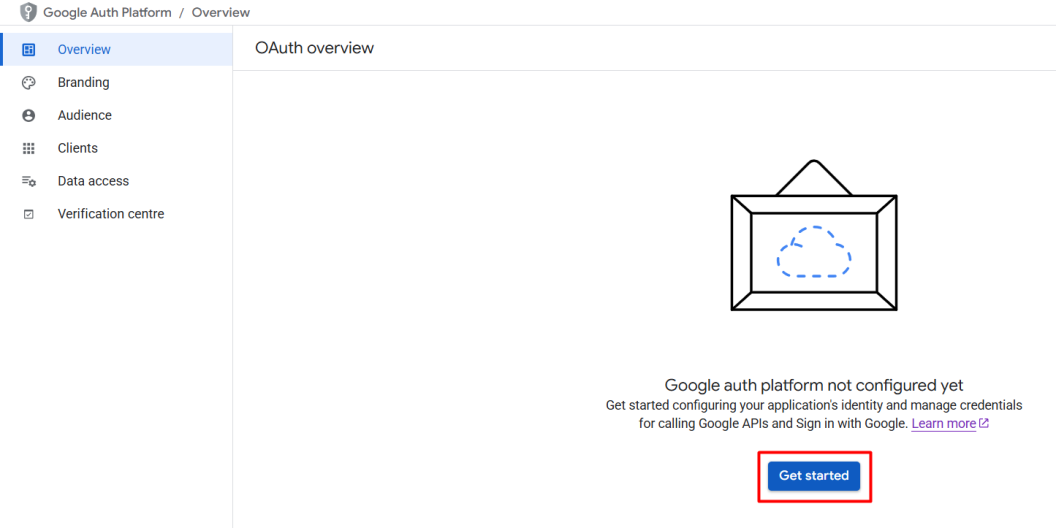
Step 1: On the left menu, go to OAuth consent screen.
Step 2: Click Get started to configure Google auth platform.
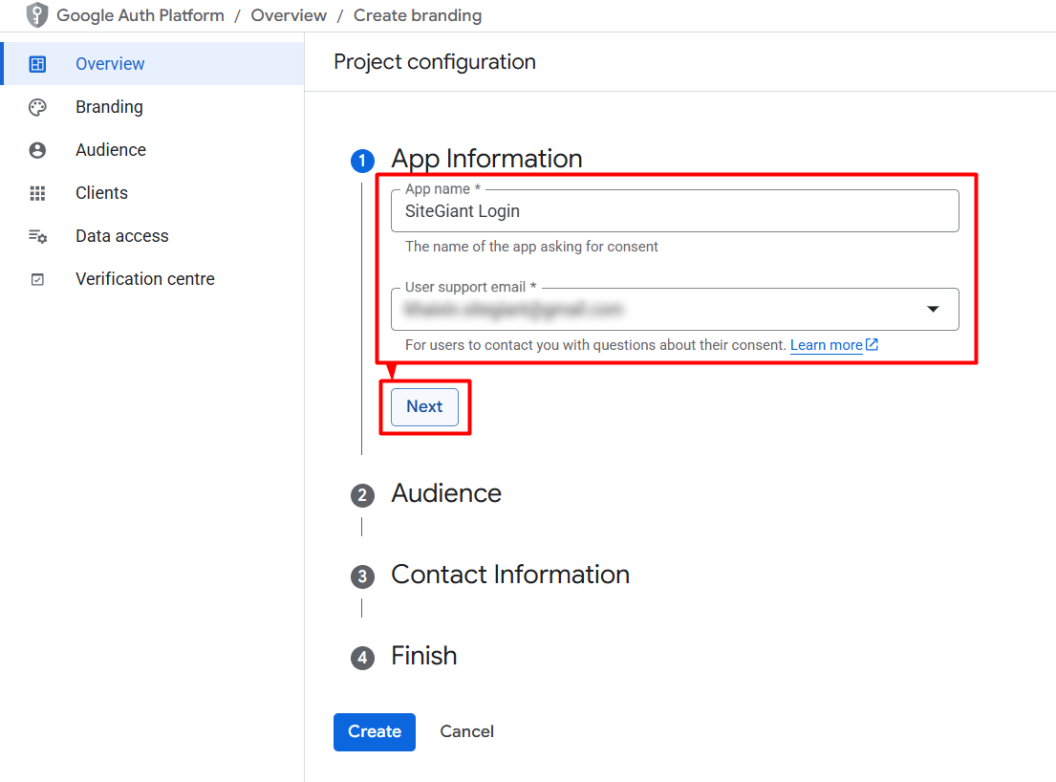
Step 3: Under App Information, fill in App name and User support email > Next.
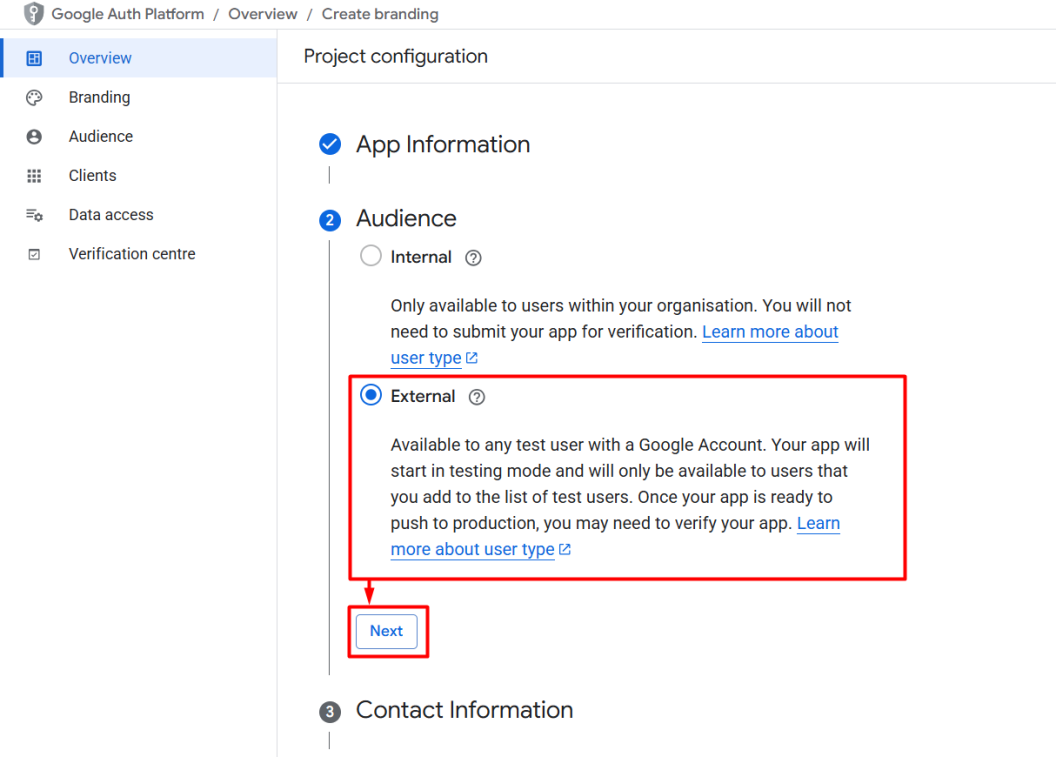
Step 4: Under Audience, choose External > Next.
Step 5: Under Contact Information, fill in your Email addresses > Next.

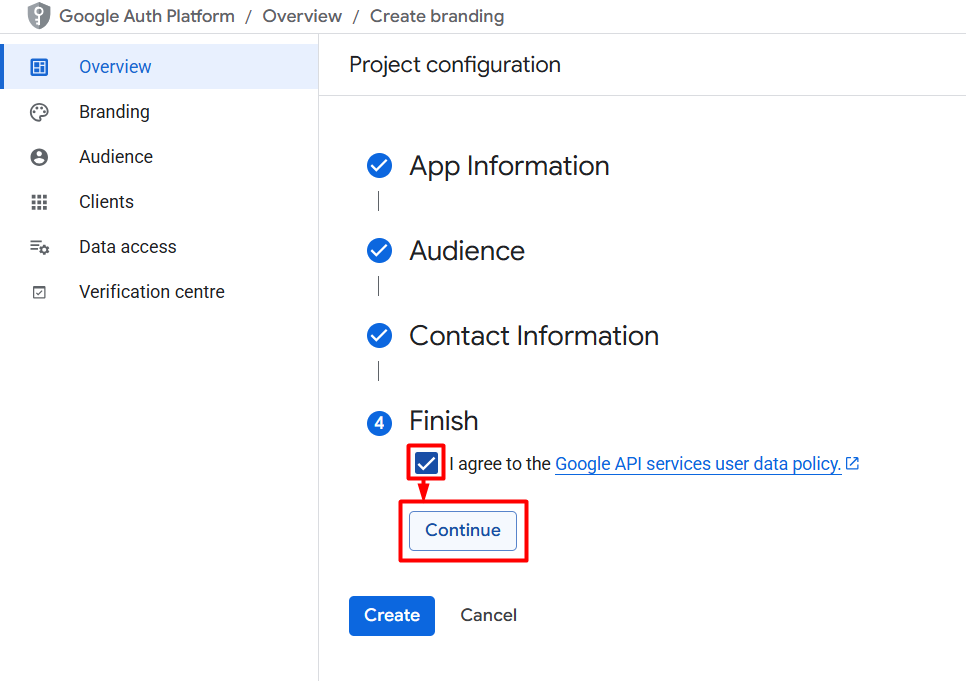
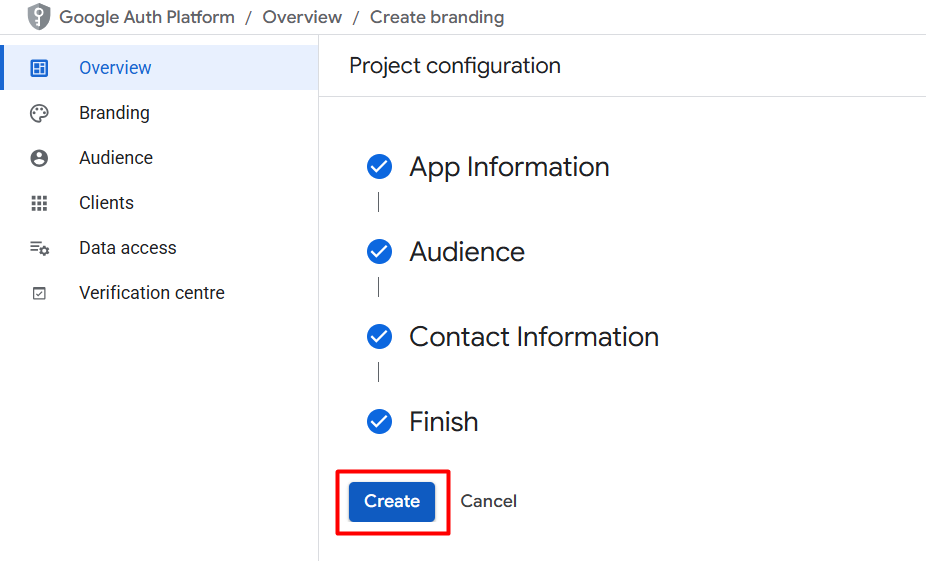
Step 6: Under Finish, tick ‘I agree to the Google API services user data policy.’ checkbox > Continue.
Step 7: Create.
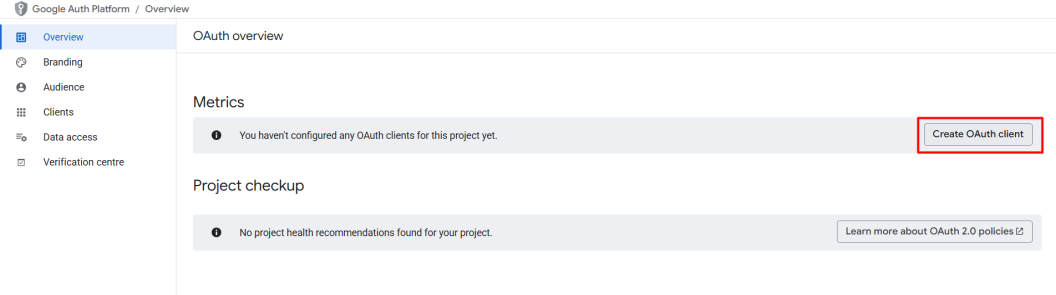
4. Configure OAuth Clients
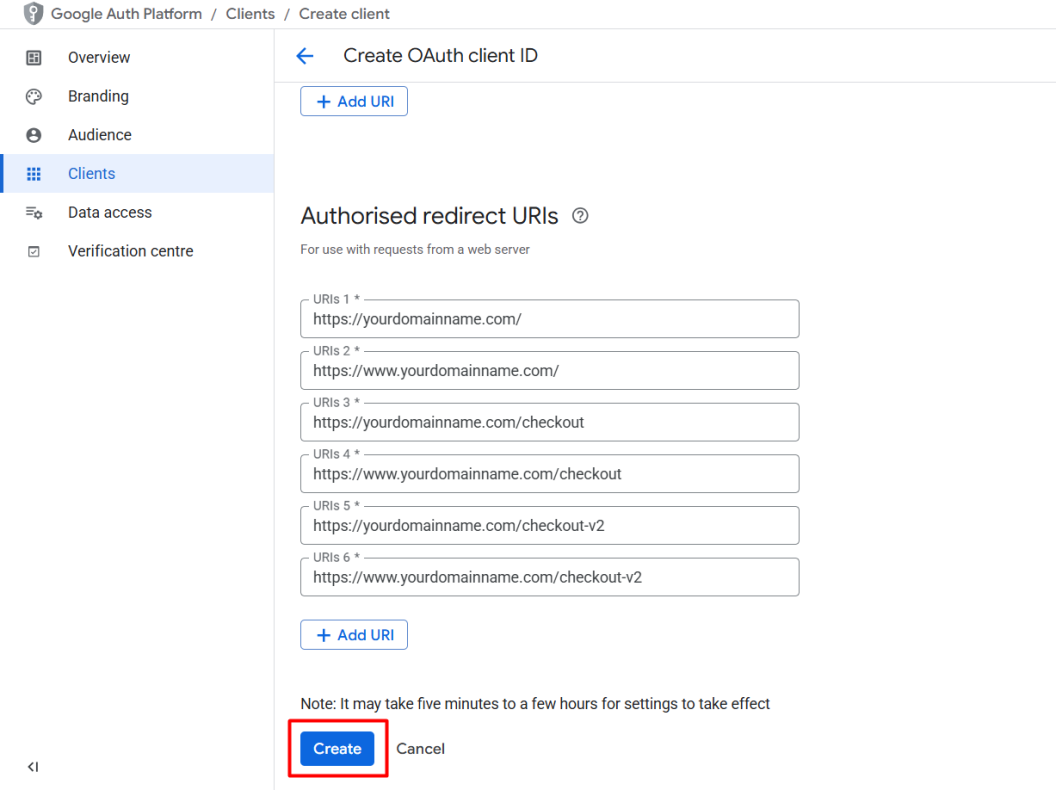
Step 1: Click Create OAuth client.
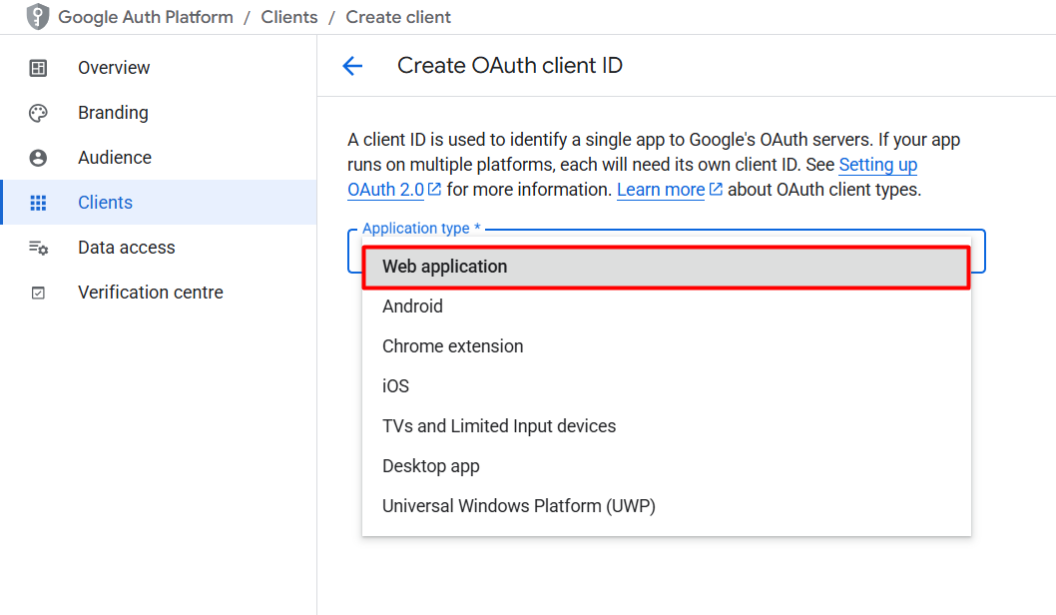
Step 2: Choose Application type as Web application.
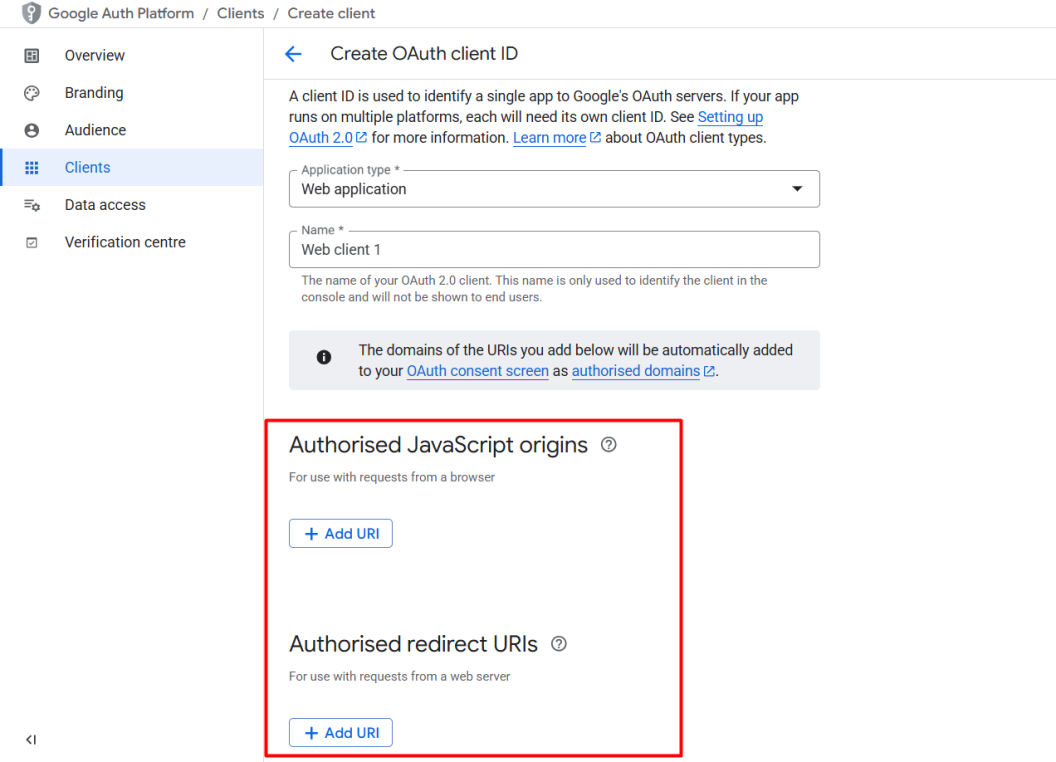
Step 3: Click on + Add URI and insert your domain name as below under Authorised JavaScript origins and Authorised redirect URIs.
Authorised JavaScript origins
https://yourdomainname.com
https://www.yourdomainname.com

Authorised redirect URIs
https://yourdomainname.com/ (with slash /)
https://www.yourdomainname.com/ (with slash /)
https://yourdomainname.com/checkout (without slash /)
https://www.yourdomainname.com/checkout (without slash /)
https://yourdomainname.com/checkout-v2 (without slash /)
https://www.yourdomainname.com/checkout-v2 (without slash /)
Step 4: Create.
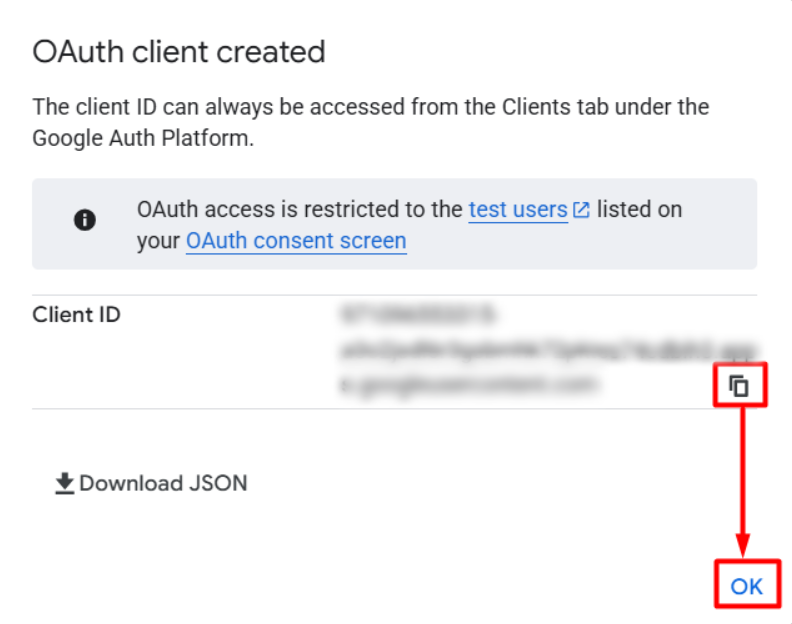
Step 5: Copy and the Client ID for later use > OK.
5. Set Up Google Login Integration
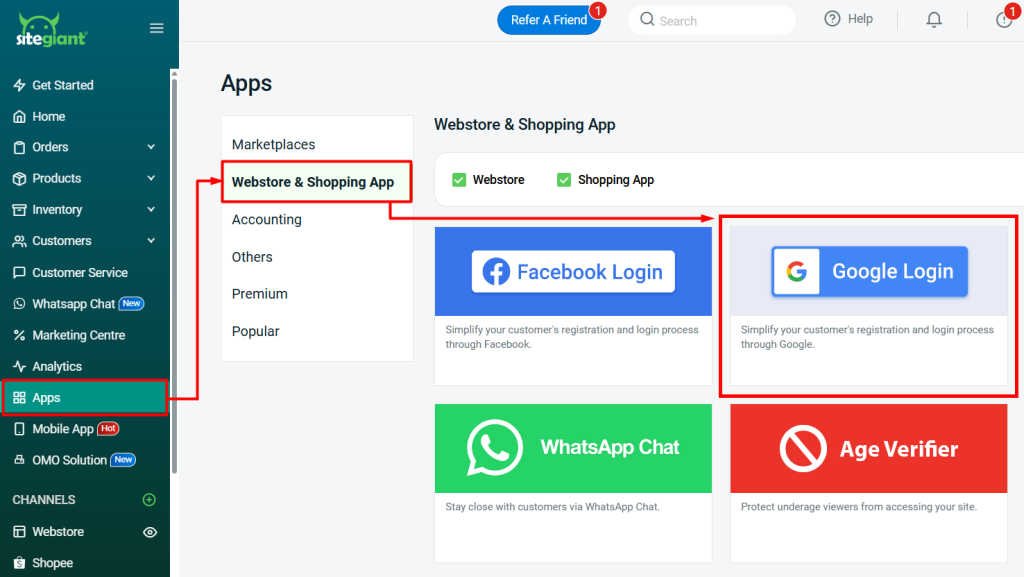
Step 1: Log in to SiteGiant Seller Center > navigate to Apps on the sidebar menu > Webstore & Shopping App > Google Login.
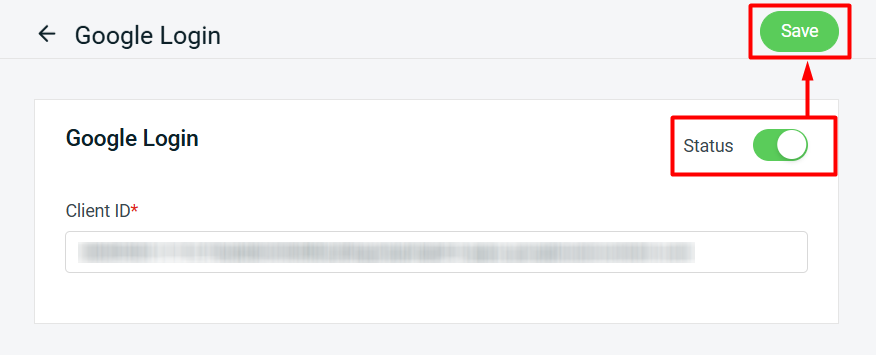
Step 2: Enable the Status > paste the Client ID to the respective field > Save.
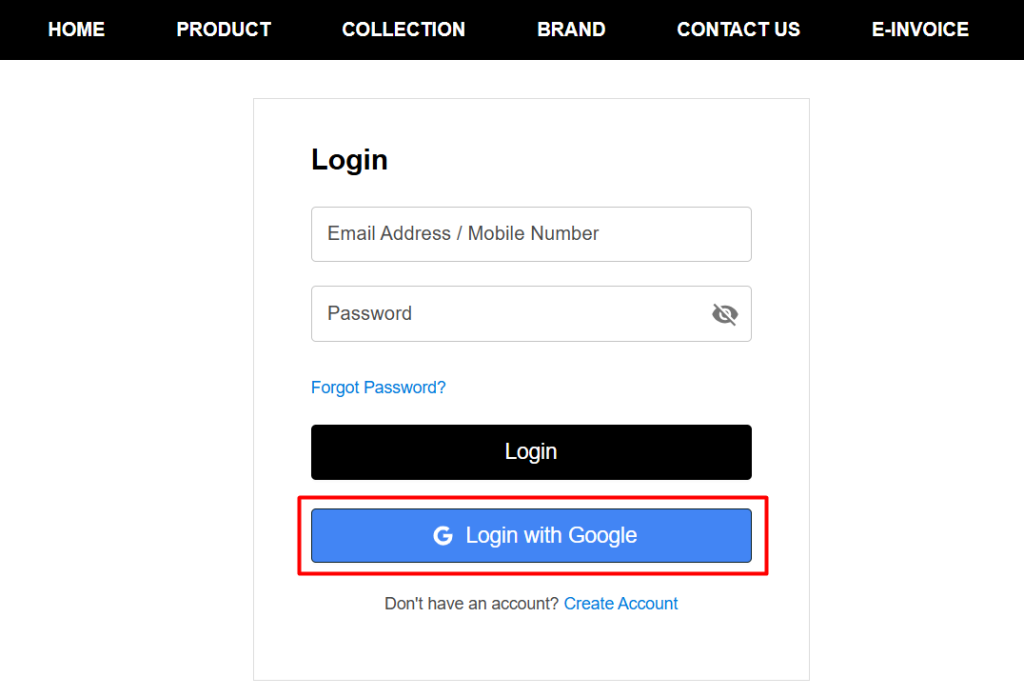
Step 3: The Login with Google button will be available on the Customer Login page.
📝Additional Information
1. Linked Account (From Customer Perspective)
After the customer successfully log in with Google, the account will be automatically linked under My Account > Linked Account.

📌 Note: Each Google account can only be linked to one account. If the customer wishes to unlink the account, they can click the Unlink button.