
1. Introduction
2. Create Facebook App
3. Set Up Basic Settings
4. Publish Facebook Login
5. Set Up Facebook Login Integration
6. Additional Information
1. Introduction

With Facebook Login, customers can quickly register on your webstore using their Facebook account with a simple click. Without the need to fill out the registration form and remember the password, it could help speed up the customer checkout process.
2. Create Facebook App
Step 1: First, you will need to create a Facebook app ID and log in at Facebook for Developers.
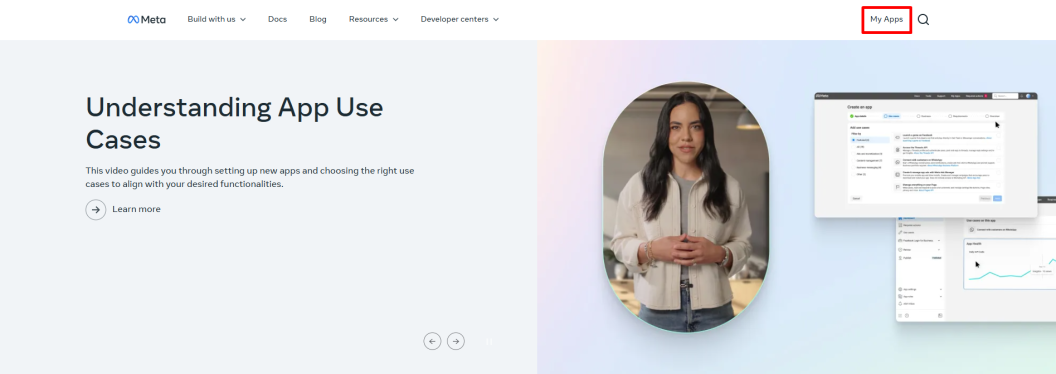
Step 2: Once logged in, click My Apps on the top right.
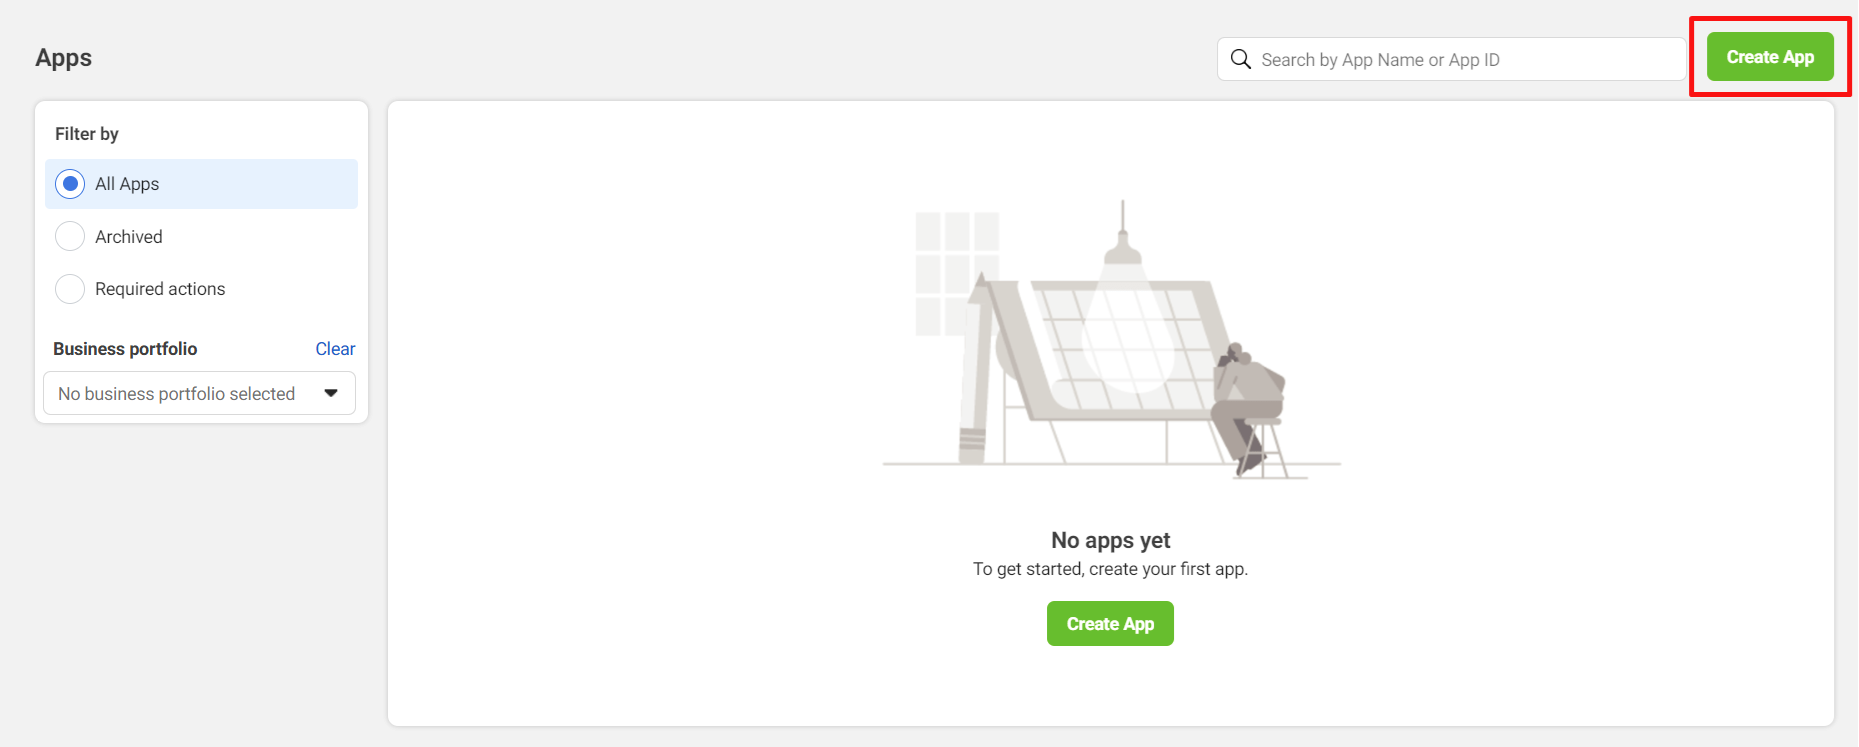
Step 3: On the Facebook developers page, click Create App.
Step 4: Fill in the App Name and App Contact Email > click Next.

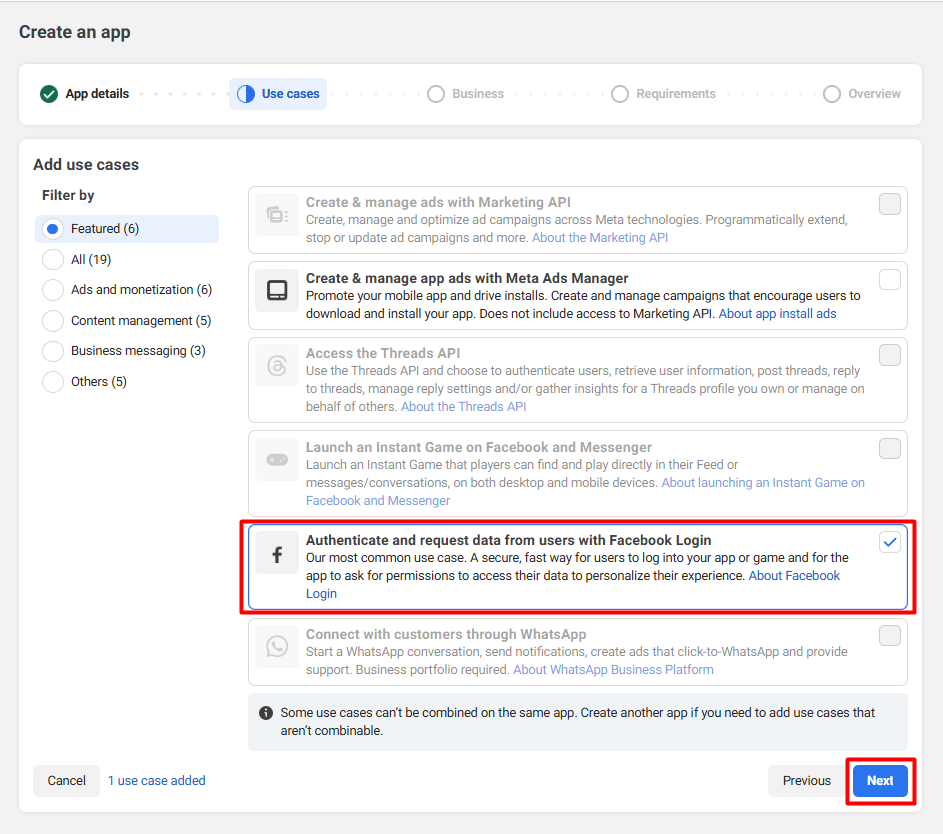
Step 5: Select Authenticate and request data from users with Facebook Login > Next.
Step 6: Select the business profile you would like to connect to this app > click Next.

Step 7: Click Next.
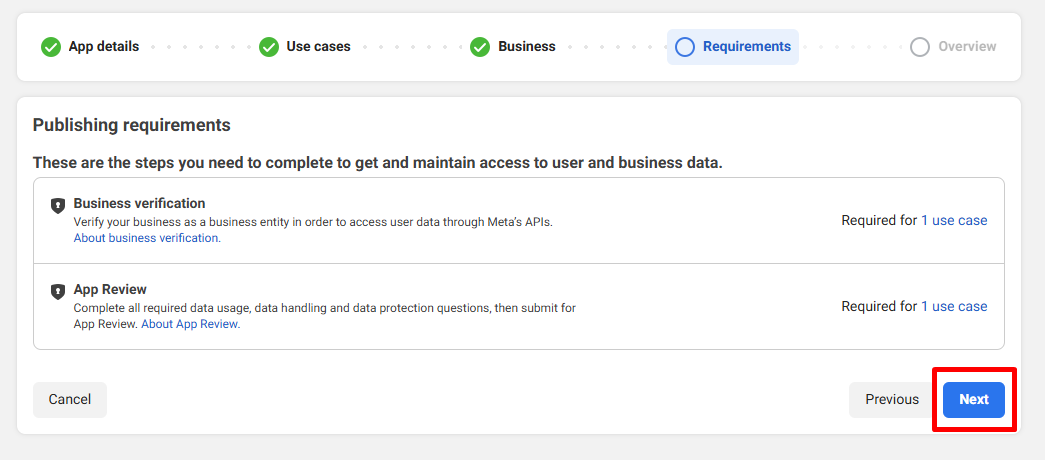
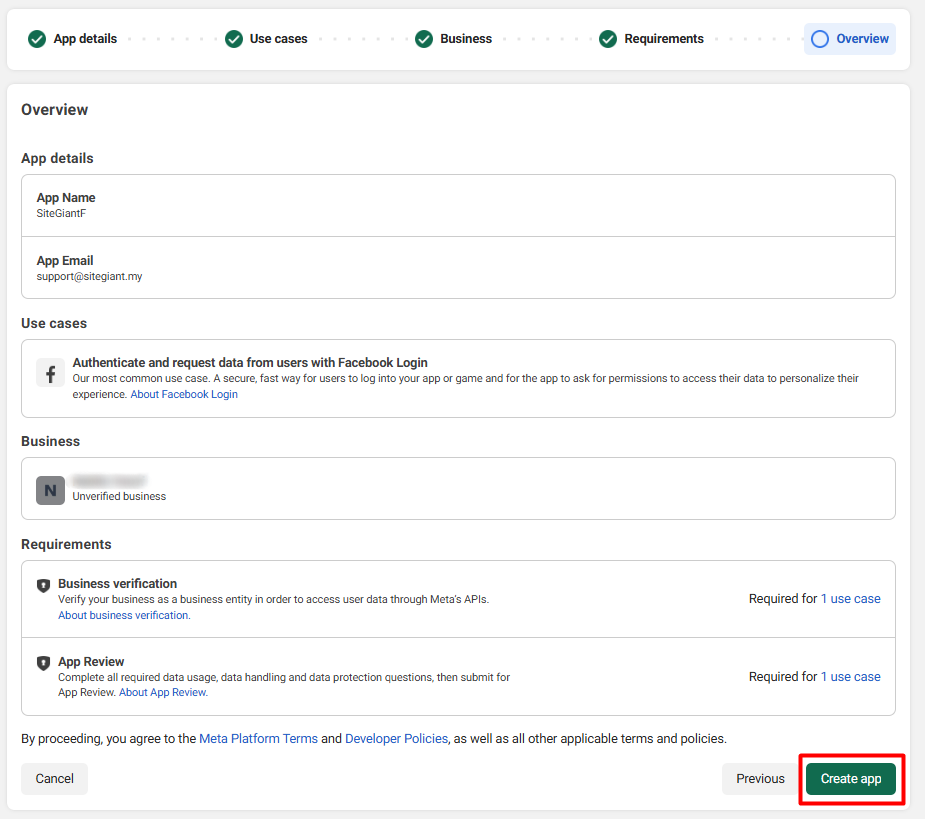
Step 8: Click Create App.
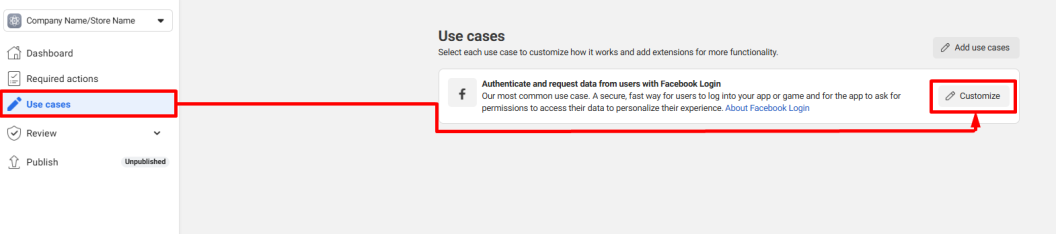
Step 9: Navigate to Use cases > click Customize.
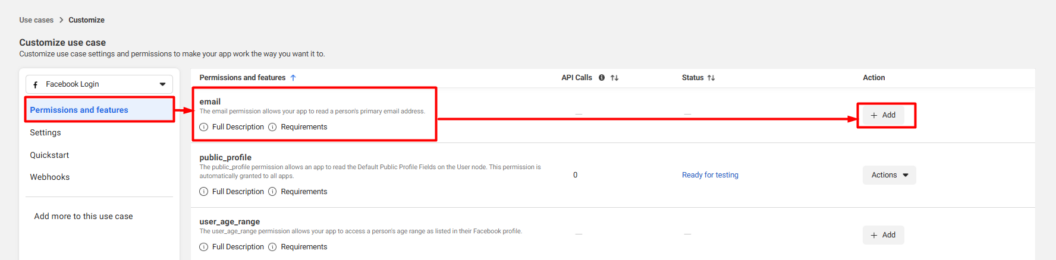
Step 10: Under Permission and features, click Add email.
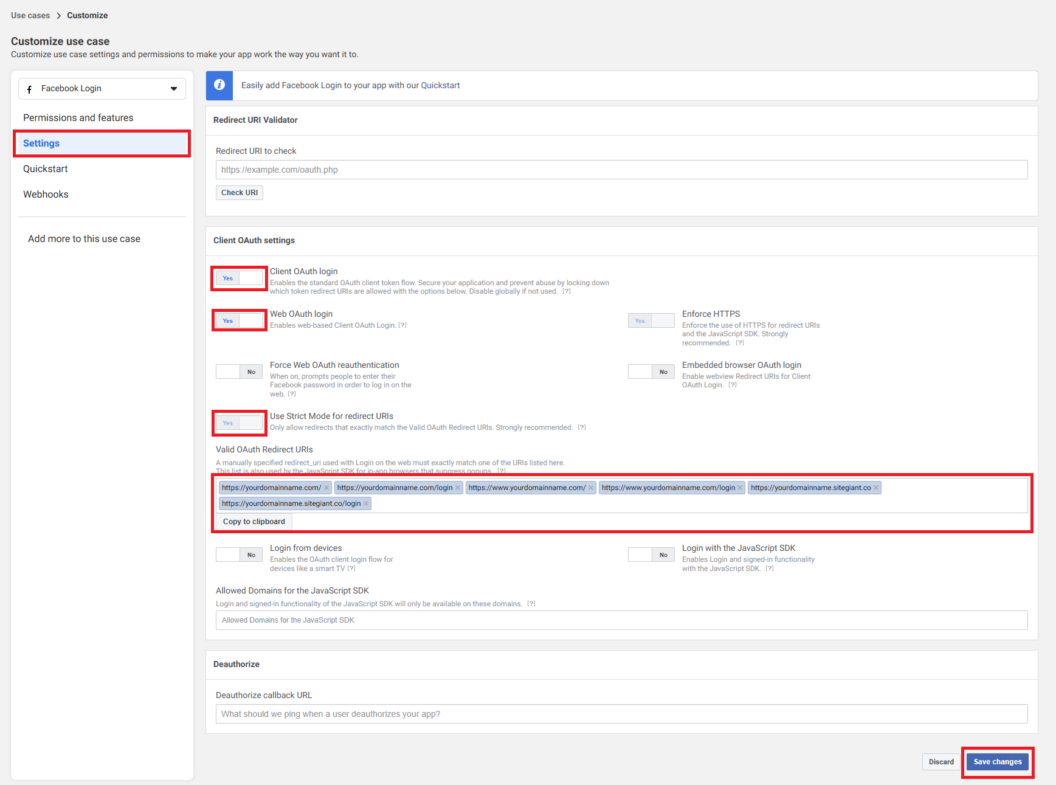
Step 11: Under Settings, Turn On the following buttons > insert your domain name (primary and temporary) under Valid Oauth Redirect URls > Save changes.
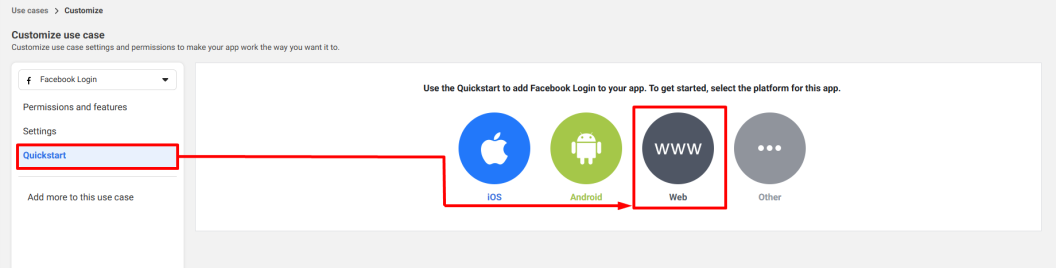
Step 12: Under Quickstart, select the platform as Web.
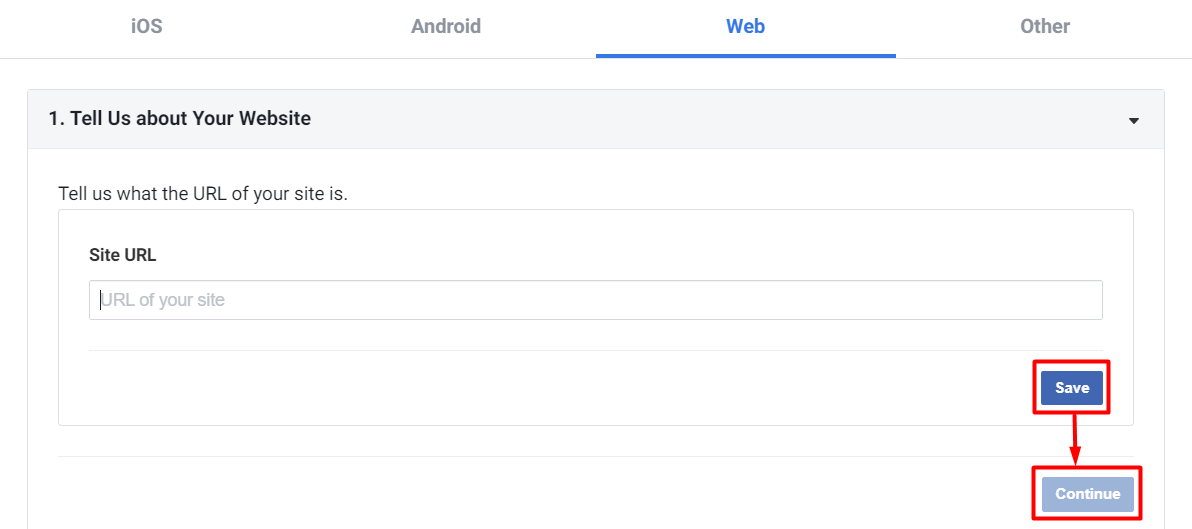
Step 13: Fill in your domain name under Site URL > Save > Continue.
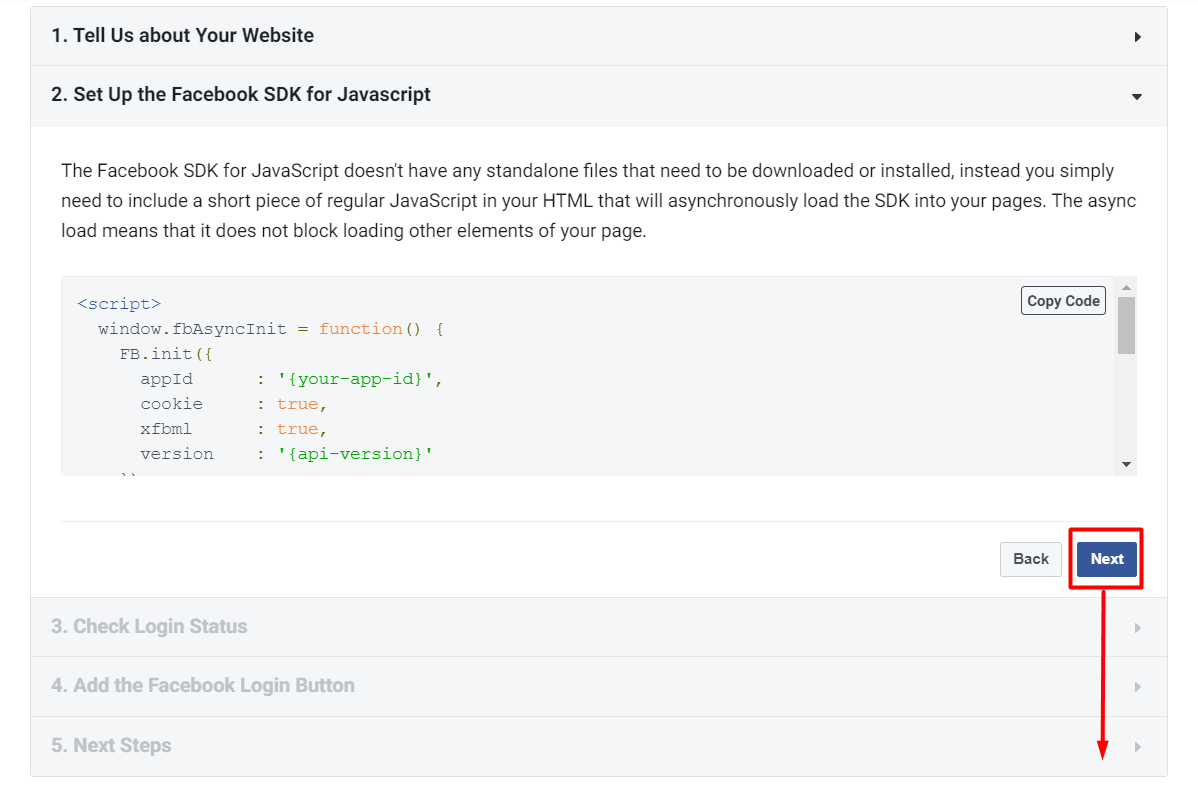
Step 14: Keep clicking Next for all the upcoming tabs until 5. Next Steps.
3. Set Up Basic Settings
Step 1: Navigate to App Settings on the sidebar menu > Basic > fill in details as follows > Save changes.
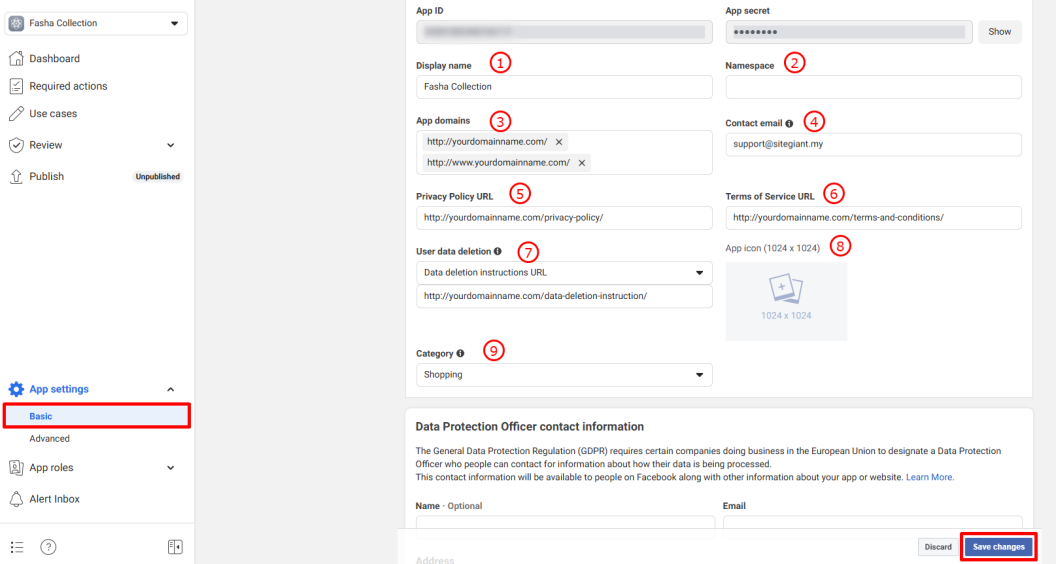
1. Display name: The name that displays on authorization page.
2. Namespace: Small letter for the Display Name input.
3. App Domains: Your SiteGiant domain name.
4. Contact email: Your primary email address.
5. Privacy Policy URL: Your webstore Privacy Policy page URL.
6. Terms of Service URL: Your webstore Terms of Service page URL.
7. User data deletion: Your webstore User Data Deletion Instruction page URL.*
8. App icon: Your business logo.
9. Category: Your business category.
📌Note: For the *User Data Deletion Instruction page, you can create and publish a webstore page using the template below. Learn more on How To Create Pages.
If you want to delete your activities for the <<store-name>> , kindly follow these instructions:

1. Go to Your Facebook Account Setting & Privacy. Click " Setting ".
2. Then, go to " Apps and Websites" and you will see all of your Apps activities.
3. Select the option box for <<store-name>> Production.
4. Click "Remove" button.

If you wish to delete user account data, you have to request us to delete your account.
Subject to your <<store-name>> user account is no longer required in the future, please send your request the with account registered email to <<store-email>>. Your account will be deleted and all data will no longer be saved.
4. Publish Facebook Login
Step 1: Navigate to Review > Verification on the sidebar menu > click Start Verification.

📌Note: Business verification may take anywhere from as little as 10 minutes up to 14 business days. You will receive a notification once the review is complete.
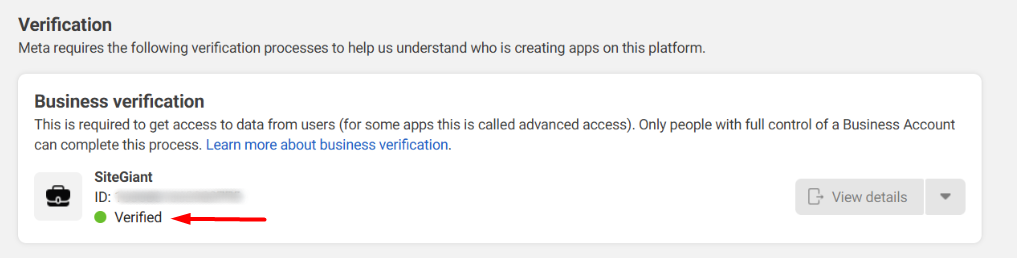
Step 2: After the Business verification is verified, go to App Review > click Next button.
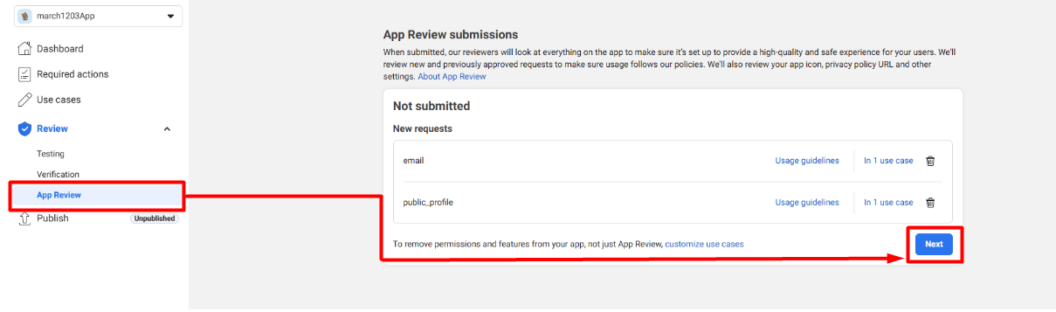
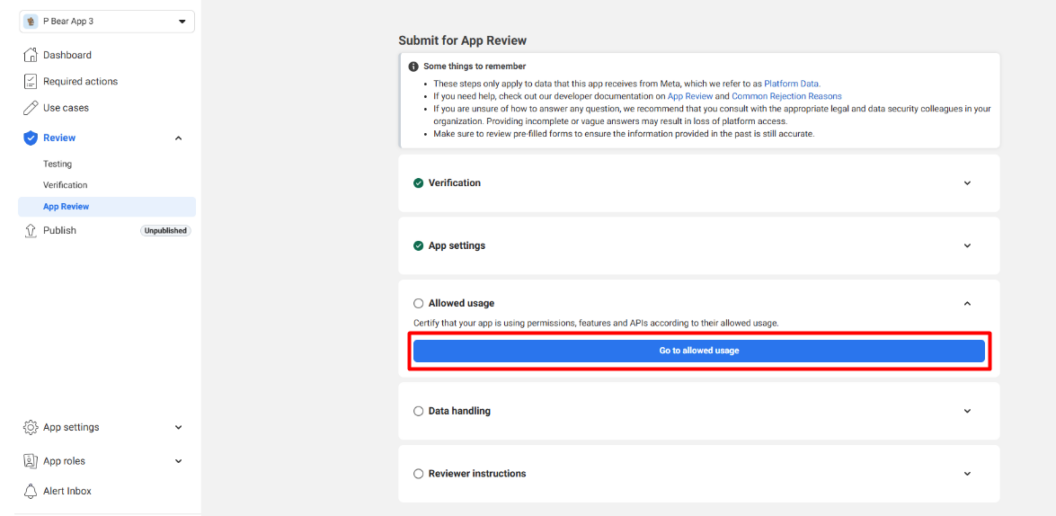
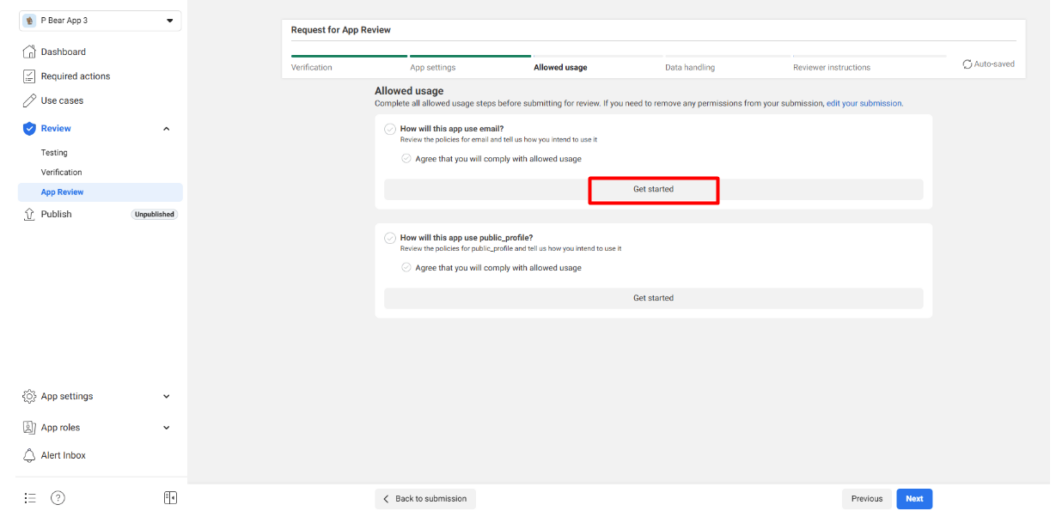
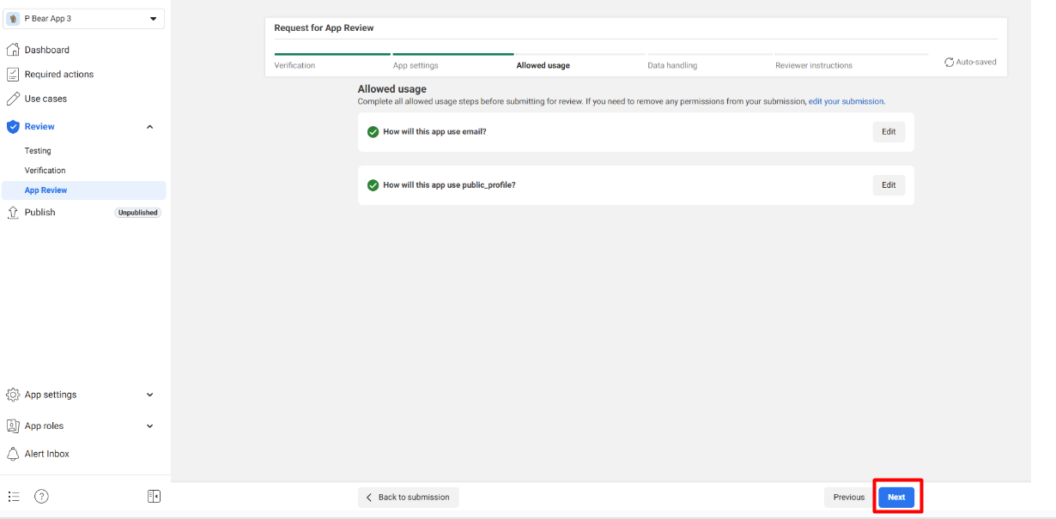
Step 3: Click on the Go to allowed usage.
Step 4: Click Get started for email permission.
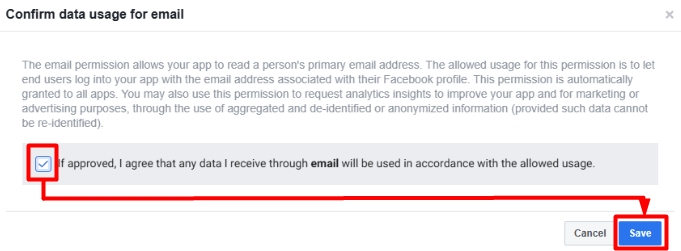
Step 5: Tick the Checkbox > click Save.
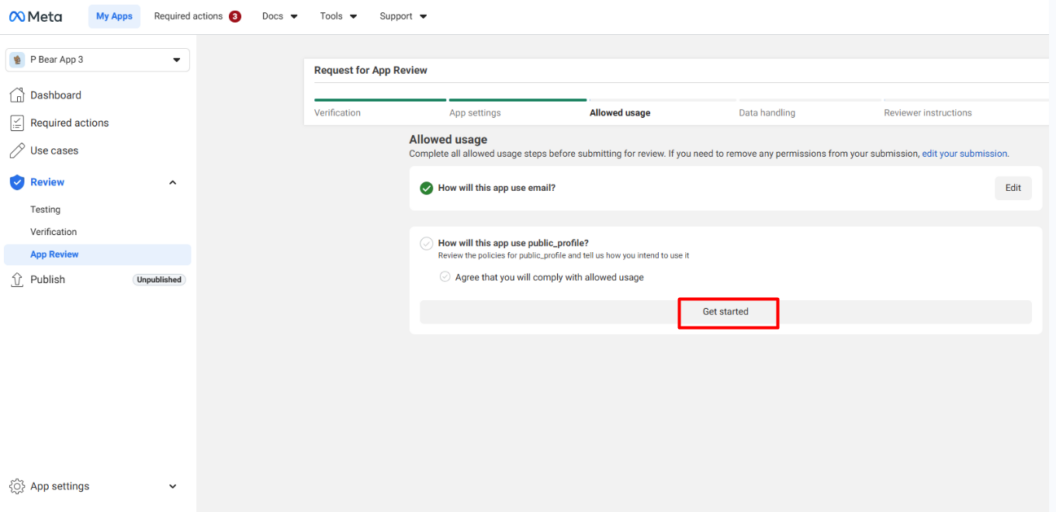
Step 6: Back to the Allowed usage page, click Get started for public_profile.
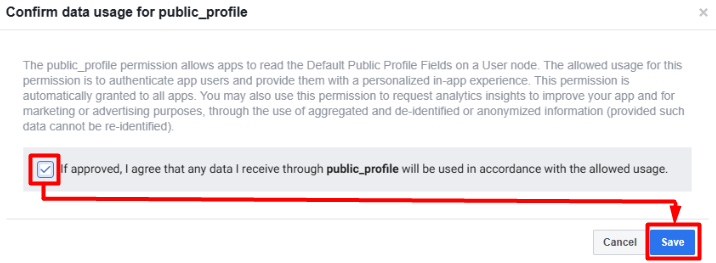
Step 7: Tick the Checkbox > click Save.
Step 8: Once both settings are completed, click Next.
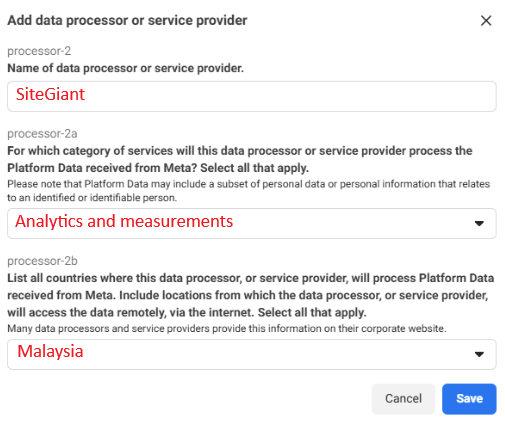
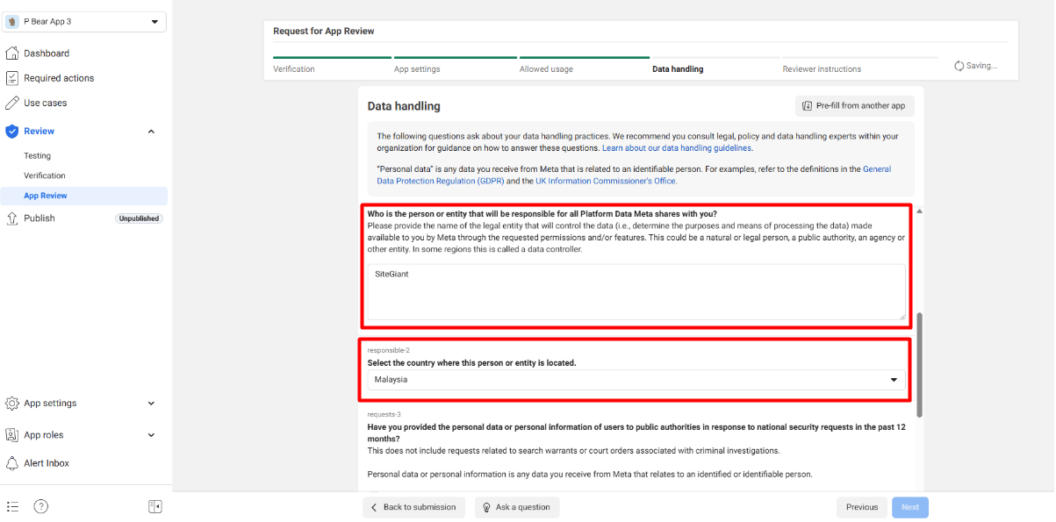
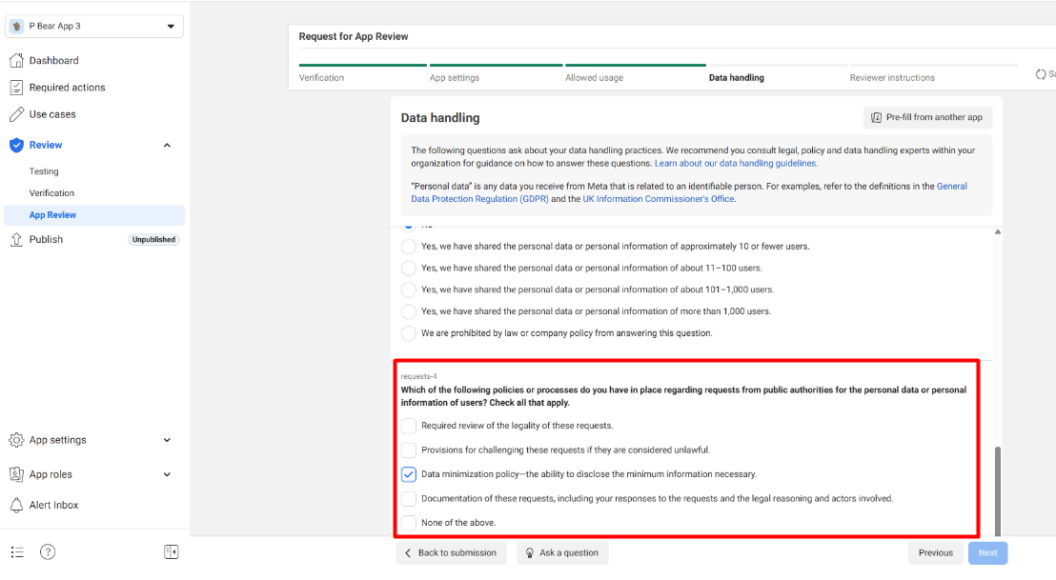
Step 9: Answer the questions as follows > click + Add data processor or service provider.

Step 10: Answer the question as below > click Save.
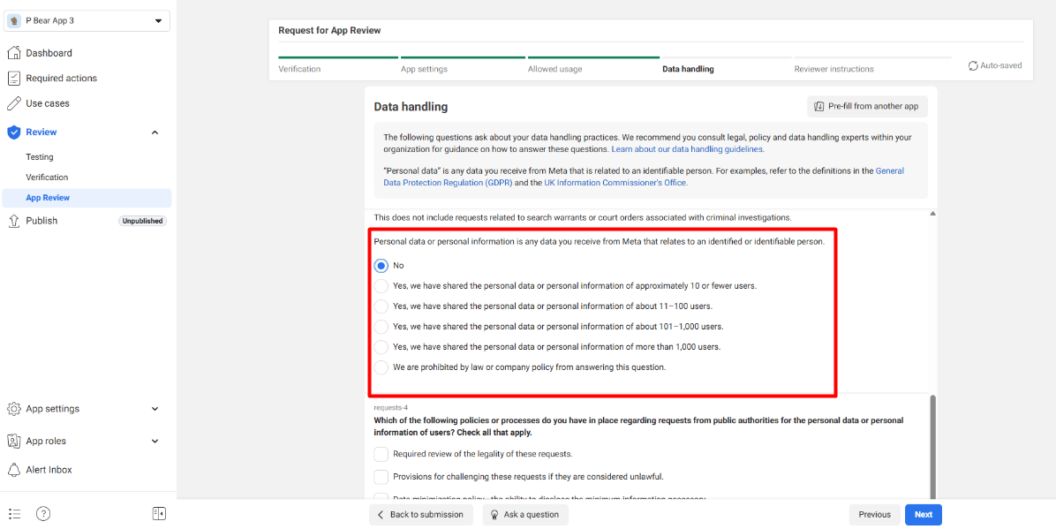
Step 11: Scroll down the page and answer all the questions.
Step 12: Update the Instructions as follows > click Next.
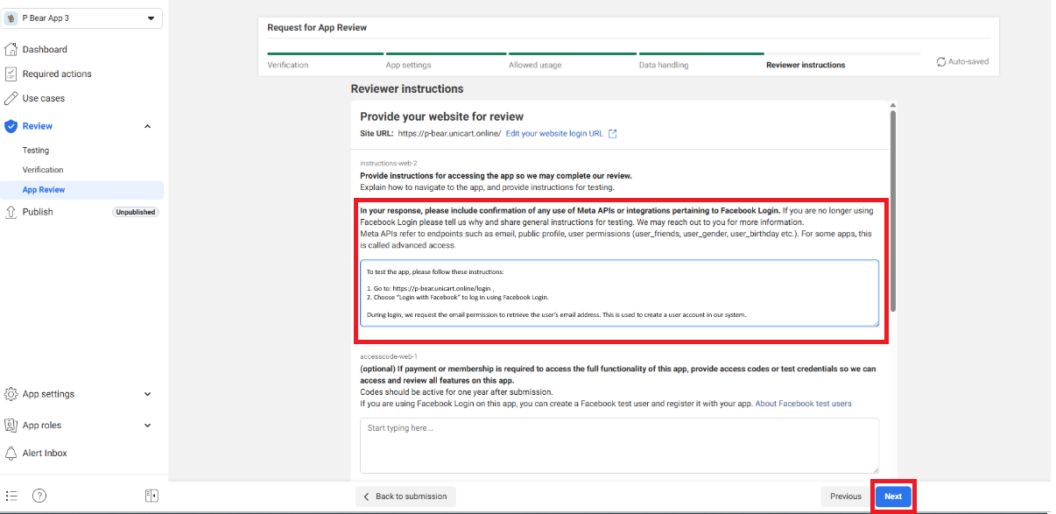
To test the app, please follow these instructions:

1. Go to: https://domainname.com/login
2. Choose “Login with Facebook” to log in using Facebook Login.

During login, we request the email permission to retrieve the user’s email address. This is used to create a user account in our system.
Step 13: Once all the steps are completed, click Submit for review.
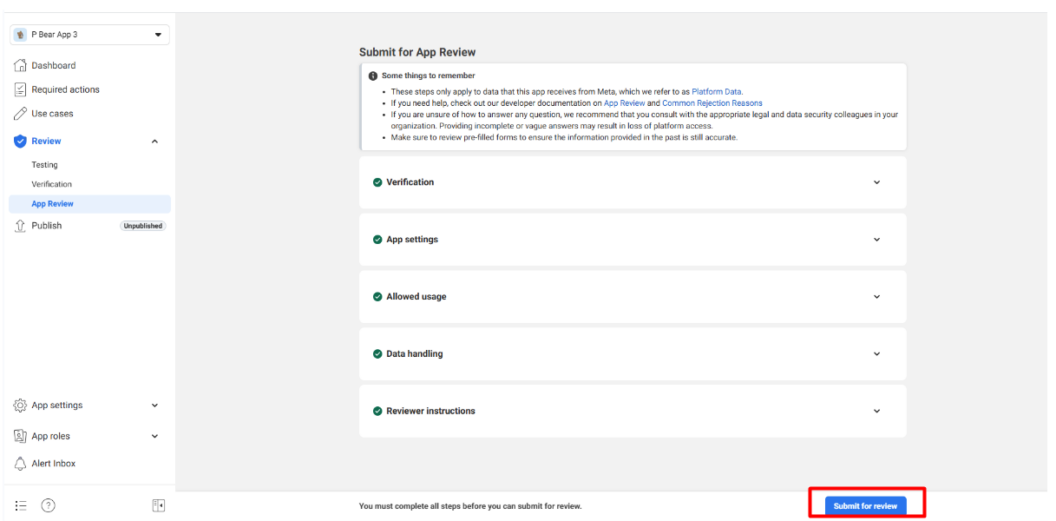
📌Note: Developers can no longer edit or cancel submissions once they are under review.
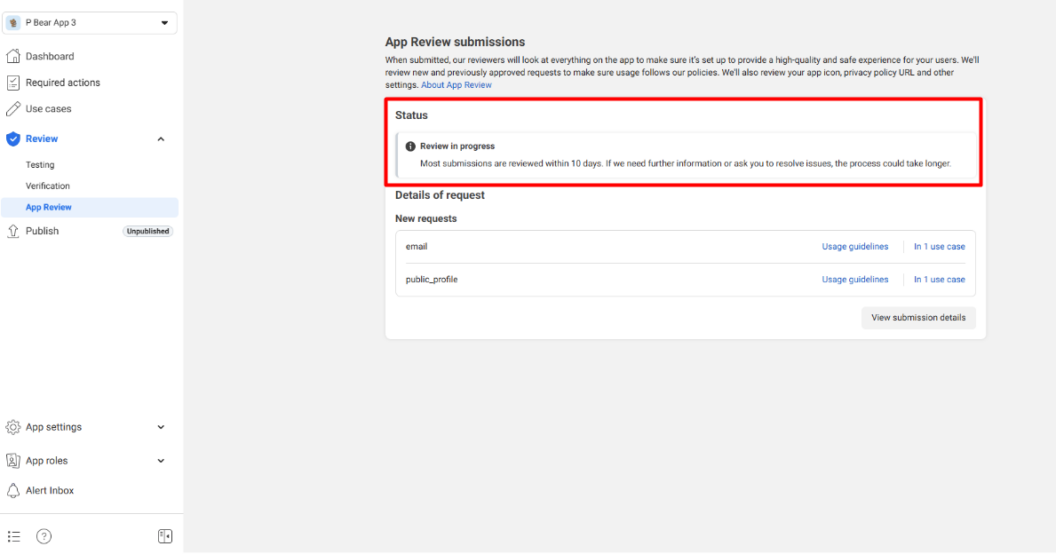
Step 14: After submission, please wait until the Review Status is completed.
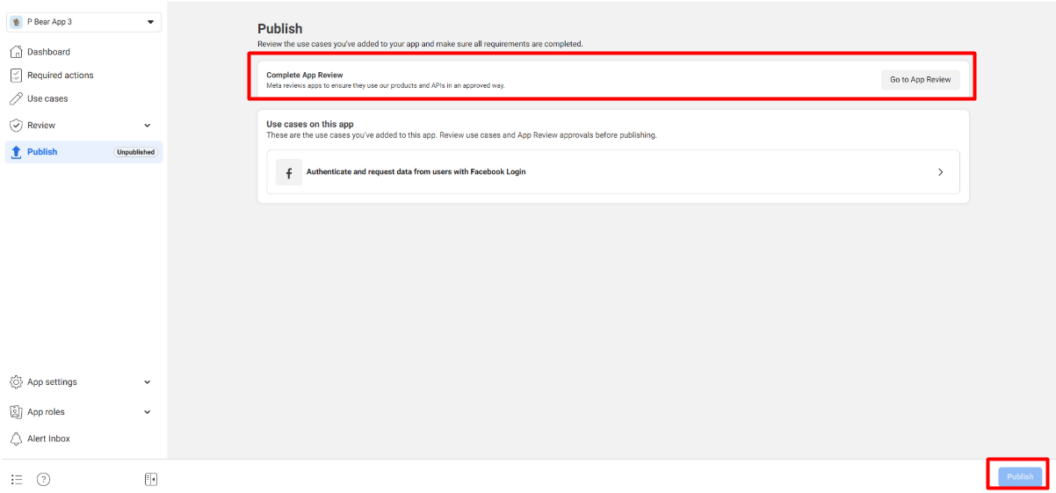
Step 15: Once Complete App Review > click the Publish button.
5. Set Up Facebook Login Integration
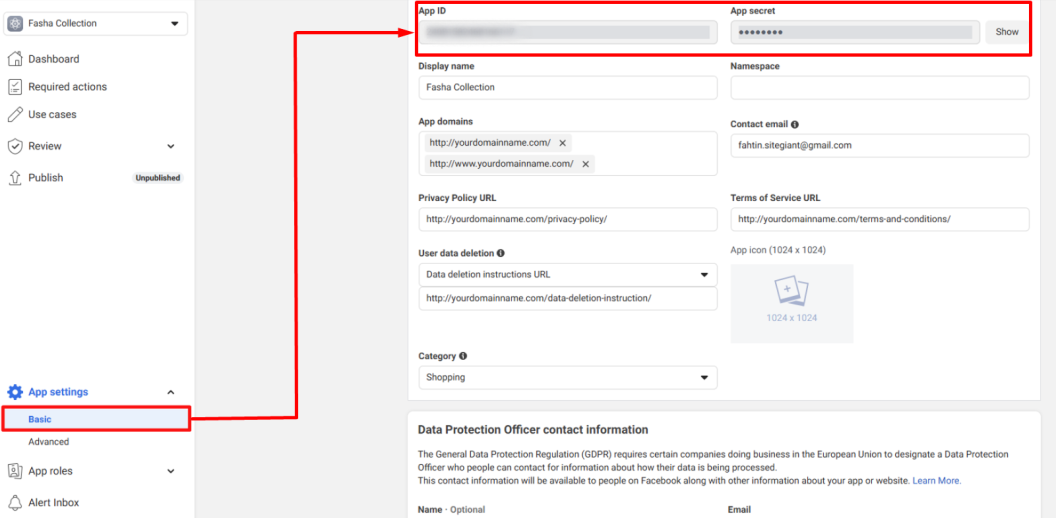
Step 1: Navigate to App Settings on the sidebar menu > Basic > copy the App ID and App Secret for later use.
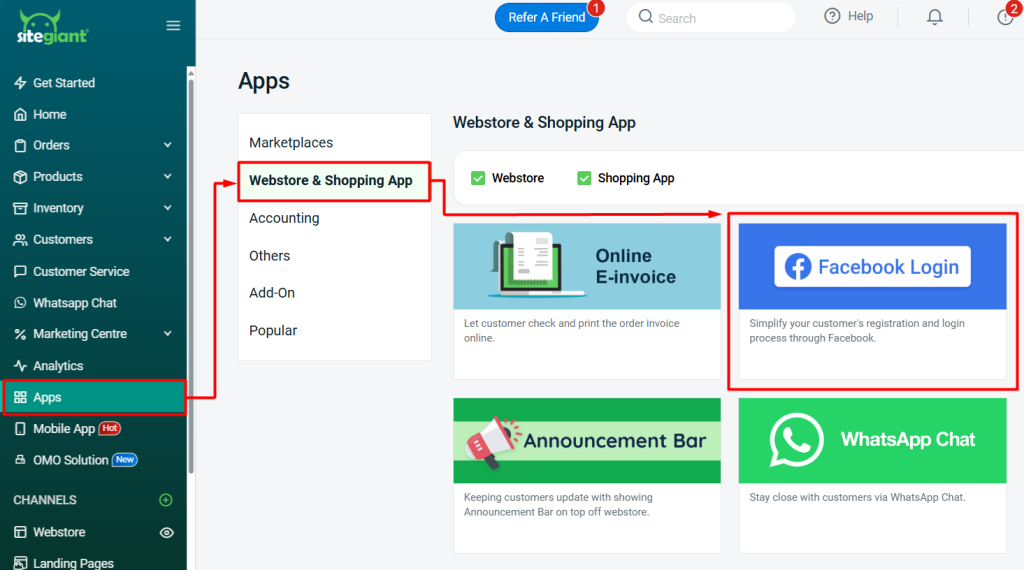
Step 2: Log in to SiteGiant Seller Center > navigate to Apps on the sidebar menu > Webstore & Shopping App > Facebook Login.
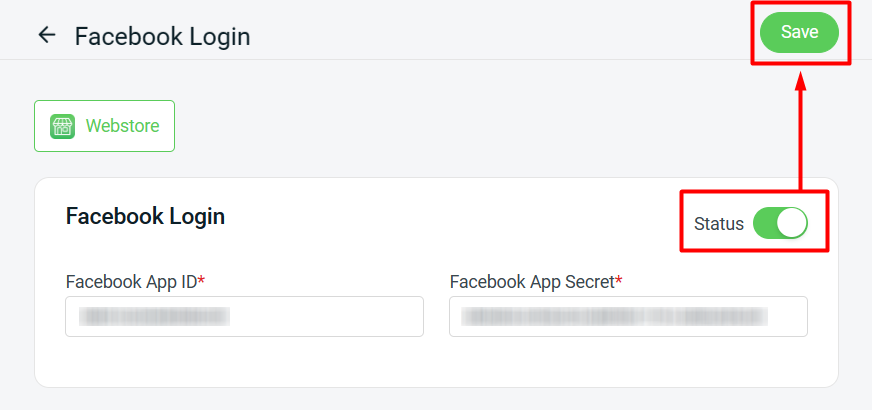
Step 3: Enable the Status > paste the App ID and App Secret to the respective field > Save.
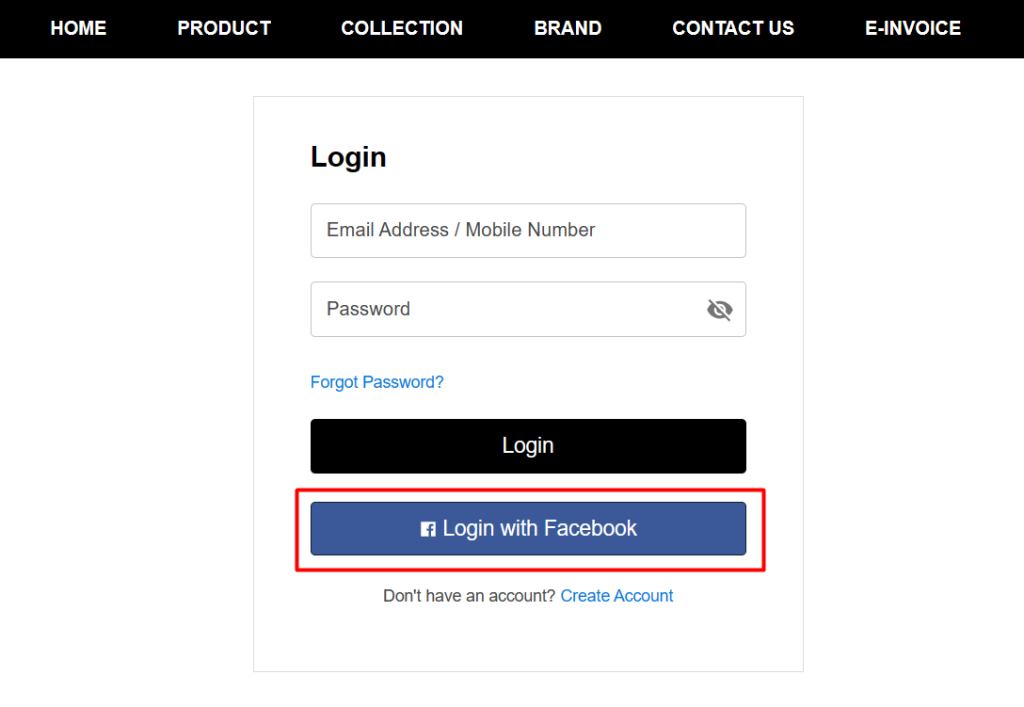
Step 4: The Login with Facebook button will be available on the Customer Login page.
📝Additional Information
1. Linked Account (From Customer Perspective)
If a customer wishes to link their Facebook account, they can click Link under My Account > Linked Account.
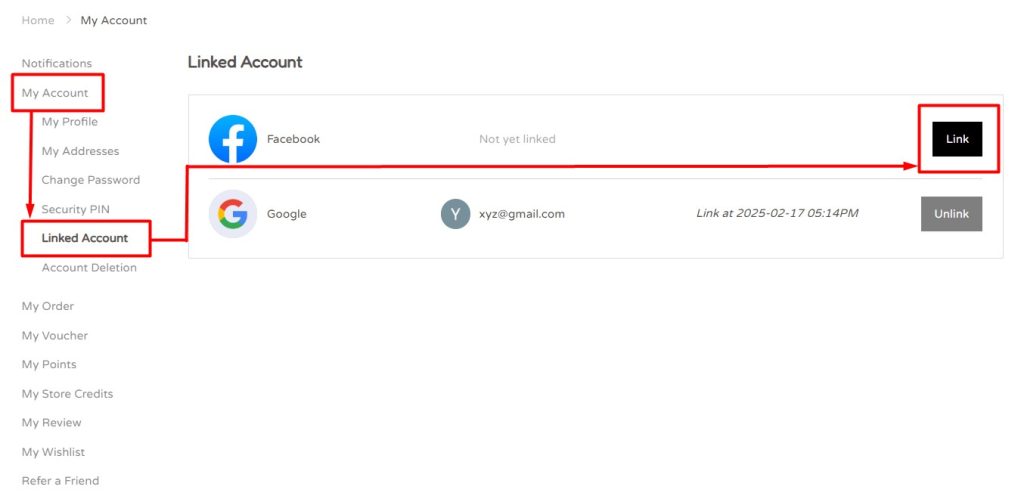
📌 Note: Each Facebook account can only be linked to one account. If the customer wishes to unlink the account, they can click the Unlink button.