1. Introduction
2. Place A Test Order
3. Manage Test Order
1. Introduction
Once you have completed the online webstore setup, you may role-play as a customer for your SiteGiant Webstore to go through the purchase and checkout flow to ensure that the checkout process is smooth and correct.
2. Place A Test Order
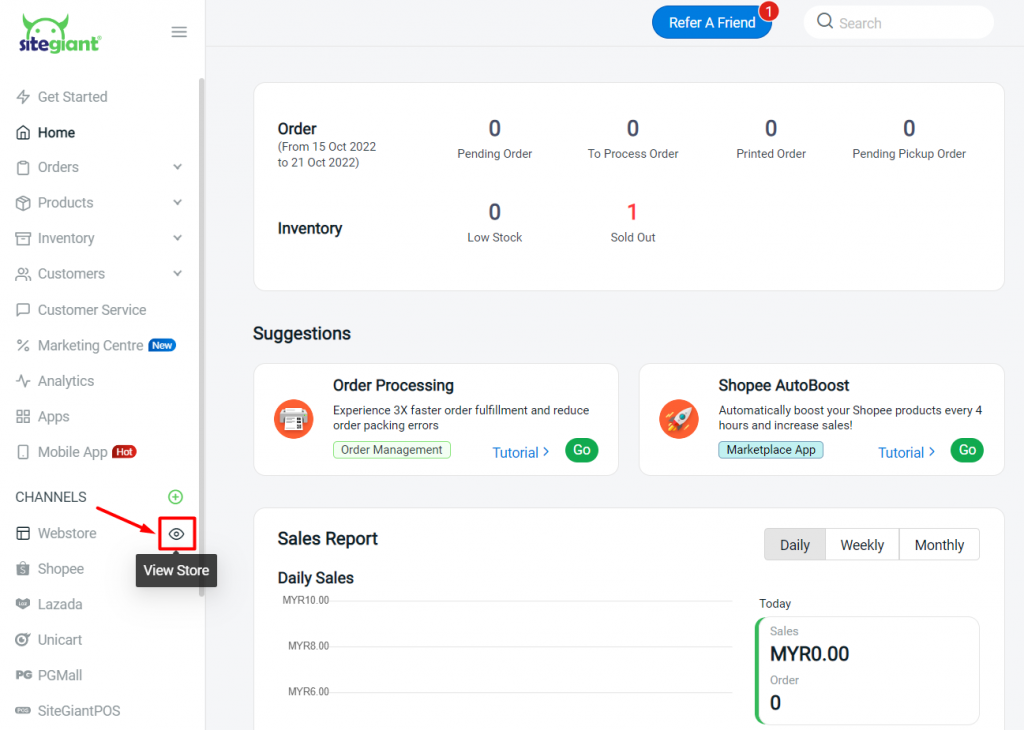
Step 1: Go to Channels > Webstore and click on the preview icon to view your webstore.
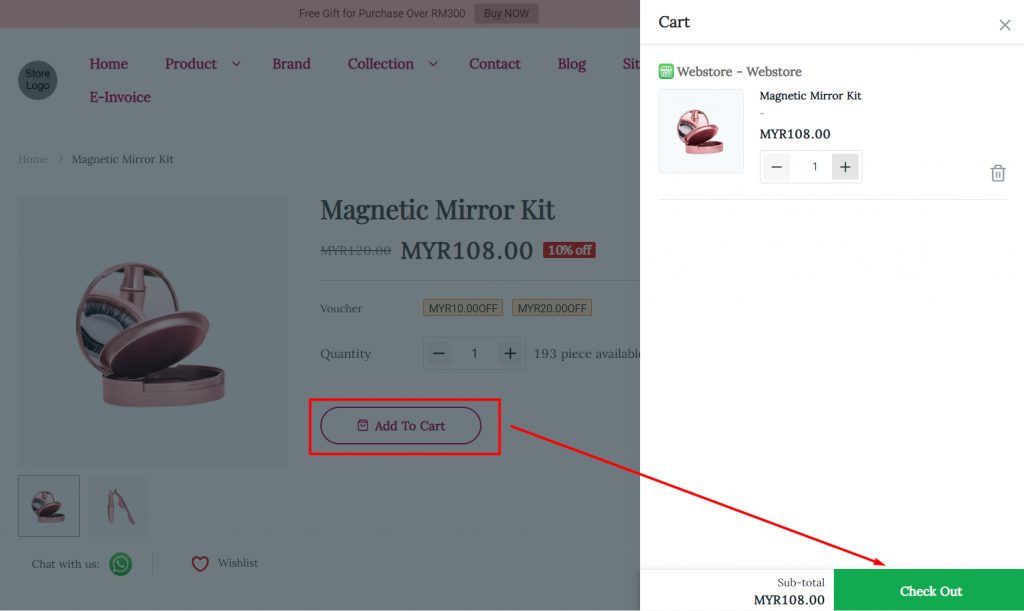
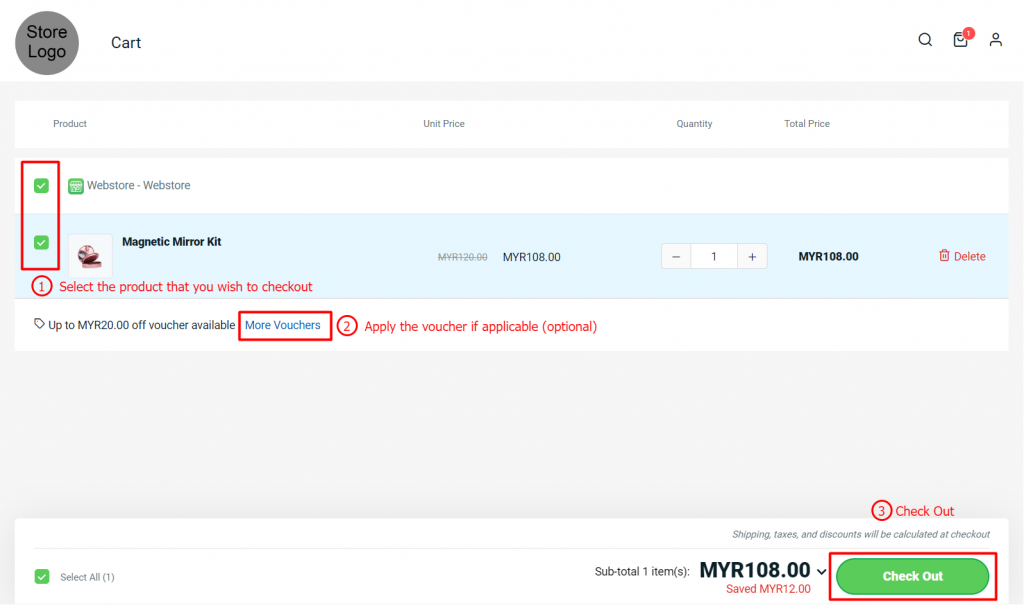
Step 2: Add a product to the cart > click on the Check Out button.
Step 3: Confirm the product to check out > apply the Vouchers (optional) > Check Out.
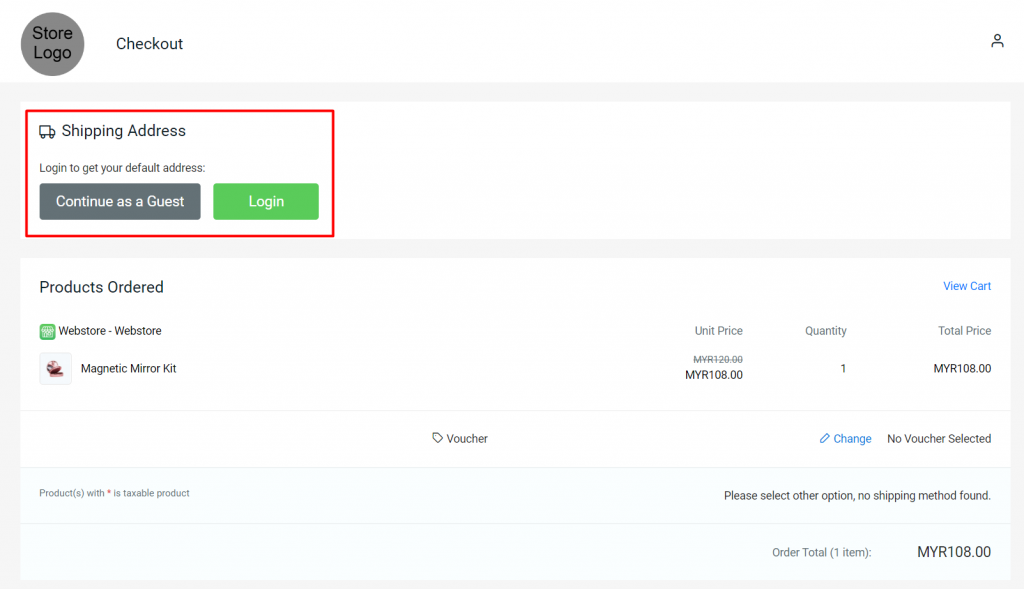
Step 4: You can choose to either Continue as a Guest or Login to your customer account.
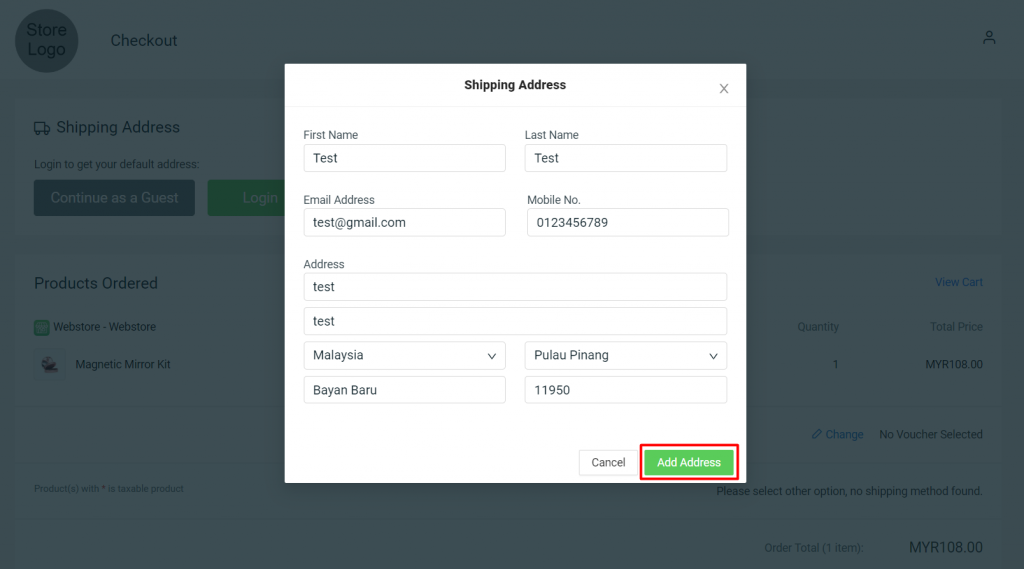
Step 5: If choose to Continue as a Guest, after clicking on the button, you will need to fill in all the shipping details > Add Address.
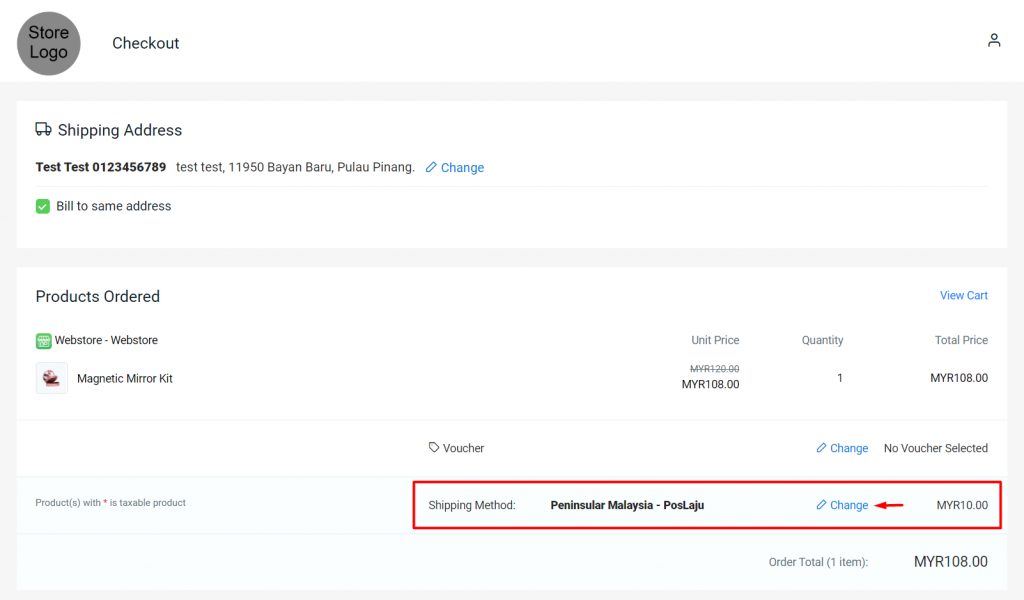
Step 6: The Shipping Method that supported your Shipping Address will be shown here, you may click on Change to select your preferred Shipping Method.
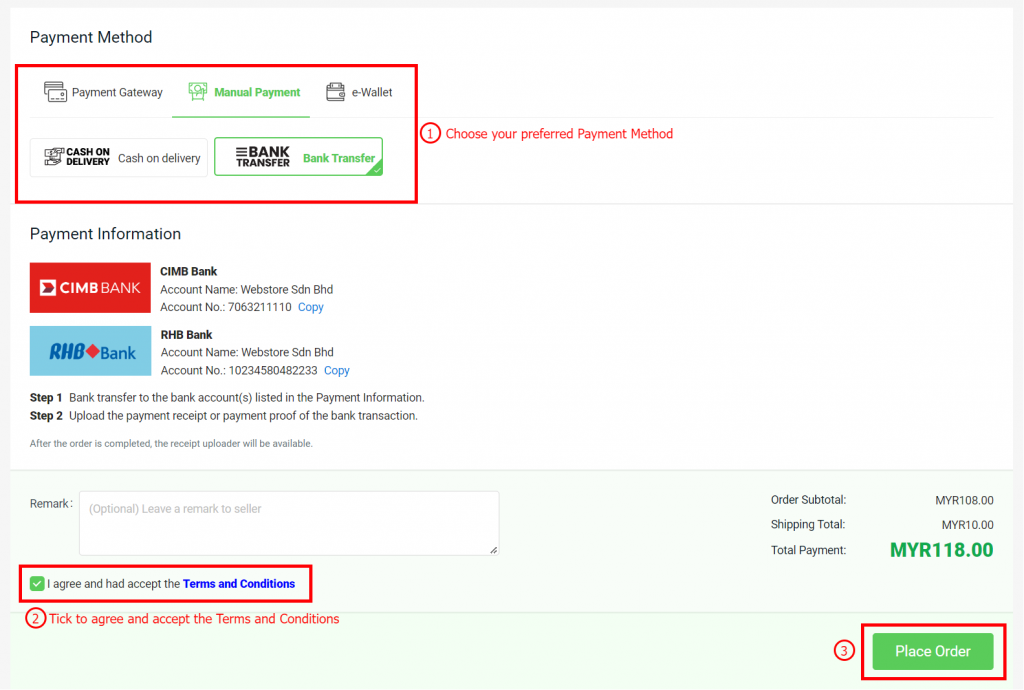
Step 7: Choose your preferred Payment Method > tick on the check box to agree and accept the Terms and Conditions > Place Order.
Step 8: Order is placed successfully.
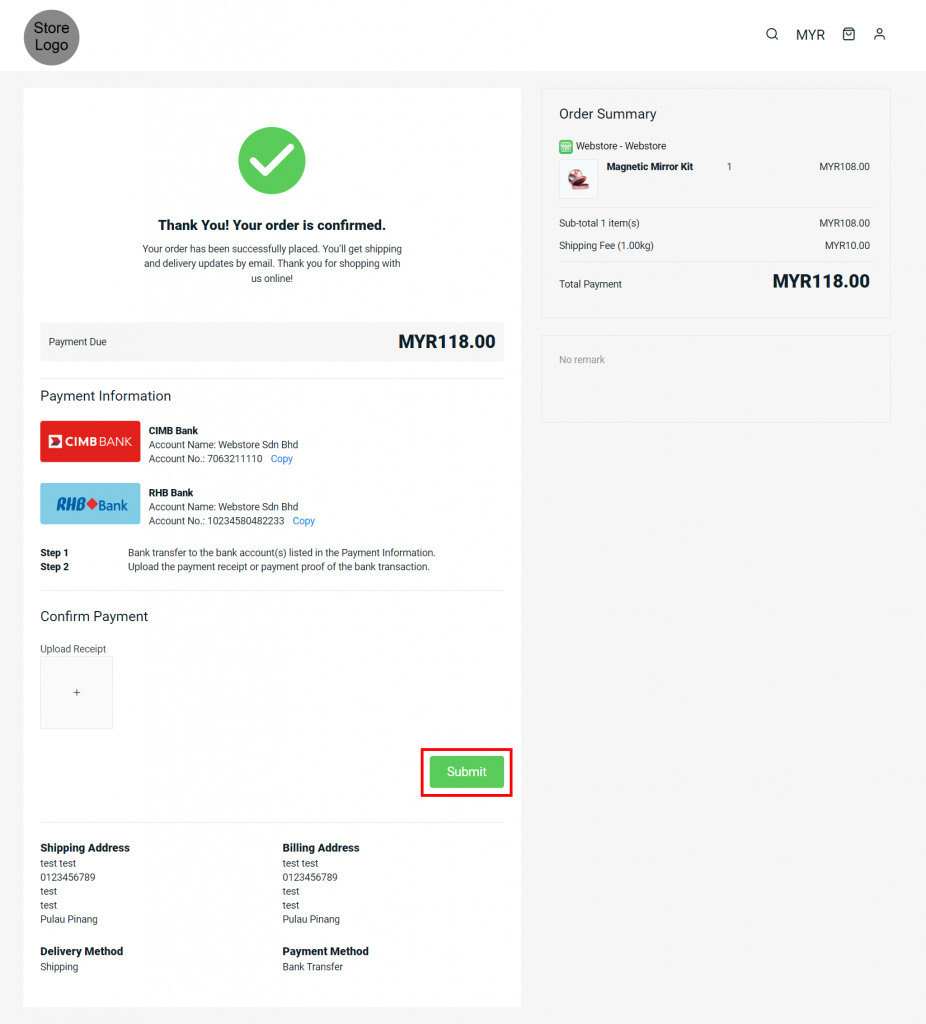
3. Manage Test Order
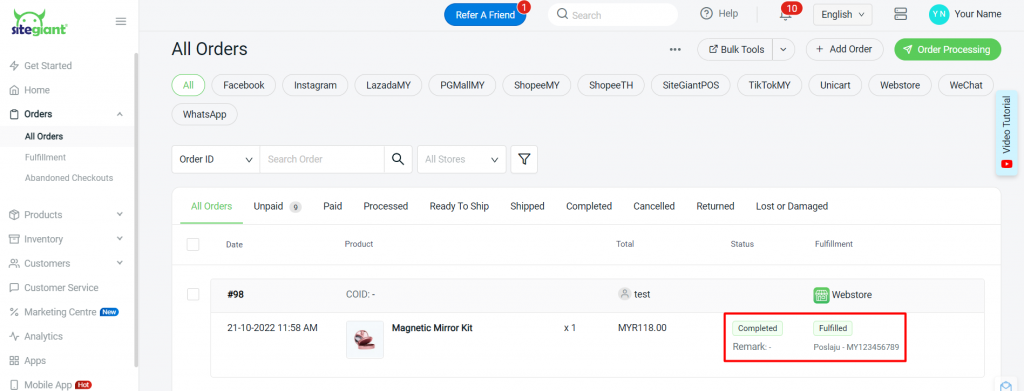
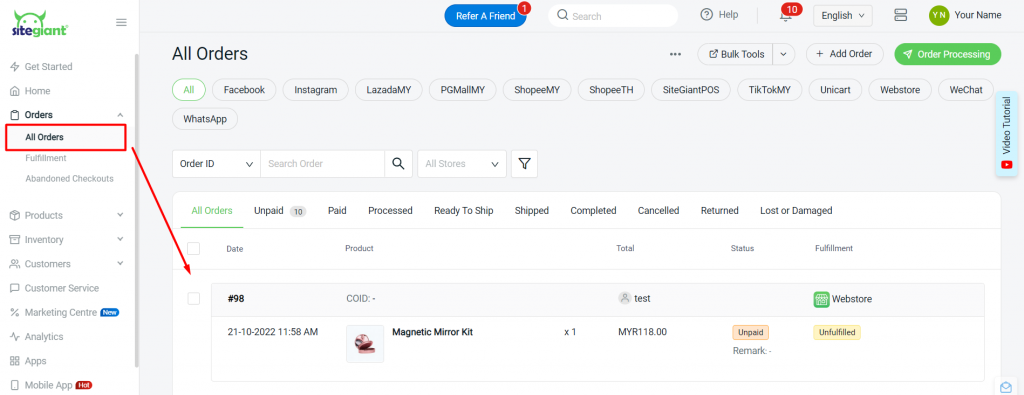
Step 1: You can find the order in Orders > All Orders.
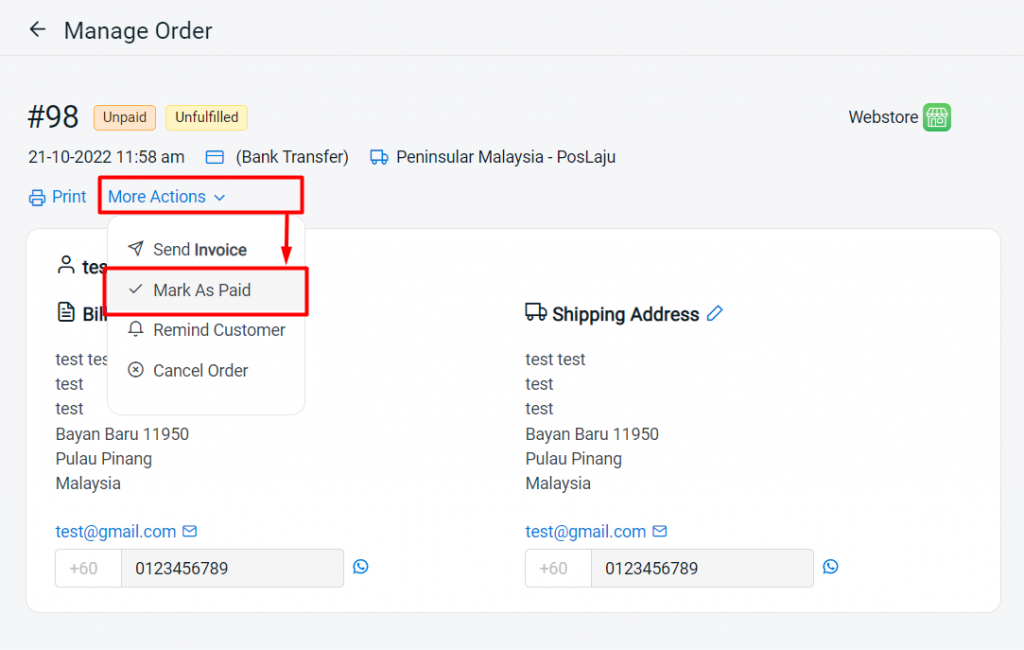
Step 2: For the Manual Payment Method such as Bank Transfer and E-Wallet, you will need to go to the order details page and mark the order as Paid once confirm that received the payment.
Step 3: Once the status is Paid, you may proceed to fulfill this order either manually or using Order Processing.
?Tips: May refer to How To Fulfill Order And Update Tracking Number Manually & How To Print Webstore And Others Shipping Label.
Step 4: Once the fulfillment is done, the order will change to Processed status and Fulfilled.
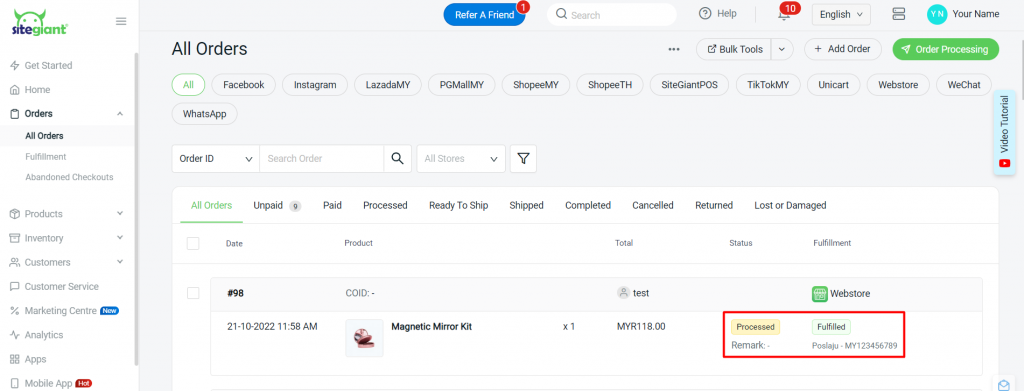
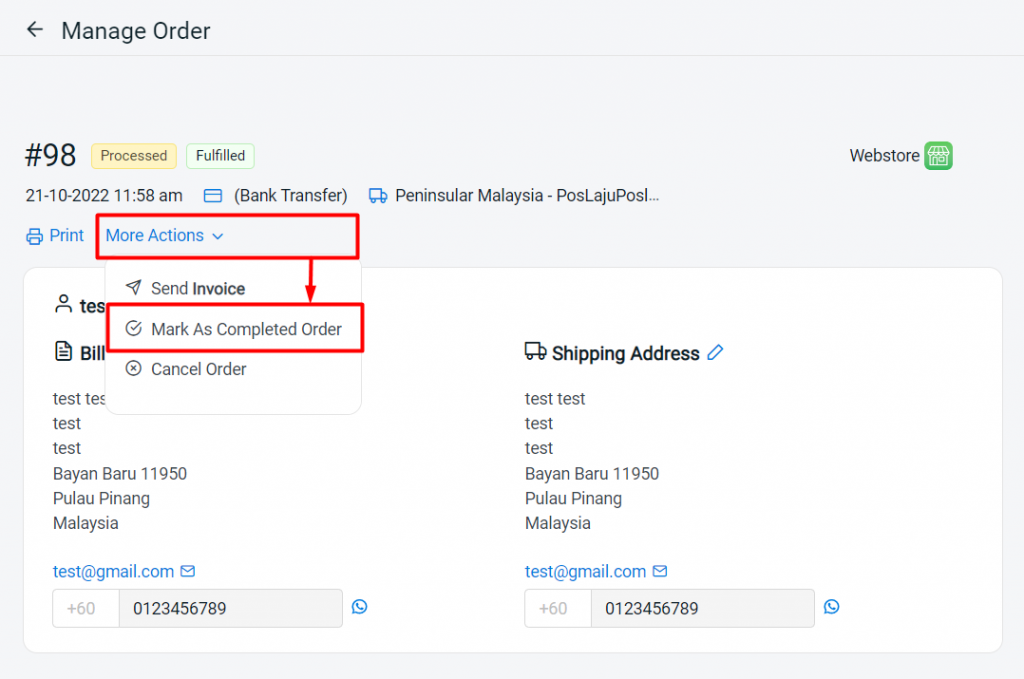
Step 5: After the product is delivered to the customer, you may go to the product details page and Mark As Completed Order. Then the whole process is considered completed.
