1. Introduction
2. Set Reserved Stock
3. Update Reserved Stock With Excel (Batch Edit)
1. Introduction
You can set some reserved stock for your local inventory for not selling that certain amount of stocks on the webstore or marketplace platforms (sales channels).
Thus, the SiteGiant system will automatically deduct the reserved stock quantity from the currently sellable stock. You can utilize this reserved stock setting to prevent oversell situation if the product has limited stock quantity which is fast selling.
2. Set Reserved Stock
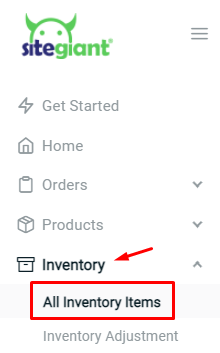
Step 1: Go to Inventory > All Inventory Items from SiteGiant Dashboard
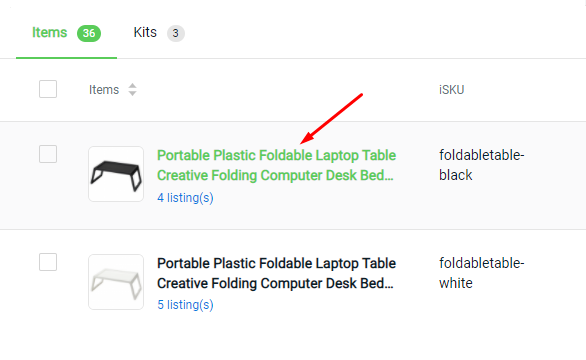
Step 2: Click on the item name to edit the information
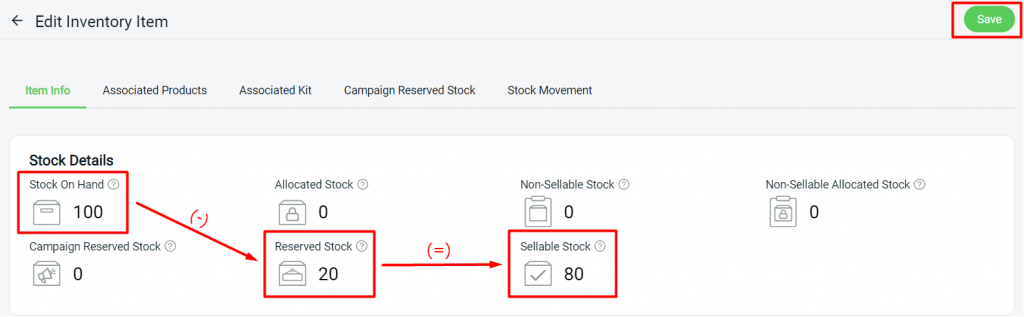
Step 3: Set the Reserved Stock quantity for the item

Step 4: You will notice that your sellable stock is equal to stock on hand deduct the reserved stock > Save to sync the new sellable stock to all associated sales channel products
Step 5: You can use the reserved quantity to cover any oversell product that may happen during the big sales campaign
3. Update Reserved Stock With Excel (Batch Edit)
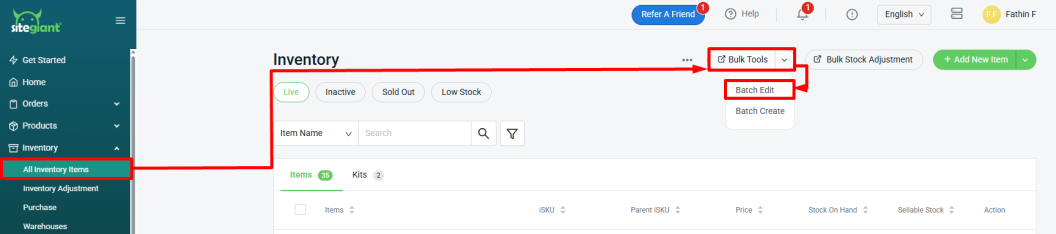
Step 1: Navigate to Inventory > All Inventory Items > click Bulk Tools > select Batch Edit.
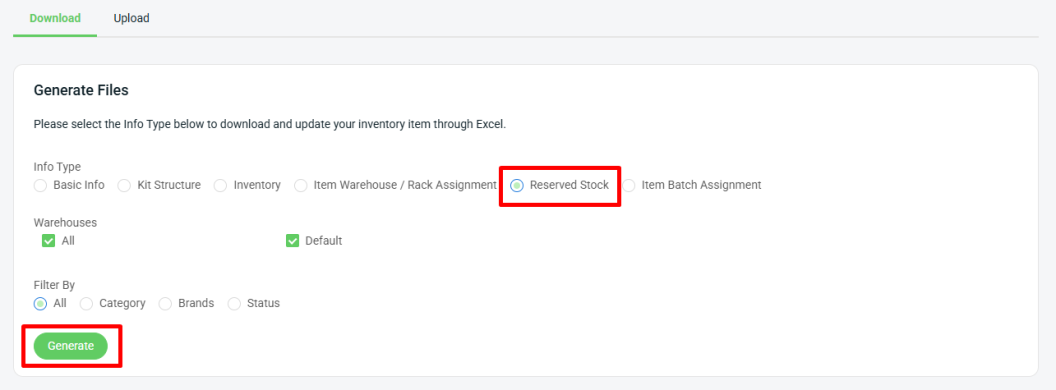
Step 2: Under Download, select Info Type, which is Reserved Stock > select Warehouses > choose Filter By > Generate.
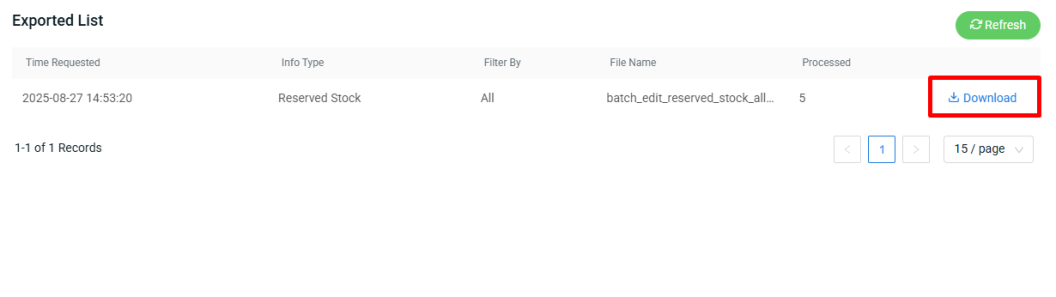
Step 3: Download the generated Excel file (zipped).
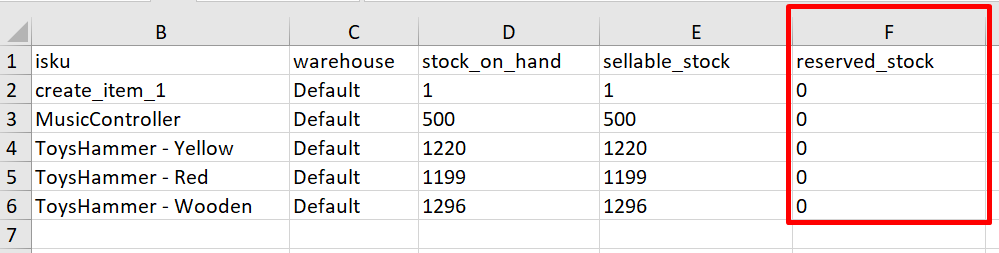
Step 4: Update the Reserved Stock column > Save.
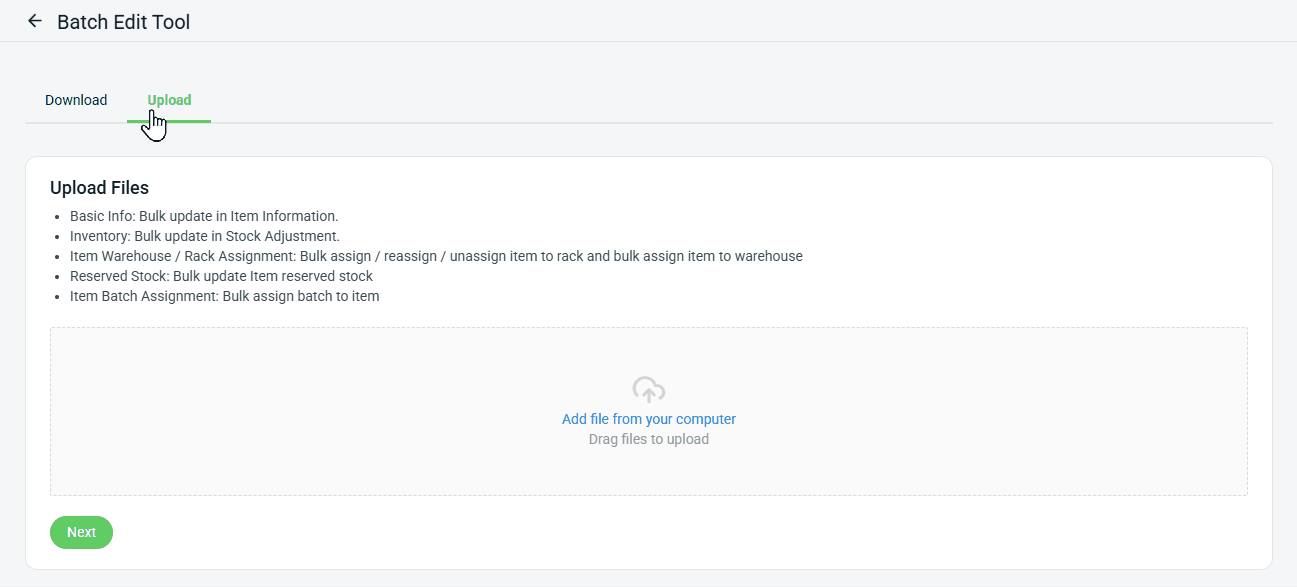
Step 5: Back to the Batch Edit Tool page > click Upload > Add file from your computer > Next.
Step 6: If there are any errors in the Excel uploaded, you will see the error message in Errors and Warnings, and it will show the error column in the Data Preview. Amend the error column and reupload the file. Click on Proceed if the file uploaded does not have errors.

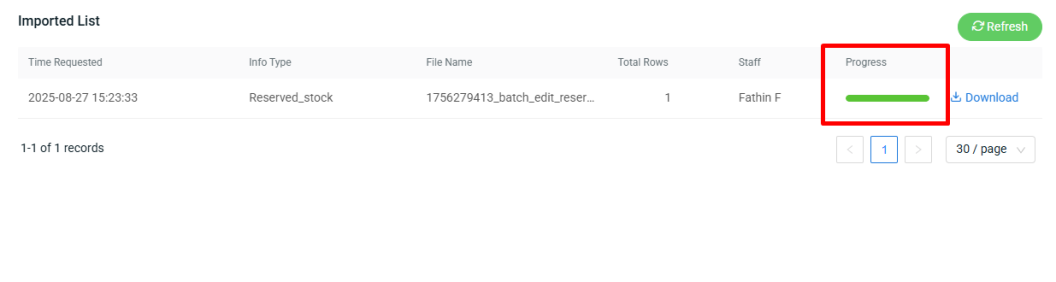
Step 7: When the Progress status turns green, it means that the data is completely updated.