
1. Introduction
2. Rack Stock Transfer
3. Rack Stock Receiving
1. Introduction
Stock Transfer (Internal) refers to moving inventory from one rack to another within the same warehouse. An internal stock transfer aims to ensure optimal inventory levels across locations, meeting demand more efficiently without needing external purchases.
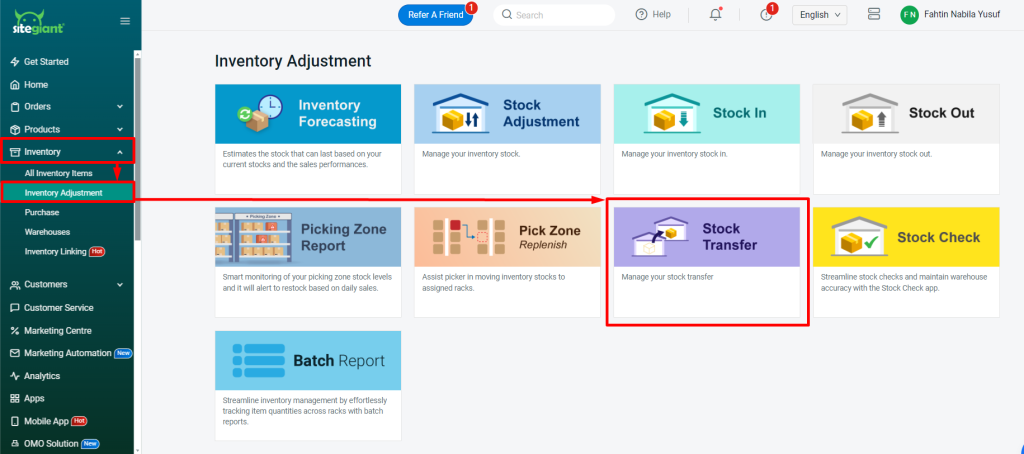
2. Rack Stock Transfer
Step 1: Go to Inventory > Inventory Adjustment > click Stock Transfer.
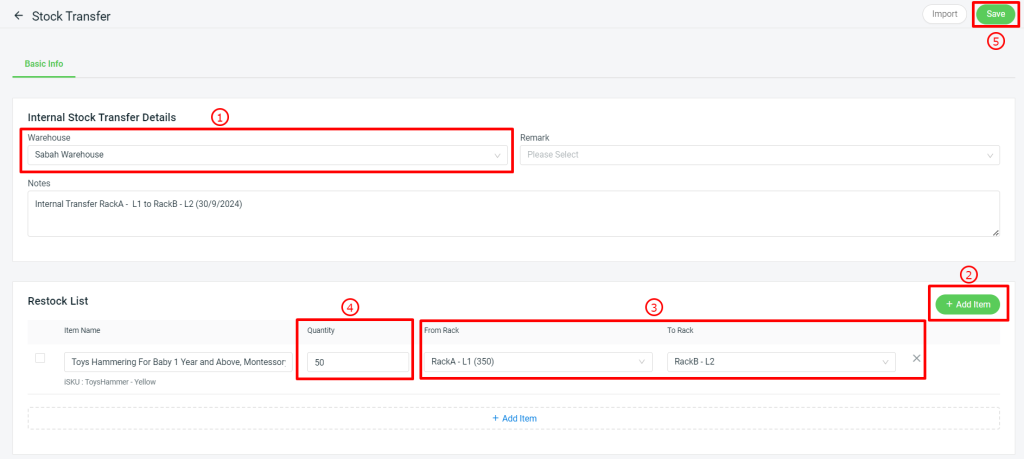
Step 2: Press + Add Stock Transfer > select Internal Stock Transfer.
Step 3: Select Warehouse > + Add Item > select From Rack and To Rack > update Quantity you wish to transfer > click Save.
3. Rack Stock Receiving
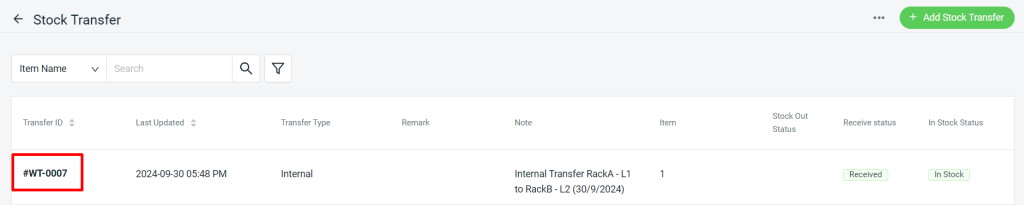
Step 1: Under Stock Transfer Listing, click Transfer ID to update the Receive Status and In Stock Status.

Step 2: Click More (…) under Restock List > select the Quantity Transferring Status.
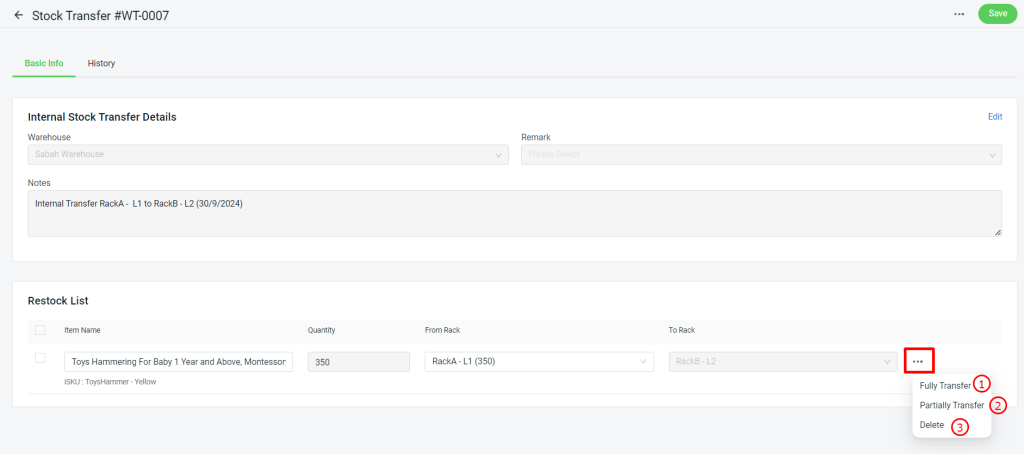
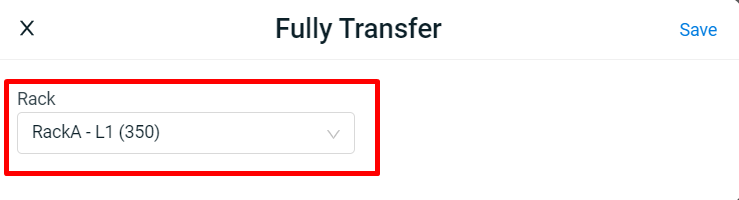
1. Fully Transfer: The Fully Transfer option will only be enabled if you allocated the full quantity from the rack that you intend to transfer.2. Partially Transfer: You can specify the quantity you wish to transfer.
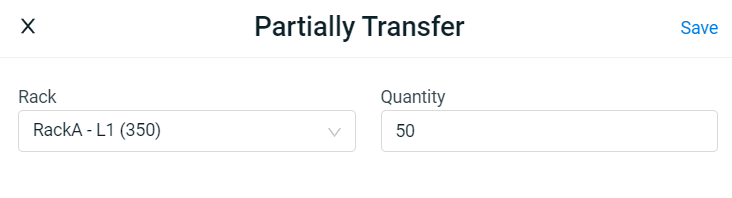
 2. Partially Transfer: You can specify the quantity you wish to transfer.
 3. Delete: You may remove the transferring item from Stock Transfer ID.
Step 3: Once the quantity is allocated, click Save.
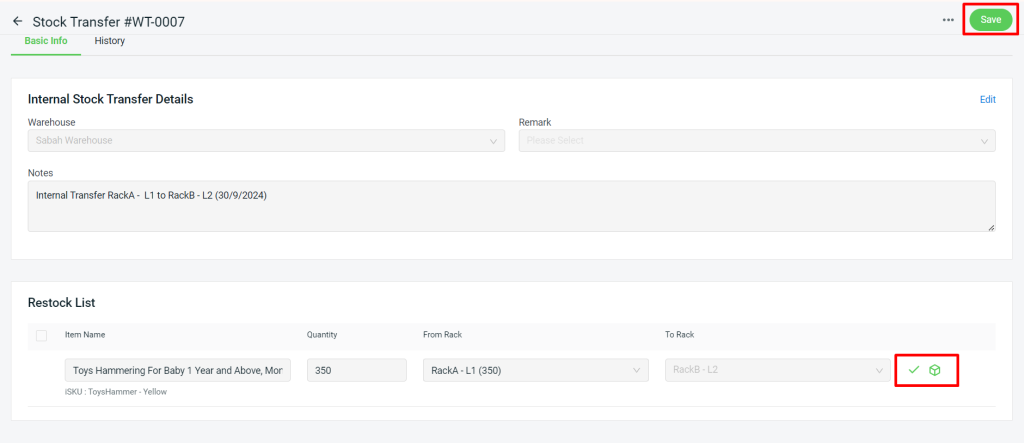
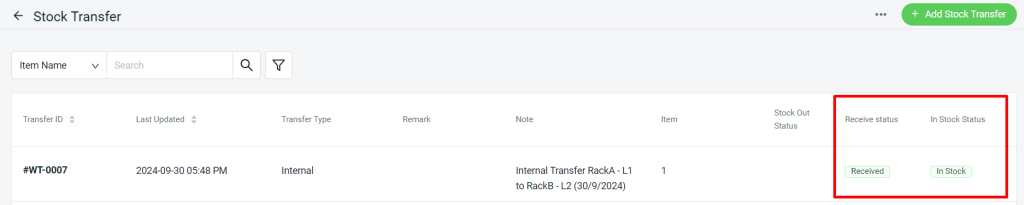
Step 4: Under Stock Transfer Listing, the Receive Status and In Stock Status are updated.
📝Additional Information
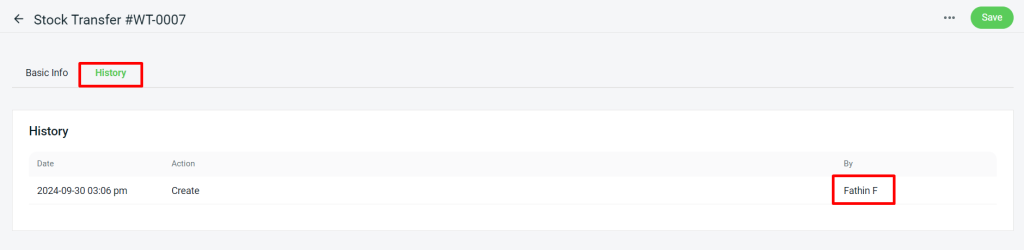
1. History
Step 1: Click inside the Transfer ID.
Step 2: Click on the History tab to review the individual responsible for the transfer process.
2. Print Stock Transfer
Step 1: Click inside the Transfer ID.
Step 2: Click More (…) > Print.
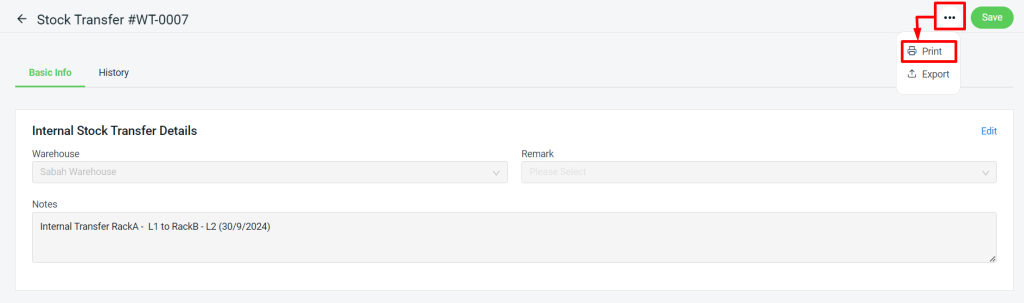
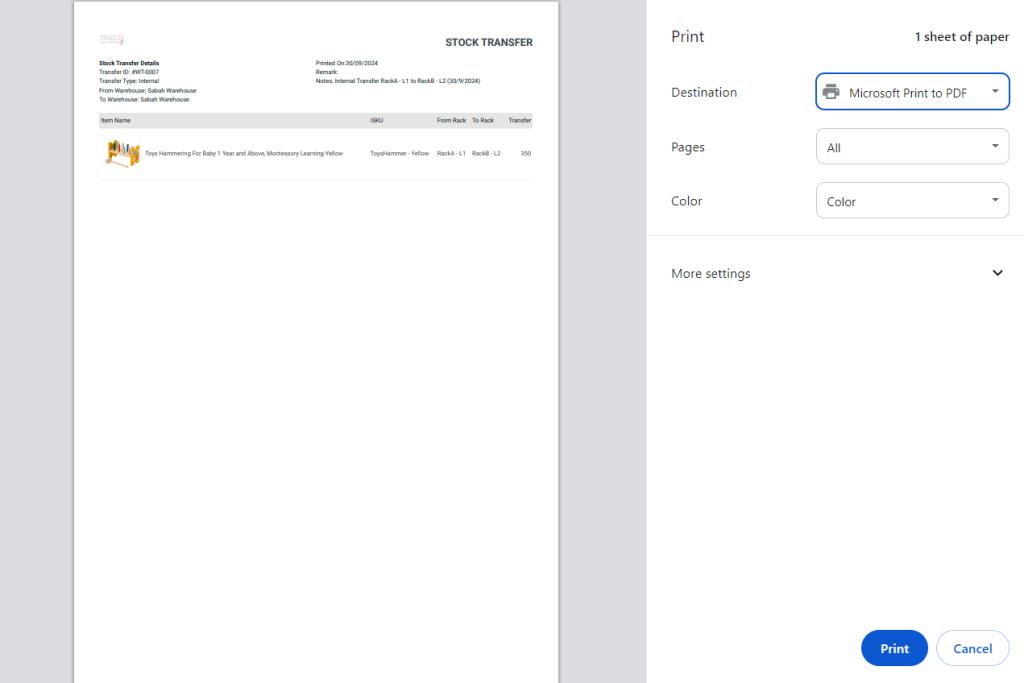
Step 3: You can print out the Stock Transfer details.
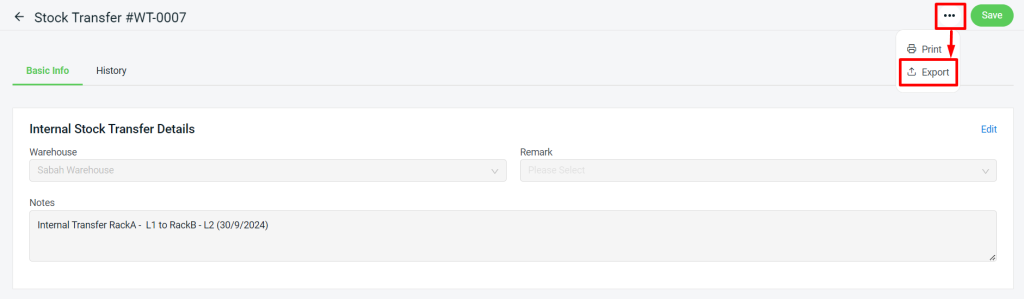
3. Export Stock Transfer Report
Step 1: Click inside the Transfer ID.
Step 2: Click More (…) > Export.
Step 3: Then, click the Download button.

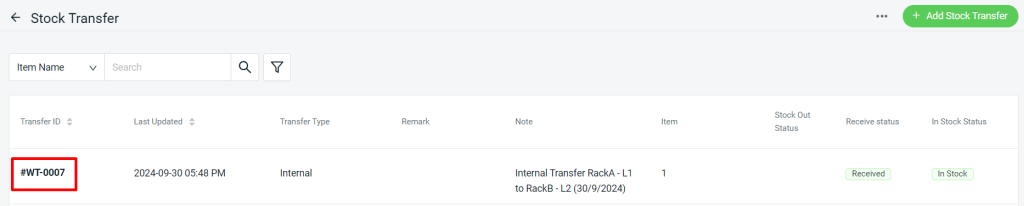
Step 4: You can check out the quantity transferred from the old rack to the new rack.
