1. Introduction
2. Add Shopping App To Facebook App
3. Set Up Facebook App Events Integration
4. iOS 14+ App Events Setup in Meta Business Suite (Optional)
5. Automatic Advanced Matching (Optional)
6. View Tracking Activities
1. Introduction
Facebook App Events is a feature similar to Facebook Pixel, but specifically for Shopping App. It helps to track your customers’ behaviour within your Shopping App, which could help you in target marketing.
Here is a list of events that we help you to track:
- Complete Registration – triggered when a customer signs up for a new account
- View Content – triggered when a customer views the product details
- Add to Wishlist – triggered when a customer adds a product to their wishlist
- Add to Cart – triggered when a customer adds a product to their cart
- Initiate checkout – triggered when a customer checkout cart, but not necessarily placing an order
- Purchase – triggered when a customer successfully places an order
This feature is only available in SiteGiant OMO Business Plan and above.
2. Add Shopping App To Facebook App
Step 1: Before you start, you will need a Facebook Developer Account and Facebook Ad Account. Please ensure that your Shopping App has already been published at both Google Play Store and Apple App Store before you proceed with the following steps.
?Tips: May refer to all the steps in How To Set Up Facebook Login to create a Facebook App.
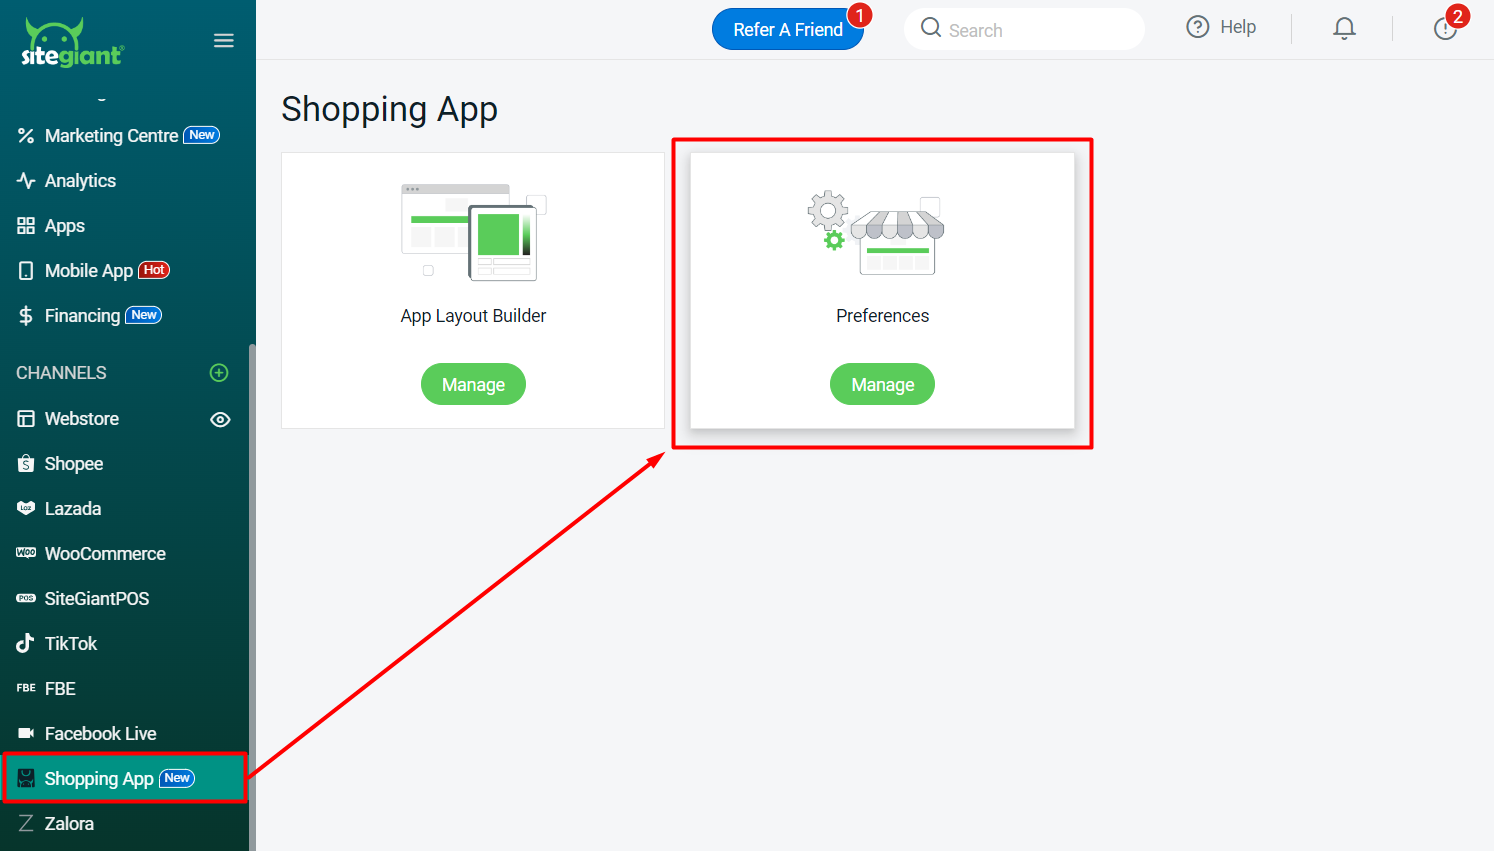
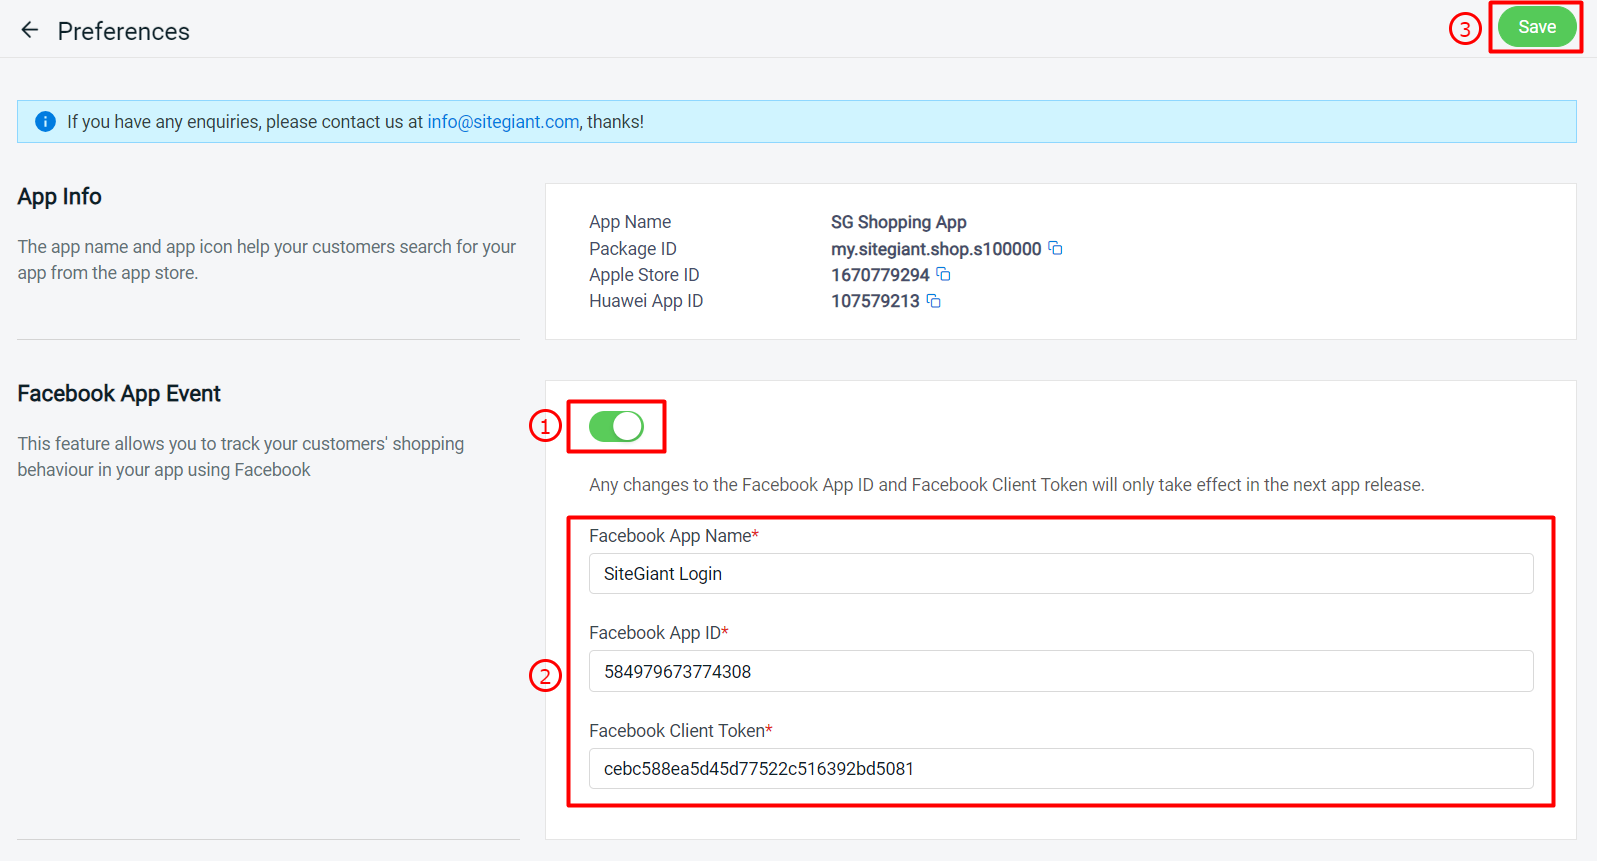
Step 2: Log in to your SiteGiant Seller Center > navigate to Shopping App from the menu > Preferences.
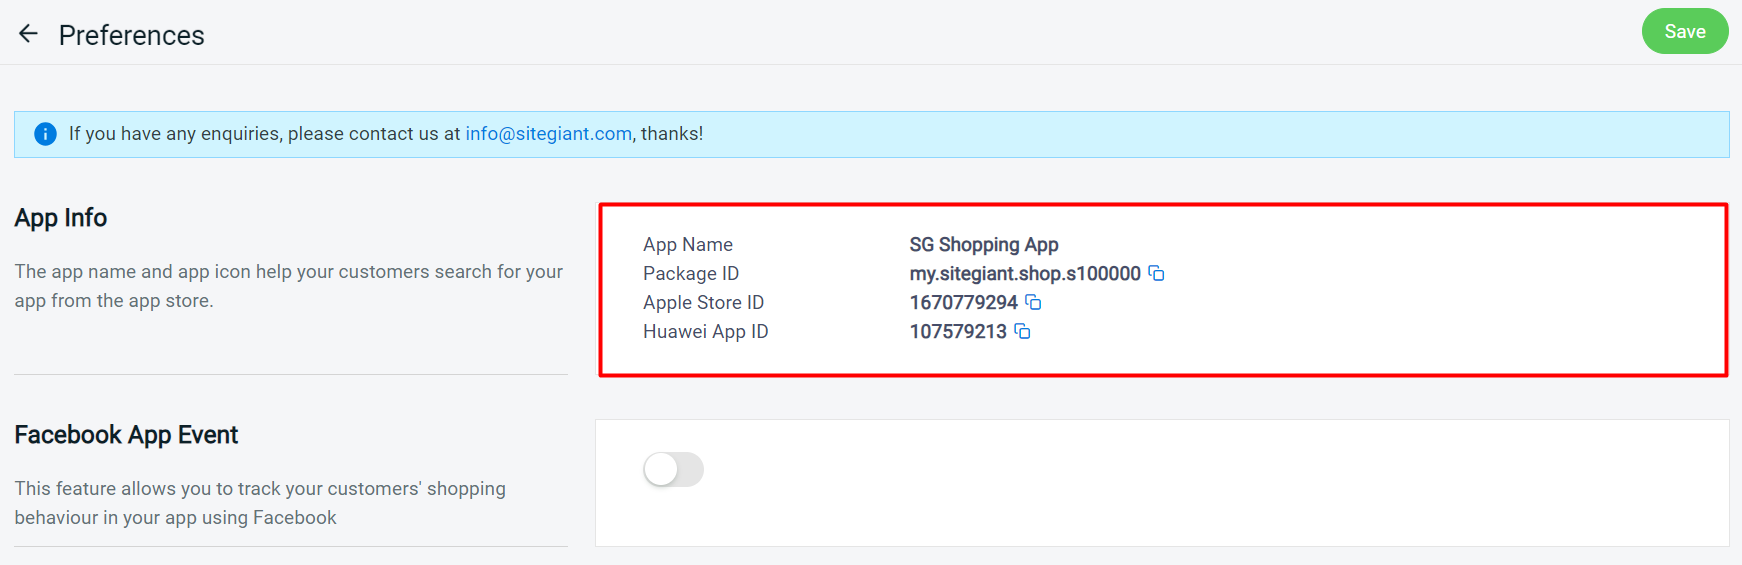
Step 3: If your Shopping App has been published, you should be able to see the following details.
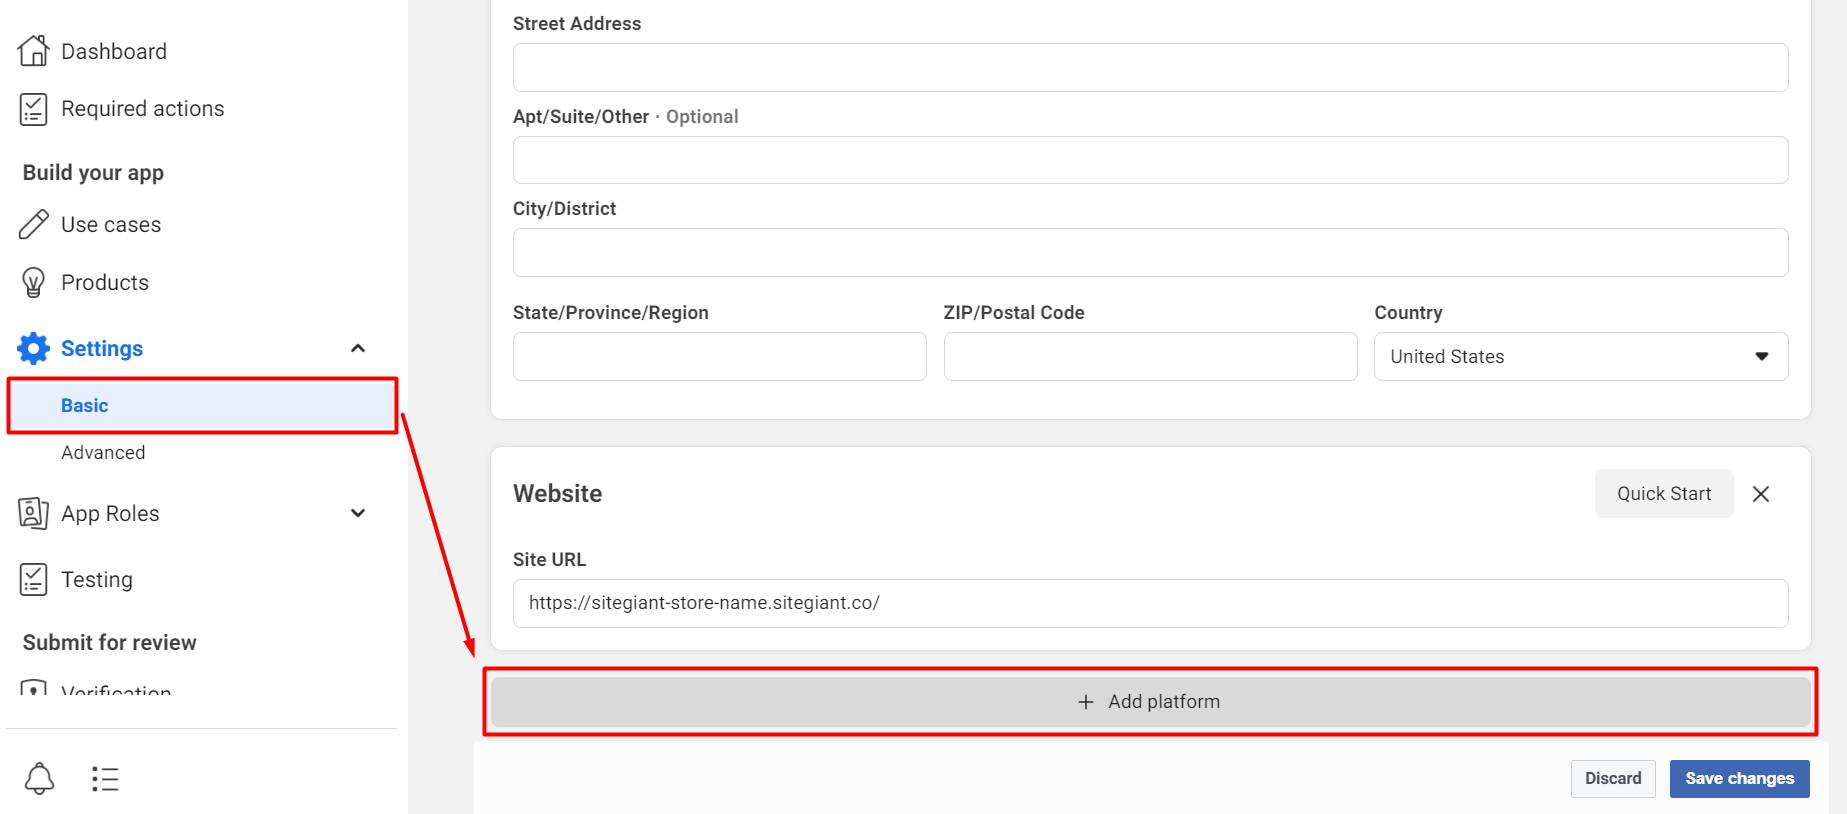
Step 4: Back to Facebook App > Go to Settings > Basic > scroll to the bottom and click + Add Platform.
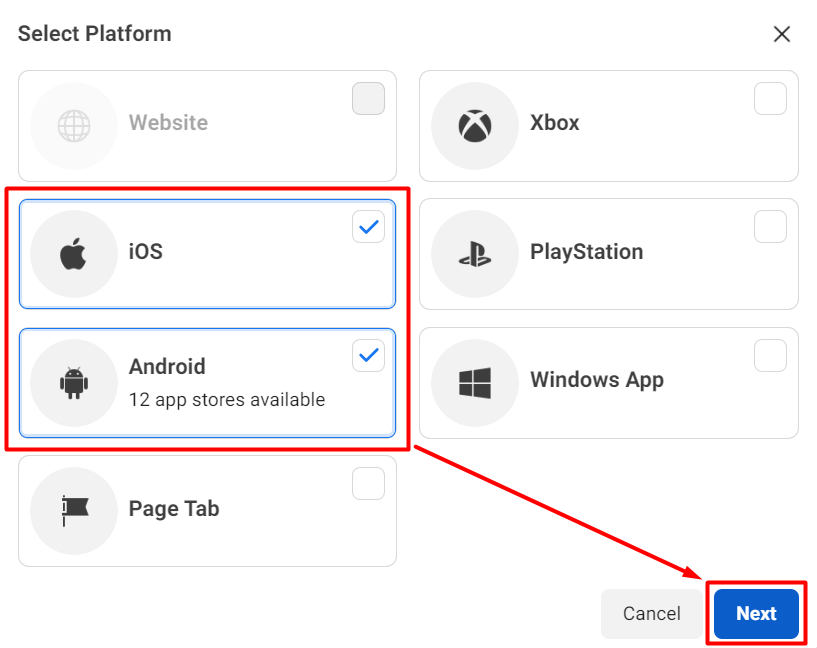
Step 5: Select iOS and Android > click on Next.
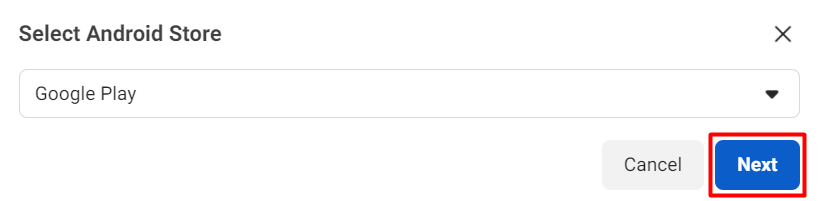
Step 6: Select Google Play from the dropdown as your Android Store > Next.
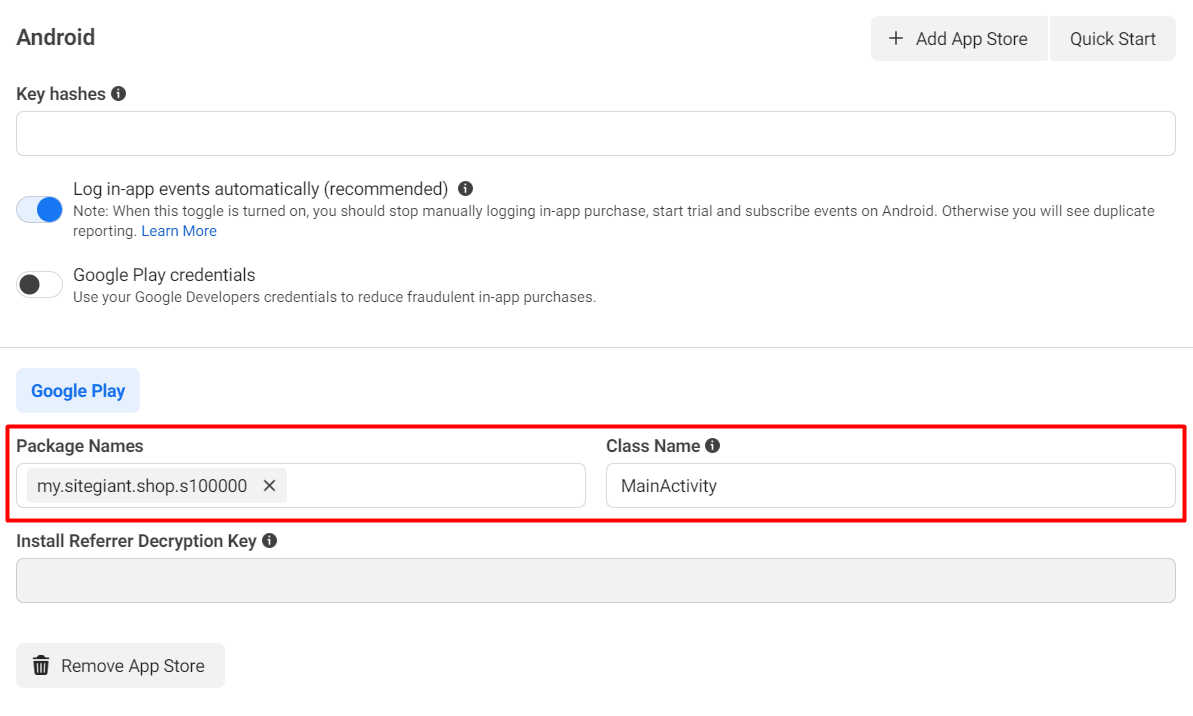
Step 7: In the Android section, copy the Package ID from SiteGiant App Info and paste it into the Package Names field > Fill in “MainActivity” in the Class Name field.
Step 8: Scroll up to the iOS section, copy the Package ID from SiteGiant App Info and paste it into the Bundle ID field > copy the App Store ID from SiteGiant App Info and paste it into iPhone Store ID and iPad Store ID fields.

Step 9: Save changes.

Step 10: Navigate to Settings > Advanced > scroll down to the Advertising Accounts section.
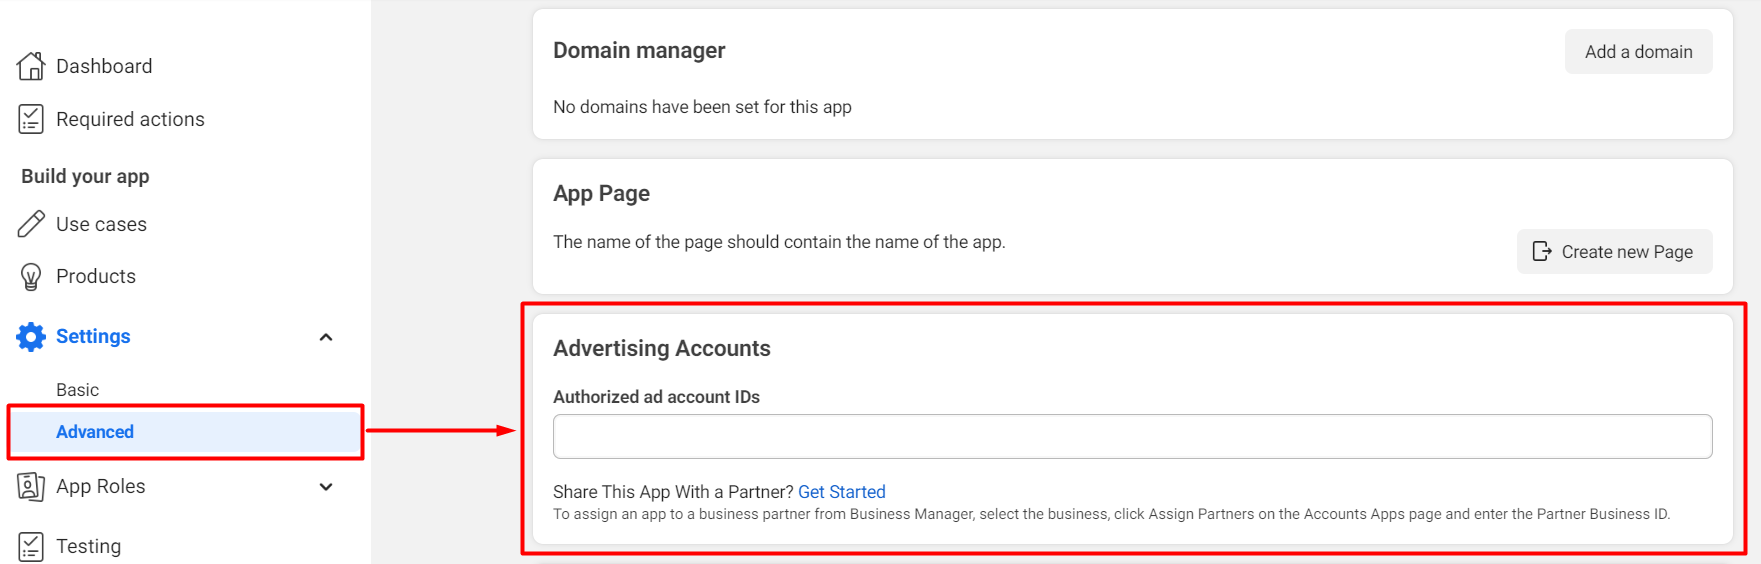
Step 11: Copy the Ad Account ID from Facebook Ad Account and paste it into the Authorized ad account IDs field > Save changes.

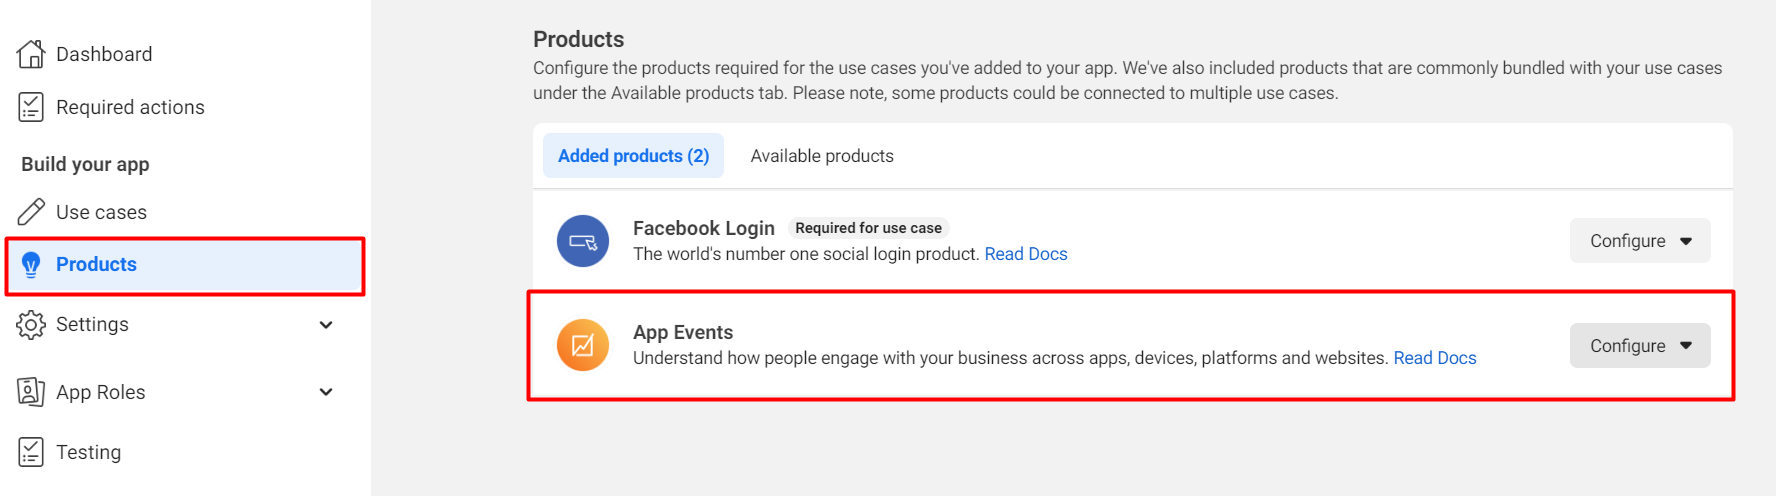
Step 12: Navigate to Products > Available products > Add App Events > the App Event will then appear in Added products.
3. Set Up Facebook App Events Integration
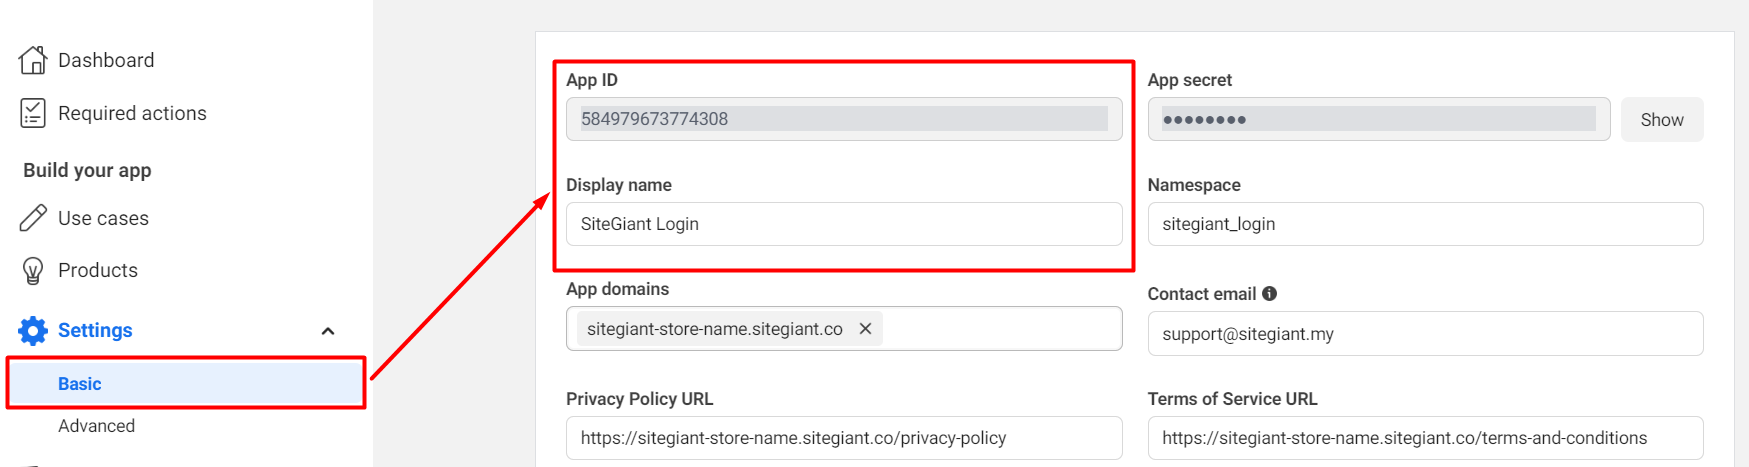
Step 1: Go to Settings > Basic > copy the App ID and Display name for later use.
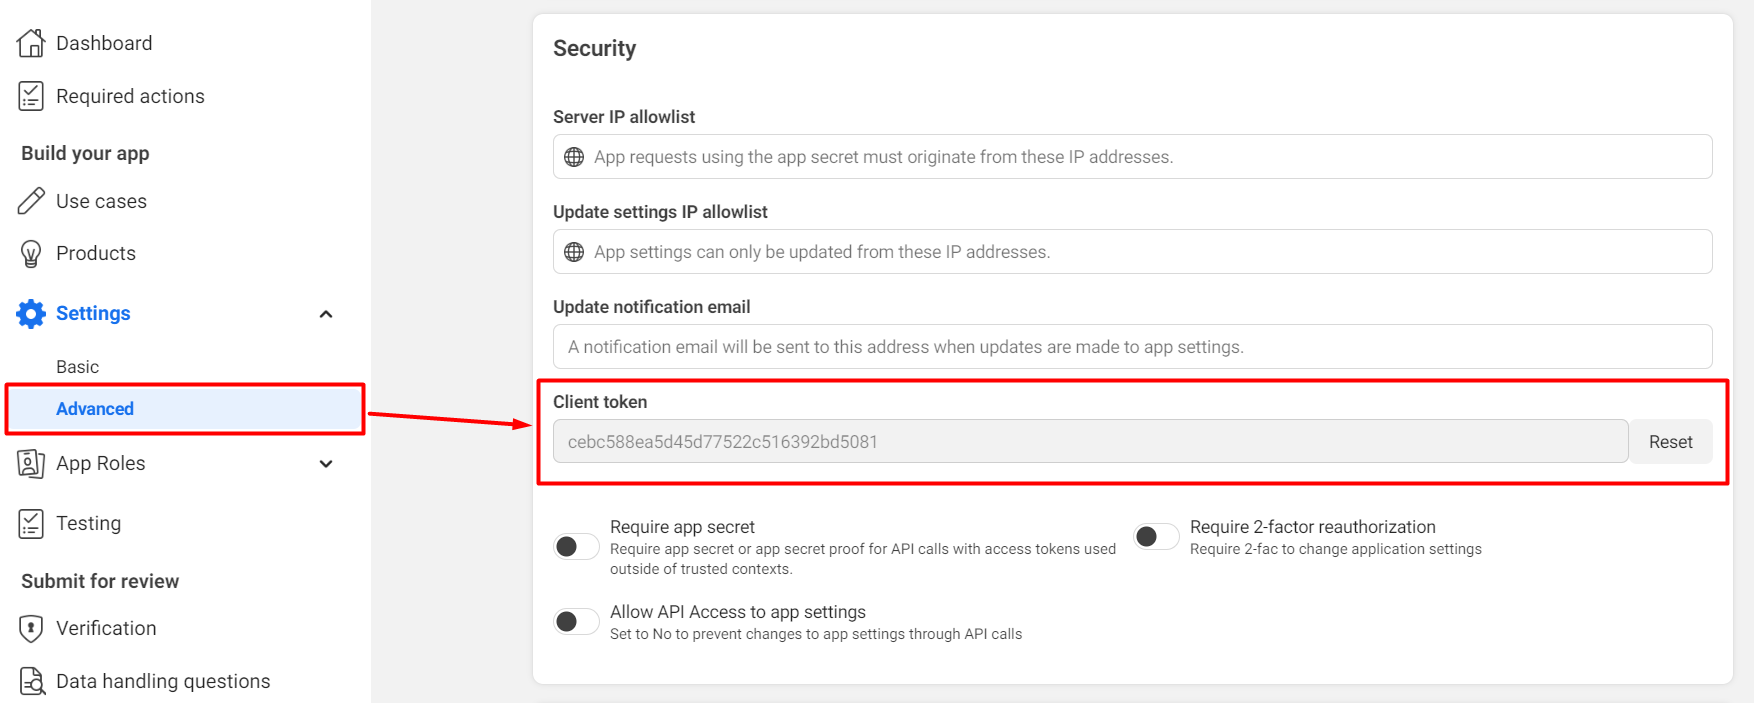
Step 2: Go to Settings > Advanced > scroll down to the Security section and copy the Client token for later use.
Step 3: Back to SiteGiant Seller Center > Shopping App > Preferences page, toggle on the status and paste all the information copied above into respective fields > Save.
You’re all set! However, your Shopping App will only start tracking the customer’s app interactions in the next app launch or update. In other words, if your customers did not update the app to the latest version after the app launched, you will not be able to track their shopping behaviour.
4. iOS 14+ App Events Setup in Meta Business Suite (Optional)
?Note: Perform this step only if you would like to track the behaviour of customers who use iOS 14 and above.
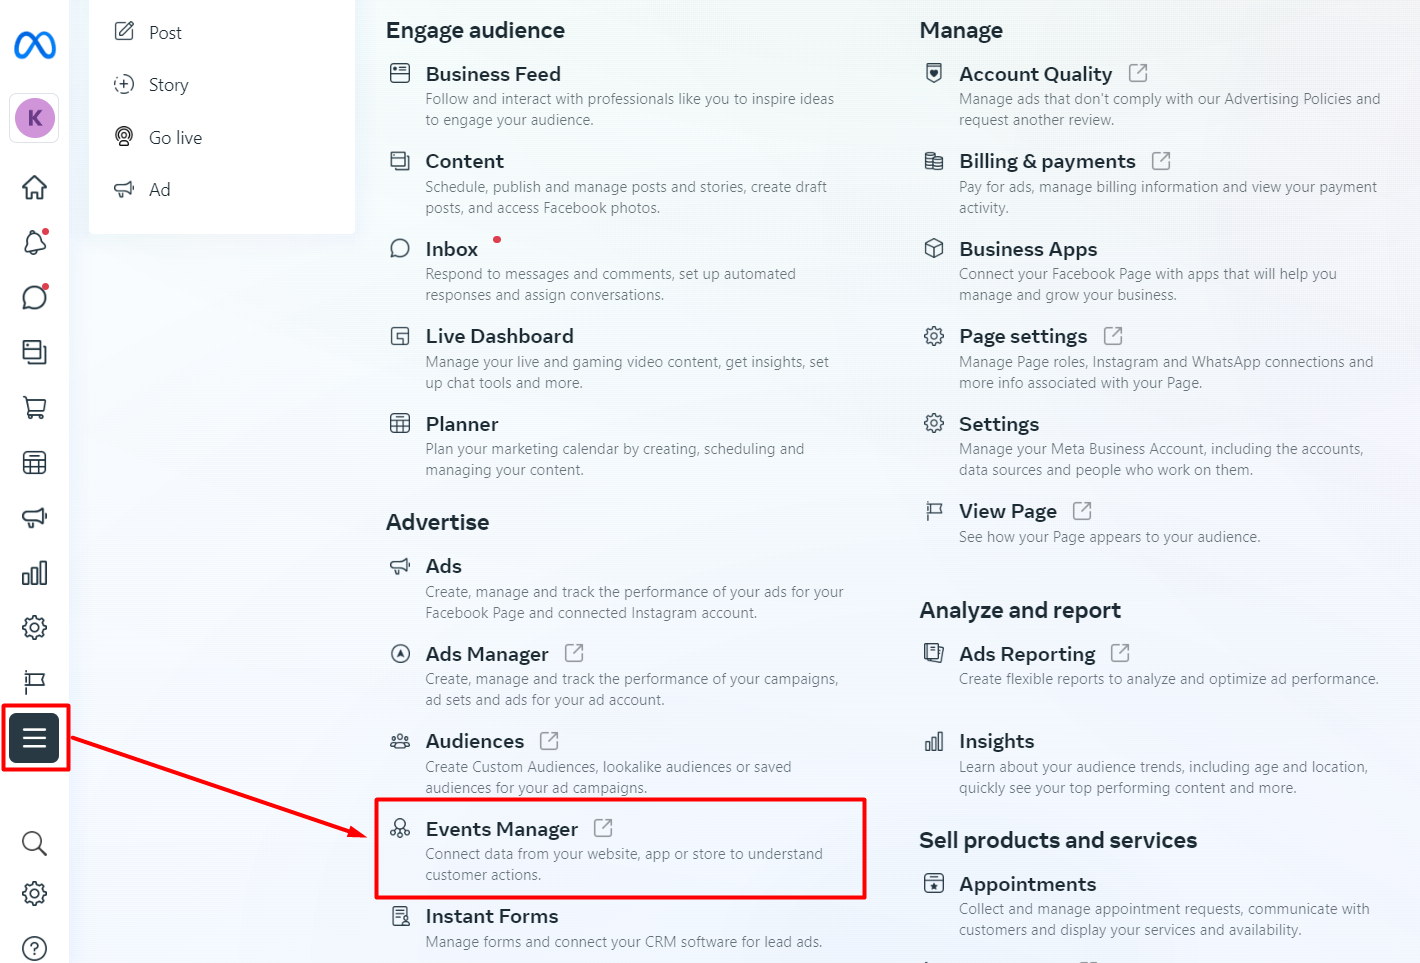
Step 1: Go to Meta Business Suite of your Facebook page > click on All Tools from the sidebar > select Events Manager.
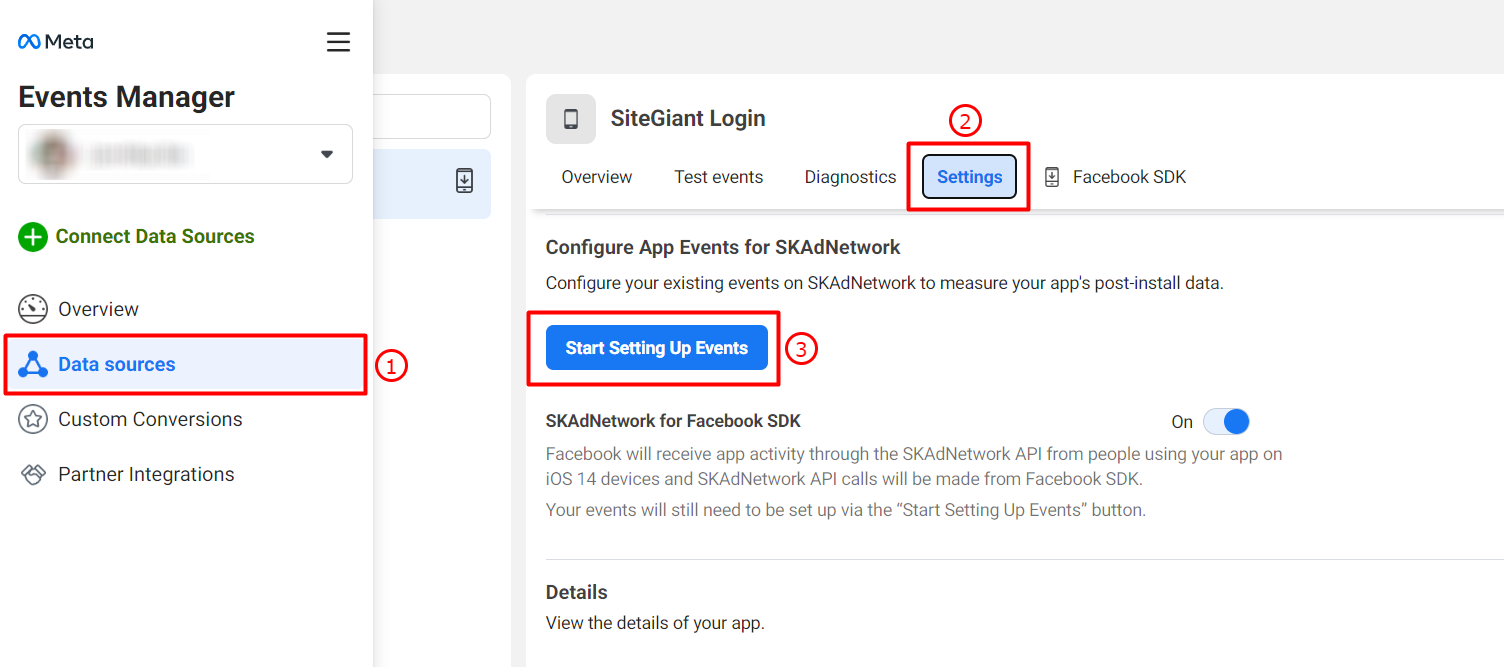
Step 2: Select Data sources from the sidebar > go to Settings > click on Start Setting Up Events at Configure App Events for SKAdNetwork section.
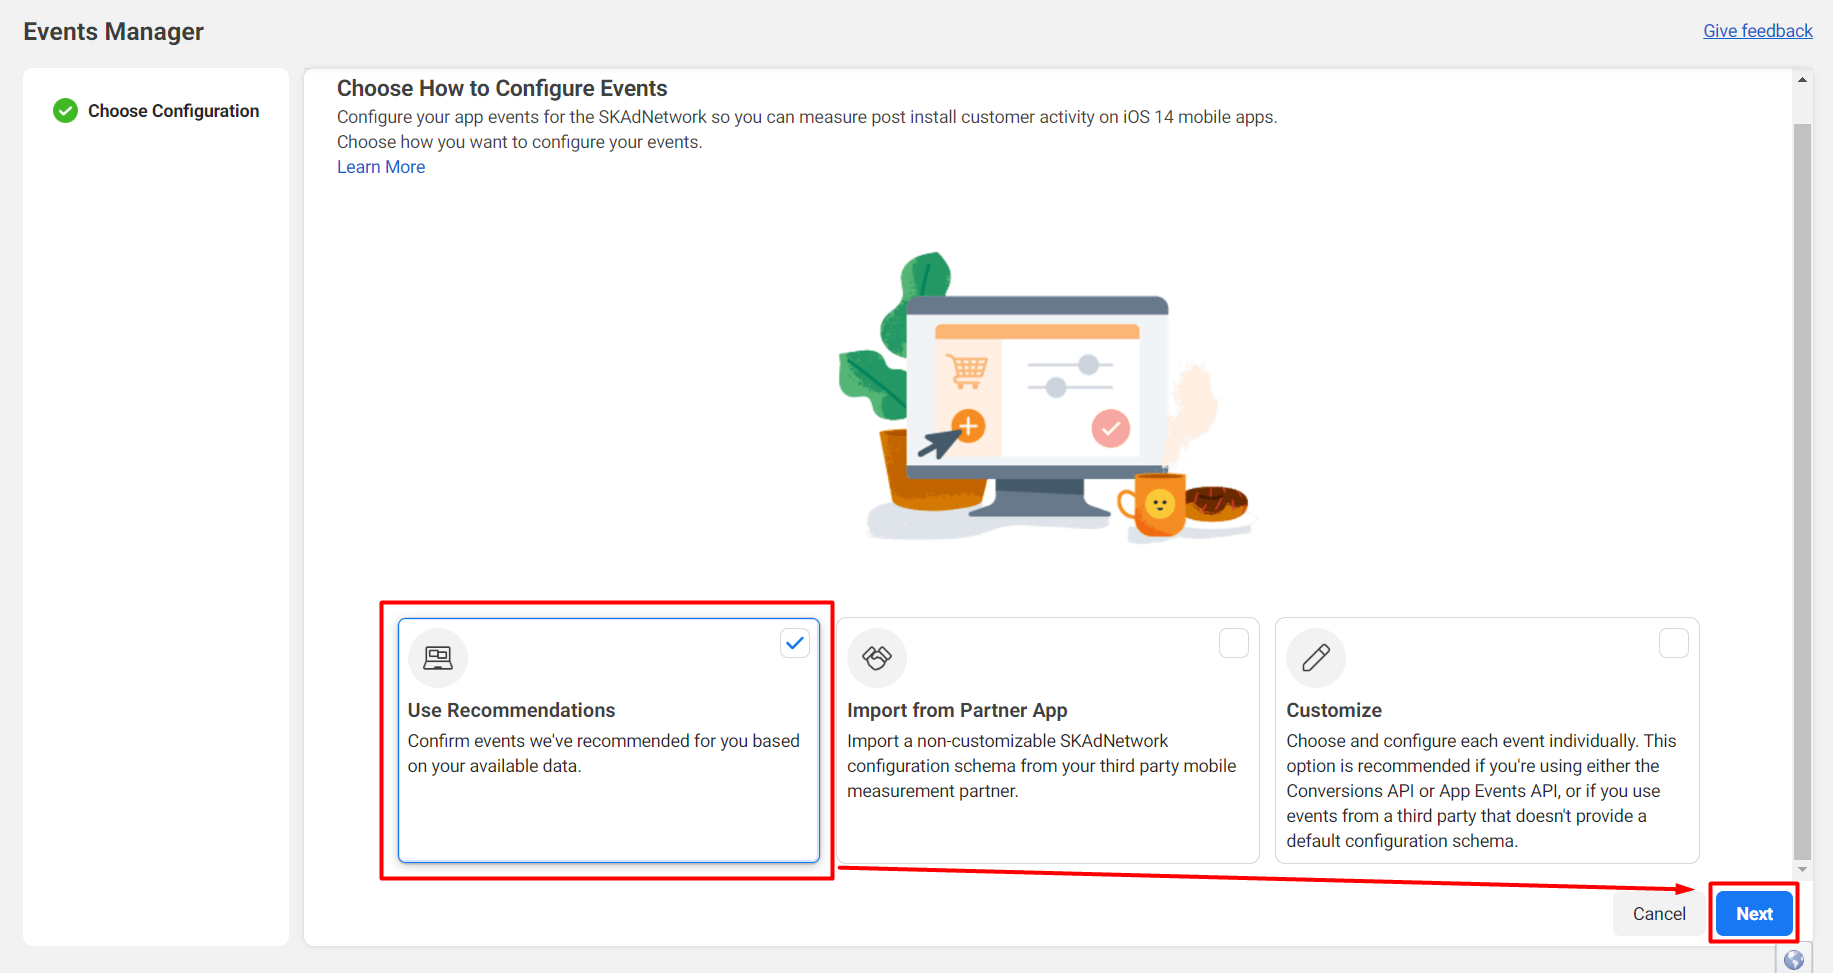
Step 3: At Choose Configuration tab, select the Use Recommendations option > Next.
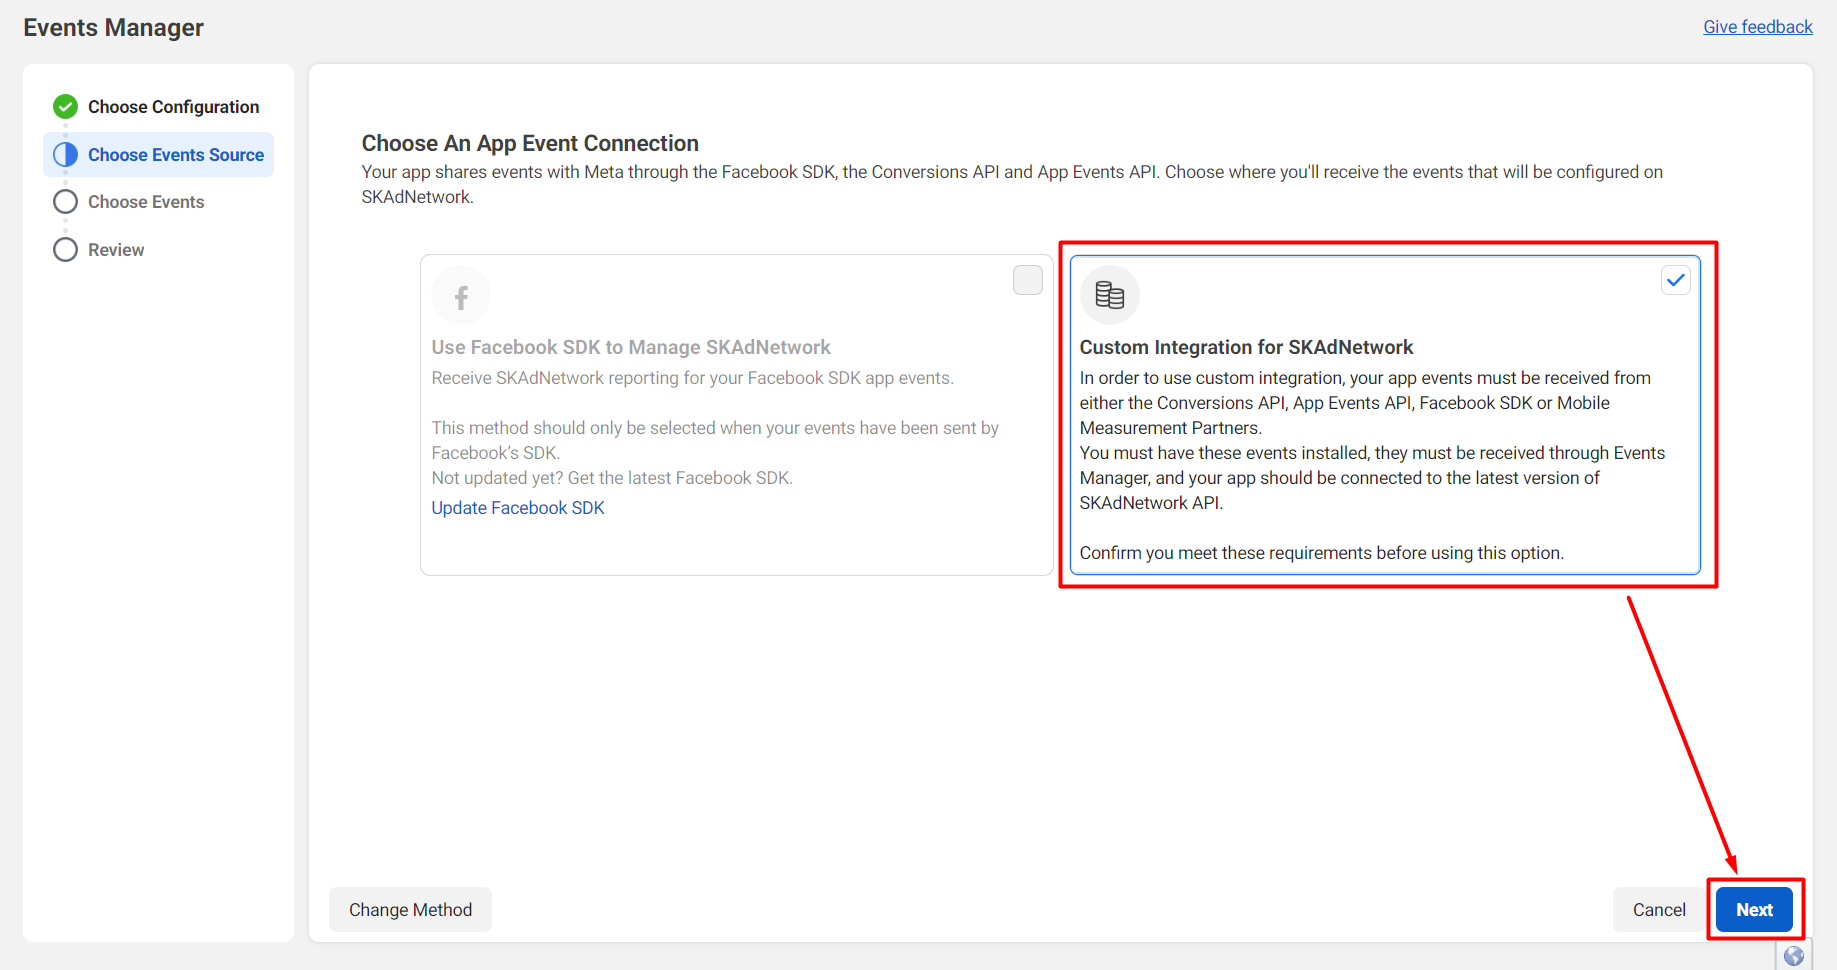
Step 4: At Choose Events Source tab, select Custom Integration for SKAdNetwork > Next.
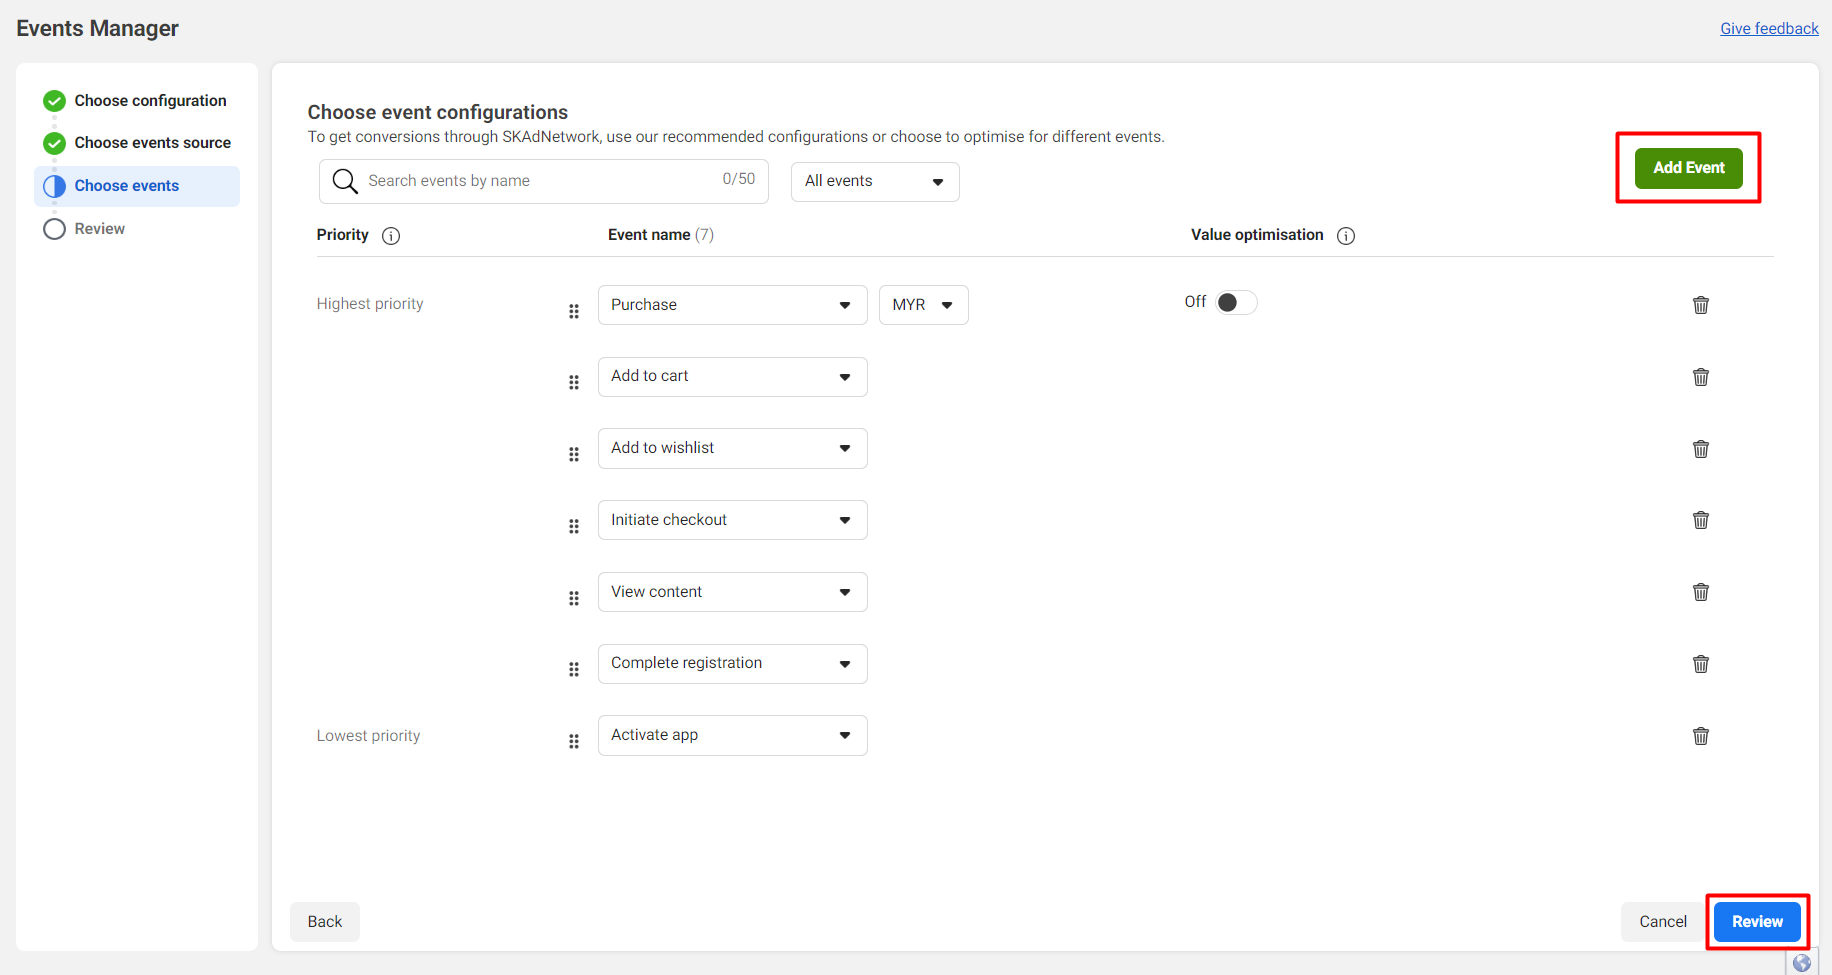
Step 5: At Choose events tab, click on Add Event button and add the following events > arrange the priority order of the events in any order that you like > Review.
?Note: If you are unable to see any events, you may need to try again a few days after your app has started to receive more user-tracking activities.
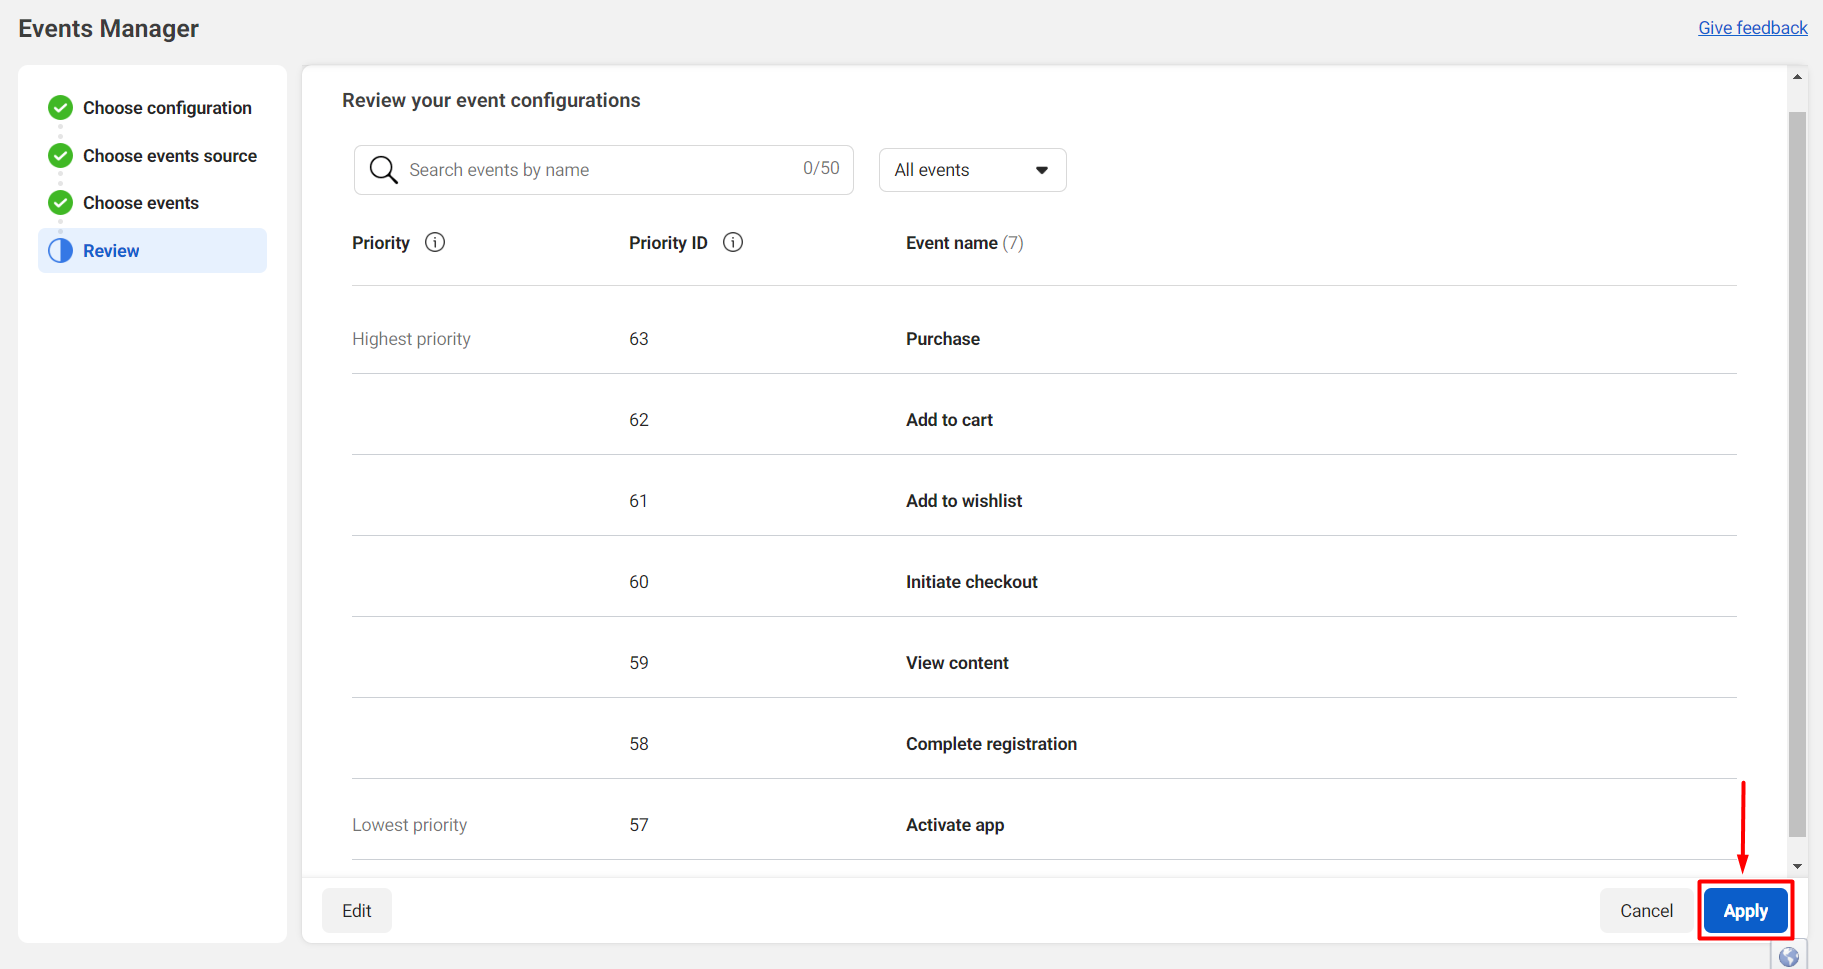
Step 6: Review your app event configurations > once confirm the data, you can click on the Apply button.
5. Automatic Advanced Matching (Optional)
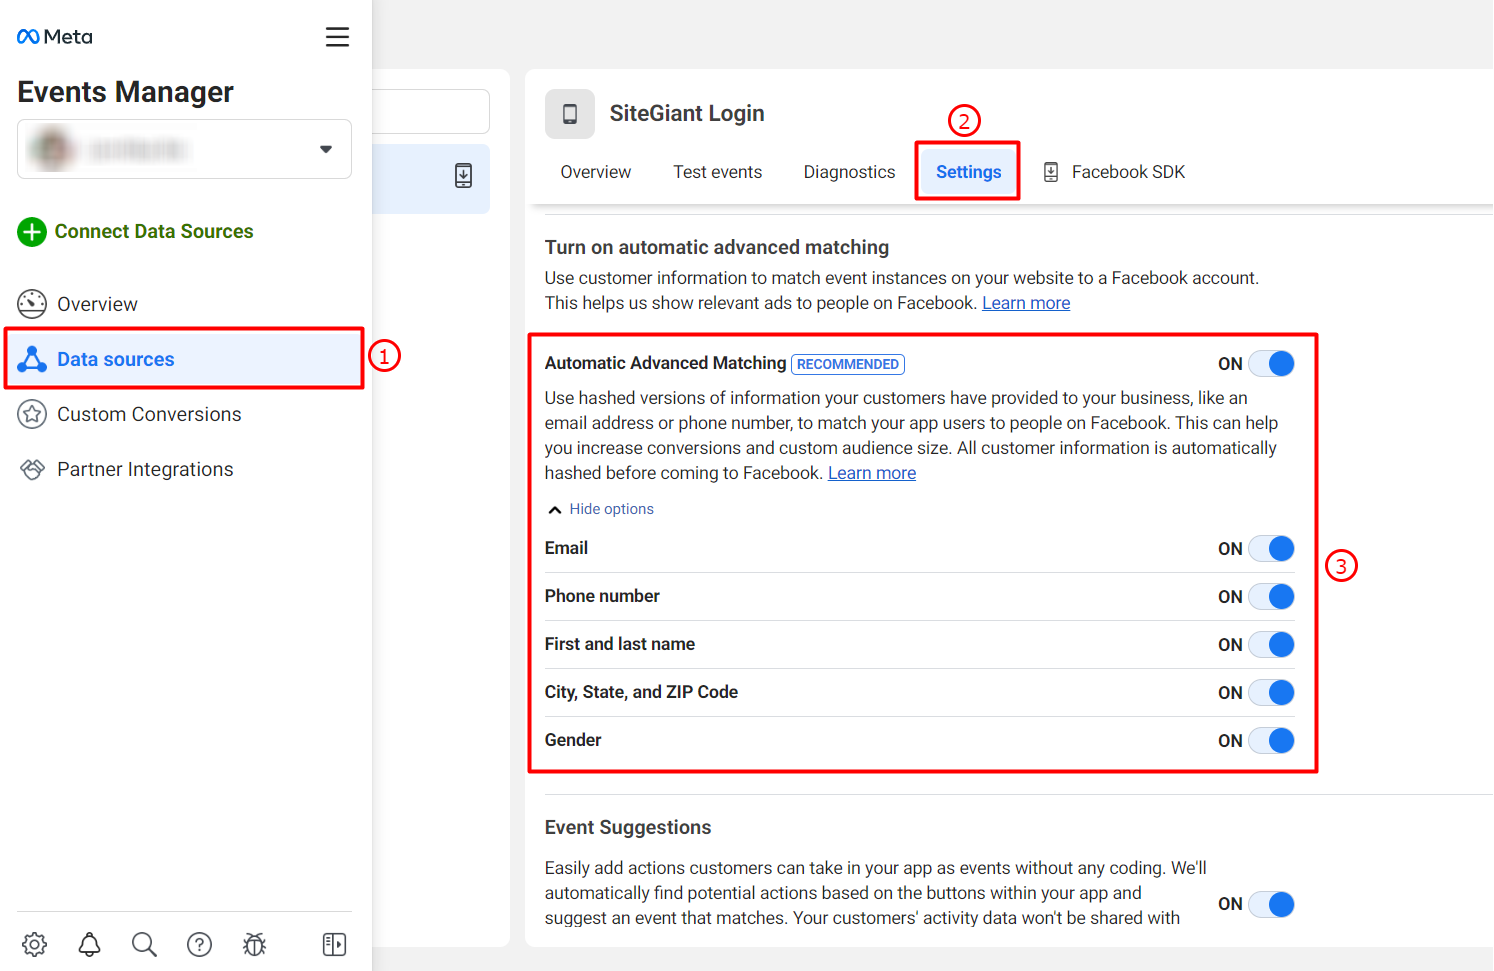
You may turn on the Automatic Advanced Matching Setting for Facebook to create profiling on your customers more easily.
Step 1: At Events Manager, select Data sources from the sidebar > go to Settings > scroll down to the Automatic Advanced Matching section and toggle ON.
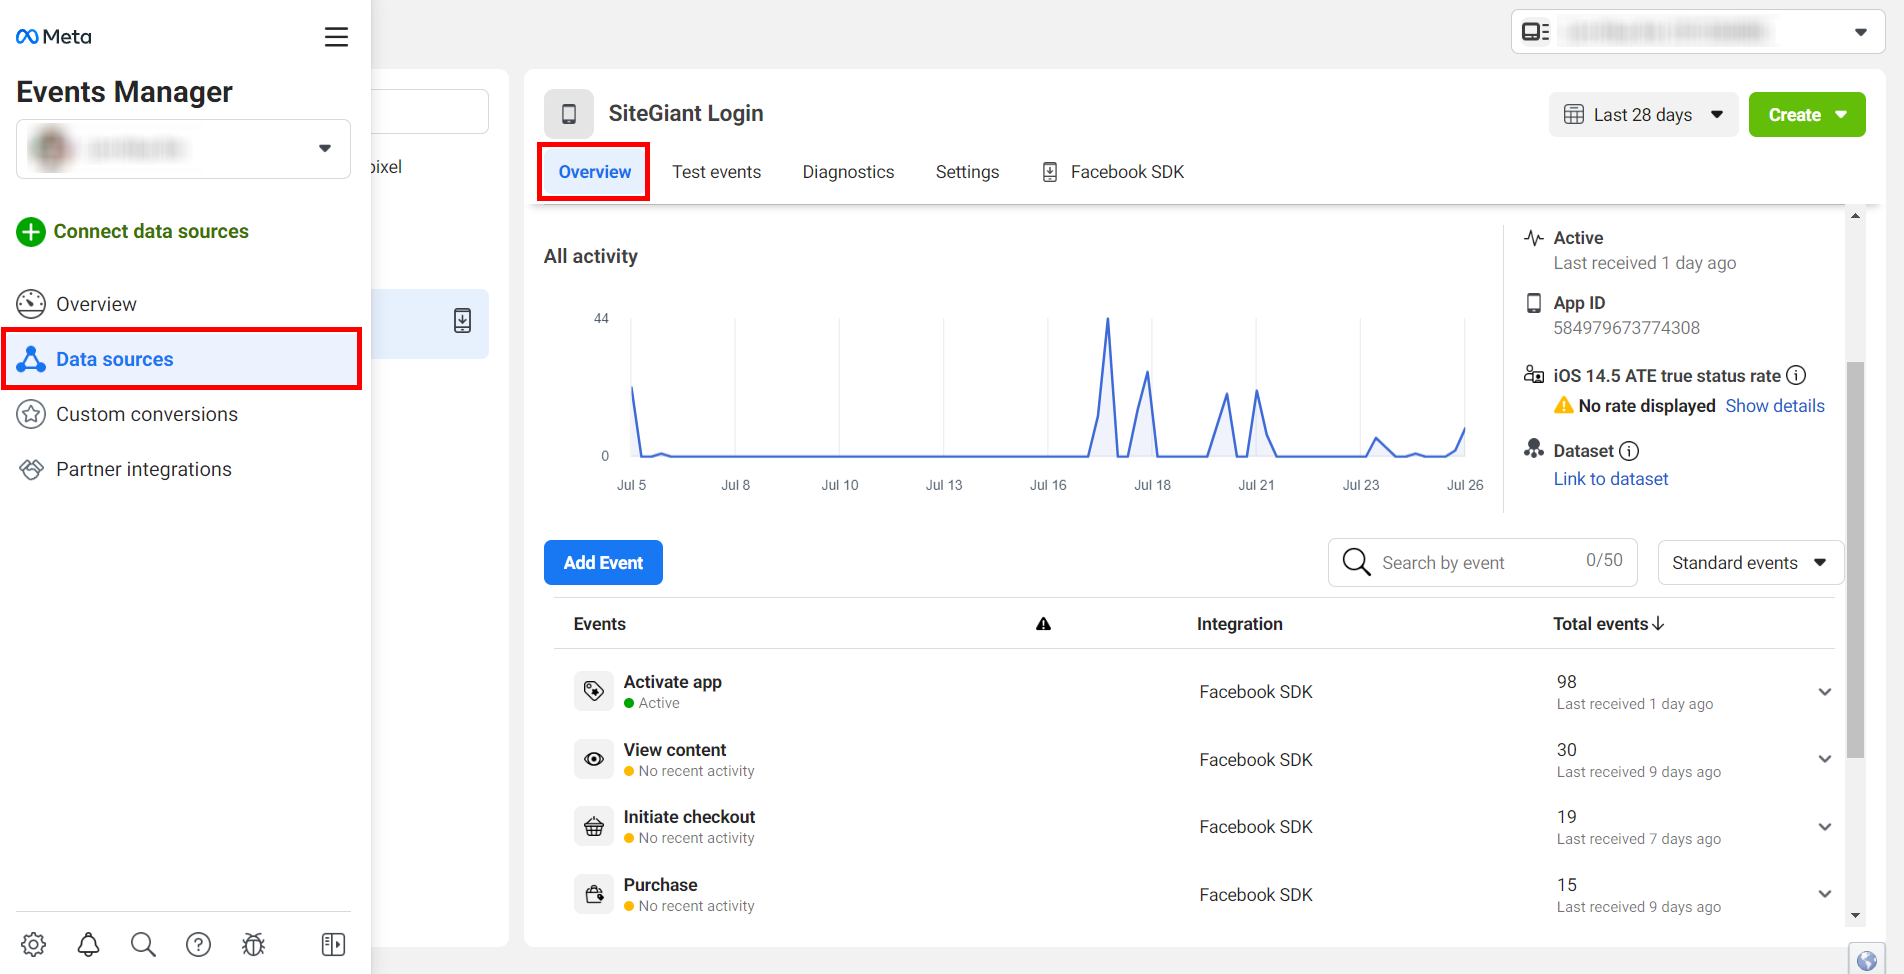
6. View Tracking Activities
Step 1: You will be able to view the tracking activities in Events Manager > Data Sources > Overview.