1. Introduction
2. How to Add Facebook Domain Verification
1. Introduction
Domain Verification provides a way for you to ‘claim’ ownership of your domain in Facebook Business Manager. This is important to protect your content on Facebook and to gain access to features related to your domain and tracking in order to help prevent misuse of your domain.
2. How to Add Facebook Domain Verification
?Note: First, set up the Facebook Business Extension Version 2.0 in order to proceed.
Step 1: Go to FBE and click on the Manage button for Facebook Business Extension Version 2.0.
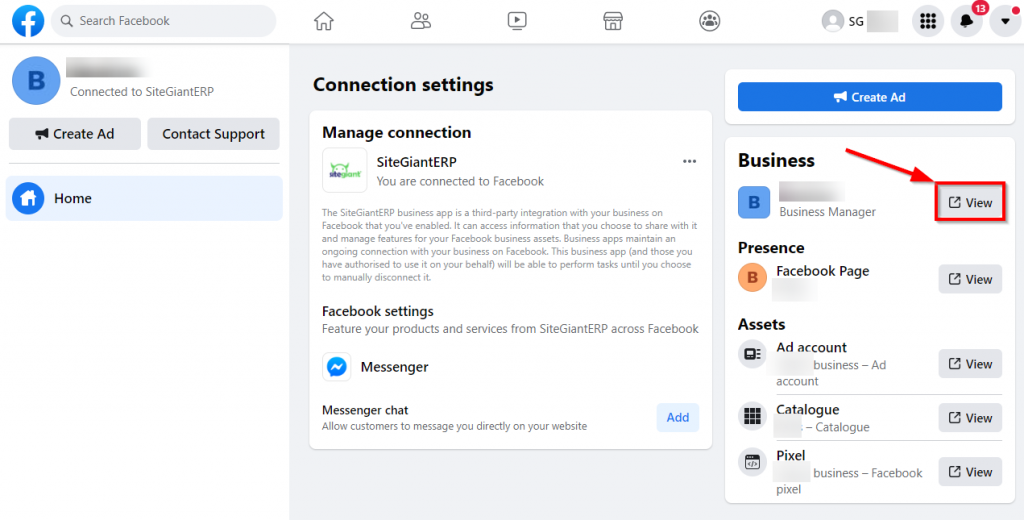
Step 2: Click on the View button for your Business Manager, then you will be directed to the Facebook Business Manager Settings page.
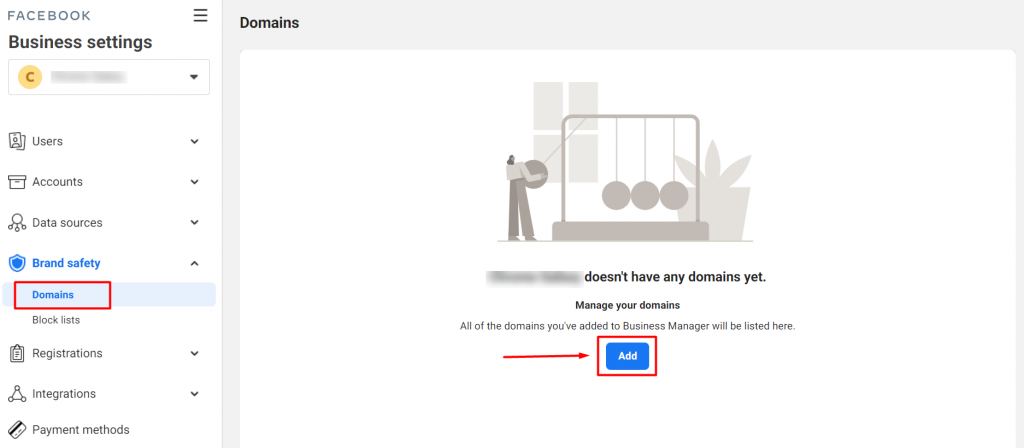
Step 3: Go to Brand Safety > Domains, and then click Add button to add a new domain.
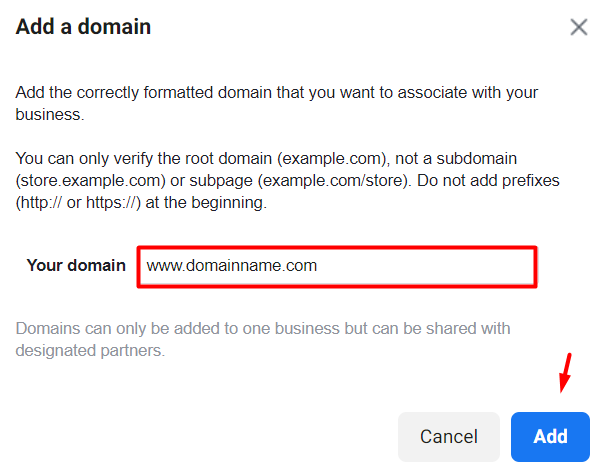
Step 4: Insert your domain name at Your domain, and proceed to Add.
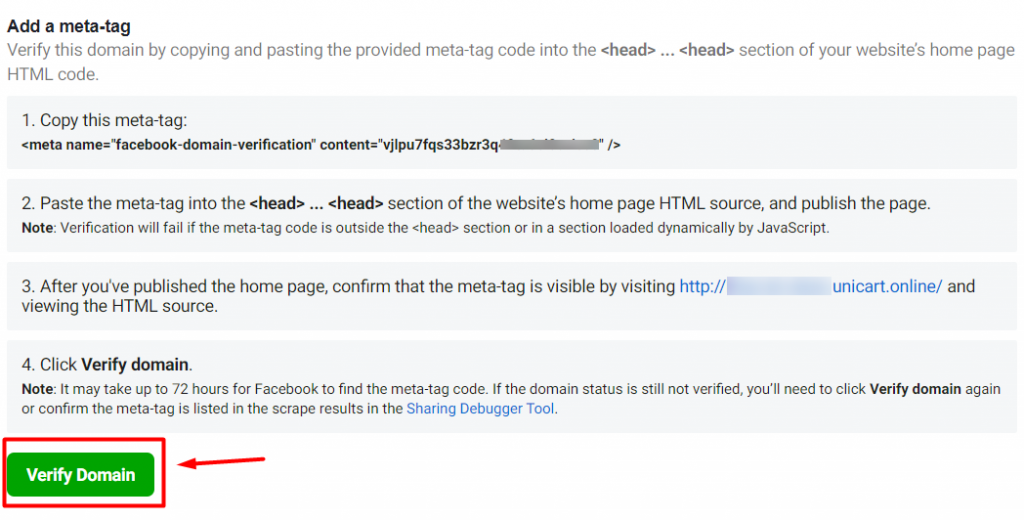
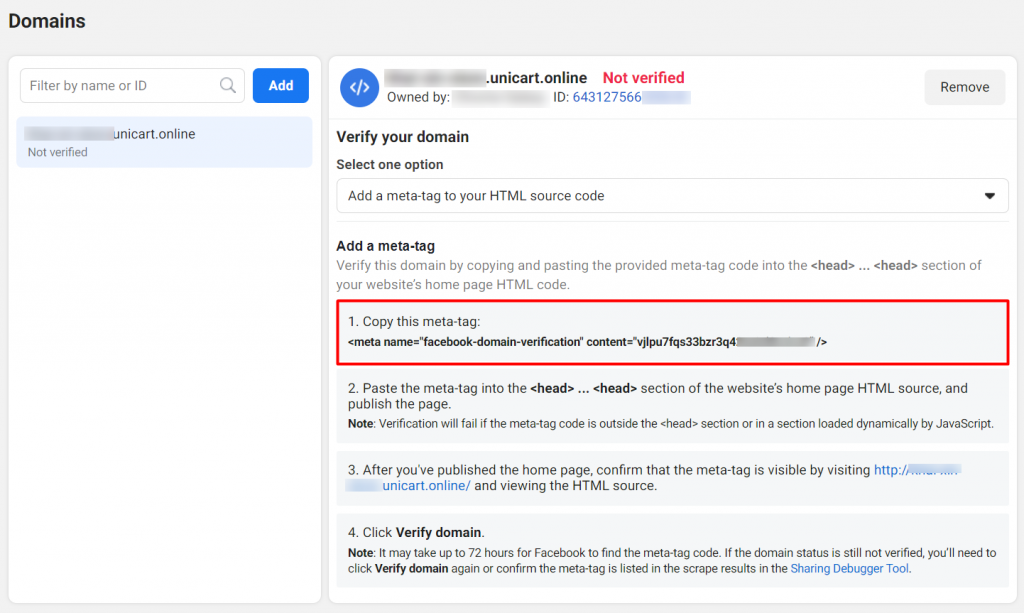
Step 5: When your domain is added to Business Manager, remain the option of ‘Add a meta-tag to your HTML source code’ and Copy the meta-tag.
Step 6: Go back into SiteGiant, navigate to FBE, then paste in the meta-tag and click on the Save button.
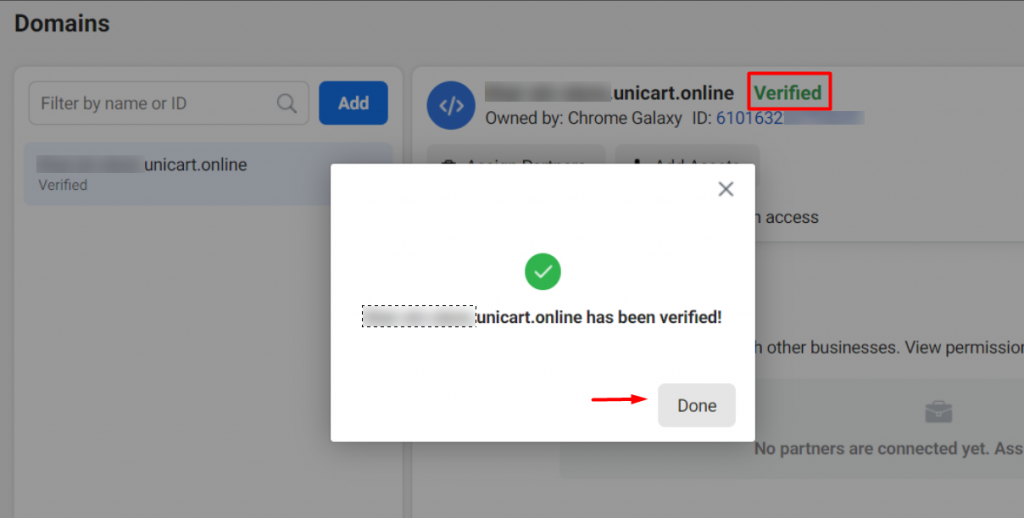
Step 7: Return to Business Manager and click Verify Domain.