1. Introduction
2. Configure Affiliate Program Setting
3. Add New Affiliate
4. Approve Affiliate
5. Obtain Affiliate Tracking Code (From Affiliate Perspective)
6. Earn Affiliate Commission
7. Make Commission Settlement
1. Introduction

Want to increase sales through the power of networking? Affiliate Program enables affiliates to promote your webstore and earn commission based on orders made by their customers.
This feature is only available in SiteGiant ERP Value Plus Plan and above.
2. Configure Affiliate Program Setting
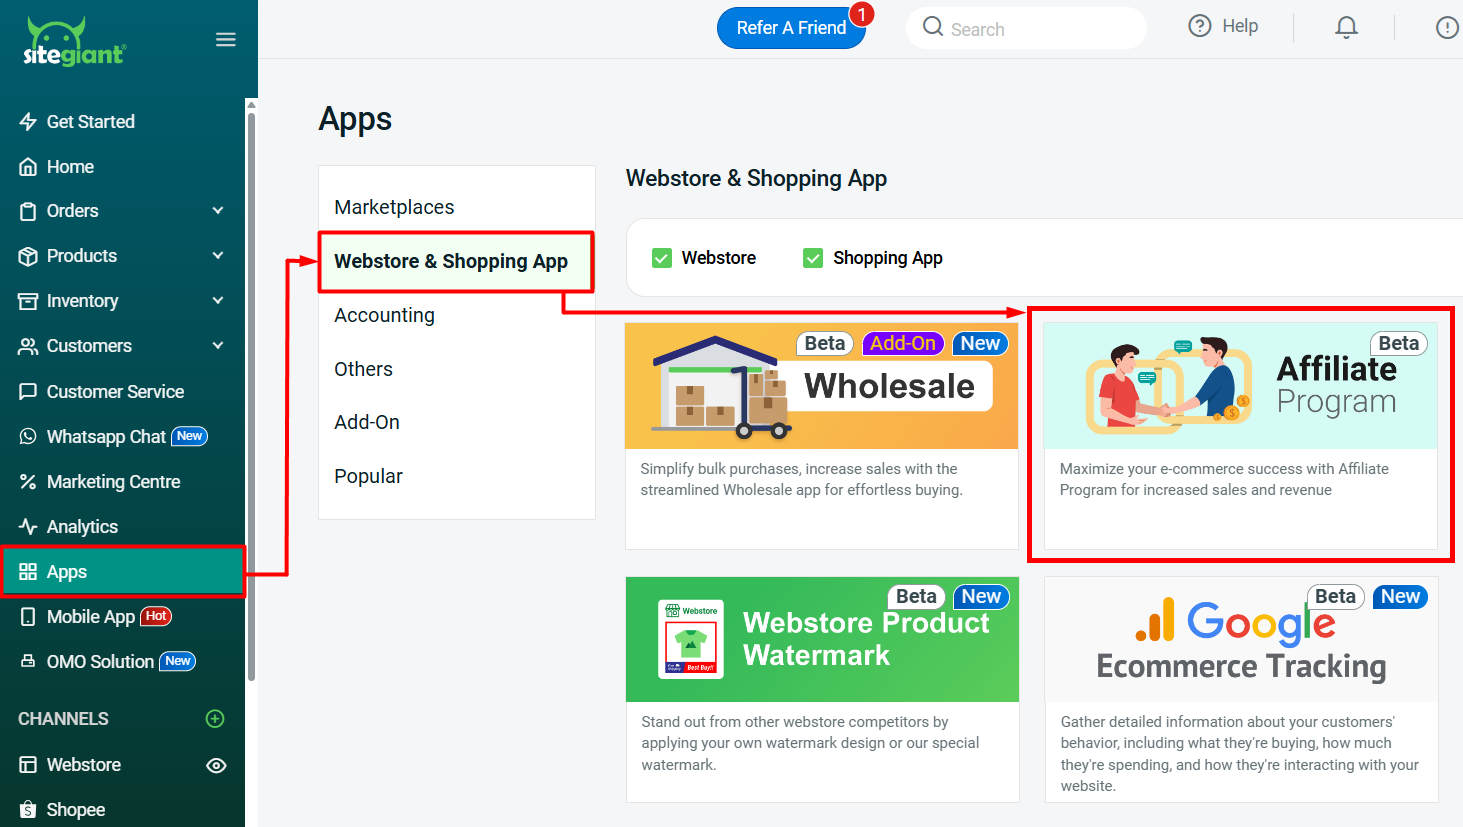
Step 1: Navigate to Apps on the sidebar menu > Webstore & Shopping App > Affiliate Program.
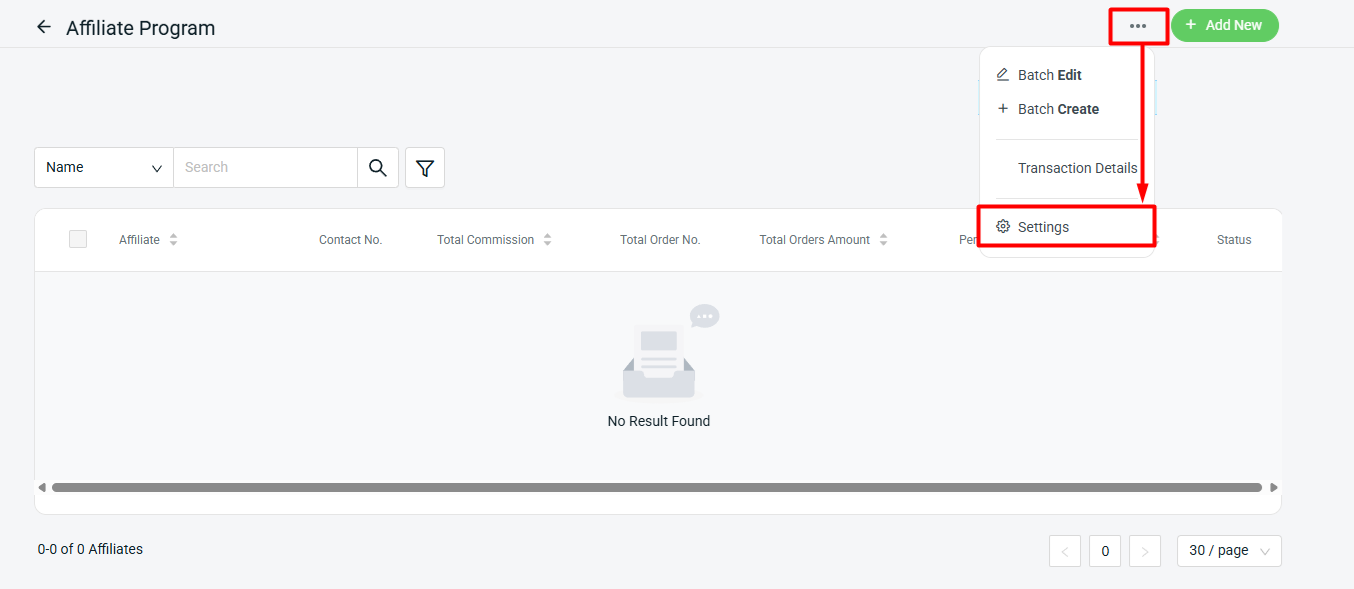
Step 2: Click More (…) > Settings.
Step 3: Enable the Status > configure the Affiliate Program Setting > Save.
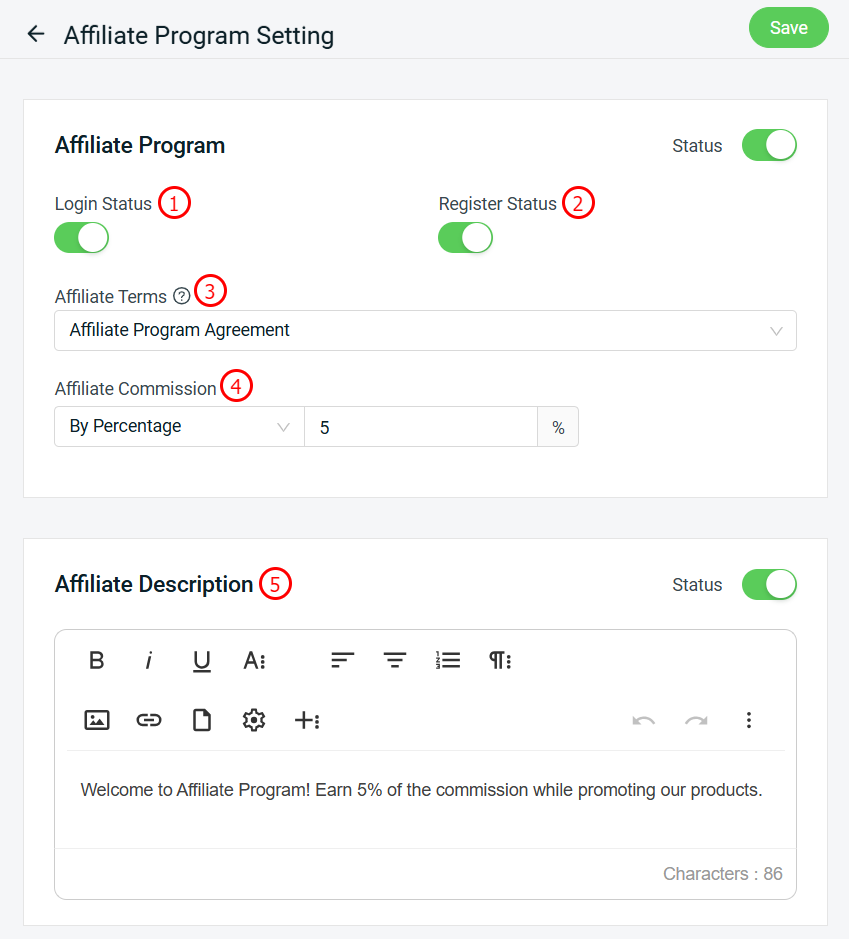
1. Login Status: Enable or disable the affiliate to login in webstore.

2. Register Status: Enable or disable affiliate to register an affiliate account in webstore.

3. Affiliate Terms: The terms and conditions which will be agreed upon by affiliates before they sign up. You will have to create a page on Webstore > Pages. Learn more on How To Create Pages.

4. Affiliate Commission: Fee paid to the affiliate when a sale is made using the affiliate tracking code. The commission can set as either By Percentage or Fix Amount.

5. Affiliate Description: A brief introduction about the Affiliate Program.
Step 4: Back to dashboard and Clear Cache to see the changes on your Webstore.
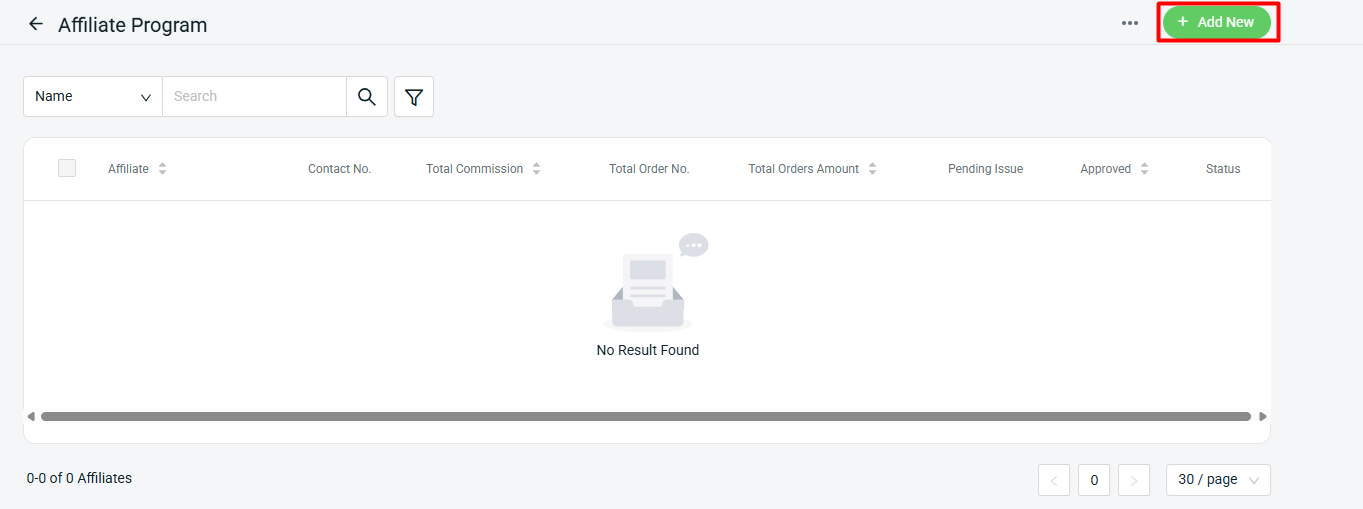
3. Add New Affiliate
Method 1: Add From SiteGiant Seller Center
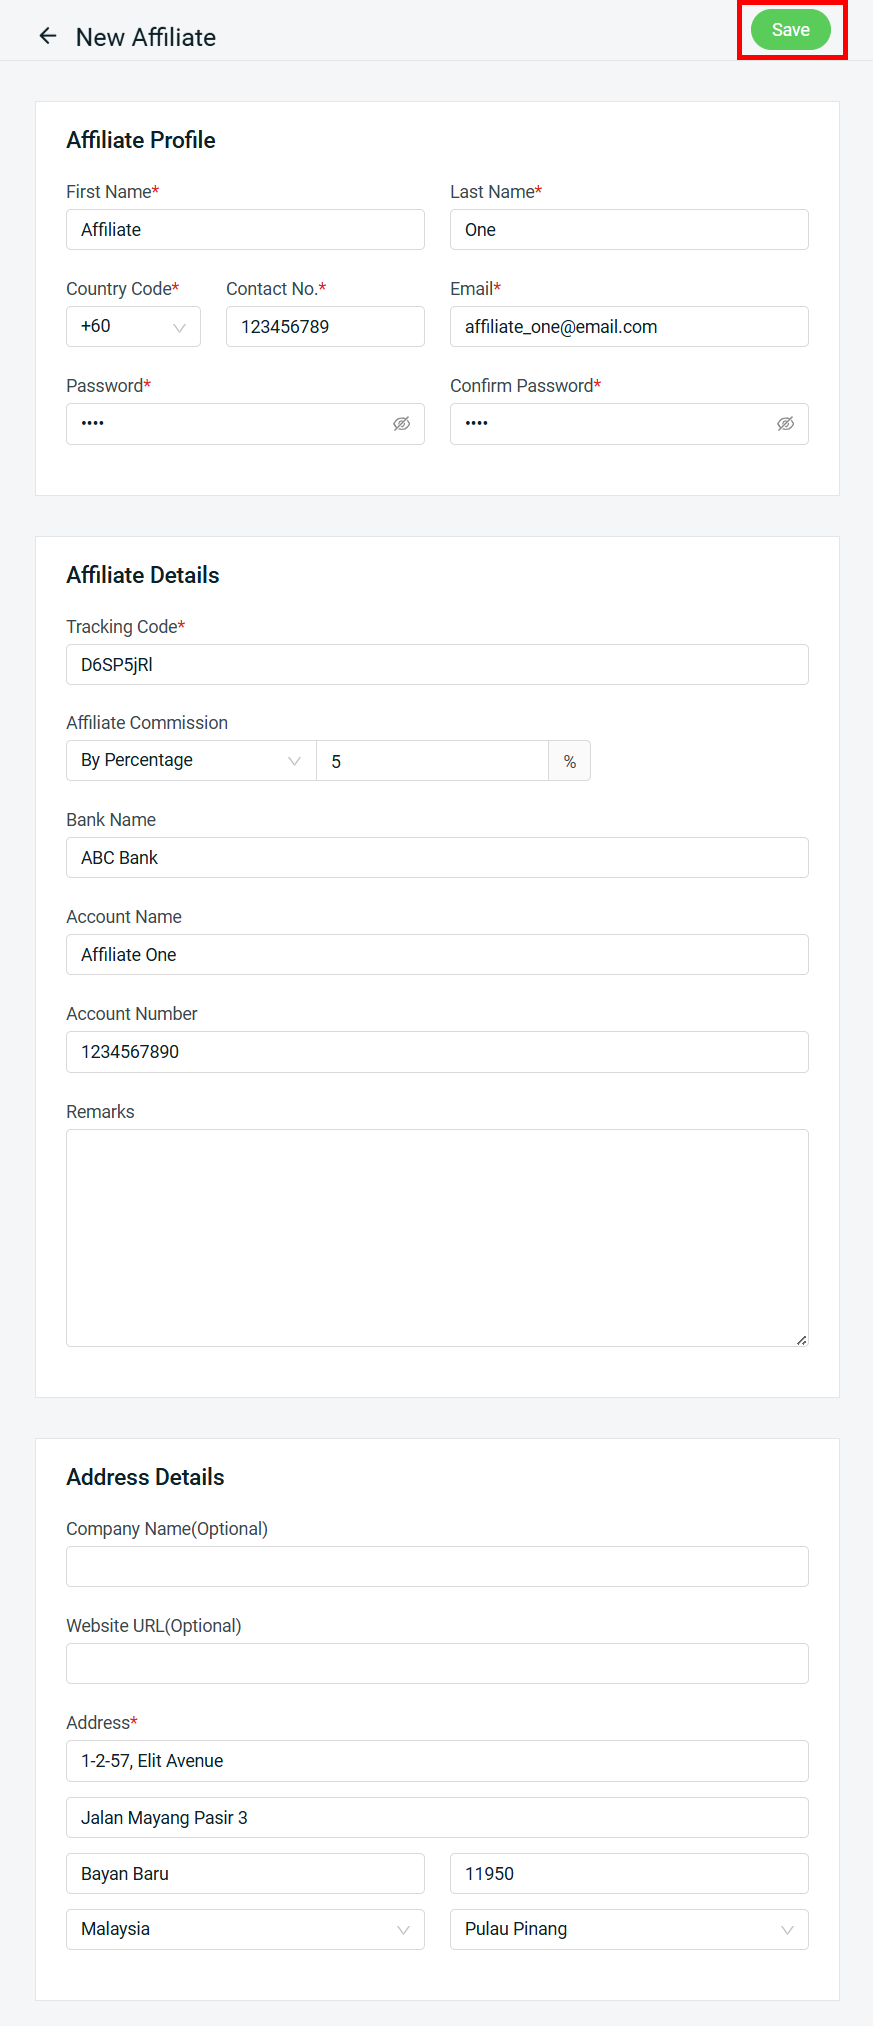
Step 1: Click + Add New.
Step 2: Fill in the Affiliate Profile, Affiliate Details and Address Details fields > Save.
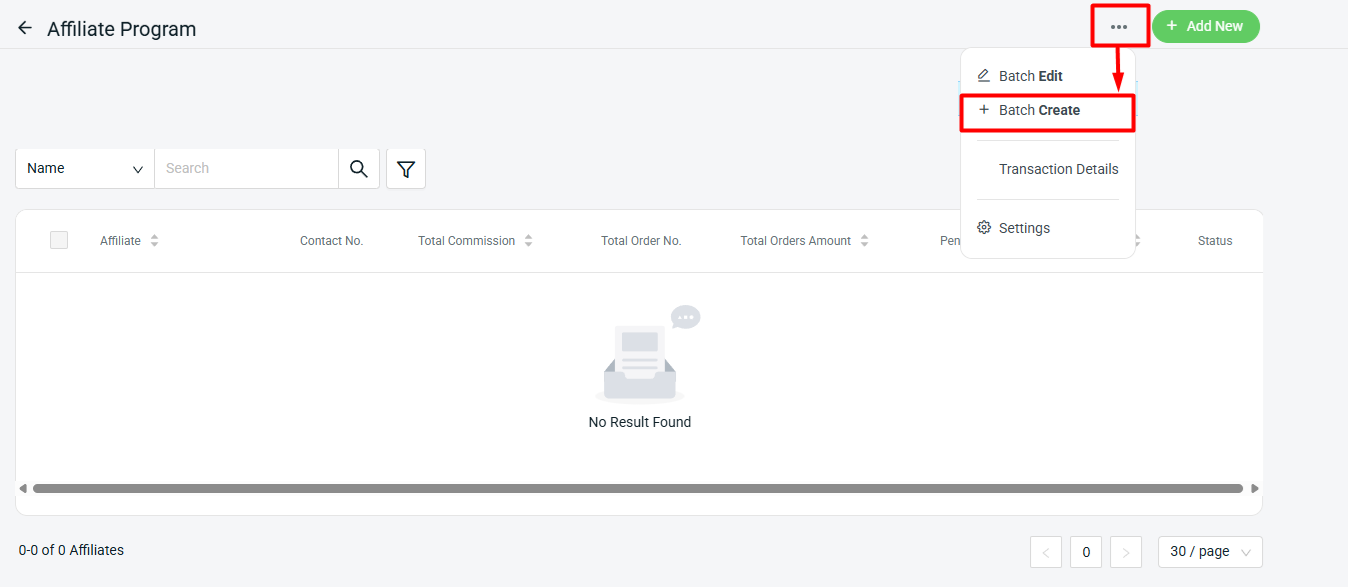
Method 2: Batch Create From SiteGiant Seller Center
Step 1: Click More (…) > + Batch Create.
Step 2: Download the Bulk Create Affiliate Template.

Step 3: The Excel file will be in Protected View, click Enable Editing to edit it.
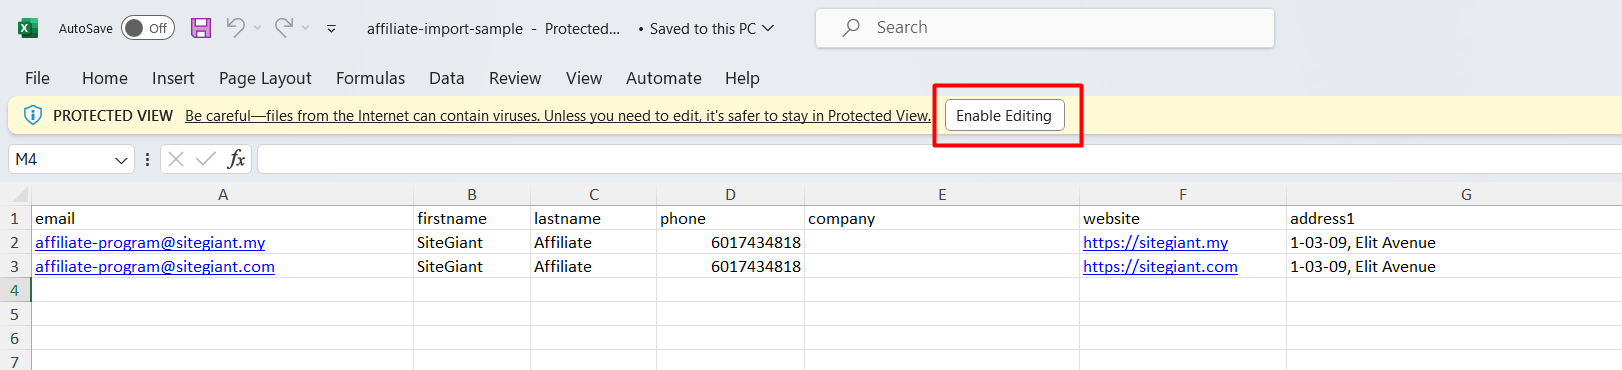
Step 4: You may set your own tracking code for the affiliate. If the tracking code column is blank, system will auto generated the tracking code when the Excel file is upload to system.
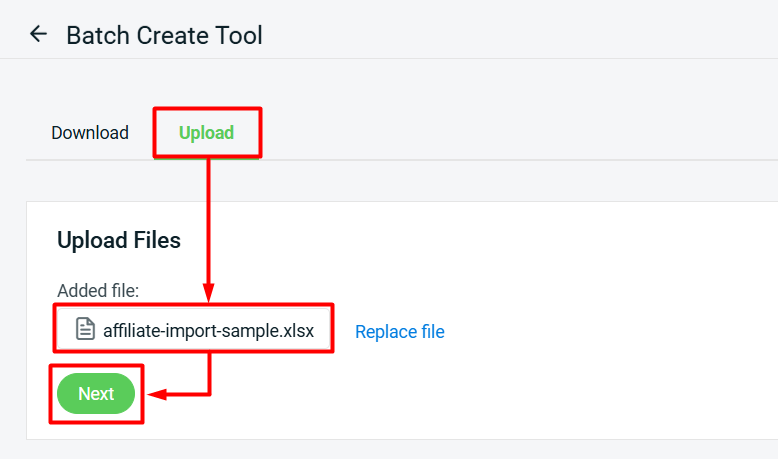
Step 5: Save the Excel file once done edit. Back to SiteGiant Affiliate Batch Create Tool page > upload the Excel file > Next.
Step 6: If there are any errors in the Excel uploaded, you will see the error message in Errors and Warnings and it will show the error column in the Data Preview. Amend the error column and reupload the file. Click on Proceed if the file uploaded does not have errors.

Step 7: Wait for the system to proceed the imported file. Click Refresh to see the changes. If the progress bar turns green, it means the file is successfully uploaded.

Method 3: Affiliate Register Account From Webstore
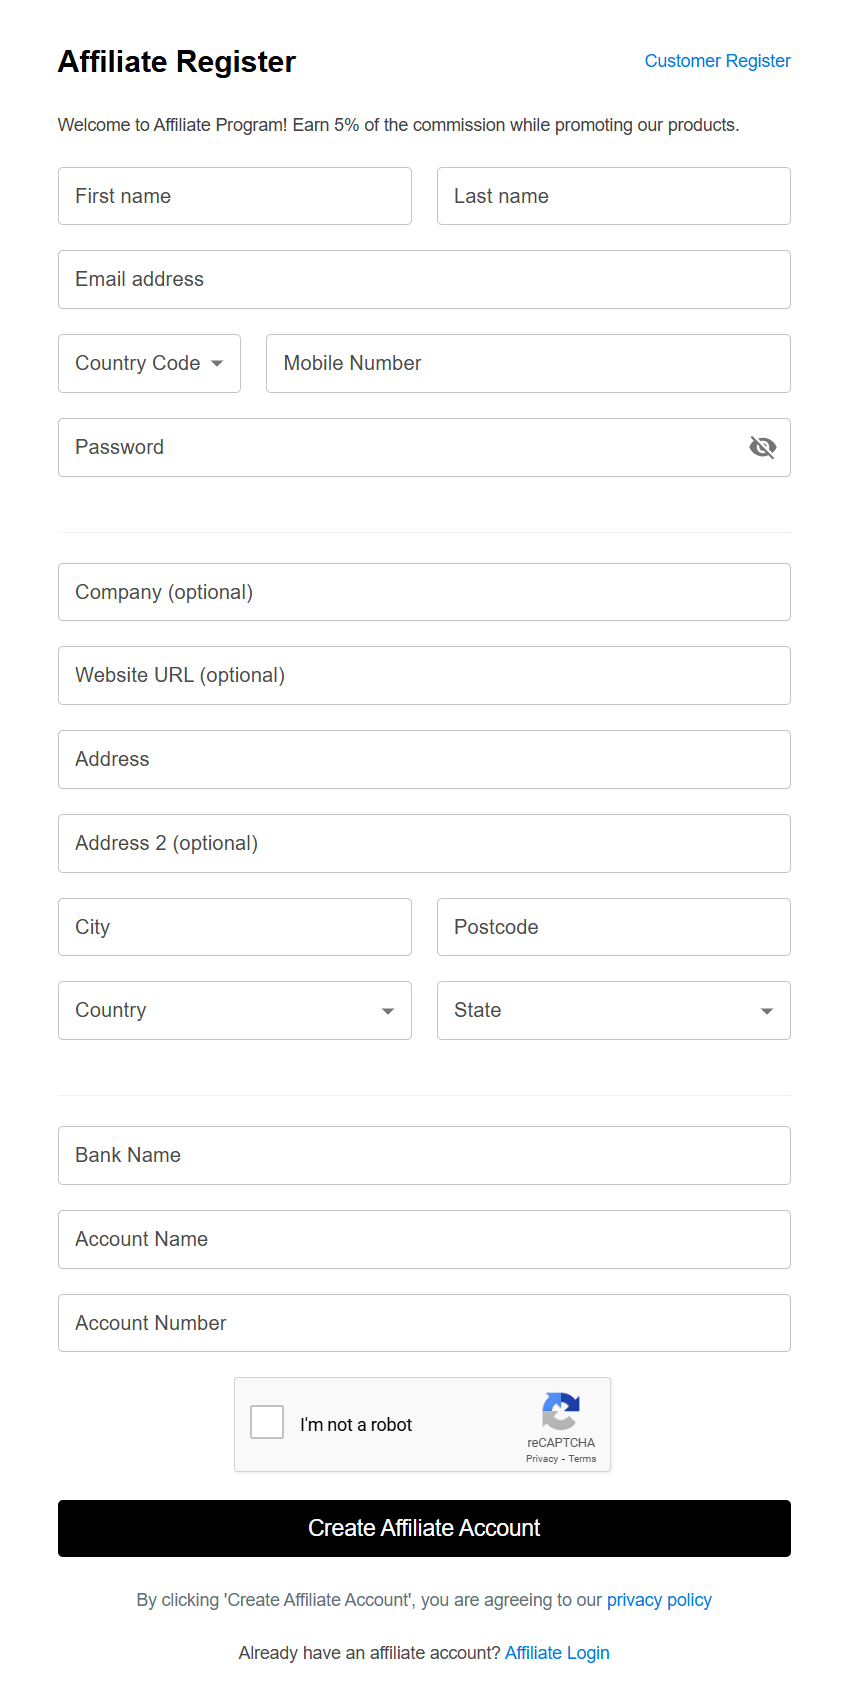
Step 1: Go to Profile > Login/ Signup > Login as Affiliate > Create Affiliate Account.

Step 2: Fill in the Affiliate Register form > Create Affiliate Account.
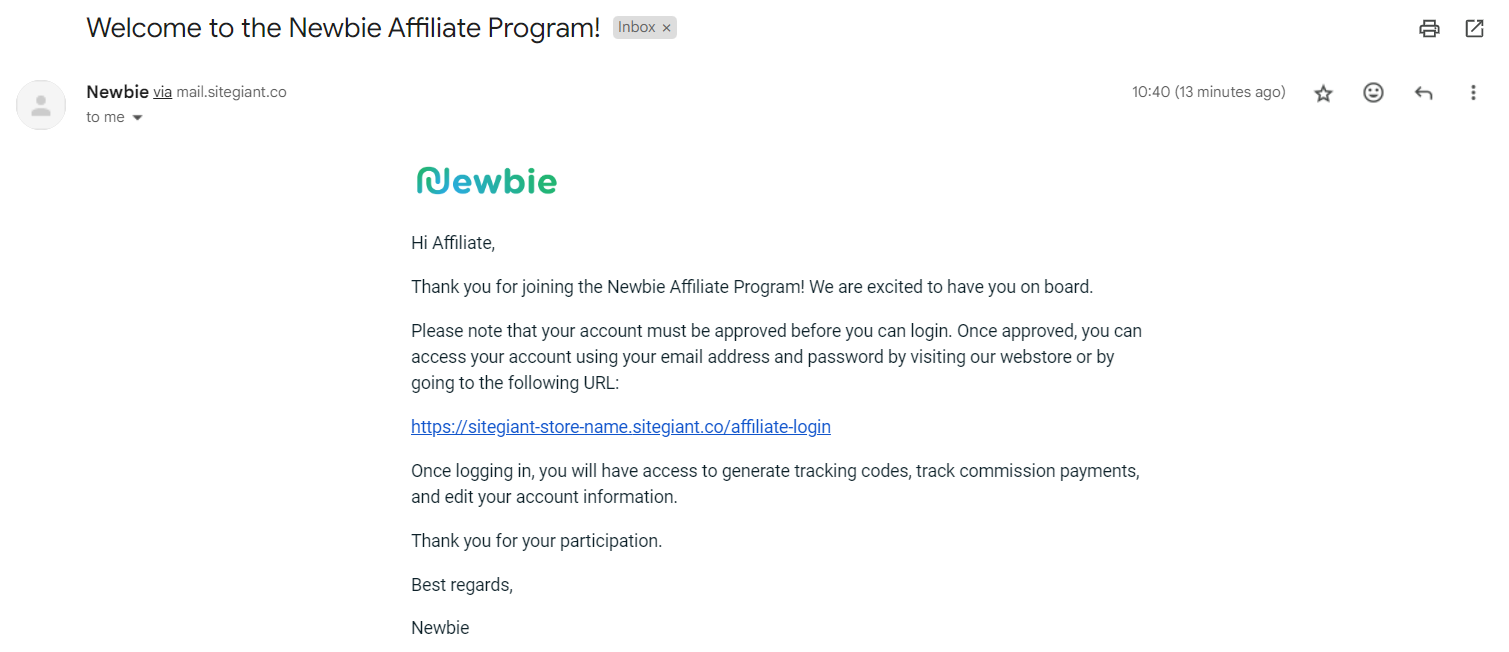
Step 3: The affiliate will receive a notification email that their account must be approved before logging in.
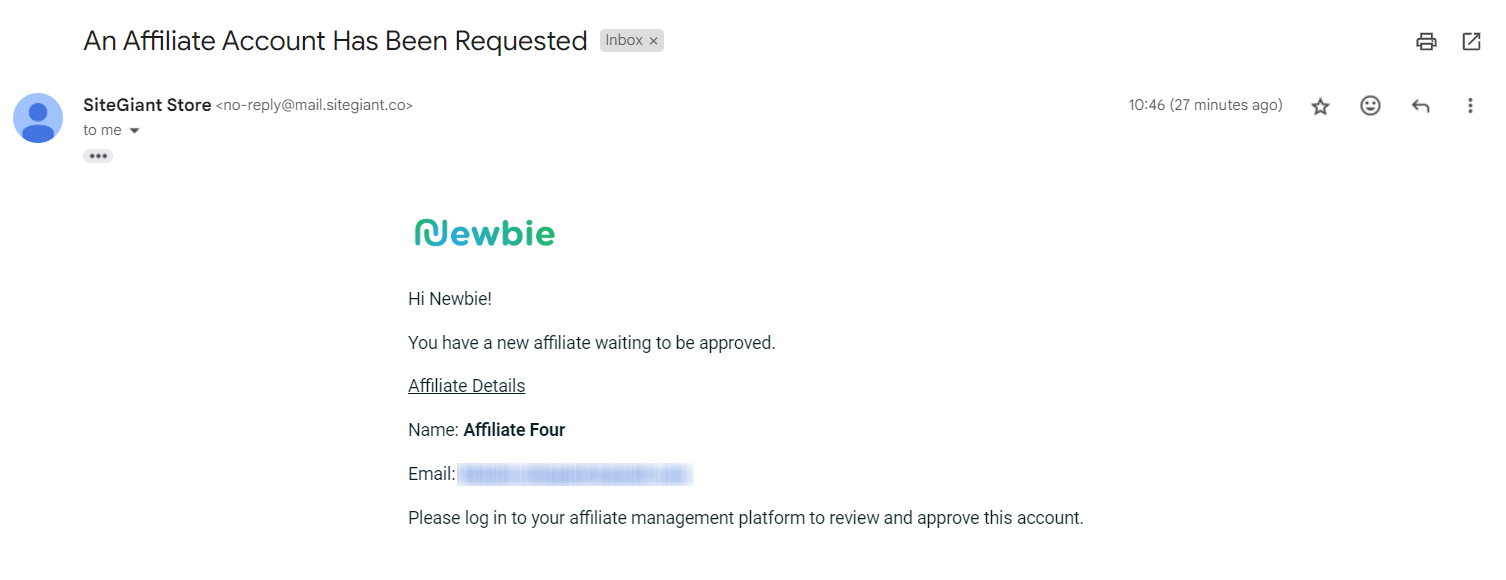
4. Approve Affiliate
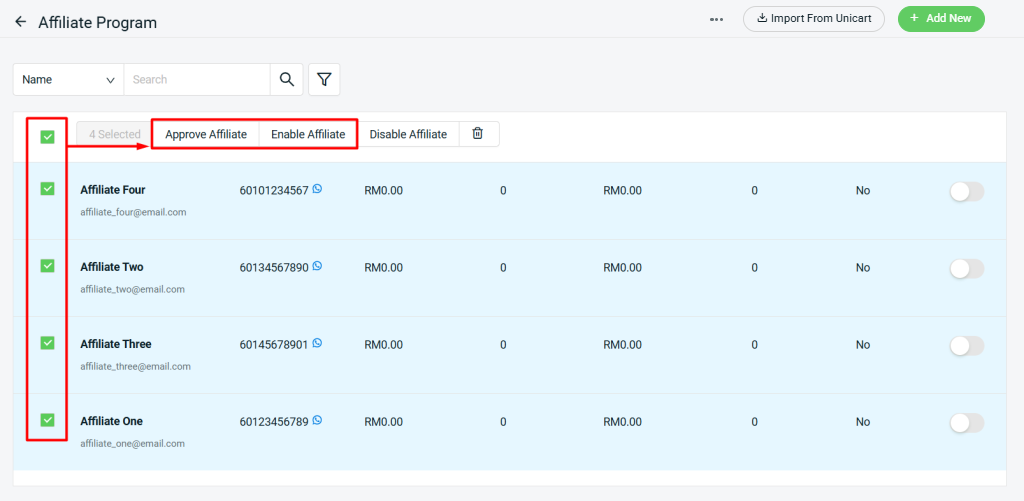
Step 1: All affiliate accounts created will need to be approved and enabled before login. Select the Affiliate > Approve Affiliate > Enable Affiliate.
📌Note: If the affiliate account is registered from the webstore, you will receive a notification email about the new registration.
5. Obtain Affiliate Tracking Code (From Affiliate Perspective)
Step 1: The affiliate will receive a notification email about their account has been activated.
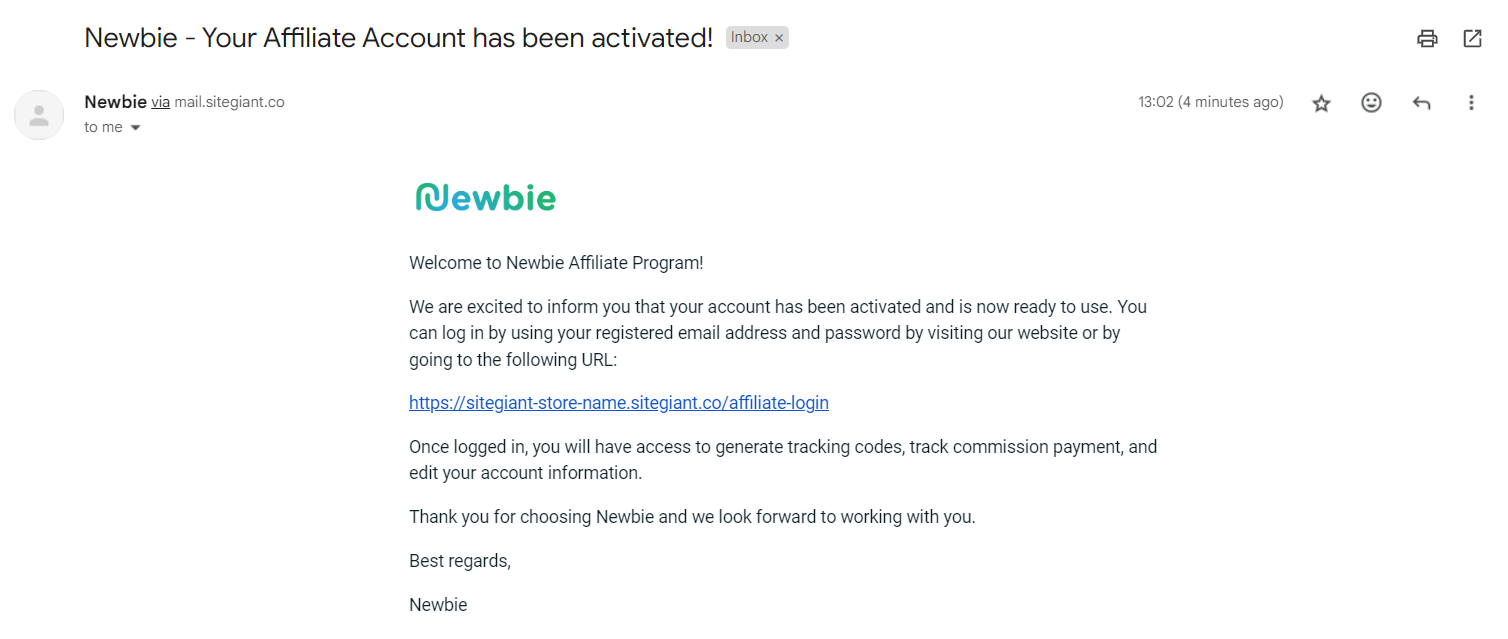
Step 2: Login into the affiliate account > go to Profile > Tracking Code > Copy Link.
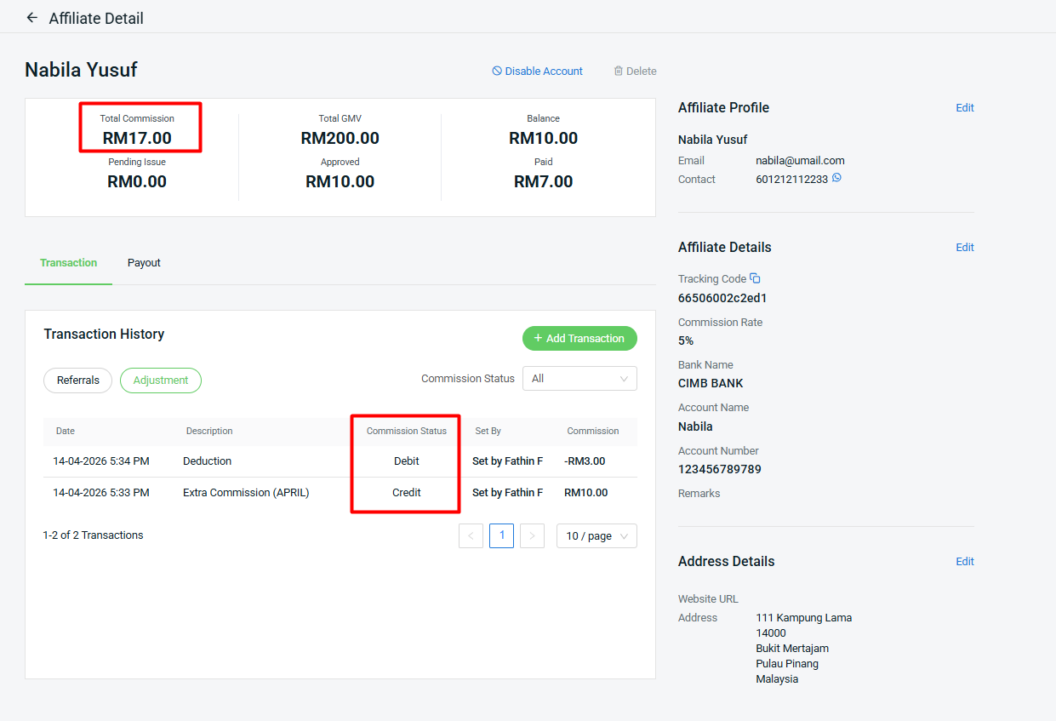
6. Earn Affiliate Commission
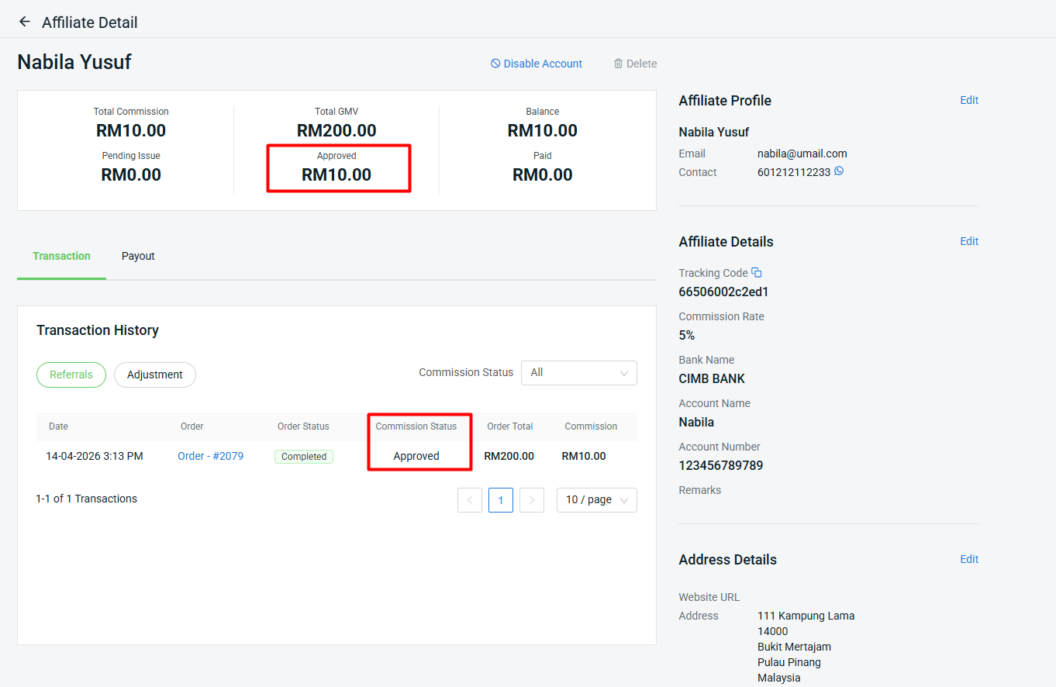
Step 1: When a customer places an order using an affiliate tracking code, the Affiliate Name and the Commission Earned will be displayed in the Order Details. You can click on the Affiliate Name to view the Transaction History.
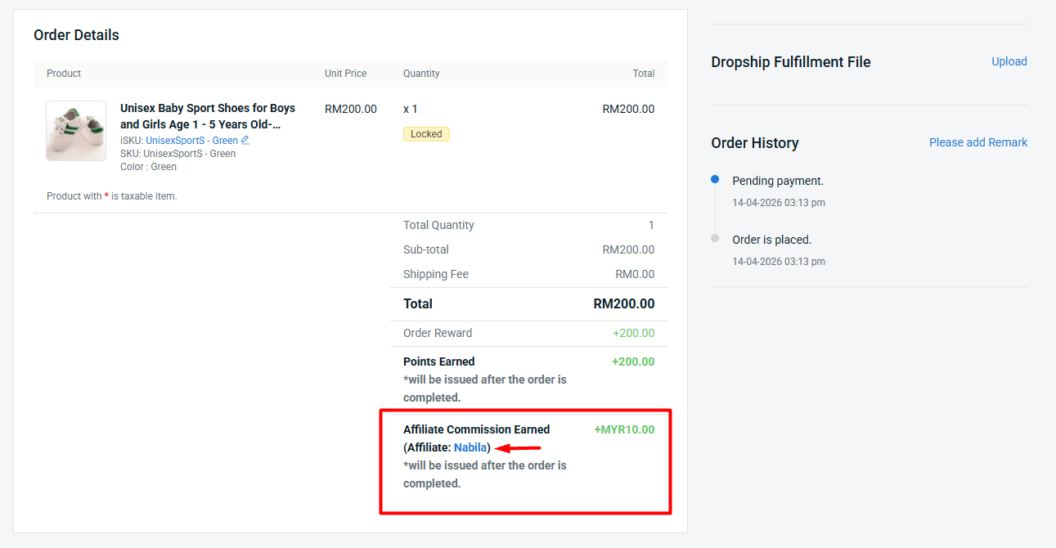
Step 2: The Commission Status will be in Pending Issue before the order is completed.
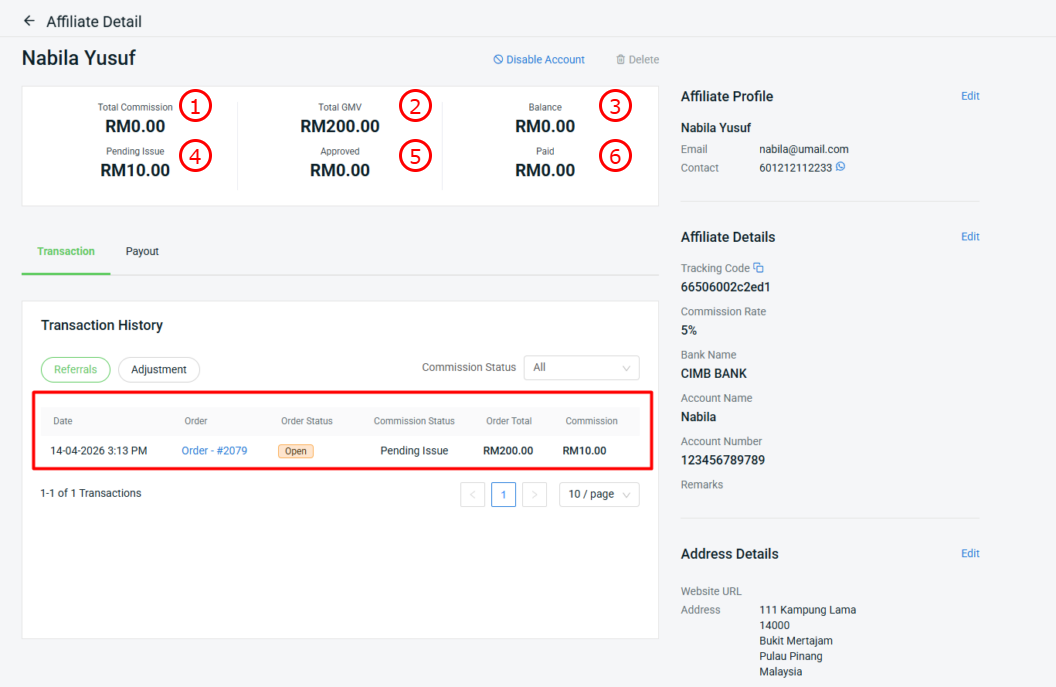
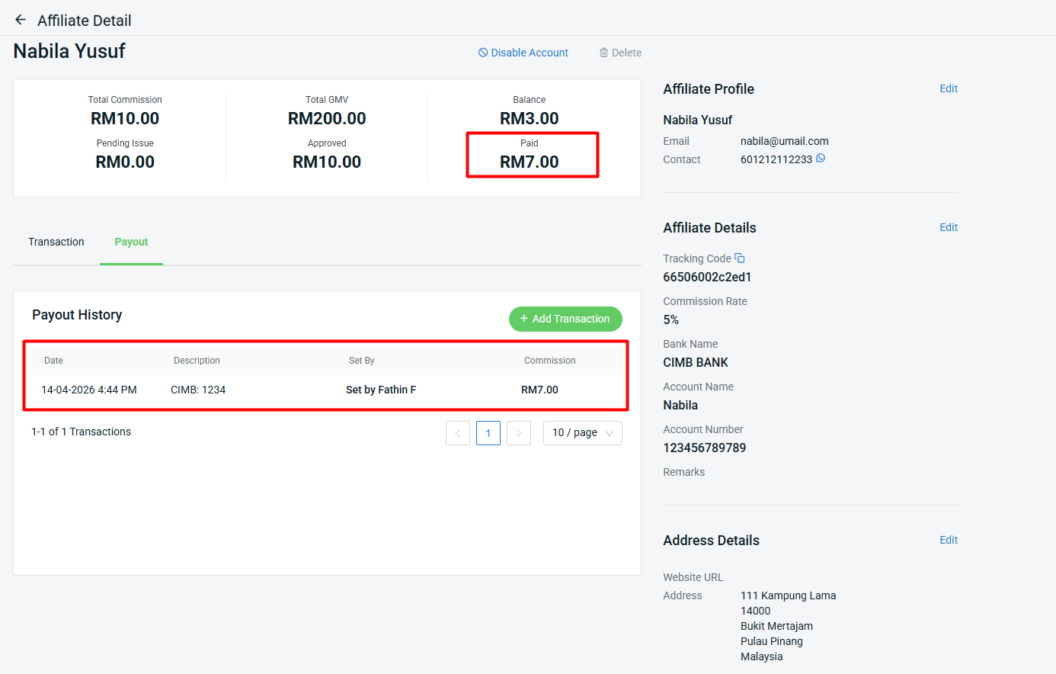
1. Total Commission: The total commission earned from all approved affiliate orders, including any adjustments.

2. Total GMV: The total sales value generated from affiliate orders, excluding orders that are Cancelled, Returned, or Refunded. This reflects the actual valid sales contributed by affiliates.

3. Balance: The remaining commission that has not yet been paid out.(Total Commission - Paid = Balance)

4. Pending Issue: Refers to affiliate orders that have not yet Completed status. These orders are still in progress and the affiliate commissions are not yet confirmed.

5. Approved: Orders that have been successfully completed. The commission from these orders is confirmed.

6. Paid: The total commission amount that has already been paid out to affiliates.
Step 3: Once the order is updated to a Completed status, the Commission Status will be changed to Approved, and the commission will be reflected.
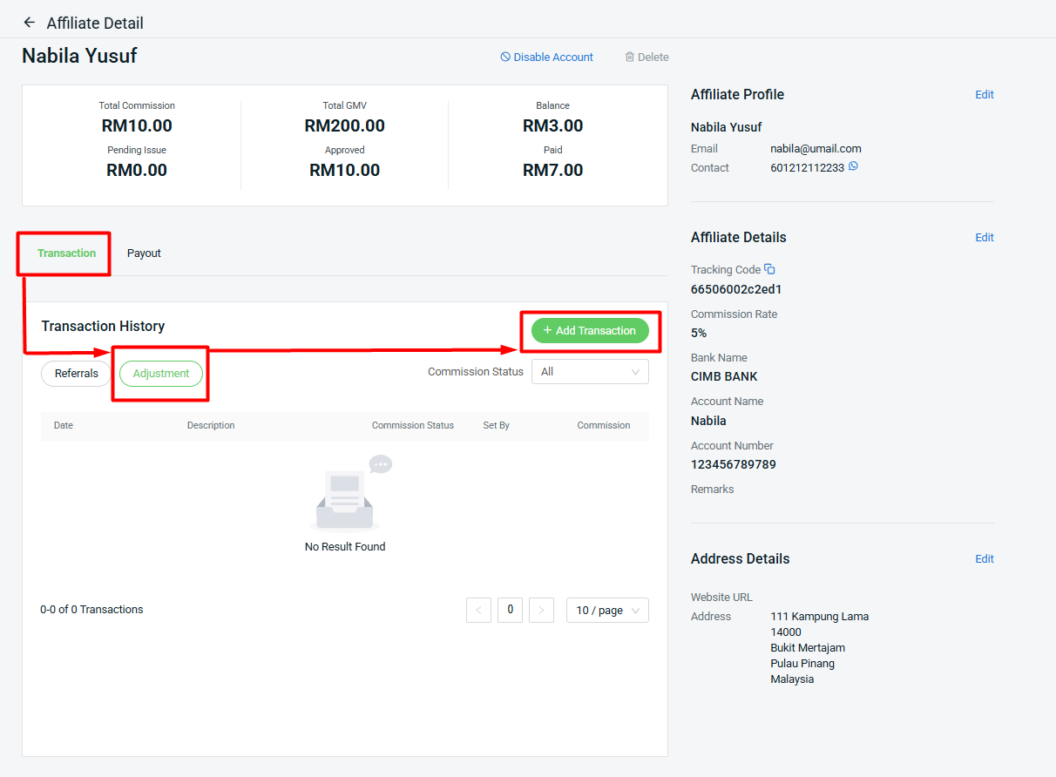
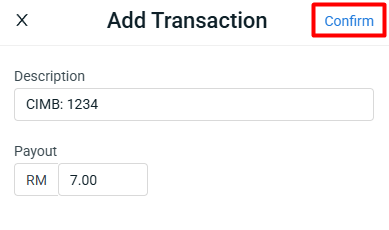
Step 4: You can also add or deduct commission by clicking Transaction > Adjustment > + Add Transaction.
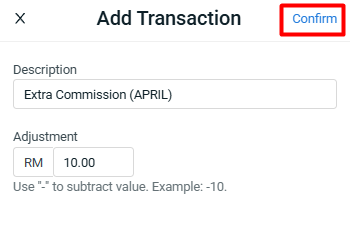
Step 5: Update the Description > enter the Adjustment amount > Confirm.
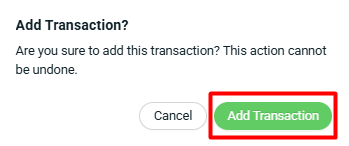
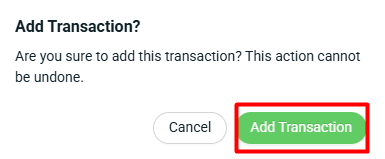
Step 6: Click Add Transaction to proceed.
Step 7: The Commission Status will be updated, and the Total Commission will be adjusted.
7. Make Commission Settlement
Step 1: After you make payment to the affiliate, it required to knock off the commission amount which is paid. Click Payout > + Add Transaction.

Step 2: Fill in the Description > enter the Payout amount > Confirm.
Step 3: Click Add Transaction to proceed.
Step 4: The transaction will be recorded under Paid status.