1. Introduction
2. Set Up QuickBooks Integration
3. Quickbooks Integration Settings
4. Matching
5. Sync Order
1. Introduction

QuickBooks is the most popular small business accounting software businesses use to automate processes such as invoicing, payments, accounting, and more. With SiteGiant Quickbooks Sync, you are able to sync your online order details from your store into Quickbooks easily.
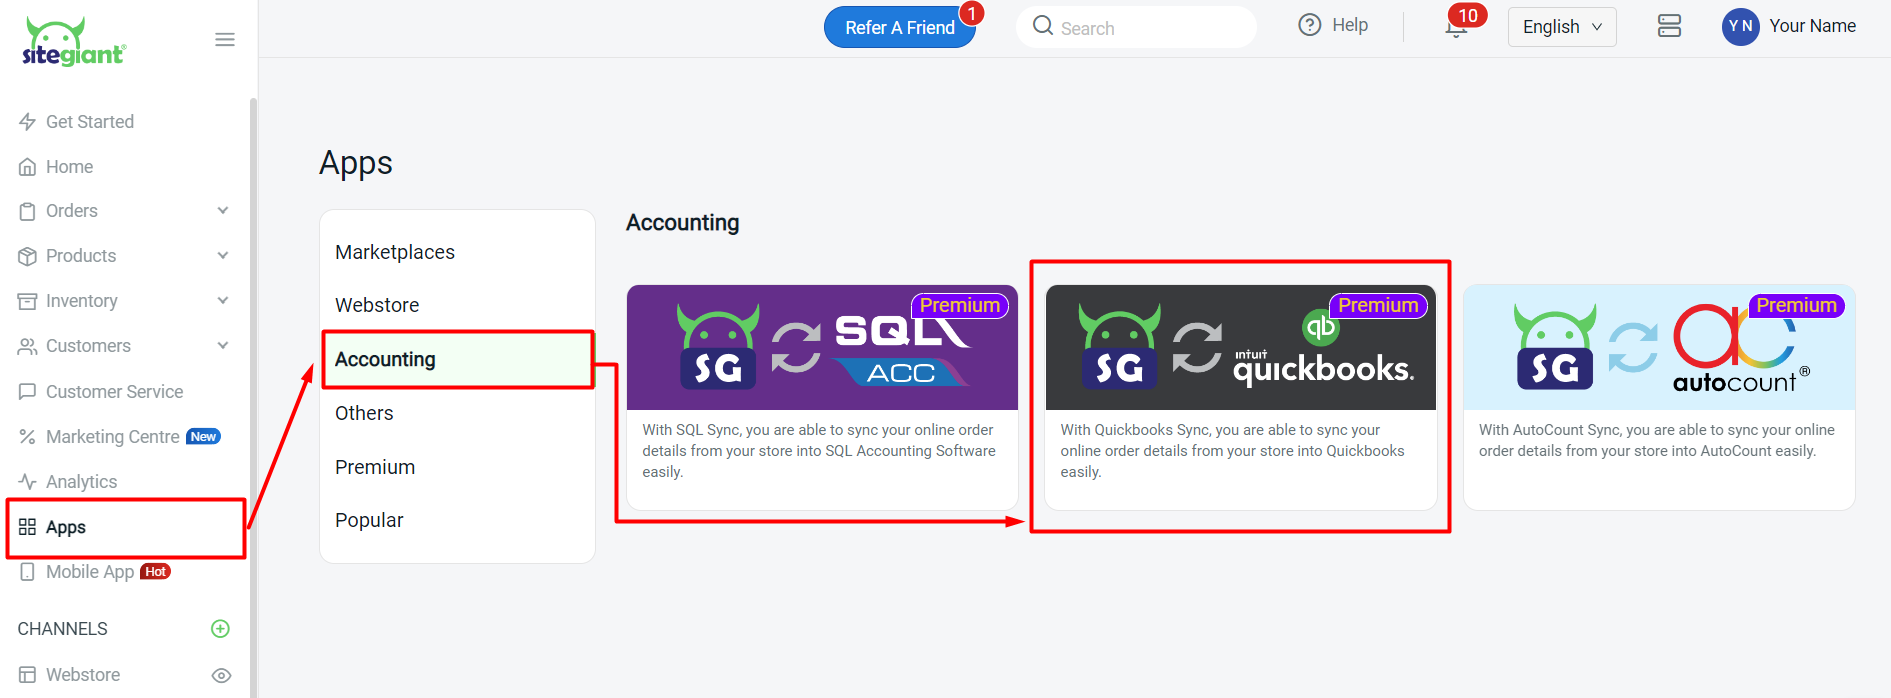
2. Set Up QuickBooks Integration
Step 1: Go to Apps > Accounting > click on QuickBooks
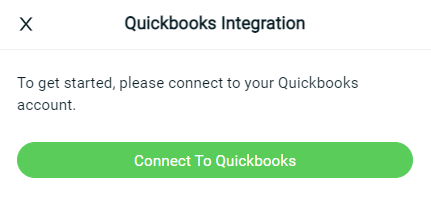
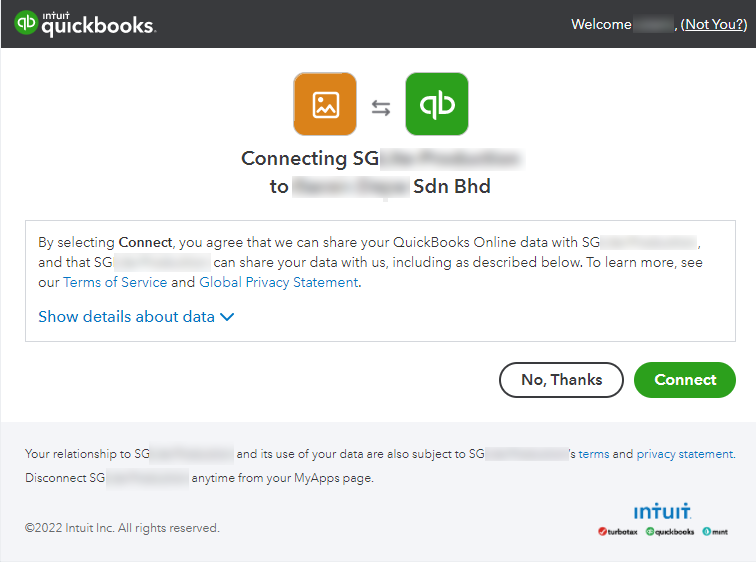
Step 2: Click on Connect to Quickbooks
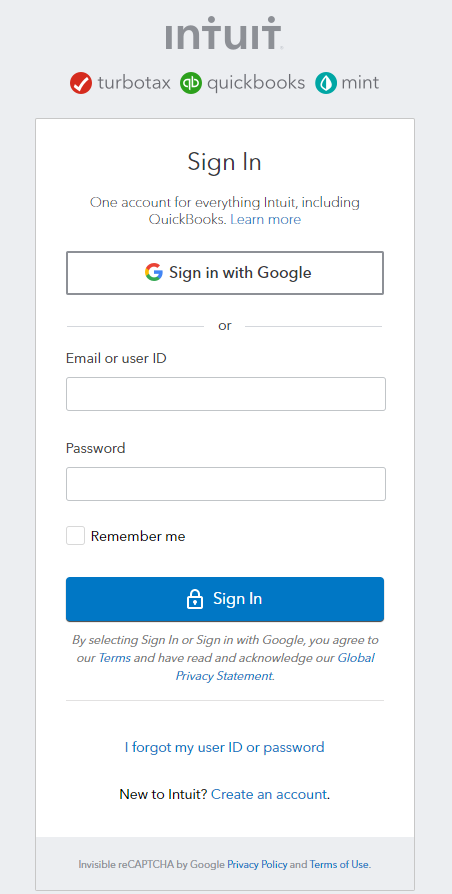
Step 3: Sign in to your QuickBooks account
Step 5: Click on Connect to proceed with the connection
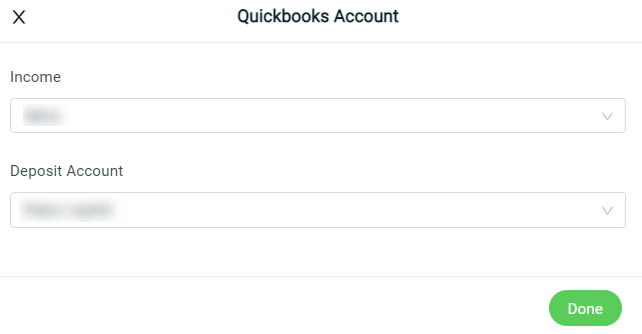
Step 6: Select the account for Income* and Deposit Amount* > Done
3. Quickbooks Integration Settings
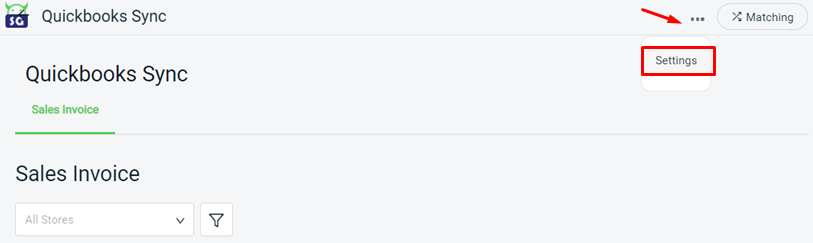
Step 1: Click on the More(…) button > Settings
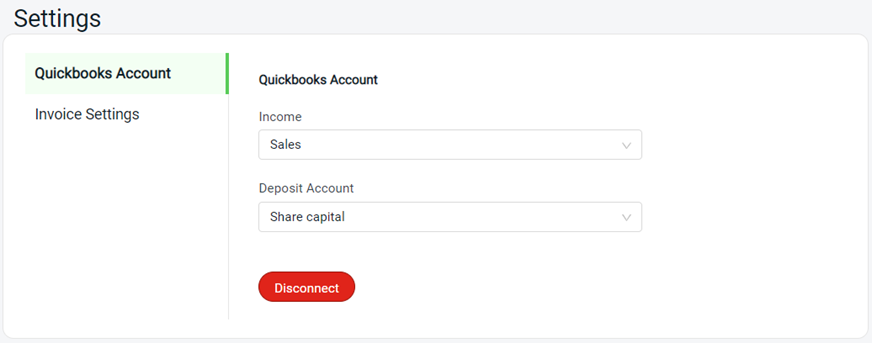
Step 2: From the Quickbooks Account tab, you can change the Income and Deposit Account or Disconnect your QuickBooks account with SiteGiant
Step 3: Under Invoice Settings, you have to select the default Product Name, default Customer account, Terms, and Discount Code. You can also choose between using Quickbooks Invoice Number or the Invoice number from SiteGiant
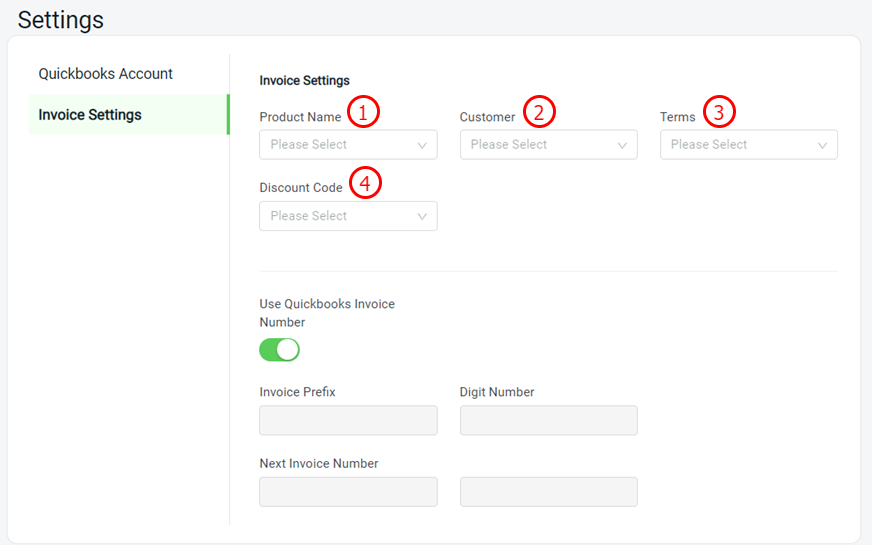
1. Product Name: Default Product Name. Products that are not linked properly will be synced to this selected product.
2. Customer: Default Customer account. Customers (sales channels) that are not linked properly will be synced to this account.
3. Terms: The terms of your invoices.
4. Discount Code: To be set as a product in QuickBooks.
4. Matching
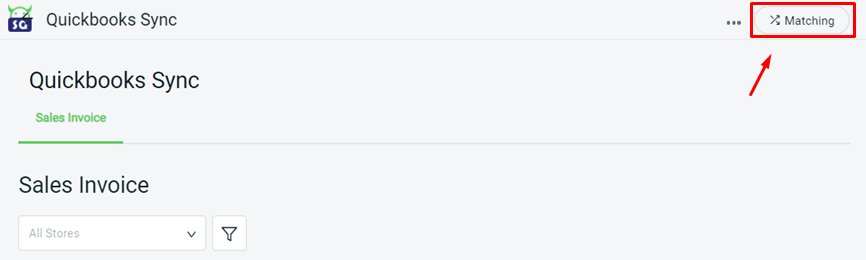
Step 1: From the QuickBooks Sync page, click on the Matching button on the top right
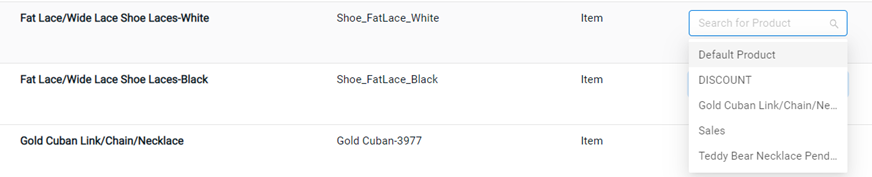
Step 2: Product Manual Matching
i. All your inventory items will be listed, hence click on the dropdown to search the QuickBooks Product Name
ii. Then, select the relevant product from QuickBooks to match with the Inventory Item in SiteGiant
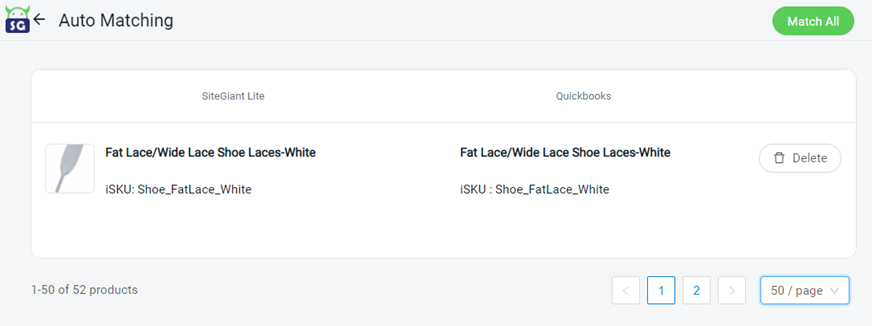
Step 3: Product Auto-Matching
i. Click on the Auto Matching icon from the top
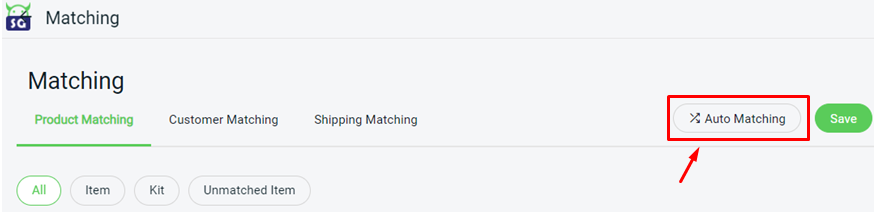
ii. If the Product Name in QuickBooks matches the Inventory Item Name from SiteGiant, the system will automatically match the product for you
iii. If the auto-matching is correct, you can click on Match All
iv. If the auto-matching is incorrect, you can click on the Delete button, to cancel the auto-match for the item, then click on Match All button
Step 4: Customer Matching
Select the correct Account code from QuickBooks to match with the Sales Channel

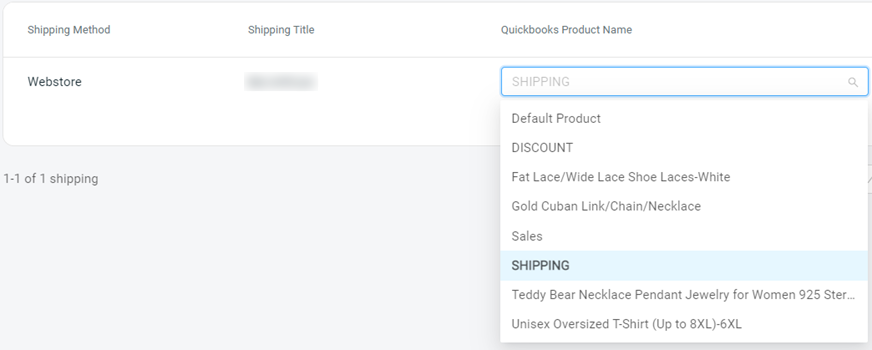
Step 5: Shipping Matching
Select the relevant product from QuickBooks to match the Shipping code, for each sales channel
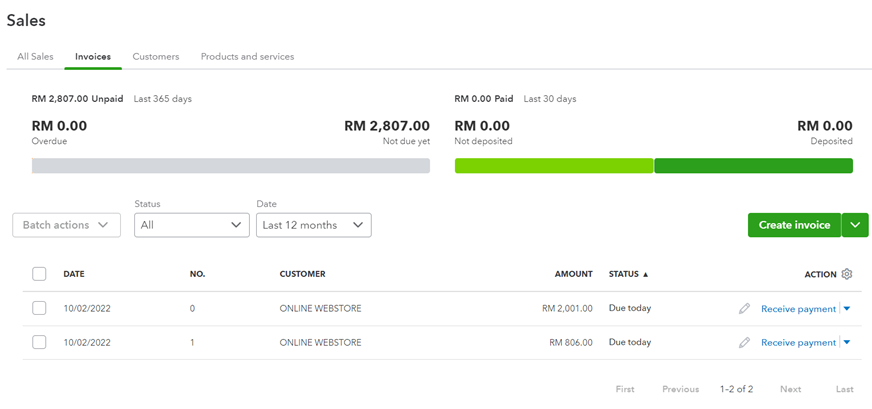
5. Sync Order
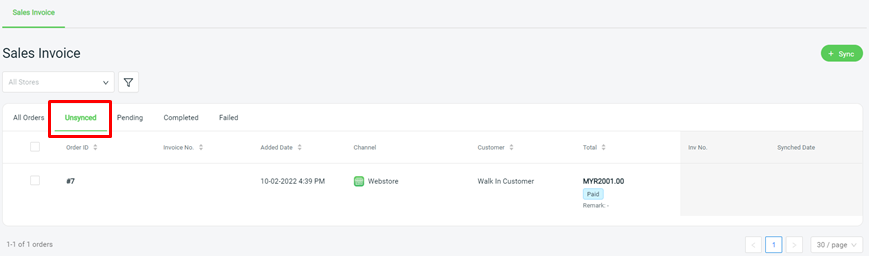
Step 1: Go into Quickbooks Sync and click on the Sales Invoice tab
Step 2: Choose the Unsynced tab and select the order(s) that you want to sync
Step 3: Click on the Sync button
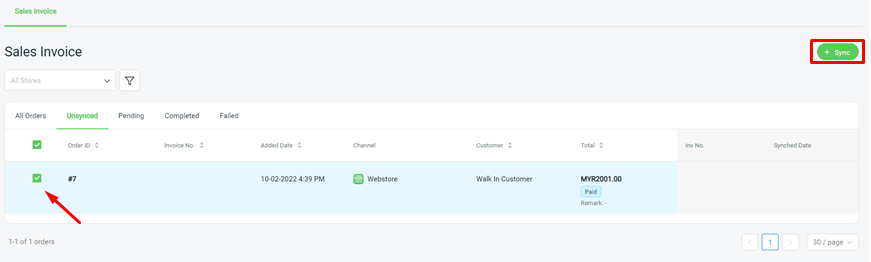
Step 4: The order will then be synced to Quickbooks and then the synced order(s) will fall under the Completed tab

Step 5: From the Quickbooks Sales Invoices, you will then find the invoices that are synced from SiteGiant