1. Introduction
2. Set Up E-invoice
3. Search And Print E-invoice (From Customer Perspective)
1. Introduction

When your customers placed an order from your marketplaces stores, they might request to have an invoice of their purchases. With E-invoice, you may just guide them to your webstore to check and print their marketplaces order by themselves.
2. Set Up E-invoice
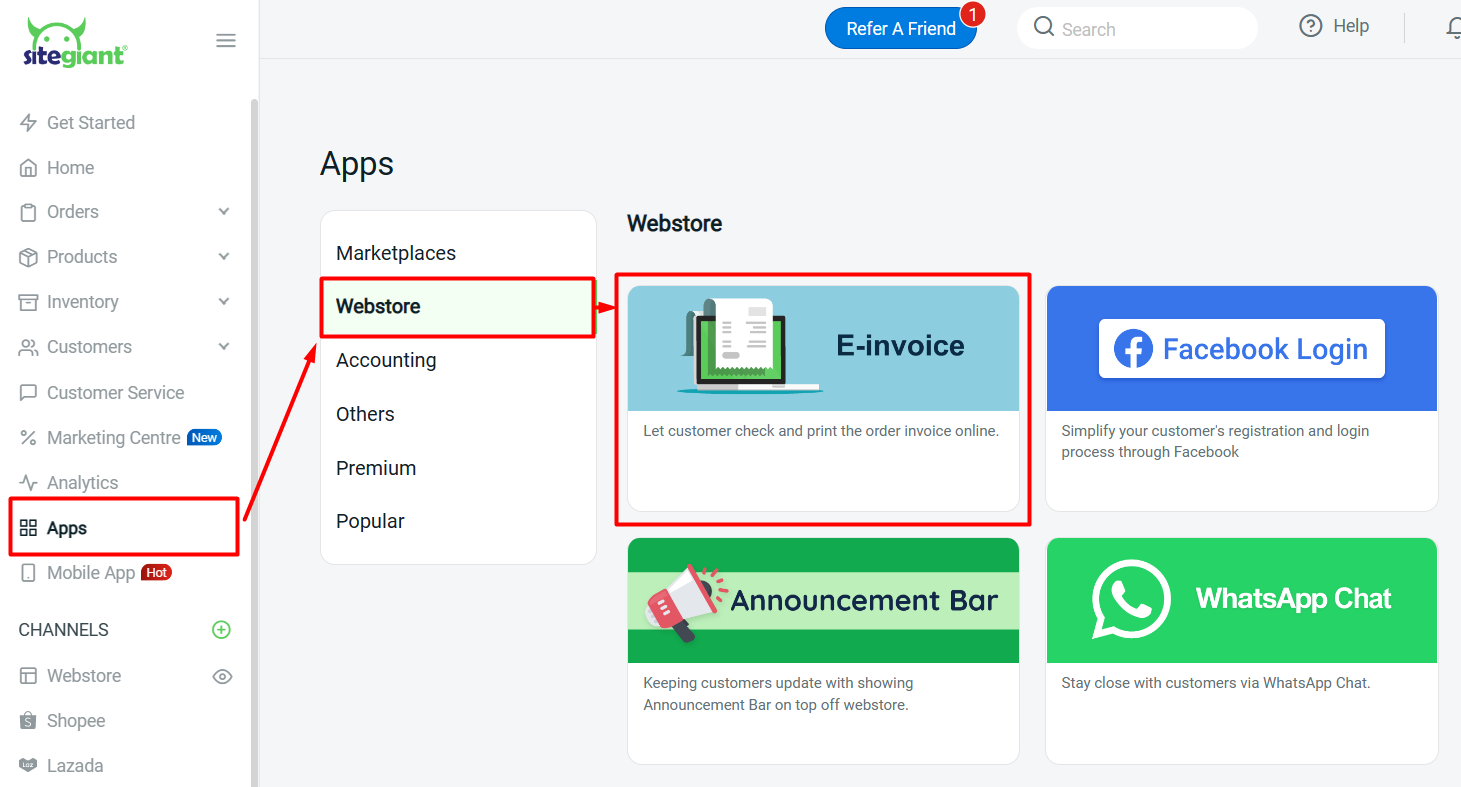
Step 1: Navigate to Apps on the dashboard menu > Webstore > E-invoice
Step 2: Enable the Webstore Status > Save
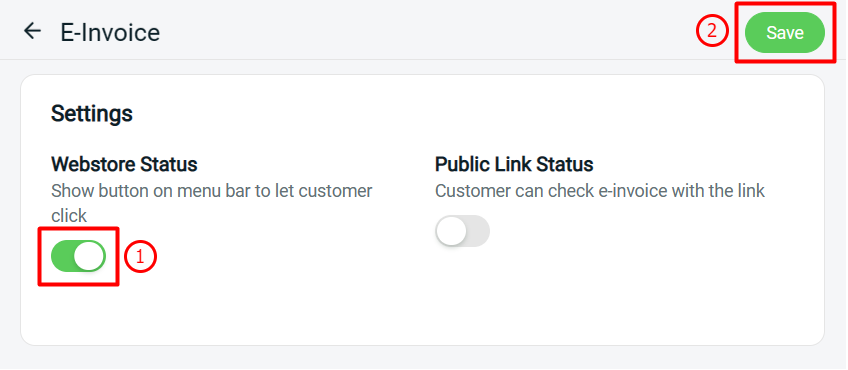
?Note: Kindly ignore Public Link Status as this feature is still in development
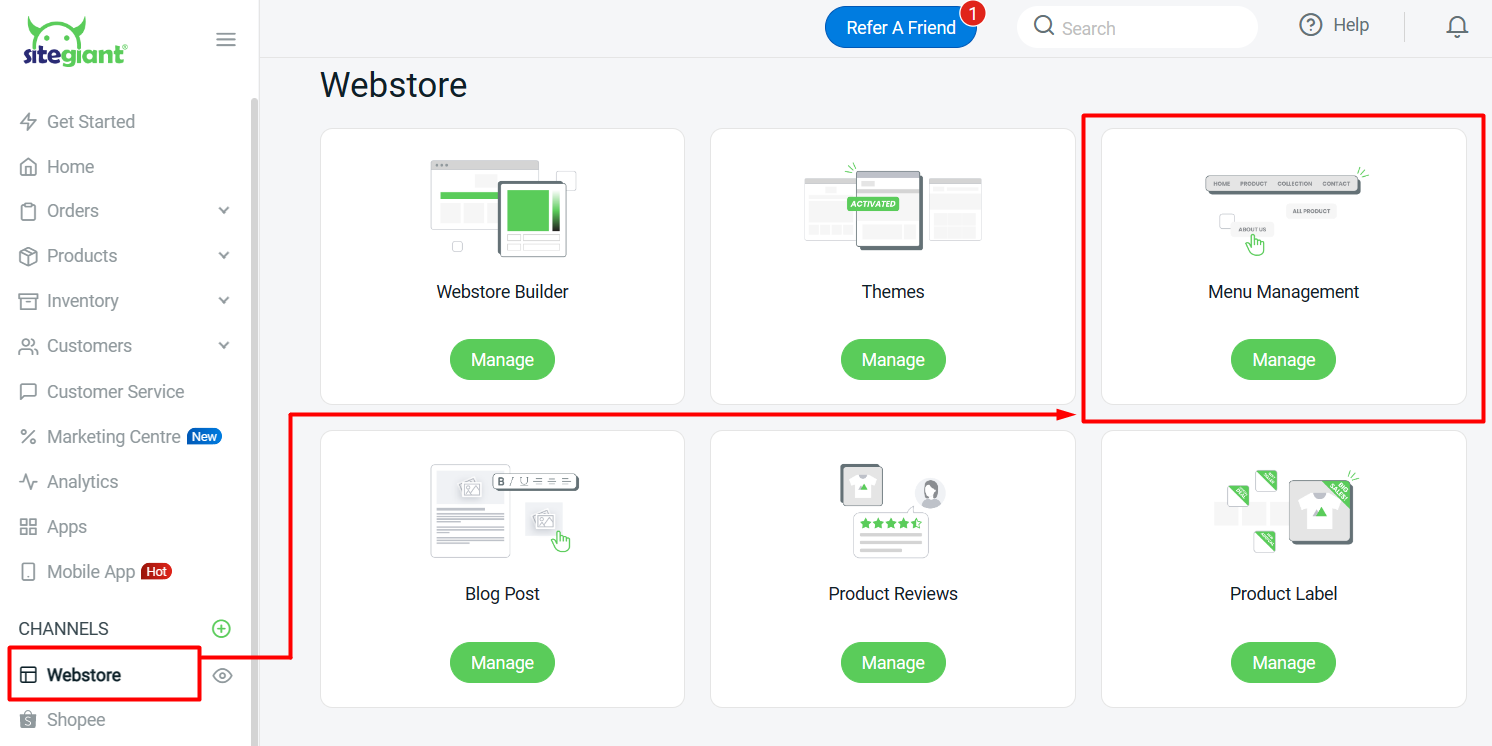
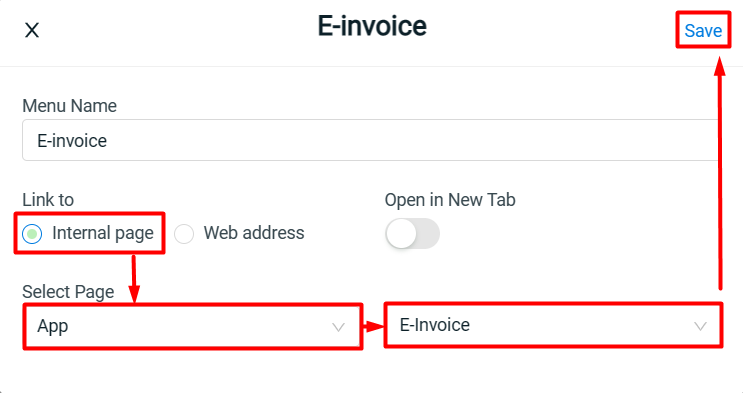
Step 3: Go to Webstore on the dashboard menu > Menu Management
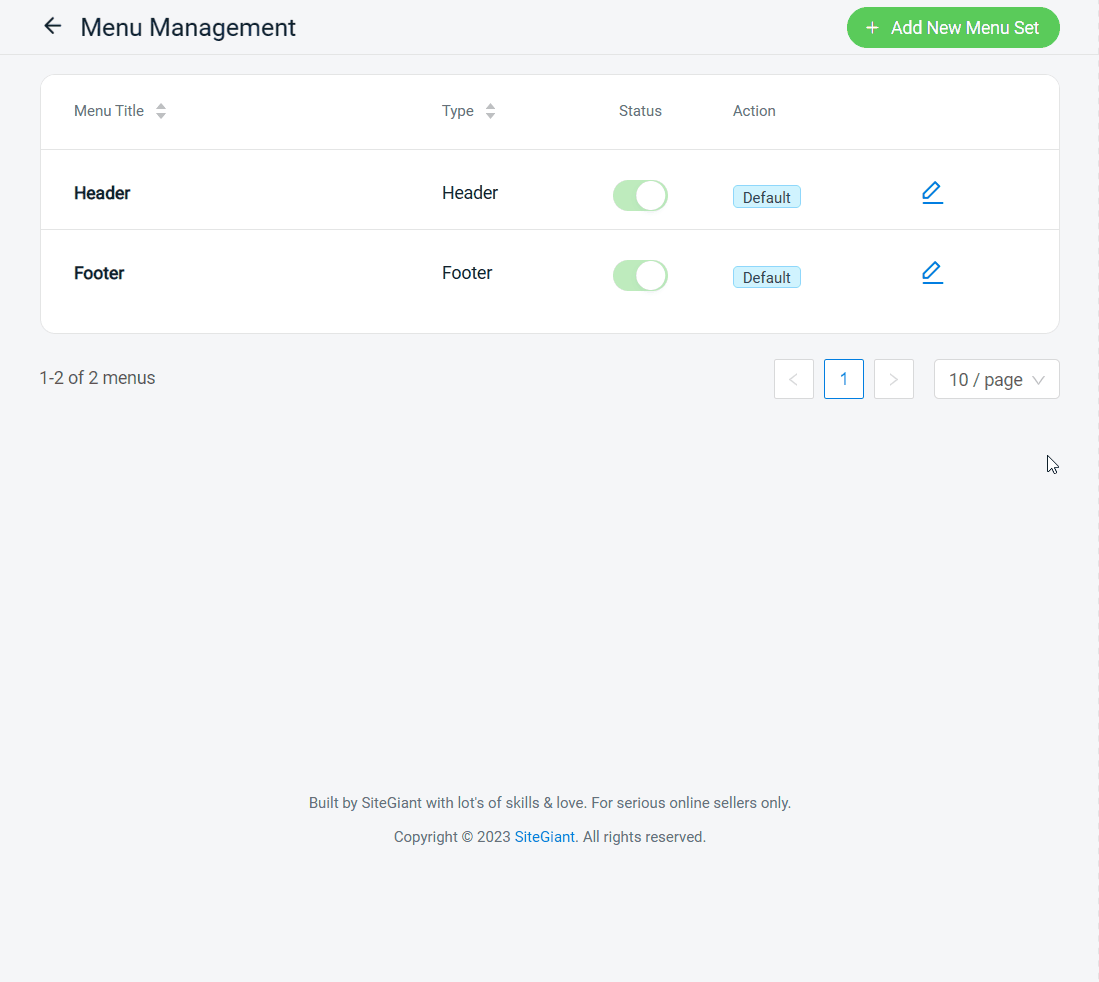
Step 4: Click on Edit button for Header / Footer > + Add Menu Item
Step 5: Set your Menu Name > choose Link to Internal page > choose App and E-invoice > Save
3. Search And Print E-invoice (From Customer Perspective)
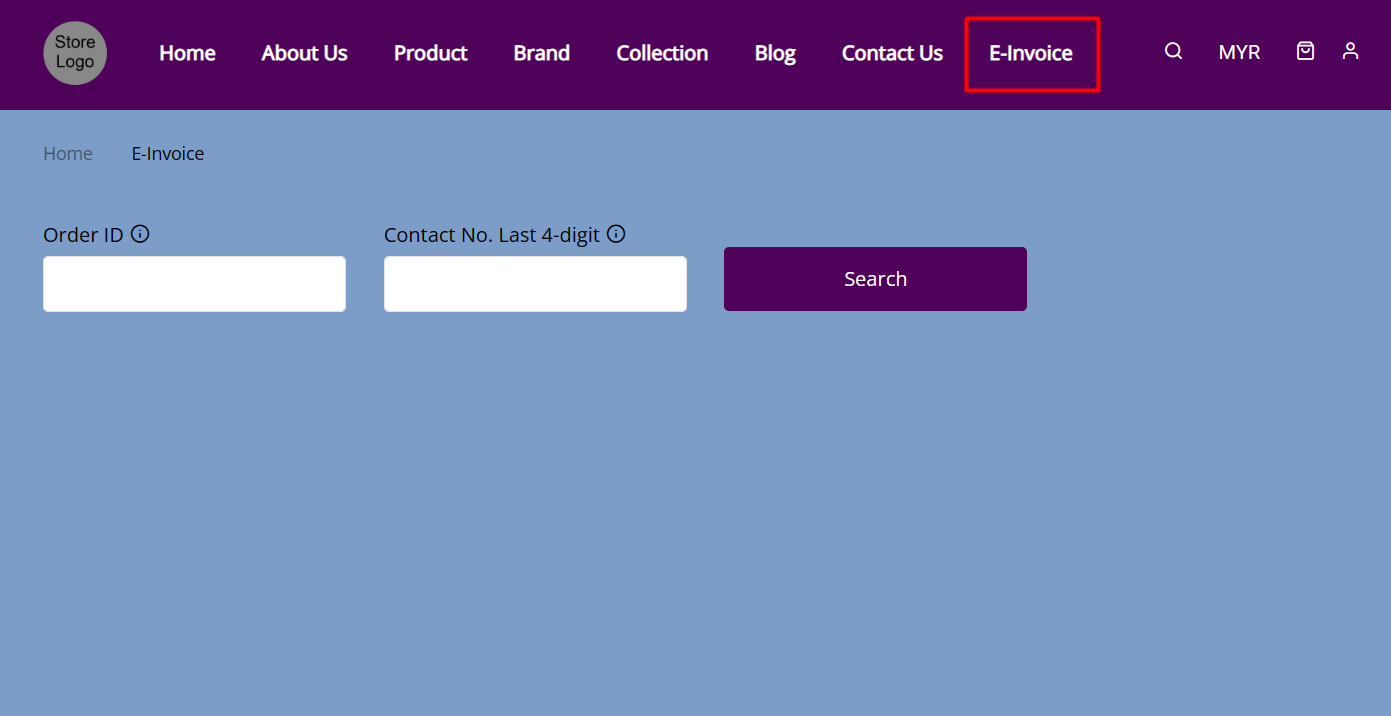
Step 1: Customer can access to e-invoice from the menu > fill in the Order ID and last 4 digit of contact no. > Search
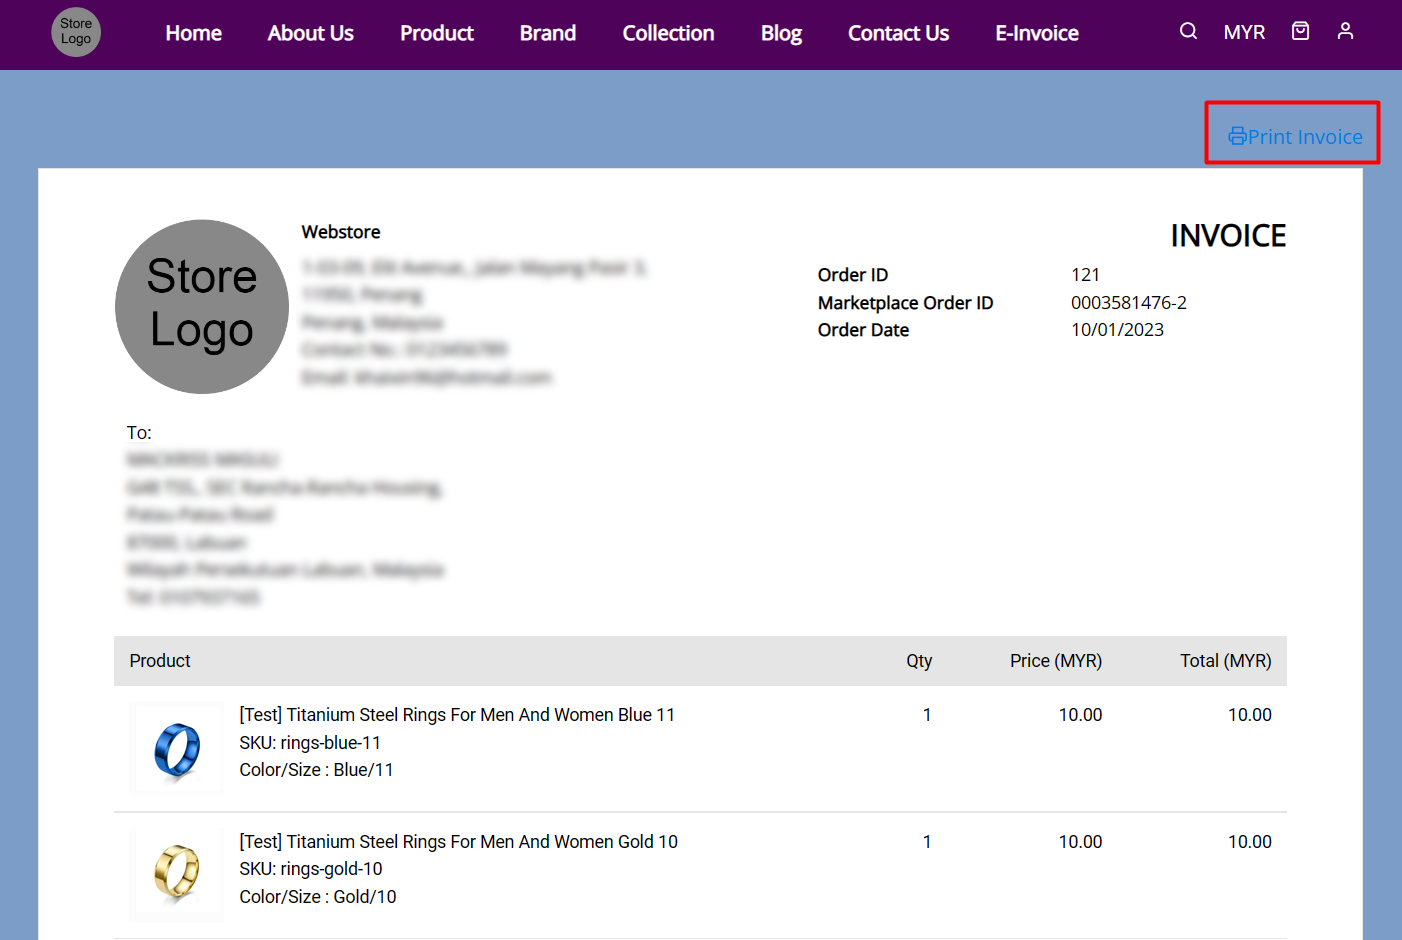
Step 2: The invoice will be generated > click on Print Invoice to print out the invoice
?Note:
1. The Print Invoice button will only be shown to the order with Paid, Processed and Completed status
2. The invoice template can be customized in Settings > General > Document Template > Invoice