Array ( [0] => Array ( [0] => Array ( [label] => Home [link] => https://support.sitegiant.com/en [title] => Home [type] => blog_home ) [1] => Array ( [label] => Inventory [link] => https://support.sitegiant.com/en/article-categories/inventory-en/ [title] => View all posts in Inventory [type] => kb_tax ) [2] => Array ( [label] => How To Perform Stock Adjustment With SiteGiant App [link] => https://support.sitegiant.com/en/knowledge-base/how-to-perform-stock-adjustment-with-sitegiant-apps/ [title] => How To Perform Stock Adjustment With SiteGiant App [type] => kb_current_page ) ) [1] => Array ( [0] => Array ( [label] => Home [link] => https://support.sitegiant.com/en [title] => Home [type] => blog_home ) [1] => Array ( [label] => Warehouse Management System [link] => https://support.sitegiant.com/en/article-categories/warehouse-management-system/ [title] => View all posts in Warehouse Management System [type] => kb_tax ) [2] => Array ( [label] => How To Perform Stock Adjustment With SiteGiant App [link] => https://support.sitegiant.com/en/knowledge-base/how-to-perform-stock-adjustment-with-sitegiant-apps/ [title] => How To Perform Stock Adjustment With SiteGiant App [type] => kb_current_page ) ) )
  1. Inventory
  2. How To Perform Stock Adjustment With SiteGiant App
  1. Warehouse Management System
  2. How To Perform Stock Adjustment With SiteGiant App

How To Perform Stock Adjustment With SiteGiant App

1. Introduction
2. Inventory Stock Adjustment
3. Assign Item Into Rack
4. Edit Item Basic Information

1. Introduction

You can now use SiteGiant Smart Scan App to perform stock adjustments, assign racks and edit basic information for your inventory item in SiteGiant.

?Note: Install SiteGiant Smart Scan Apps into your PDA or smartphone device.


2. Inventory Stock Adjustment

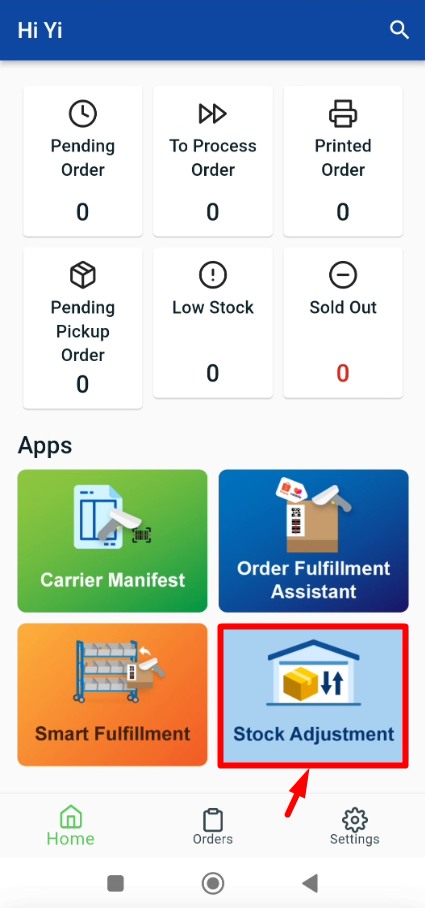
Step 1: Log in to SiteGiant Smart Scan App > Stock Adjustment.
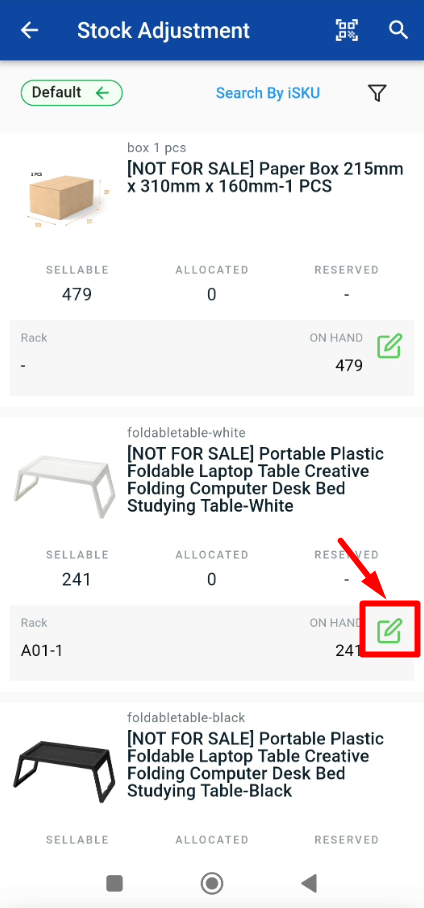
Step 2: Click on the Edit icon.
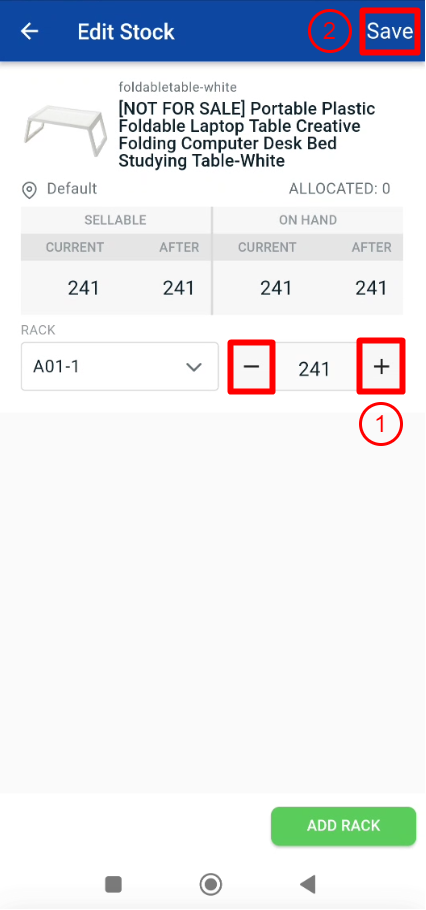
Step 3: Adjust stock quantity > Save.

3. Assign Item Into Rack

Step 1: Click on the Edit icon.
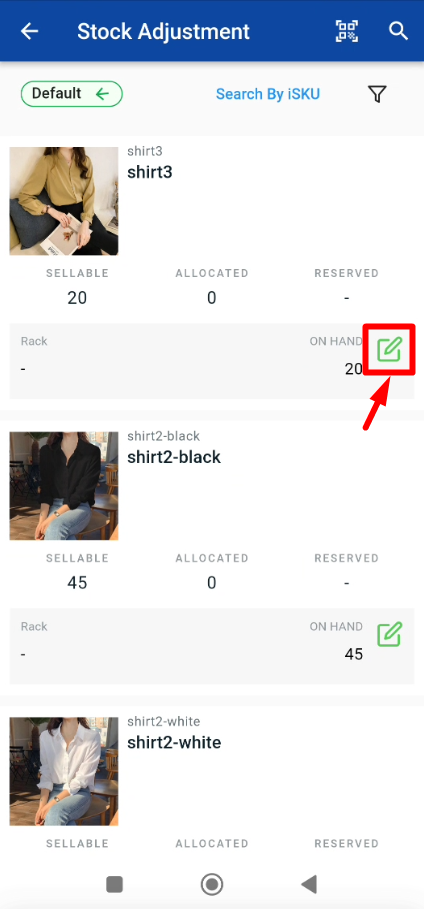
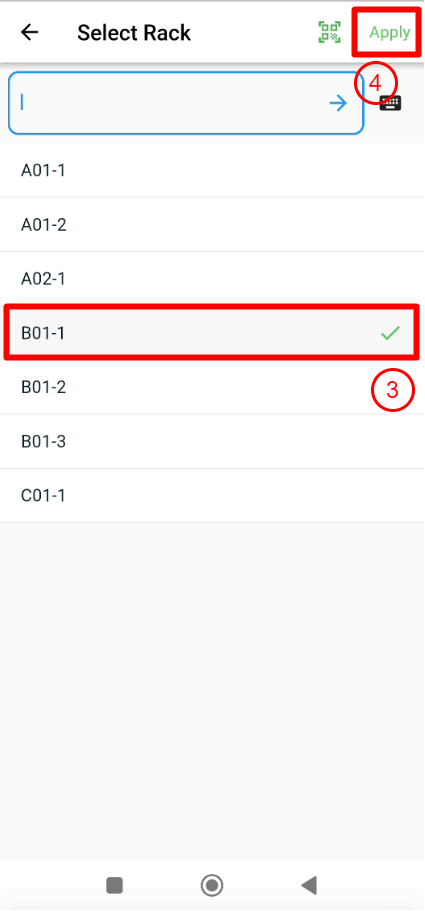
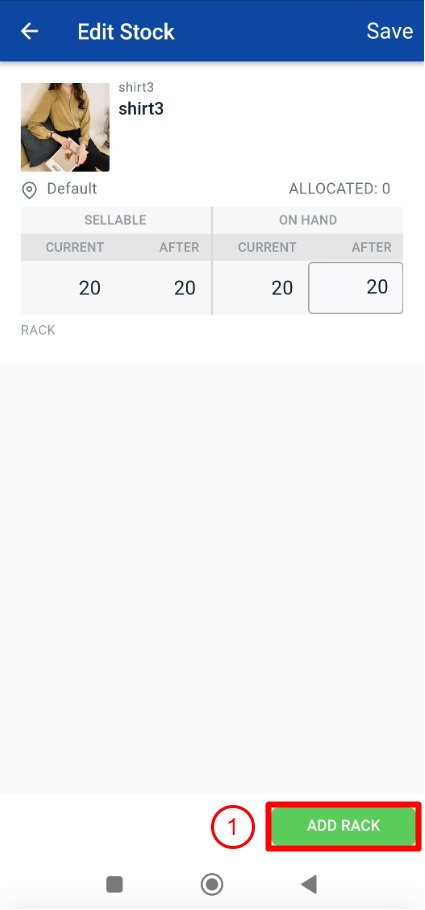
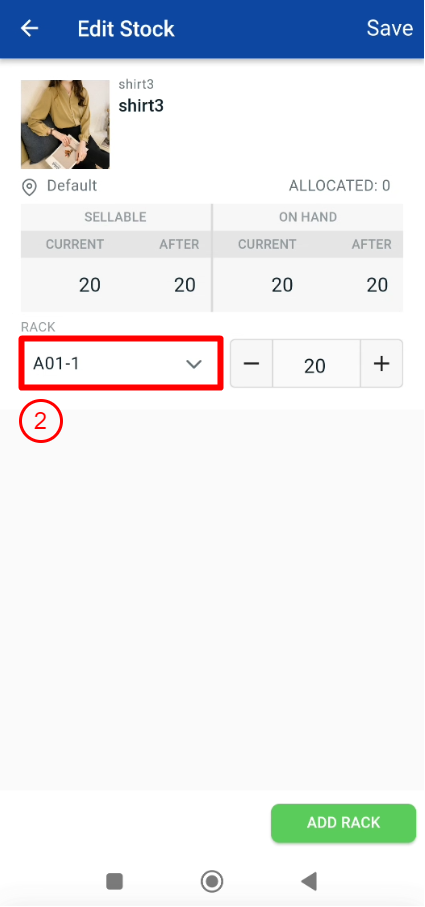
Step 2: Click on Add Rack > Click on Rack > Select Rack > Apply.
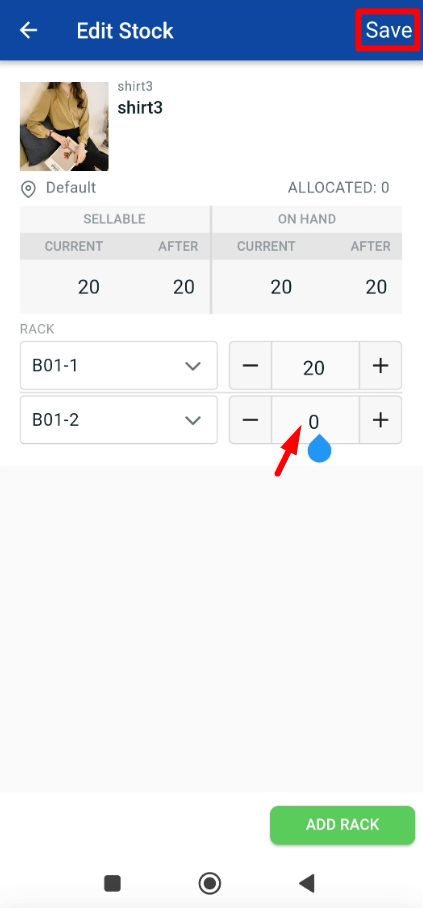
Step 3: Add multiple racks or perform stock adjustment (optional) > Save.

4. Edit Item Basic Information

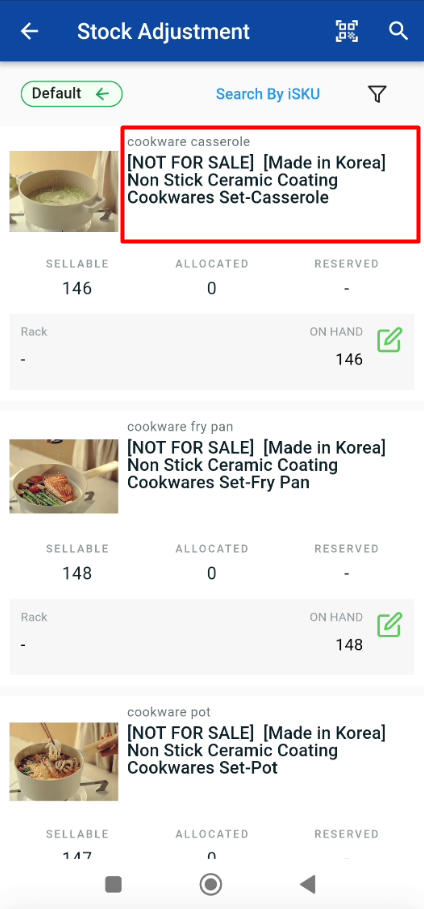
Step 1: Click on the Item Name to view the item.
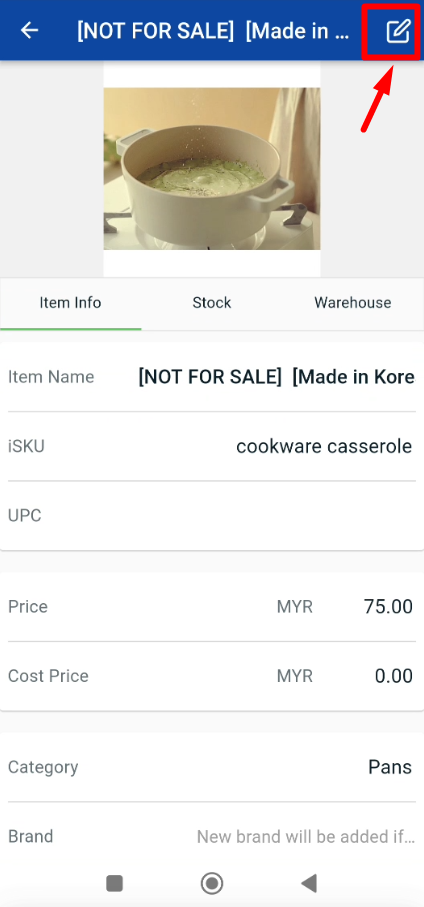
Step 2: Click on the Edit icon to change the item information.
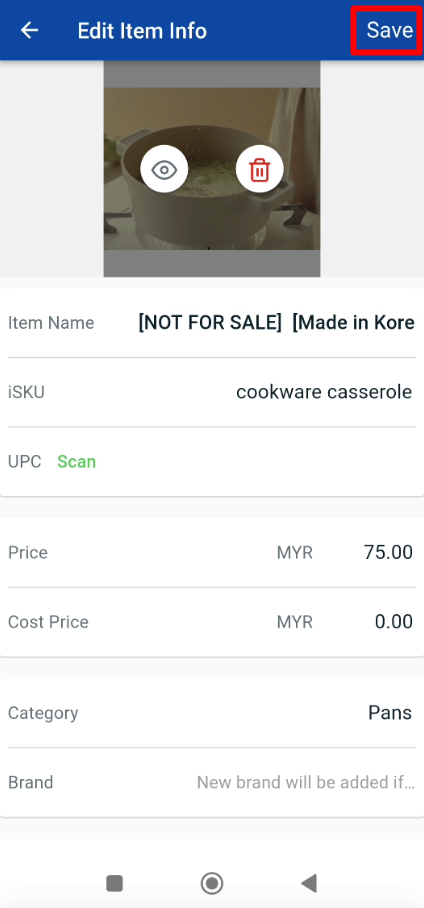
Step 3: Once done edit the item information > Click Save.

?Tips: You can upload the item image, or scan the UPC of the item via App.
Was this article helpful?

Need Support?
Can’t find the answer you’re looking for? Don’t worry we’re here to help!
Contact Support