1. Introduction
2. Insert Category And Brand
3. Filter Category And Brand
4. Edit Category And Brand Name
1. Introduction
You can easily filter and organize your Inventory Items by classifying them into Category and Brand.
2. Insert Category And Brand
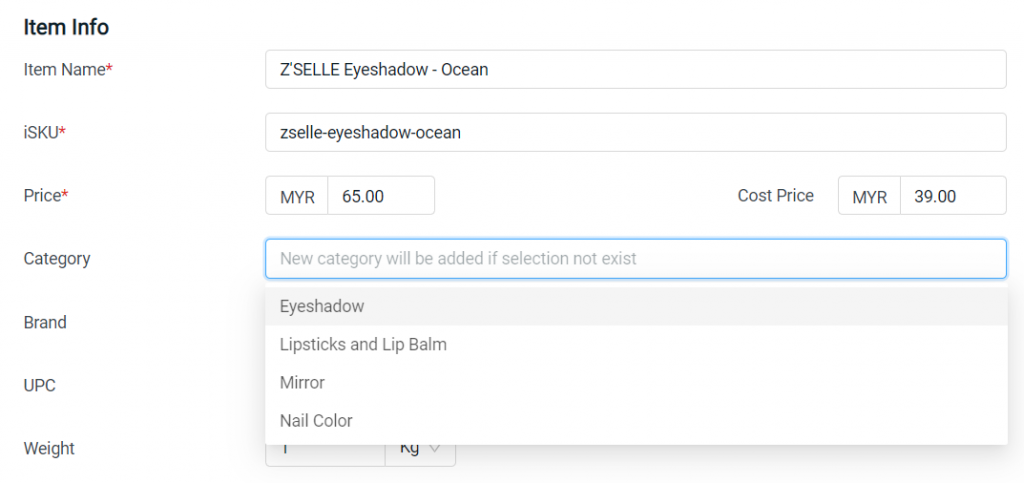
Step 1: Navigate to Inventory > All Inventory Items > click on Item Name

Step 2: You can select the Category and Brand from the dropdown menu, or insert a new Category or Brand if the selection does not exist

?Note: The Category and Brand will be saved according to the Shopee or Lazada Product Listing on the first time you perform Bulk Inventory Linking.
Step 3: Click Save when done edited
?Tips: To bulk update the Category and Brand of the inventory items, you may use Batch Edit Tools
3. Filter Category And Brand
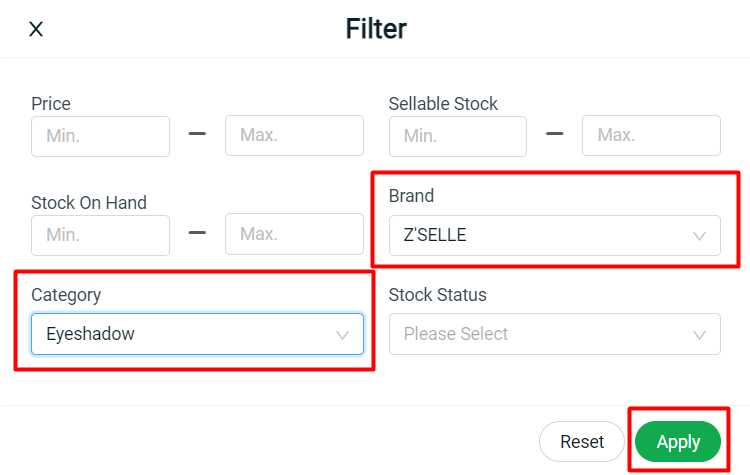
Step 1: Click the Filter button

Step 2: You may filter the inventory item with Brand or/and Category > click Apply button

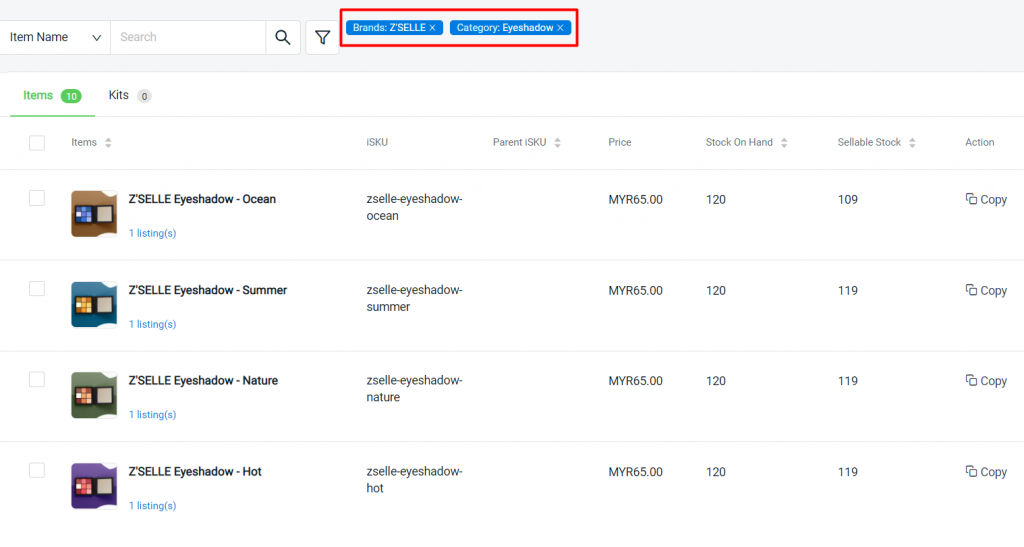
Step 3: The item will be filtered out accordingly

4. Edit Category And Brand Name
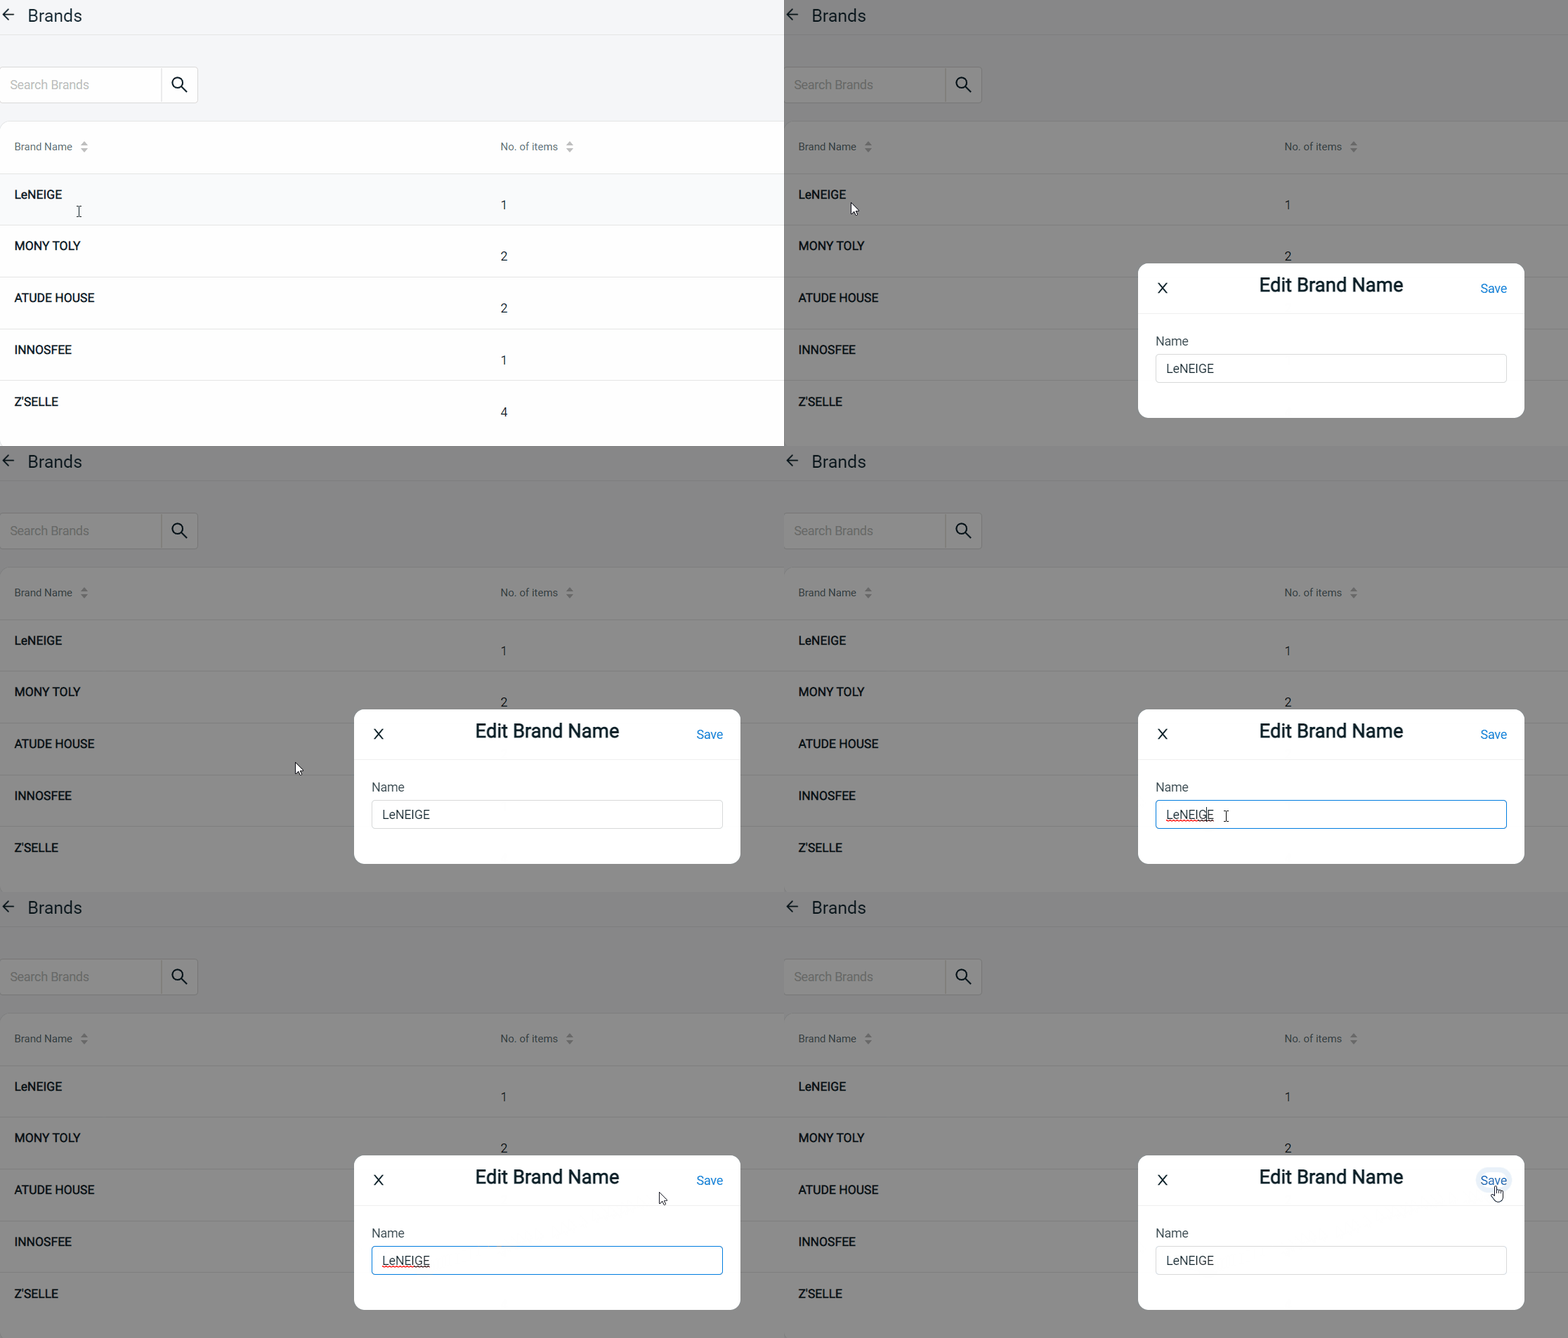
Step 1: Go to More(…) > choose Brands/ Categories

Step 2: Click into Brand/ Categories name > Edit the name > Save

