1. Introduction
2. Manually Assign Loyalty Points
3. View Points (From Customer Perspective)
1. Introduction
Customers can collect loyalty points by placing orders on your Webstore. But sometimes you might want to reward them with more points or deduct points from the customer account, so you may manually adjust the points. Other than that, running an online business makes it hard to prevent customers from requesting refunds. Instead of issuing refunds by cash, you can issue points to customers to redeem products from your Webstore.
2. Manually Assign Loyalty Points
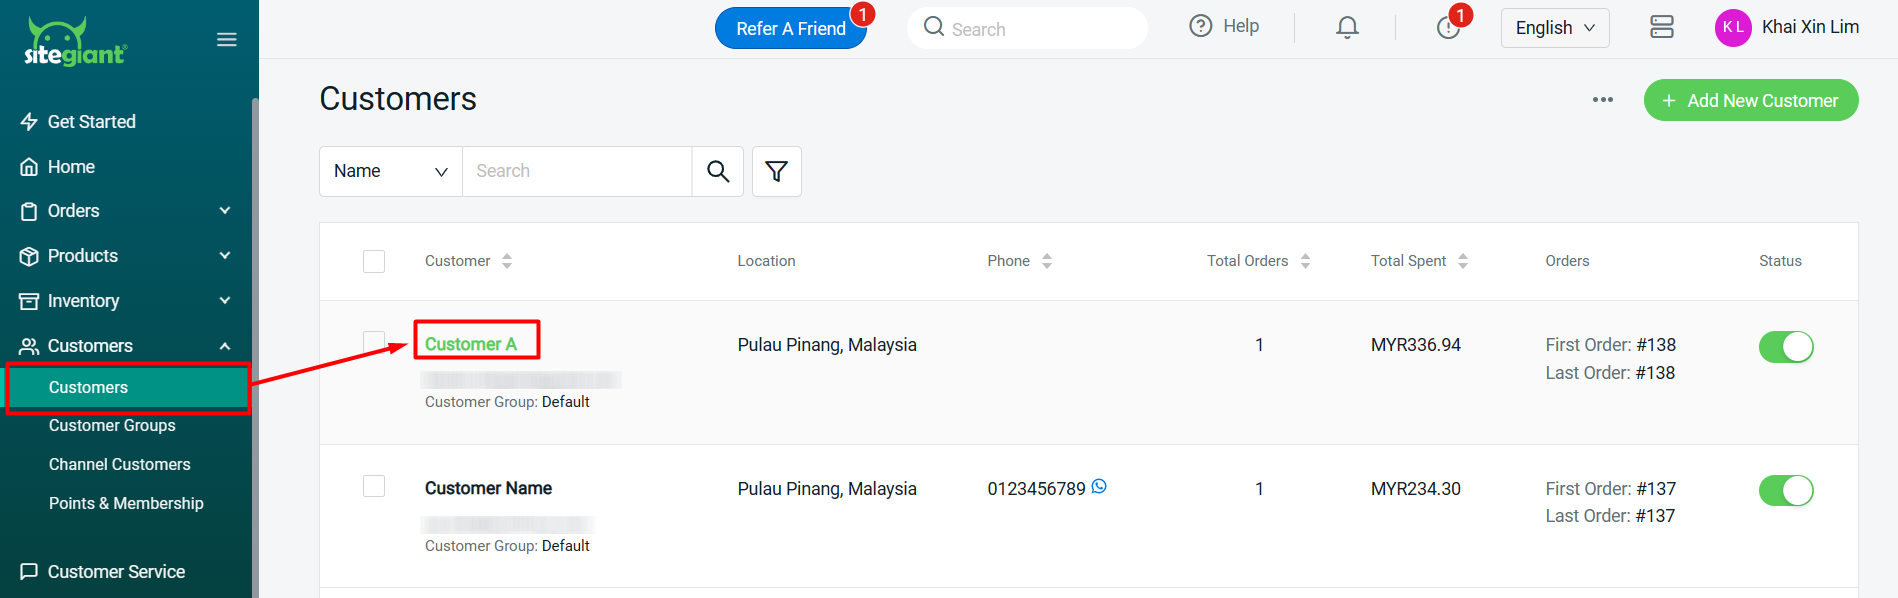
Step 1: Navigate to Customers > click on Customer Name.
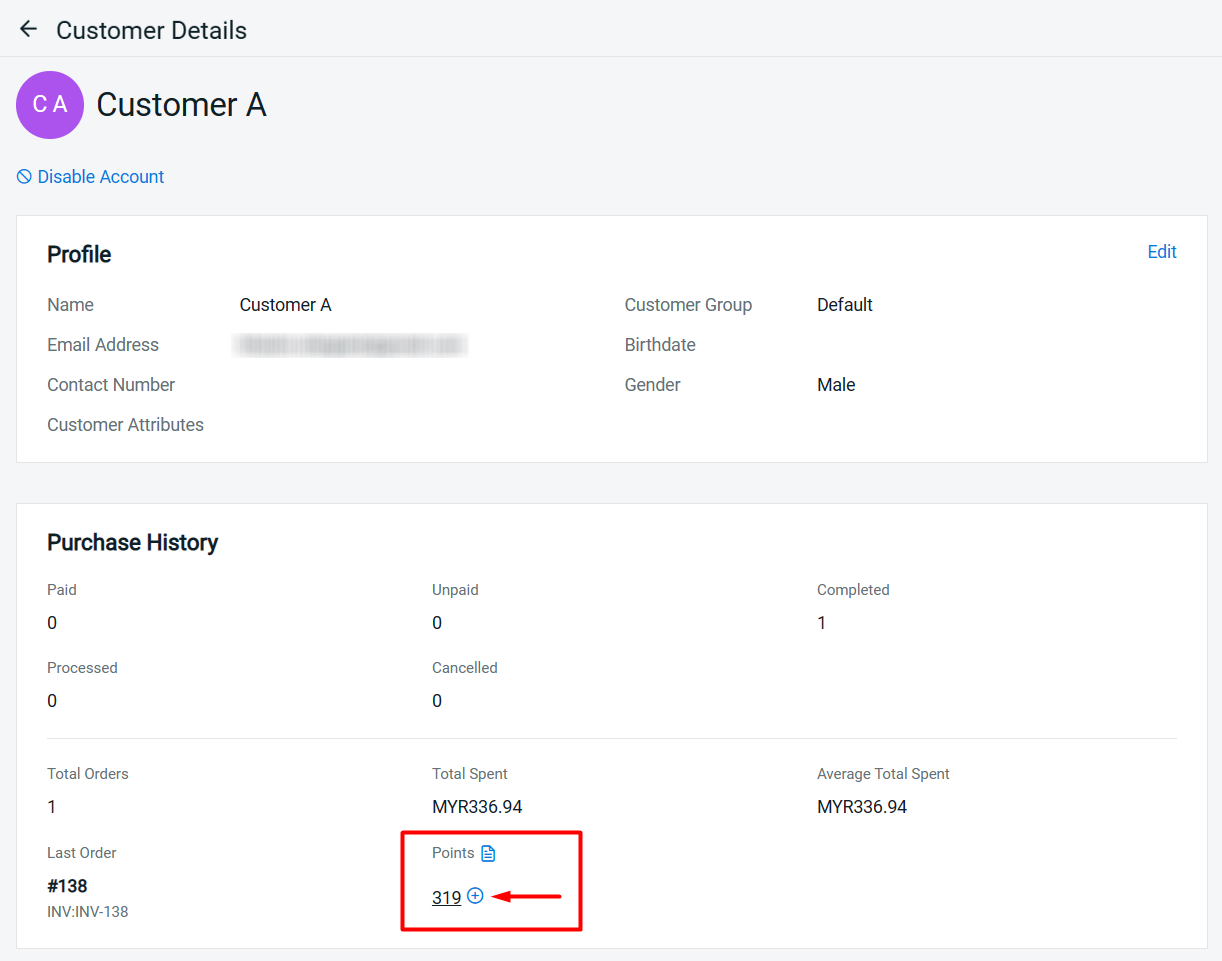
Step 2: Under the Purchase History section, click on the + icon of Points.
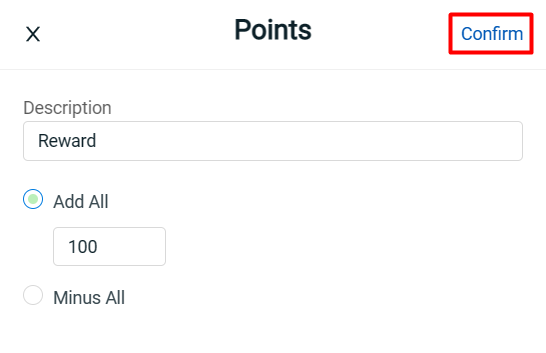
Step 3: Fill in the Description and choose whether to Add or Minus the amount > Confirm.
Step 4: You can click on the Points Record to view the history of added or minus points.
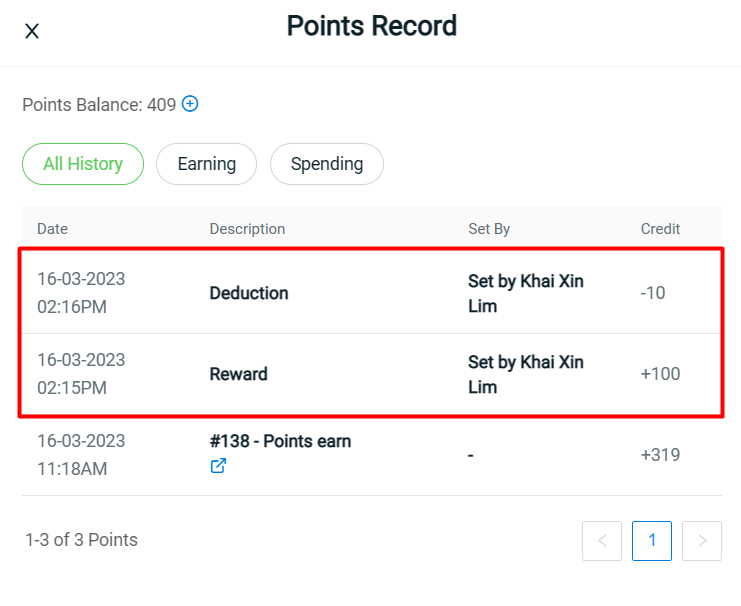
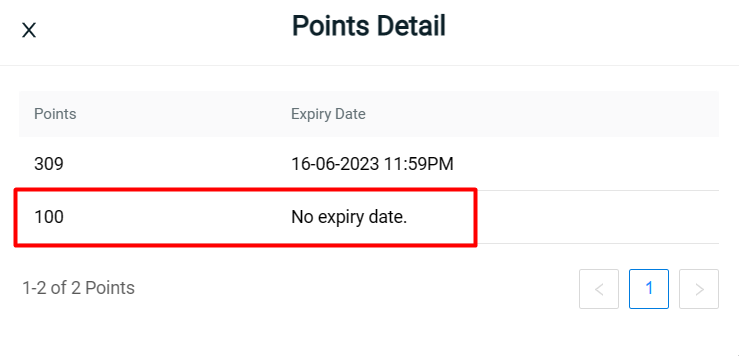
?Note: Points that are added manually will not have an expiry date.
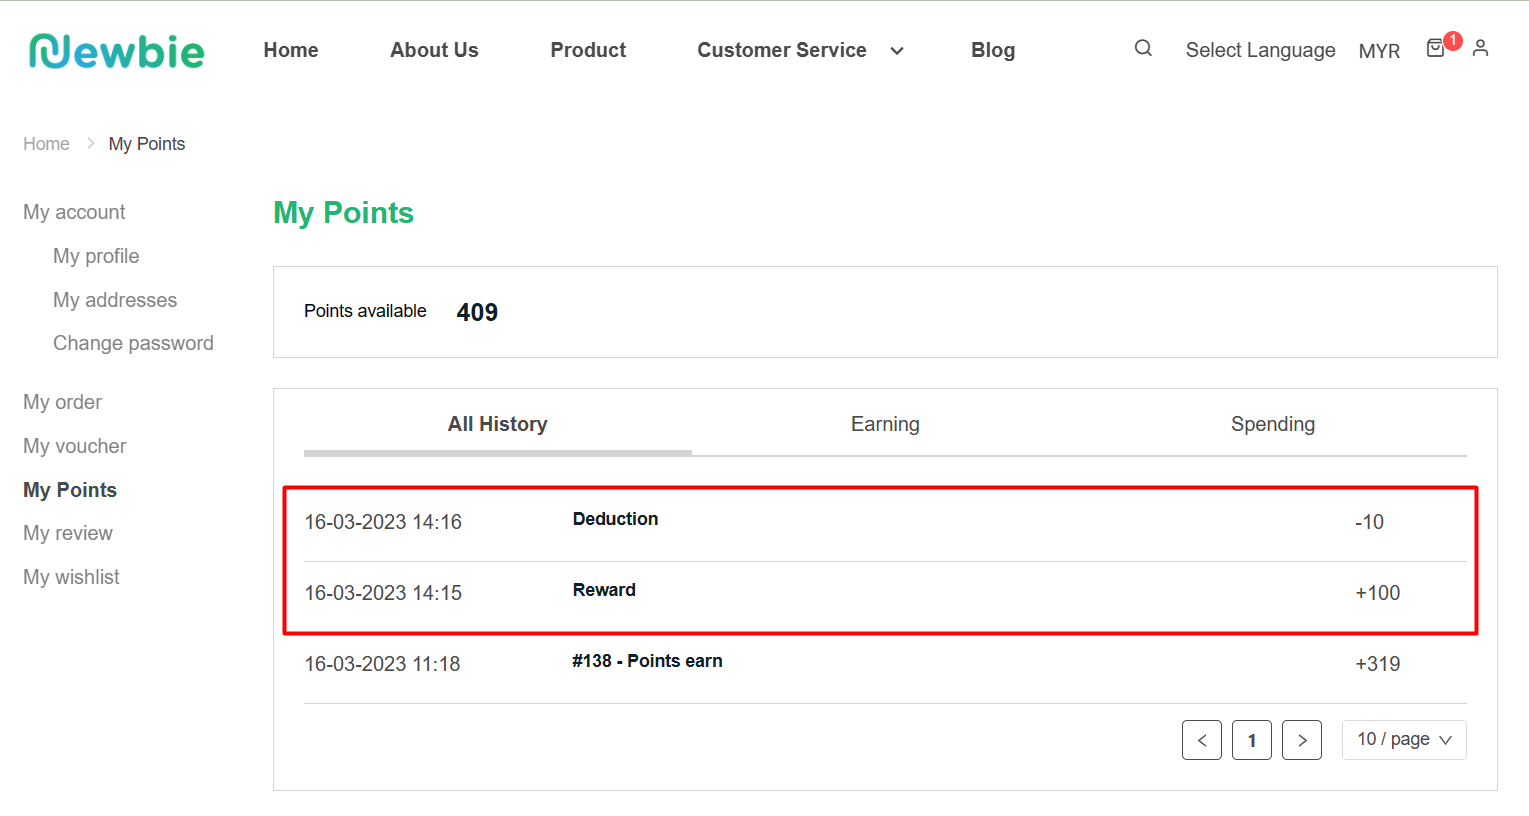
3. View Points (From Customer Perspective)
Step 1: Log in to the user account > go to Profile > My Points.

Step 2: Customer able to view the history of adding or minus the points.