1. Introduction
2. Configure Barcode Label Settings
3. Print Barcode Label
4. Additional Information
1. Introduction

The use of barcode labels is essential, not only cost-effective and reliable, barcode labels can help businesses improve efficiency and reduce overheads. Scanning a barcode is quick and reliable, which helps to remove human error from your sales and stock taking processes.
2. Configure Barcode Label Settings
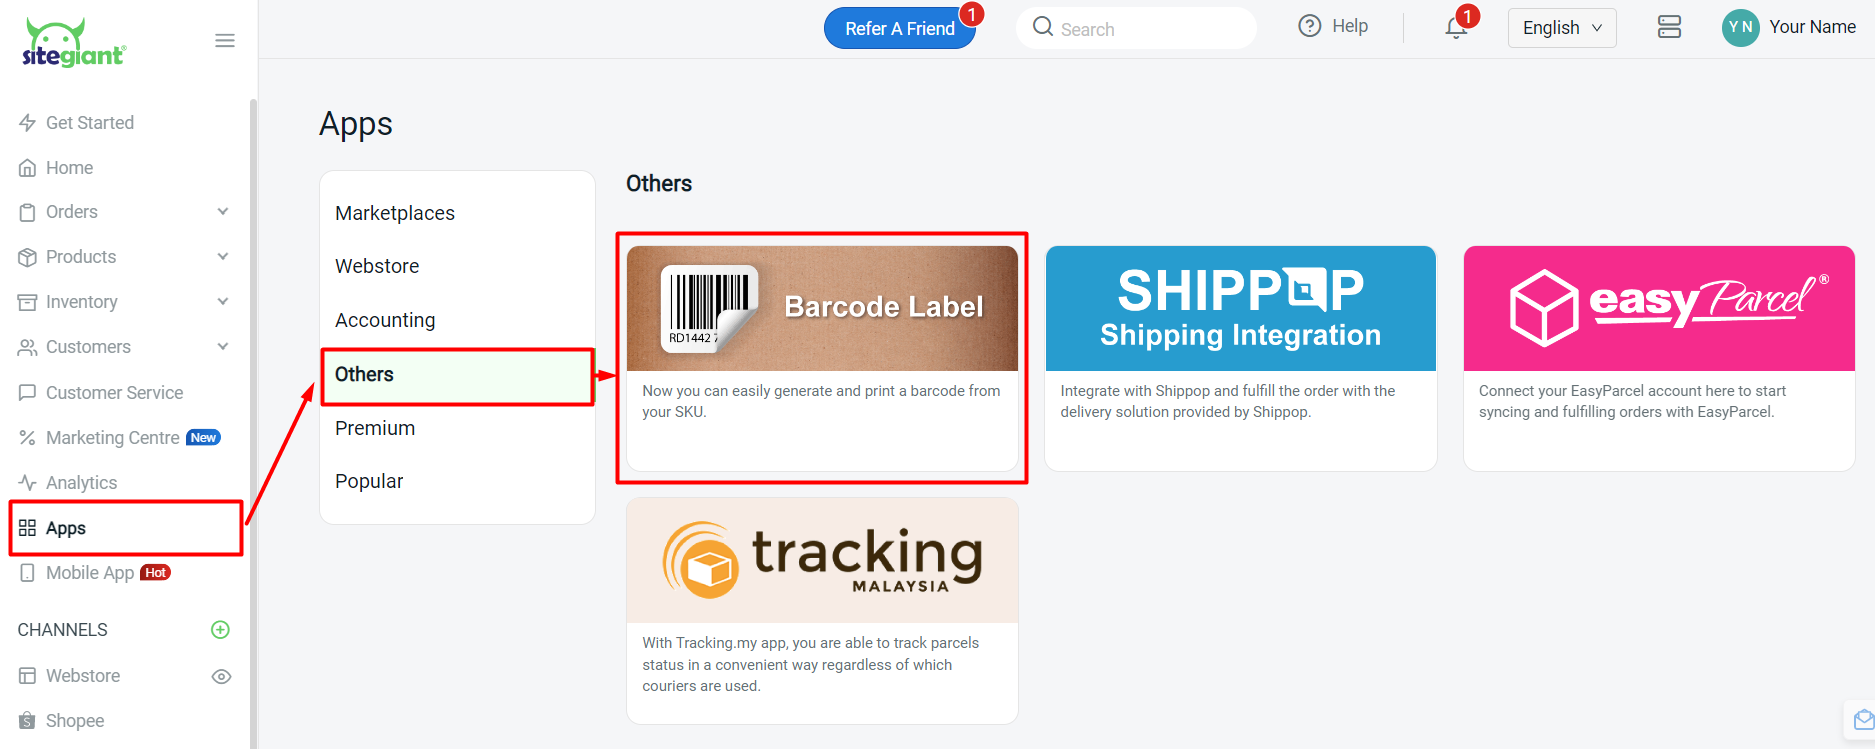
Step 1: Navigate to Apps on the dashboard menu > Others > Barcode Label
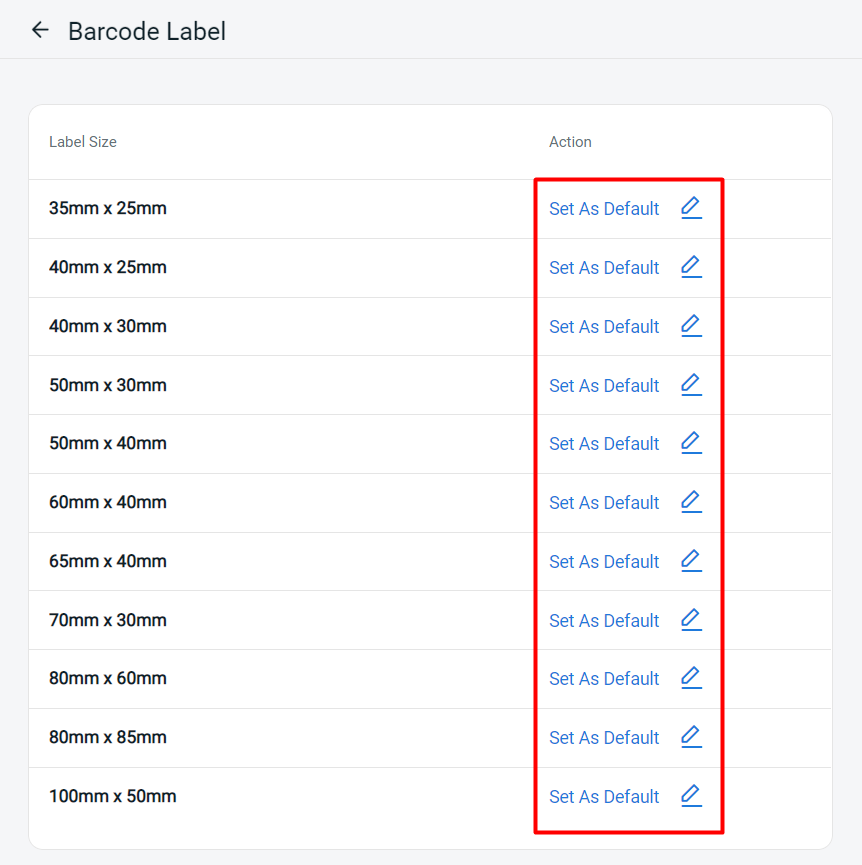
Step 2: Choose your preferred barcode label size and Set As Default > click on the Edit icon to configure the barcode label settings
Step 3: Customize the barcode label based on your preferences
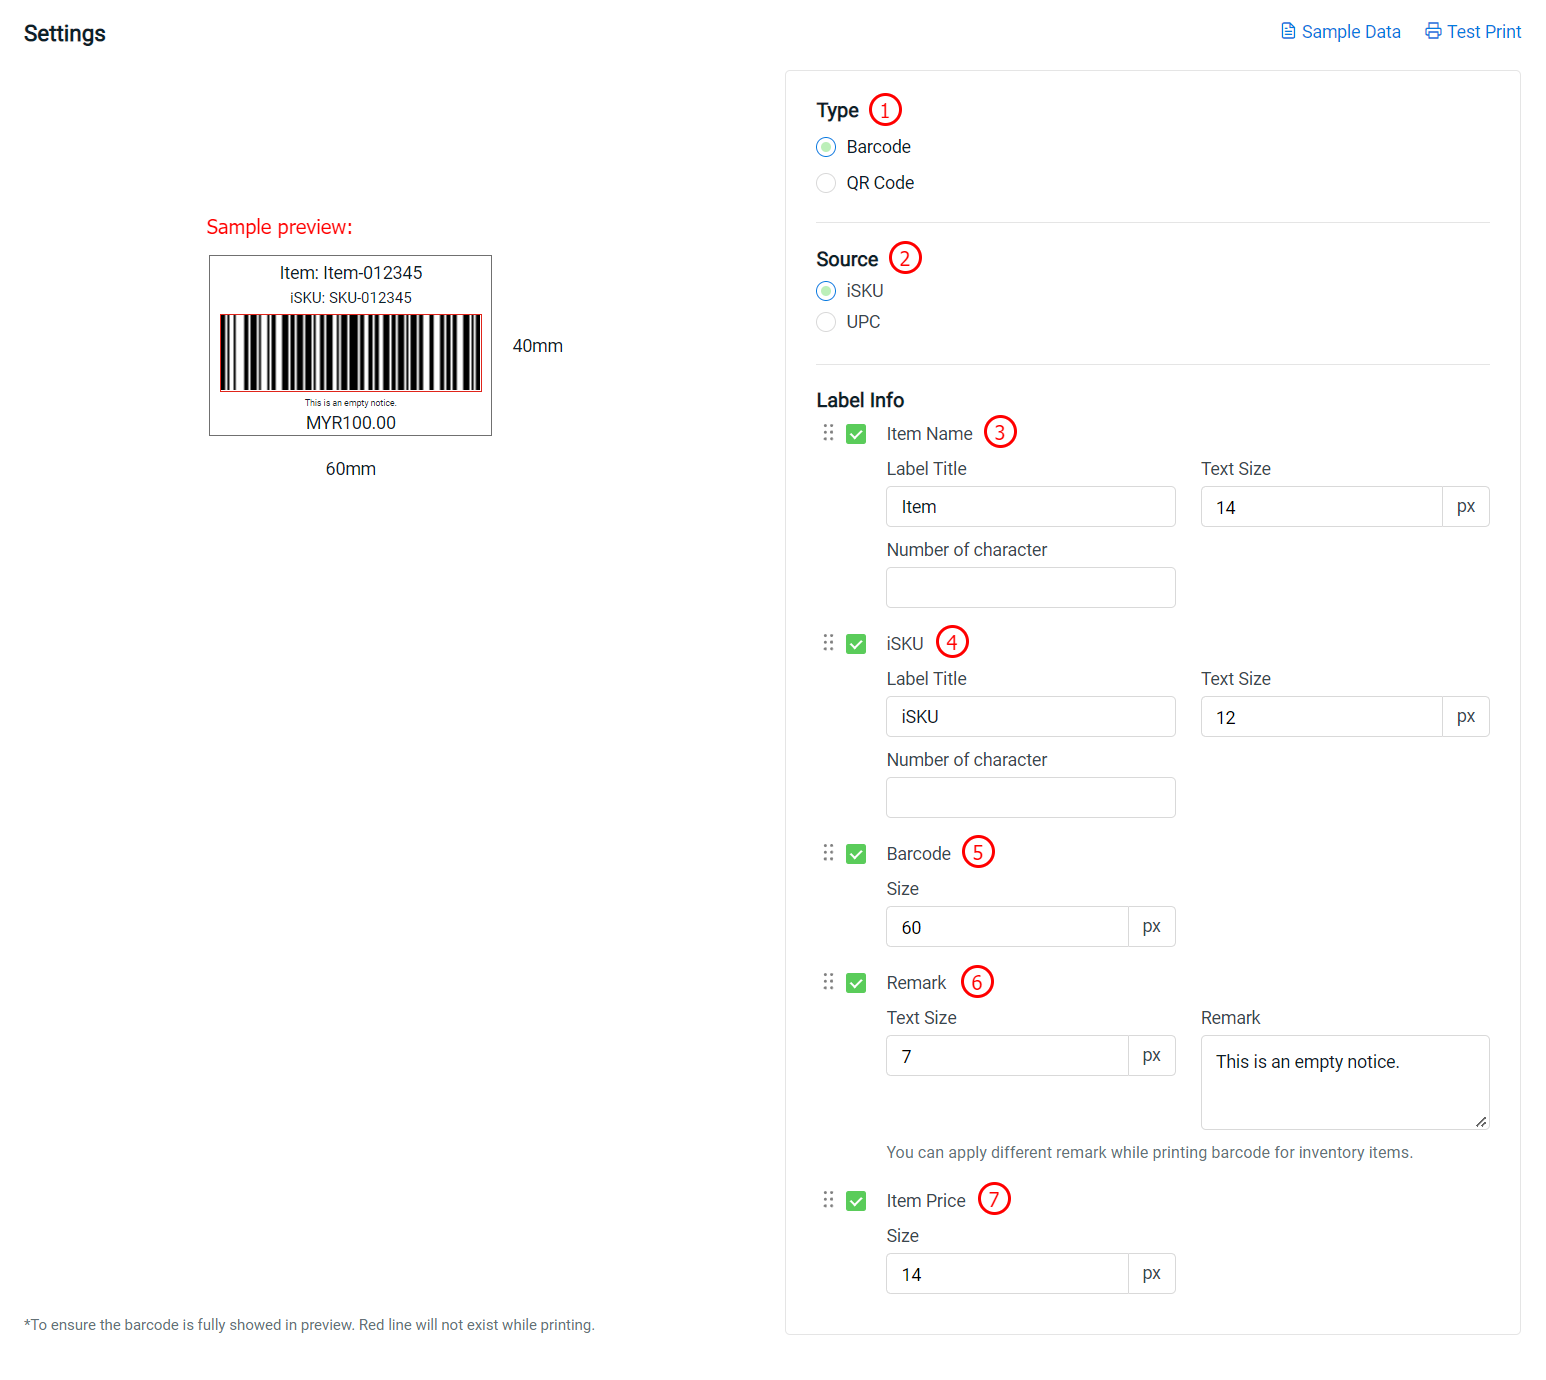
1. Type: Choose to generate in Barcode or QR code
2. Source: Chooses to generate based on iSKU or the UPC in inventory
3. Item Name: The inventory item name. You can change the label title, text size and limit number of character of the item name
4. iSKU/UPC: Based on the Source chosen above. You can change the label title, text size and limit number of character of the iSKU/UPC
5. Barcode/QR Code: Based on the Type chosen above. You can adjust to your preferred size
6. Remark: Additional note as standard remark to all items. You can apply different remark while printing barcode for inventory items.
7. Item Price: The price inserted in the inventory item
Step 4: You may drag and drop the label info to arrange the sequence of the barcode label
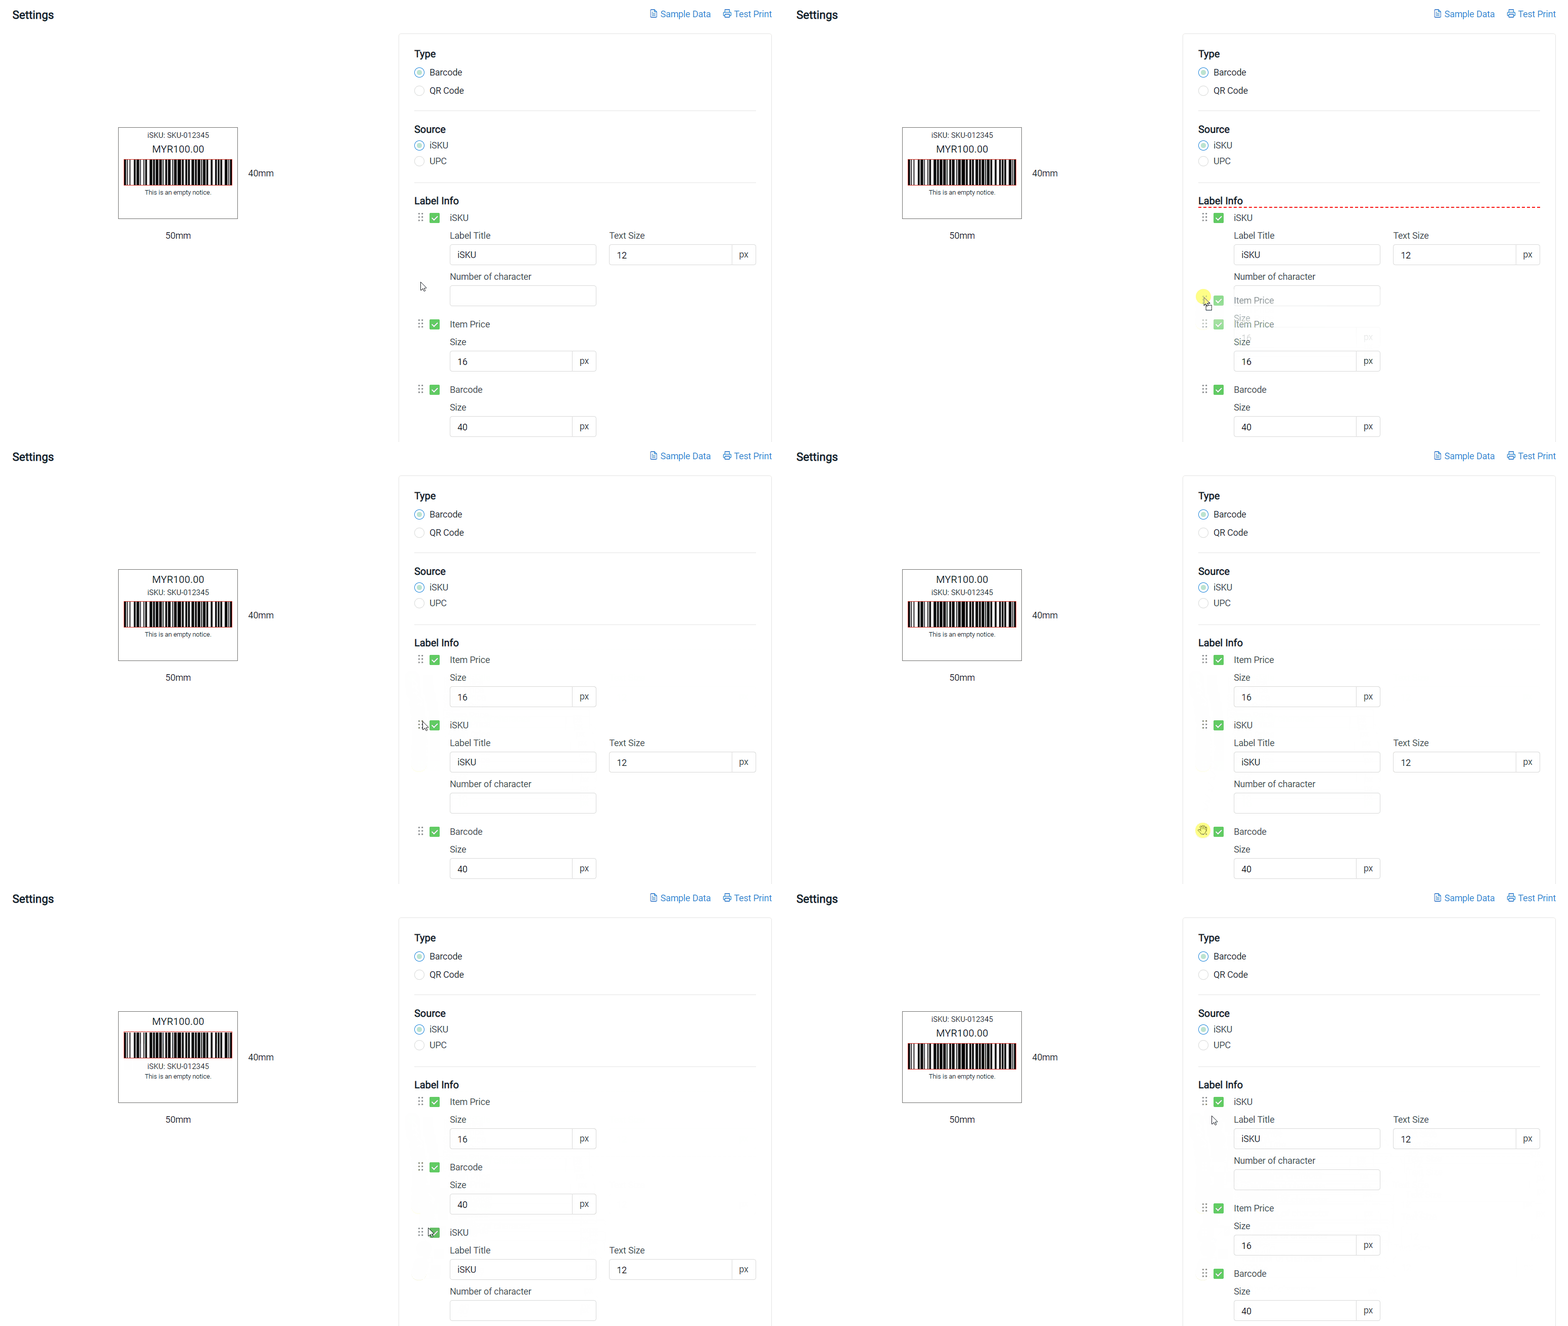
Step 5: Click on the Save button once done configure
3. Print Barcode Label
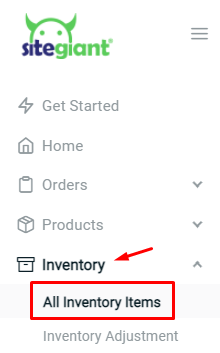
Step 1: Navigate to Inventory > All Inventory Items
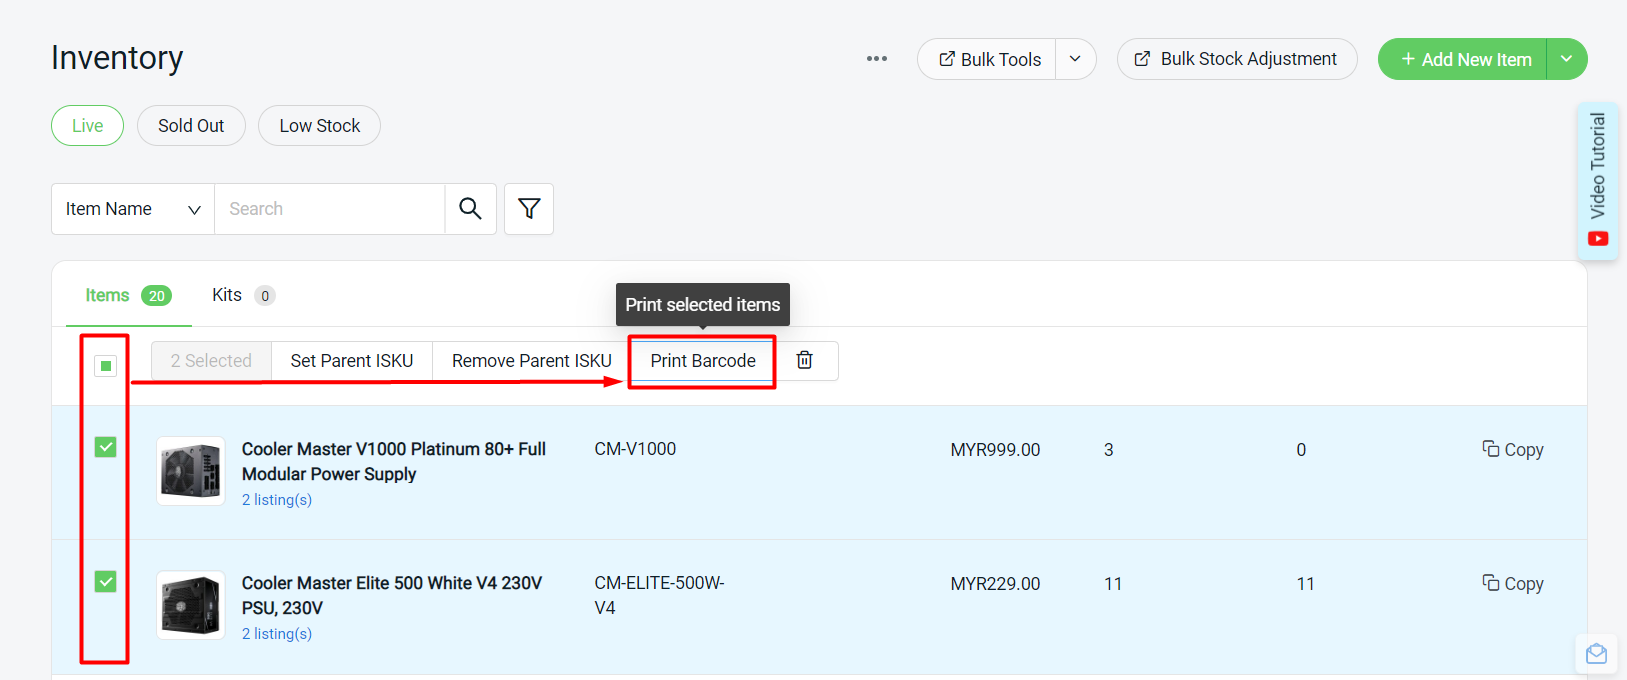
Step 2: Select the item(s) you wish to print the barcode label > click on Print Barcode
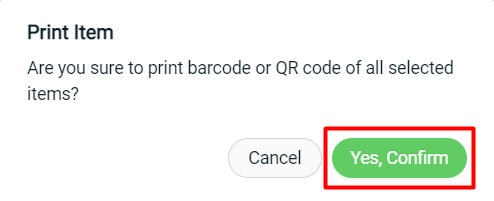
Step 3: Click on Yes, Confirm to proceed
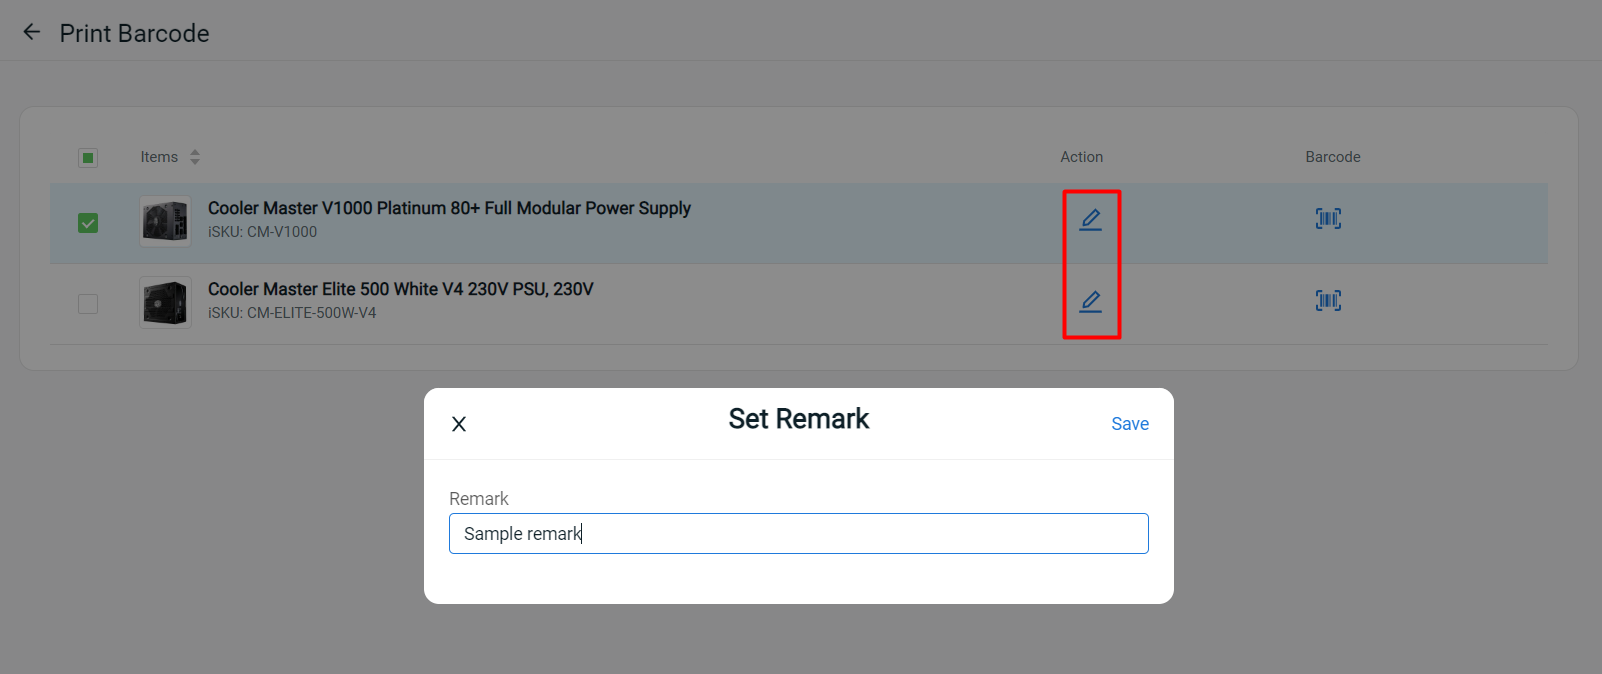
Step 4: You may set a remark by clicking on the edit icon (optional)
Step 5: Click on the barcode icon of the item to preview > click on the Print Barcode button to proceed with printing
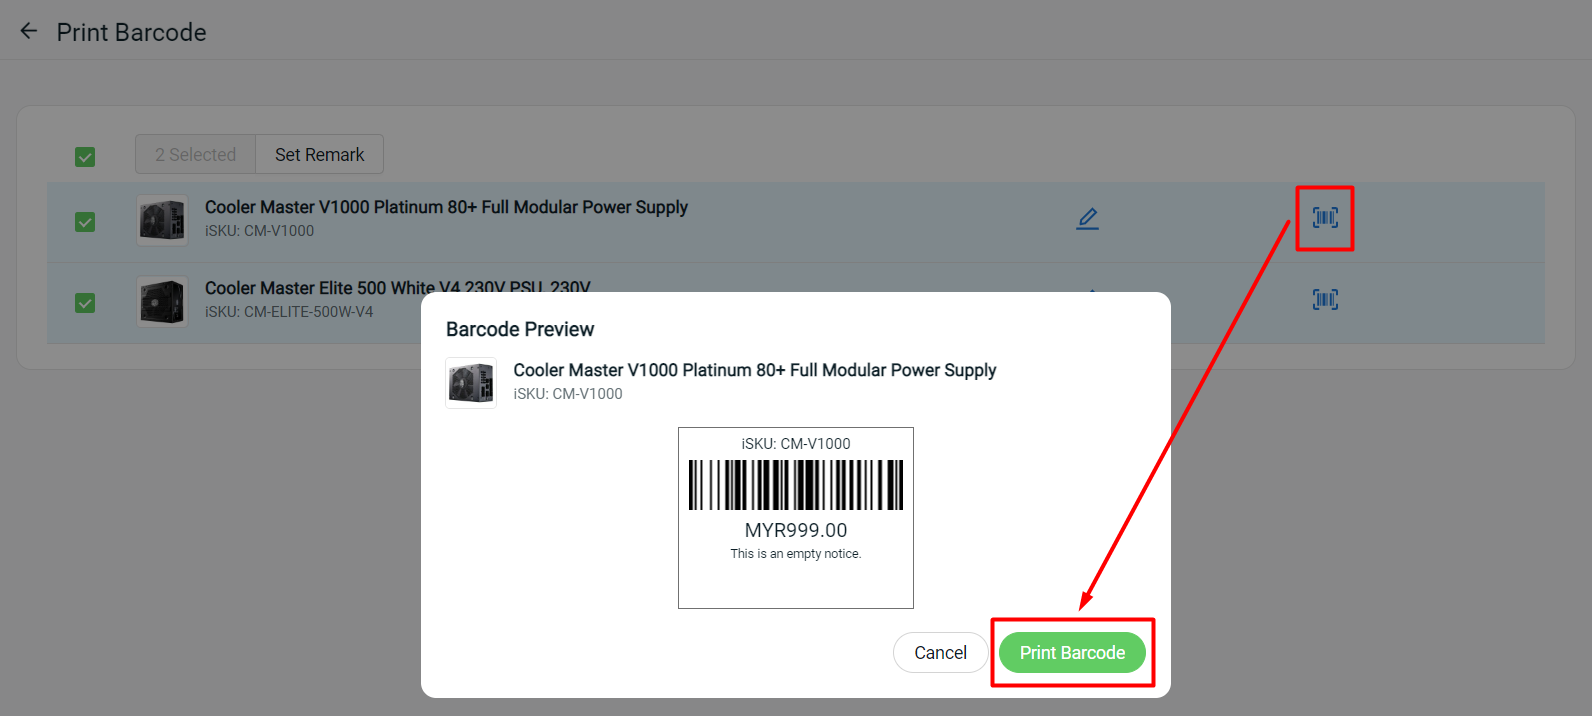
?Note: The barcode label will have to preview and print item by item
?Additional Information
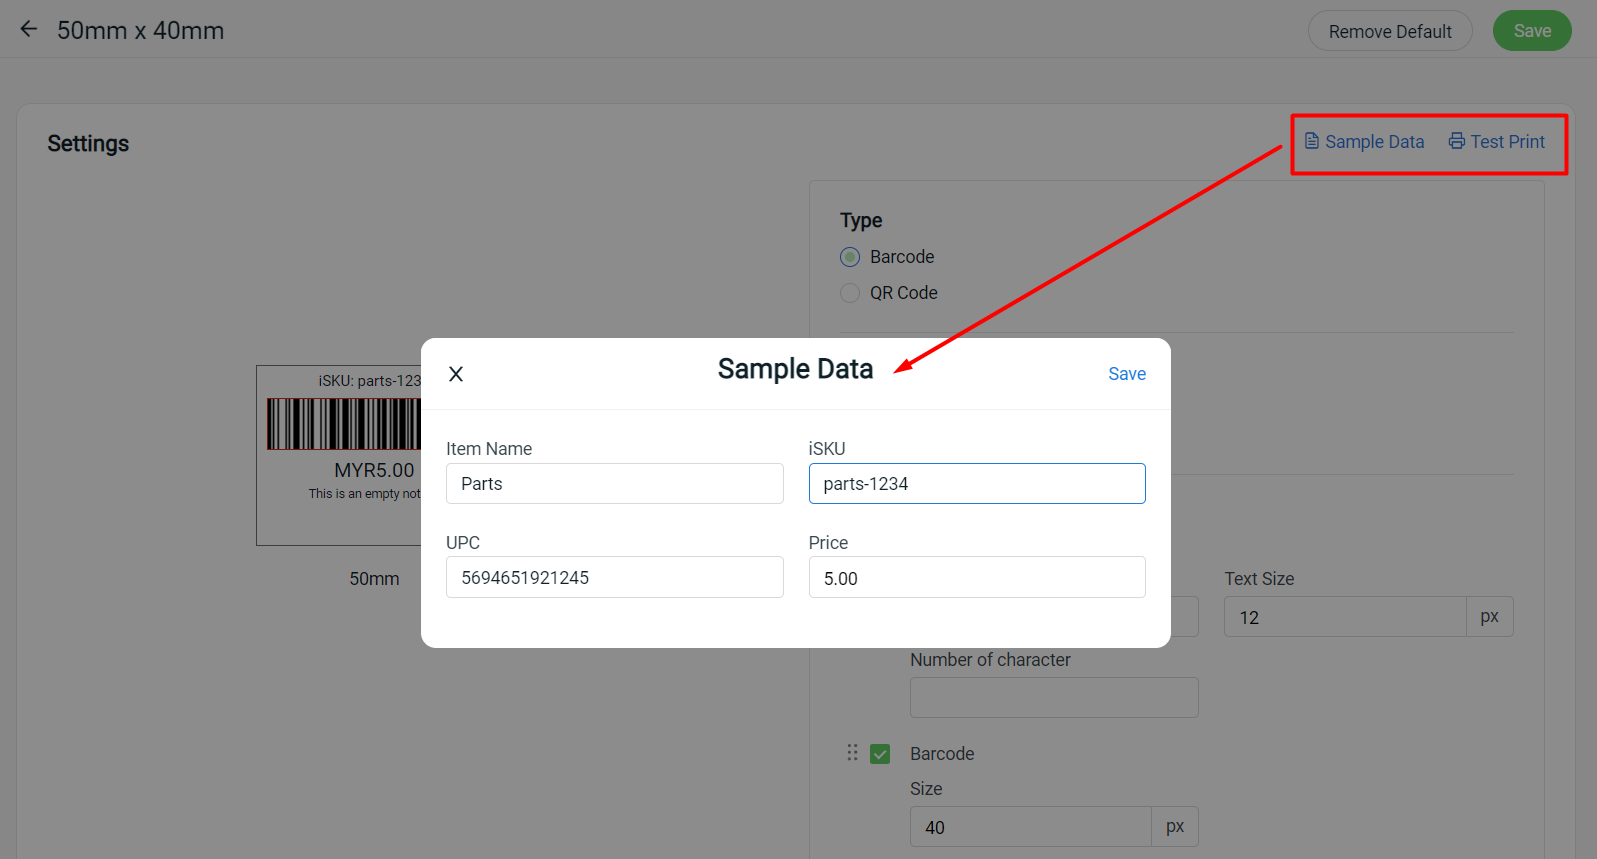
1. If you wish to generate and print the barcode label for custom info or the item that is not existing in the inventory, you may set the sample data and use test print to print out the barcode label.
